Add tags to filter the Agents list
You can add tags to Elastic Agent during or after enrollment, then use the tags to filter the Agents list shown in Fleet.
Tags are useful for capturing information that is specific to the installation environment, such machine type, location, operating system, environment, and so on. Tags can be any arbitrary information that will help you filter and perform operations on Elastic Agents with the same attributes.
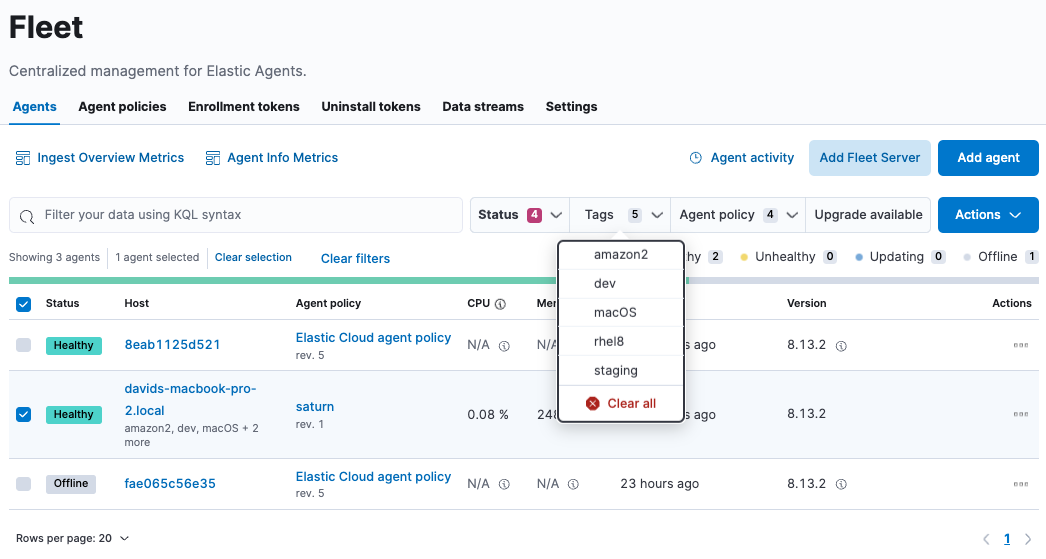
To filter the Agents list by tag, in Kibana, go to Fleet > Agents and click Tags. Select the tags to filter on. The tags are also available in the KQL field for autocompletion.

If you haven’t added tags to any Elastic Agents yet, the list will be empty.
You can use Fleet to add, remove, or rename tags applied to one or more Elastic Agents.
Want to add tags when enrolling from a host instead? See Add tags during agent enrollment.
To manage tags in Fleet:
On the Agents tab, select one or more agents.
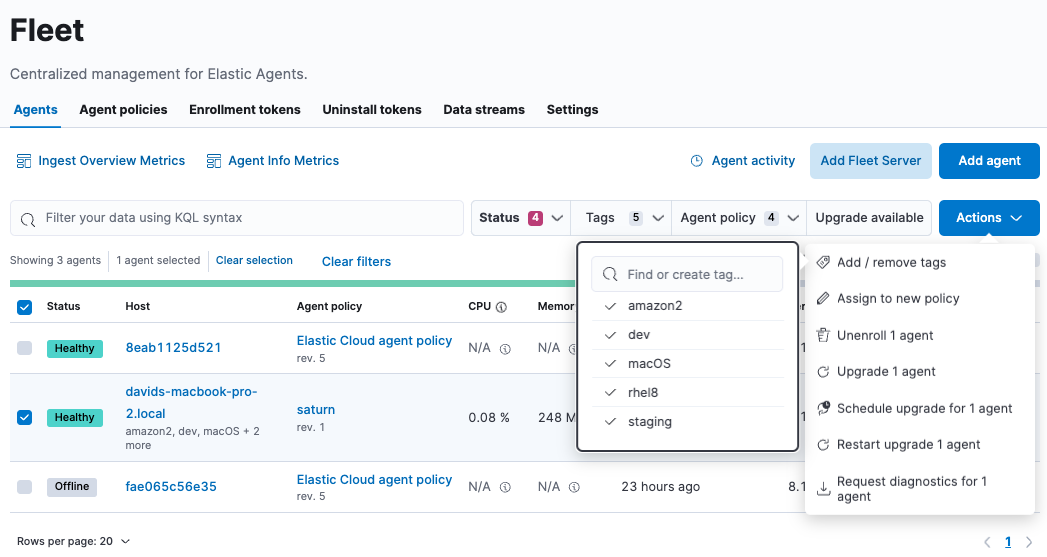
From the Actions menu, click Add / remove tags.
 Tip
TipMake sure you use the correct Actions menu. To manage tags for a single agent, click the ellipsis button under the Actions column. To manage tags for multiple agents, click the Actions button to open the bulk actions menu.
In the tags menu, perform an action:
To… Do this… Create a new tag Type the tag name and click Create new tag…. Notice the tag name has a check mark to show that the tag has been added to the selected agents. Rename a tag Hover over the tag name and click the ellipsis button. Type a new name and press Enter. The tag will be renamed in all agents that use it, even agents that are not selected. Delete a tag Hover over the tag name and click the ellipsis button. Click Delete tag. The tag will be deleted from all agents, even agents that are not selected. Add or remove a tag from an agent Click the tag name to add or clear the check mark. In the Tags column, notice that the tags are added or removed. The menu only shows tags that are common to all selected agents.
When you install or enroll Elastic Agent in Fleet, you can specify a comma-separated list of tags to apply to the agent, then use the tags to filter the Agents list shown in Fleet.
The following command applies the macOS and staging tags during installation:
sudo ./elastic-agent install \
  --url=<Fleet Server host URL> \
  --enrollment-token=<enrollment token> \
  --tag macOS,staging
For the full command synopsis, refer to elastic-agent install and elastic-agent enroll.
The following command applies the docker and dev tags to Elastic Agent running in a Docker container:
docker run \
  --env FLEET_ENROLL=1 \
  --env FLEET_URL=<Fleet Server host URL> \
  --env FLEET_ENROLLMENT_TOKEN=<enrollment token> \
  --env ELASTIC_AGENT_TAGS=docker,dev
  --rm docker.elastic.co/elastic-agent/elastic-agent:9.3.0
For more information about running on containers, refer to the guides under Install Elastic Agents in a containerized environment.