Add Osquery Response Actions
This functionality is in technical preview and may be changed or removed in a future release. Elastic will work to fix any issues, but features in technical preview are not subject to the support SLA of official GA features.
Osquery Response Actions allow you to add live queries to custom query rules so you can automatically collect data on systems the rule is monitoring. Use this data to support your alert triage and investigation efforts.
- Ensure you have the appropriate Elastic Stack subscription or Serverless project feature tier.
- The Osquery manager integration must be installed.
- Elastic Agent's status must be
Healthy. Refer to Common problems with Fleet and Elastic Agent if it isn’t. - Your role must have Osquery feature privileges.
- You can only add Osquery Response Actions to custom query rules.

You can add Osquery Response Actions to new or existing custom query rules. Queries run every time the rule executes.
Choose one of the following:
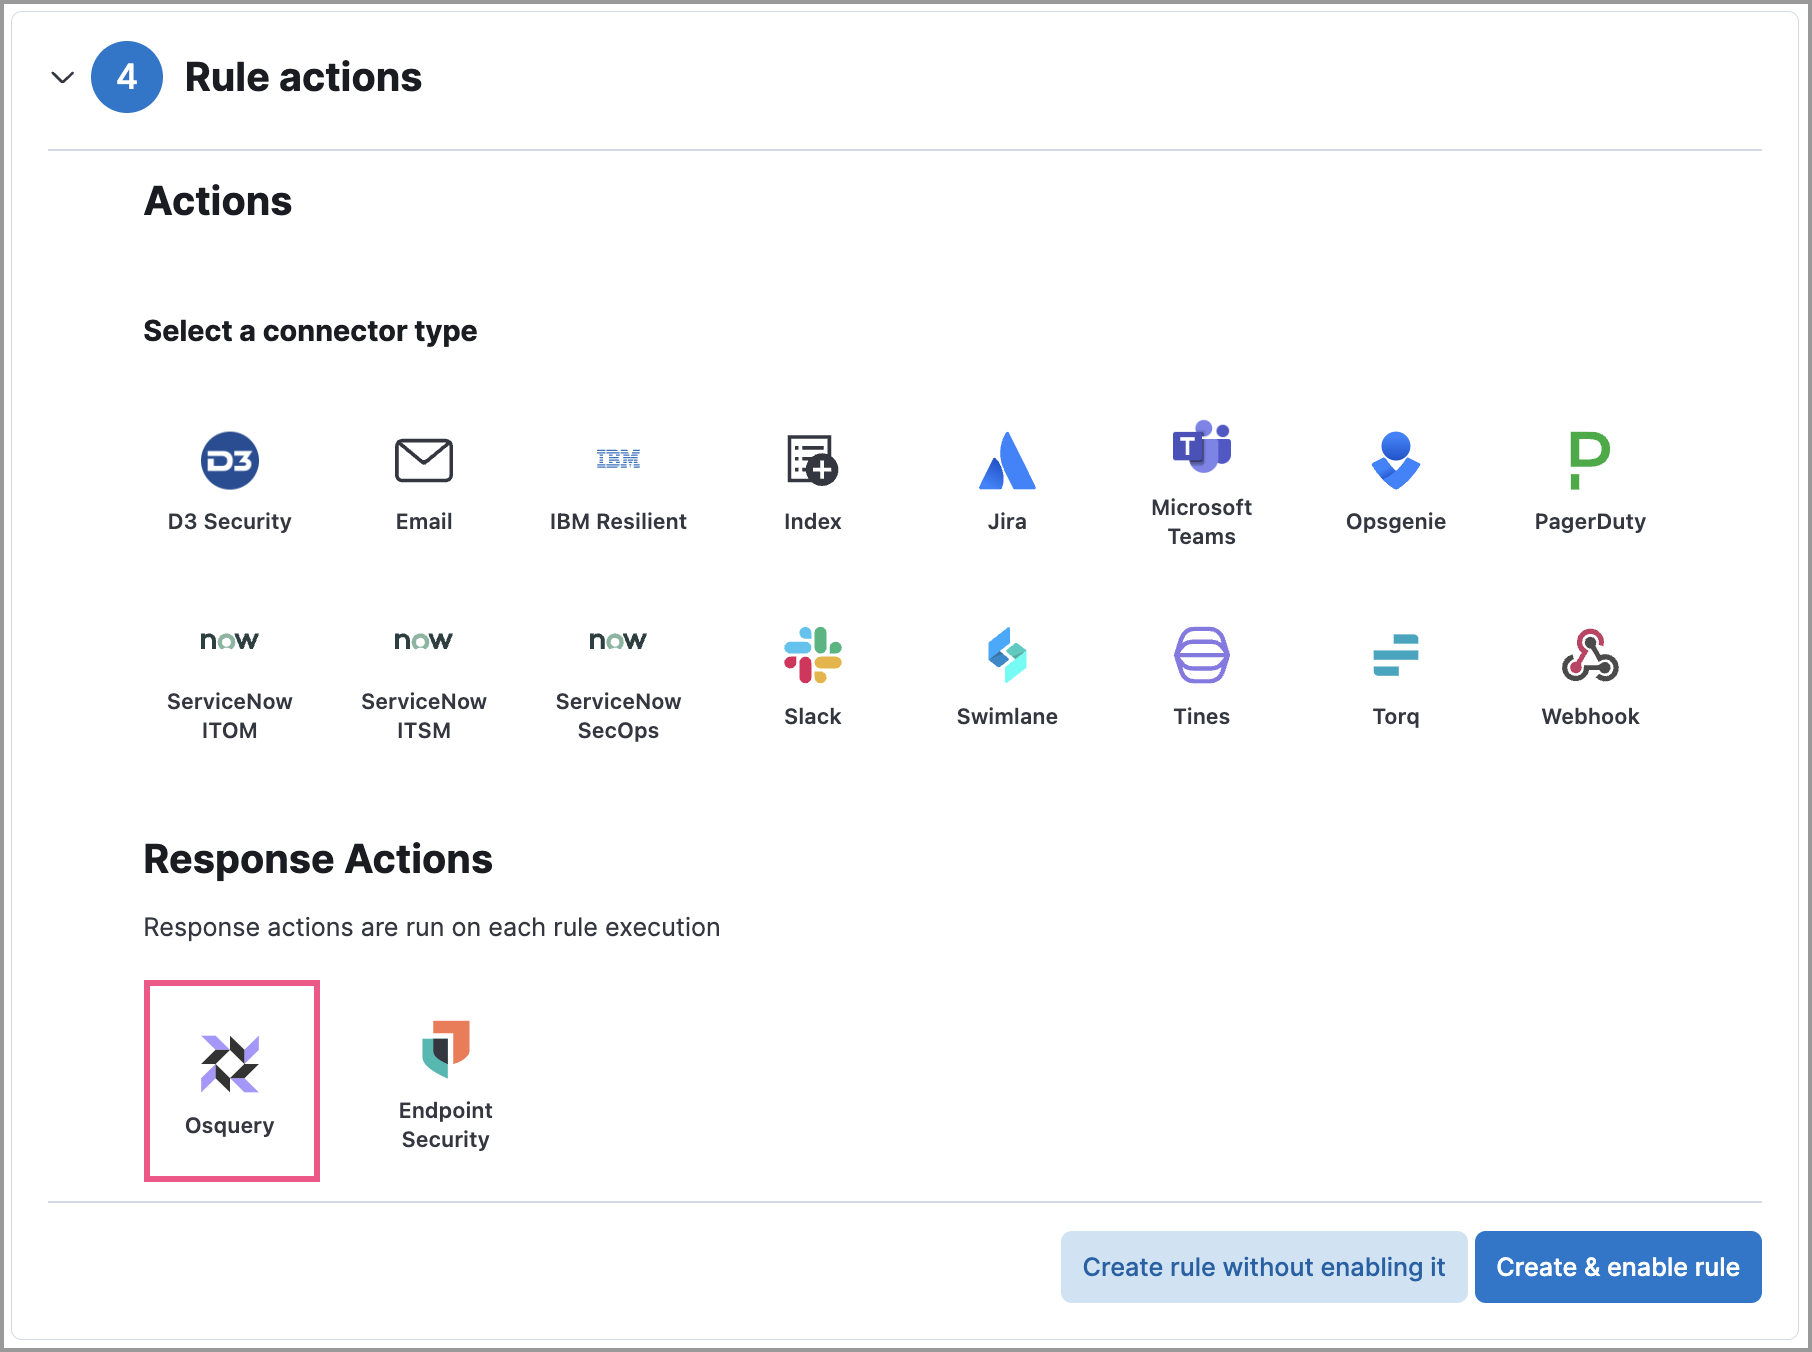
New rule: When you are on the last step of custom query rule creation, go to the Response Actions section and click the Osquery icon.
Existing rule: Edit the rule’s settings, then go to the Actions tab. In the tab, click the Osquery icon under the Response Actions section.
NoteIf the rule’s investigation guide is using an Osquery query, you’ll be asked if you want to add the query as an Osquery Response Action. Click Add to add the investigation guide’s query to the rule’s Osquery Response Action.
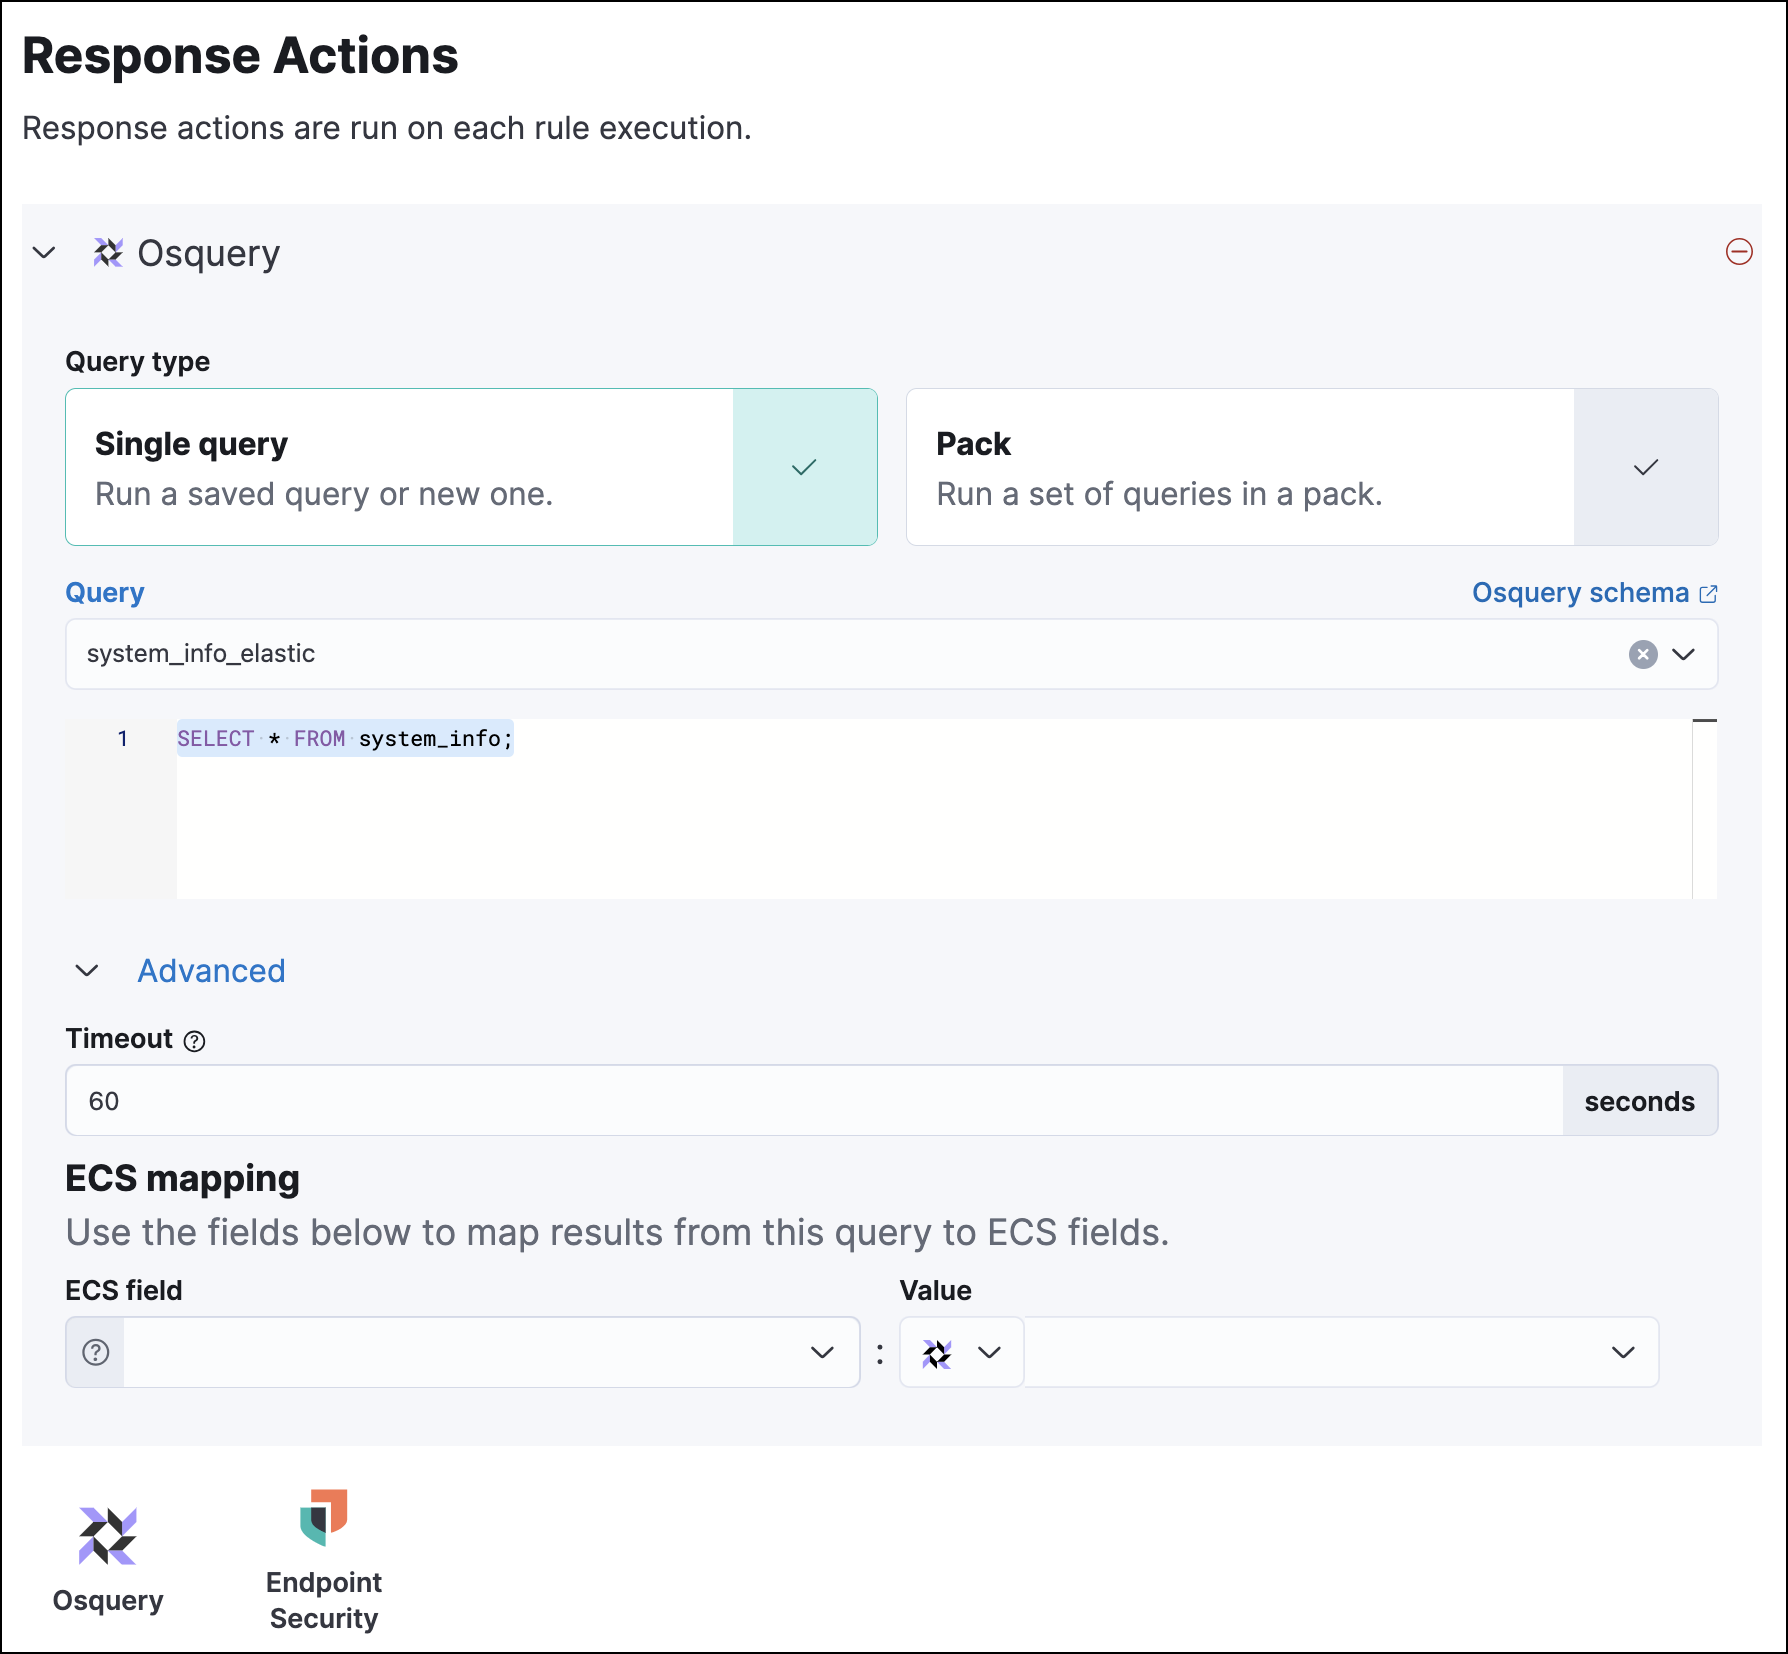
Specify whether you want to set up a single live query or a pack:
Query: Select a saved query or enter a new one. After you enter the query, you can expand the Advanced section to set a timeout period for the query, and view or set mapped ECS fields included in the results from the live query (optional).
NoteOverwriting the query’s default timeout period allows you to support queries that take longer to run. The default and minimum supported value for the Timeout field is
60. The maximum supported value is86400(24 hours).TipYou can use placeholder fields to dynamically add alert data to your query.
Pack: Select from available query packs. After you select a pack, all of the queries in the pack are displayed.
TipRefer to prebuilt packs to learn about using and managing Elastic prebuilt packs.

Click the Osquery icon to add more live queries (optional).
Click Create & enable rule (for a new rule) or Save changes (for existing rules) to finish adding the queries.
If you want to choose a different query or query pack for the Osquery Response Action to use, edit the rule to update the Response Action.
If you edited a saved query or query pack that an Osquery Response Action is using, you must reselect the saved query or query pack on the related Osquery Response Action. Query changes are not automatically applied to Osquery Response Actions.
- Edit the rule’s settings, then go to the Actions tab.
- Modify the settings for Osquery Response Actions you’ve added.
- Click Save changes.
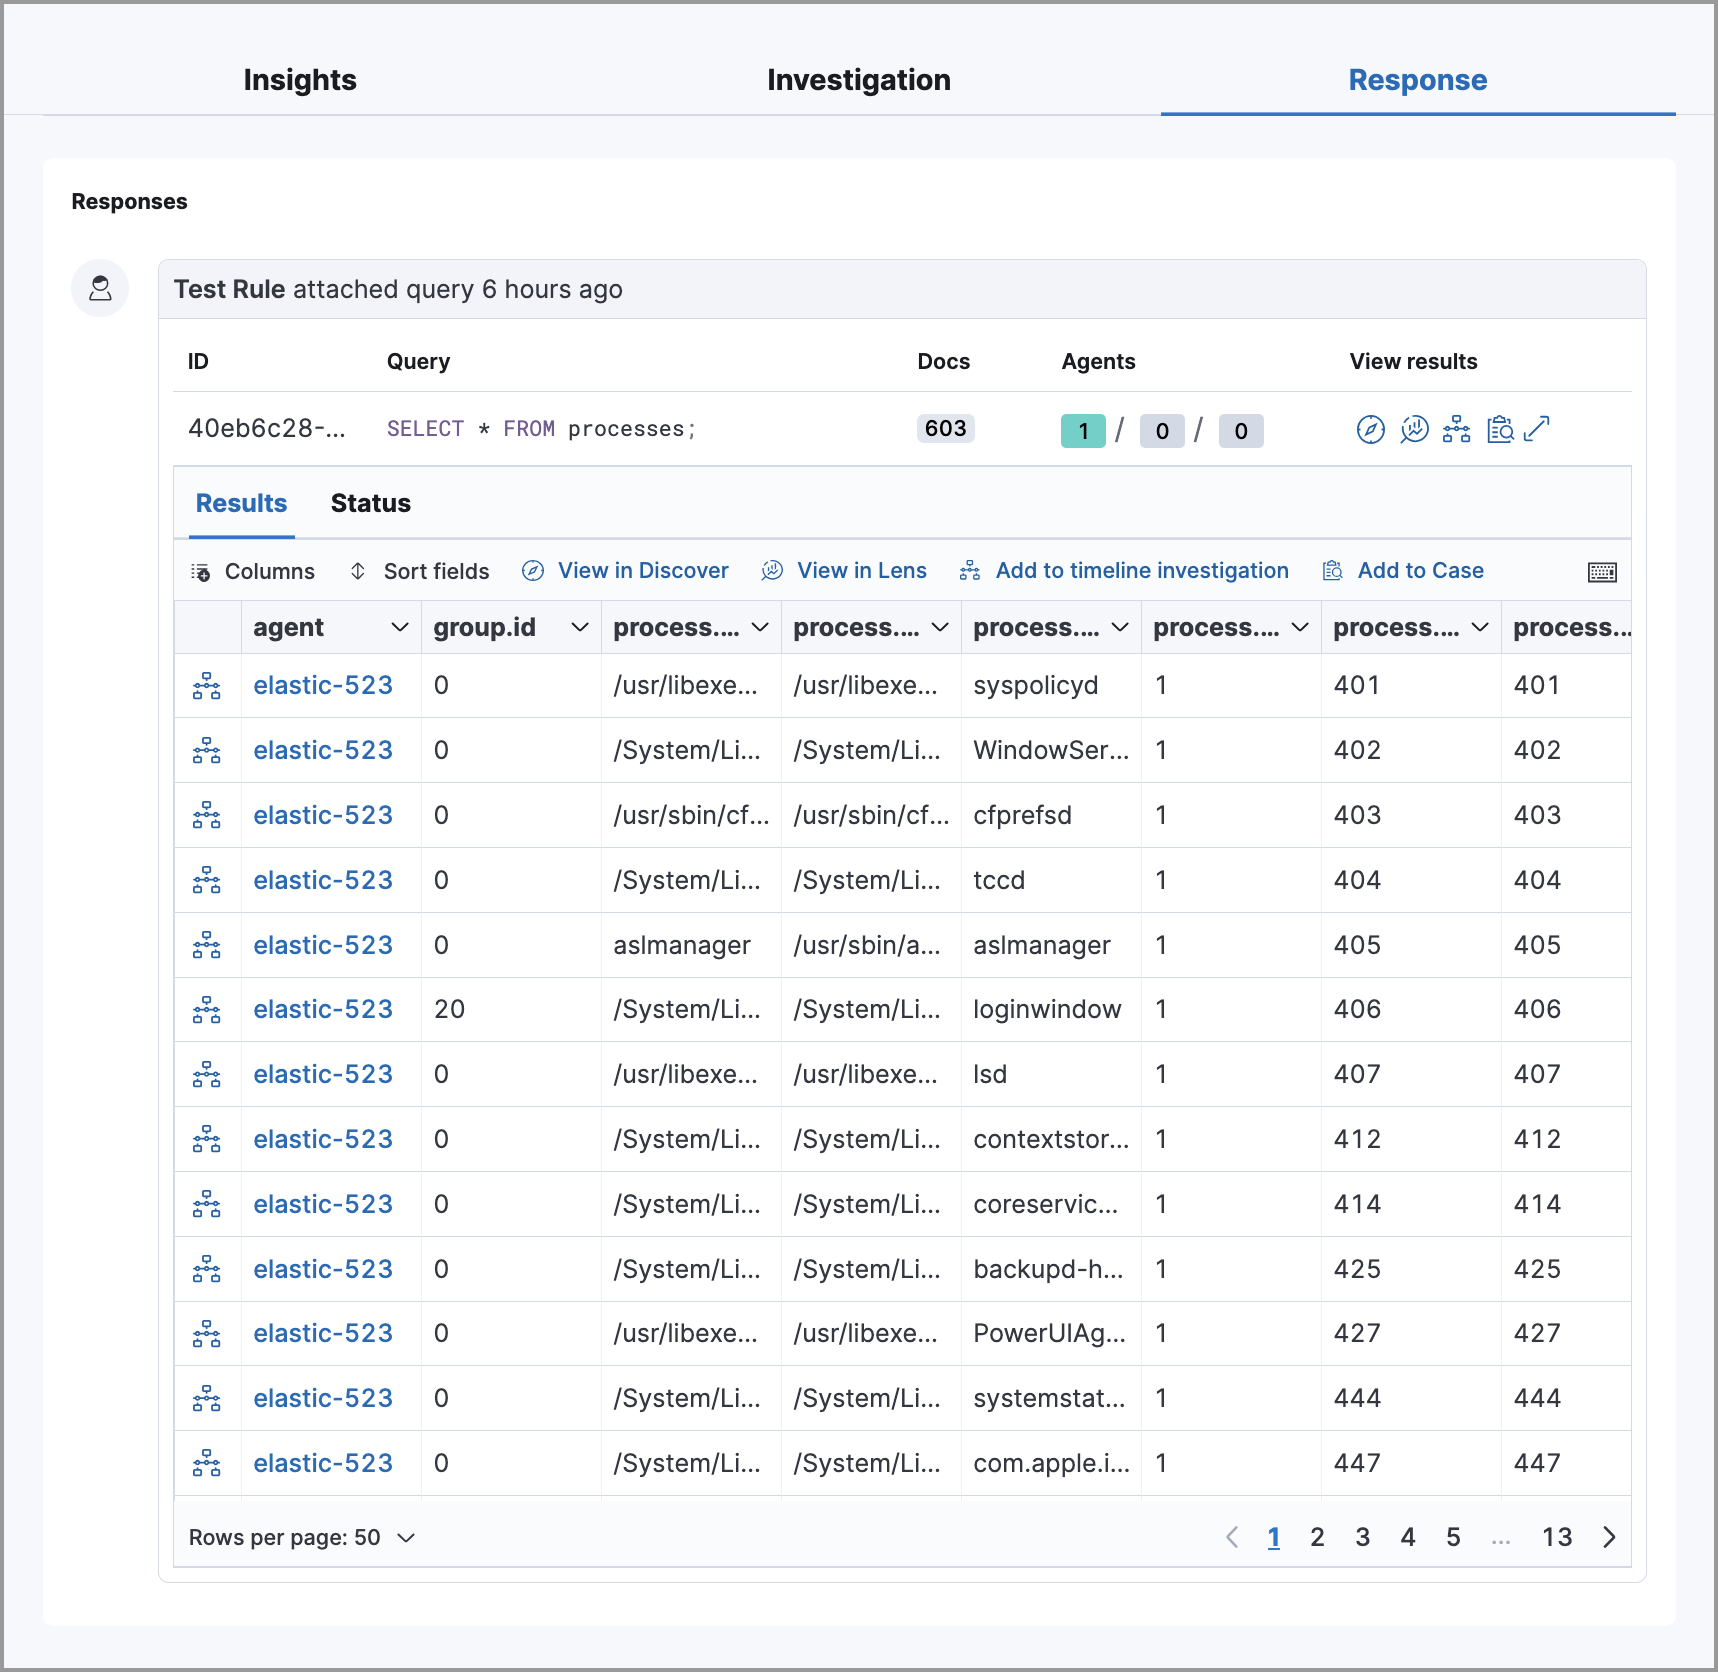
When a rule generates an alert, Osquery automatically collects data on the host. Query results are displayed within the Response tab in the left panel of the alert details flyout. The number next to the Response Results tab represents the number of queries attached to the rule, in addition to endpoint response actions run by the rule.
Refer to Examine Osquery results for more information about query results.
