Add and manage AI index sources
This page is currently hidden from the documentation navigation.
The following Context Engine pages are live:
Sources identify the data that an AI index is intended to use. They also give Elastic Agent Builder the starting point for suggested automations. Add sources in Kibana or manage them programmatically with the Context Engine APIs. Update the selection when the intended scope of the AI index changes.
The source editor in Kibana has tabs for Elasticsearch data and connectors:
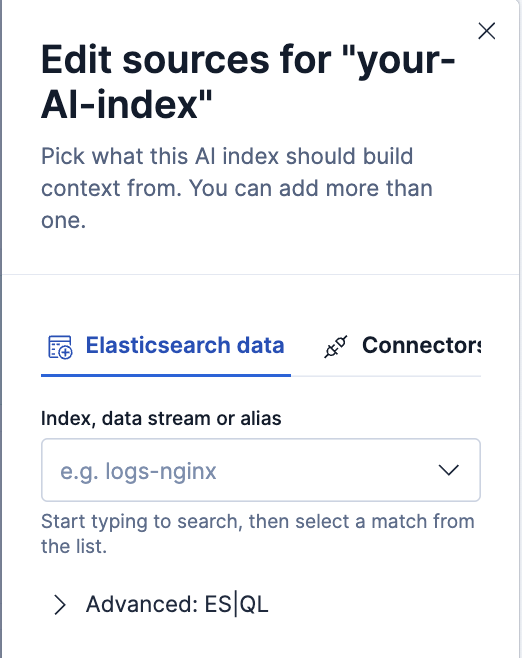
You need a custom AI index and the All privilege for the Context Engine feature. You also need access to the Elasticsearch data or connectors you want to select. To create a connector from the source picker, you need permission to create connectors.
Choose data that supports the AI index's purpose and intended questions. For design guidance, refer to Select source data.
Use the index picker when the automation should have access to all documents in one Elasticsearch index, data stream, or alias. Selecting one creates an ES|QL source in the form FROM <name>.
Add the source as follows:
- Open Context, then select the AI index.
- In Sources, select Edit.
- On the Elasticsearch data tab, start typing the name of an index, data stream, or alias.
- Select a result. The source appears under Selected sources.
- Add any other sources the automations need, then select Save.
- Confirm that the selected source appears in the AI index's Sources section.
Use an ES|QL query when the automation should analyze a filtered or transformed result, or data from more than one Elasticsearch index:
Open the AI index's Sources editor.
On the Elasticsearch data tab, expand Advanced: ES|QL.
Enter the query that defines the data available to the automation. For example:
FROM logs-*
| WHERE event.outcome == "failure"
| LIMIT 100
Select Add ES|QL source.
Confirm that the query appears under Selected sources, then select Save.
The query records the intended scope of the source and gives Elastic Agent Builder a result to inspect when it suggests an automation. A generated workflow can add mapping, aggregation, or other queries against the underlying Elasticsearch data. Review those queries to confirm that they stay within the intended scope. Saving the source checks that its query syntax is valid, but you should also run it against your data and inspect the result.
Add data from a supported external system as follows:
- Open the AI index's Sources editor.
- Select the Connectors tab.
- Search for and select each configured connector that the automation should use.
- If the connector does not exist and you have permission to create it, select Create connector, configure it, and save it. The new connector is selected automatically.
- Confirm that the connectors appear under Selected sources, then select Save.
The picker lists only connector types that support Context Engine and only connectors that you can access.
Update the source selection as follows:
- Open the AI index's Sources editor.
- Under Selected sources, remove any source that is no longer in scope.
- Add its replacement or any additional sources.
- Select Save.
- Confirm that the Sources section shows the intended selection.
Changing the source selection does not update attached workflow automations or Knowledge Indicators (KIs) generated by earlier runs. Review each workflow for queries or connector references that also need to change, run the updated automations, and evaluate the resulting KIs.
Use the create or update AI index API to replace the sources programmatically. Each source has a type and value:
- For an ES|QL source, set
typetoesqlandvalueto the complete query. - For a connector source, set
typetoconnectorandvalueto the connector ID.
For example, the following partial AI index document combines both source types:
{
  "sources": [
    {
      "type": "esql",
      "value": "FROM support-cases | WHERE status == \"open\""
    },
    {
      "type": "connector",
      "value": "my-connector-id"
    }
  ]
}
The update API replaces the complete AI index record, not only its sources. For an example that preserves the other fields, refer to Update an AI index with the API.