Elastic SIEM for home and small business: GeoIP data and Beats config review
Note: The “SIEM for home and small business” blog series contains configurations relevant to the beta release of Elastic SIEM using Elastic Stack 7.4. We recommend using Elastic Stack 7.6 and newer, as Elastic SIEM was made generally available in 7.6. Please also note the Elastic SIEM solution mentioned in this post is now referred to as Elastic Security.
Hey, there. This is part three of the Elastic SIEM for home and small business blog series. In the Getting started blog, we created our Elasticsearch Service deployment and started collecting data from one of our computers using Winlogbeat. In the Securing cluster access blog, we secured access to our cluster by restricting privileges for users and Beats. If you haven’t read the first and second blogs, you may want to before going any further. In this blog, we will create an ingest pipeline for GeoIP data and review our Beats configurations.
Configuring our Elasticsearch Service deployment
Before we configure all of our systems to send data to our Elasticsearch Service deployment, we need to configure an ingest pipeline that will enrich our data with GeoIP information. We also will review the common configurations for Beats, so we have time to decide and standardize our settings before we start collecting data from our systems. Since we will be making administrative changes to our cluster, we will need to sign into the Kibana instance of our Elasticsearch Service deployment using our elastic superuser account.
Configuring an ingest pipeline for GeoIP data
The way we will enrich our data from Beats is using the GeoIP processor in an ingest pipeline. This configuration allows us to add GeoIP data when it is sent to Elasticsearch. For this section of the blog I will reference Packetbeat, even though each Beat supports using the GeoIP processor in an ingest pipeline. We can accomplish this using either the Packetbeat guide or the SIEM guide. Read through the Packetbeat “Enrich events with GeoIP information” guide before getting started.
In Kibana click Dev Tools. Then in the console issue the PUT _ingest/pipeline/geoip-info command (from the guide and shown below):
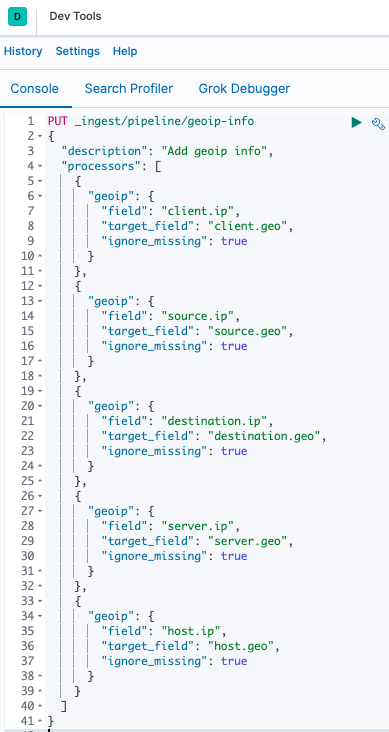
If you would prefer to copy and paste, this is the command to issue in Dev Tools:
PUT _ingest/pipeline/geoip-info
{
  "description": "Add geoip info",
  "processors": [
    {
      "geoip": {
        "field": "client.ip",
        "target_field": "client.geo",
        "ignore_missing": true
      }
    },
    {
      "geoip": {
        "field": "source.ip",
        "target_field": "source.geo",
        "ignore_missing": true
      }
    },
    {
      "geoip": {
        "field": "destination.ip",
        "target_field": "destination.geo",
        "ignore_missing": true
      }
    },
    {
      "geoip": {
        "field": "server.ip",
        "target_field": "server.geo",
        "ignore_missing": true
      }
    },
    {
      "geoip": {
        "field": "host.ip",
        "target_field": "host.geo",
        "ignore_missing": true
      }
    }
  ]
}
Once we issue the command, we should receive an "acknowledged" : true response in the Dev Tools console window:

While still in the Dev Tools console, issue the GET _ingest/pipeline/geoip-info command to validate that our ingest pipeline settings match what is listed in the guide. Now that we have our ingest pipeline created, we will review our common Beats configurations.
Reviewing common Beats configurations
The reason we want to review our common Beats configurations is so we can standardize the data (and settings) across the different Beats we plan on deploying. While I encourage you to read through the documentation for each of the Beats we will configure (Auditbeat, Filebeat, Packetbeat, and Winlogbeat), we will highlight a few of the configuration settings and why we will (or won't) use them.
For this section, we'll use the Configuring Winlogbeat guide to review the general settings that are common across each Beat. Based on the configuration we used in part one and part two of this blog series, the common settings we want to review are in the General, Top Level Processor, Elastic Cloud, and Xpack Monitoring sections. We will also review a few other settings to implement in our configurations. I highly encourage you to read through the documentation for each of these configuration items, so you can decide how you want to enrich the data being shipped from your systems.
Beats general settings
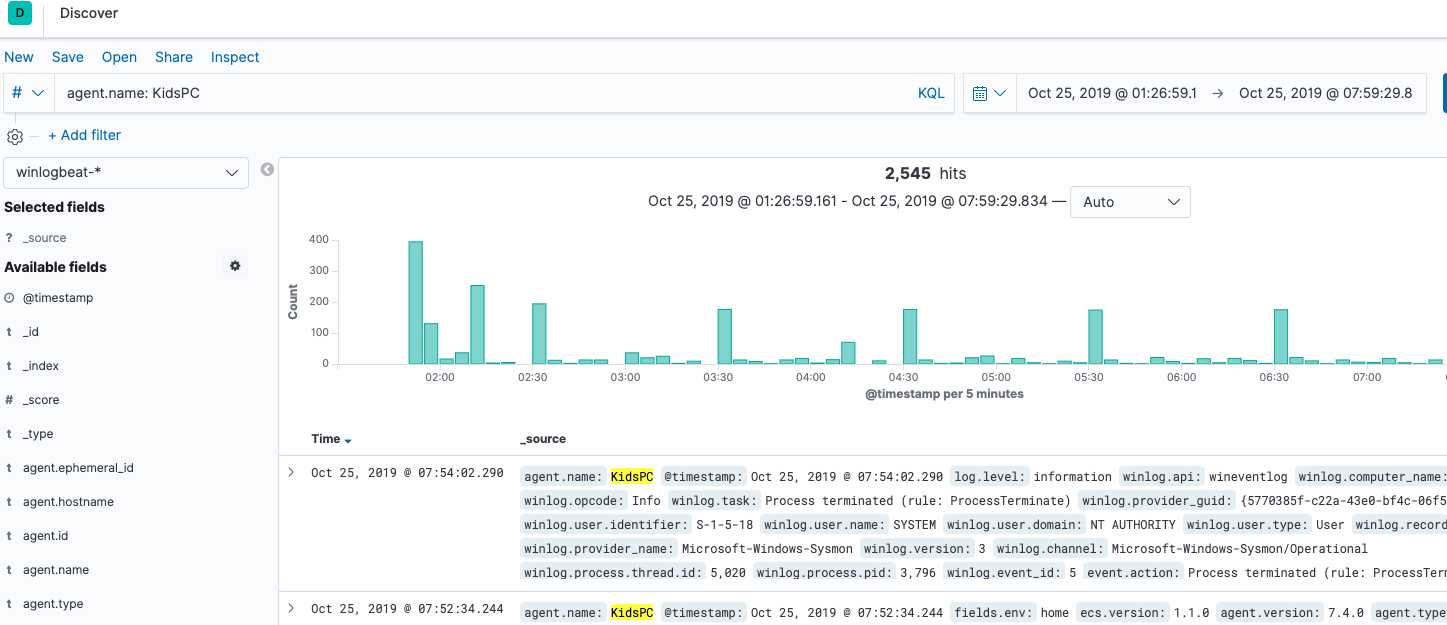
In the General section of our configuration we have defined name, tags, and fields (fields.env). The host.name setting is very important as it is the primary field SIEM uses to pivot on data. While we can leave these settings blank, let’s review how we can filter this data and why it is a good idea to define these settings.
#=== General ===
name: KidsPC
tags: ["Home", "KidsPC"]
fields:
  env: home
With this configuration, we will be able to group all transactions using agent.name: KidsPC:
Some other ways we can filter through this data in Kibana are using the following:
tags: hometags: KidsPChost.name: KidsPCfields.env: home
Beats top-level processor settings
While there are different ways to define processors, we are using the top-level configuration to enrich our data before it is shipped to our Elastic cluster. Even though there are many processors available, the example in the blog uses add_host_metadata, add_locale, add_cloud_metadata, and add_fields. When we define a processor with a tilde (~), we are enabling the processor in the respective Beat:
#=== Top Level Processor ===
processors:
  - add_host_metadata:
      # netinfo.enabled should be set to `false` until GitHub issue
      # https://github.com/elastic/elasticsearch/issues/46193 is resolved
      netinfo.enabled: false
      Geo: # These Geo configurations are optional
        location: 40.7128, -74.0060
        continent_name: North America
        country_iso_code: US
        region_name: New York
        region_iso_code: US-NY
        city_name: New York City
        name: myLocation
  - add_locale: ~
  - add_cloud_metadata: ~
  - add_fields:
      #when.network.source.ip: 10.101.101.0/24
      when.network.source.ip: private
      fields:
        source.geo.location:
          lat: 40.7128
          lon: -74.0060
        source.geo.continent_name: North America
        source.geo.country_iso_code: US
        source.geo.region_name: New York
        source.geo.region_iso_code: US-NY
        source.geo.city_name: New York City
        source.geo.name: myLocation
      target: ''
  - add_fields:
      #when.network.destination.ip: 10.101.101.0/24
      when.network.destination.ip: private
      fields:
        destination.geo.location:
          lat: 40.7128
          lon: -74.0060
        destination.geo.continent_name: North America
        destination.geo.country_iso_code: US
        destination.geo.region_name: New York
        destination.geo.region_iso_code: US-NY
        destination.geo.city_name: New York City
        destination.geo.name: myLocation
      target: ''
I highly encourage you to read through each of these configuration items and define them to match your use case. Here is an overview of how these configurations enrich our data:
- add_host_metadata allows us to collect information like IP and MAC addresses, as well as define geo information. Since we have defined geo information, we can visualize our data on a map in Kibana.
- add_locale enriches each event with the machine’s time zone offset from UTC and adds the
event.timezonevalue to each event. - add_cloud_metadata is used to enrich data from supported cloud providers. This configuration would be useful for a small business that has servers hosted by a cloud provider. In our example of running Beats on a physical workstation, no data is being added to events.
- add_fields has two configurations in our example:
- Check for a private source IP address (
when.network.source.ip: private) and then add predefined geo data. - Check for a private destination IP address (
when.network.destination.ip: private) and then add predefined geo data.
- Check for a private source IP address (
In the add_fields configuration, we can map our internal network by defining our known internal subnet instead of private (10.101.101.0/24 as shown in the commented example). This is useful if you don’t want to always define private addresses with your location. I personally define my known subnets instead of private on my laptop, so I don’t add geo location data when I am not at home.
Beats Elastic Cloud settings
Since we will be shipping data from Beats to our Elasticsearch Service deployment, we need to use the Elastic Cloud output along with our Cloud ID. The cloud.id is used by the respective Beat to resolve the Elasticsearch and Kibana URLs. The cloud.auth setting is used for authentication to our Elasticsearch Service deployment.
Instead of moving to the next configuration section, we’re going to add some more settings to our Elastic Cloud section before we finalize our output. We will tell each Beat to use our new geoip-info ingest pipeline by configuring the Elasticsearch output pipeline (output.elasticsearch.pipeline: geoip-info). Note that the output.elasticsearch.pipeline: geoip-info setting needs to be commented out in the configuration file until Elasticsearch GitHub issue 46193 is resolved.
We will also add the Elasticsearch output max_retries setting here (output.elasticsearch.max_retries: 5) for Beats that do not retry indefinitely. Note that in the Winlogbeat documentation, we see that Winlogbeat retries indefinitely; however, Packetbeat and Auditbeat will drop events after the specified number of retries. The default value is 3, so use caution when adjusting this setting.
For systems that will only ship data, we need to disable the required setup options so we do not have a conflict publishing events when using the beats_writer role we created in the previous blog. With that said, we are also going to add setup.template.enabled: false, setup.ilm.check_exists: false, and setup.ilm.overwrite: false to this section, but leave them commented out for now.
Now our Elastic Cloud configuration section looks like this:
#=== Elastic Cloud ===
cloud.id: “My_Elastic_Cloud_Deployment:abcdefghijklmnopqrstuvwxyz1234567890ABCDEFGHIJKLMNOPQRSTUVWXYZ”
# For production, we should NOT use the elastic superuser
cloud.auth: “home_beats:abcDEF0987654321” # example: “username:password”
# The geoip-info pipeline is used to enrich GeoIP information in Elasticsearch
# You must configure the pipeline in Elasticsearch before enabling the pipeline in Beats.
# The `output.elasticsearch.pipeline: geoip-info` setting should be commented out until
# until GitHub issue https://github.com/elastic/elasticsearch/issues/46193 is resolved
#output.elasticsearch.pipeline: geoip-info
# The `max_retries` setting is the number of times to retry publishing an event after
# a publishing failure. After the specified number of retries, the events are typically dropped.
output.elasticsearch.max_retries: 5
# When deploying Beats to multiple systems or locations, uncomment the following
# setup.template.* and setup.ilm.* configurations after running the Beats setup command
# Otherwise, uncomment the following configurations for Beats that will only publish data
#setup.template.enabled: false
#setup.ilm.check_exists: false
#setup.ilm.overwrite: false
I know I’ve stated this a few times, but I highly encourage you to read through each of these configuration items and define them to match your use case.
Beats Xpack monitoring settings
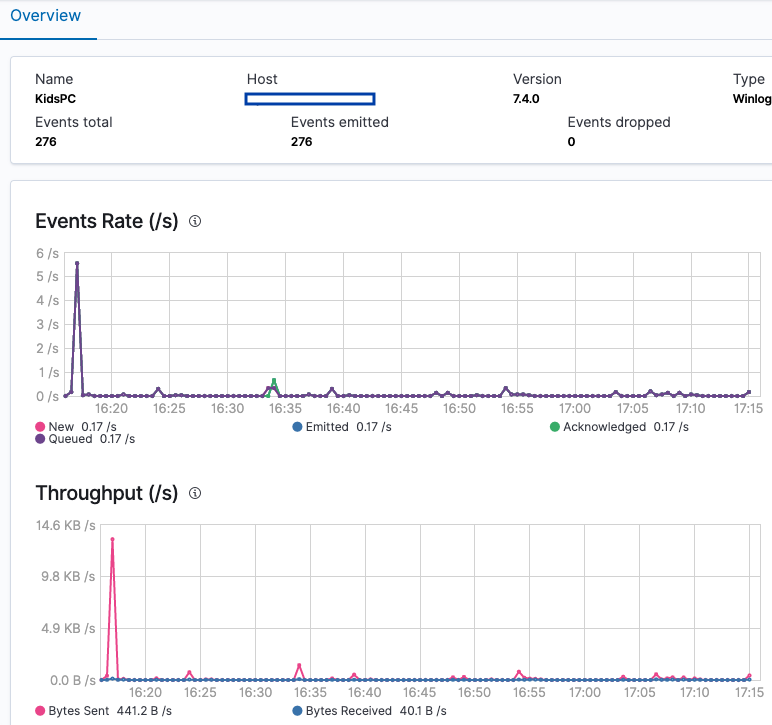
Enabling monitoring gives you the ability to look at what is happening with each individual Beat in Stack Monitoring in Kibana. By setting monitoring.enabled: true, you are telling the Beat to ship monitoring data to your cluster.
#=== Xpack Monitoring ===
monitoring.enabled: true
You can look at the overall performance of the specific Beat, like this:


We will cover one new section to finish our configuration review.
Beats queue settings
If our systems are offline or are unable to connect to our cluster, we need a way for Beats to retain events until reconnecting to our cluster. We will configure internal queue settings, in case our systems are offline or if we have an internet outage. We can choose to configure either the memory queue or the file spool queue, but only one queue type can be configured. The memory queue is useful to cache events to memory in case there is an internet outage, but the file spool queue is useful in case a system is offline. Note that for version 7.4, the file spool queue is a beta functionality.
At home, my computers are set to turn off after a specific amount of inactivity, so I will configure the file spool queue. You should configure the queue type that is appropriate for your use case. With that said, we are also going to add both the queue.mem and queue.spool settings to our configuration file, but leave them commented out for now. You need to uncomment the specific queue type you decide to use. With queue.mem commented out and queue.spool set, my configuration is:
#=== Queue ===
# See the 'Configure the internal queue' documentation for each Beat before
# configuring the queue.  Note that only one queue type can be configured.
# You need to uncomment the specific queue type you decide to use.
# The `queue.mem` settings will cache events to memory in case access to the
# Elasticsearch cluster, via the internet, is unavailable (internet outage)
#queue.mem:
#  events: 4096
#  flush.min_events: 512
#  flush.timeout: 1s
# The `queue.spool` settings will cache events to disk in case the system is offline
# NOTE: The file spool queue is a beta functionality in 7.4
queue.spool:
  file:
    size: 512MiB
    page_size: 16KiB
    prealloc: ~
  write:
    buffer_size: 10MiB
    flush.timeout: 1s
    flush.min.events: 1024
Instead of posting our full configuration here, you can access the common Beats configuration in the SIEM-at-Home folder of the elastic/examples GitHub repo. Once again, I highly encourage you to read through each of the configuration items and define them to match your use case.
Coming up in Part 4: Data collection with Beats
Now that we have completed the prerequisites, our next steps are to collect data from our systems and network devices. We will accomplish this by installing and configuring Beats on our systems. Keep in mind that we need to retain a copy of our Beats common configuration settings from the General, Top Level Processor, Elastic Cloud, Xpack Monitoring, and Queue sections for use when we configure Beats on our other systems.
Follow along with this Elastic SIEM for home and small business blog series as we develop a powerful, yet simple, security solution at home (or for your small business). Remember that once we install and configure Beats on our systems, we can go to the SIEM app to see what data is available.
- Part 1: Getting started
- Part 2: Securing cluster access
- Part 3: GeoIP data and Beats config
- Part 4: Beats on Windows
- Part 5: Beats on CentOS
- Part 6: Beats on macOS
- Part 7: SIEM overview
A few last things...
If you run into any issues, the first place we’d recommend turning is to our documentation. It can help with many common issues. If you still have outstanding questions, check out our Elastic forums for additional help. Or, if you want to talk to the Elastic Support team directly, you have direct access to a team of experts if you’ve deployed on Elasticsearch Service. If you are self-hosting, you can start an Elastic subscription today and have direct access to a team of experts. Be safe out there!