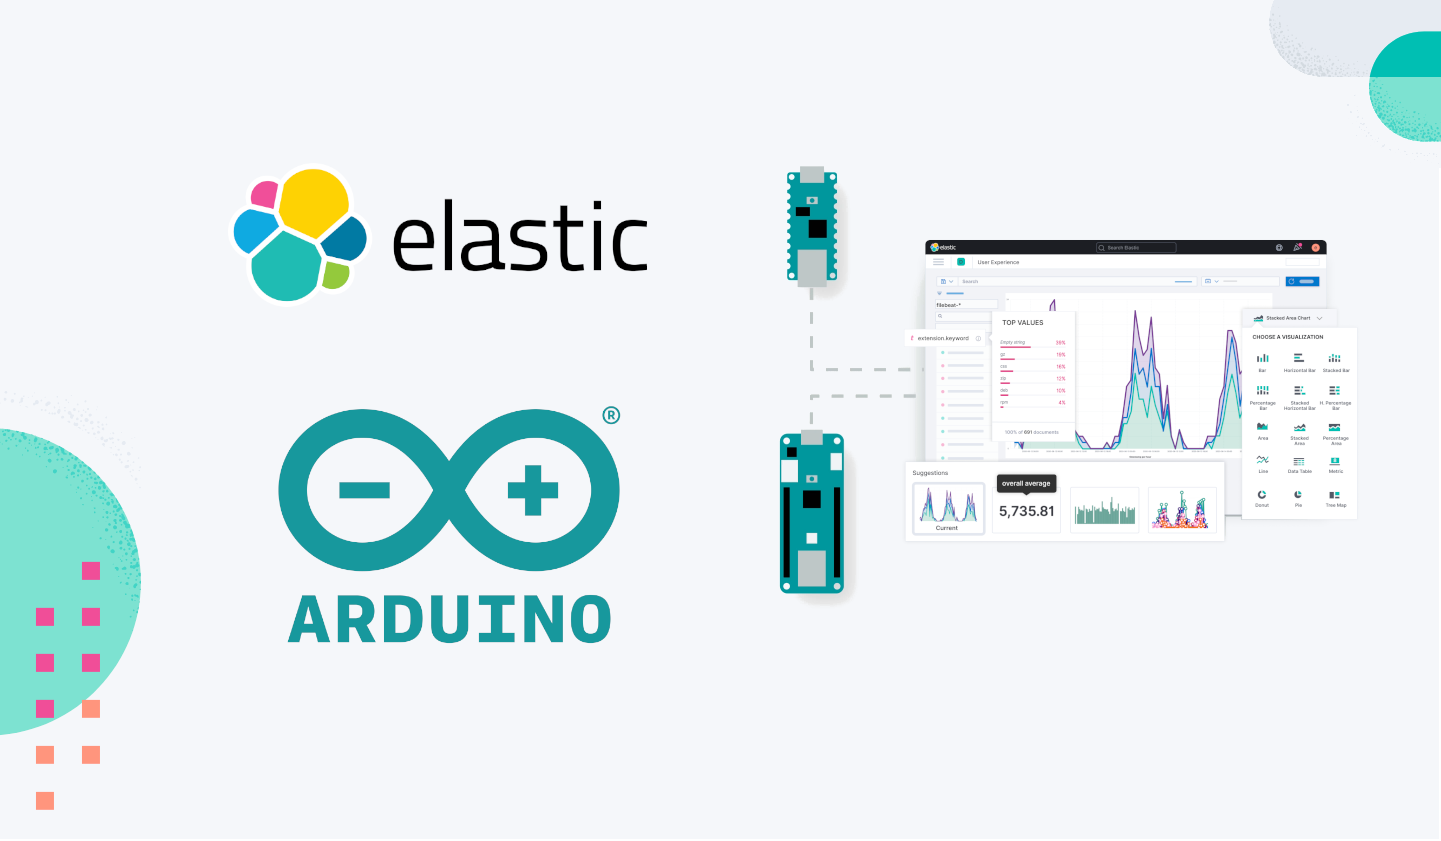
Elasticsearch and Arduino: Better together!
An easy way to communicate with Elasticsearch and Elastic Cloud using Arduino IoT devices

 Share on Twitter
Share on Twitter

 Share on LinkedIn
Share on LinkedIn

 Share on Facebook
Share on Facebook

 Share by Email
Share by Email

 Print this page
Print
At Elastic®, we are constantly looking for new ways to simplify search experience, and we started to look at the IoT world. The collection of data coming from IoT can be quite challenging, especially when we have thousands of devices.
Elasticsearch® can be very useful to collect, explore, visualize, and discover data — for all the data coming from multiple devices. Elastic’s distributed nature enables it to easily handle requests from millions of devices.
Thanks to the collaboration with Arduino, a very popular brand in IoT, we tested some devices and we developed an experimental open source library that connects Arduino boards to Elasticsearch in a very easy way.
What is Arduino?
Arduino is the world’s leader for open-source hardware and software, with more than 30 million active users! Born to enable makers of all kinds to create their own interactive projects, the brand has grown and adapted as its users faced new challenges, branching out into IoT, wearables, 3D printing, and embedded environments. It also opened a dedicated Pro Business Unit to support companies in becoming the innovators of their field, with a customized and user-friendly approach that avoids vendor lock-in and leverages a 360° ecosystem ready to go from prototyping to mass production.
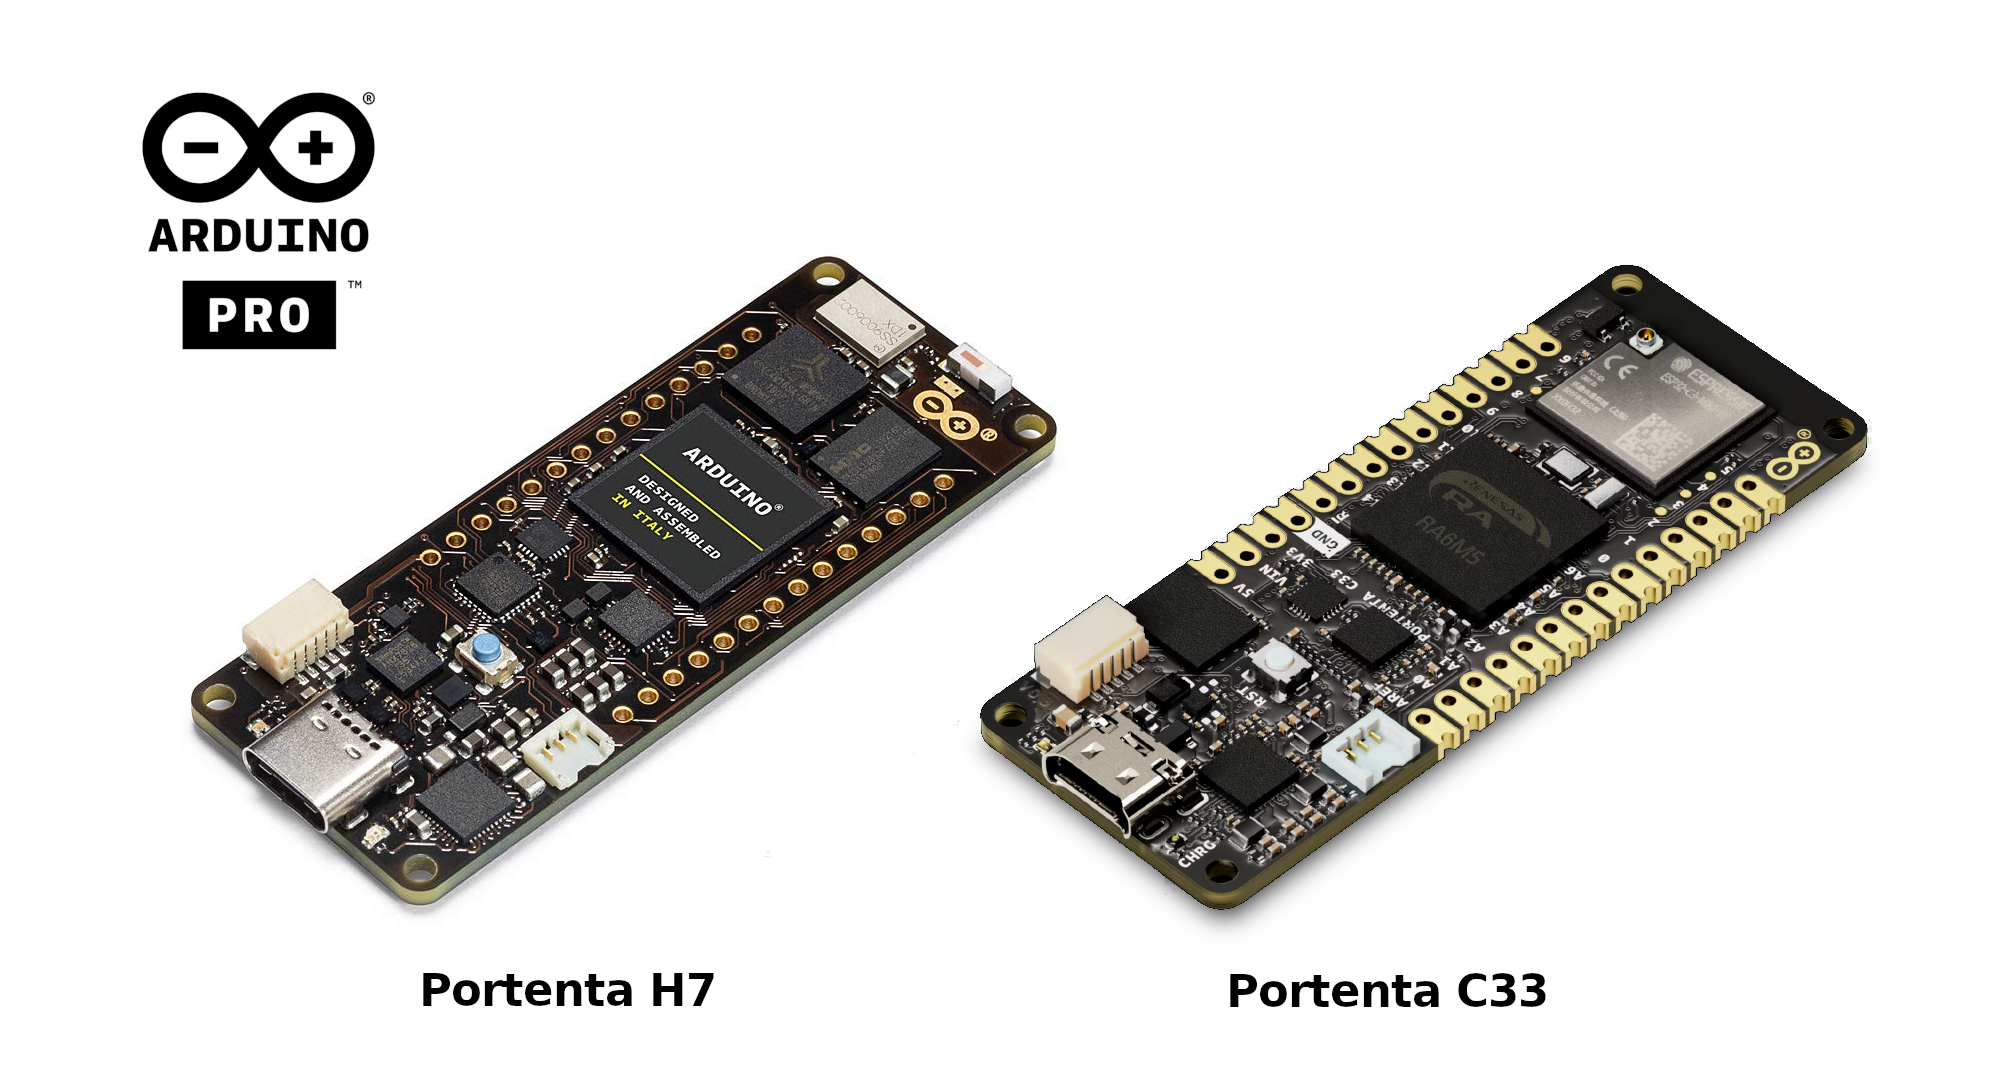
Arduino Pro
Among Arduino Pro’s high-performance technological solutions, you’ll find low-power and secure System-on-Module such as Portenta H7, which can be programmed with high-level languages and AI while performing low-latency operations on its customizable hardware, and the more recent Portenta C33, making IoT more accessible than ever thanks to a streamlined and cost-effective set of features.
What’s more, Arduino Pro’s industrial-grade offerings fit in with the entire Arduino ecosystem, which includes Cloud services, countless software libraries and ready-to-use sketches shared by the community, and of course a wide variety of components to meet any need. These include popular products such as MKR WiFi 1010 and Nano RP2040 boards — veritable cornerstones of the maker movement.
Elasticsearch and Arduino
We developed an R&D project to provide a simple Elasticsearch client library (written in C++) that runs on Arduino modules. That’s right: now you can communicate with an Elasticsearch cluster directly from an Arduino board!
We tested this library using Portenta H7, MKR WiFi 1010, and NANO RP2040 Connect. Potentially any Arduino board with a Wi-Fi or Ethernet connection can use this library.
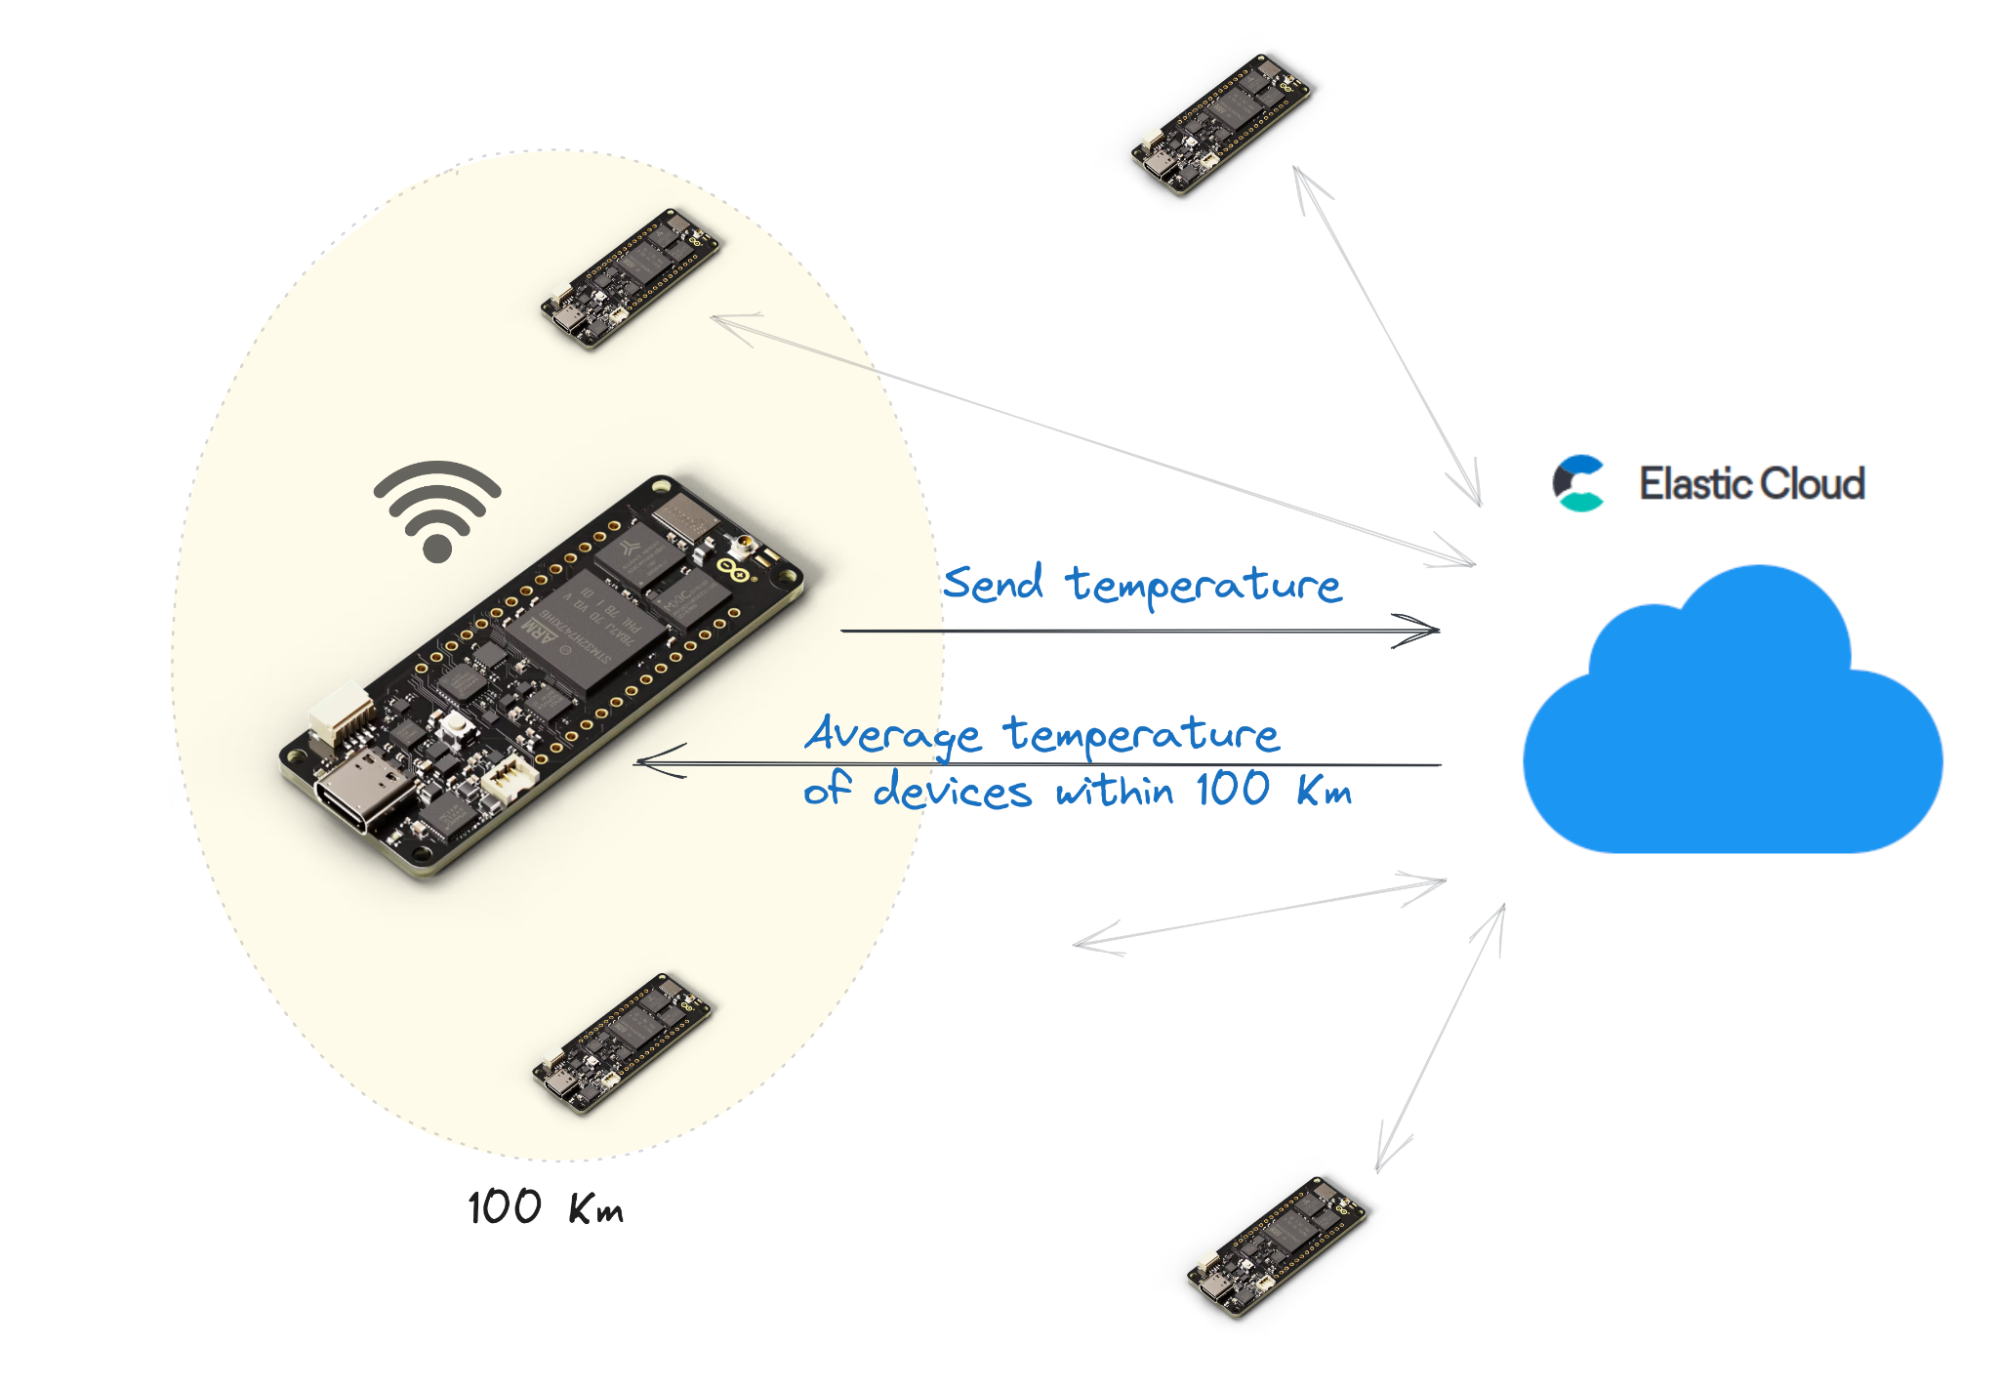
We used Elastic Cloud as a database, collecting all the data and providing the elaboration of the average temperature, from the neighboring devices. This is a typical scenario in control engineering applications.
Want to find out more? Below is a simple tutorial with all the details.
Use case: Monitoring temperatures from multiple IoT devices
We designed a use case for a company that needed to manage multiple IoT devices located in Italy. Each device sends data coming from sensors (e.g., temperature) to Elastic Cloud. Using Elastic Cloud, the company can manage any scale of IoT devices, without the need of managing a dedicated infrastructure. Moreover, the company needs to adjust some internal parameters of each device from the average temperature of neighboring devices, in a range of 100 Km. This is a typical scenario in control engineering applications.
Using Elasticsearch, we can provide multiple feedback using search features like filtering, aggregation, multi-match, geospatial, vector search (kNN), semantic search, and machine learning.
In this use case, we used the average aggregation and geo-distance to retrieve all the devices between 100 Km.
Using Kibana®, the UI available in Elastic Cloud, we can easily create a dashboard to monitor the data coming from all the devices. Since we also have geo-data, we can represent this information in a map.
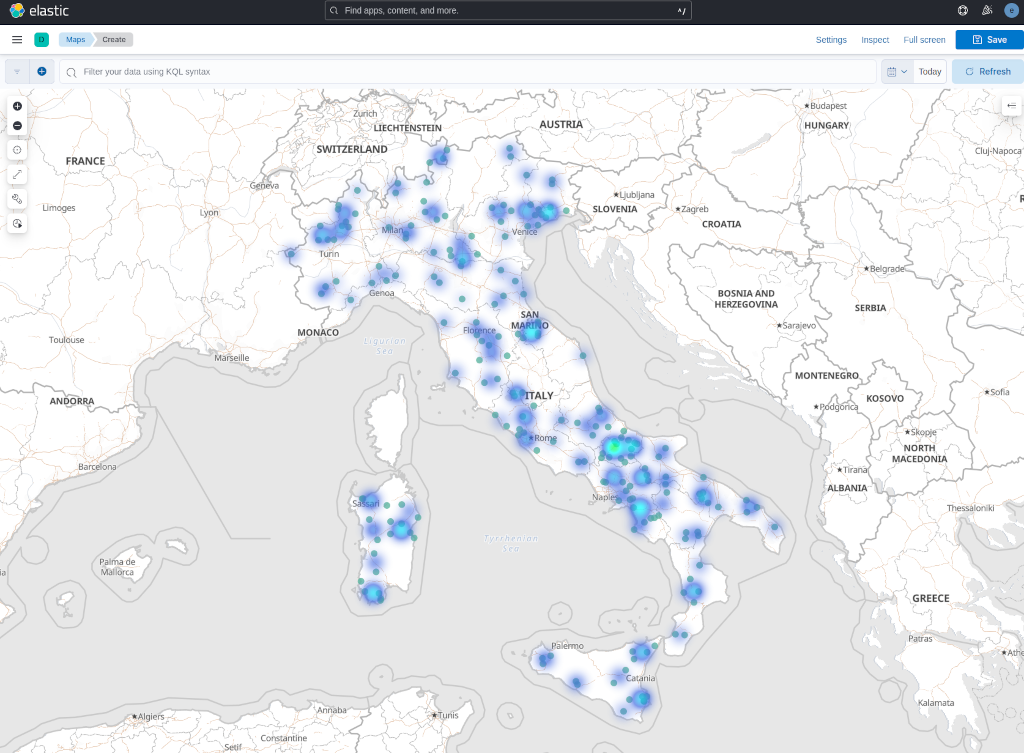
This is a heat map created with different colors representing different temperatures (blue is cold and green is hot).
Setup of Elastic Cloud
The first step is to have an account for Elastic Cloud. If you don’t have one, you can register for a trial here (no credit card required). Once you log in, you can create a new deployment, choosing the size of the Elasticsearch instances that you want to use.
Once you have created a deployment, you need to retrieve the endpoint URL and generate an API key of Elasticsearch. You can read this guideline for obtaining this information. For advanced use cases, you can also create groups of API keys to be used for different devices and change the API policy to allow only the usage of a specific index.
Preparing Elasticsearch index
We need to create an index to store the data coming from the Arduino boards. We want to store temperature values, position of the device using geo-location (latitude and longitude), a device identifier name, and a timestamp.
We can create an index “temperature” with the following HTTP request to Elasticsearch:
PUT /temperature
{
  "mappings": {
    "properties": {
      "temperature": { "type": "float" },
      "timestamp":   { "type": "date" },
      "location":    { "type": "geo_point" },
      "device-id":   { "type": "keyword" }
    }
  }
}
To send this HTTP request, you can use the Dev Tools of Kibana in Elastic Cloud.
We want to store the timestamp of the operation each time a device sends data. This can be done using the ingest pipeline feature of Elasticsearch. An ingest pipeline is an action that Elasticsearch executes before indexing (storing) a document. For instance, a pipeline can assign the value of a specific document field, based on some calculation.
In our case, we just need to store the timestamp and we can create a “set-timestamp” pipeline:
PUT _ingest/pipeline/set-timestamp
{
  "description": "sets the timestamp",
  "processors": [
    {
      "set": {
        "field": "timestamp",
        "value": "{{{_ingest.timestamp}}}"
      }
    }
  ]
}Using this pipeline, we can then send data to Elasticsearch as follows:
POST /temperature/_doc?pipeline=set-timestamp
{
  "temperature": 21.45,
  "device-id": "H7-001",
  "location": {
    "type": "Point",
    "coordinates": [12.4923, 41.8903]
  }
}Here the device-id H7-001 is the name of the Arduino board and location is the geographic point expressed with 12.4923 (longitude) and 41.8903 (latitude), which is the position of Colosseo in Rome (Italy).
Notice that we did not specify the timestamp value because this is automatically generated using the “set-timestamp” pipeline (specified in the URL as query string).
Geo-distance query
To retrieve the average temperature of the devices distance up to 100 Km, we can use the following Elasticsearch query:
GET /temperature/_search
{
  "query": {
    "bool": {
      "must": {
        "match_all": {}
      },
      "filter": {
        "geo_distance": {
          "distance": "100km",
          "location": [12.4923, 41.8903]
        }
      }
    }
  },
  "aggs": {
    "avg_temp": { "avg": { "field": "temperature" } }
  }
}
This query will return an “avg_temp” aggregation field containing the average temperature of all devices within a radius of 100 Km.
Usage of the Elasticsearch client for Arduino
It’s finally time to show some Arduino code! Here we reported a simple sketch that sends a temperature value to Elastic Cloud, gets the average temperature performing a geo-distance query, and waits for 30 seconds.
The code reported here is available online in the examples folder of the GitHub repository elastic/elasticsearch-arduino. The sketch uses an elasticsearch_config.h file as follows:
#define WIFI_SECRET_SSID ""
#define WIFI_SECRET_PASS ""
#define ELASTIC_ENDPOINT ""
#define ELASTIC_PORT 443
#define ELASTIC_CLOUD_API_KEY ""
#define DEVICE_GEO_LON 12.4923
#define DEVICE_GEO_LAT 41.8903
#define DEVICE_ID "x"
#define DEVICE_GEO_DISTANCE "50km"
In our example, we used a Wi-Fi connection for connecting the Arduino board to the internet.
The WIFI_SECRET_SSID and the WIFI_SECRET_PASS are the name of the SSID network to use and the Wi-Fi password.
The ELASTIC_ENDPOINT is the URL of the Elastic Cloud endpoint, the ELASTIC_PORT is 443 since Elastic Cloud uses TLS (https). The ELASTIC_CLOUD_API_KEY is the API key to be generated in the Elastic Cloud admin interface.
This file also contains other information related to the Arduino device. We have the longitude (DEVICE_GEO_LON) and latitude (DEVICE_GEO_LAT), the ID (DEVICE_ID), and the distance (DEVICE_GEO_DISTANCE) for the geo-query.
After filling all the previous information, we can have a look at the sketch, reported as follows.
#include <ArduinoJson.h>
#include <WiFi.h>
#include <WiFiSSLClient.h>
#include "ESClient.h"
#include "elasticsearch_config.h"

// WiFi settings
char ssid[] = WIFI_SECRET_SSID;
char pass[] = WIFI_SECRET_PASS;

// Elastic settings
char serverAddress[] = ELASTIC_ENDPOINT;
int serverPort = ELASTIC_PORT;

WiFiSSLClient wifi;

ESClient client = ESClient(wifi, serverAddress, serverPort);
int status = WL_IDLE_STATUS;

void setup() {
  Serial.begin(9600);
  Serial.println("Started");

  while (status != WL_CONNECTED) {
    Serial.print("Attempting to connect to Network named: ");
    Serial.println(ssid);

    // Connect to WPA/WPA2 network:
    status = WiFi.begin(ssid, pass);
  }

  // print the SSID of the network you're attached to:
  Serial.print("SSID: ");
  Serial.println(WiFi.SSID());

  // print your WiFi shield's IP address:
  IPAddress ip = WiFi.localIP();
  Serial.print("IP Address: ");
  Serial.println(ip);

  client.setElasticCloudApiKey(ELASTIC_CLOUD_API_KEY);
}

void loop() {

  float temperature;
  // Set the temperature from a sensor (removing the randomness)
  temperature = random(10,30) + random(0,100)/100.00;

  // Prepare the JSON with temperature and geopoint for Elasticsearch
  StaticJsonDocument<200> doc;
  doc["temperature"] = temperature;
  doc["device-id"] = DEVICE_ID;
  doc["location"]["type"] = "Point";
  doc["location"]["coordinates"][0] = DEVICE_GEO_LON;
  doc["location"]["coordinates"][1] = DEVICE_GEO_LAT;

  String temp;
  serializeJson(doc, temp);

  Serial.println("Sending to Elasticsearch:");
  Serial.println(temp);
  ESResponse indexResult;
  // Send the temperature to Elastic Cloud
  indexResult = client.index("temperature", temp, "pipeline=set-timestamp");

  DynamicJsonDocument result(1024);
  deserializeJson(result, indexResult.body);

  if (result["result"] == "created") {
    Serial.println("Created with _id: " + result["_id"].as<String>());
  } else {
    Serial.println("Error sending data: " + indexResult.body);

  }

  StaticJsonDocument<512> query;
  query["query"]["bool"]["filter"]["geo_distance"]["distance"] = DEVICE_GEO_DISTANCE;
  query["query"]["bool"]["filter"]["geo_distance"]["location"][0] = DEVICE_GEO_LON;
  query["query"]["bool"]["filter"]["geo_distance"]["location"][1] = DEVICE_GEO_LAT;
  query["aggs"]["avg_temp"]["avg"]["field"] = "temperature";
  query["size"] = 0;

  String search;
  serializeJson(query, search);
  Serial.println("Geo-location query:");
  Serial.println(search);

  ESResponse searchResult;
  // Send the temperature to Elastic Cloud
  searchResult = client.search("temperature", search);

  DynamicJsonDocument avg(512);
  deserializeJson(avg, searchResult.body);
  float avgTemp = avg["aggregations"]["avg_temp"]["value"];
  int numDevices = avg["hits"]["total"]["value"];
  Serial.println("Average temperature of " + String(numDevices) + " devices in " + DEVICE_GEO_DISTANCE + ": " + String(avgTemp));

  Serial.println("Wait 30 seconds");
  delay(30000);
}
This sketch requires Wi-Fi, WiFiSSLClient (for connecting using TLS) for the internet connection, the EsClient for connecting to Elasticsearch, and the ArduinoJson library for serializing and deserializing Json data structure.
In the setup() function, we start the Wi-Fi connection and we set the API key of Elastic Cloud using client.setElasticCloudApiKey(ELASTIC_CLOUD_API_KEY) function call.
The client object is initialized in the main area passing the Wi-Fi object, the server address (endpoint), and the HTTP port.
In the loop() function, we have the code that sends the temperature to Elastic Cloud. The temperature here is just a random float number between 10 and 30; typically it comes from a sensor attached to the Arduino board.
To prepare the document to send to Elasticsearch, we used the ArduinoJson library.
We used the following code to create a “doc” object:
StaticJsonDocument<200> doc;
doc["temperature"] = temperature;
doc["device-id"] = DEVICE_ID;
doc["location"]["type"] = "Point";
doc["location"]["coordinates"][0] = DEVICE_GEO_LON;
doc["location"]["coordinates"][1] = DEVICE_GEO_LAT;
This object is serialized in a JSON string as follows:
String temp;
serializeJson(doc, temp);
Finally, the document, stored in the “temp” variable, can be sent to Elasticsearch using the index API, as follows:
ESResponse indexResult;
indexResult = client.index("temperature", temp, "pipeline=set-timestamp");
This API adds the “temp” document in the index “temperature” using the “set-timestamp” pipeline. The result is stored in the “indexResult” variable that is a struct type as follows:
struct ESResponse {
    int statusCode;
    String body;
};
The “statusCode” is the HTTP status code of the response, and “body” is the response body. The index operation is successful if the response contains a “result” field with value “created.”
For getting the average temperature of the devices within a radius of 100 Km, we used the following geo-distance query, expressed using ArduinoJson.
StaticJsonDocument<512> query;
query["query"]["bool"]["filter"]["geo_distance"]["distance"] = DEVICE_GEO_DISTANCE;
query["query"]["bool"]["filter"]["geo_distance"]["location"][0] = DEVICE_GEO_LON;
query["query"]["bool"]["filter"]["geo_distance"]["location"][1] = DEVICE_GEO_LAT;
query["aggs"]["avg_temp"]["avg"]["field"] = "temperature";
query["size"] = 0;

String search;
serializeJson(query, search);

ESResponse searchResult;
searchResult = client.search("temperature", search);

DynamicJsonDocument avg(512);
deserializeJson(avg, searchResult.body);
float avgTemp = avg["aggregations"]["avg_temp"]["value"];
int numDevices = avg["hits"]["total"]["value"];
The response of the search contains the average temperature, as an aggregation value. Moreover, we can retrieve the number of devices retrieved by the query using the [‘hits’][‘total’][‘value’] field in the JSON response from Elasticsearch.
Conclusion
Thanks to the collaboration with Arduino, we developed a very simple library that allows the usage of Elasticsearch directly from an Arduino board. In a few lines of code, we can send data to Elasticsearch and execute complex elaborations, using geolocation and more.
We cannot wait to see what other creative use cases the Arduino users will design with the usage of Elasticsearch. For instance, if you are interested in generative AI, you will enjoy all the newest features of Elastic.
Do not wait anymore — give a try to Elastic Cloud and the elasticsearch-arduino library.
Acknowledgements
I want to thank all the employees of Arduino that made this R&D project possible. A special thanks to Giampaolo Mancini for his help and collaboration in the development of elasticsearch-arduino library. Moreover, I would like to thank Andrea Richetta and Stefano Implicito from Arduino for making this collaboration possible.
The release and timing of any features or functionality described in this post remain at Elastic's sole discretion. Any features or functionality not currently available may not be delivered on time or at all.
Share
- Share on Twitter
Share on Twitter
- Share on LinkedIn
Share on LinkedIn
- Share on Facebook
Share on Facebook
- Share by Email
Share by Email
- Print this page
Print