How to enrich logs and metrics using an Elasticsearch ingest node
When ingesting data into Elasticsearch, it is often beneficial to enrich documents with additional information that can later be used for searching or viewing the data. Enrichment is the process of merging data from an authoritative source into documents as they are ingested into Elasticsearch.
For example, enrichment can be done with the GeoIP Processor which processes documents that contain IP addresses and adds information about the geographical location associated with each IP address. Enriching documents with a geographical location at ingest-time is useful because it permits fast query-time operations such as queries by location or the efficient presentation of information on a map.
While the GeoIP processor is a good example for understanding the power of enrichment, there are many other cases where documents may need to be enriched with custom data. It is not difficult to imagine a scenario where there are devices logging data into Elasticsearch, and where the data that is sent from these devices needs to be enriched with Master Data. This Master Data could include information such as device location, which team owns a given device, device type, and so on.
Historically, enrichment functionality was only available in Logstash, however since the introduction of the enrich processor in Elasticsearch 7.5.0, it is possible to do enrichments directly in Elasticsearch, without needing to configure a separate service/system.
As Master Data that is commonly used for enrichment is often created in CSV files, in this blog we give step-by-step instructions about how the Enrich Processor running on an ingest node can be used for enrichment using data from a CSV file.
Example CSV data
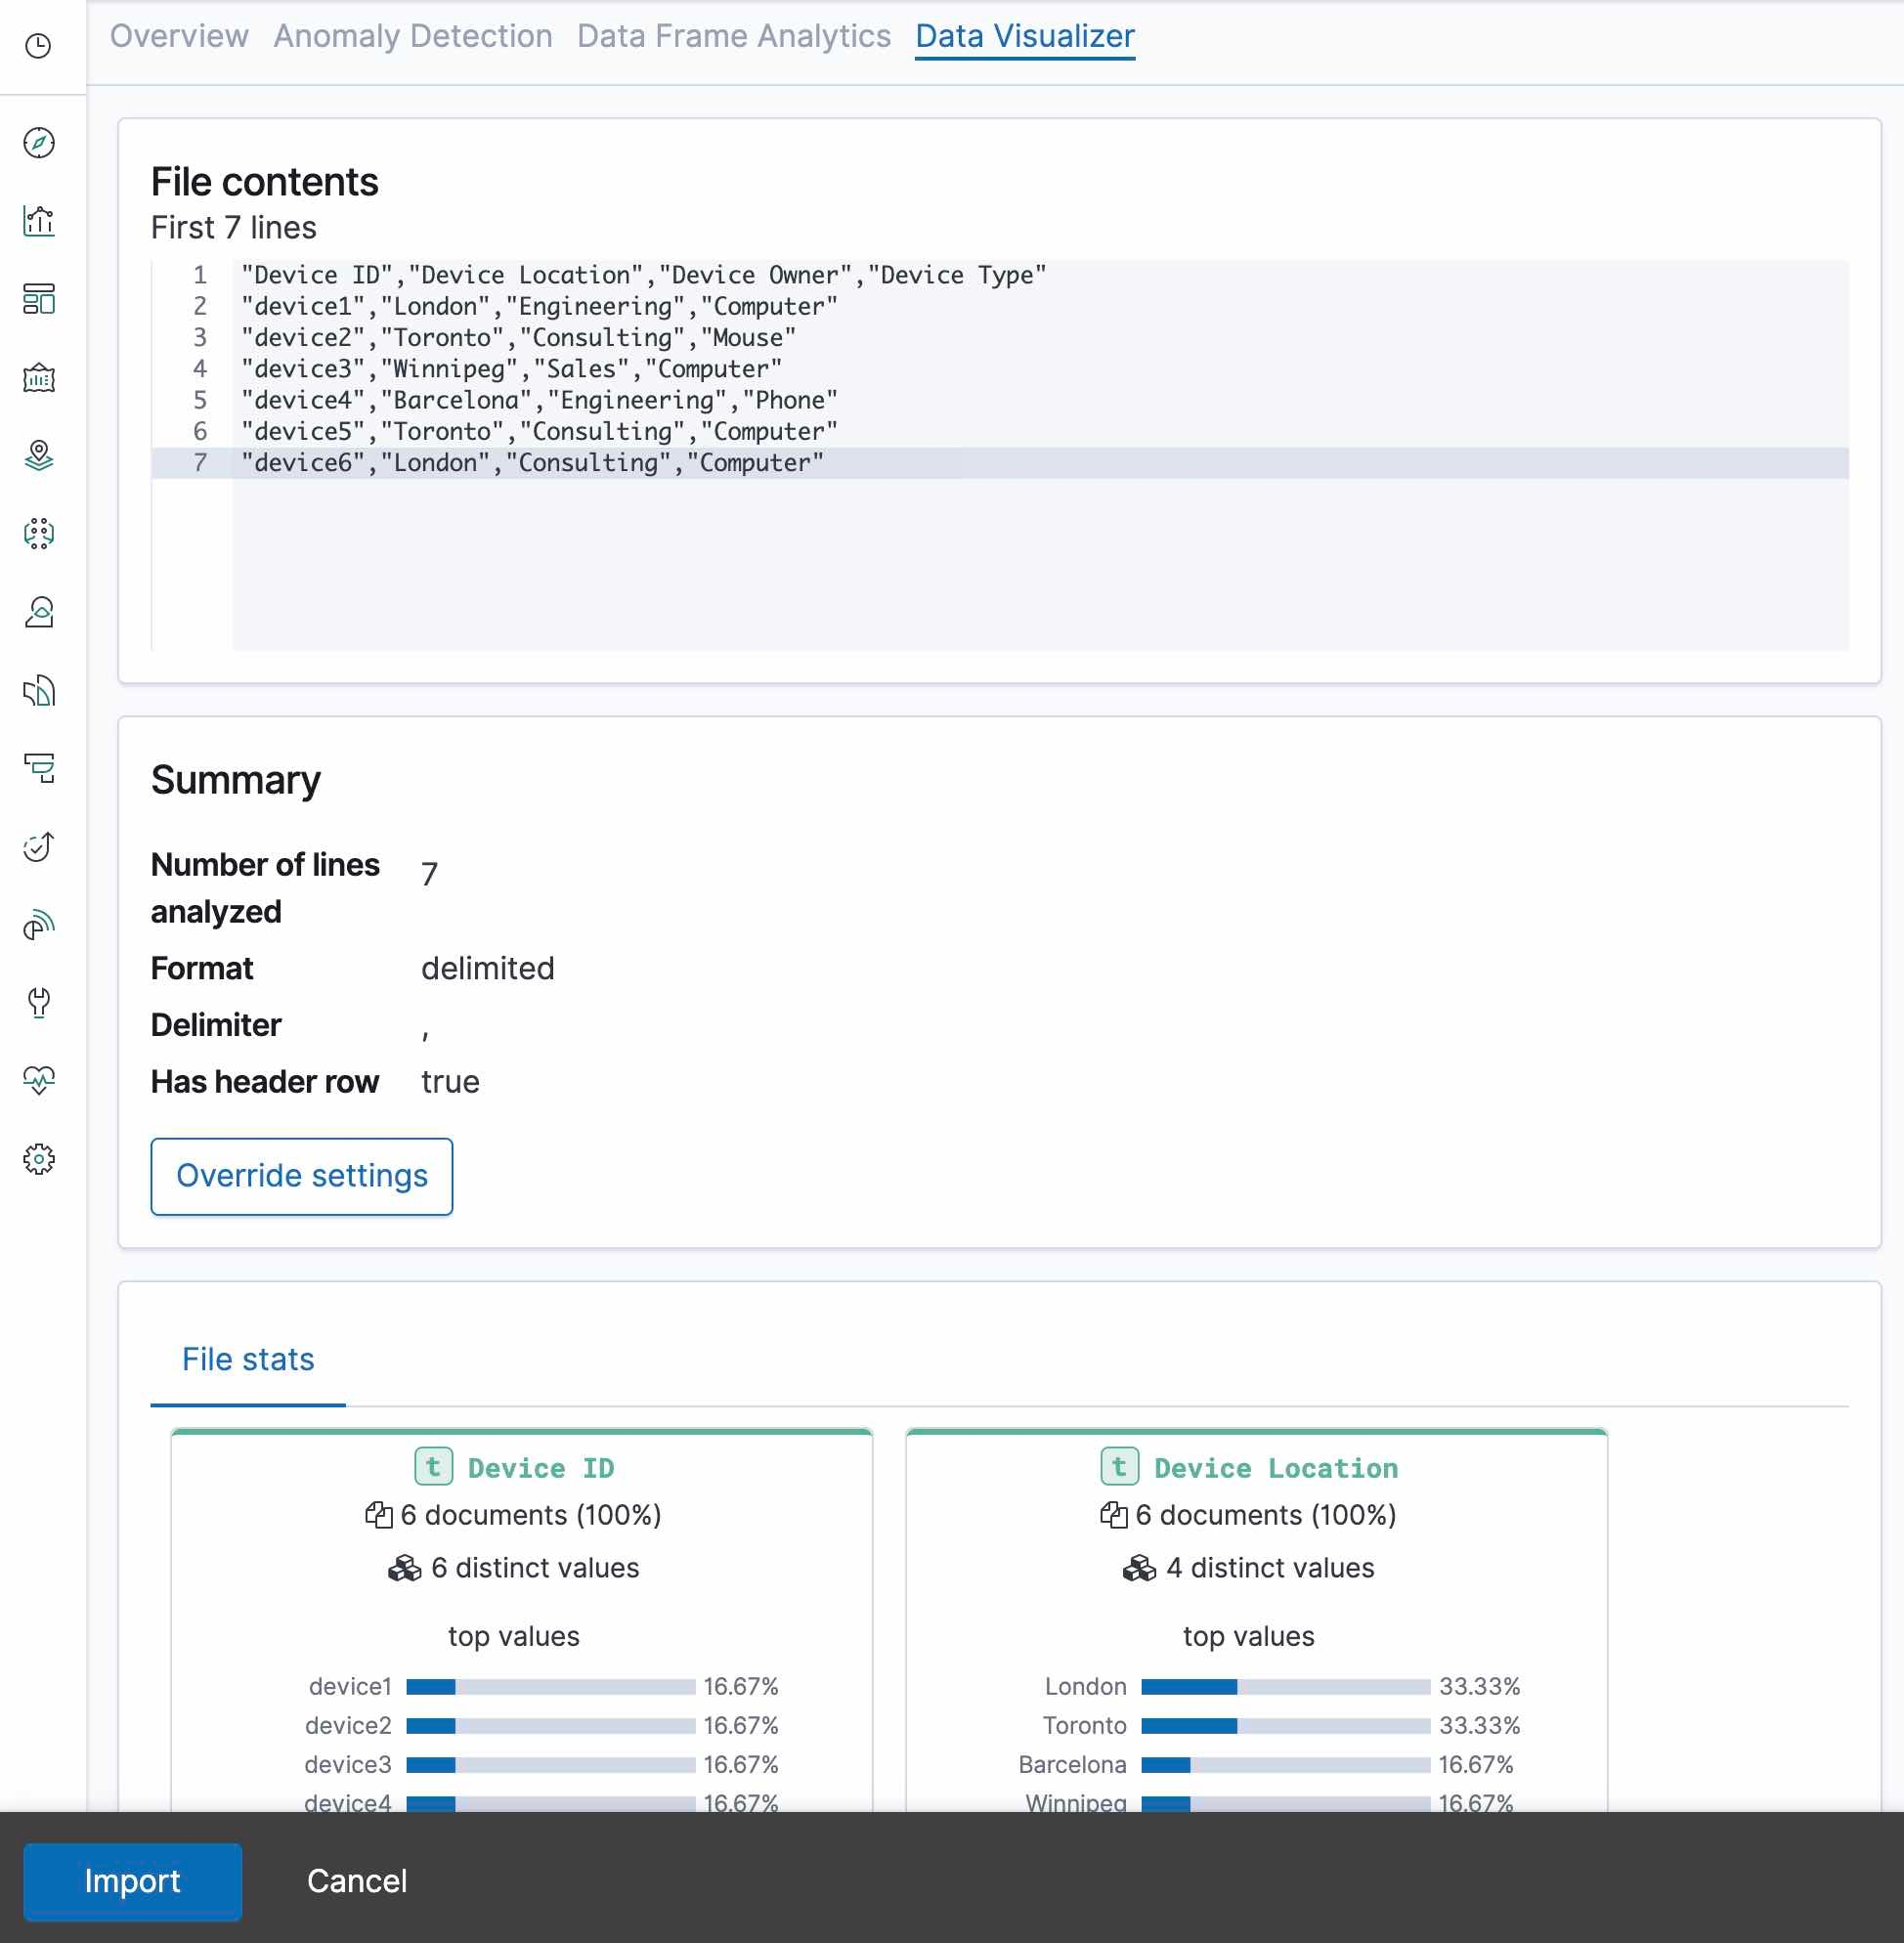
The following example Master Data in CSV format can be imported with Kibana, and later used for enriching documents as they are ingested into Elasticsearch. For the example given in this blog, we store our Master Data in a file called test.csv. This data represents devices in an organisation's inventory.
"Device ID","Device Location","Device Owner","Device Type"
"device1","London","Engineering","Computer"
"device2","Toronto","Consulting","Mouse"
"device3","Winnipeg","Sales","Computer"
"device4","Barcelona","Engineering","Phone"
"device5","Toronto","Consulting","Computer"
"device6","London","Consulting","Computer"
Note that the CSV data should not include any additional spaces, as the current version of the Data Visualizer requires that the data is precisely formatted. This is documented in this github issue.
Ingesting CSV Data into Elasticsearch
The blog on Importing CSV and Log Data into Elasticsearch with File Data Visualizer shows how the Data Visualizer in Kibana can be used to import CSV data into Elasticsearch.
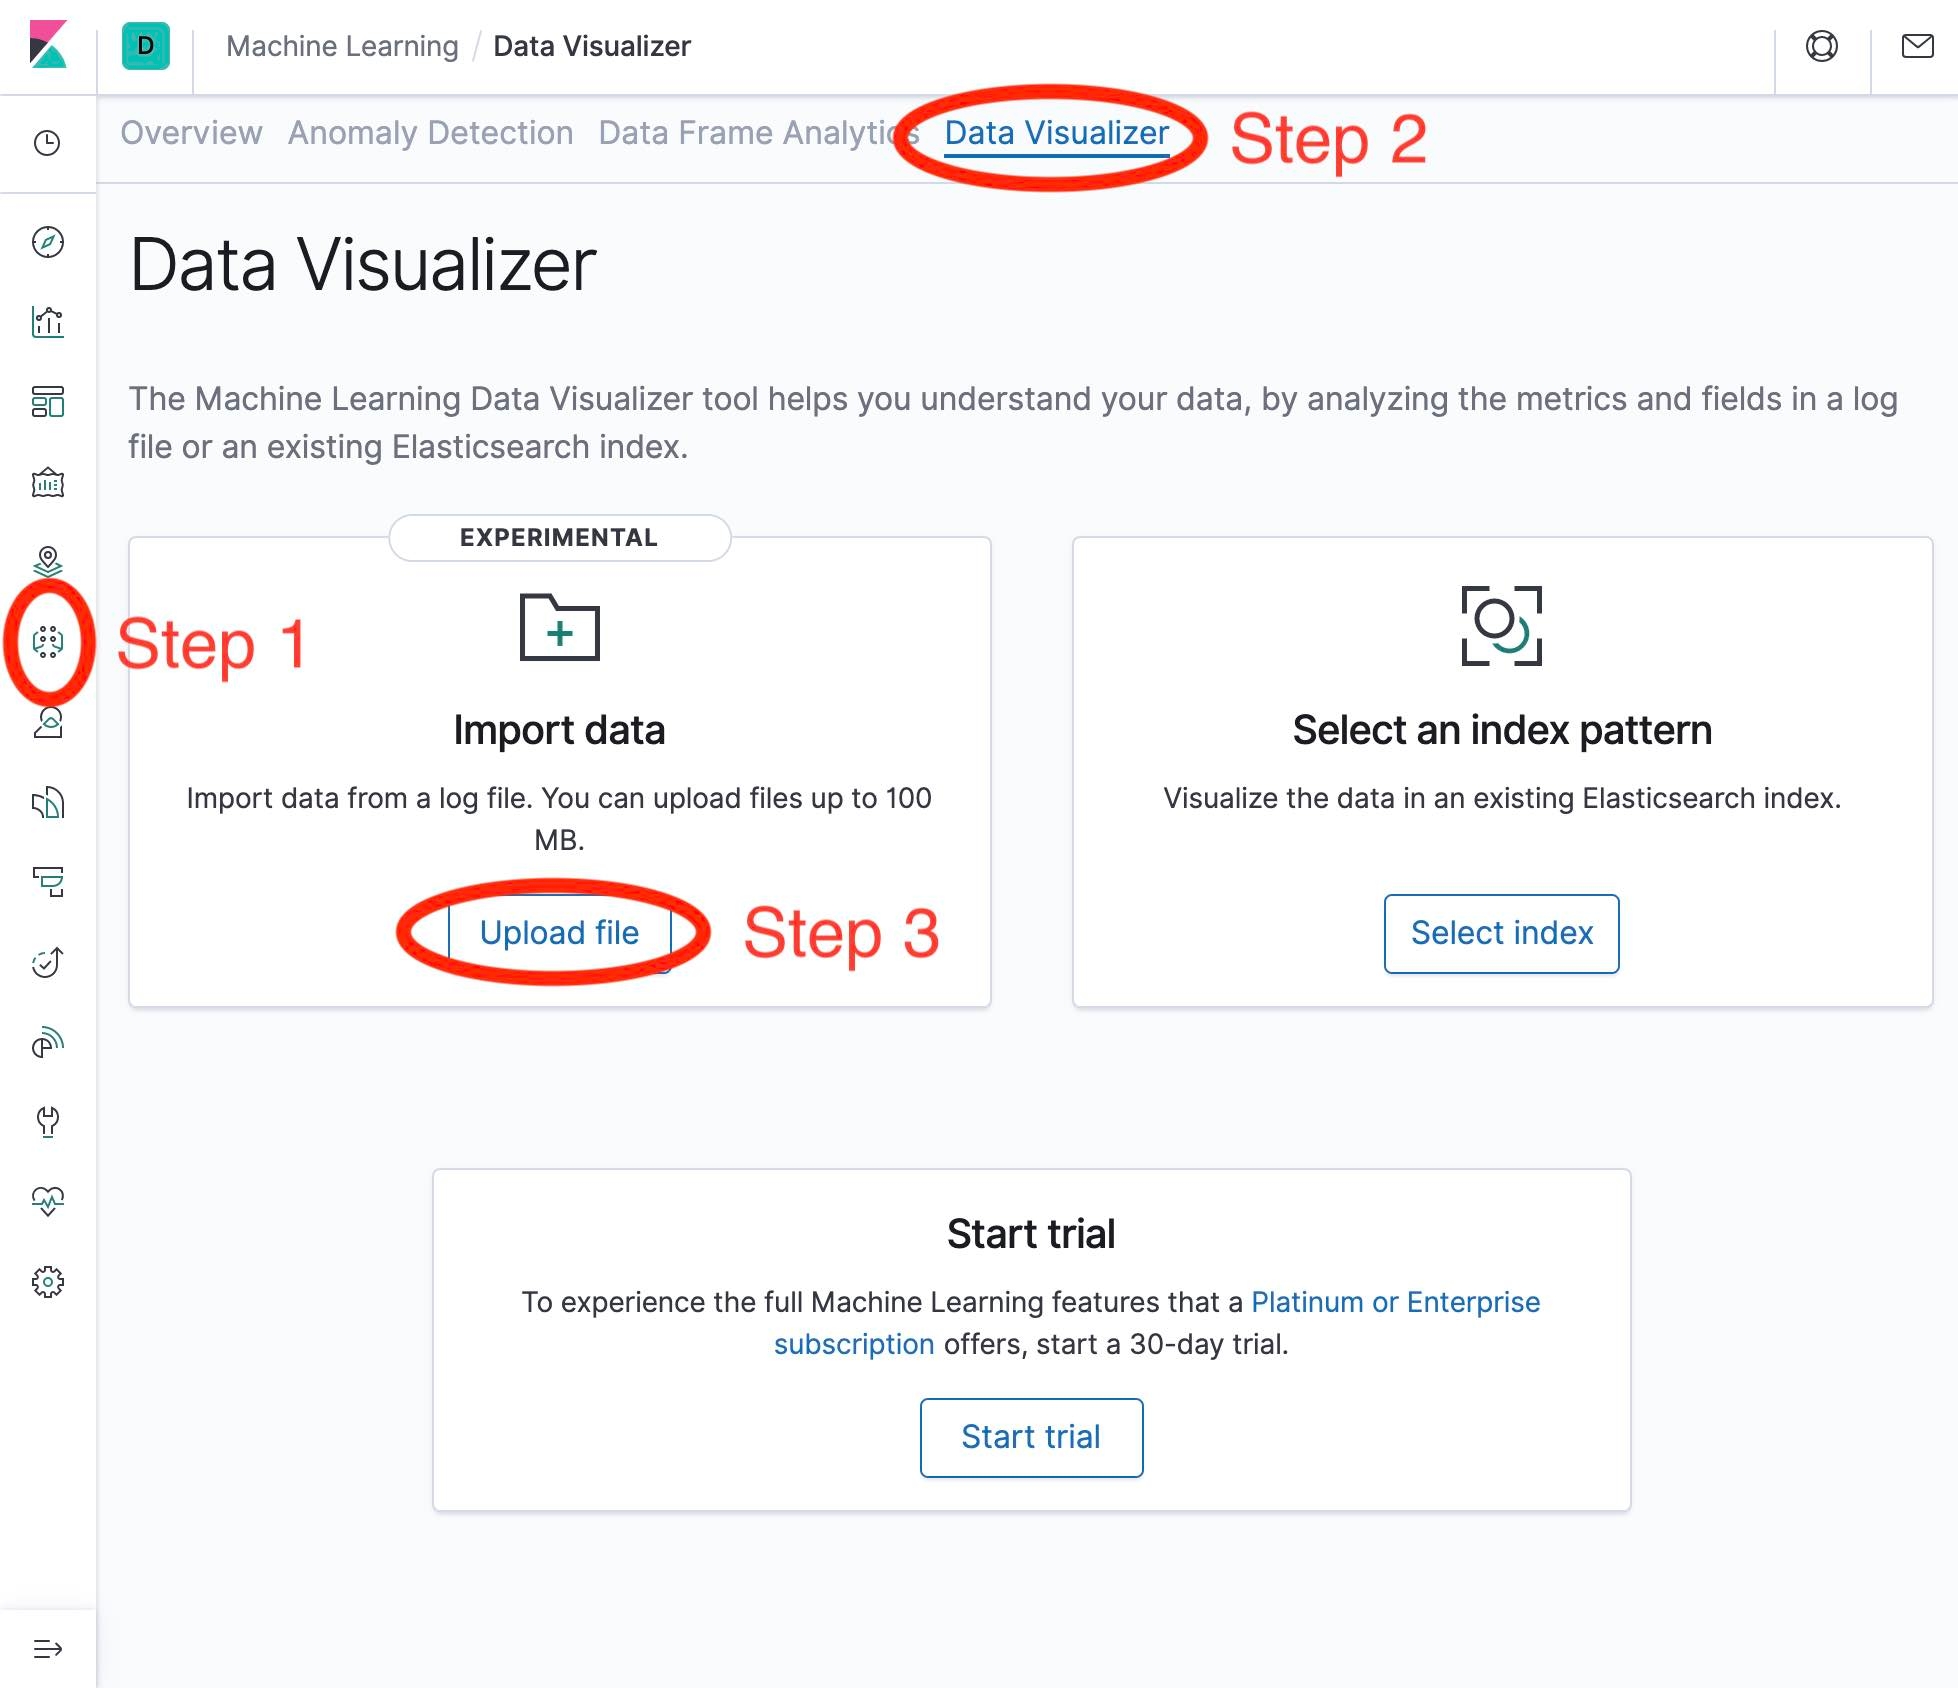
To get to the Data Visualizer do the following:
- Click on the Machine Learning icon.
- Click on the Data Visualizer tab.
- Click on the Upload file button (in the Import data section).
These steps are demonstrated in the following screenshot:
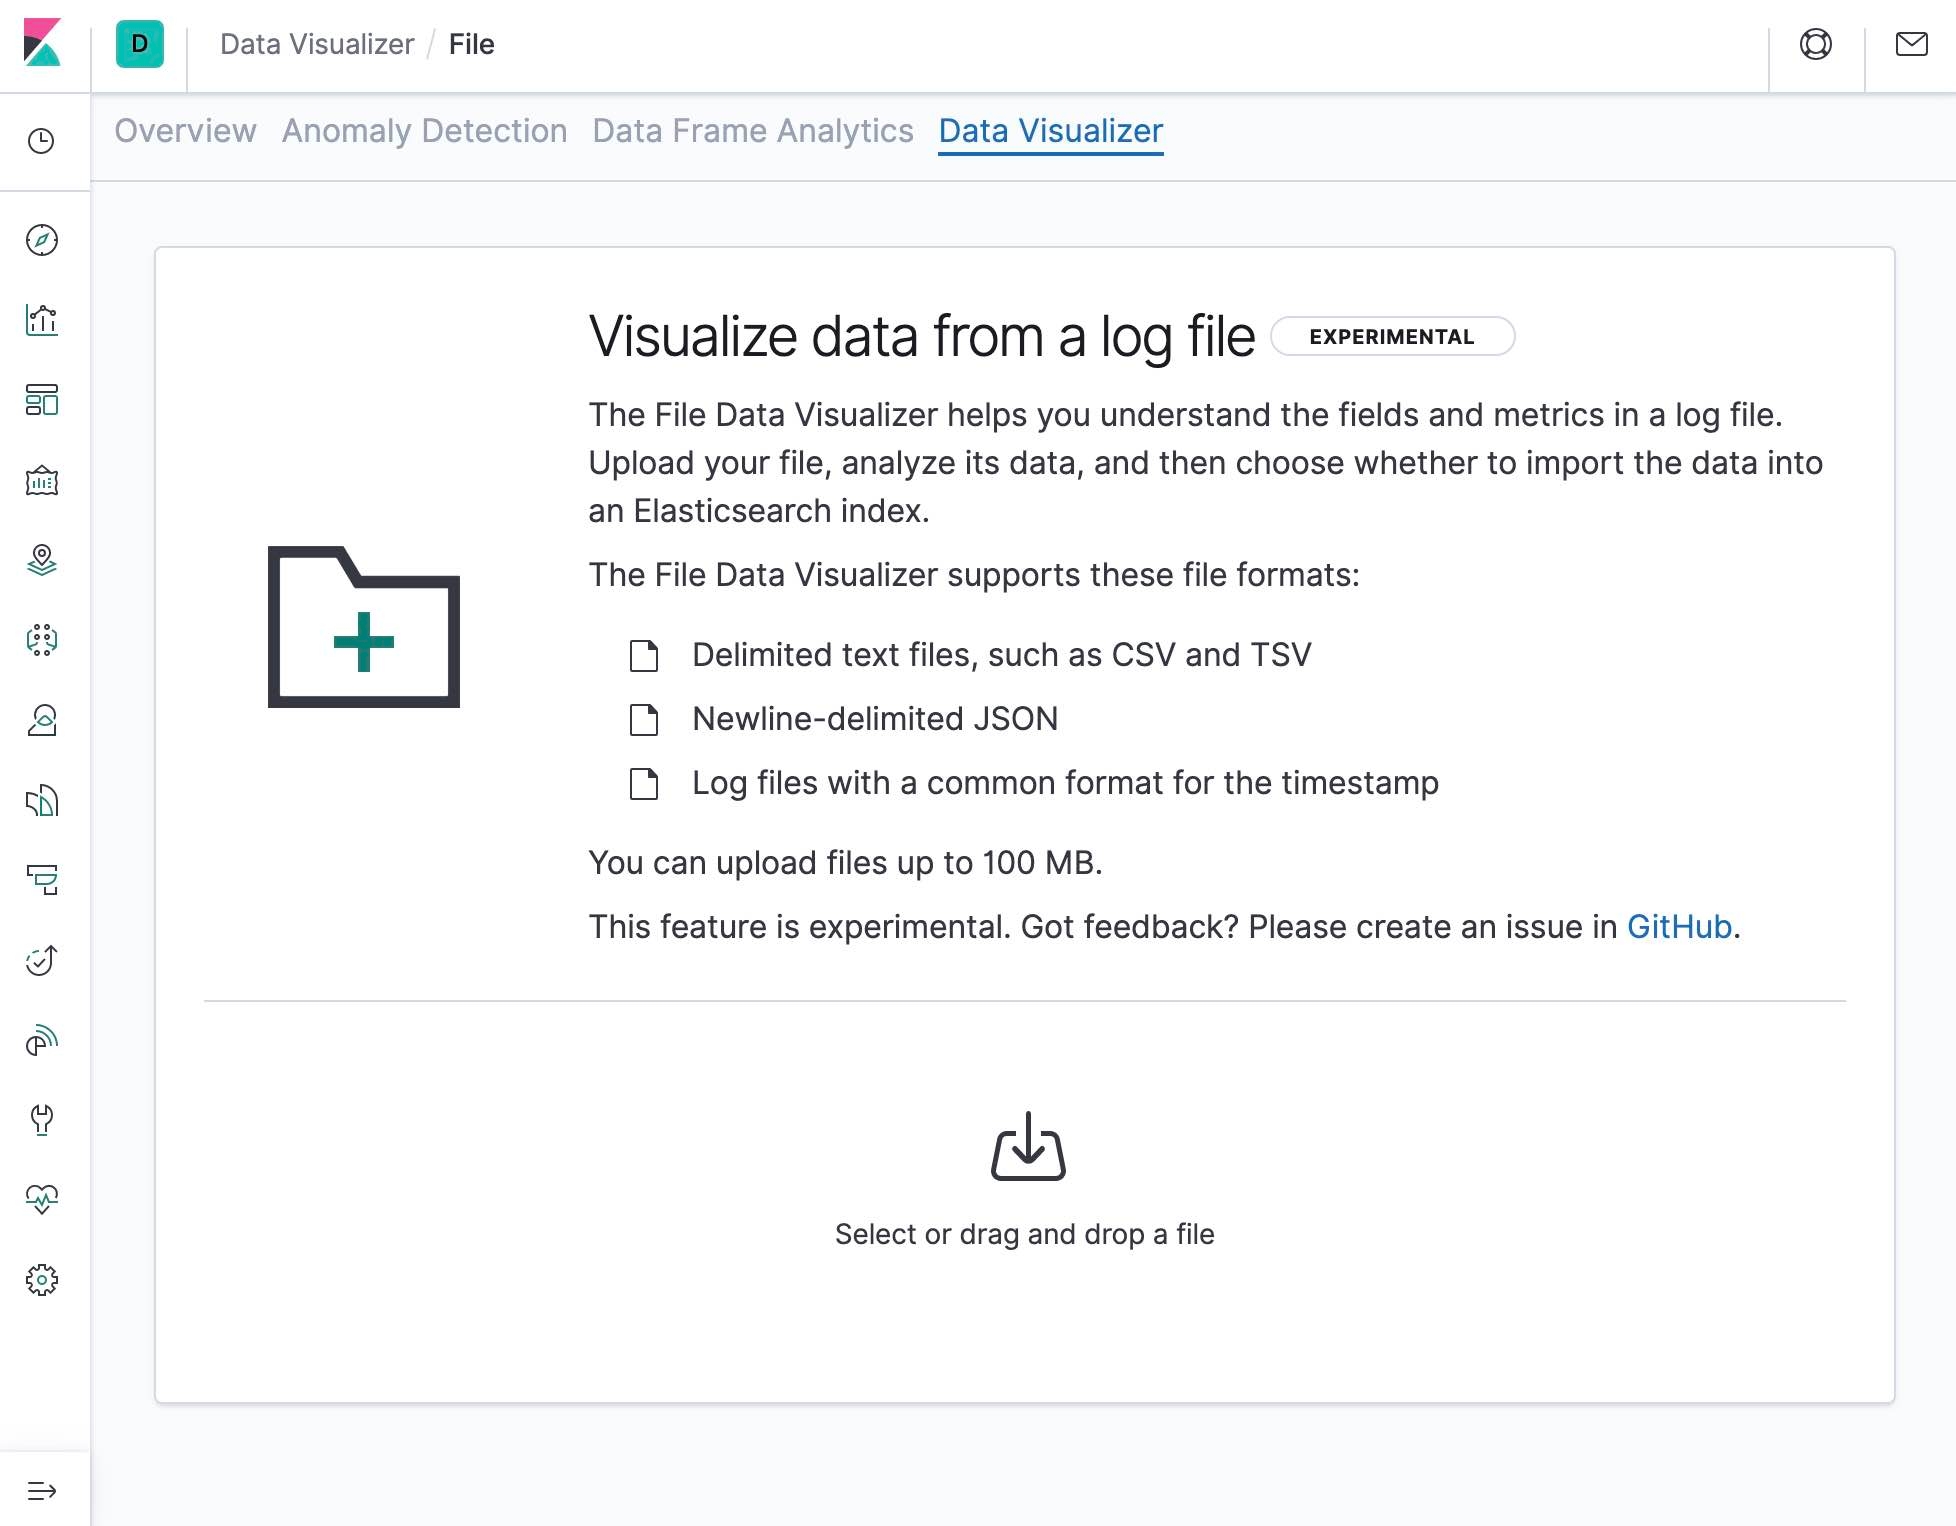
After performing the above steps, follow the steps on the next screen to upload our CSV data:
Once we have uploaded our data, we will see a screen that will looks like the following, and we can click on the Import button:
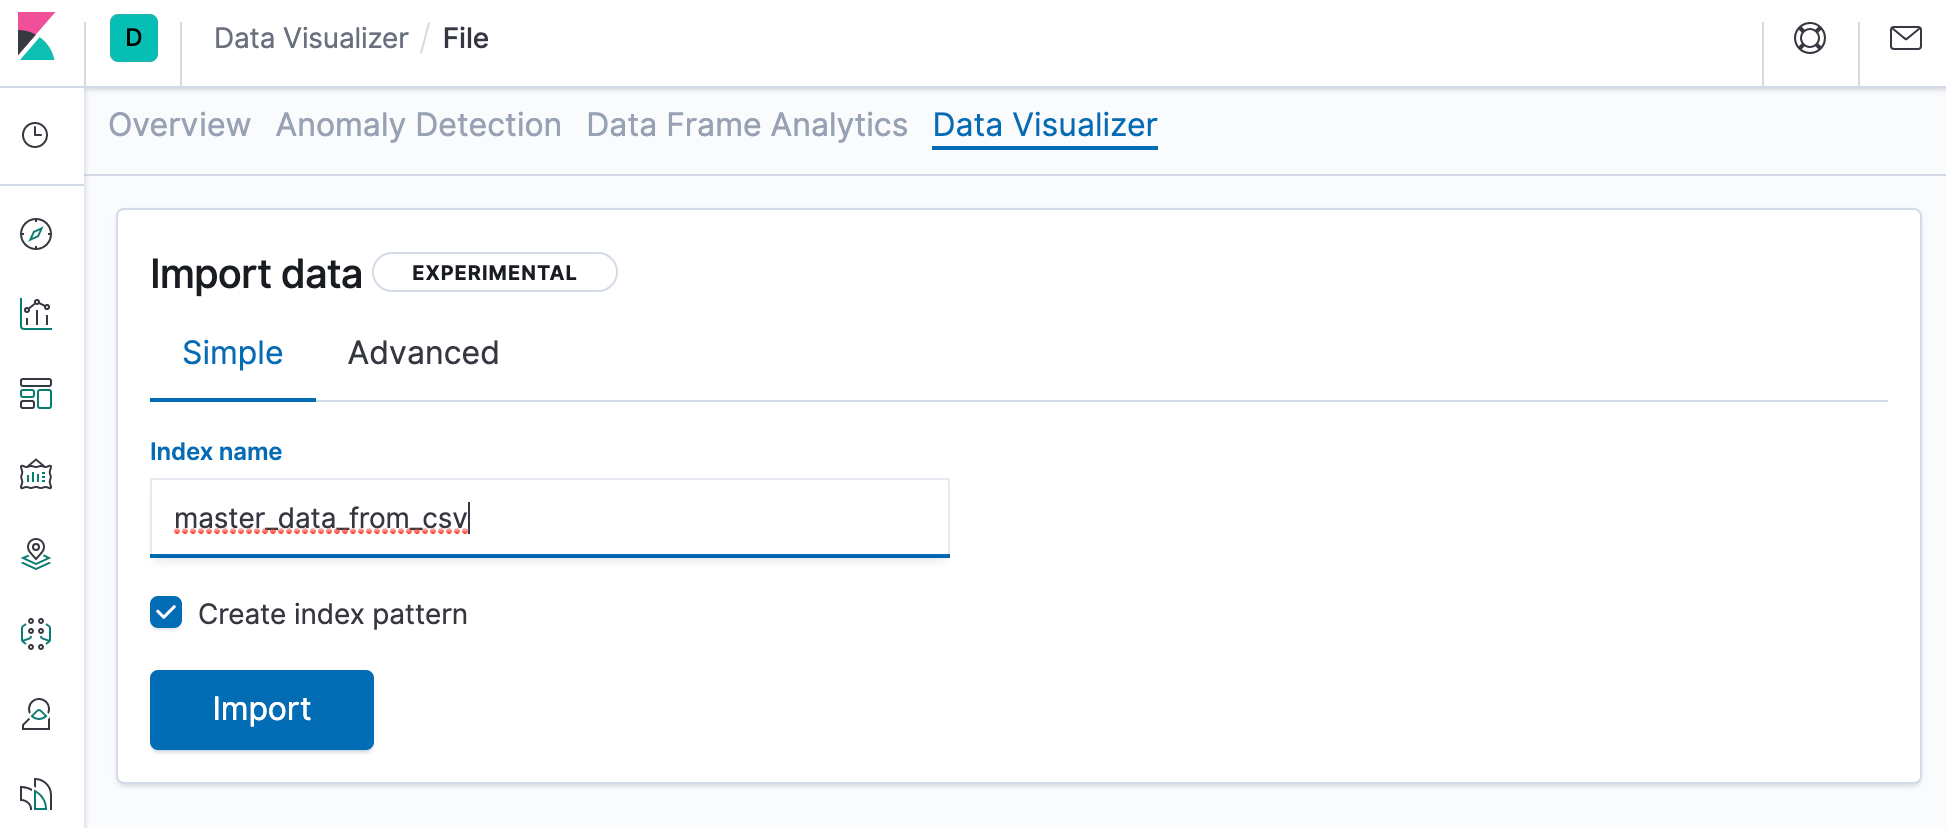
Finally, we name our index master_data_from_csv as follows:
After executing the import, we will see a screen that looks like this:
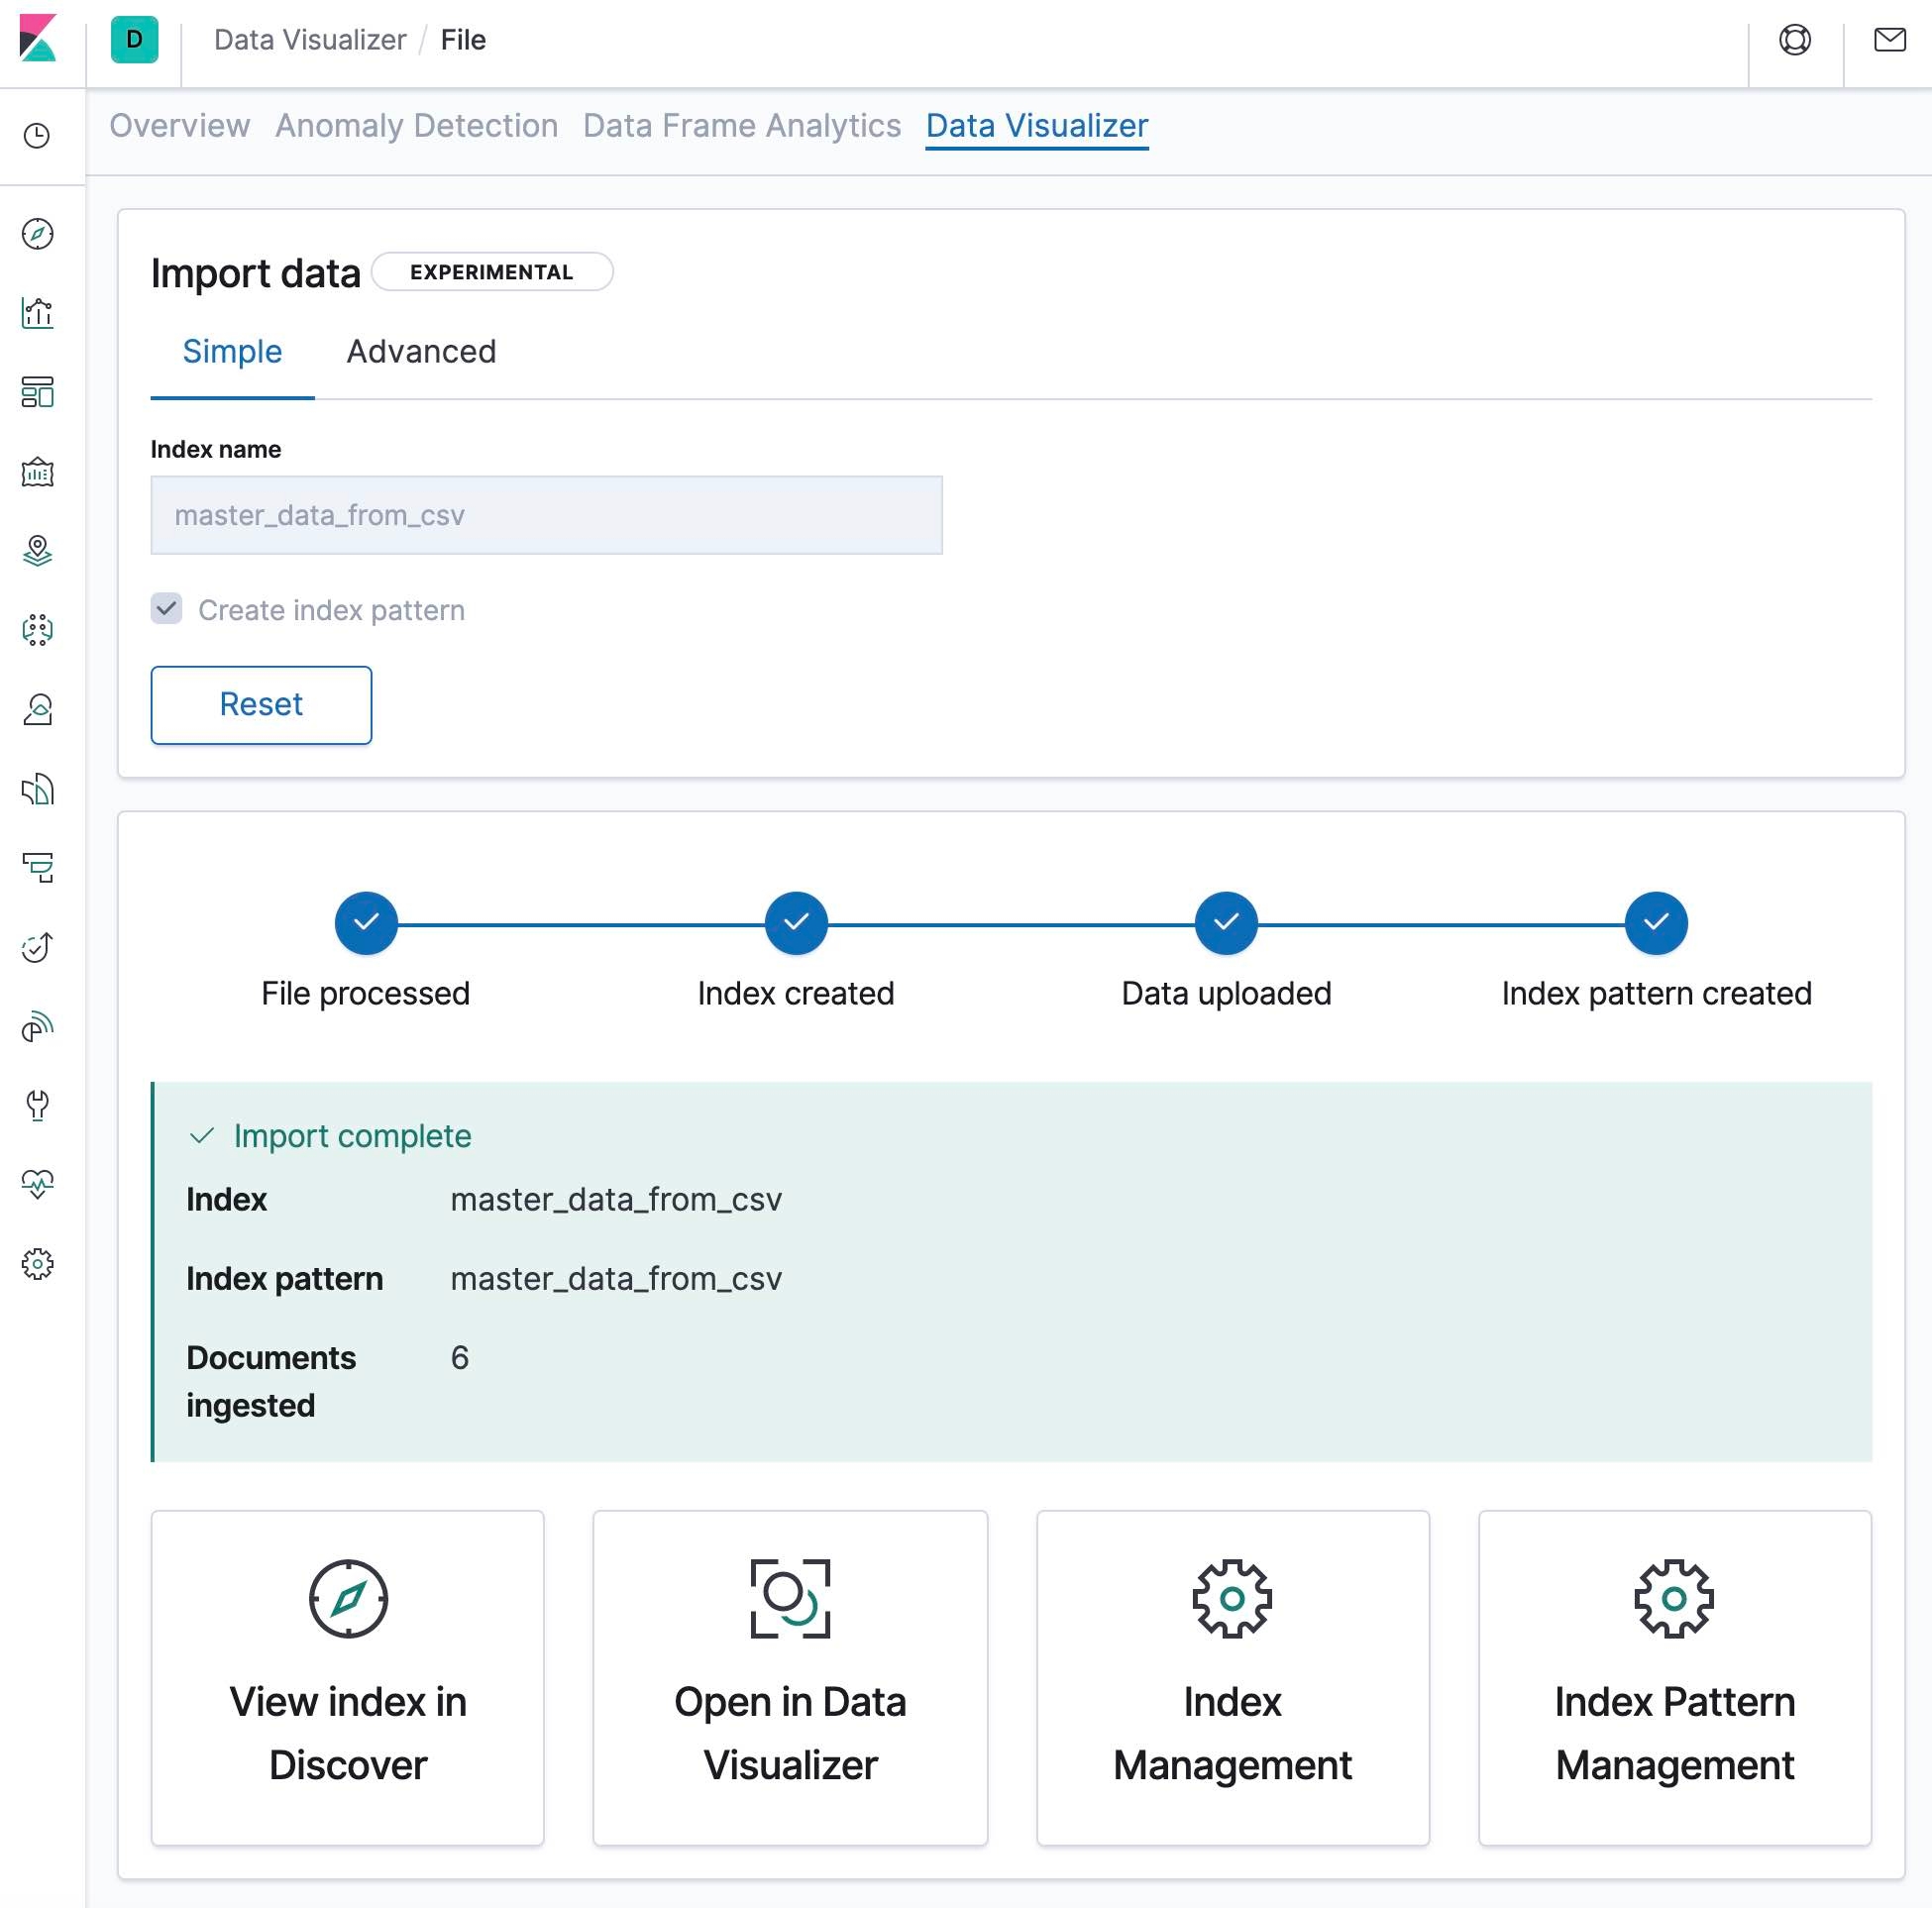
We can then select one of the options at the bottom of the screen to view the data that we have just imported.
Enriching documents with our Master Data
In this section we demonstrate how to use an Enrich Processor to merge our Master Data into the documents in our input data stream. The first step is to create an enrich policy that defines which field we will use to match the Master Data with the documents in the input data stream. An example policy that will work with our data is given below:
PUT /_enrich/policy/enrich-devices-policy
{
    "match": {
        "indices": "master_data_from_csv",
        "match_field": "Device ID",
        "enrich_fields": ["Device Location", "Device Owner", "Device Type"]
    }
}
We then use the execute enrich policy API to create an enrich index for the policy:
POST /_enrich/policy/enrich-devices-policy/_execute
And next we create an ingest pipeline that uses our enrich policy.
PUT /_ingest/pipeline/device_lookup
{
  "description" : "Enrich device information",
  "processors" : [
    {
      "enrich" : {
        "policy_name": "enrich-devices-policy",
        "field" : "device_id",
        "target_field": "my_enriched_data",
        "max_matches": "1"
      }
    }
  ]
}
We insert a document that executes the ingest pipeline as follows:
PUT /device_index/_doc/1?pipeline=device_lookup
{
  "device_id": "device1",
  "other_field": "some value"
}
And we can look at the ingested document with the GET API as follows:
GET device_index/_doc/1
Which should return a document that has been enriched with our Master Data:
{
  "_index" : "device_index",
  "_type" : "_doc",
  "_id" : "1",
  "_version" : 2,
  "_seq_no" : 1,
  "_primary_term" : 1,
  "found" : true,
  "_source" : {
    "my_enriched_data" : {
      "Device Location" : "London",
      "Device Owner" : "Engineering",
      "Device ID" : "device1",
      "Device Type" : "Computer"
    },
    "device_id" : "device1",
    "other_field" : "some value"
  }
}
Specifying the pipeline in index settings
When using an ingest pipeline in a production deployment it may be preferable to apply the pipeline to the index settings, rather than specifying the pipeline in the PUT URL. This can be done by adding index.default_pipeline to the index settings as follows:
PUT device_index/_settings
{
  "index.default_pipeline": "device_lookup"
}
Now any document that is sent into device_index will pass through the device_lookup pipeline without the need for ?pipeline=device_lookup in the URL. We can verify this is working with the following PUT command.
PUT /device_index/_doc/2
{
  "device_id": "device2",
  "other_field": "some value"
}
Execute the following command to see the document that we have just ingested:
GET device_index/_doc/2
Which should return an enriched document that looks like the following:
{
  "_index" : "device_index",
  "_type" : "_doc",
  "_id" : "2",
  "_version" : 1,
  "_seq_no" : 2,
  "_primary_term" : 1,
  "found" : true,
  "_source" : {
    "my_enriched_data" : {
      "Device Location" : "Toronto",
      "Device Owner" : "Consulting",
      "Device ID" : "device2",
      "Device Type" : "Mouse"
    },
    "device_id" : "device2",
    "other_field" : "some value"
  }
}
Conclusion
Enriching documents at ingest-time is often necessary to ensure that the documents in Elasticsearch contain information that is required for searching or viewing them. In this blog we demonstrated how the enrich processor running on an ingest node can use CSV data for enrichment, which is useful for merging Master Data into documents as they are ingested into Elasticsearch. And if you've never used File Data Visualizer to import data, check out our Importing CSV and Log Data into Elasticsearch with File Data Visualizer blog and then give it a try for yourself in a free trial of our Elasticsearch Service.