Introducing the enrich processor for Elasticsearch ingest nodes
As part of Elasticsearch 7.5.0, a new ingest processor — named enrich processor — was released. This new processor allows ingest node to enrich documents being ingested with additional data from reference data sets. This opens up a new world of possibilities for ingest nodes.
But first… what’s an ingest node?
Let’s zoom out a bit. What do ingest nodes do exactly? Ingest nodes allow documents to be pre-processed prior to being indexed. In order to do this, a pipeline with processors needs to be defined, and each document that is being ingested flows through the pipeline. A pipeline is a set of processors that execute in the order you defined. Each processor that is defined in a pipeline performs a specific operation to a document, such as splitting a log line into multiple fields or removing a specific field. There are many different kinds of processors that perform all kinds of operations.
Pipelines run on nodes that have the ingest role, hence the name ingest node. As a note, a node can have multiple roles, for example data or master role. By default, all nodes have the ingest role. If you would like to know more about ingest node, then check out our ingest node documentation.
The new enrich processor can enrich incoming documents with data sourced from another index. For example, an incoming document contains a users email address and in another index you have that users email address and full name. With the enrich processor, you can enrich the incoming document with the user’s full name since there is a match on the email address. This sounds neat, but how can it be used? Let’s learn with an example.
Enriching example using sample flight data
Let’s say that we’re indexing flight data — the sample dataset that ships with Kibana. This dataset has a number of properties: flight number, origin and destination airports, weather conditions, flight time, whether a flight was delayed, and whether a flight was cancelled. There is a reference data set for US airports, which contains airport codes that we can match against. This will allow us to enrich the flight data with airport data.
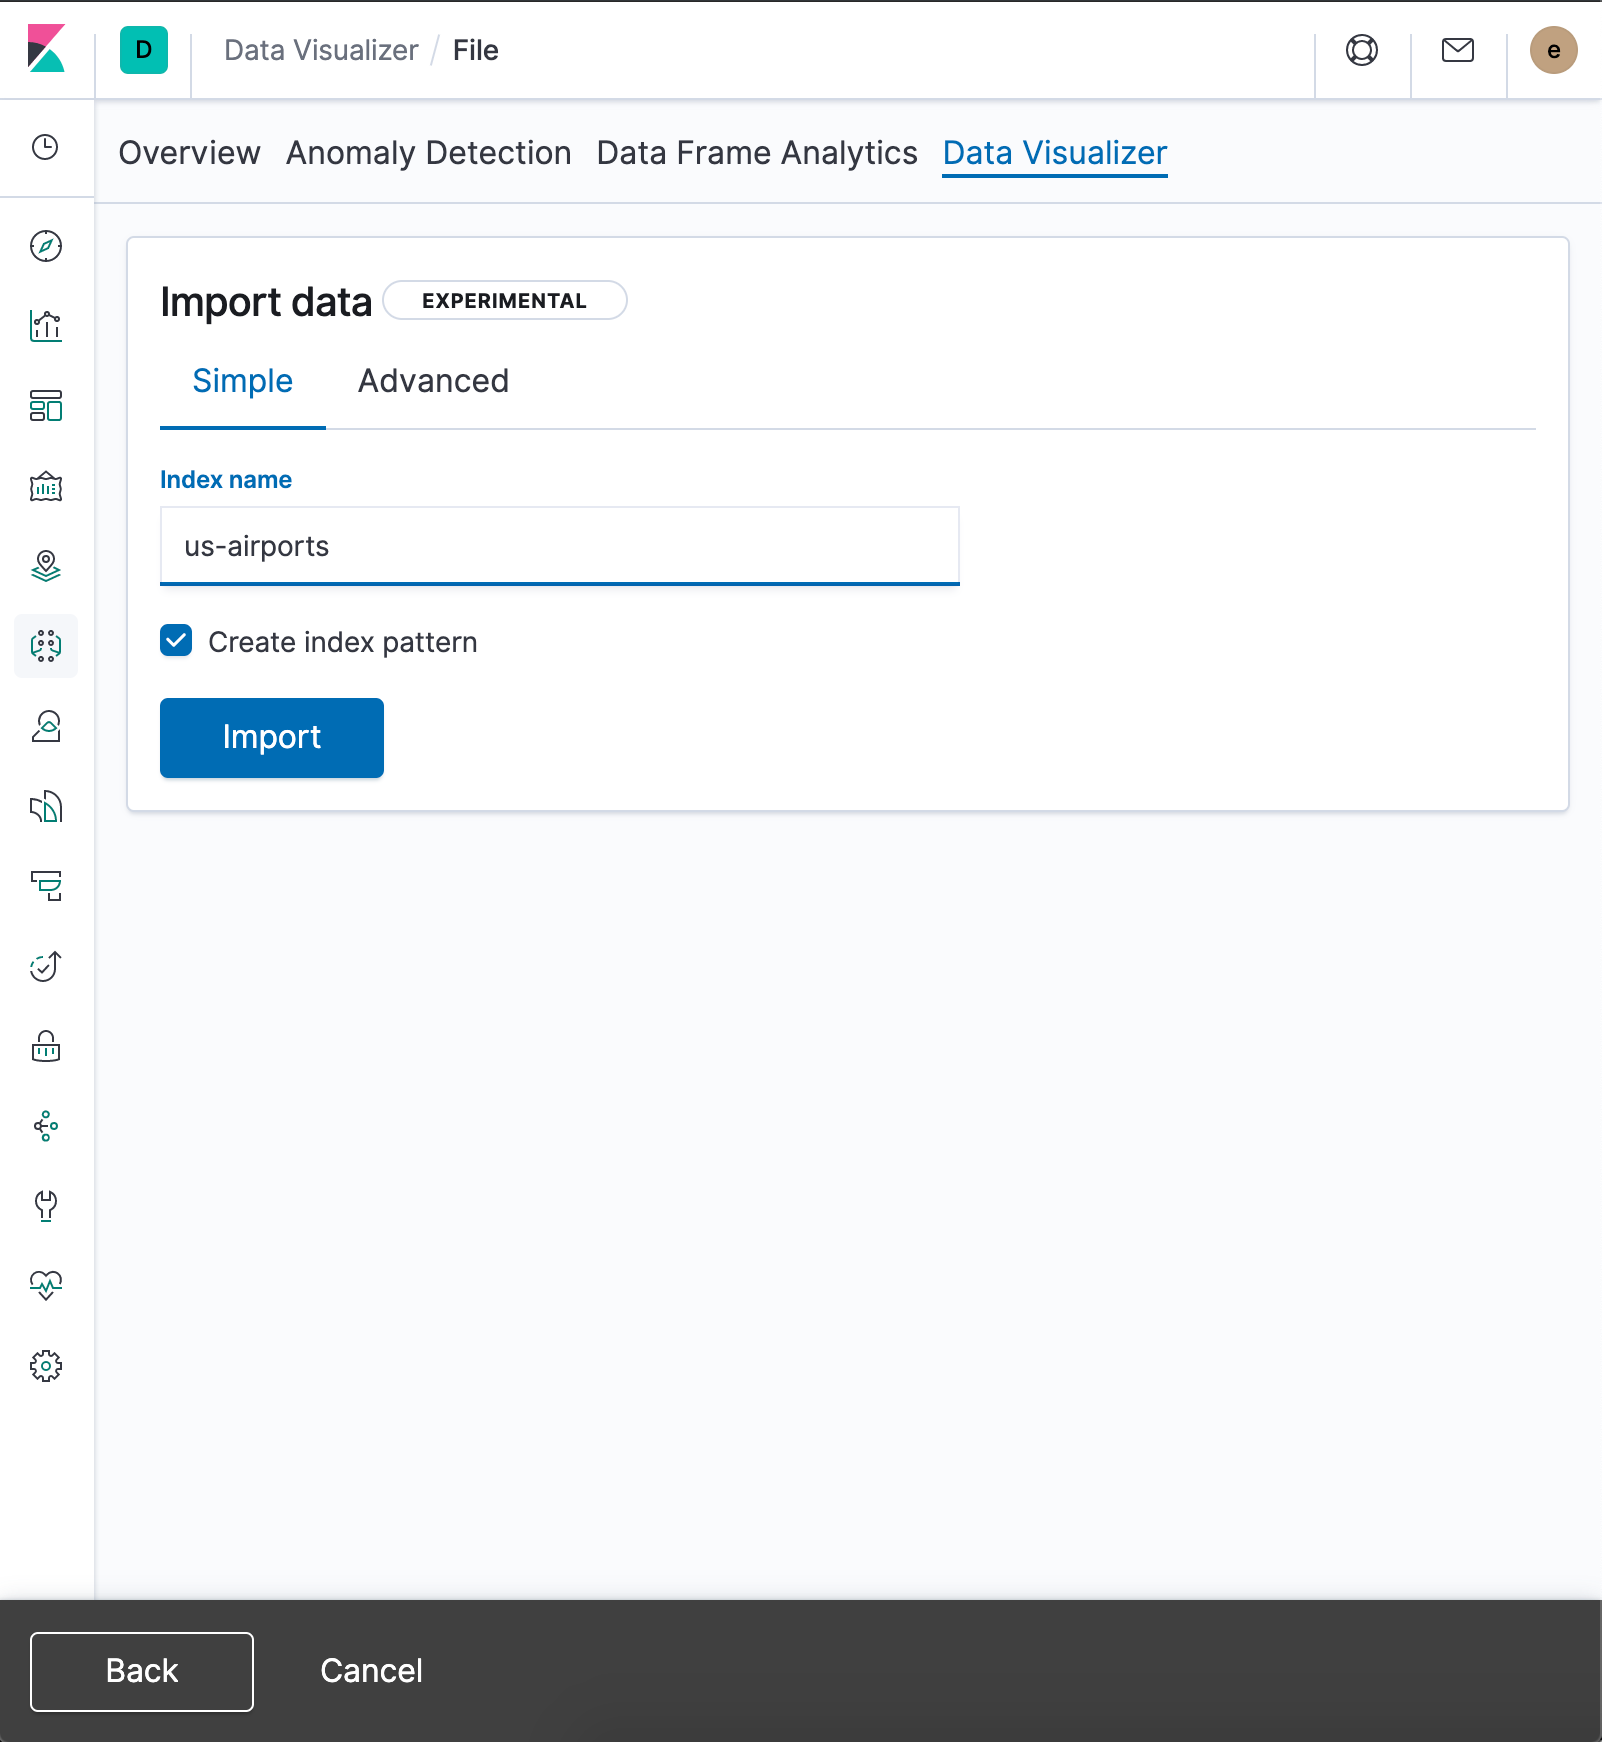
First we need to make sure to index the CSV file with airport data into Elasticsearch. There are many ways of doing this, but the easiest way is to use Kibana’s file data visualizer.
- Download the CSV file and upload it via file data visualizer, which will analyze the data. Then click Import (no need to overwrite settings).
- Use us-airports as the index name.
- Click Import again.
Now we have our reference dataset available in Elasticsearch as an index.
The enrich processor can’t directly query the us-airports index. It requires an enrich policy that manages the data inside the reference index for us. The purpose of an enrich policy is to take the data inside an index and make it available to the enrich processor in a more efficient format, so that the enrich processor can enrich documents very quickly.
In an enrich policy, the index with the reference data is known as the source index (us-airports). An enrich policy makes sure that the matching field, which is known as the match_field, exists and has the correct field type depending on the enrich policy type. The policy also ensures that the fields that will be attached to the documents being ingested, known as enrich_fields, also exist in the source index. There are currently two types of enrich policies: match and geo_match. We will be using the match policy type, which can do string-based matches. Check out the enrich policy docs to learn more.
Before creating an enrich policy, let’s take a look at a document snippet in the source index:
{
    "Loc_Id" : "PDX",
    "Elevation" : 30.79999924,
    "Last_Inspection" : 9142018,
    "Passengers" : 9391236,
    "Freightlbs" : 14342682,
    "Departures" : 88387,
    "Dist_City_To_Airport" : 4,
    ...
}
This includes the id (Loc_id) and other metadata we are interested in.
Creating an enrich policy
Let’s create the enrich policy first:
PUT /_enrich/policy/us-airports-enrich <1>
{
  "match" <2>: {
    "indices": [
      "us-airports" <3>
    ],
    "match_field": "Loc_Id", <4>
    "enrich_fields": [ <5>
      "Elevation",
      "Dist_City_To_Airport",
      "Last_Inspection",
      "Passengers",
      "Freightlbs",
      "Departures"
    ]
  }
}
The name of the enrich policy is us-airports-enrich (1) and this policy is of type match (2). This policy’s source index is us-airports (3), the match field is Loc_Id (4), and the enrich fields are Elevation, Dist_City_To_Airport, Last_Inspection, Passengers, Freightlbs, and Departures(5).
Now that the enrich policy and the source index are in place, the policy can be executed via the execute enrich policy API. This creates a compact read-only copy of the source index, which the ingest nodes can use either locally (if the current node is also a data node) or remotely (if the current node is an ingest-only node).
Executing the us-airports enrich policy
POST /_enrich/policy/us-airports-enrich/_execute
Behind the scenes, the execute policy API creates a system dot index (e.g., .enrich-us-airports-enrich-1574722099642), that is fully managed by Elasticsearch. Only the enrich processor interacts with this index. The source index can be updated, but changes are only visible to the enrich processor after the execute policy API executes again. This system index can be seen as a snapshot of the source data, because after updating your source index, a new ‘.enrich-’ index is created every time the execute policy API is executed. You don’t have to worry about older/unused enrich indices, Elasticsearch will clean up these indices for you.
Defining a pipeline
Now that that enrich policy has been executed, a pipeline with enrich processors can be defined:
PUT _ingest/pipeline/enrich_flight_data
{
  "processors": [
    {
      "enrich": { <1>
        "policy_name": "us-airports-enrich",
        "field": "OriginAirportID",
        "target_field": "origin"
      }
    },
    {
      "rename": { <4>
        "field": "origin.Loc_Id",
        "target_field": "origin.id"
      }
    },
    {
      "remove": { <3>
        "field": "OriginAirportID"
      }
    },
    {
      "enrich": { <2>
        "policy_name": "us-airports-enrich",
        "field": "DestAirportID",
        "target_field": "destination"
      }
    },
    {
      "rename": { <4>
        "field": "destination.Loc_Id",
        "target_field": "destination.id"
      }
    },
    {
      "remove": { <3>
        "field": "DestAirportID"
      }
    }
  ]
}
This ingest pipeline has two enrich processors defined. The first enrich processor (1) enriches based on the origin airport code, and the second enrich processor (2) enriches airport data based on the destination airport code. Besides enriching, this pipeline also cleans up documents by removing the redundant OriginAirportID and DestAirportID fields (3) and renaming the Loc_Id fields (4).
Ingesting the flight data
Now that the ingest pipeline has been created we can ingest flight data and enrich it with airport data:
PUT /us_flights/_doc/KS8C1FN?pipeline=enrich_flight_data
{
  "FlightNum": "KS8C1FN",
  "OriginWeather": "Cloudy",
  "FlightDelay": true,
  "DestWeather": "Hail",
  "FlightTimeMin": 328.83746831699835,
  "FlightDelayMin": 210,
  "Cancelled": false,
  "FlightDelayType": "Security Delay",
  "DestAirportID": "RST",
  "timestamp": "2019-10-15T08:41:22",
  "OriginAirportID": "PDX"
}
When this request completes, you can check the enriched document by executing the following API call:
GET /us_flights/_doc/KS8C1FN
This returns the following response:
{
  "FlightNum" : "KS8C1FN",
  "FlightDelay" : true,
  "origin" : {
    "Elevation" : 30.79999924,
    "Passengers" : 9391236,
    "id" : "PDX",
    "Freightlbs" : 14342682,
    "Departures" : 88387,
    "Last_Inspection" : 9142018,
    "Dist_City_To_Airport" : 4
  },
  "destination" : {
    "Elevation" : 1317.40002441,
    "Passengers" : 183300,
    "id" : "RST",
    "Freightlbs" : 3296,
    "Departures" : 4108,
    "Last_Inspection" : 12042018,
    "Dist_City_To_Airport" : 7
  },
  "FlightTimeMin" : 328.83746831699835,
  "Cancelled" : false,
  "OriginWeather" : "Cloudy",
  "DestWeather" : "Hail",
  "FlightDelayMin" : 210,
  "FlightDelayType" : "Security Delay",
  "timestamp" : "2019-10-15T08:41:22"
}
As you can see, the OriginAirportID and DestAirportID fields have been replaced with origin and destination JSON object fields that contain additional data about these airports.
In the OriginAirportID field, the value ‘PDX’ was used to do a term query in the enrich index, which yielded a match and therefore the document was enriched with information about an airport with ‘PDX’ as the airport code. If there was no match, the enrich processor wouldn’t do anything and the OriginAirportID would remain untouched.
That wasn’t too difficult
If you would like to know more about enrich policies and the enrich processor, I recommend that you read Enrich your data in our reference guide. I hope you enjoyed reading this blog post. You can try out the enrich processor today either by upgrading to 7.5 or by spinning up a free trial of Elasticsearch Service, and let us know what you think on our Discuss forums!