How to
How to add search to your iOS app with Elastic App Search: Part 2
In part one, we went over setting up your Elastic stack and ingesting data. In the second part of this blog series, we will be creating an iOS app that uses Elasticsearch for searching a movie database.
Note: This tutorial is based on Elasticsearch version 7.12.x
Starting a New Xcode Project
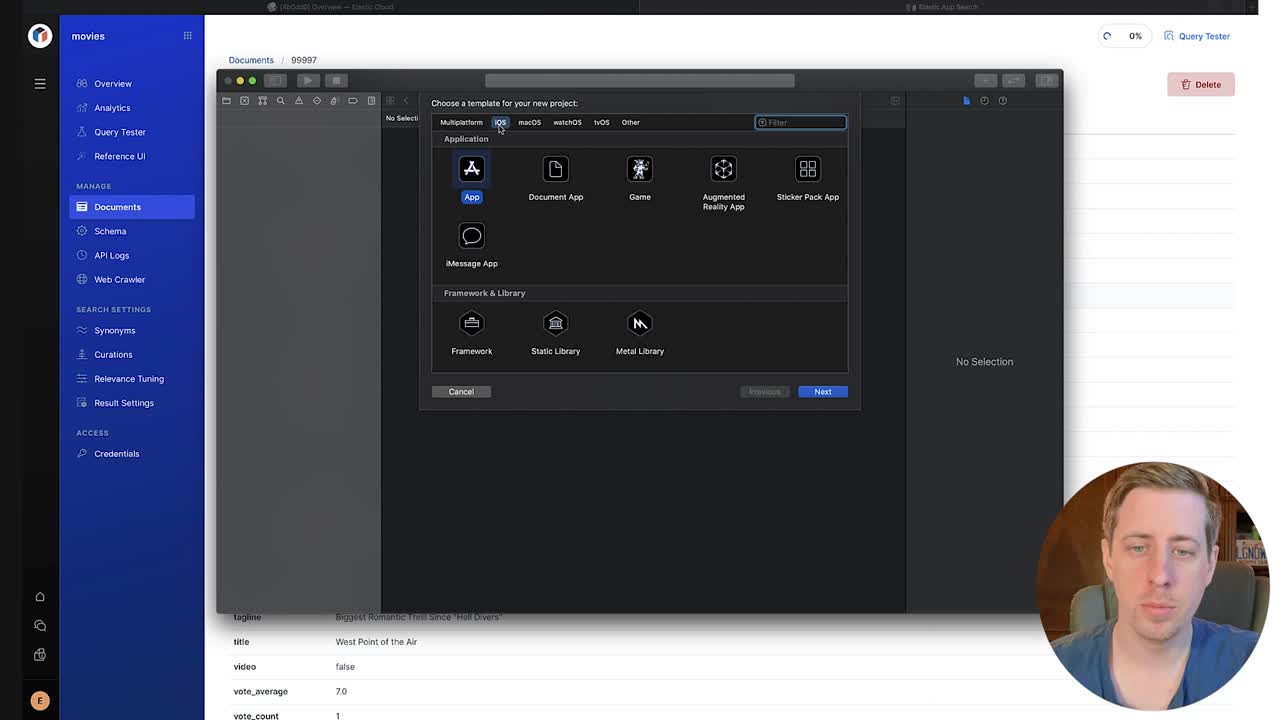
- Open Xcode and create a new project.
- In the iOS tab, select App and choose Next
- Configure the options for setting up the new app
- Product name:
App-Search - Team:
<your team name> - Organization Identifier:
<your identifier> - Interface:
SwiftUI - Life Cycle:
SwiftUI App - Language:
Swift - Use core data:
No - Include tests:
No
- Product name:
- Select Next
- Choose where to save your project, and select Create
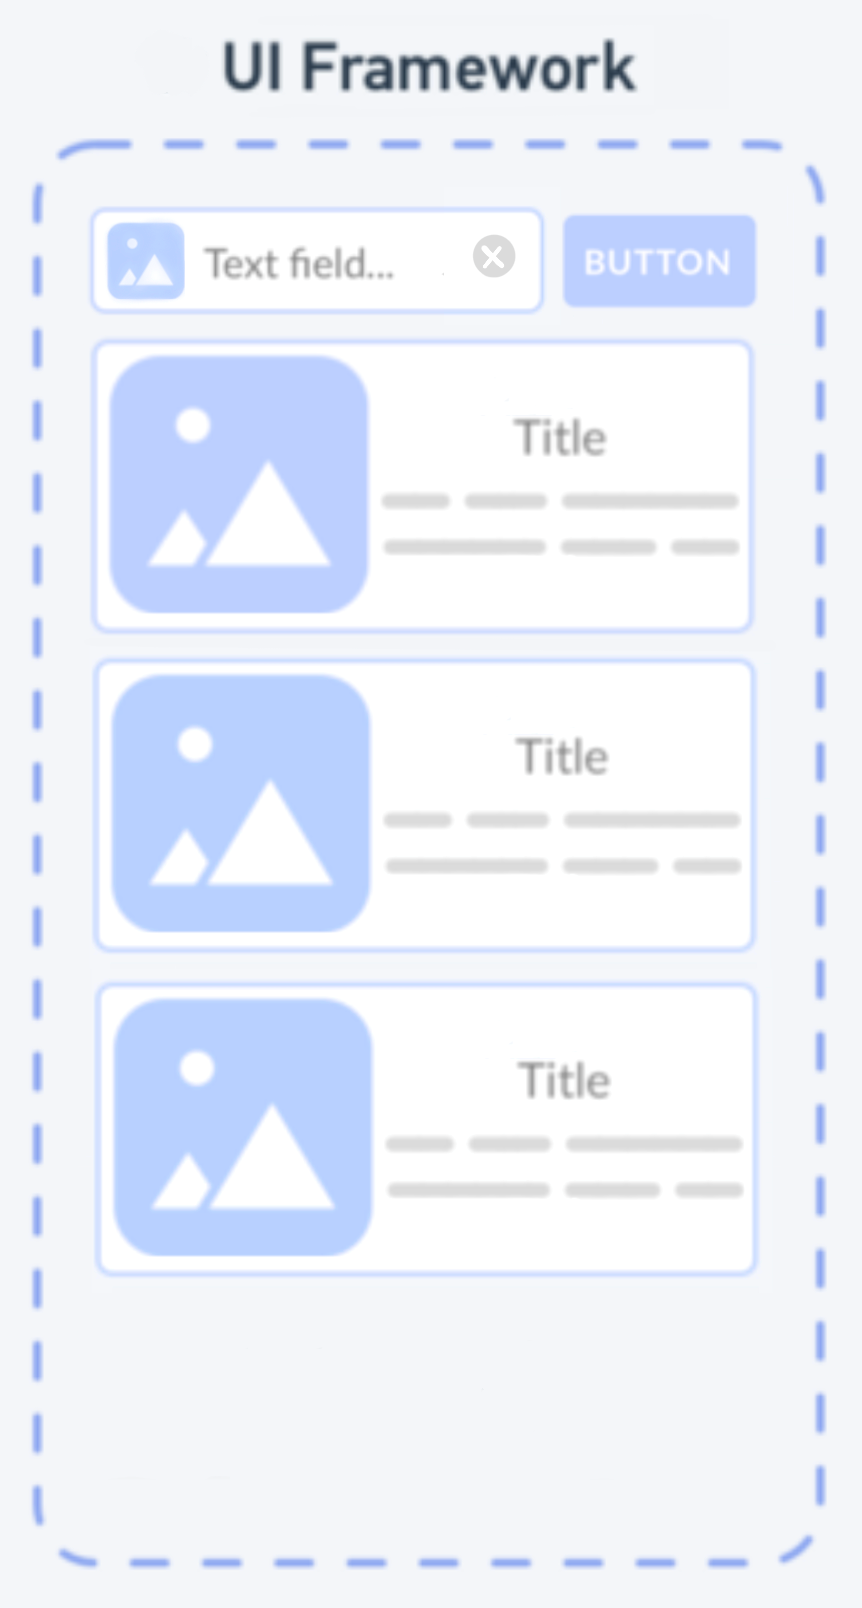
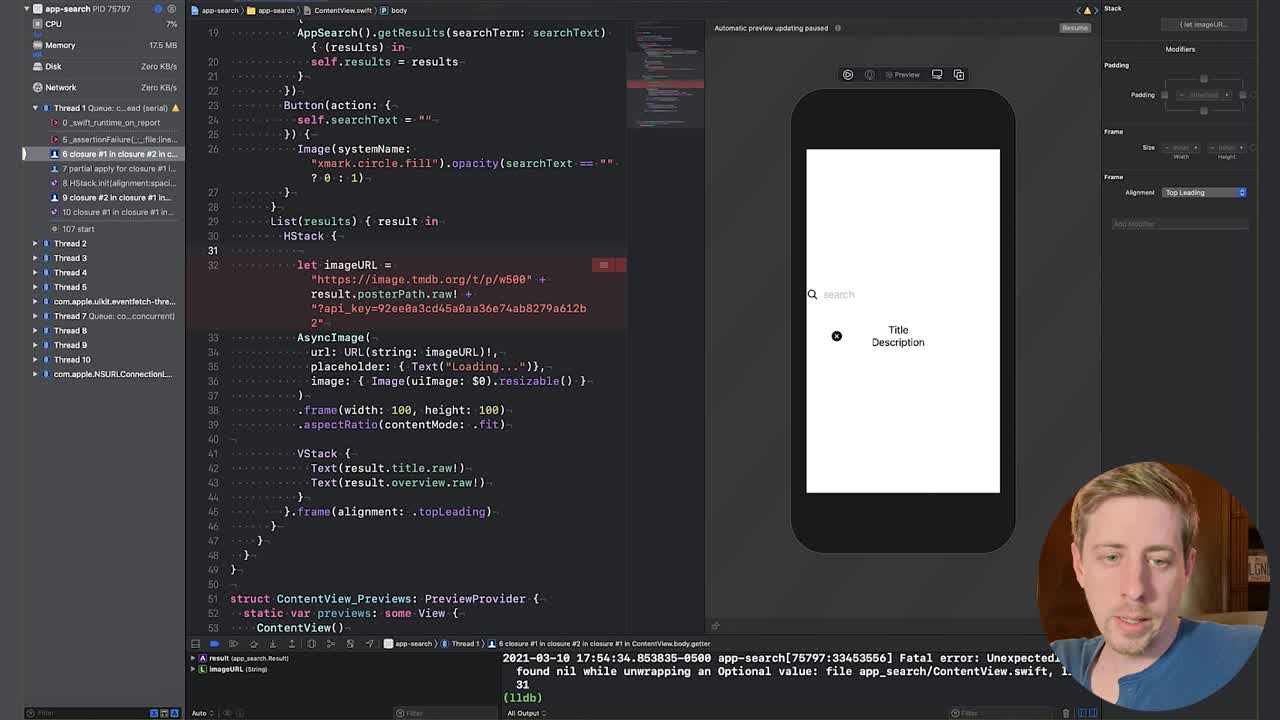
Building the UI
- The UI will be built out in the
ContentView.swiftfile. - The basic structure of the UI will be as follows:
- Since the UI is not the main focus of this tutorial, I'll just post the full code for the UI without going into too much detail.
// // ContentView.swift // app-search // // Created by Ethan Groves on 3/5/21. // import SwiftUI struct ContentView: View { // @State variables are special variables that are automatically monitored for changes, and will update any UI elements that contain references @State var results: [Result] = [] @State private var searchText = "" @State private var showCancelButton: Bool = false private let TmdbApiKey = "my_tmdb_api_key" //------------------------------------ // The main body of the UI //------------------------------------ var body: some View { VStack(alignment: .leading) { //-------------------------------- // Search bar //-------------------------------- HStack { HStack { Image(systemName: "magnifyingglass") TextField("search", text: $searchText, onEditingChanged: { isEditing in // Set Bool to show the cancel button whenever there is text in the field self.showCancelButton = true }, onCommit: { // When a search is submitted, send it to App Search and get the results AppSearch().getResults(searchTerm: searchText) { (results) in self.results = results } }) // Display a small 'x' button in the text field which can clear all text Button(action: { self.searchText = "" }) { Image(systemName: "xmark.circle.fill").opacity(searchText == "" ? 0 : 1) } } // Formatting and styling for the search bar .padding(EdgeInsets(top: 8, leading: 6, bottom: 8, trailing: 6)) .foregroundColor(.secondary) .background(Color(.secondarySystemBackground)) .cornerRadius(10.0) // Display a 'Cancel' button to clear text whenever there is text in the TextField if showCancelButton { Button("Cancel") { UIApplication.shared.endEditing() self.searchText = "" self.showCancelButton = false } } } // Formatting and styling for the 'Cancel' button .padding(.horizontal) //-------------------------------- // Table containing search results //-------------------------------- List(results) { result in // For each search result returned from App Search, build a simple UI element HStack { // If the search results contain a URL path for a movie poster, use that for the image // Otherwise, grab a random image from http://source.unsplash.com if result.posterPath.raw != nil { let imageURL = "https://image.tmdb.org/t/p/w500" + result.posterPath.raw! + "?api_key=" + TmdbApiKey AsyncImage( url: URL(string: imageURL)!, placeholder: { Text("Loading...")}, image: { Image(uiImage: $0).resizable() } ) // Formatting and styling for the image .aspectRatio(contentMode: .fit) .frame(width: 100) } else { let imageURL = "https://source.unsplash.com/user/jakobowens1/100x150?" + String(Int.random(in: 1..<930)) AsyncImage( url: URL(string: imageURL)!, placeholder: { Text("Loading...")}, image: { Image(uiImage: $0).resizable() } ) // Formatting and styling for the image .aspectRatio(contentMode: .fit) .frame(width: 100) } // Display the movie title and description VStack { Text(result.title.raw!) // Formatting and styling for the title .fontWeight(/*@START_MENU_TOKEN@*/.bold/*@END_MENU_TOKEN@*/) .multilineTextAlignment(/*@START_MENU_TOKEN@*/.leading/*@END_MENU_TOKEN@*/) Text(result.overview.raw!) // Formatting and styling for the description .font(.caption) .foregroundColor(Color(red: 0.4, green: 0.4, blue: 0.4, opacity: 1.0)) } // Formatting and styling for the title and description container .frame(height: 150) } // Formatting and styling for the search results container .frame(alignment: .topLeading) } } } } // This struct is used for generating a preview in Xcode struct ContentView_Previews: PreviewProvider { static var previews: some View { ContentView() } } // A simple function for removing "focus" from (i.e. unselecting) a UI element extension UIApplication { func endEditing() { sendAction(#selector(UIResponder.resignFirstResponder), to: nil, from: nil, for: nil) } } - You can also find the code here: https://github.com/elastic/tutorials/tree/master/app-search.
- You will need to register for an API key at TMDB in order to access the movie poster images:
- Follow the instructions at https://developers.themoviedb.org/3/getting-started/introduction to register for an API key.
- In the UI code above, replace
my_tmdb_api_keywith your TMDB API key.
| CODE | DIAGRAM |
 VStack {
  HStack {
   HStack {
    Image() #Magnify glass
    TextField() #Search
    Button() #"x" clear
   }
   Button() #"Cancel"
  }
  List(results) {
   HStack {
    Image() #Movie poster
    VStack {
     Text() #Title
     Text() #Description
    }
   }
 }
}
| 
|
Send search request to App Search
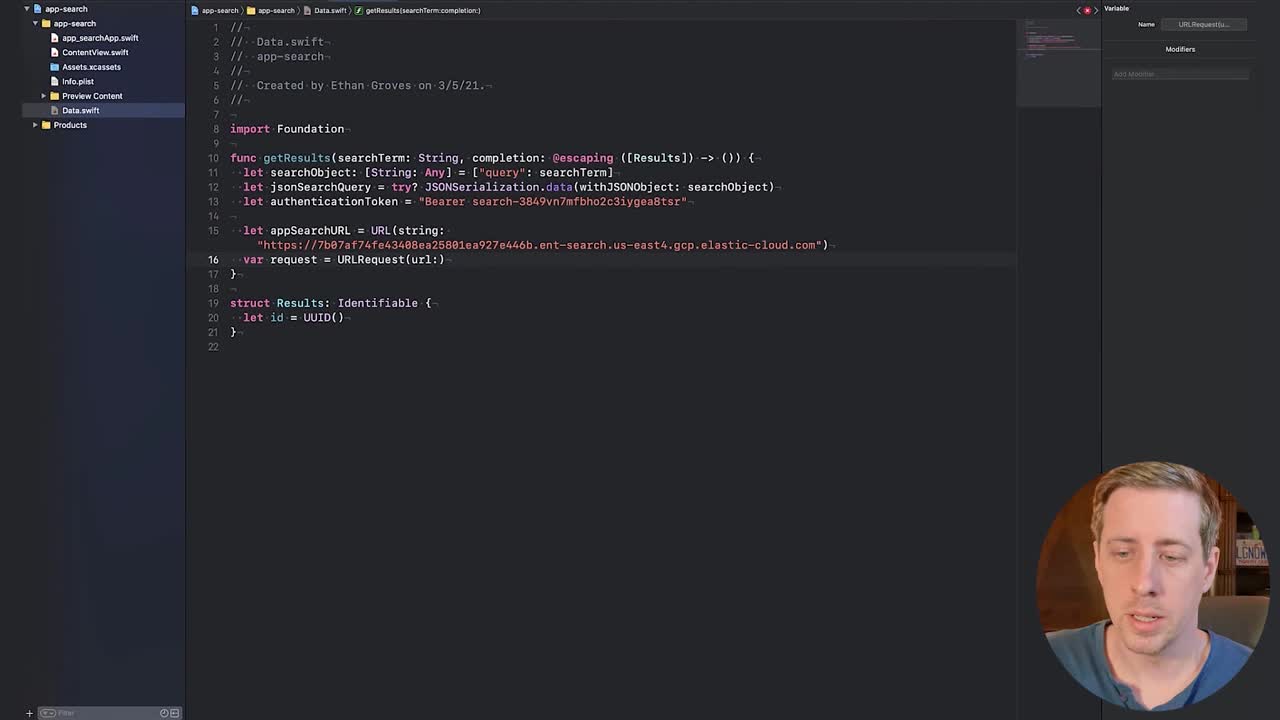
- Elastic doesn't have a Swift client for App Search yet, therefore we will need to build the request ourselves. In the nav, in the
app-searchdirectory, create a new file calledData.swift. - We will create a class called
AppSearchthat will handle all of our queries to App Search. - Inside the class, we will create a single function called
getResultswhich will handle everything. The function is passed a string of text (thesearchTerm) and asynchronously (completion: @escaping) returns an array of results. - First, we will need to turn the
searchTermstring that gets passed into the function into a JSON object. - Next, we will need to grab the credentials and API endpoint from App Search.
- Navigate to your App Search instance.
- In the left sidebar, select the
Credentialstab. - Copy and paste the
search-keyand theAPI Endpointinto the following two variables in Xcode:
let authenticationToken = "Bearer my_authentication_token" let appSearchURL = URL(string: "my_app_search_url")!
- Next, let’s package all of these variables into a request that we can send to App Search.
- Finally, let’s send everything to App Search, and wait for a response.
- The completed code should look something like the following:
class AppSearch {}
class AppSearch {
  func getResults(searchTerm: String, completion: @escaping ([Result]) -> ()) {
  }
}
let searchObject: [String: Any] = ["query": searchTerm]
let jsonSearchQuery = try? JSONSerialization.data(withJSONObject: searchObject)
var request = URLRequest(url: appSearchURL)
request.httpMethod = "POST"
request.setValue(authenticationToken, forHTTPHeaderField: "Authorization")
request.httpBody = jsonSearchQuery
URLSession.shared.dataTask(with: request) { (data, response, error) in
let JSONData = try!
JSONDecoder().decode(JSONResponse.self, from: data!)
DispatchQueue.main.async {
completion(JSONData.results)
}
}
.resume()
class AppSearch {
func getResults(searchTerm: String, completion: @escaping ([Result]) -> ()) {
let searchObject: [String: Any] = ["query": searchTerm]
let jsonSearchQuery = try? JSONSerialization.data(withJSONObject: searchObject)
let authenticationToken = "Bearer my_authentication_token"
let appSearchURL = URL(string: "my_app_search_url")!
var request = URLRequest(url: appSearchURL)
    request.httpMethod = "POST"
    request.setValue(authenticationToken, forHTTPHeaderField: "Authorization")
    request.httpBody = jsonSearchQuery
URLSession.shared.dataTask(with: request) { (data, response, error) in
      let JSONData = try!
JSONDecoder().decode(JSONResponse.self, from: data!)
      DispatchQueue.main.async {
        completion(JSONData.results)
      }
    }
    .resume()
}
}
Decode JSON response
- In the code above, you will notice there is a line of code that attempts to
decode the JSON response from App Search.
let JSONData = try! JSONDecoder().decode(JSONResponse.self, from: data!)
The Swift language is pretty strict about defining everything up front, so even the format of the incoming JSON results needs to be explicitly defined. However, when a JSON object is reasonably complex, constructing the necessary Swift equivalent code can be notoriously tedious and difficult. Thankfully, there is an online resource for this very issue: https://app.quicktype.io. - First we need to know what kind of JSON is going to be returned when we query the App Search API endpoint.
- In the Github tutorial repo, I’ve provided an example JSON document: https://github.com/elastic/tutorials/blob/master/app-search/example.jsonI also provided a python script so that you can send test queries for yourself
- OPTIONAL: Python script for sending quick test queries: https://github.com/elastic/tutorials/blob/master/app-search/app_search_query.py
- Copy and paste the
search-keycredentials and the App SearchAPI Endpointinto the python script: - Run the script:
python3 ./app_search_query.py.
api_endpoint = 'my_api_endpoint'
api_key = 'my_api_key'
- Copy and paste the
- OPTIONAL: Python script for sending quick test queries: https://github.com/elastic/tutorials/blob/master/app-search/app_search_query.py
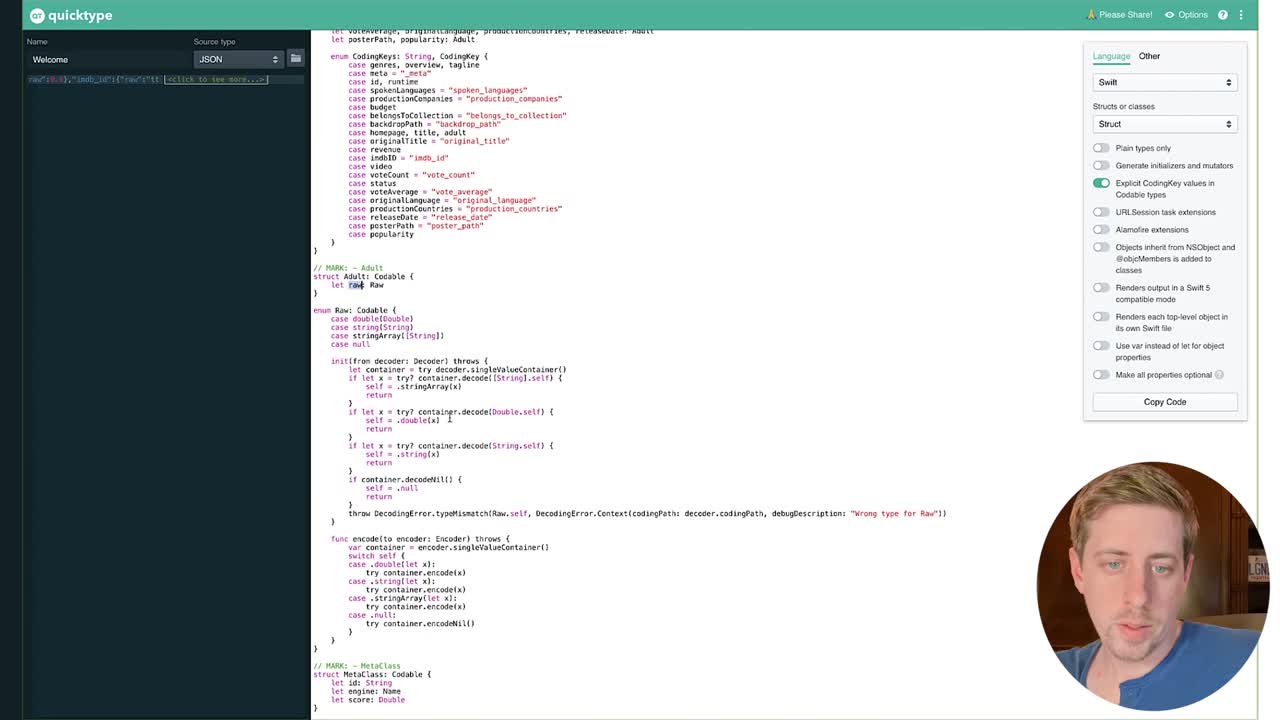
- Once you have JSON results from App Search, navigate to https://app.quicktype.io
- Copy and paste your JSON results into the left panel
- In the left panel, set
- Source type =
JSON
- Source type =
- In the right panel, set
- Language =
Swift - Struct or classes =
Struct - Explicit CodingKey values in Codable types =
Yes
- Language =
- Copy the resulting code in the right panel, and paste it into the bottom of your
Data.swiftfile in Xcode.
Tweaking the JSON decoder
- https://app.quicktype.io has given us a good starting place, but we will need to tweak things a little bit to make them work. The main issue is that App Search stores all of its document fields as a
rawtype, which causes quicktype.io to think everything is the same type, even though they should actually be handled differently. For example, you can see below that the value for the fieldbudgetis an object of typerawinstead of being a simplekey: valuepair. - First, let’s rename the
Welcomestruct at the top to be something a little more descriptive: rename it toJSONResponse. - Next, we need to properly define the types for each of the fields in the
Resultstruct. We will also need to set theidfield to be equal toUUID(), which is a special function that generates a unique (Swift approved) ID for each result.BEFORE AFTER struct Result: Codable { let genres: Genres let overview, tagline: Adult let meta: MetaClass let id: Adult let runtime: Budget let spokenLanguages, productionCompanies: Genres let budget: Budget let belongsToCollection, backdropPath, homepage, title: Adult let adult, originalTitle: Adult let revenue: Budget let imdbID, video: Adult let voteCount: Budget let status: Adult let voteAverage: Budget let originalLanguage: Adult let productionCountries: Genres let releaseDate, posterPath: Adult let popularity: Budget ...struct Result: Codable, Identifiable { let id = UUID() let adult: RawString? let backdropPath: RawString? let belongsToCollection: RawString? let budget: RawNumber? let genres: RawArrayOfStrings? let homepage: RawString? let imdbID: RawString? let meta: MetaClass let originalLanguage: RawString? let originalTitle: RawString? let overview: RawString let popularity: RawNumber? let posterPath: RawString let productionCompanies: RawArrayOfStrings? let productionCountries: RawArrayOfStrings? let releaseDate: RawString? let revenue: RawNumber? let runtime: RawNumber? let spokenLanguages: RawArrayOfStrings? let status: RawString? let tagline: RawString? let title: RawString let video: RawString? let voteAverage: RawNumber? let voteCount: RawNumber? ... - Finally, we will need to define structs for each of the types that we created:
RawStringRawArrayOfStringsRawNumber
- Depending on what quicktype.io spits out, your BEFORE may look different, but don’t worry. Just make sure that the final result matches the AFTER.
BEFORE AFTER // MARK: - Adult struct Adult: Codable { let raw: String } // MARK: - Genres struct Genres: Codable { let raw: [String] } // MARK: - Budget struct Budget: Codable { let raw: Double }// MARK: - RawString struct RawString: Codable { let raw: String? } // MARK: - RawArrayOfStrings struct RawArrayOfStrings: Codable { let raw: [String]? } // MARK: - RawNumber struct RawNumber: Codable { let raw: Double? }
"budget": { "raw": 94000000 }
| BEFORE | AFTER |
// MARK: - Welcome
struct Welcome: Codable {
    let meta: Meta
    let results: [Result]
}
|
// MARK: - JSON Response
struct JSONResponse: Codable {
    let meta: Meta
    let results: [Result]
}
|
Adding async image handler
- The last bit of code that we will need to include is a way to asynchronously load images off of the internet. Fortunately, this problem has already been solved. I used a slightly modified version of this https://github.com/V8tr/AsyncImage solution.
- In Xcode, in the
app-searchfolder, create a new file calledAsyncImage.swift. - Copy the contents of this file (it’s basically just V8tr’s solution condensed into a single file), and paste it into your
AsyncImage.swiftfile: https://github.com/elastic/tutorials/blob/master/app-search/xcode/app-search/AsyncImage.swift - That’s it! That should be all the code we need! 🎉
Run your code
- In Xcode, select the simulator that you would like to run your app on (e.g., iPhone 11 Pro)
- Build and run your project.
- CONGRATULATIONS! (Hopefully!)
- OPTIONAL: Compare your code to the source code here to debug any issues:https://github.com/elastic/tutorials/tree/master/app-search
Optimizing your App Search experience
- Type a generic search term into your app simulator, and see what kind of results you get.
- Search for something generic, like
family.
- Search for something generic, like
- The results are a little lack-luster. Normally, you would expect the search results to return items with the term
familyin the title. So, let’s boost the importance of the movie title in our search results.- Navigate to your App Search instance.
- In the left sidebar, click on
Relevance Tuning. - Click on the
titlefield. - Drag the
WEIGHTparameter up to approx.5or something close. - Select
Save.
- In your app simulator, run the same generic search that you did earlier. You should get much better results this time.
- Cool! You just tuned and improved your search results without restarting the app or writing a single line of code!
Congratulations! 🎉 You just built a mobile app with incredibly powerful search capabilities. Elasticsearch provides lightning fast search results and can scale to handle petabytes of data. The crazy part is, all of that power is now available to your mobile app users, and it's free! Try experimenting with some of the other App Search features like synonyms, curations, and the Web Crawler. Have fun!