How to add a store locator to your ecommerce storefront with Elastic

 Share on Twitter
Share on Twitter

 Share on LinkedIn
Share on LinkedIn

 Share on Facebook
Share on Facebook

 Share by Email
Share by Email

 Print this page
Print
One thing that adds value to a business’s ecommerce presence is the ability for customers to easily find physical stores with an interactive map. Store locators can be built quite rapidly — all you need to place them on a map is geographic location in latitude and longitude.
In this post, I’ll outline the pieces needed to put together a proof-of-concept store locator that could later be added to an ecommerce website.
[Related article: Building personalized ecommerce search experiences with Elastic]
Indexing data and making it searchable
In this example, we’re going to make use of two datasets:
- A list of stores with their location
- A list of cities in the U.S. with their location
Both datasets are provided in our sample repository as JSON files.
Here is an example of a store in JSON format:
{
    "id": 1000,
    "type": "BigBox",
    "name": "Mall of America",
    "address": "340 W Market",
    "address2": "",
    "city": "Bloomington",
    "state": "MN",
    "zip": "55425",
    "location": "33.430729,-111.89966",
    "hours": "Mon: 10-9:30; Tue: 10-9:30; Wed: 10-9:30; Thurs: 10-9:30; Fri: 10-9:30; Sat: 10-9:30; Sun: 11-7",
    "services": [
      "Geek Squad Services",
      "Best Buy Mobile",
      "Best Buy For Business",
      "Apple Shop",
      "Hablamos Español",
      "Camera Experience Shop ",
      "Electronics Recycling",
      "Magnolia Home Theater",
      "Samsung Experience Shop",
      "Windows Store"
    ]
  }
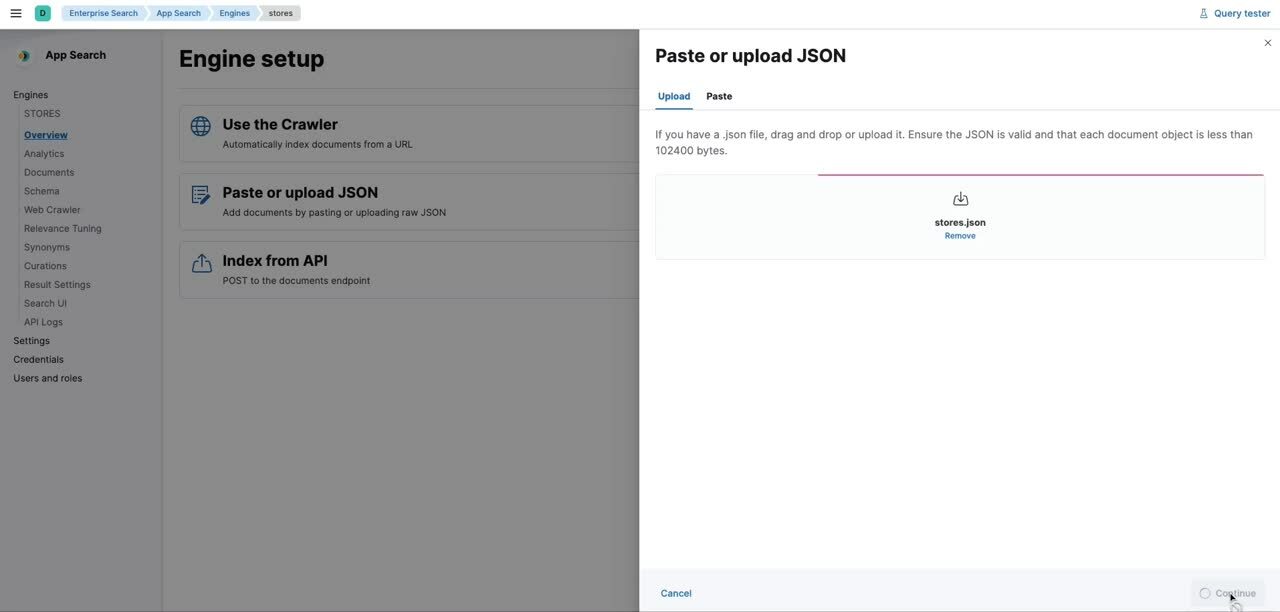
As you can see, the location property has latitude and longitude data points, so we have the ability to place them on a map. To make this data searchable, we can use Elastic Cloud to ingest this content in a variety of ways, one being simply uploading the JSON file in a new App Search engine.
For the stores data, simply create an engine named stores and upload the JSON file data.json.
Finally to make use of the geolocated data points, we need to set location as a geolocation schema type in Elastic Enterprise Search.
Once the stores data is uploaded to App Search, we can do the same for the cities data in a separate App Search engine. Simply create a new engine named cities and upload the file cities.json.
Once the stores data is uploaded to App Search, we can do the same for the cities data in a separate App Search engine. Simply create a new engine named cities and upload the file cities.json.
We now have everything we need to build a user interface that allows customers to search for and locate on a map.
[Related article: Using search analytics to strengthen ecommerce solutions]
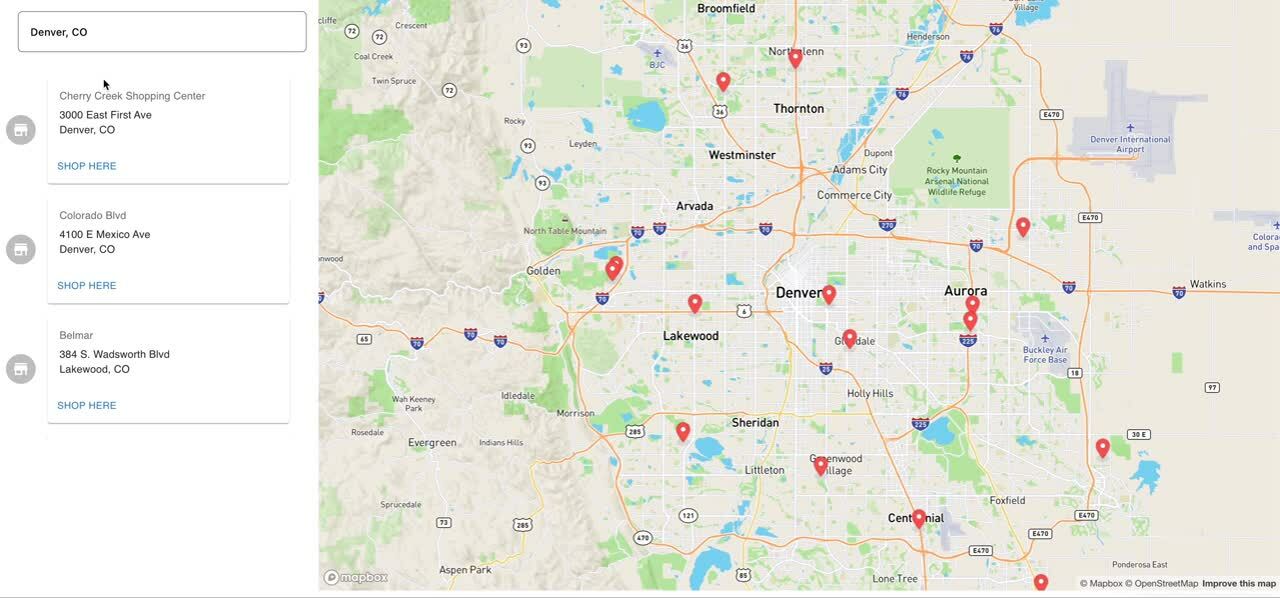
Building a searchable store map
There are many ways we can build a searchable store map user interface. In our case, we’re going to build a search experience where users can search for a city and get the stores located close to that city. To make it more visual, the user interface will also display a map to show the picked location and the stores close by.
The final application will look like this:
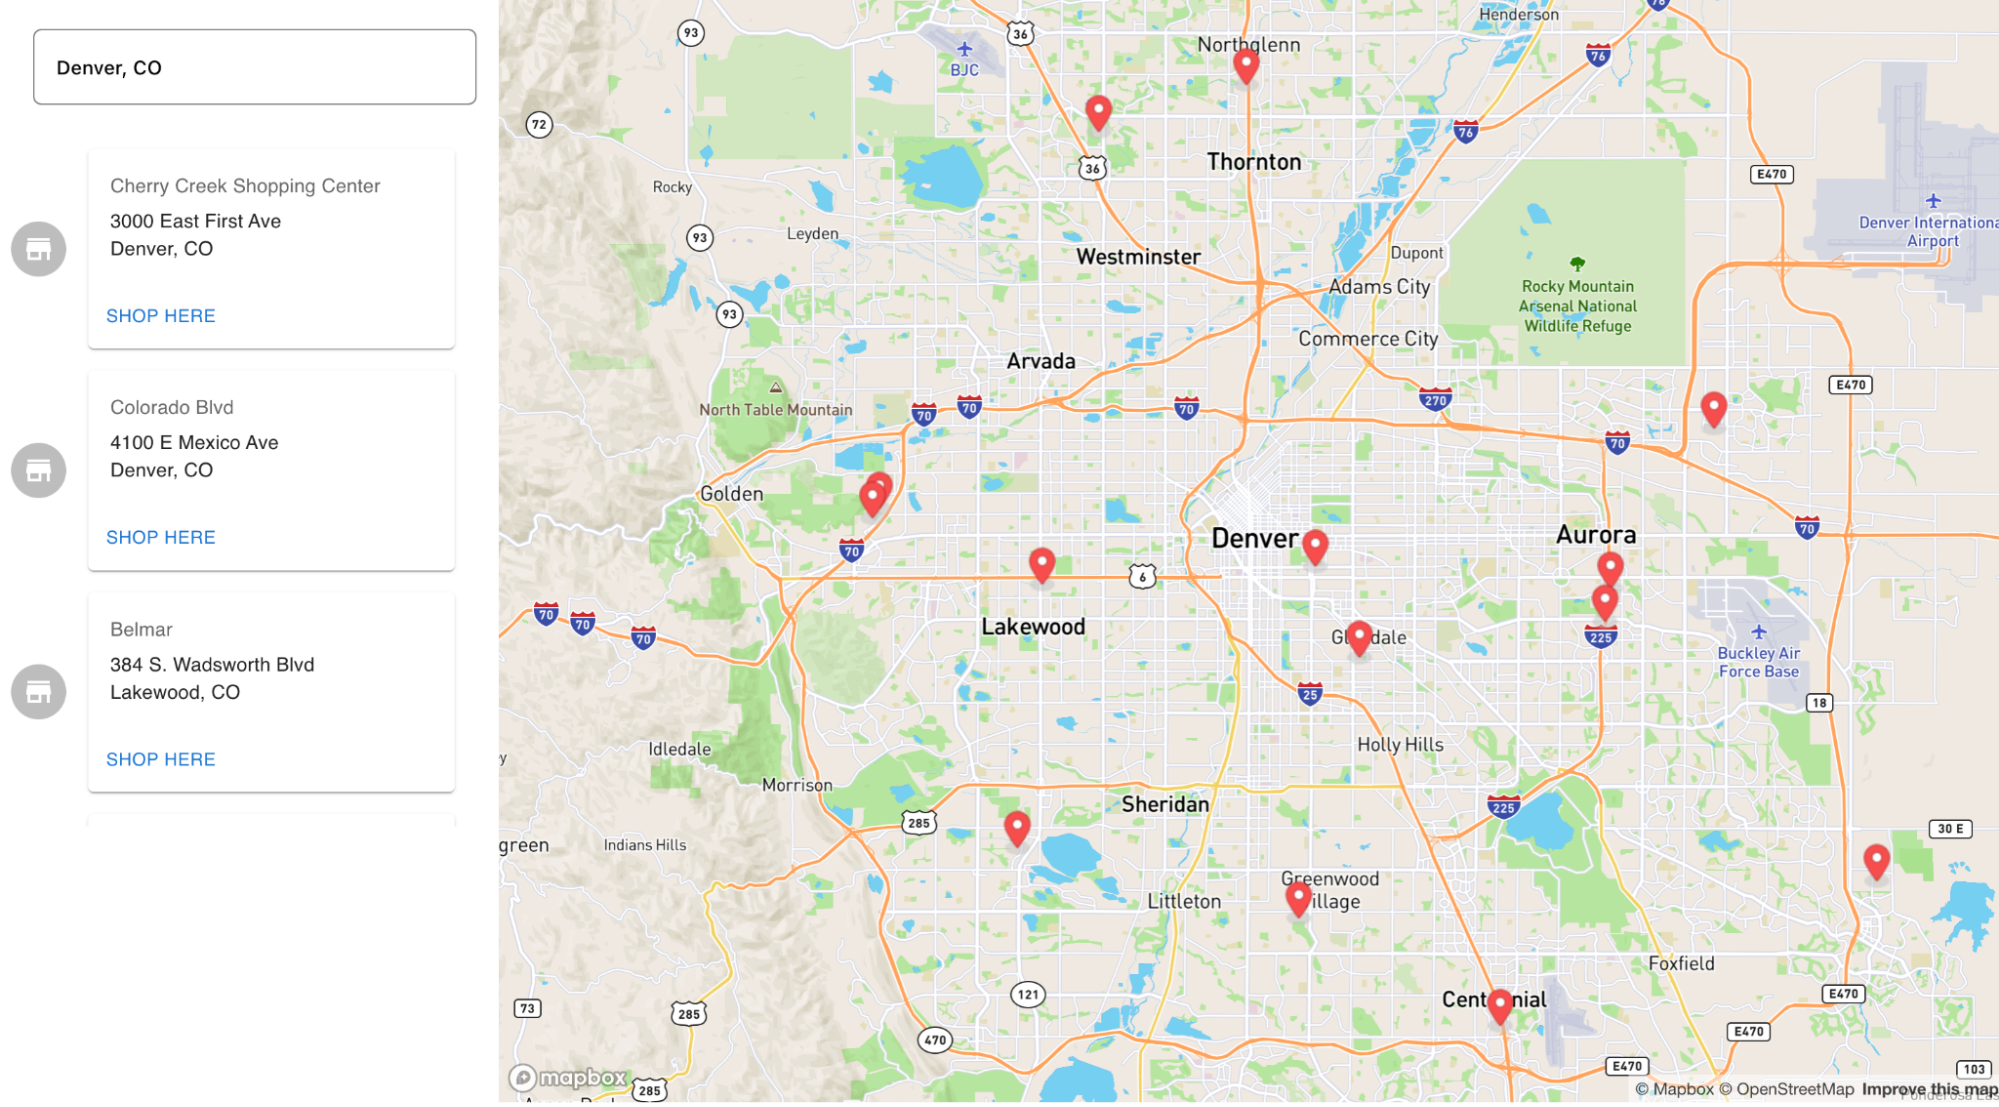
For building the actual user interface, we chose React as the web framework. We’re going to leverage MapBox to display the map and Enterprise Search to search for cities and the stores close to the selected location.
These components paired with Search UI — a free and open React library from Elastic that allows you to quickly implement search experiences — will accelerate the development of this proof of concept. For our application, we’ll build the following React components:
- CitySearchBox: Contains the search box for cities
- StoreResults: Shows the list of results of stores in the vicinity of searched cities
- StoresMap: Contains the map with markers representing the location of stores
Following are some high-level architectures with code samples of the components that show how they all fit together. While the code here isn’t exhaustive, it paints a picture of what’s needed to build a similar proof of concept.
CitySearchBox component
Since the primary purpose of the store locator is search, we need a text box that auto-completes location data.
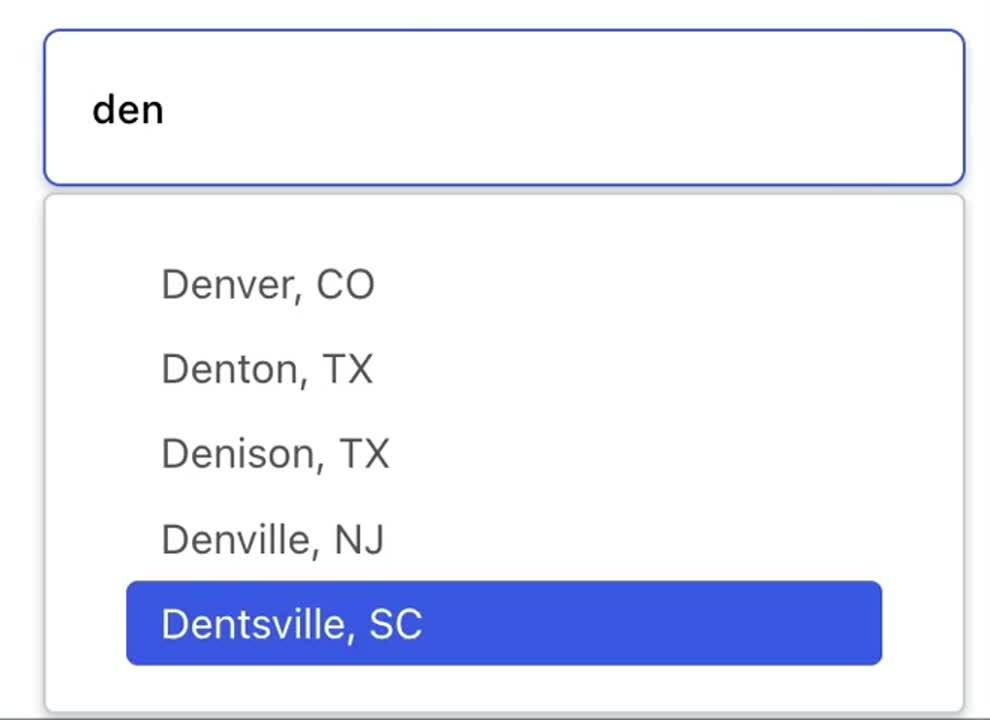
Using Search UI, we can use the provided SearchBox component and customize it to our needs by providing a customized view for the inputView and autocompleteView props.
<SearchBoxComponent
           inputView={({ getAutocomplete, getInputProps }) => (
               <div>
                   <SearchBoxInput
                       {...getInputProps({
                           placeholder: "Enter a city..."
                       })}
                   />
                   {getAutocomplete()}
               </div>
           )}
           autocompleteResults={{
               titleField: "name"
           }}
           onSelectAutocomplete={handleStoreSearch}
           autocompleteView={renderAutocompleteView}
       />
When a user selects a city from the dropdown list, the function handleStoreSearch is executed.
   const handleStoreSearch = (place) => {
       if (place.coordinates) {
           setSearchTerm(place.name.raw + ", " + place.admin1_code.raw)
           const lat = parseFloat(place.coordinates.raw.split(",")[0])
           const lon = parseFloat(place.coordinates.raw.split(",")[1])
           setCenter({ lat: lat, lng: lon })
           setZoom(10)
       }
   }
This function retrieves the coordinates of the selected city and queries for stores using the selected parameters.
StoreResults component
Once we have the location set from the CitySearchBox component, we now can populate both the list of stores in the vicinity as well as the map.
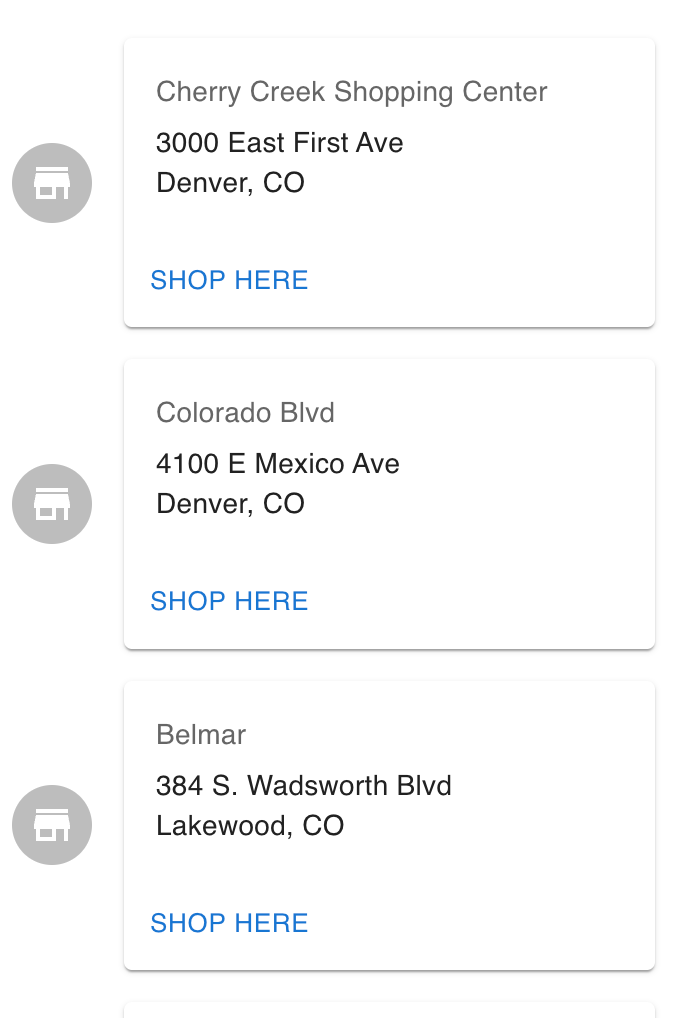
The StoreResults component lists the stores by calling the Elastic Enterprise Search API using the Search UI connector, retrieving a result set, and iterating over that result set. When the Enterprise Search API is called, we make use of of the geo-based filtering capability in the Search API.
Since we are listing stores in the vicinity of a selected place, we can leverage the location datapoint in the result set and specify that as a filter for all the returned results. For example, we can pass a center location in latitude and longitude and specify the distance from that center to filter, then sort on the results by distance to present the closest stores to the user first.
useEffect(() => {
       setFilter("location", { center: center.lat + "," + center.lng, distance: 50, unit: "km" })
       setSort("location", { center: center.lat + "," + center.lng, order: "asc" })
       // eslint-disable-next-line react-hooks/exhaustive-deps
}, [center]);The API returns all stores within a 50-kilometer radius of the specified place. We can then build a list of store locations using a Grid, List, and Cards from the mui\material package.
return (
       <Grid item style={{ maxHeight: "507px", overflow: 'auto' }}>
           <List>
               {results.map((r) => (
                   <ListItem key={r.id.raw}>
                       <ListItemAvatar>
                           <Avatar>
                               <StoreIcon fontSize="medium" />
                           </Avatar>
                       </ListItemAvatar>
                       <Card sx={{ width: 325 }}>
                           <CardContent>
                               <Typography sx={{ fontSize: 14 }} color="text.secondary" gutterBottom>
                                   {r.name.raw}
                               </Typography>
                               <Typography variant="body2">
                                   {r.address.raw}<br />
                                   {r.city.raw}, {r.state.raw}
                               </Typography>
                           </CardContent>
                           <CardActions id={r.id.raw} onMouseEnter={handleOnResultHover} onMouseLeave={handleOnResultHoverEnd}>
                               <Button size="small">Shop here</Button>
                           </CardActions>
                       </Card>
                   </ListItem>
               ))}
           </List>
       </Grid>
);StoreMaps component
The final piece of our application is the map itself. It takes advantage of the context set in the other components to populate the map with markers.
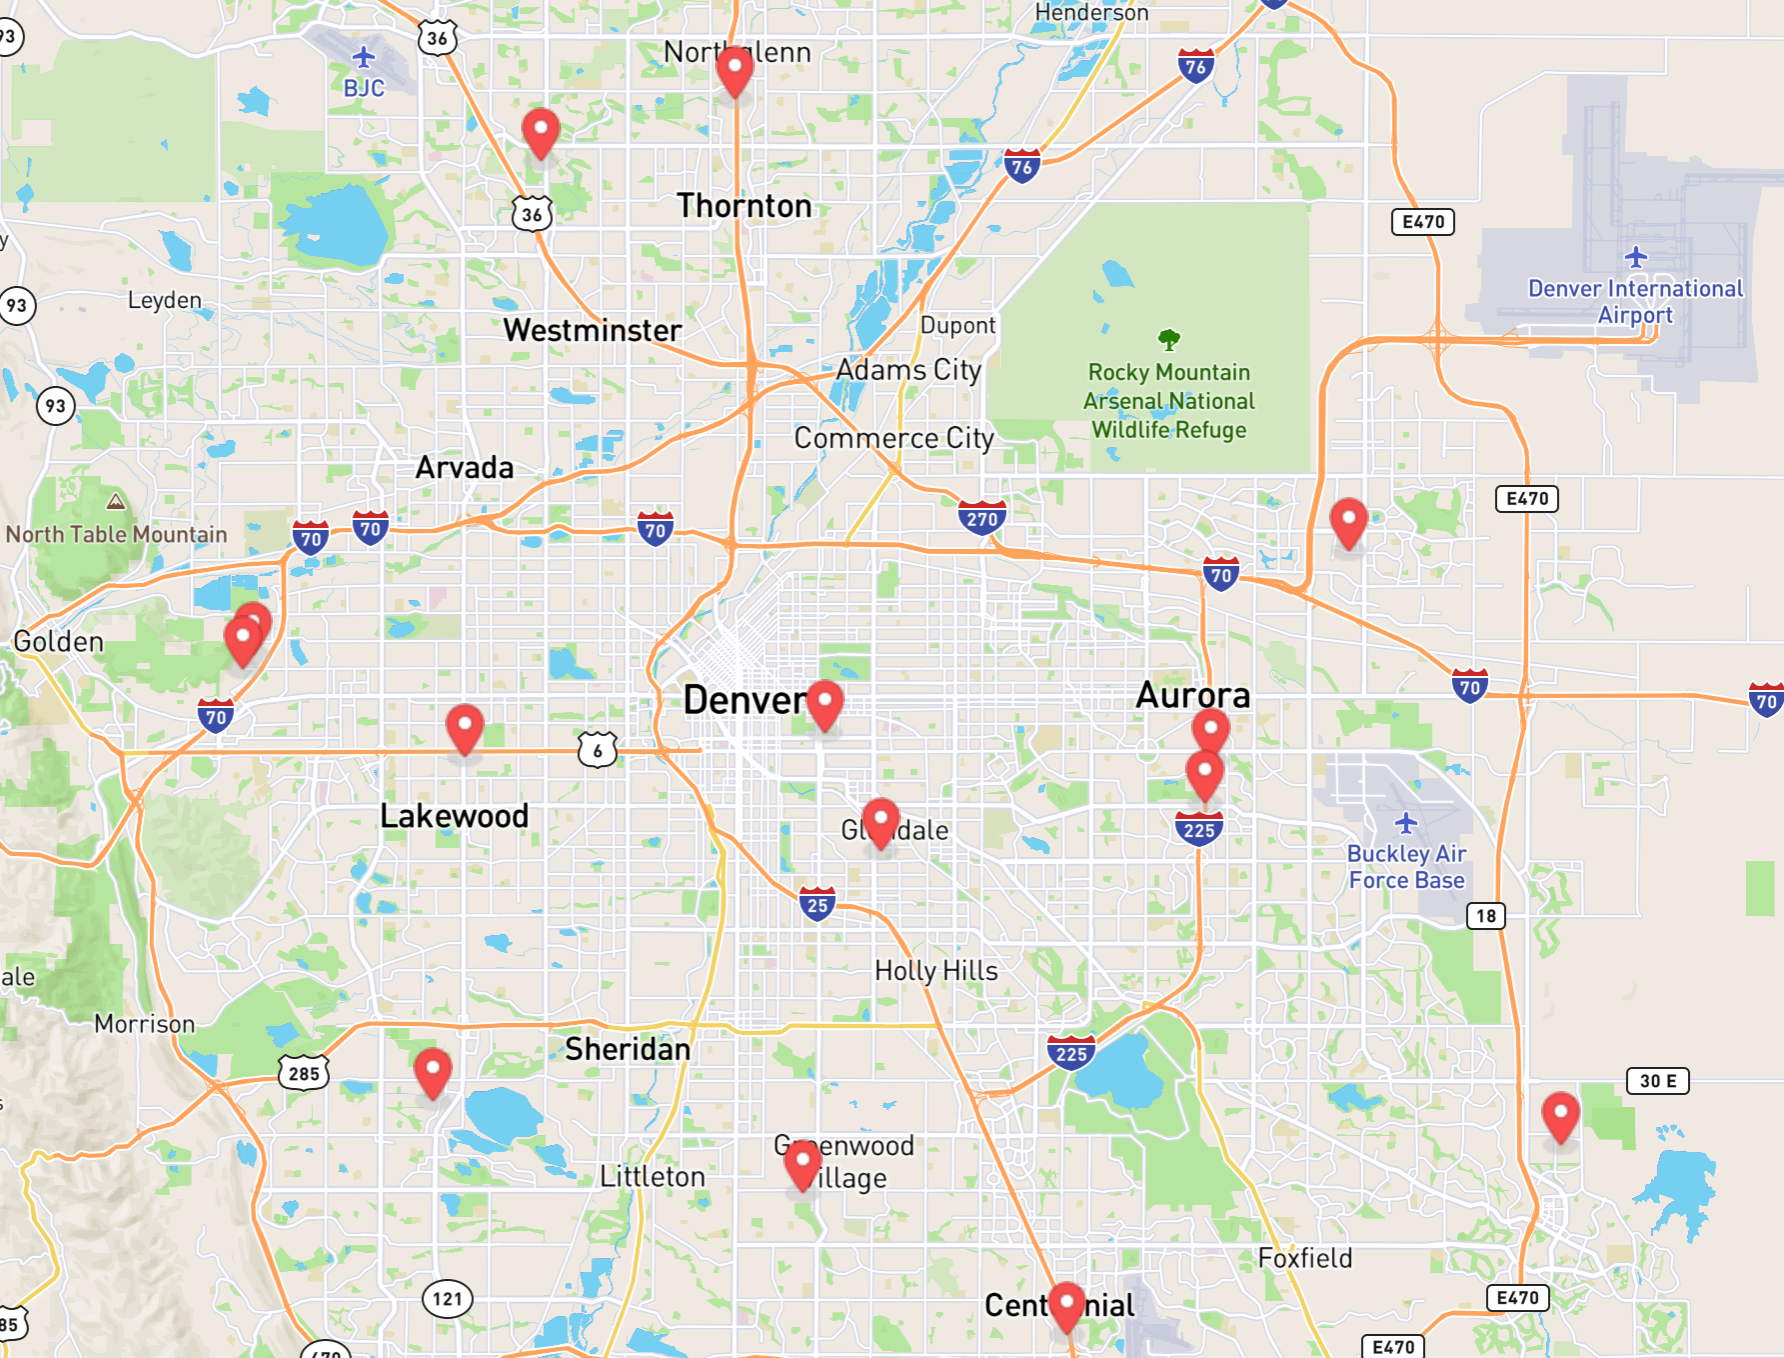
In essence, we make use of the react-map-gl component to load the map and iterate through the results obtained from the Enterprise Search API and then place markers based on their location data.
const StoresMap = ({ center, zoom, results, setFilter, placeHover }) => {

   const map = useRef(null);

   useEffect(() => {
       setFilter("location", { center: center.lat + "," + center.lng, distance: 50, unit: "km" })
       console.log(center)
       if (map.current) {
           map.current.jumpTo({center: [center.lng,  center.lat], zoom: 10});
       }
       // eslint-disable-next-line react-hooks/exhaustive-deps
   }, [center]);


   const getLat = (latLon) => {
       const latLonArr = latLon.split(",")
       const lat = parseFloat(latLonArr[0])
       return lat
   }

   const getLng = (latLon) => {
       const latLonArr = latLon.split(",")
       const lon = parseFloat(latLonArr[1])
       return lon
   }


   return (<Map
       ref={map}
       style={{ height: "800px" }}
       initialViewState={{
           longitude: center.lng,
           latitude: center.lat,
           zoom: zoom
       }}
       mapStyle="mapbox://styles/mapbox/streets-v11"
   >
       {results.map((r) => (
       placeHover === r.id.raw?
       <Marker key={r.id.raw} longitude={getLng(r.location.raw)} latitude={getLat(r.location.raw)} anchor="bottom" >
           <img src="./mapbox-marker-icon-20px-blue.png" alt="" />
       </Marker>
       :
       <Marker key={r.id.raw} longitude={getLng(r.location.raw)} latitude={getLat(r.location.raw)} anchor="bottom" >
           <img src="./mapbox-marker-icon-20px-red.png" alt="" />
       </Marker>
       ))}
   </Map>)

}Finished product!
Once all the React components are wired up, you can run your application and see a proof of concept.
You can also see the code in action in CodeSandbox or find the source code on GitHub and deploy that example locally.
Learn more
Elastic provides best-in-class tools to build solutions that provide exceptional value to ecommerce businesses. Functionality like store locators can be extremely impactful, especially for creating omnichannel experiences that lead directly to customer action.
To get started building solutions that can drive growth in your ecommerce business, sign up for a free 14-day trial of Elastic Cloud or try AWS Marketplace, Google Cloud Marketplace, or Microsoft Azure Marketplace.
Share
- Share on Twitter
Share on Twitter
- Share on LinkedIn
Share on LinkedIn
- Share on Facebook
Share on Facebook
- Share by Email
Share by Email
- Print this page
Print