How to configure Auth0 SSO with Elastic Cloud

 Share on Twitter
Share on Twitter

 Share on LinkedIn
Share on LinkedIn

 Share on Facebook
Share on Facebook

 Share by Email
Share by Email

 Print this page
Print
In this blog, we will look at integrating identity services provider Auth0 with Elastic Cloud and enabling the social login on Kibana, so that you can log in to Kibana with your Gmail, GitHub, or Microsoft account without creating any additional credentials.
Elastic Cloud supports three types of SSO protocols:
- Secure Access Markup Language (SAML)
- OpenID
- Kerberos
We are going to configure the Auth0 integration via SAML (Security Assertion Markup Language) protocol. And we need to create some identifiers and register them on Elasticsearch and Kibana. Without going into the details of SAML, the most important part is: You need an Identity Provider that performs the authentication and authorization — that’s Auth0 in this example. And you need a Service Provider that trusts the Identity Provider and gives an authorized user access to the system — that’s Kibana.
Prerequisites for this blog:
- If you are running Elasticsearch on-premise, you must have a platinum license to configure Single Sign-on (SSO). I’m using Elastic Cloud to configure this integration. You can create an Elasticsearch deployment for free by creating an account!
- You need an Auth0 account.
Below are the steps to follow:
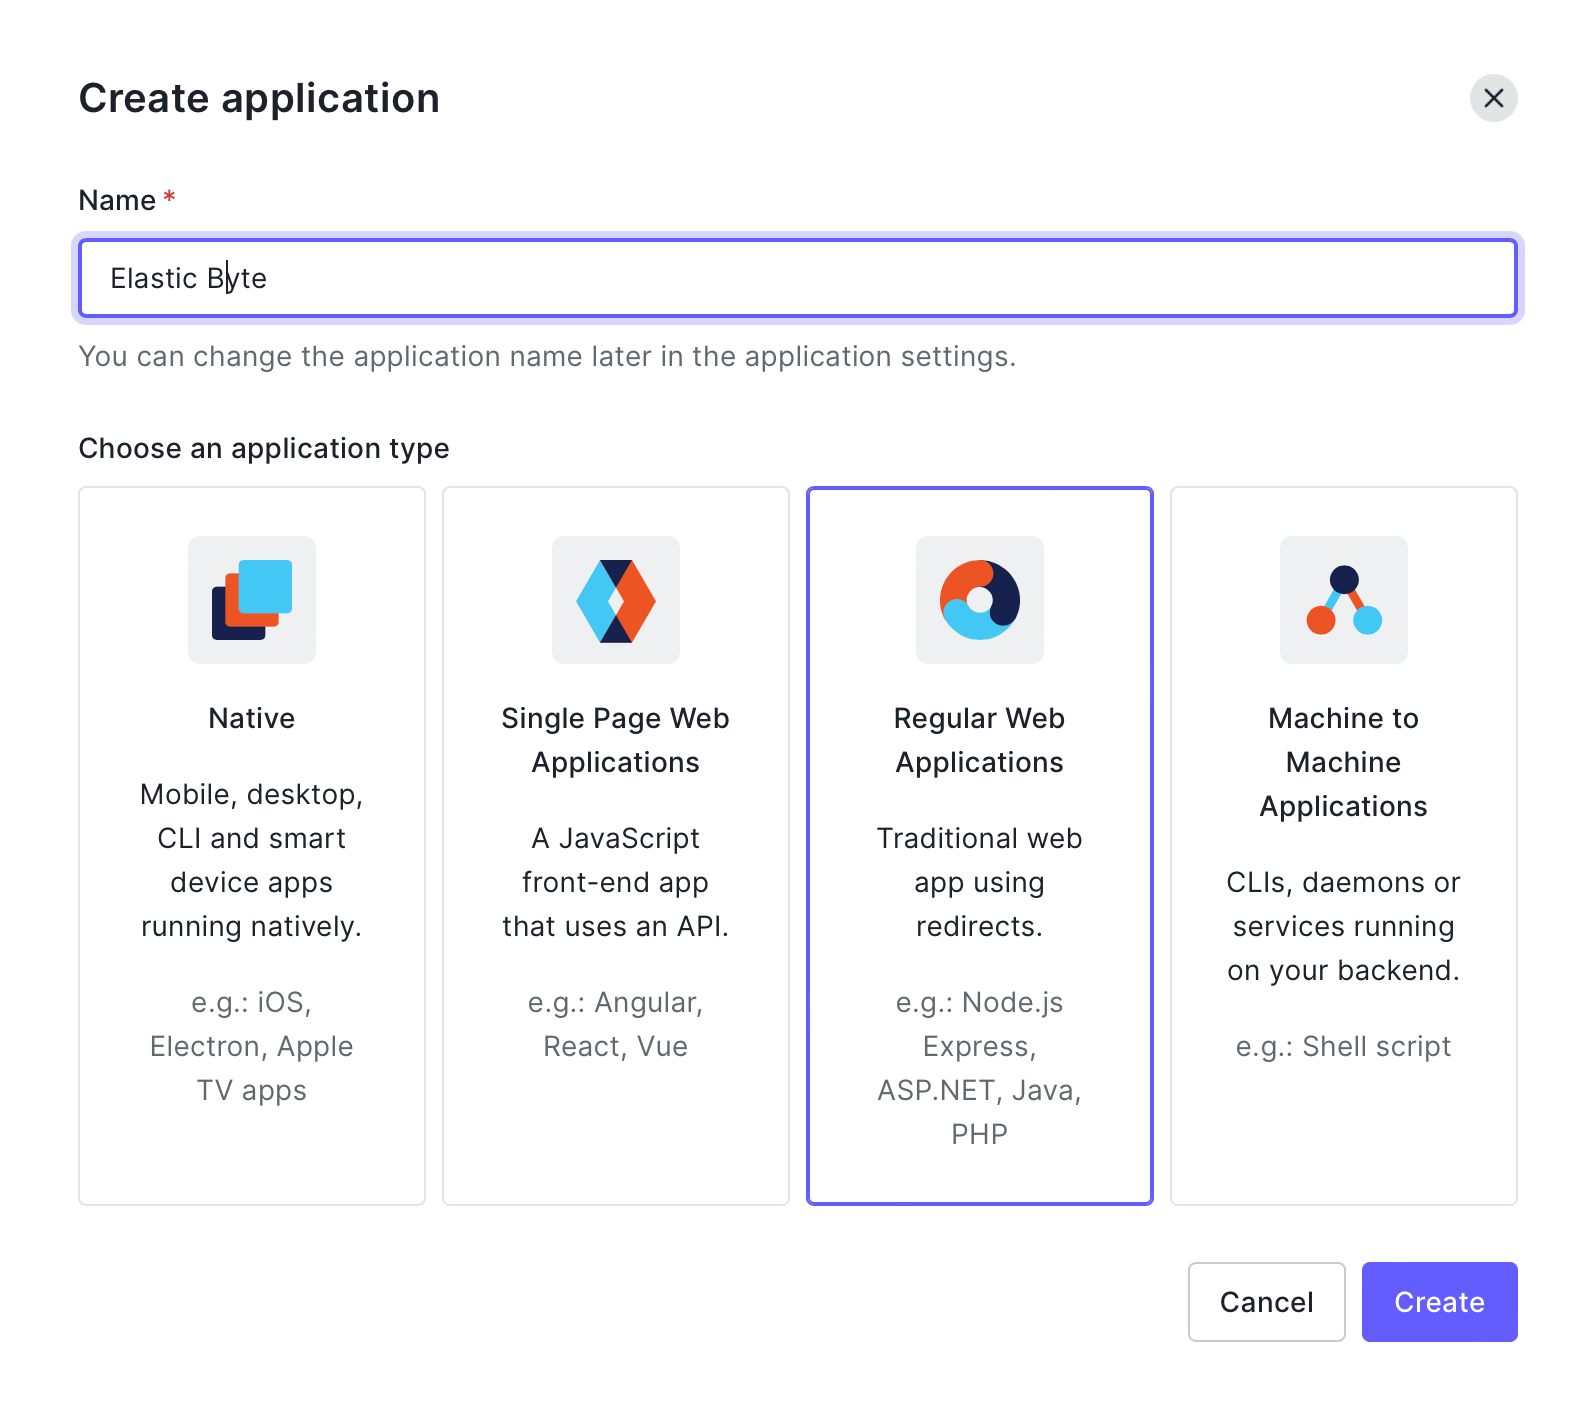
- In the Auth0 console, create an application (Regular Web Application) with SAML add-on enabled.
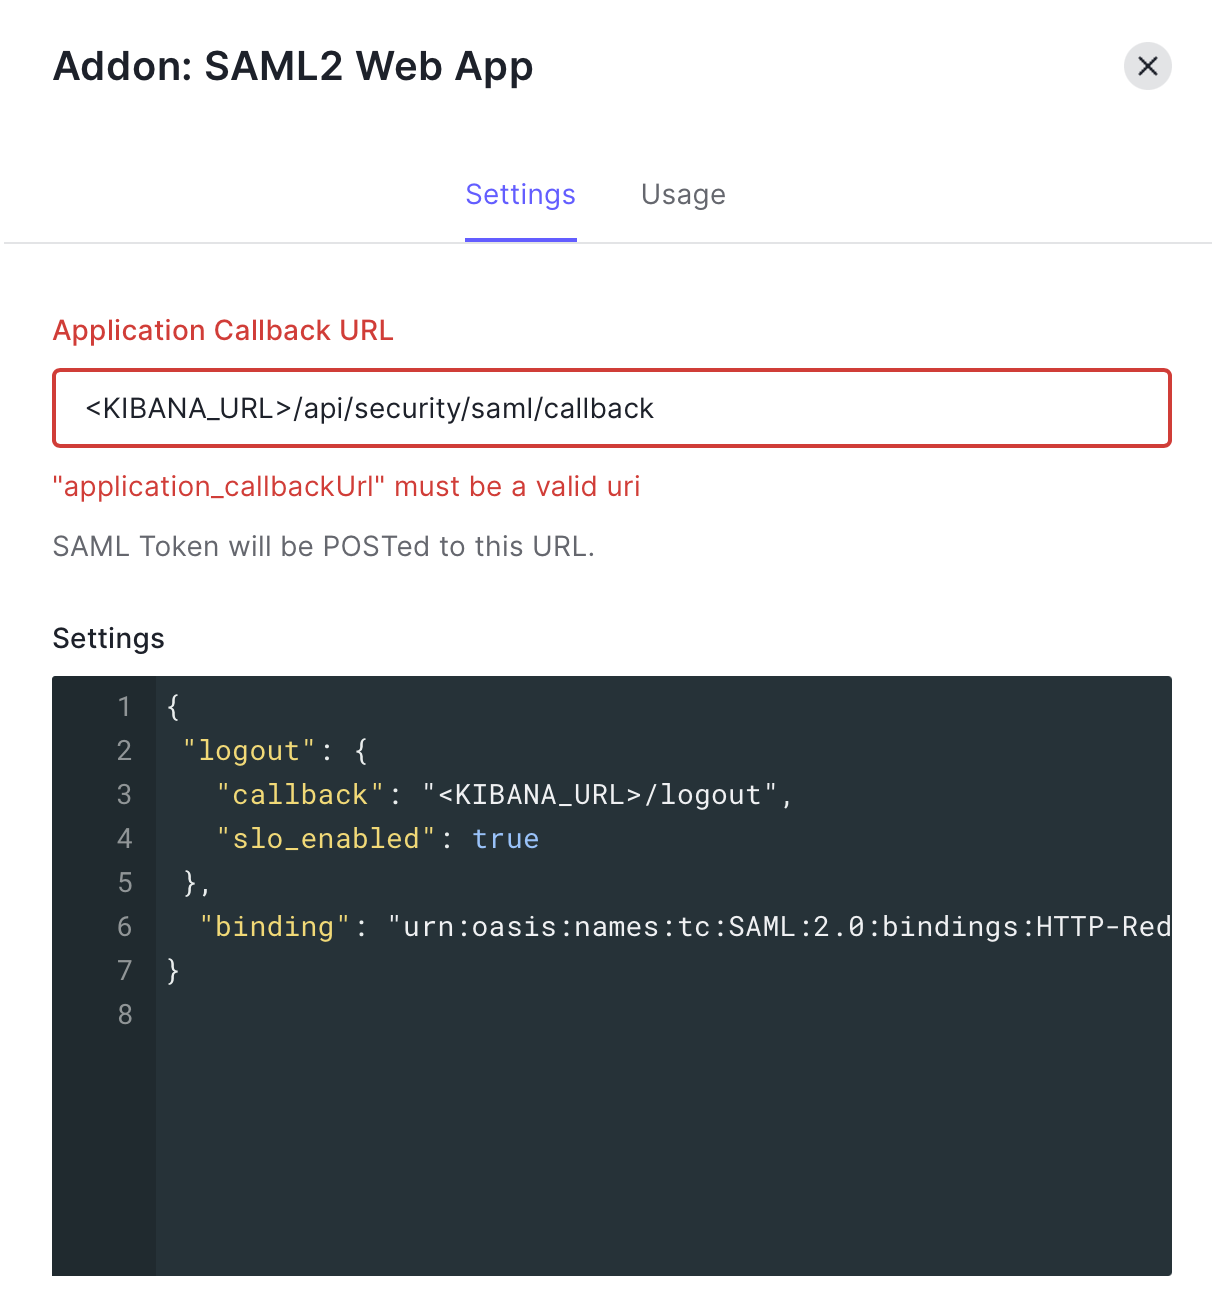
Callback URL should be in this format: <KIBANA_URL>/api/security/saml/callback.
{
 "logout": {
   "callback": "<KIBANA_URL>/logout",
   "slo_enabled": true
 },
  "binding": "urn:oasis:names:tc:SAML:2.0:bindings:HTTP-Redirect"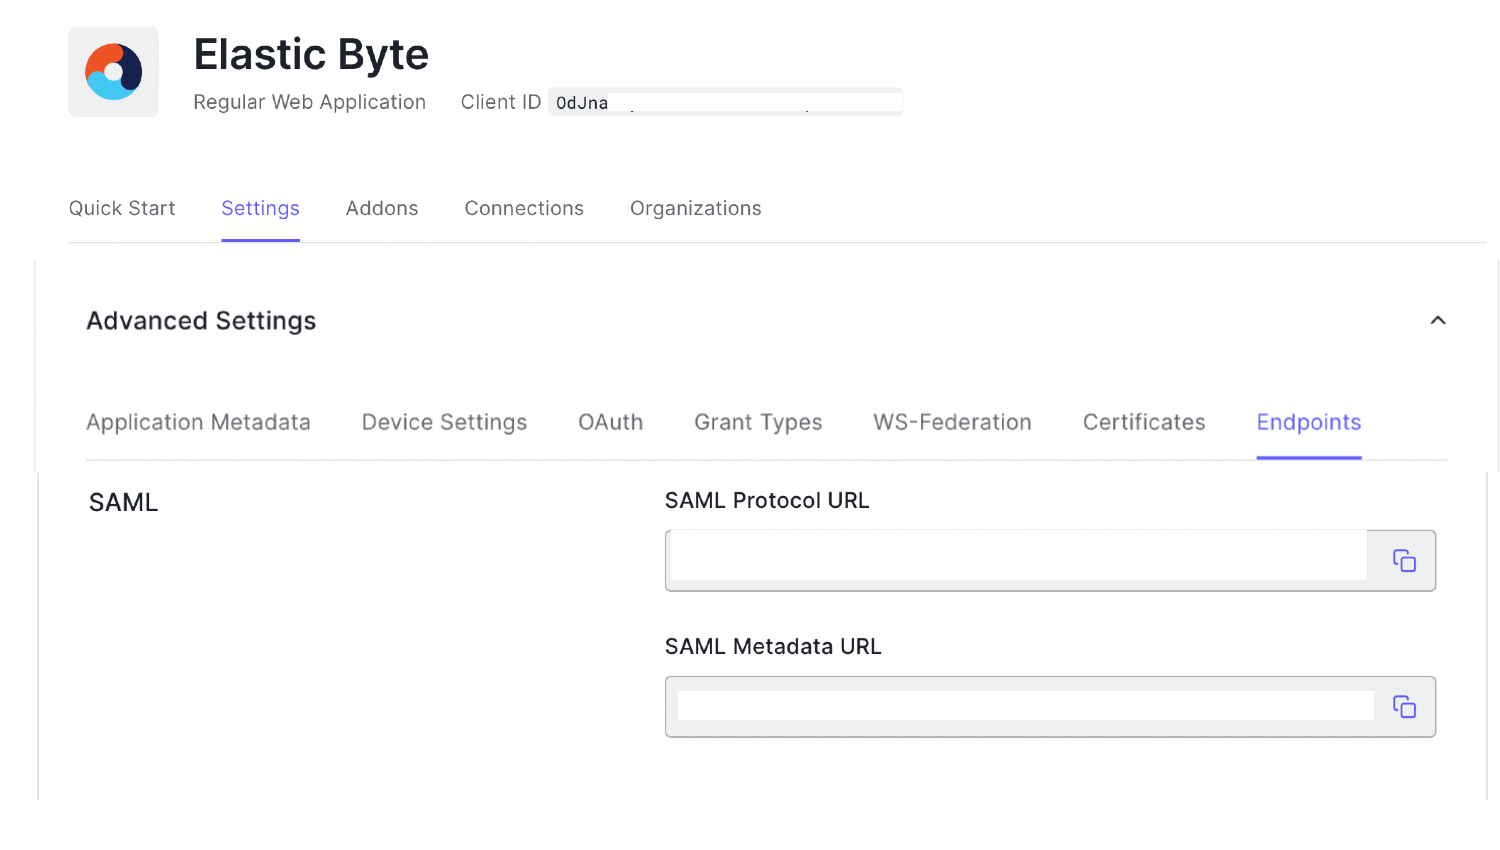
}3. In the same application go to Settings > Advanced Settings > Endpoints > SAML - Metadata : Copy the URL for later.
4. Download the SAML XML by pasting the URL in your web browser. Downloaded XML would look like this:
<EntityDescriptor entityID="urn:dev-jg1h3gfn.us.auth0.com" xmlns="urn:oasis:names:tc:SAML:2.0:metadata">
  <IDPSSODescriptor protocolSupportEnumeration="urn:oasis:names:tc:SAML:2.0:protocol">
    <KeyDescriptor use="signing">
      <KeyInfo xmlns="http://www.w3.org/2000/09/xmldsig#">
        <X509Data>
	….
  </IDPSSODescriptor>
</EntityDescriptor>5. Head over to Elastic Cloud console > Elasticsearch configuration (elasticsearch.yml) or Elasticsearch User settings (Elastic Cloud) and add the following snippet:
xpack.security.authc.realms.saml.elastic-byte:
   order: 2
   attributes.principal: "http://schemas.xmlsoap.org/ws/2005/05/identity/claims/emailaddress" #this can be anything that you want to login with
   idp.metadata.path: "<SAML_APP_URL_FROM_AUTH0>" #SAML metadata XML URL you copied in Step 3
   idp.entity_id: "<ENTITY_ID_FROM_APP_XML>" #Open the SAML metadata XML downloaded to find out EntityID
   sp.entity_id: "<KIBANA_URL>"
   sp.acs: "<KIBANA_URL>/api/security/saml/callback"
sp.logout: "<KIBANA_URL>/logout"6. Head to Kibana configuration (kibana.yml) or Kibana User settings (Elastic Cloud) and add the following snippet:
xpack.security.authc.providers:
 saml.elastic-byte:
   order: 0
   realm: elastic-byte #name as given in step 5 above
   description: "Log in with Auth0"
   icon: https://my-company.test/saml-logo.svg #you can substitute it with your Organization SVG format logo
hint: "Typical for Teams"7. Map the external identity provider realm to the role you want to have. You can do this via Kibana Console.
POST _security/role_mapping/elastic-byte
{
  "enabled": true,
   "roles": [ "kibana_admin" ],
   "rules": {
       "field": { "realm.name": "elastic-byte" } #notice the realm name.
   },
   "metadata": { "version": 1 }
}8. In the Auth0 console, go to Authentication > Social to enable a Social Login connection so users can log in from GitHub or Microsoft accounts. I’ve used Google OAuth2.

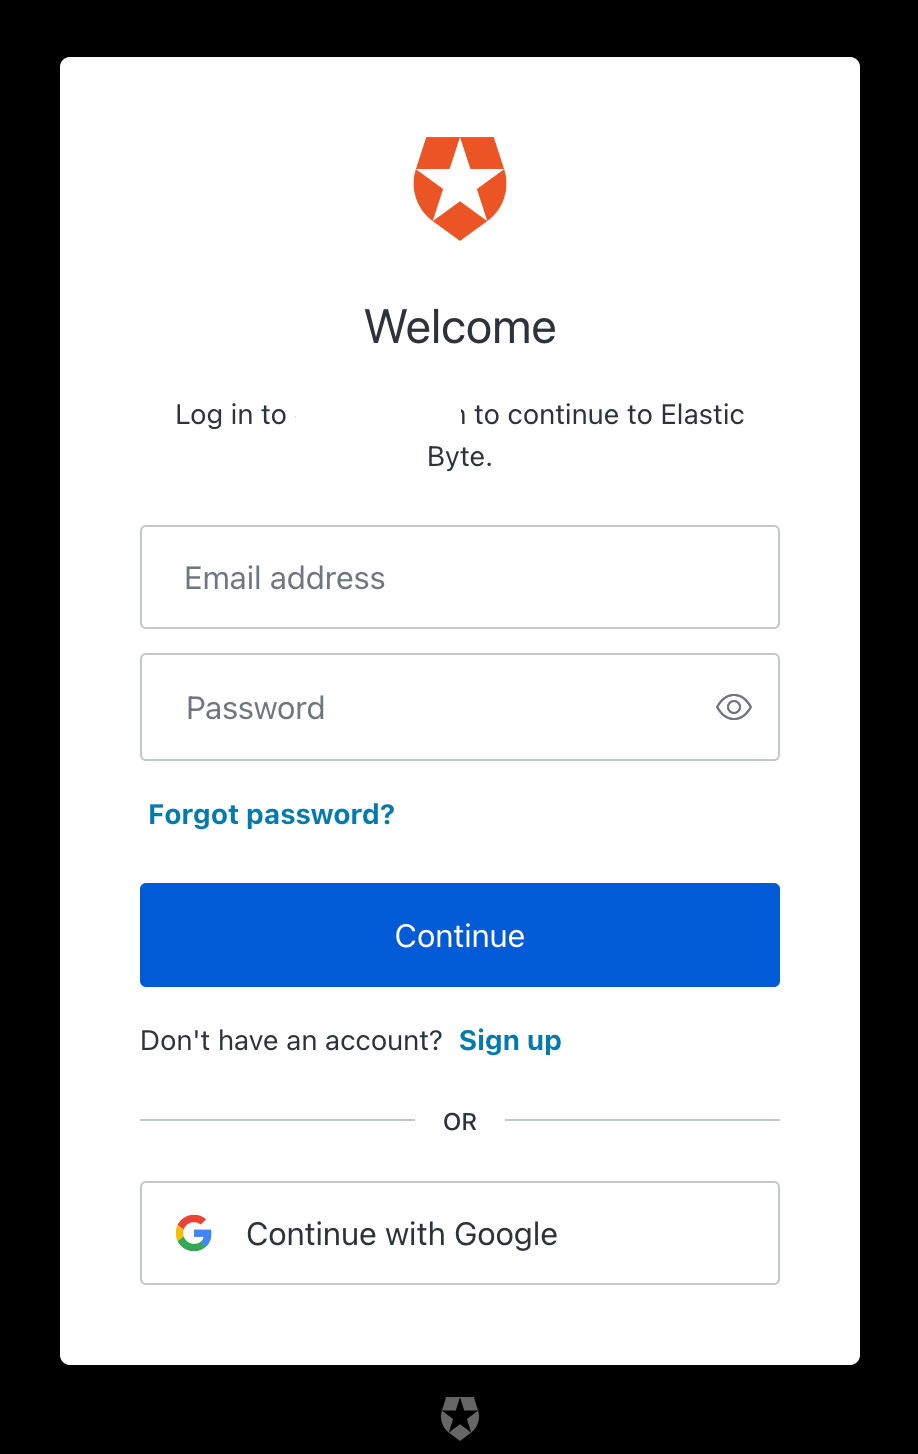
9. Open Kibana URL in your browser, and you will see an Auth0 login option, which redirects you to the App we have created in the Auth0 console. Use your Google account to log in as you have enabled the social login connection in Step 8.

Conclusion
This blog post helps you to connect with Auth0, but as per the SAML protocol, the integration flow would remain the same. However, you might see some changes in the UI of the identity provider.
You could also look at the video demonstrating the configuration and role mapping using the Kibana Dev Tools console.
The documentation on SAML protocol, including guides to integrating with Azure AD, is available here. Also, refer to the Elastic Cloud service documentation about other security protocols like Open ID Connect and Kerberos.
Share
- Share on Twitter
Share on Twitter
- Share on LinkedIn
Share on LinkedIn
- Share on Facebook
Share on Facebook
- Share by Email
Share by Email
- Print this page
Print