Get hands-on with Elasticsearch: Dive into our sample notebooks in the Elasticsearch Labs repo, start a free cloud trial, or try Elastic on your local machine now.
Type a natural language question in your terminal. The official Elastic GitHub Copilot CLI plugin inspects your index schema, generates the Elasticsearch Query Language (ES|QL) query, and runs it, returning a formatted table. No Kibana, no manual query syntax. One command. The plugin is now available in the Awesome GitHub Copilot marketplace.
Elastic has published our skills and plugin source in the official elastic/agent-skills repository.
What is GitHub Copilot CLI, and how do you install it?
GitHub Copilot CLI is an AI agent that brings Copilot's models directly to your terminal. It helps developers generate code, edit files, and run shell commands within the context of their local development environment. When paired with the Elastic plugin, it lets developers query Elasticsearch data using natural language directly from the shell.
You can install it using your preferred package manager. For example, via npm:
(If you prefer Homebrew, you can run brew install copilot-cli. Windows users can use winget install GitHub.Copilot).
After installation, authenticate your Copilot session by running:
Then type /login, and follow the prompts in your browser.
After successful login, type /quit to return to the shell.
Install the Elasticsearch plugin
The Elastic plugin is published in the Awesome GitHub Copilot marketplace, GitHub's community-curated collection of agents, skills, and configurations for Copilot CLI. The marketplace is registered by default in Copilot CLI. Installation is a single command.
To verify that it’s installed correctly, type copilot plugin list. You should see elasticsearch@awesome-copilot active and ready to use.
Configure Elasticsearch
The plugin connects to Elasticsearch via three environment variables: ELASTICSEARCH_URL, ELASTICSEARCH_API_KEY, and ELASTIC_MCP_URL. If you want to use the Model Context Protocol (MCP) server integration, you need Elasticsearch 9.2+ or Elastic Cloud Serverless.
1. Activate a cluster: You can start a free trial on Elastic Cloud, or run it locally using the start-local script (curl -fsSL https://elastic.co/start-local | sh).
2. Get your ELASTICSEARCH_URL: The value can be found at the upper right of your home page in Kibana and will end with “.es.region.elastic.cloud:443”.

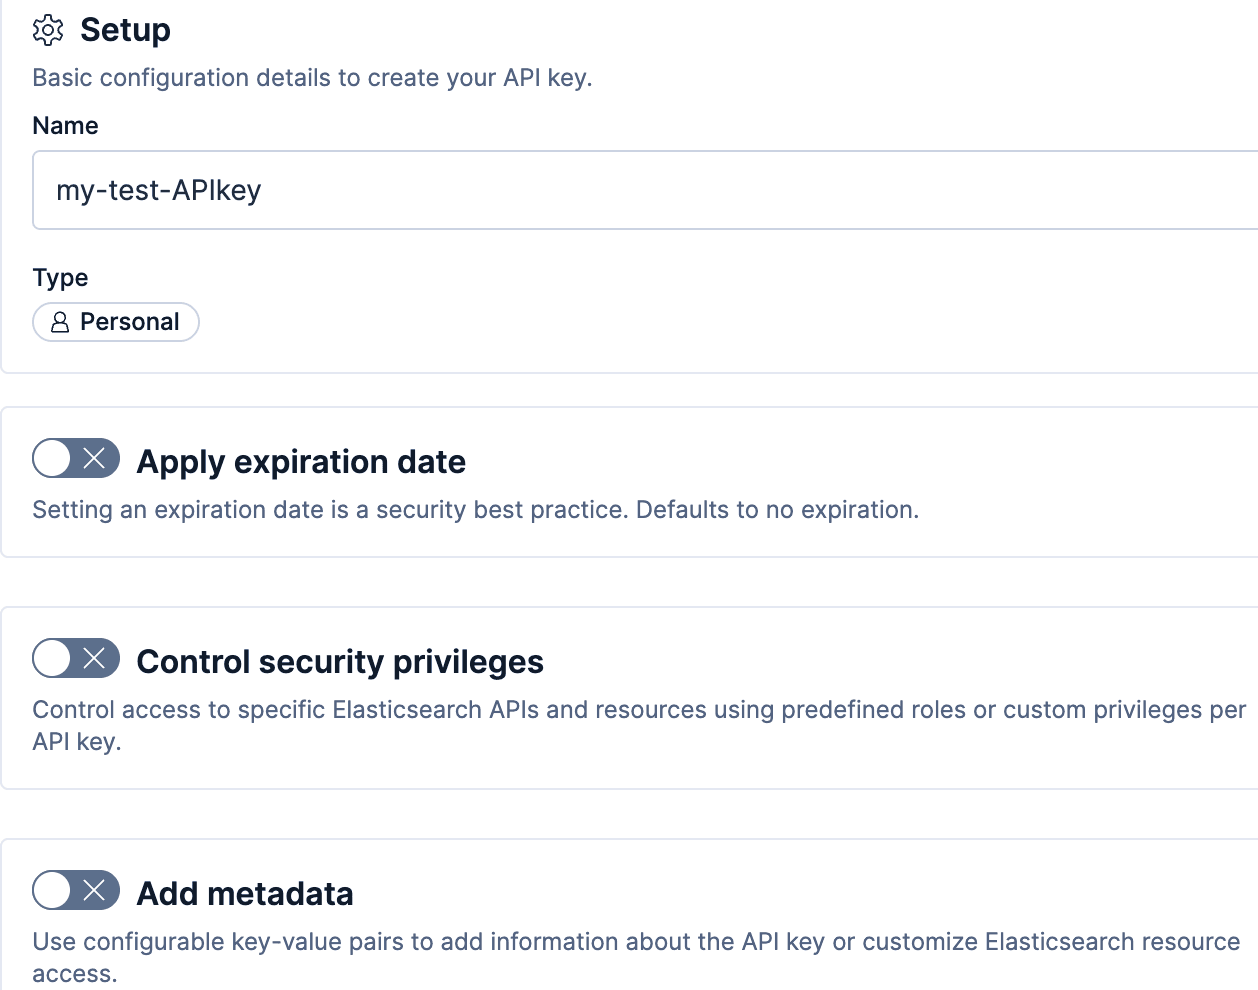
3. Get your ELASTICSEARCH_API_KEY: In Kibana, go to Stack Management > Security > API Keys, or type “API Keys” into the upper-right search box, and create an API key. Give your API key a name, and leave the defaults. Copy the encoded key. After this exercise, you can go back and delete this key so that you don’t leave an expired, full privileges key available.
4. Get your ELASTIC_MCP_URL: Go to Agents > View all tools > Manage MCP, and copy your MCP Server URL.
Create an .env file in your project directory so the plugin can authenticate without requiring global shell configuration.
ELASTICSEARCH_URL="your-elasticsearch-url"
ELASTICSEARCH_API_KEY="your-encoded-api-key"
ELASTIC_MCP_URL="your-elasticsearch-mcp-url"
This approach is recommended over exporting variables in ~/.bashrc or ~/.zshrc, particularly if you switch between multiple clusters or environments.
Load the .env file with the following shell command:
Install sample data to test your Elasticsearch queries
To test this out, we recommend installing the ecommerce orders dataset available from Kibana. It includes an index named kibana_sample_data_ecommerce containing 4,675 orders, complete with product categories, pricing, and geo-information.
To install the sample data, open the Integrations page in Kibana (search for “Integration” from the search top bar) and install the “Sample Data.” For more details, refer to the documentation here: https://www.elastic.co/docs/explore-analyze/#gs-get-data-into-kibana.
How to use the @elasticsearch agent
Once installed, Copilot handles the tool routing for you via the custom @elasticsearch agent. You can ask questions about your cluster, and it will automatically invoke the Elasticsearch MCP tools.
Let's do a quick discovery check. We recommend passing the --allow-tool 'shell' flag to ensure that Copilot has permission to execute the underlying background queries:
Copilot will reach out to your cluster, fetch the index data, and return a clean table right in your terminal:
How do you query Elasticsearch using natural language and ES|QL?
The Elastic GitHub Copilot CLI plugin is built around ES|QL, Elastic's piped query language for data exploration. Instead of manually looking up syntax or context-switching to Kibana, you can ask Copilot natural language questions about your data.
Try running this prompt:
Behind the scenes, the agent will try a few different ways to execute. First, it will try node.js commands and fail, and then it will check to see if your cluster is running on your local machine (https://localhost:9200) and fail. It will then check your environment variables and have success.
1. Call the MCP server to inspect the mapping of kibana_sample_data_ecommerce.
2. Construct the proper ES|QL query:
3. Execute the query against the Elasticsearch API.
4. Render the results in a formatted Markdown table.
Schema discovery, query generation, and execution happen in the background. You get the results.
Start querying your Elasticsearch data from the terminal
Bringing the Model Context Protocol directly into GitHub Copilot CLI allows developers to interact with Elasticsearch data using natural language. Whether you’re debugging a production issue in your application logs or analyzing ecommerce revenue, you can now get your answers instantly.
Frequently asked questions
How do I query Elasticsearch from the terminal without switching to Kibana?
Install the Elastic GitHub Copilot CLI plugin. Once set up, ask the @elasticsearch agent a question in plain English, and it generates and runs the ES|QL query against your cluster, returning results as a formatted table in your terminal.
Can I use natural language to generate ES|QL queries?
Yes. The Elastic GitHub Copilot CLIplugin uses Elasticsearch’s MCP server to inspect your index schema and translate natural language questions into valid ES|QL queries automatically. You don’t need to know ES|QL syntax to get results.
Which version of Elasticsearch is required for the MCP integration?
The MCP server integration requires Elasticsearch 9.2 or later, or an Elastic Cloud Serverless deployment. Earlier versions are not supported for the MCP-based query workflow.
Is the Elastic GitHub Copilot CLI plugin open source?
Yes. The plugin is published at github.com/elastic/agent-skills and is available for installation, contribution, or forking. It runs locally and connects to your Elasticsearch cluster via environment variables. The plugin is also discoverable in the Awesome GitHub Copilot marketplace.
What are the limitations of natural language ES|QL query generation?
Query accuracy depends on how well your index mapping describes the data. Ambiguous field names or complex multi-index queries may require manual ES|QL refinement. The plugin is best suited for exploratory queries and data discovery, not production query pipelines.
Do I need a paid GitHub Copilot subscription to use this?
Any Copilot plan (Free, Pro, Business, Enterprise) is required; the free tier has limited premium requests.
Related Content

July 21, 2026
4 NVIDIA AI tasks, 1 Elasticsearch API: Embeddings, chat, completion, and rerank
Set up NVIDIA hosted models in Elasticsearch with one API key and a model ID. No custom integration code needed.

How to build search analytics on Elastic using OpenTelemetry, no extra pipeline required
How to instrument your search application to use modern Open Telemetry standard to drive insights in to your search and users.

Follow the money: tracing laundering networks with ES|QL and cross-cluster search
The data model, cross-cluster architecture and five ES|QL queries that power mule detection and laundering network tracing, built from infrastructure most financial institutions already run.
June 30, 2026
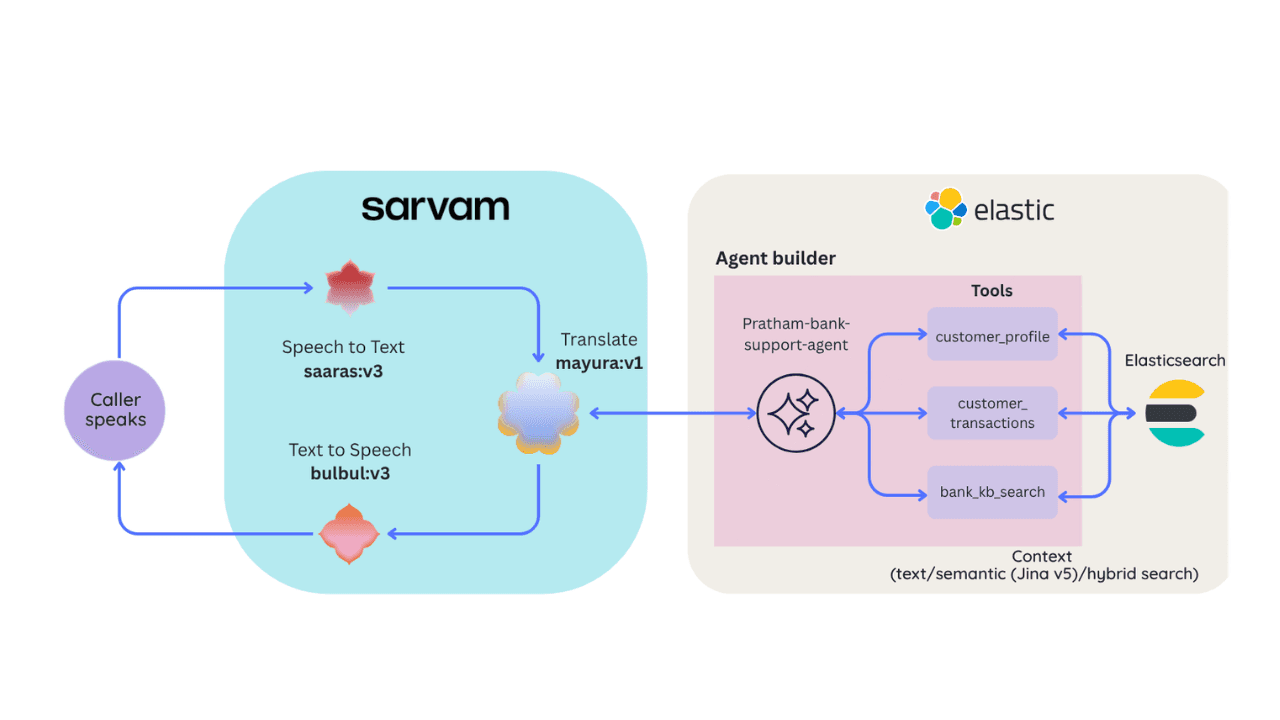
Building a multilingual voice agent with Elastic Agent Builder & Sarvam AI
A working demo combining Sarvam AI speech with Elastic Agent Builder: identity verification, per-customer ES|QL queries, and mid-call language switching across 22 Indian languages without multilingual indices.

June 29, 2026
Bringing it together: How we rebuilt Elasticsearch as a columnar metrics engine; 6.6x less storage, 160x faster queries
Elasticsearch metrics in version 9.4 run on a fully columnar engine: 6.6x less storage, 160x faster queries, native PromQL and OTel support.