.jpg)

 Share on Twitter
Share on Twitter

 Share on LinkedIn
Share on LinkedIn

 Share on Facebook
Share on Facebook

 Share by Email
Share by Email

 Print this page
Print
We’re excited to announce the latest feature release for Kibana® dashboards: the Links panel, an easy way to organize and navigate between your dashboards. This feature is available in technical preview in Kibana 8.11.
There are occasions in which you may want to create multiple thematically related dashboards and link them to each other. This is a better way to organize your visualizations that will result in smaller, more usable and more performant dashboards. In other situations, you may want to create an index where end users can find all the relevant dashboards listed together.
For these use cases (among others), you previously had to use the Markdown text panel, which had a series of issues. For example, users could not carry over their context such as filters and queries when navigating from dashboard to dashboard, which slowed down their analysis. Moreover, when importing or copying a new dashboard to a space, the links in the Markdown panel would not work because they were referencing a different space.
The Links panel will fix all these issues by providing a streamlined way to organize and navigate your dashboards.
Get started with the Links panel
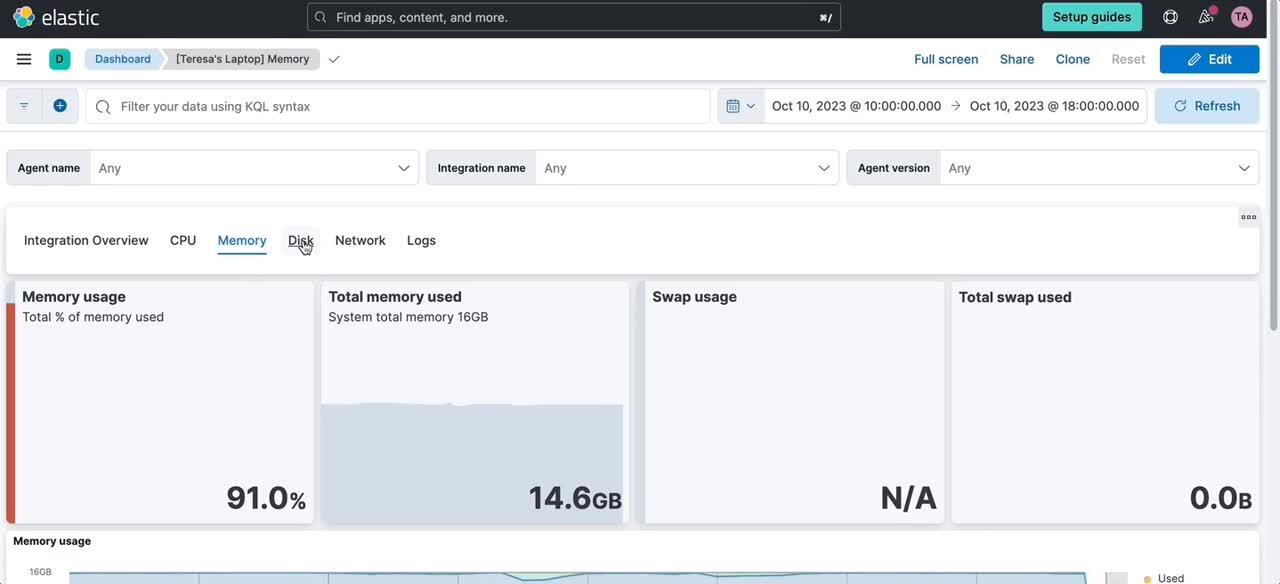
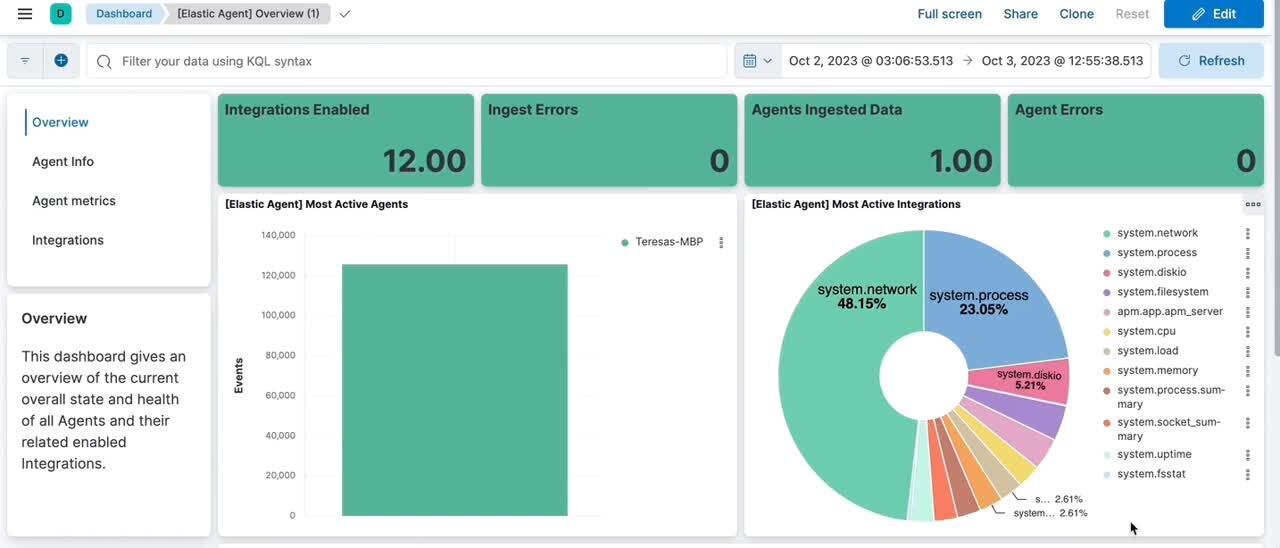
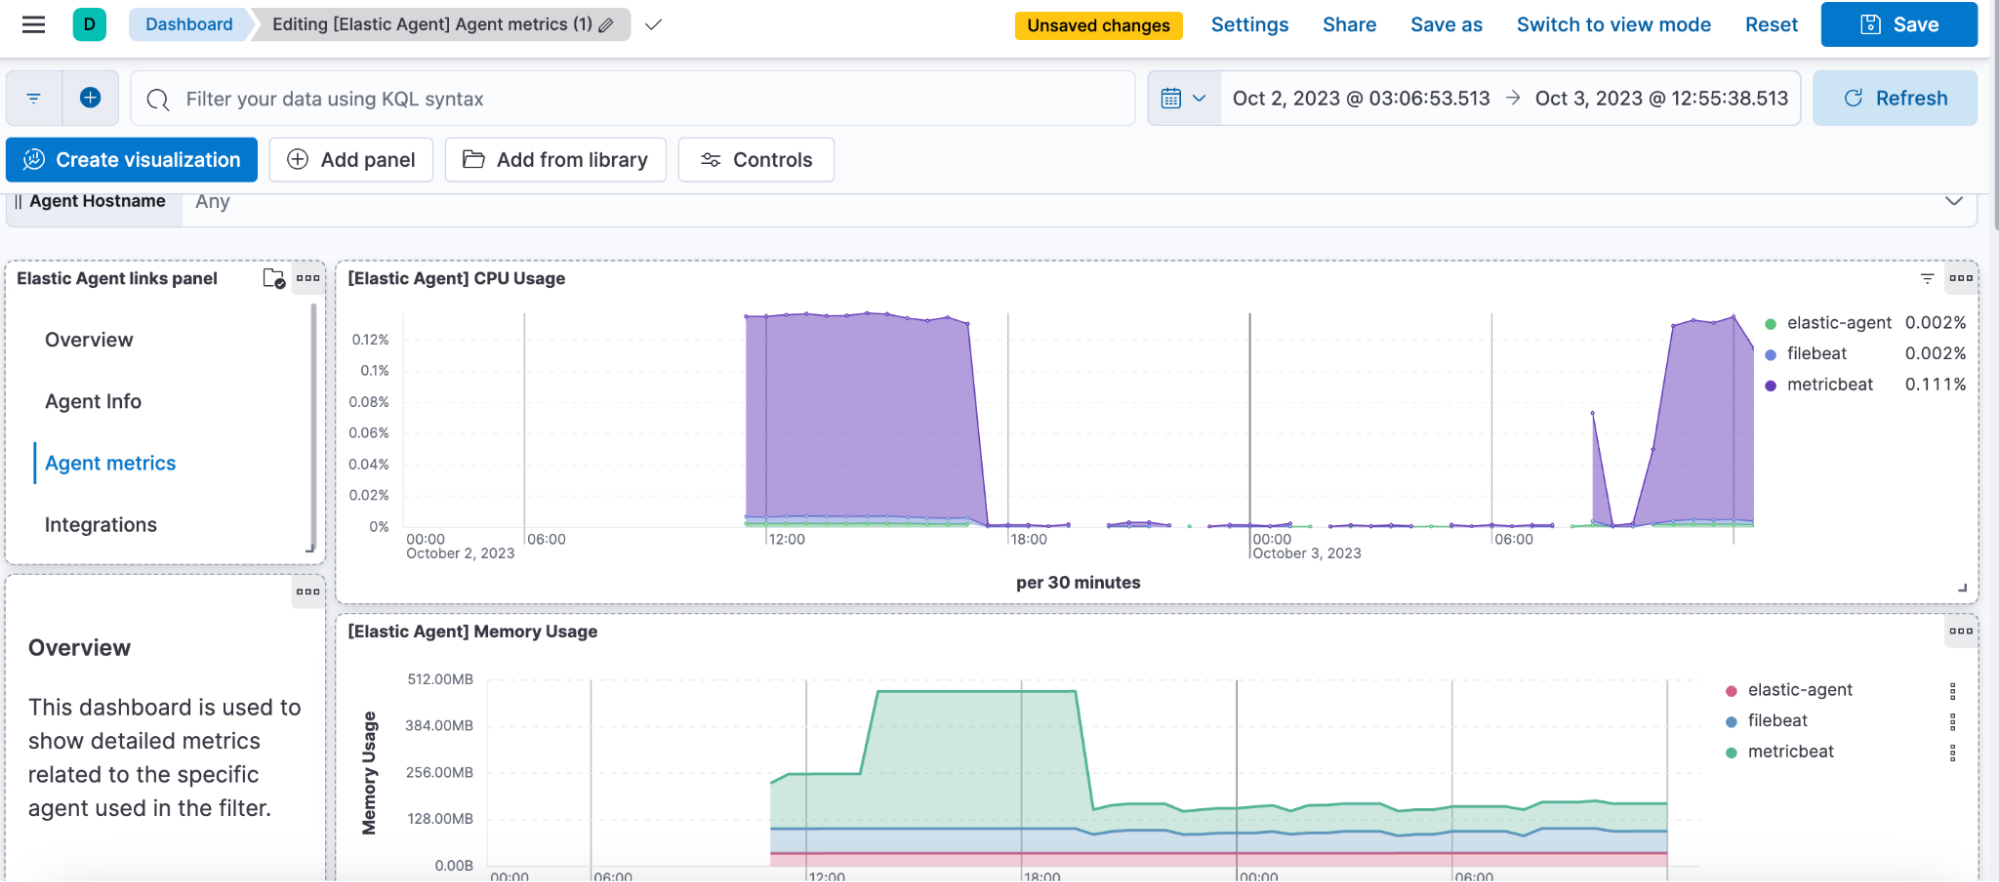
In this post, we will show how to create a Links panel to link four different dashboards provided by default when you install the Elastic Agent. These dashboards contain different metrics collected by the Elastic Agent, and users will usually need to navigate from one to the other.
Start by opening one of the dashboards you want to link (make sure you have edit permissions) and follow these easy steps:
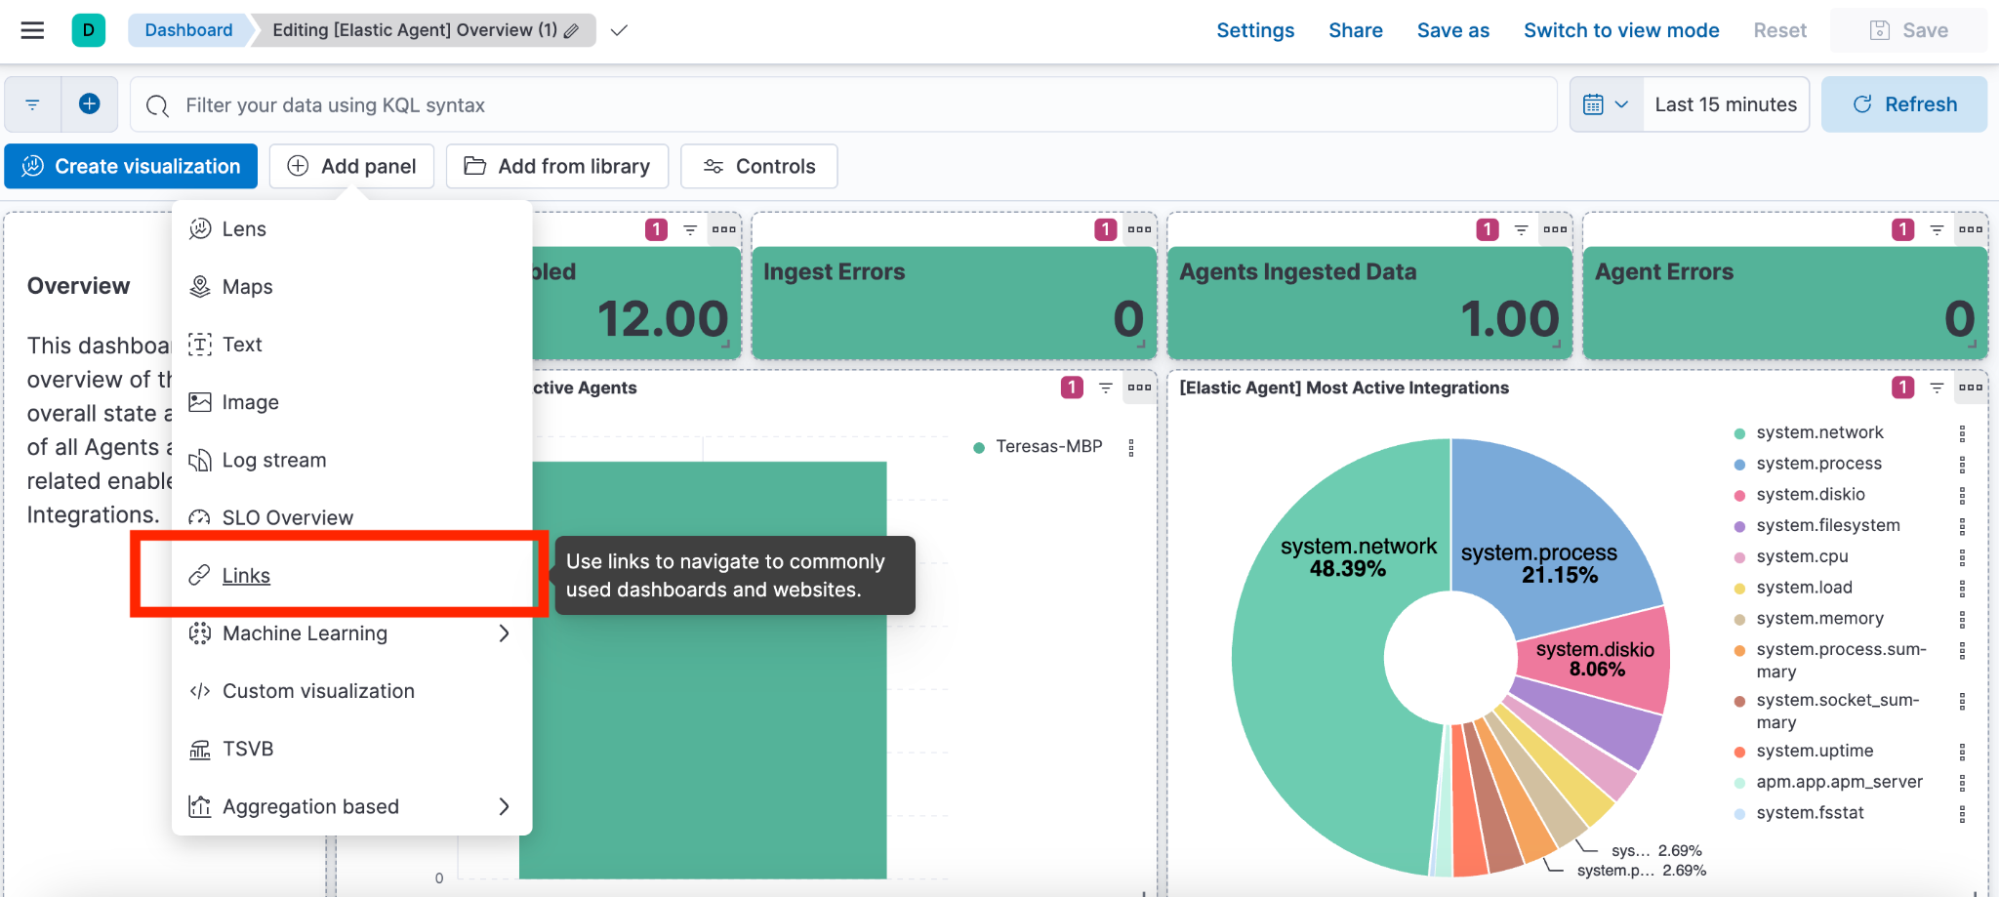
1. Click the Add panel button and click again on the Links option.
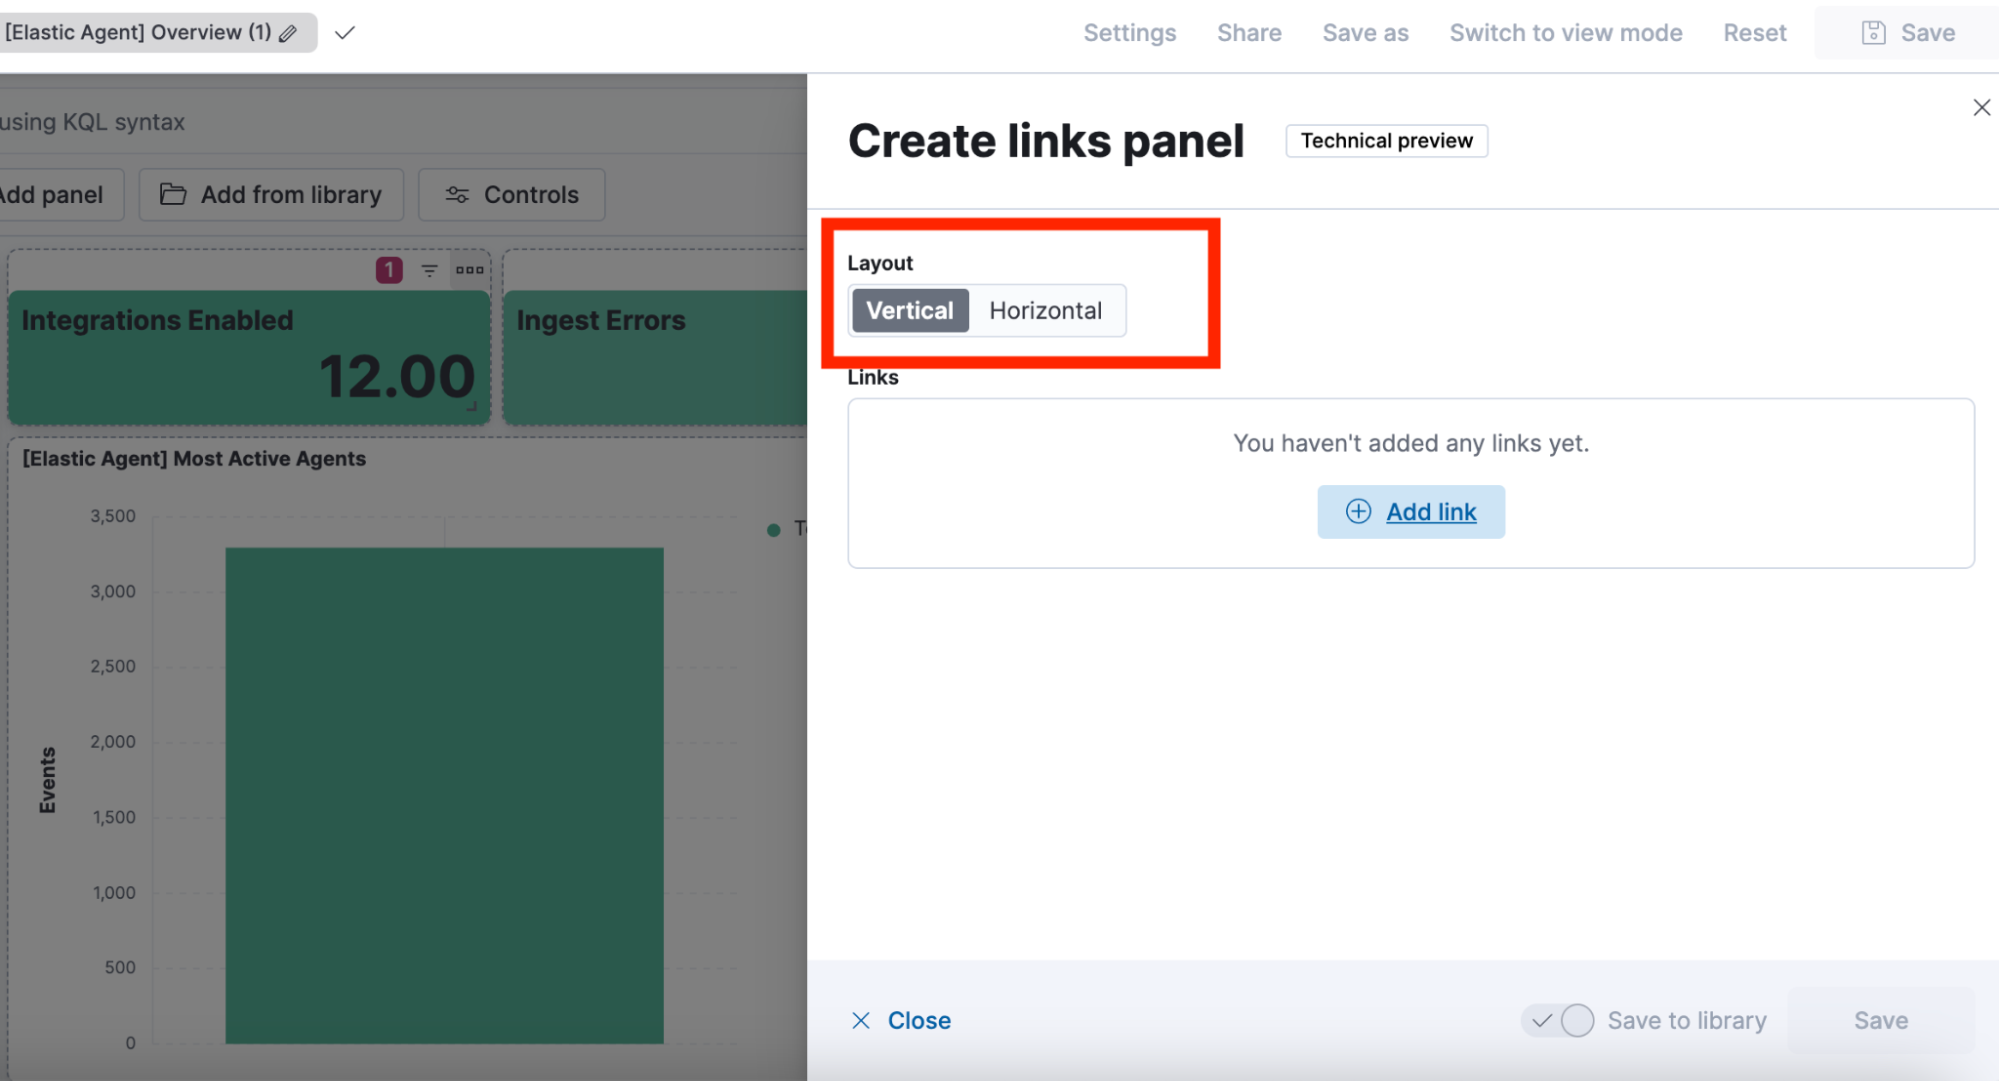
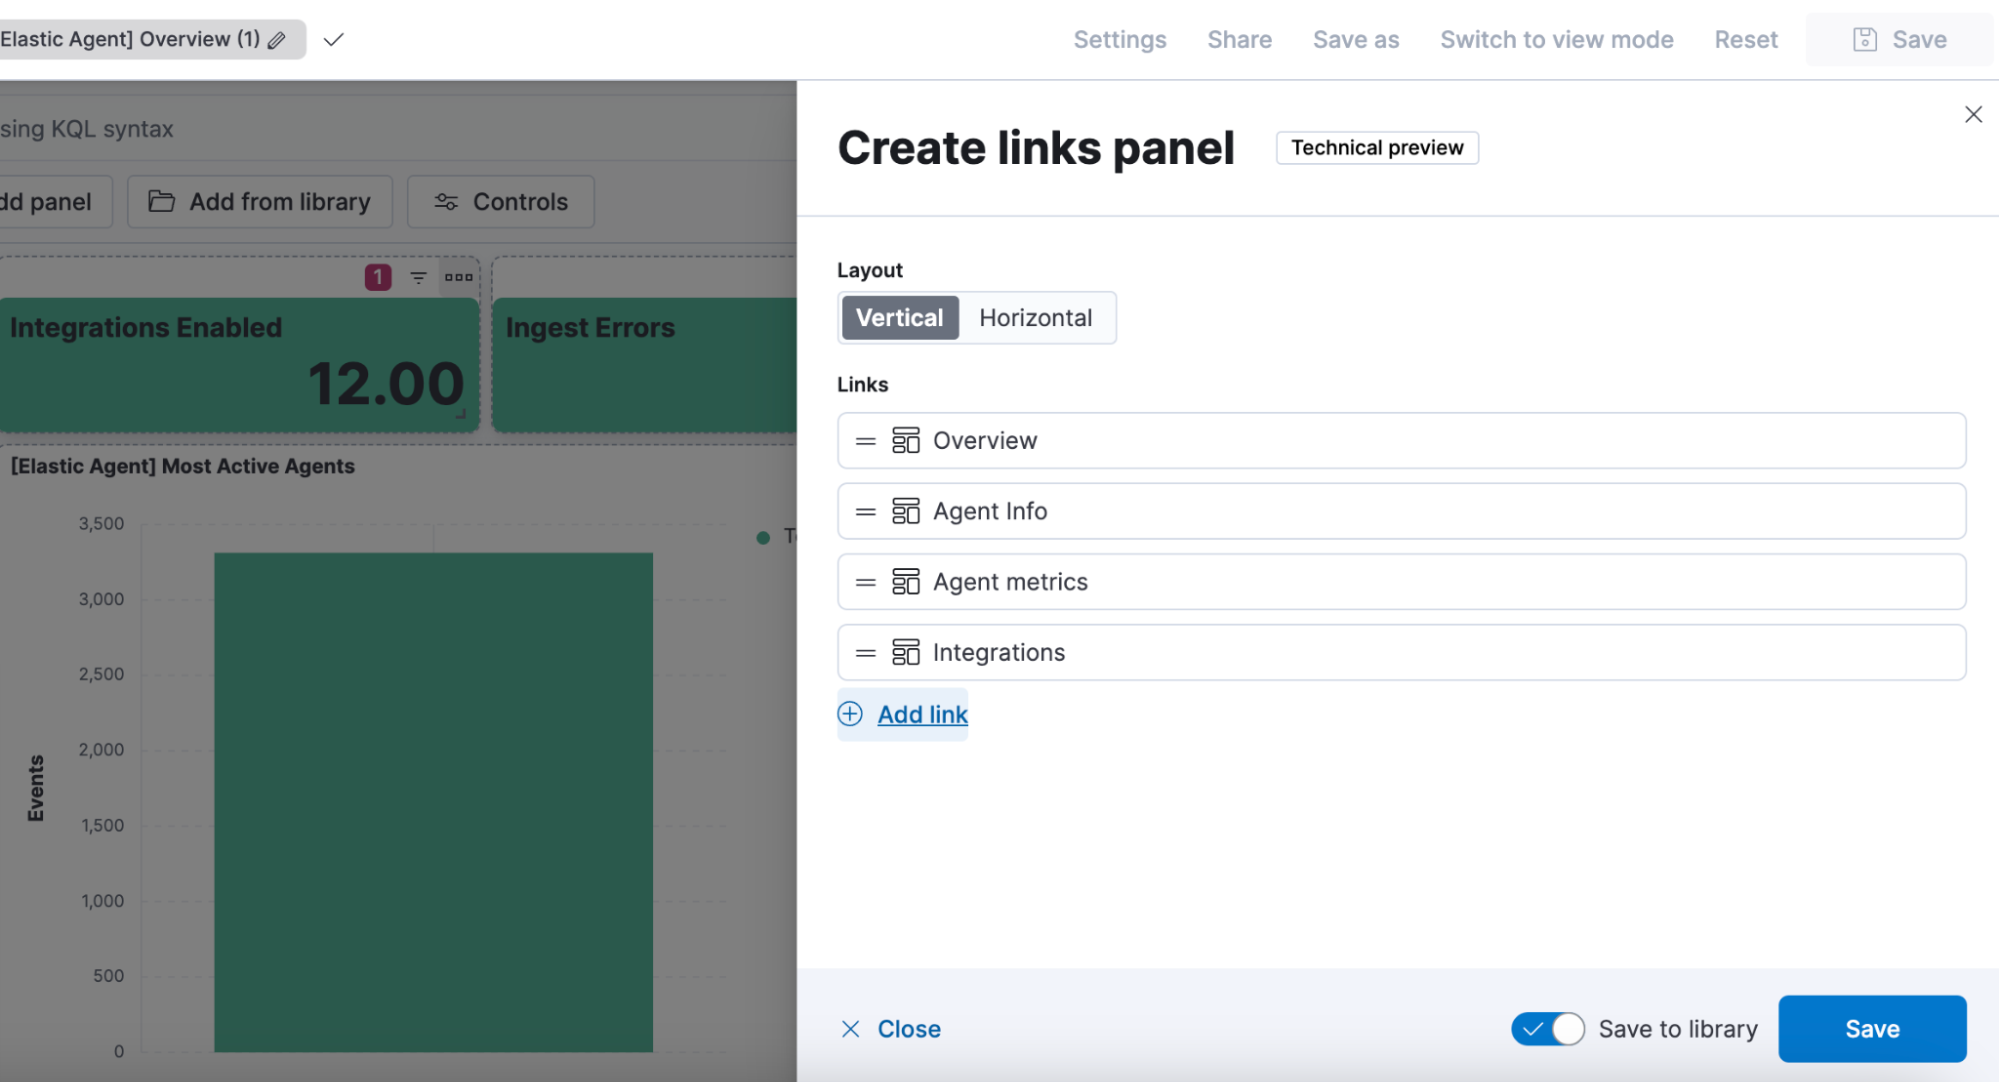
2. A flyout will be displayed where you can decide whether you want your links to be listed vertically or horizontally. We are selecting vertical for this example (a horizontal layout example is provided in the first gif in this post). Then click on the Add link button.
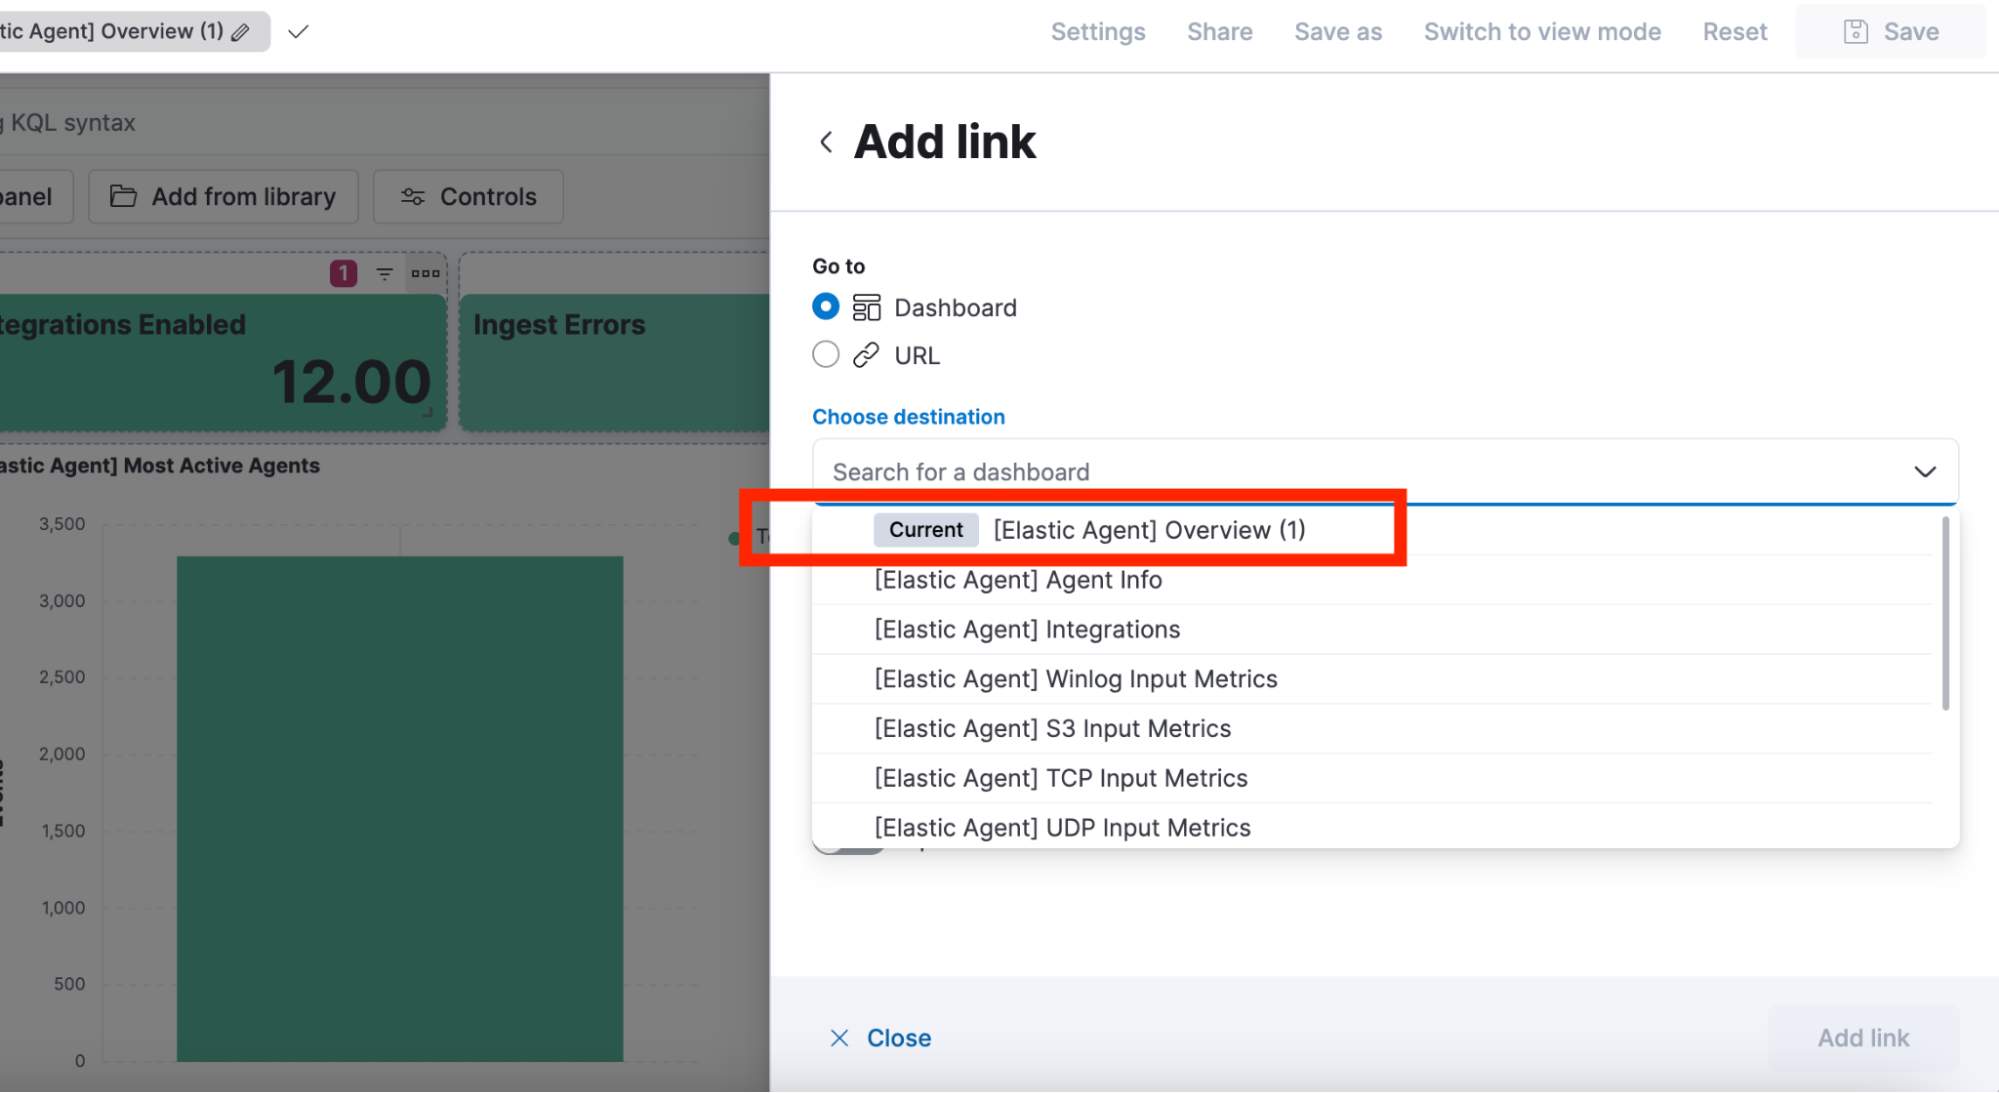
3. You can select to add a link to dashboards or to any other URLs. Select the dashboard labeled as Current to add a link to the open dashboard.
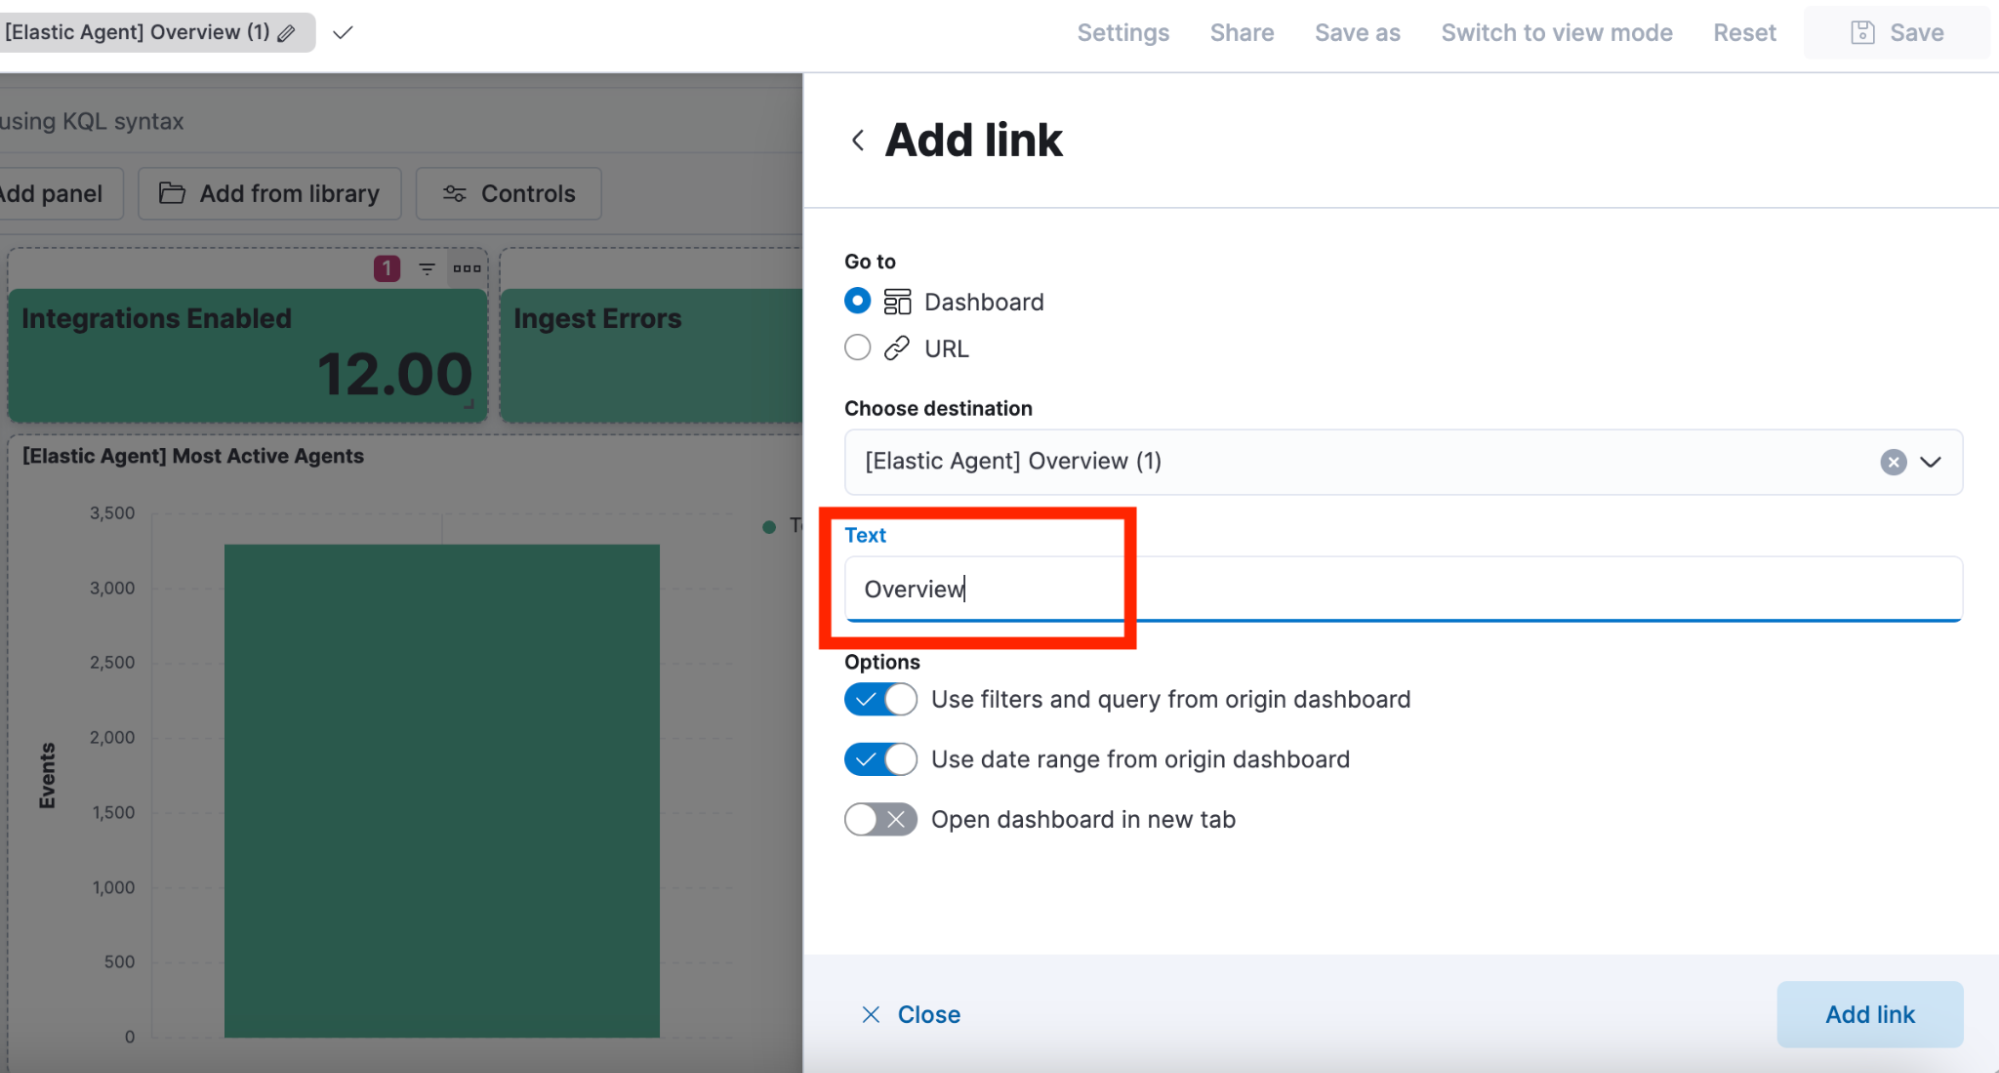
4. Add any custom text to display in your panel if you don’t want to use the original dashboard name and click Add link.
5. Keep doing the same for all the dashboards. Rearrange them by dragging and dropping them in this list.
6. Before clicking Save, you will realize there is a Save to library toggle that is on by default. This will allow you to reuse this panel in other dashboards later on. Since we need to add the same panel to our four dashboards, it will be faster and easier to manage if we reuse the same panel rather than creating multiple different panels. That way any edits to the panel will be automatically reflected in all dashboards. However, if you don’t need this, you can disable this option by turning off the toggle. You will always be able to make the decision later by using the save to library option from the panel menu.

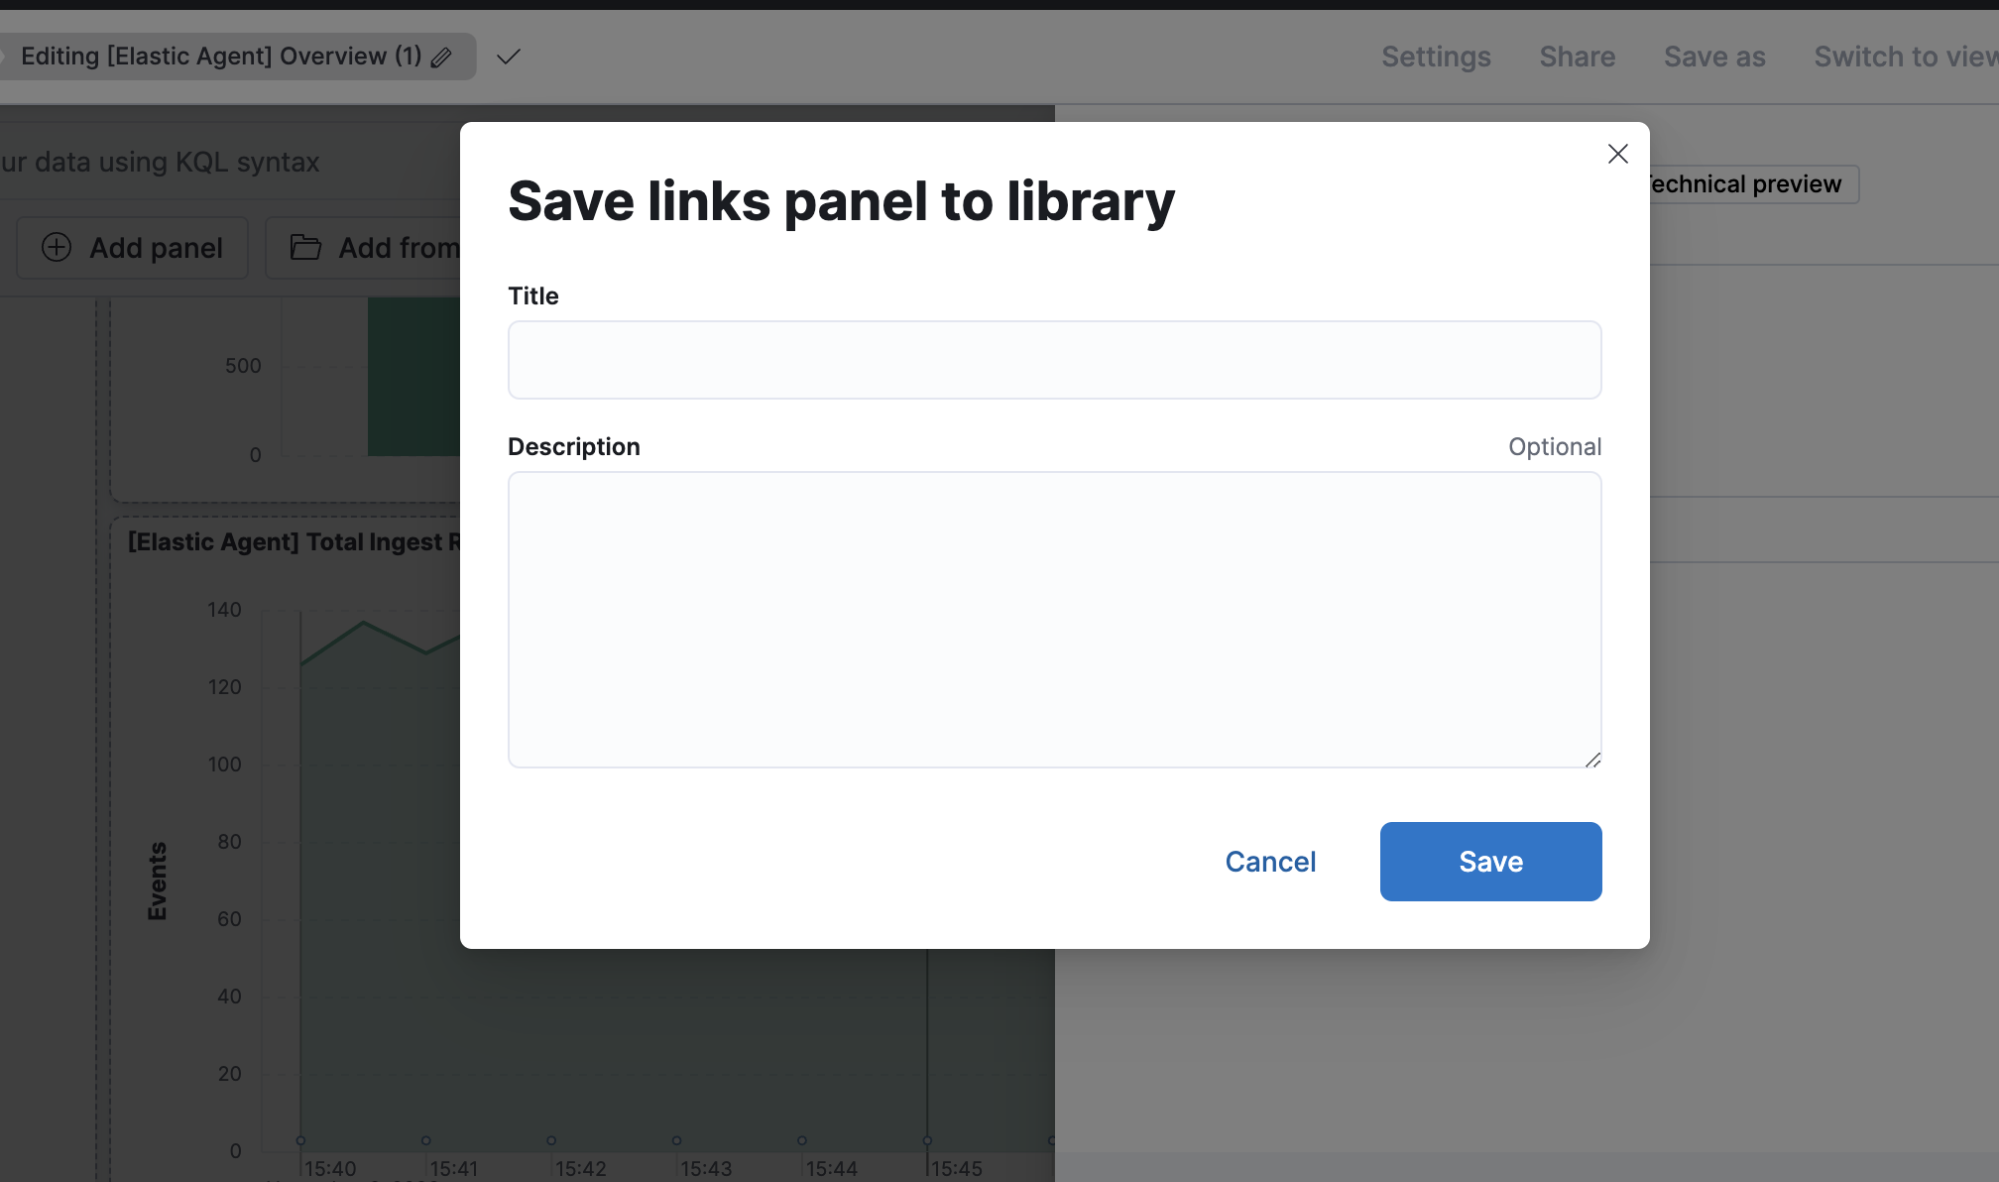
7. After clicking Save, the following window will be displayed asking you to set a name for your Links panel and save it to the library.
8. You can now see your Links panel in the dashboard where you can resize it and move it around. The panel title set in the previous step is displayed by default, but you can hide it by clicking on it and turning off the Show title toggle.
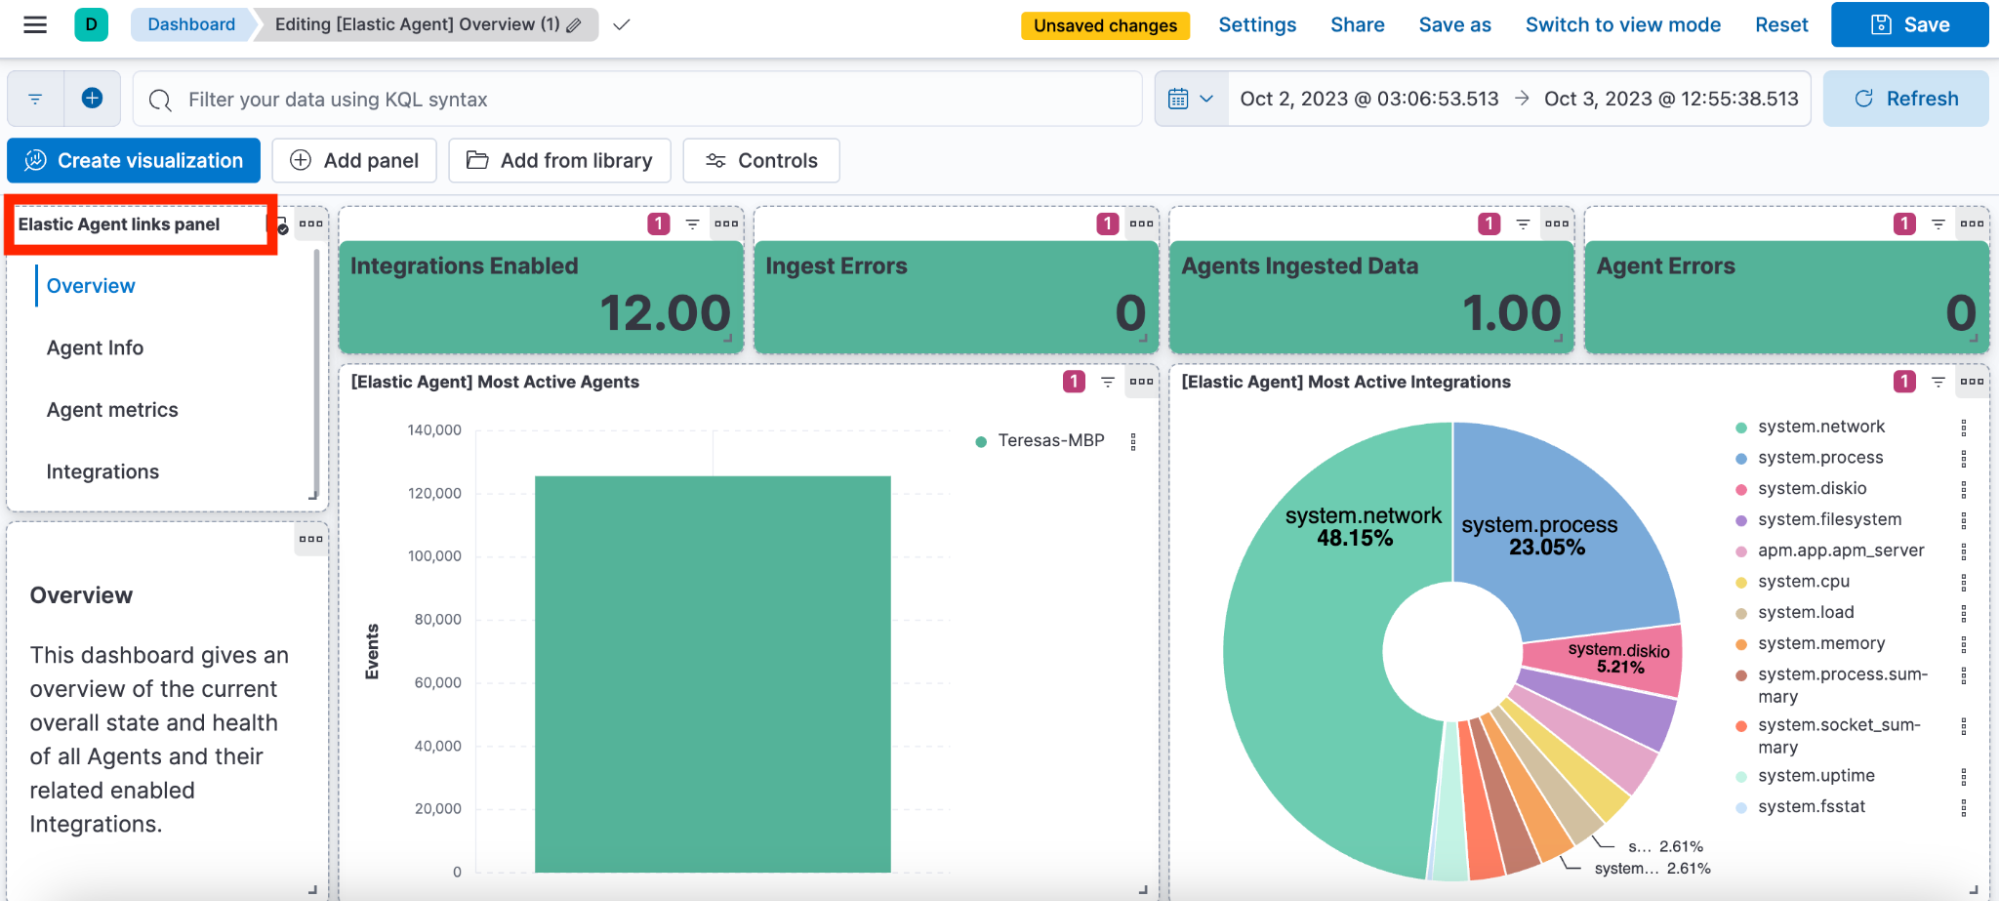

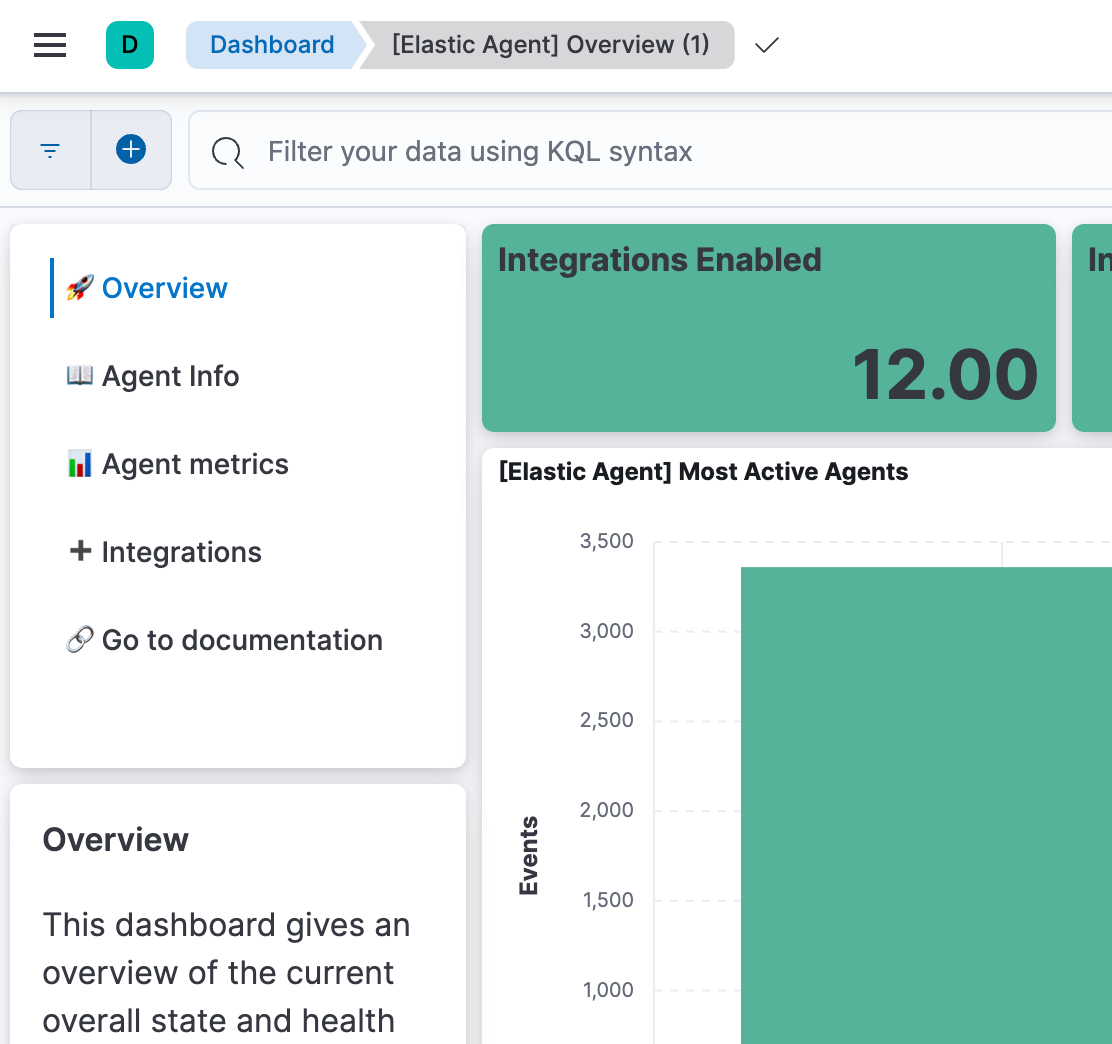
9. We now have our Links panel in the dashboard!
Next, we need to add this Links panel to the rest of the dashboards. Since we added the Links panel to the library (see steps 6 and 7), you will be able to search for it and simply add it to the other dashboards.
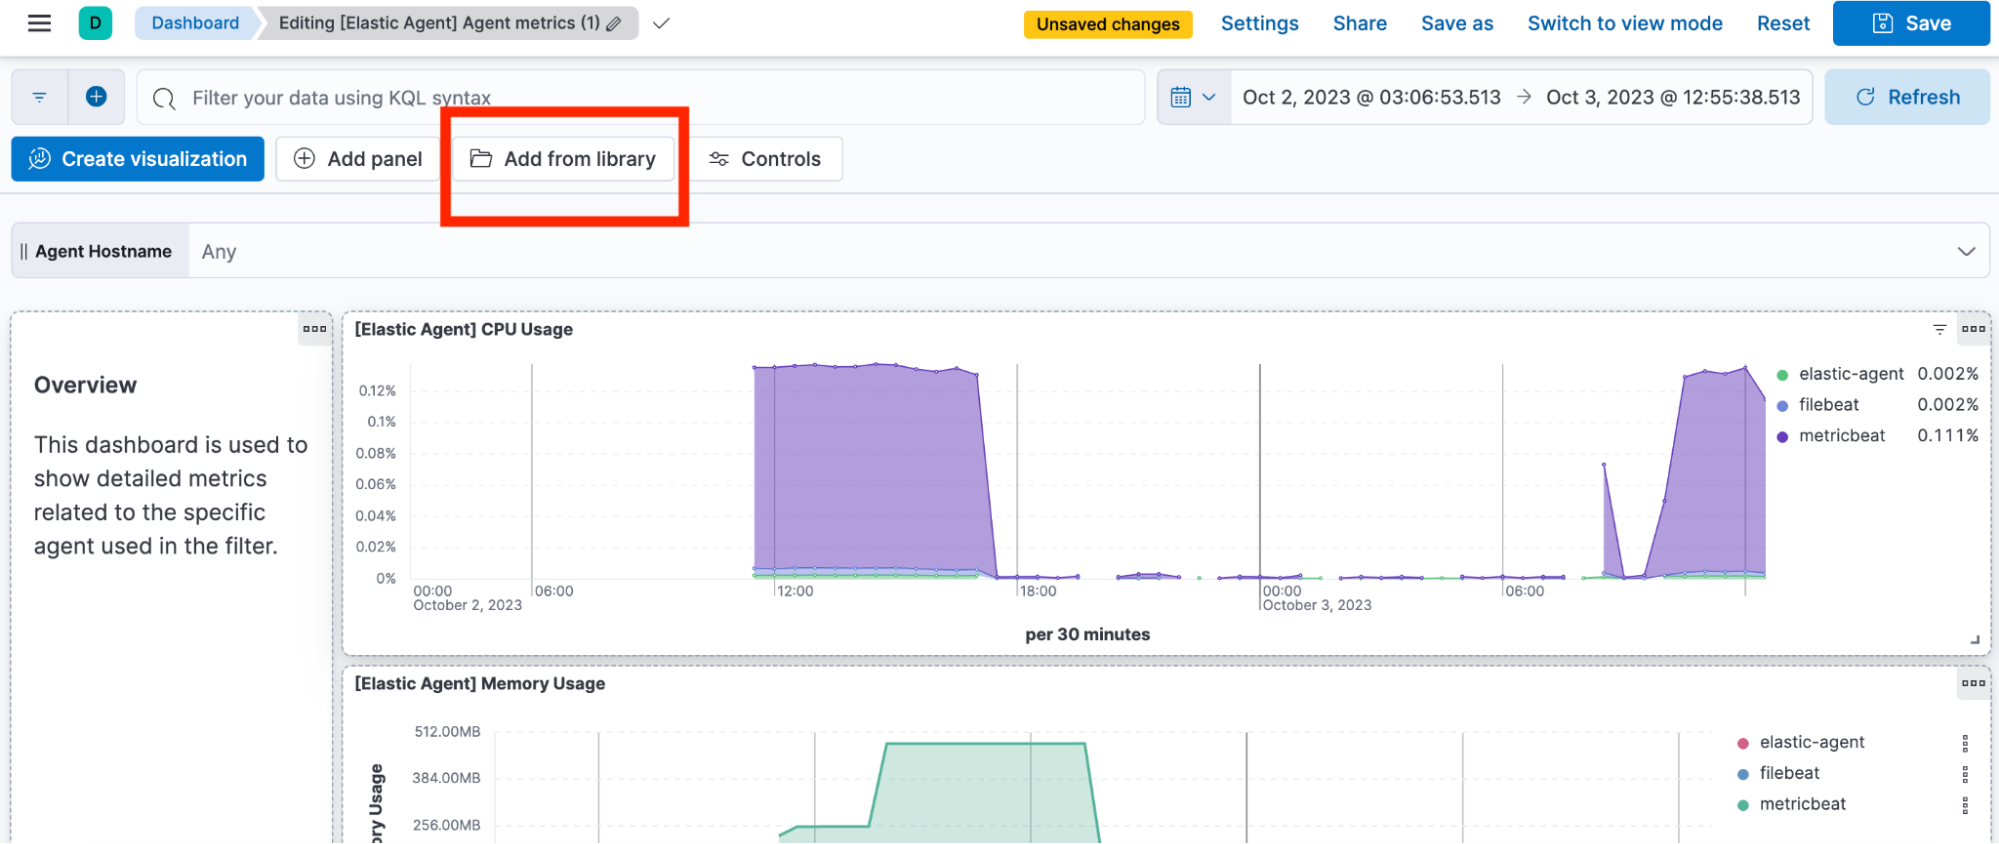
10. Navigate to one of the other dashboards where you want to add the Links panel and click on the Add from library button.
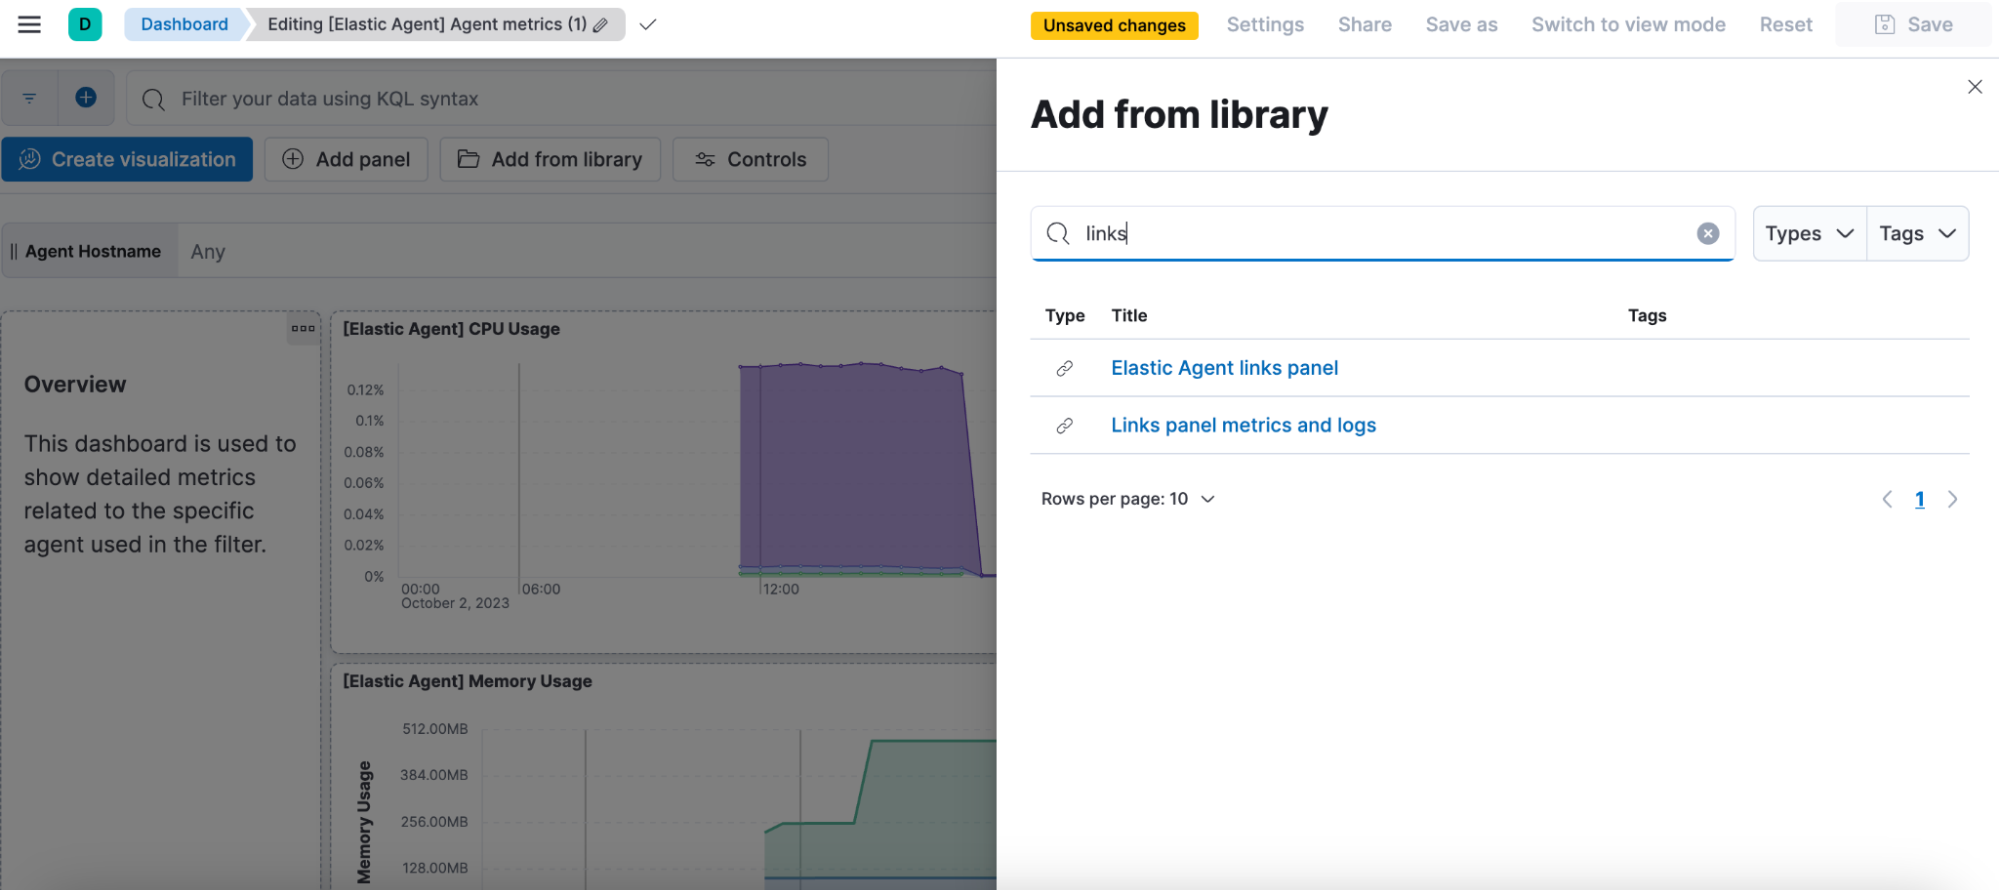
11. Search for the Links panel name and click on it — it will automatically be added to the dashboard with the same width and height as the one you set in the previous dashboard.
12. Repeat the same with the other dashboards.
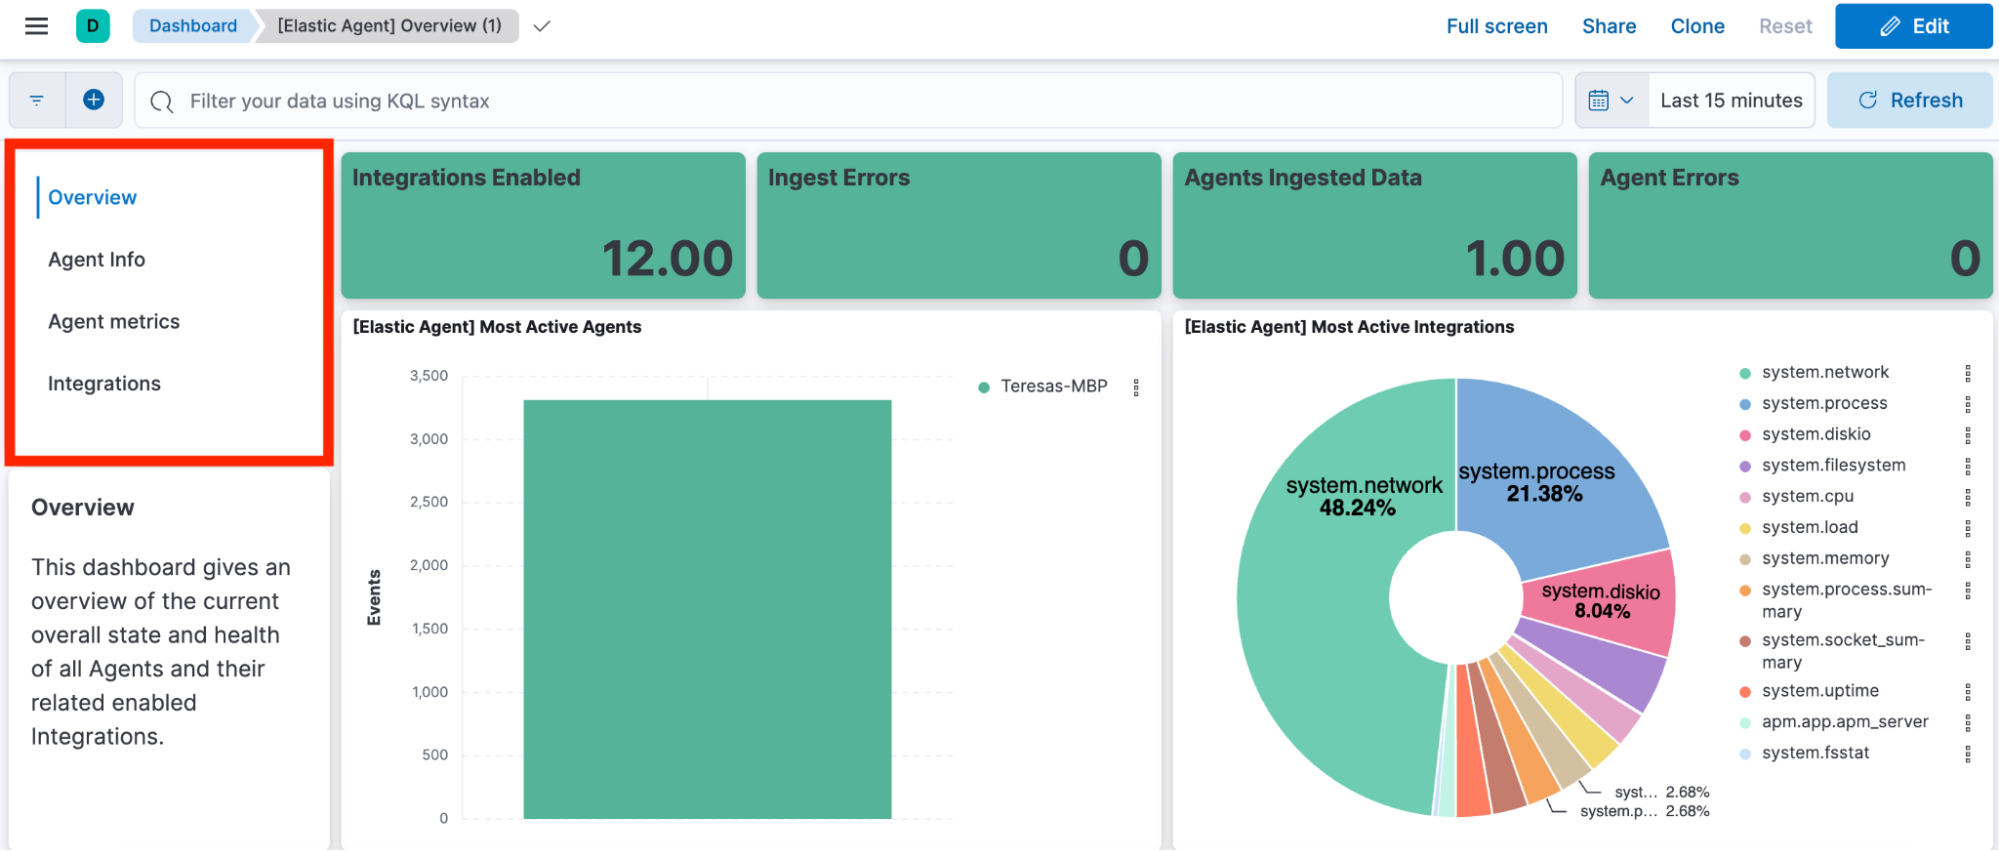
When you are done with the four dashboards, you will be able to navigate from one dashboard to the other and all your filters, queries, and controls selections will be carried over.
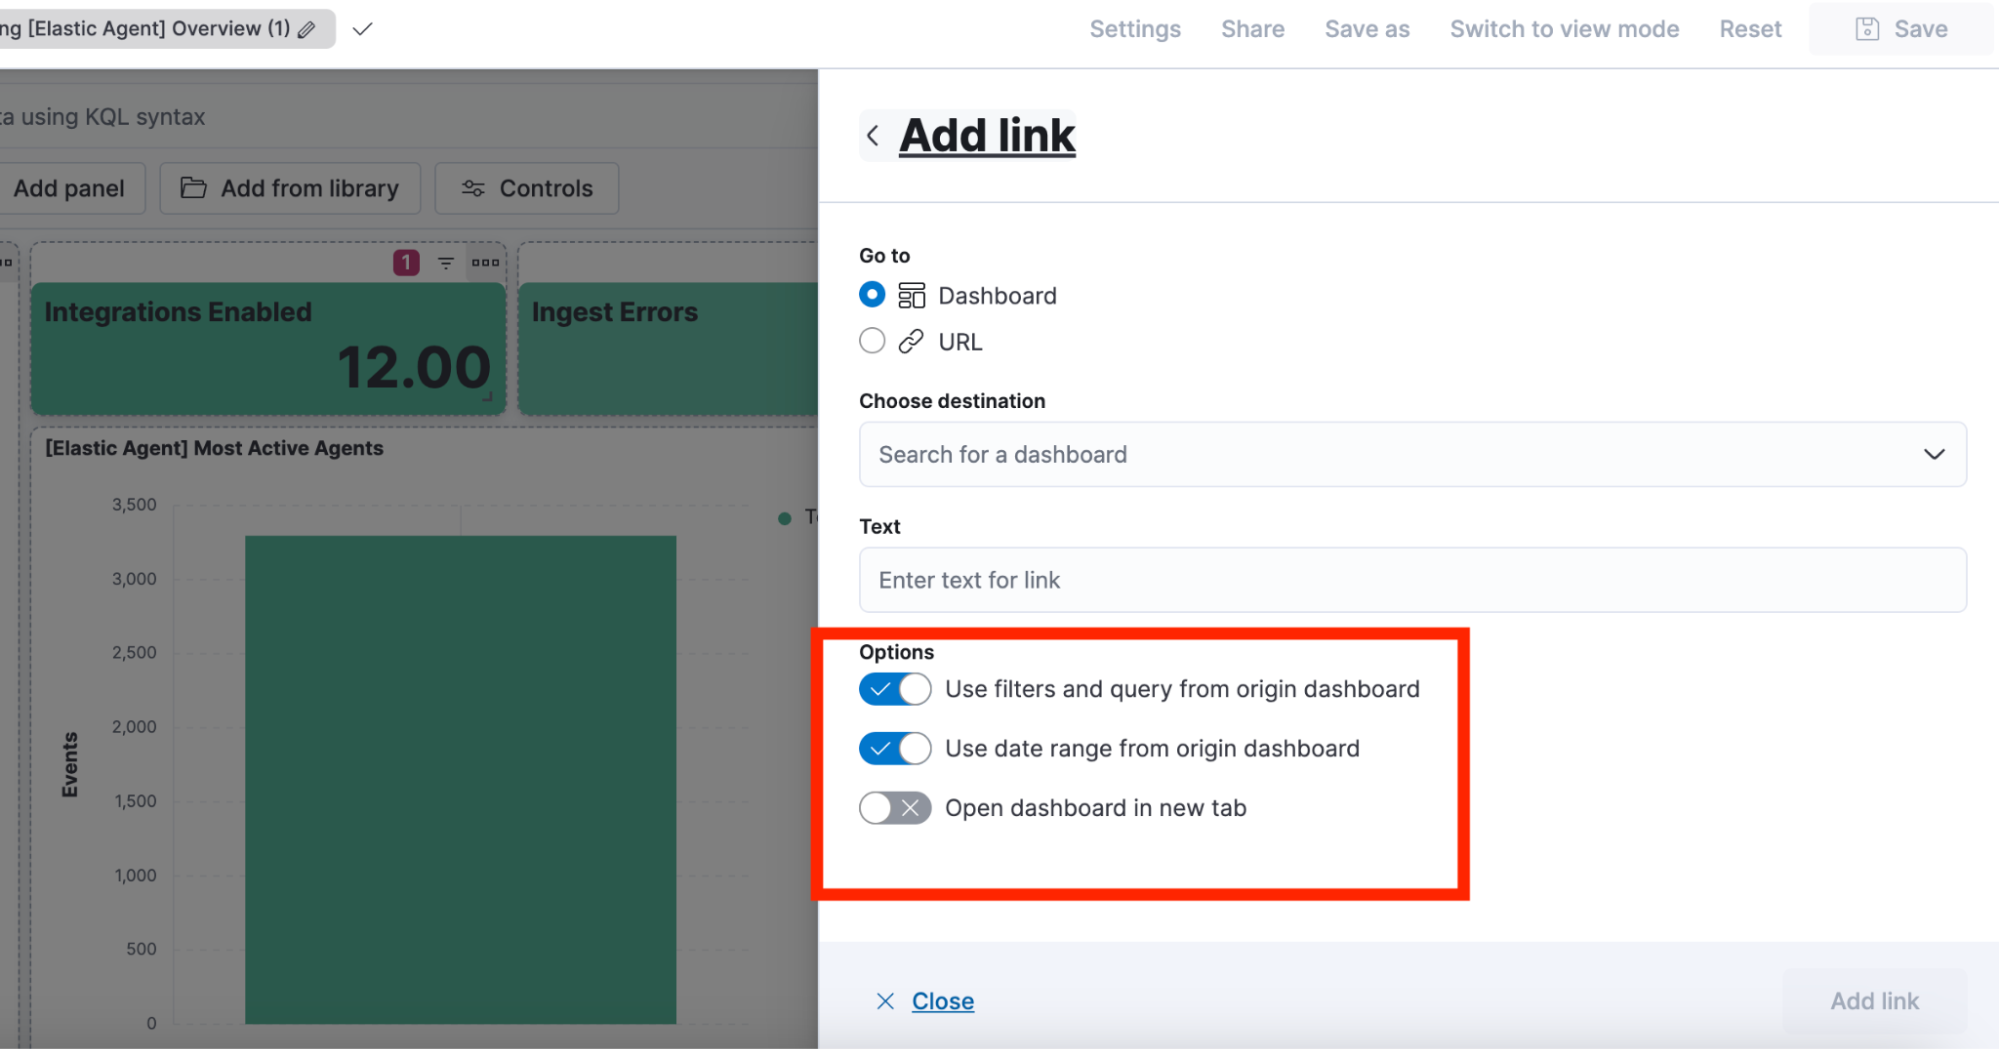
If you don’t want to carry over your context, you can configure it when adding the links (step 4) by switching off the options highlighted in the image below. You can also decide to open the links in a new tab (usually helpful for external URLs).
Moreover, another cool feature that you can configure when adding the text for your Links (step 4) is emojis to differentiate external links versus dashboards or simply to make them more engaging and beautiful.
Try the Links panel today
The new Links panel will allow you to better organize your dashboards while providing a seamless navigation experience. Ready to get started? Try the new Links panel now from your Elastic Cloud account, or read our documentation to learn more.
Share
- Share on Twitter
Share on Twitter
- Share on LinkedIn
Share on LinkedIn
- Share on Facebook
Share on Facebook
- Share by Email
Share by Email
- Print this page
Print