How to set up OpenID Connect on Elastic Cloud with Azure, Google, or Okta
OpenID Connect (OIDC) is an authentication layer based on OAuth 2.0 protocol that provides a way to identify and authenticate users via an authorization server. OAuth 2.0 authorization servers are managed by identity providers. In the domain associated with OIDC, they are also called OpenID Connect Providers (OPs).
OIDC allows users to connect to web applications in a simplistic single sign-on (SSO) manner thanks to the identity provider. OIDC leverages JSON web tokens (JWTs) to relay the identity of authenticated users between an identity provider and a service provider (in our case Elastic Cloud). This means no additional account or password creation on the service platform is needed.
While documentation around how to secure your clusters with OIDC already exists, this blog provides more advanced guidance on how to implement OIDC with several OPs in a step-by-step walkthrough from the OAuth client credentials generation to the realm configuration for Elasticsearch and Kibana. Use the below links to jump directly to your preferred OP:
Azure
OAuth client ID setup
Create a new application
Sign into the Azure Portal and go to Azure Active Directory. From there, register a new application via App registrations > New registration.
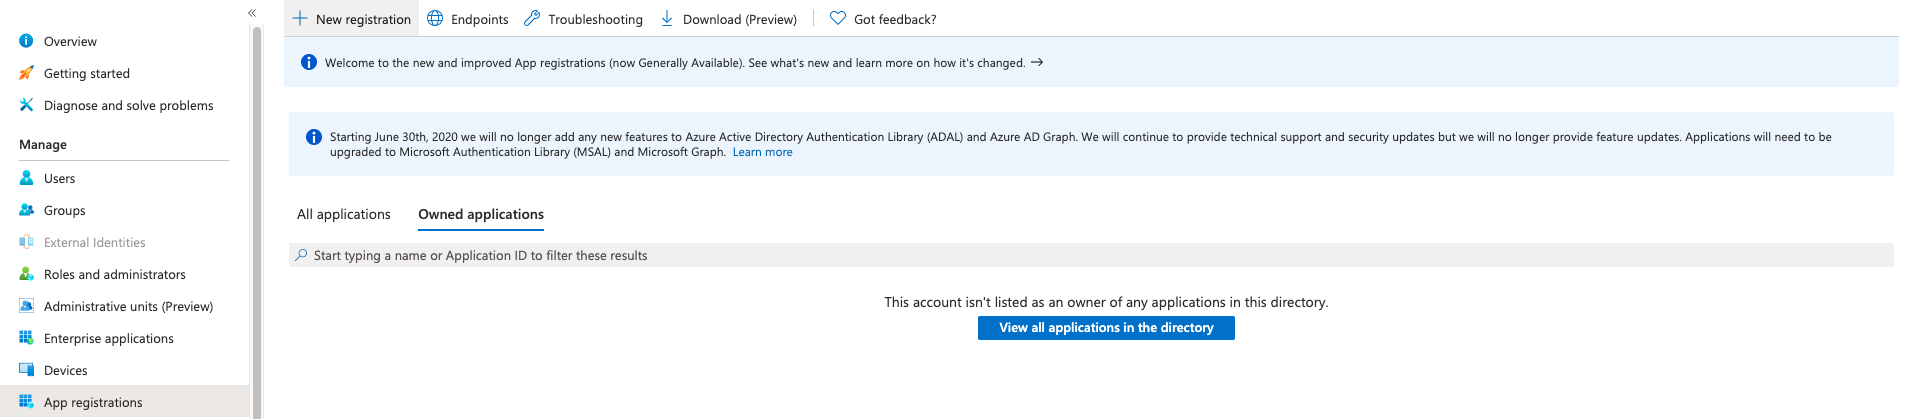
- Enter a Name for your application (e.g., ec-oauth2)
- Select a Supported Account Type according to your preferences
- The Redirect URI should be defined as: <KIBANA_ENDPOINT_URL>/api/security/v1/oidc
| Note: You can retrieve your <KIBANA_ENDPOINT_URL> from the Elasticsearch Service Console by clicking on the Kibana Copy endpoint in the details of your deployment. |
- Click Register
- You should see your Application (client) ID in the app details
Create a client id / secret
From the application you just created, go to Certificates & secrets and create a new secret under Client secrets > New client secret.
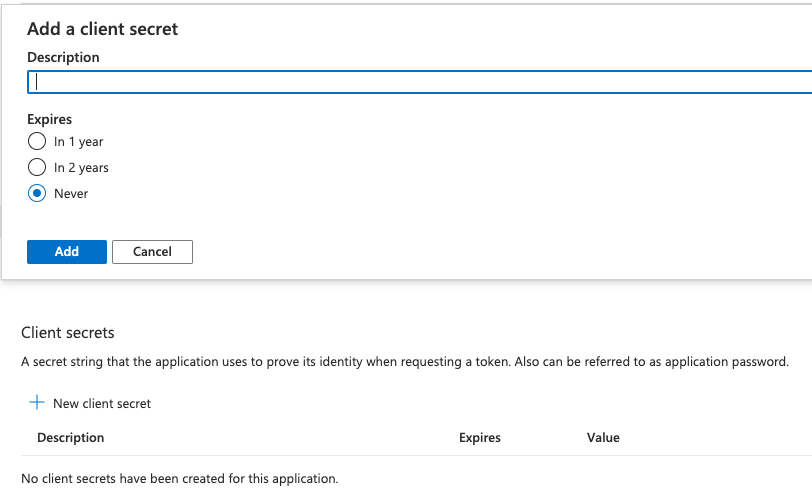
- Choose a Description (e.g., Kibana)
- Select the desired expiration for the secret
- Click Add and copy the value of your new created Client Secret for later use
Add your client secret to the Elasticsearch keystore
Steps to add a secret value to the keystore are described in our Secure your Settings - Add secret values documentation.
- Define Setting name as: xpack.security.authc.realms.oidc.oidc1.rp.client_secret
| Note: For OIDC, client secret setting name in keystore should be of the form: xpack.security.authc.realms.oidc.<oidc-realm-name>.rp.client_secret |
- For Type, choose Single string
- Paste your Client Secret into Secret
- Click Save
Configure Elasticsearch (with the OIDC realm)
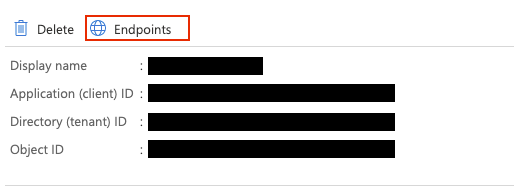
To learn more about the available endpoints provided by Microsoft Azure, please refer to the Endpoints details in the application you configured.
In order to configure OIDC, please:
- Log in to to the Elasticsearch Service Console
- Update your Elasticsearch user settings with the following configuration:
xpack:
  security:
    authc:
      realms:
        oidc:
          oidc1:
            order: 2
            rp.client_id: "<Application (client) ID>"
            rp.response_type: "code"
            rp.requested_scopes: ["openid", "email"]
            rp.redirect_uri: "<KIBANA_ENDPOINT_URL>/api/security/oidc/callback"
            op.issuer: "https://login.microsoftonline.com/<Directory (tenant) ID>/v2.0"
            op.authorization_endpoint: "https://login.microsoftonline.com/<Directory (tenant) ID>/oauth2/v2.0/authorize"
            op.token_endpoint: "https://login.microsoftonline.com/<Directory (tenant) ID>/oauth2/v2.0/token"
            op.userinfo_endpoint: "https://graph.microsoft.com/oidc/userinfo"
            op.endsession_endpoint: "https://login.microsoftonline.com/<Directory (tenant) ID>/oauth2/v2.0/logout"
            rp.post_logout_redirect_uri: "<KIBANA_ENDPOINT_URL>/logged_out"
            op.jwkset_path: "https://login.microsoftonline.com/<Directory (tenant) ID>/discovery/v2.0/keys"
            claims.principal: email
            claim_patterns.principal: "^([^@]+)@your_domain\\.tld$"
- <Application (client) ID>: Your Client ID (available in the application details on Azure)
- <Directory (tenant) ID>: Your Directory ID (available in the application details on Azure)
- <KIBANA_ENDPOINT_URL>: Kibana endpoint from the Elasticsearch Service Console
| Note: Don’t forget to add this configuration for each node type if you use several node types based on your deployment architecture (Dedicated Master / High IO and/or High Storage) in the User Settings. |
Create a role mapping
The following role mapping for OIDC restricts access to a specific user (firstname.lastname) based on the claim_patterns.principal email address. This prevents other users on the same domain from having access to your deployment. You can remove the rule or adjust it at your convenience.
More details are available in our Configuring role mappings documentation.
POST /_xpack/security/role_mapping/oidc_kibana
{
    "enabled": true,
    "roles": [ "superuser" ],
    "rules" : {
      "all" : [
        {
          "field" : {
            "realm.name" : "oidc1"
          }
        },
        {
          "field" : {
            "username" : [
              "<firstname.lastname>"
            ]
          }
        }
      ]
    },
    "metadata": { "version": 1 }
}
If you use an email in the claim_patterns.principal, you won’t need to add the domain in the role_mapping (ex: firstname.lastname@your_domain.tld should be firstname.lastname).
Configure Kibana (with the OIDC realm)
Now, we need to configure Kibana in order to initiate the OpenID authentication.
- Log in to to the Elasticsearch Service Console
- Update your Kibana user settings with the following configuration:
xpack.security.authc.providers:
  oidc.oidc1:
    order: 0
    realm: oidc1
    description: "Log in with Azure"
  basic.basic1:
    order: 1
OAuth client ID setup
Create a project
First, we need to create a New Project from the Google Cloud console: https://console.cloud.google.com/projectcreate
Create a client id/secret
Then, you will need to create your OAuth client ID credentials from the GCP console under APIs & Services > Credentials
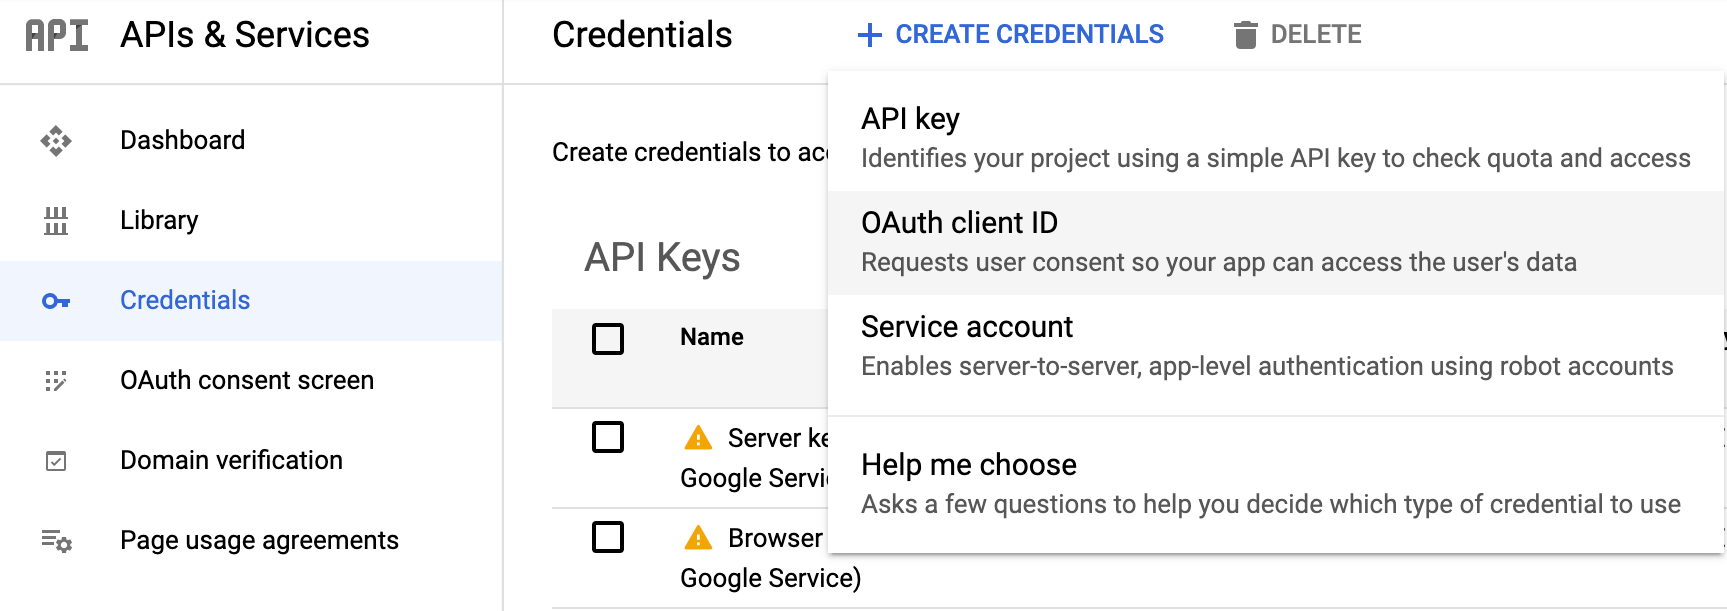
- For Application Type choose “Web application”
- Give a Name to your OAuth 2 client (e.g., ec-oauth2)
- Add a Authorized redirect URIs; this URI should be defined as: <KIBANA_ENDPOINT_URL>/api/security/v1/oidc
| Note: You can retrieve your <KIBANA_ENDPOINT_URL> from the Elasticsearch Service Console by clicking on the Kibana Copy endpoint in the details of your deployment. |
- Click on Create and copy Your Client ID and Your Client Secret for later
Add your client secret to the Elasticsearch keystore
Steps to add a secret value to the keystore are described in the Secure your Settings - Add secret values documentation.
- Define Setting name as: xpack.security.authc.realms.oidc.oidc1.rp.client_secret
| Note: For OIDC, client secret setting name in keystore should be of the form: xpack.security.authc.realms.oidc.<oidc-realm-name>.rp.client_secret |
- For Type, choose Single string
- Paste your Client Secret into Secret
- Click Save
Configure Elasticsearch (with the OIDC realm)
To learn more about the endpoints provided by Google, refer to the following OpenID configuration: https://accounts.google.com/.well-known/openid-configuration
In order to configure OIDC, please:
- Log in to to the Elasticsearch Service Console
- Update your Elasticsearch user settings with the following configuration:
xpack:
  security:
    authc:
      realms:
        oidc:
          oidc1:
            order: 2
            rp.client_id: "<YOUR_CLIENT_ID>"
            rp.response_type: "code"
            rp.requested_scopes: ["openid", "email"]
            rp.redirect_uri: "<KIBANA_ENDPOINT_URL>/api/security/oidc/callback"
            op.issuer: "https://accounts.google.com"
            op.authorization_endpoint: "https://accounts.google.com/o/oauth2/v2/auth"
            op.token_endpoint: "https://oauth2.googleapis.com/token"
            op.userinfo_endpoint: "https://openidconnect.googleapis.com/v1/userinfo"
            op.jwkset_path: "https://www.googleapis.com/oauth2/v3/certs"
            claims.principal: email
            claim_patterns.principal: "^([^@]+)@your_domain\\.tld$"
- <YOUR_CLIENT_ID>: Your Client ID
- <KIBANA_ENDPOINT_URL>: Kibana endpoint from the Elasticsearch Service Console
| Note: Don’t forget to add this configuration for each node type if you use several node types based on your deployment architecture (Dedicated Master / High IO and/or High Storage) in the User Settings. |
Create a role mapping
The following role mapping for OIDC restricts access to a specific user (firstname.lastname) based on the claim_patterns.principal email address. This prevents other users on the same domain from having access to your deployment. You can remove the rule or adjust it at your convenience.
More details are available in our Configuring role mappings documentation.
POST /_xpack/security/role_mapping/oidc_kibana
{
    "enabled": true,
    "roles": [ "superuser" ],
    "rules" : {
      "all" : [
        {
          "field" : {
            "realm.name" : "oidc1"
          }
        },
        {
          "field" : {
            "username" : [
              "<firstname.lastname>"
            ]
          }
        }
      ]
    },
    "metadata": { "version": 1 }
}
If you use an email in the claim_patterns.principal, you won’t need to add the domain in the role_mapping (ex: firstname.lastname@your_domain.tld should be firstname.lastname).
Configure Kibana (with the OIDC realm)
Now, we need to configure Kibana in order to initiate the OpenID authentication.
- Log in to to the Elasticsearch Service Console
- Update your Kibana user settings with the following configuration:
xpack.security.authc.providers:
  oidc.oidc1:
    order: 0
    realm: oidc1
    description: "Log in with Google"
  basic.basic1:
    order: 1
Okta
OAuth client ID setup
Create a new application
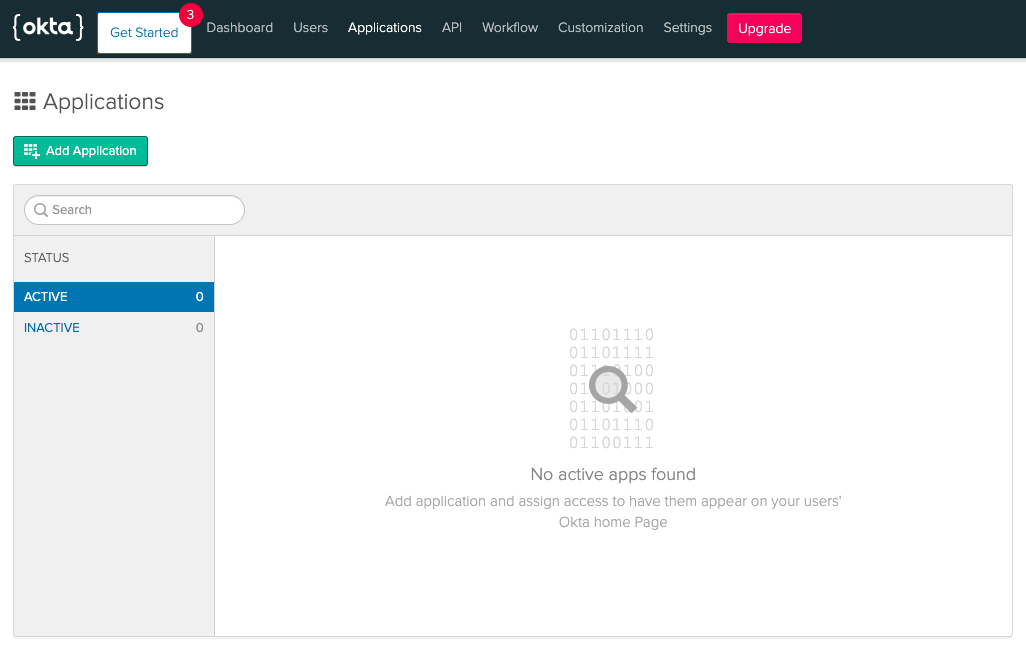
- Go to Applications > Add Application
- Platform
- Select Web and click Next
- Application settings
- Name: Give a name to your application (e.g., Kibana OIDC)
- Base URI: Specify your <KIBANA_ENDPOINT_URL>
- Login redirect URIs: It should be defined as <KIBANA_ENDPOINT_URL>/api/security/v1/oidc
- Logout redirect URIs: <KIBANA_ENDPOINT_URL>/logged_out
- Click Done and make notes of your Client ID and Client secret
| Note: You can retrieve your <KIBANA_ENDPOINT_URL> from the Elasticsearch Service Console by clicking on the Kibana Copy endpoint in the details of your deployment. |
Add your client secret to the Elasticsearch keystore
Steps to add a secret value to the keystore are described in the Secure your Settings - Add secret values documentation.
- Define Setting name as: xpack.security.authc.realms.oidc.oidc1.rp.client_secret
For OIDC, client secret setting name in keystore should be of the form:
xpack.security.authc.realms.oidc.<oidc-realm-name>.rp.client_secret
- For Type, choose Single string
- Paste your Client Secret into Secret
- Click Save
Configure Elasticsearch (with the OIDC realm)
To learn more about the endpoints provided by Okta, refer to the following OpenID configuration: https://{yourOktadomain}/.well-known/openid-configuration
In order to configure OIDC, please:
- Log in to to the Elasticsearch Service Console
- Update your Elasticsearch user settings with the following configuration:
xpack:
  security:
    authc:
      realms:
        oidc:
          oidc1:
            order: 2
            rp.client_id: "<YOUR_CLIENT_ID>"
            rp.response_type: "code"
            rp.requested_scopes: ["openid", "email"]
            rp.redirect_uri: "<KIBANA_ENDPOINT_URL>/api/security/oidc/callback"
            op.issuer: "<YOUR_OKTA_DOMAIN>"
            op.authorization_endpoint: "<YOUR_OKTA_DOMAIN>/oauth2/v1/authorize"
            op.token_endpoint: "<YOUR_OKTA_DOMAIN>/oauth2/v1/token"
            op.userinfo_endpoint: "<YOUR_OKTA_DOMAIN>/oauth2/v1/userinfo"
            op.endsession_endpoint: "<YOUR_OKTA_DOMAIN>/oauth2/v1/logout"
            op.jwkset_path: "<YOUR_OKTA_DOMAIN>/oauth2/v1/keys"
            claims.principal: email
            claim_patterns.principal: "^([^@]+)@elastic\\.co$"
- <YOUR_CLIENT_ID>: Your Client ID
- <KIBANA_ENDPOINT_URL>: Kibana endpoint from the Elasticsearch Service Console
- <YOUR_OKTA_DOMAIN>: Your Okta domain
| Note: Don’t forget to add this configuration for each node type if you use several node types based on your deployment architecture (Dedicated Master / High IO and/or High Storage) in the User Settings. |
Create a role mapping
The following role mapping for OIDC restricts access to a specific user (firstname.lastname) based on the claim_patterns.principal email address. This prevents other users on the same domain from having access to your deployment. You can remove the rule or adjust it at your convenience.
More details are available in our Configuring role mappings documentation.
POST /_xpack/security/role_mapping/oidc_kibana
{
    "enabled": true,
    "roles": [ "superuser" ],
    "rules" : {
      "all" : [
        {
          "field" : {
            "realm.name" : "oidc1"
          }
        },
        {
          "field" : {
            "username" : [
              "<firstname.lastname>"
            ]
          }
        }
      ]
    },
    "metadata": { "version": 1 }
}
If you use an email in the claim_patterns.principal, you won’t need to add the domain in the role_mapping (ex: firstname.lastname@your_domain.tld should be firstname.lastname).
Configure Kibana (with the OIDC realm)
Now, we need to configure Kibana in order to initiate the OpenID authentication.
- Log in to to the Elasticsearch Service Console
- Update your Kibana user settings with the following configuration:
xpack.security.authc.providers:
  oidc.oidc1:
    order: 0
    realm: oidc1
    description: "Log in with Okta"
  basic.basic1:
    order: 1
Wrapping up
We covered how to authenticate users via Kibana using OpenID Connect and different providers (Azure, Google, and Okta). If you are looking for other authentication methods, Elasticsearch Service also supports SAML and Kerberos. Please note that OpenID Connect support is only available for Platinum and Enterprise subscriptions.
New to Elasticsearch Service? Sign up for a free 14-day trial to try it out.
OpenID Connect references
- OpenID Foundation: https://openid.net/connect/
- Elasticsearch Service: https://www.elastic.co/guide/en/cloud/current/ec-secure-clusters-oidc.html
- Azure: https://docs.microsoft.com/en-us/azure/active-directory/develop/active-directory-v2-protocols
- Google: https://developers.google.com/identity/protocols/oauth2/openid-connect
- Okta: https://developer.okta.com/docs/guides/implement-oauth-for-okta/create-oauth-app/