Getting started with Elastic App Search on Elastic Cloud
With Elastic App Search, you can easily add rich, powerful search to your website, applications, or mobile apps. And now you can deploy directly from the Elastic Cloud.
App Search is built on top of Elasticsearch, meaning that it’s highly scalable and fast. It comes out of the box with pre-tuned relevance, but gives you plenty of user-friendly options for fine-tuning results to customize the search experience. Detailed search analytics let you know what your users are looking for (and whether they’re finding it or not). And all of this is packaged up with useful APIs and made simple to get started.
If you’re a new App Search user running a trial or getting your first deployment off the ground, this blog post is a handy high-level guide to some of the first steps and resources to help your search project get up and running.
Getting started with App Search
In seven easy steps, you can be up, running, and searching. You’ll log into Elastic Cloud, create your App Search deployment, index your content, and then start searching and tuning.
1 – Log into the Elastic Cloud
Begin by logging into your Elastic Cloud account. Not already an Elastic Cloud user? No problem. Creating an account is simple, and you can get started with a free 14-day trial. Just click Sign up on the Cloud page and you can start your trial with just an email address — no credit card required.

2 – Create an App Search deployment
Once on your cloud dashboard simply open the Create Deployment page and be sure to choose the App Search template. You can get started quickly with the default options by clicking Create Deployment.
But, if you know what size of deployments you need, feel free to click Customize Deployment on the Cloud deployment creation page and fine-tune your deployment options there first. And remember, because App Search runs on our Elastic Cloud, you can choose to deploy in any region or on any platform Cloud runs on. And there’s no need to guess what you’ll need in the future: App Search is completely scalable, so you can easily add resources as you grow with just a few clicks.
Don’t forget to save the Elastic username and password — that’s what you’ll use to log in to the App Search dashboard to start.
Getting stuck and need some help? We’ve got some handy documentation to help.
3 – Log into App Search and create an engine
Once your Elastic Cloud deployment has been created, you’re ready to log into App Search. Under App Search on your Elastic Cloud dashboard, click Launch. Use your Elastic username and password.

Next you’ll need to create an engine. An engine in App Search is analogous to an index in Elasticsearch. It serves as a container for the documents you index, dataset-level configurations such as weights and boosts, and the search analytics that App Search automatically collects for you as users perform searches.
To create an engine, click the “Create an Engine” button from your account home and enter a name for your new engine.
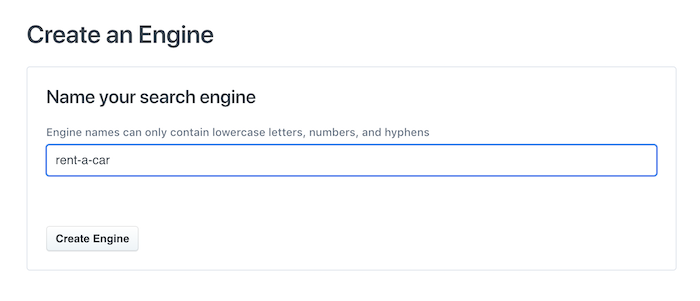
Name your engine wisely — it will be used as the identifying key when making API calls or issuing search queries.
See the documentation for more information on engines.
4 – Locate your API URL and credentials
Now that you’ve created your first engine, you should locate the various keys required to issue API requests, which you can find on your App Search or Elastic Cloud dashboard. These API requests will allow you to index documents and ultimately perform searches.
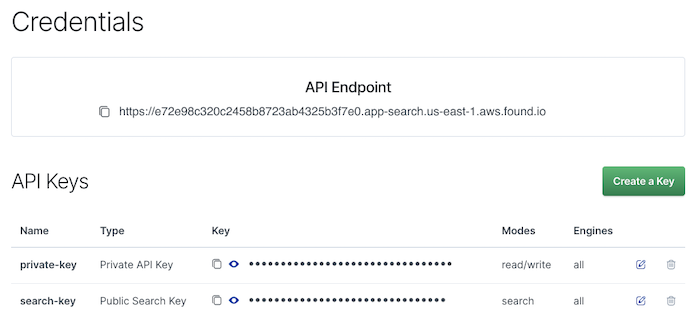
For a more complete authentication overview, refer to the Understanding API Authentication guide.
5 – Start indexing content
Now that you’ve got your API URL and credentials, you can start adding documents and content to your new App Search engine using our Documents API. And to save you up-front effort, our schemaless ingestion means that you don’t need to define a schema prior to indexing your first documents. Schema will be dynamically generated based on the data and fields provided via the Documents API.
Using the API Client of your choice, or simply using cURL to submit API requests, you can start indexing a small number of documents as an array of JSON objects, including your API key as the HTTP authorization request header.
You may confirm that the documents were properly indexed by visiting the Documents area of the App Search dashboard. If you encounter any issue while indexing documents, you may also refer to the API Logs area of the dashboard for more information on request failures.

Our Indexing Documents guide is a helpful asset for you to better understand how document ingestion works, including additional document operation and schema updates.
6 – Start searching content
And now, the moment of truth: it’s time to search for content in your engine. There are a number of ways to do this, but the quickest and easiest way to test your queries and see what results they’re returning is with the — you guessed it — Query Tester. You’ll find the Query Tester right there in your App Search Dashboard.
Simply click Query Tester on the left panel, and start typing in terms to see what they find.
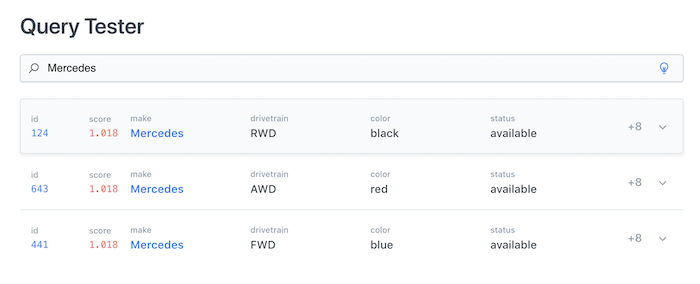
You can learn more about the Query Tester as well as other basic search features and query customizations in our Searching Guide.
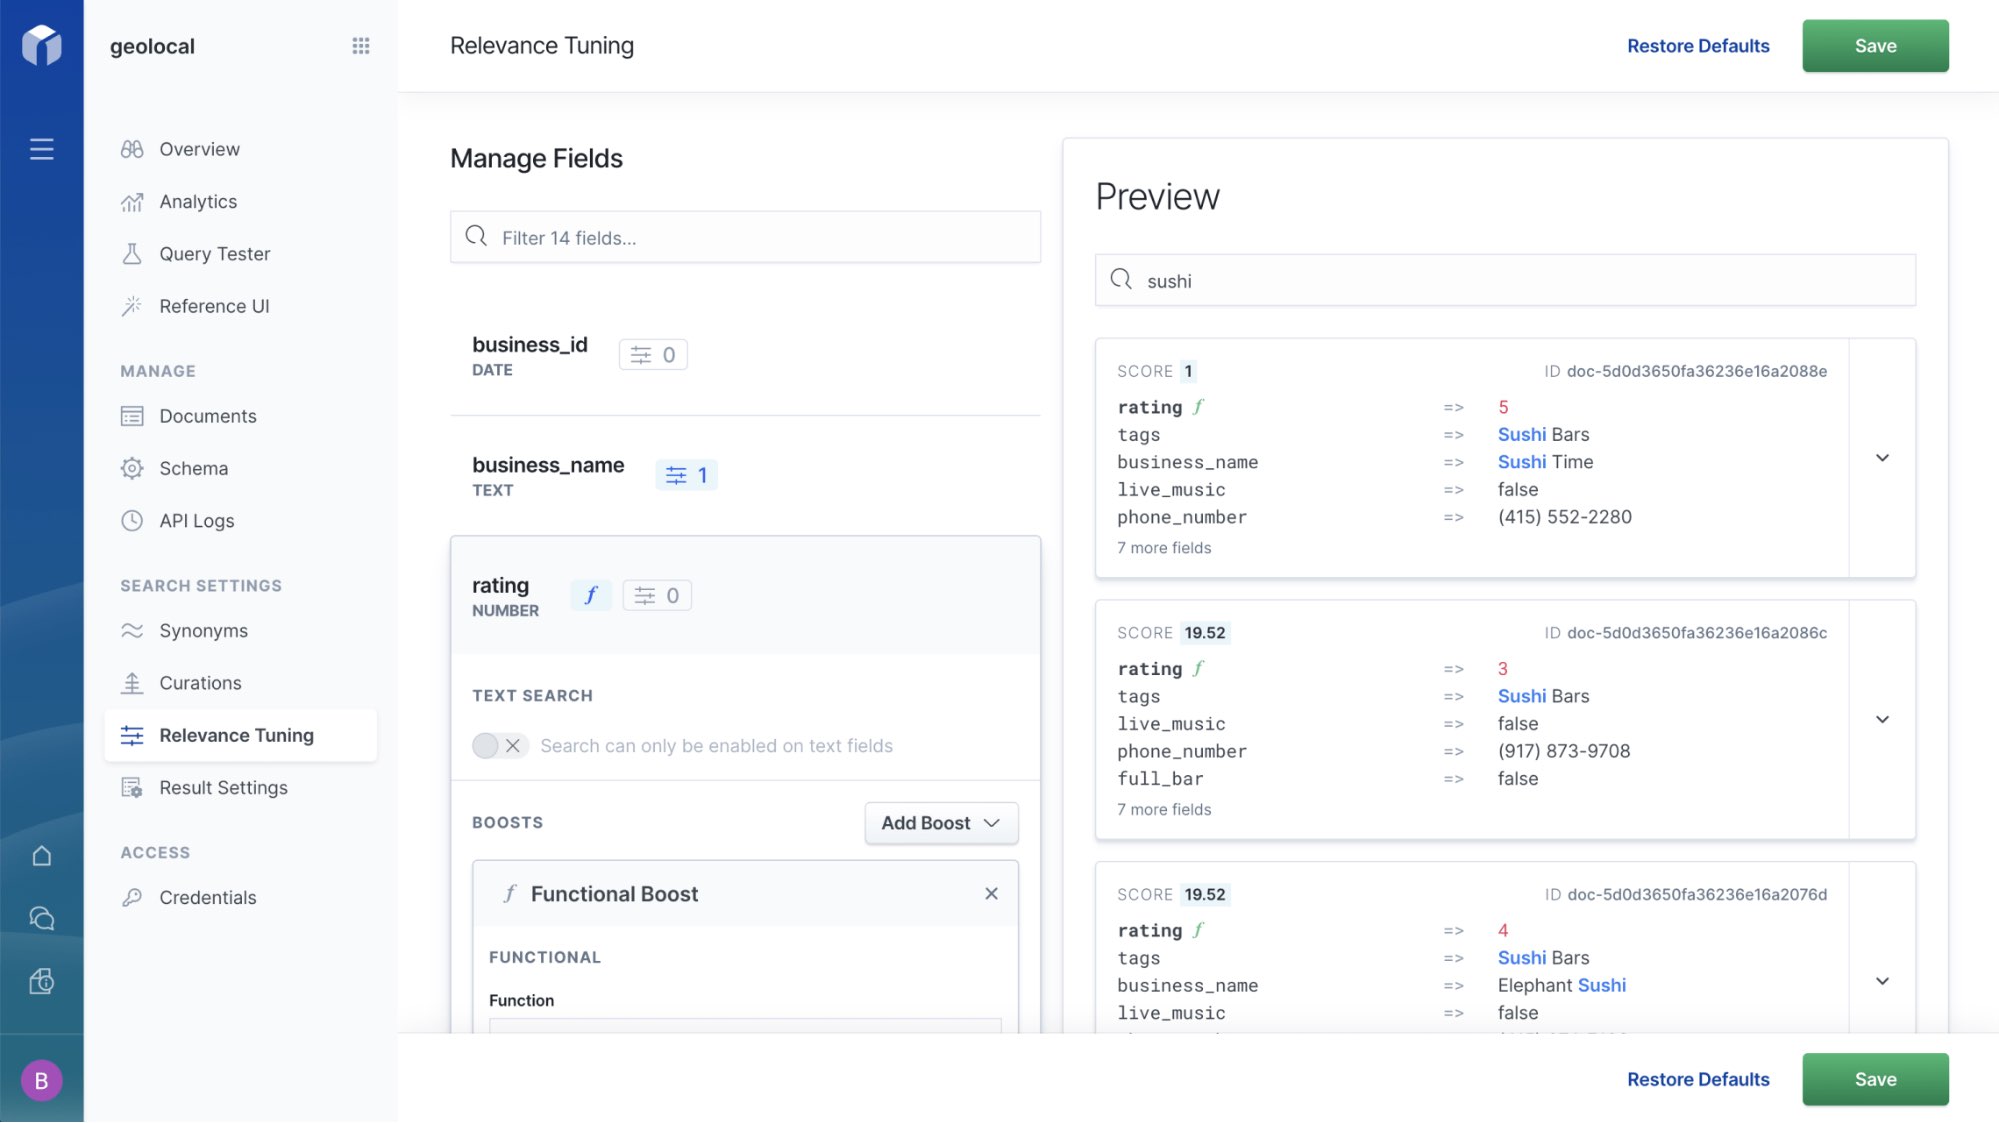
Once you start searching, you may find that you want to tune your results by boosting the ranking of some, suppressing others, or even pinning one to the top to better promote it. You can do all of this — and more — with Relevance Tuning, which you can also find right there on your App Search dashboard.
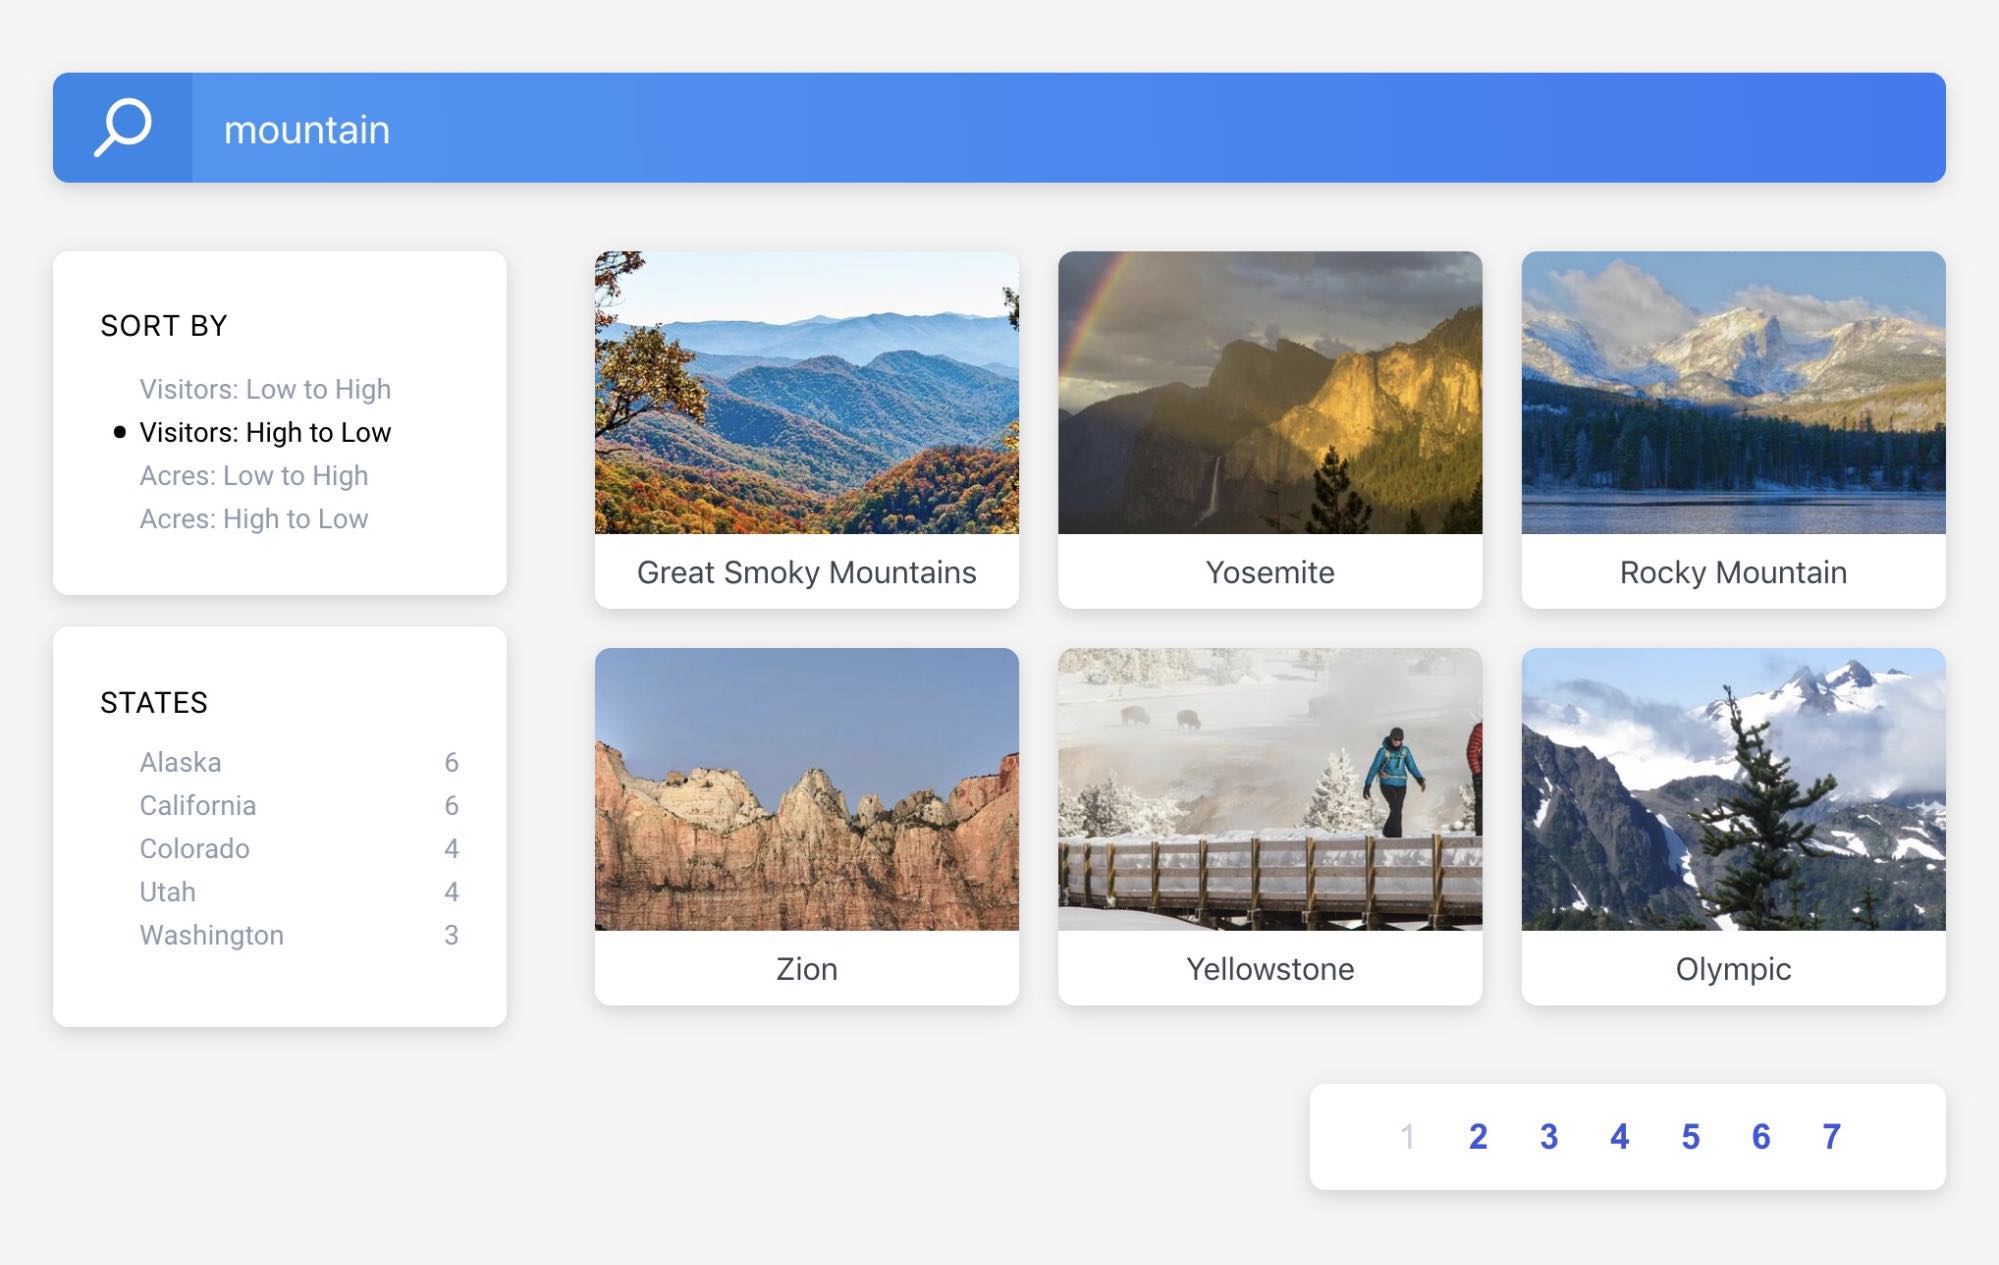
7 – Create beautiful search experiences with Search UI
As always, we want to help make it as easy and simple for you to create truly rich search experiences, which is why we created Search UI: a free, open source JavaScript library that allows you to add search to any website or app with just a few lines of code. It includes everything you need to create a complete search experience, without having to build it from scratch. This includes things like the search bar, search suggestions and autocomplete, and results pages with dynamic filters.
So when you’re ready, head on over to our GitHub repo to get started building beautiful search using Search UI here.
Next steps
Hopefully this guide has helped you get on your way with App Search. If you’d like to dive a little deeper, watch the Getting Started with Elastic App Search webinar, where an Elastic expert walks you through ease of setup, fine-tuning your search experience, and scaling it out as you grow.