Migrating from self-managed Elastic Stack to Elastic Cloud using snapshot and restore with Amazon S3
.jpg)

 Share on Twitter
Share on Twitter

 Share on LinkedIn
Share on LinkedIn

 Share on Facebook
Share on Facebook

 Share by Email
Share by Email

 Print this page
Print
I had the pleasure of talking with many interesting people at AWS re:Invent 2023 in Las Vegas while I was helping out at Elastic®’s booth in the Expo hall. I spoke to many SREs, developers, solution architects, and other professionals who were running a self-managed Elastic Stack and had questions about the process of migrating their Elastic stack to Elastic Cloud.
To help provide guidance on questions about Elastic Cloud migration, this blog post provides a walkthrough of how to set up a self-managed Elastic stack and then migrate that Elastic stack’s contents to Elastic Cloud using a snapshot and restore migration method. For the storage location of the snapshot, we’ll use Amazon S3, which is a perfect service for saving and accessing files with fine grain control provided by AWS Identity and Access Management (IAM).
This blog post covers four main steps:
Set up and run a self-managed Elastic stack using Docker.
Create a simple search index in the self-managed Elastic stack.
Create an Elastic Cloud deployment.
Migrate the self-managed Elastic stack to Elastic Cloud.
Step 1: Set up and run a self-managed Elastic stack using Docker
We’ll start with how to set up and run a self-managed Elastic stack using Docker.
Begin by installing Docker Desktop on your local computer. Visit the Docker Desktop docs and follow the installation instructions for macOS, Linux, or Windows based on the operating system on your local computer.
Once you’ve got Docker Desktop installed, you’re ready to install the self-managed Elastic stack as a three-node cluster. Open Docker Desktop and make sure to allocate at least 4GB of memory to Docker Desktop. You can adjust memory usage in Docker Desktop by going to Settings > Resources.
Next, open a terminal on your local computer. Run the following two commands. The first command creates a new directory named “elastic-self-managed” and the second command changes the terminal’s current directory to the newly created elastic-self-managed directory:
mkdir elastic-self-managed
cd elastic-self-managed
In your terminal, download two files, .env and docker-compose.yml, into the elastic-self-managed directory by running the following two CURL commands:
curl https://github.com/elastic/elasticsearch/blob/8.11/docs/reference/setup/install/docker/.env -o .env

curl https://github.com/elastic/elasticsearch/blob/8.11/docs/reference/setup/install/docker/docker-compose.yml -o docker-compose.ymlEdit the .env file in your terminal.
On a macOS or Linux based computer, open the file for editing by typing “nano .env”. Then after you’ve made the necessary edits, close the file and save the changes by typing “Ctrl + x”. Press the “y” key and then the “Enter” key to save the changes.
On a Windows based computer, type “notepad .env” to open the file for editing. This will open the Notepad text editor. Use the Notepad’s File menu to save and close the file after you’ve made the necessary edits.
Make the following changes to the .env file:
Specify a password for the ELASTIC_PASSWORD and KIBANA_PASSWORD variables.
Set STACK_VERSION to the current Elastic stack version, which is 8.11.1 at the time this blog post was published.
Set ES_PORT to 127.0.0.1:9200, which ensures Elasticsearch® is only accessible from the computer where the Elastic stack is running.
After you made the changes, the .env file should look something like this:
# Password for the 'elastic' user (at least 6 characters)
ELASTIC_PASSWORD=EnterYourPasswordHere

# Password for the 'kibana_system' user (at least 6 characters)
KIBANA_PASSWORD=EnterYourPasswordHere

# Version of Elastic products
STACK_VERSION=8.11.1

CLUSTER_NAME=docker-cluster

# Set to 'basic' or 'trial' to automatically start the 30-day trial
LICENSE=basic

# Port to expose Elasticsearch HTTP API to the host
ES_PORT=127.0.0.1:9200

# Port to expose Kibana to the host
KIBANA_PORT=5601

# Increase or decrease based on the available host memory (in bytes)
MEM_LIMIT=1073741824

# Project namespace (defaults to the current folder name if not set)
#COMPOSE_PROJECT_NAME=myproject
Run the following command in your terminal to start the Elastic stack:
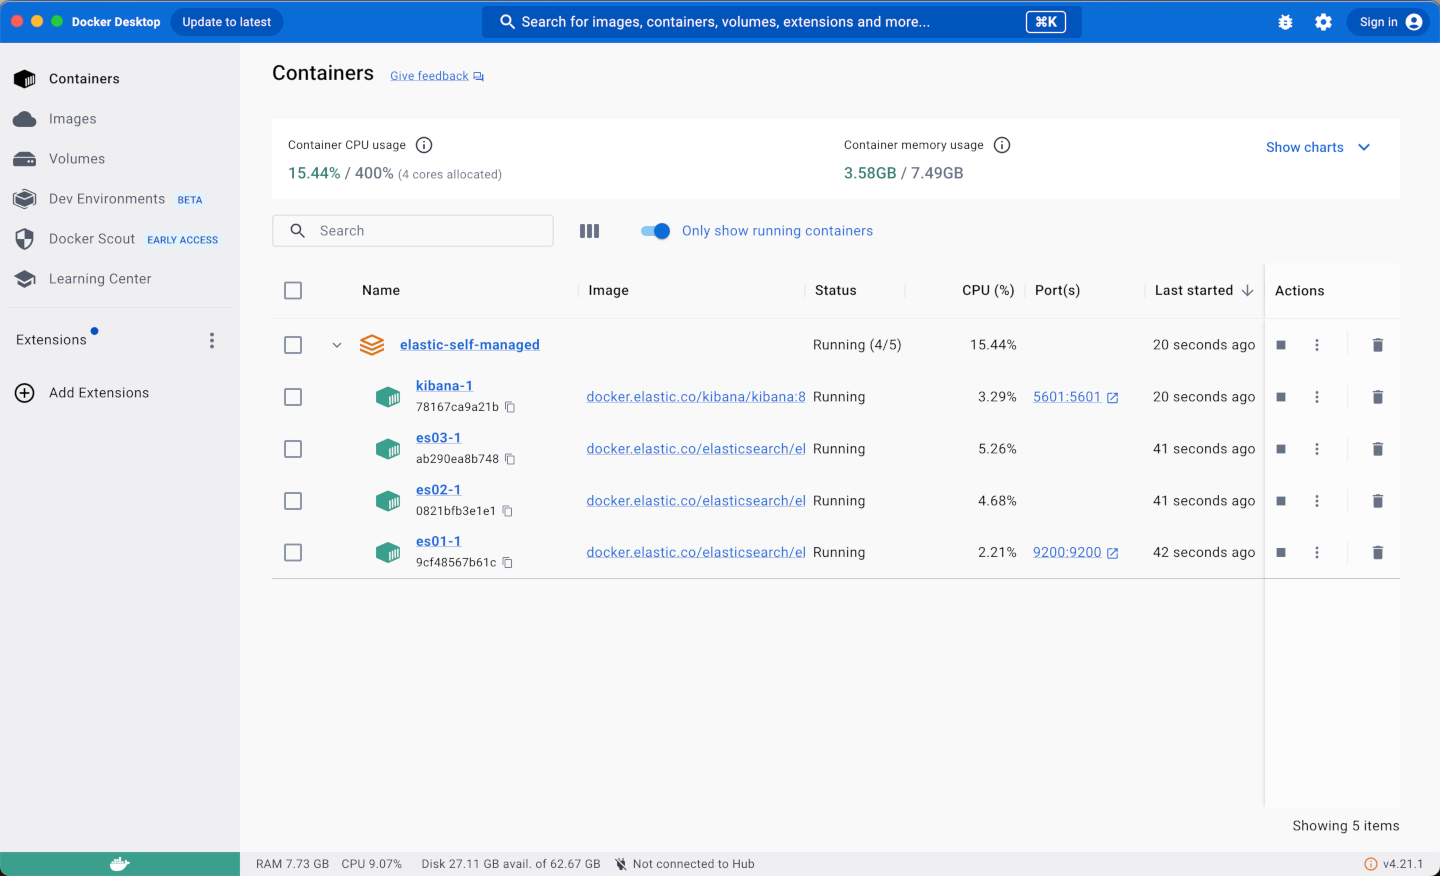
docker-compose up -dGo back to Docker Desktop, where you should now see the self-managed Elastic stack running.
Step 2: Create a search index in the self-managed Elastic stack
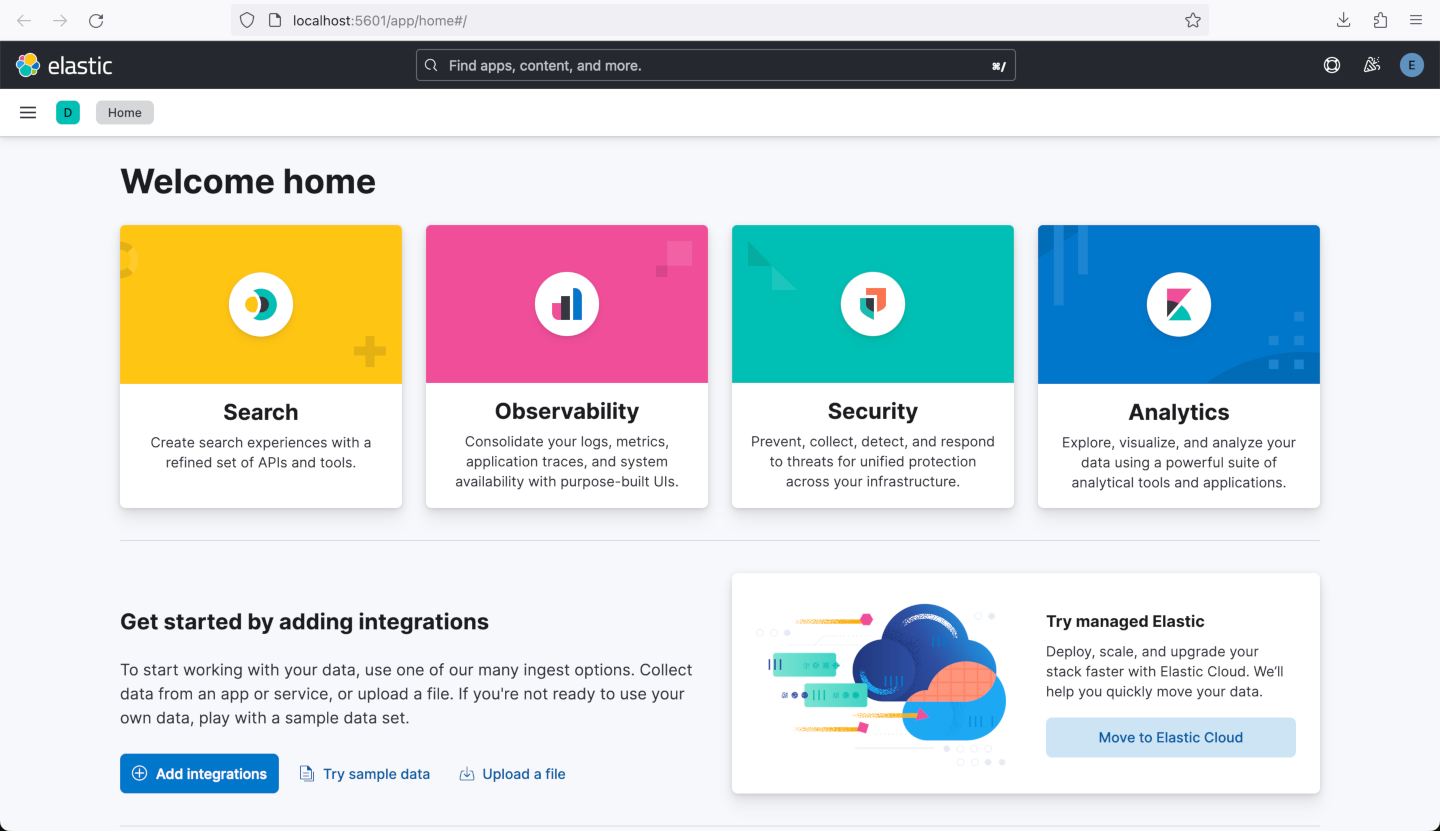
Now that you’ve got an Elastic deployment running on your local computer, you’re ready to create a search index. Open the locally running deployment by going to http://localhost:5601 in a web browser to access Kibana® (which is the Elastic stack’s user interface). You’ll be prompted for a Username and Password. Enter “elastic” as the Username and enter the Password that you specified in the .env file.
You should see the Elastic Home page. Select Search.
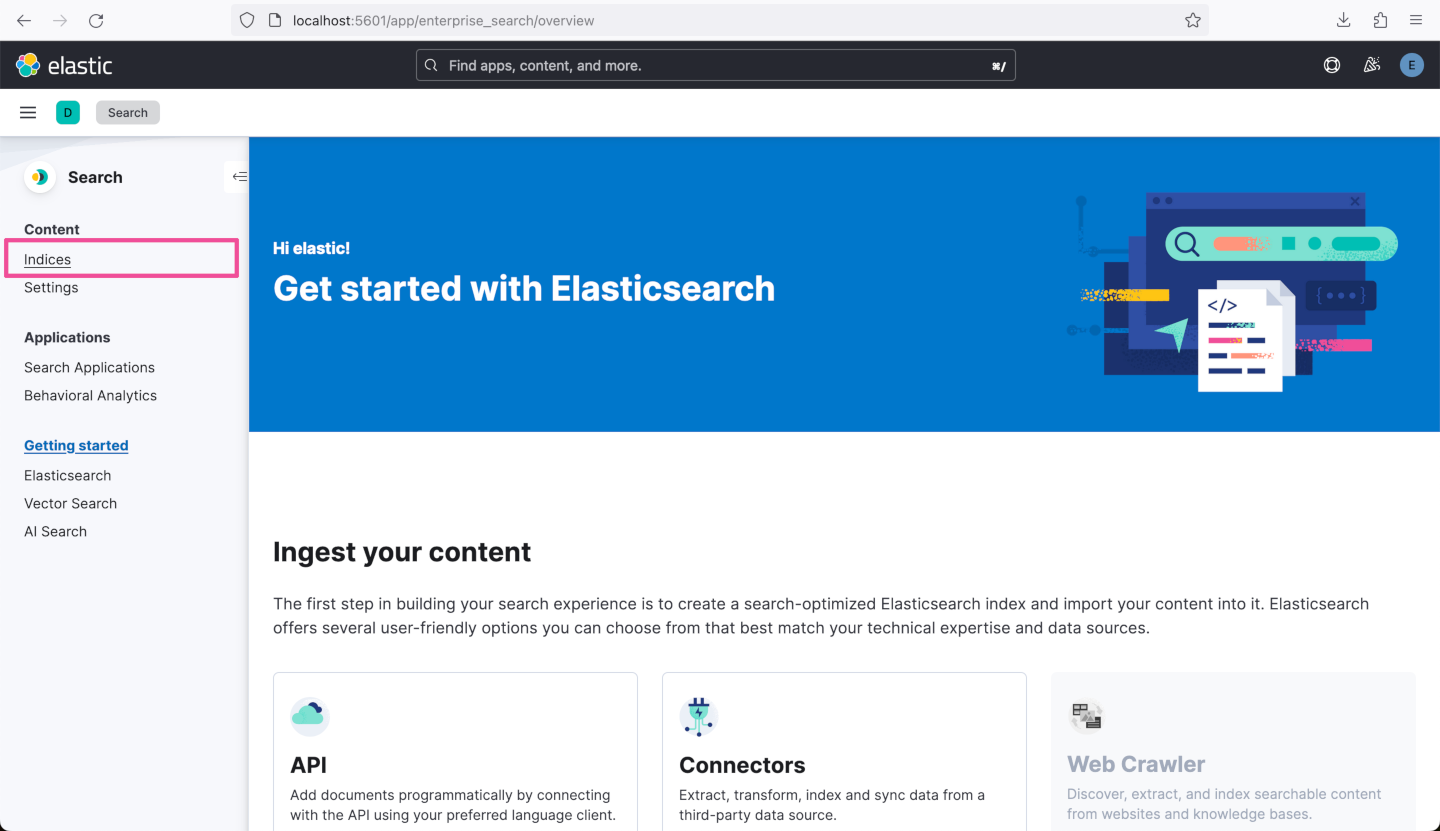
On the Search page, select Indices.
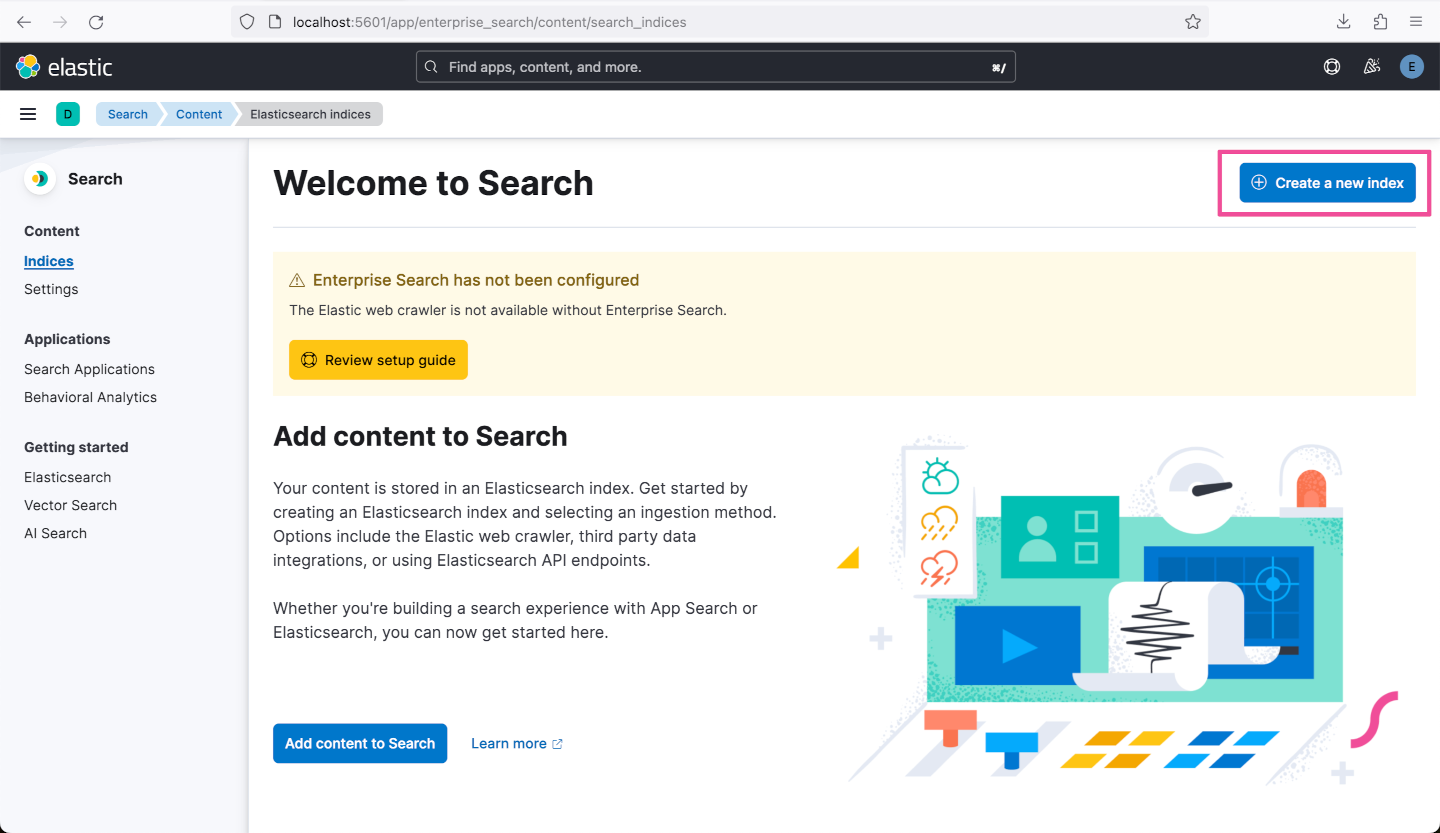
Click Create a new index.
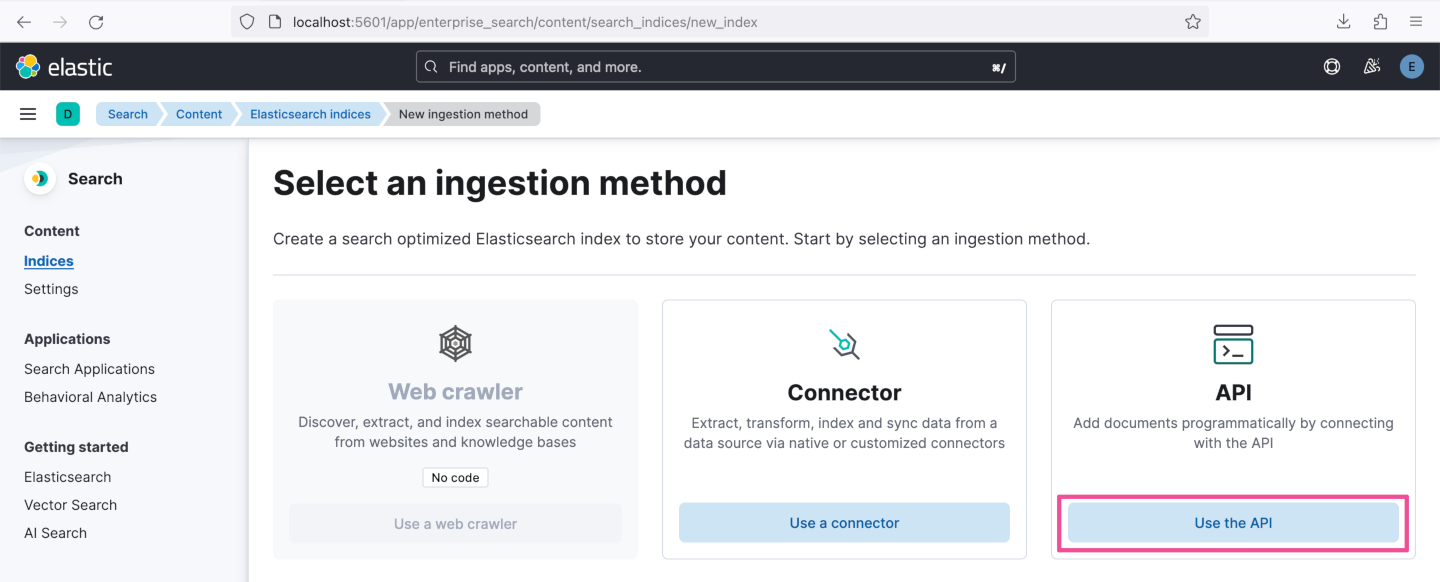
On the Select an ingestion method page, click Use the API.
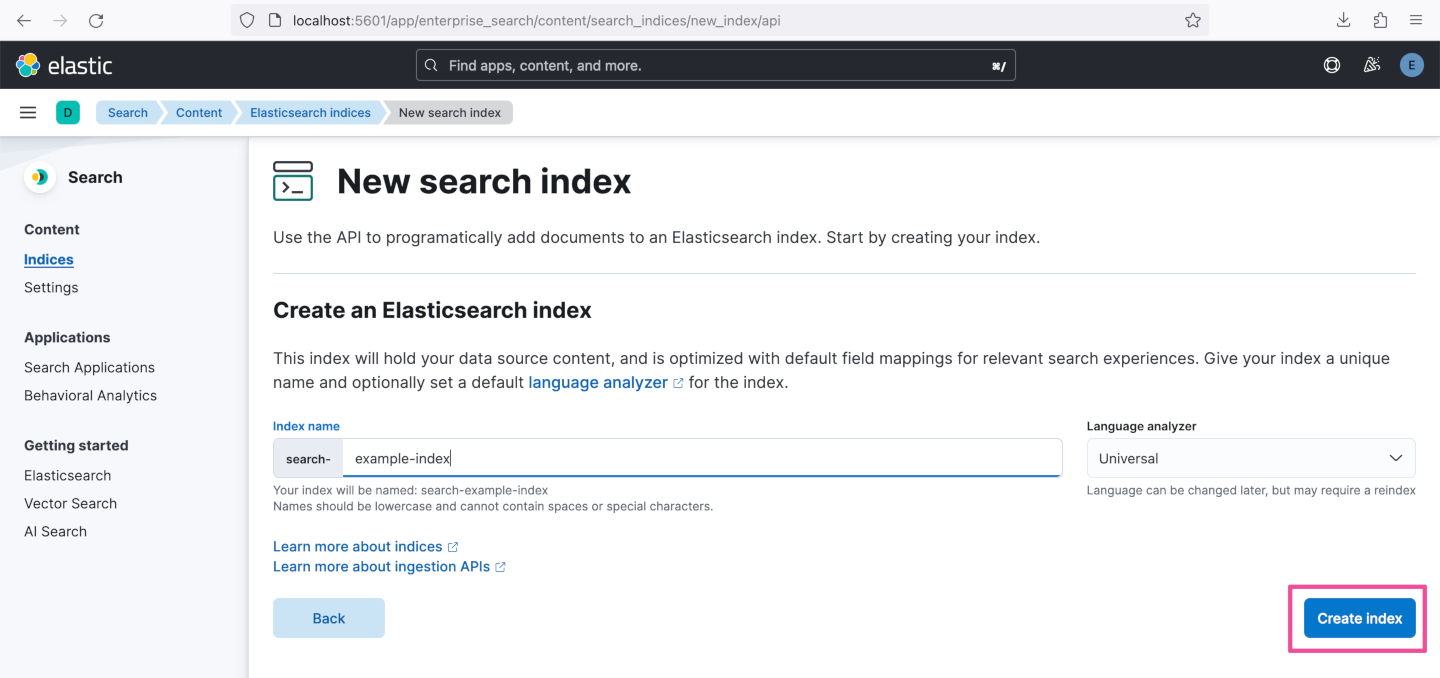
On the New search index page, enter an Index name like search-example-index and click Create index.
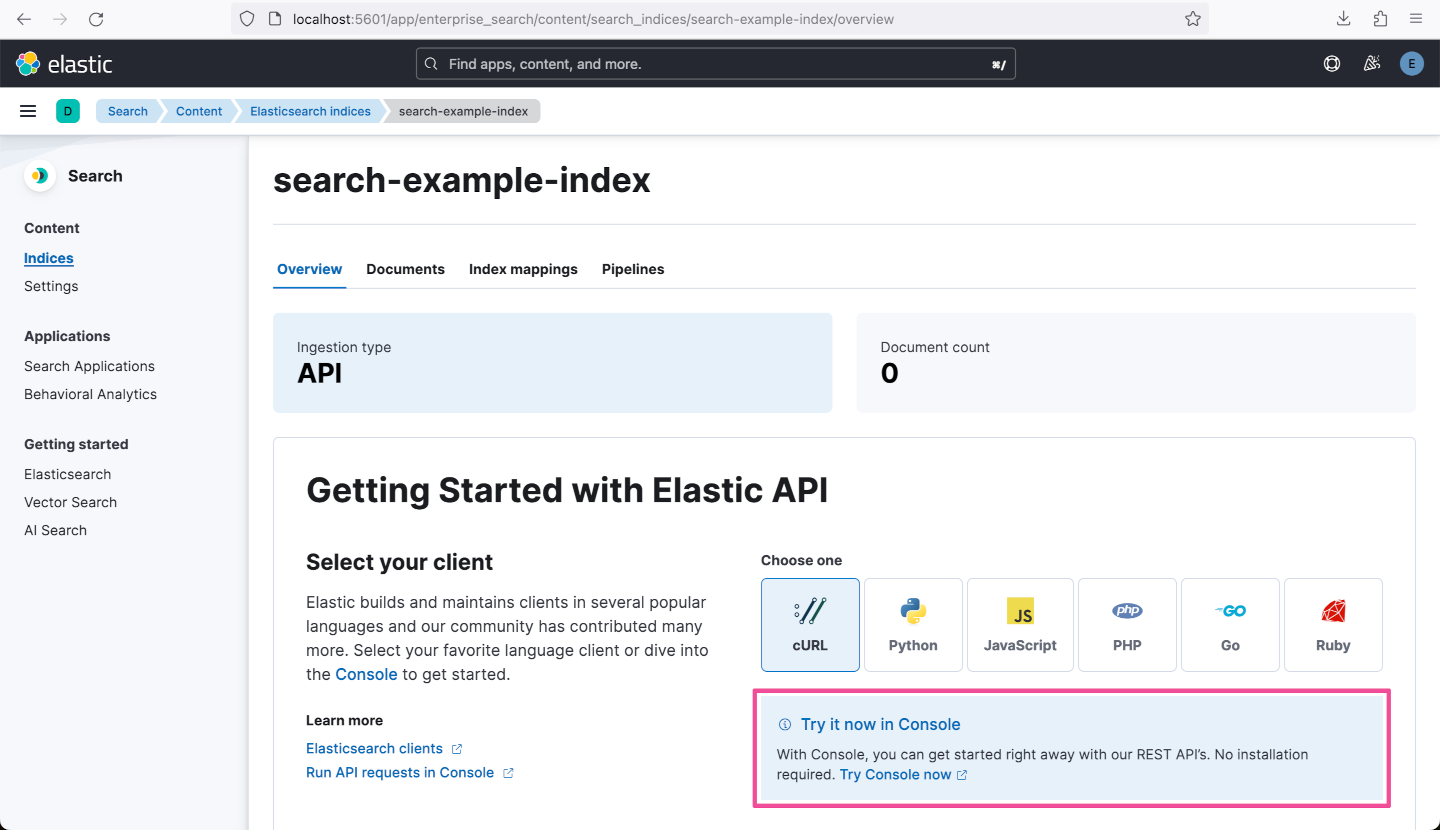
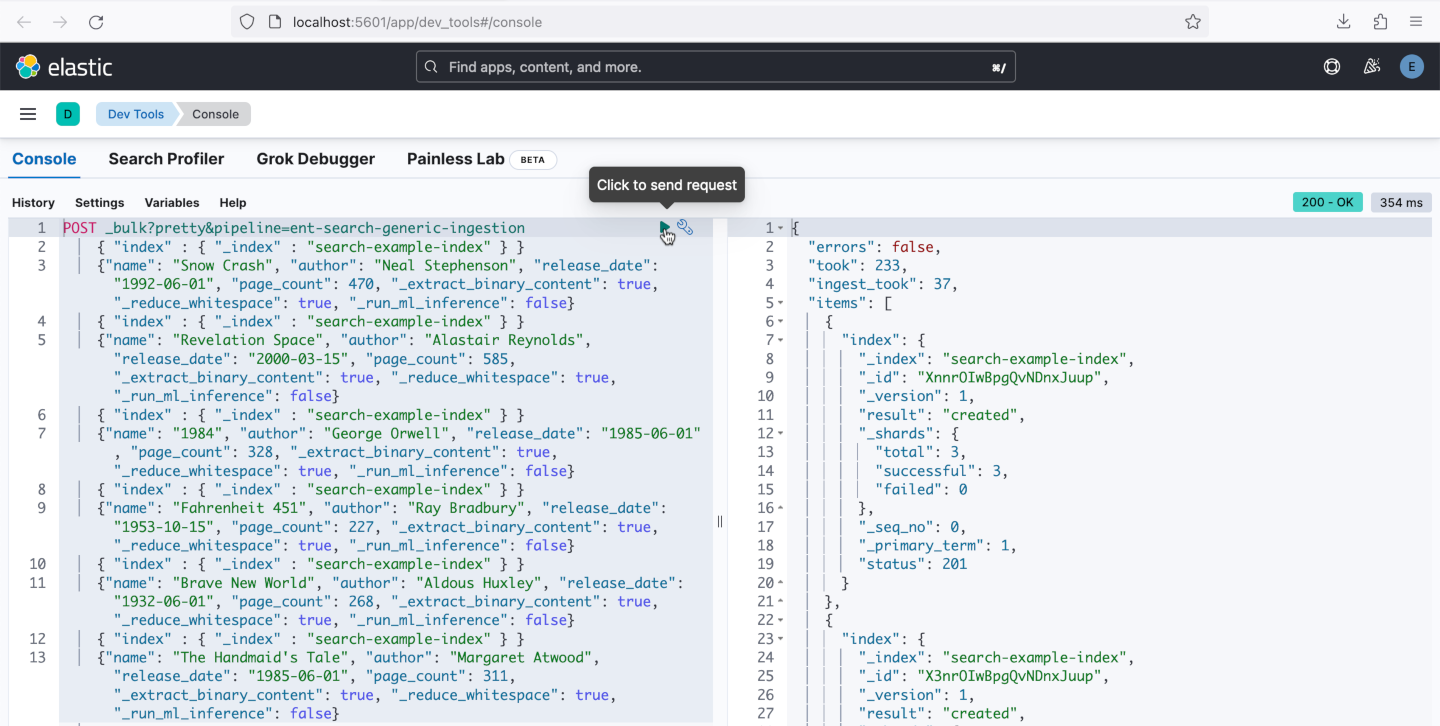
On the overview page for the newly created index, click the Try Console now link.
A new browser tab will open Dev Tools. By default, an example query is provided to insert six documents into the newly created index. Click the run button to execute the example query.
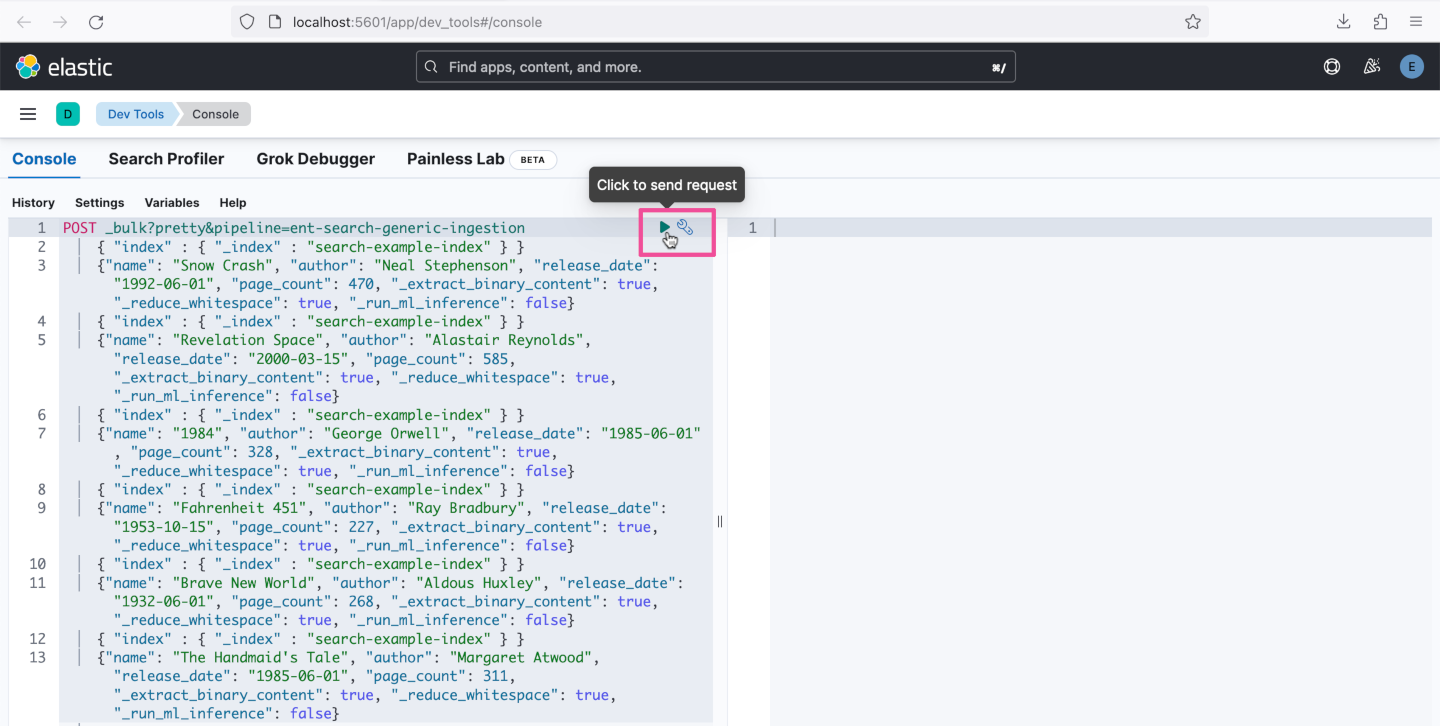
You should see a 200 - OK response confirming that the documents have been added to the index.
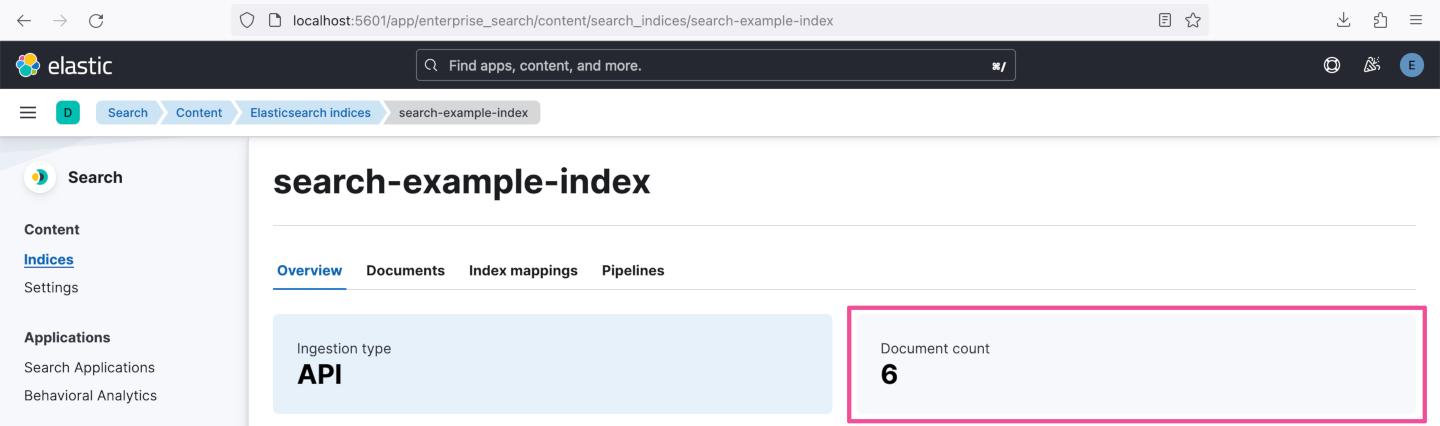
You now have a search index with six documents. This index is what we’ll use to confirm that the migration process is successful.
Step 3: Create an Elastic Cloud deployment
Go to Elastic Cloud and create a new deployment. There’s a 14-day free trial if you’re a new user of Elastic Cloud.
Step 4: Migrate the self-managed Elastic stack to Elastic Cloud
The process of migration involves taking a snapshot of the self-managed Elastic stack, saving that snapshot to Amazon S3, and then restoring the snapshot to your Elastic Cloud deployment. Here’s a guided tour of all the steps to accomplish this right within your browser.
Although the migration process covered in this blog post migrates an Elastic stack search index as an example, this same process will migrate the entire self-managed Elastic stack’s contents, which means that Observability and Security data will also be included in the snapshot restoration to the Elastic Cloud deployment. One final consideration for completing migration of Elastic deployments that include real-time data ingestion is to update any data collectors like Elastic integrations or Elastic agents installed on your external resources (VMs, etc.) to point to your new Elastic Cloud deployment.
Migrate to Elastic Cloud today
You have now seen the complete process of how to migrate from a self-managed Elastic stack to Elastic Cloud. While a self-managed Elastic stack is a great way to get started with Elastic, Elastic Cloud will handle the ongoing task of managing your cluster as well as unlock the full functionality of Elastic’s solutions so you can get maximum functionality and more precious time for your most important tasks. Learn more about the benefits of migrating to Elastic Cloud, or sign-up for a free 14-day trial today.
The release and timing of any features or functionality described in this post remain at Elastic's sole discretion. Any features or functionality not currently available may not be delivered on time or at all.
Share
- Share on Twitter
Share on Twitter
- Share on LinkedIn
Share on LinkedIn
- Share on Facebook
Share on Facebook
- Share by Email
Share by Email
- Print this page
Print