How to Debug Elasticsearch Source Code in IntelliJ IDEA
| Editor's Note (Jan 6, 2020): This was written and tested with Elasticsearch 6.6. These instructions will not work with version 7.5 and later due to changes made in PR #48188. |
If one wishes to understand the inner workings of Elasticsearch, the source code is the ultimate authority. If the source code has been downloaded, then a full-featured Integrated Development Environment (IDE) such as IntelliJ IDEA can be useful for browsing, editing, and debugging it. Therefore, in this blog post I present (1) how to download the Elasticsearch source code, (2) how to setup an Elasticsearch project in IntelliJ IDEA, and (3) how to launch the Java debugger in IntelliJ IDEA.
Environment
The instructions presented in this blog have been tested on Mac OSX 10.14.2 with IntelliJ IDEA 2018.3 (Community Edition), and OpenJDK 11.0.2.
Download Elasticsearch
Get a copy of the Elasticsearch source code from github as follows:
git clone https://github.com/elastic/elasticsearch.git
Checkout the branch for the Elasticsearch release that you want to debug.
cd elasticsearch
git checkout --track origin/6.6
Review the text files included with the distribution
Within the elasticsearch directory, there are several text files that should be reviewed. In particular, CONTRIBUTING.md includes a description of the process for importing Elasticsearch code into an IntelliJ IDEA project, and TESTING.asciidoc describes ways to build and debug the code. The remainder of this blog post is based on the instructions in these files.
Configure the code for use with IntelliJ IDEA
The build system used by Elasticsearch is gradle, and at least Java 11 is required to build "Elasticsearch gradle tools". Additionally, Java 9 is used in part of the build process and if it is not found you will see warnings when the code is built. Ensure that your JAVA_HOME and JAVA9_HOME environment variables are set correctly. For example my JAVA_HOME and JAVA9_HOME are set in my .bash_profile (on OSX) as follows:
JAVA_HOME=/Library/Java/JavaVirtualMachines/jdk-11.0.2.jdk/Contents/Home
export JAVA_HOME
JAVA9_HOME=/Library/Java/JavaVirtualMachines/jdk-9.0.4.jdk/Contents/Home
export JAVA9_HOME
Finally, execute the following command to configure an Elasticsearch project for use in IntelliJ IDEA.
./gradlew idea
The above command may take a few minutes to execute, and once it is complete, your project is ready to be imported into IntelliJ IDEA.
Import Elasticsearch into an IntelliJ IDEA project
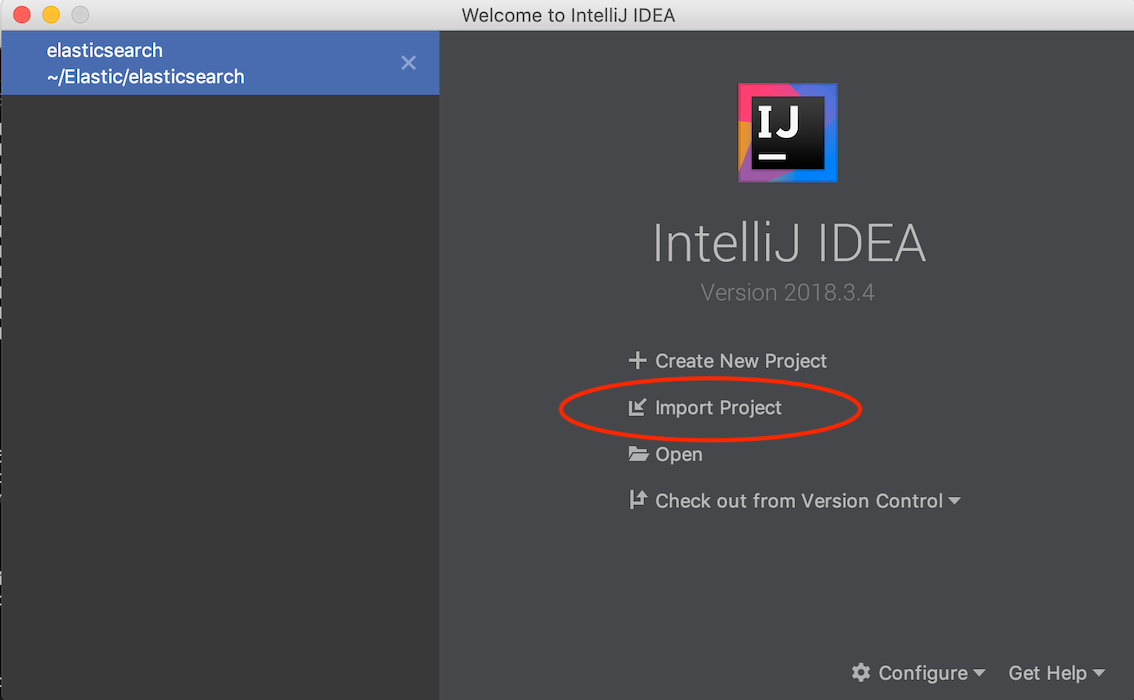
1. Open IntelliJ IDEA, and if you don't have any other projects open, you will see a screen that looks like the image below. Click on Import project.
2. Select the elasticsearch directory and click on Open.

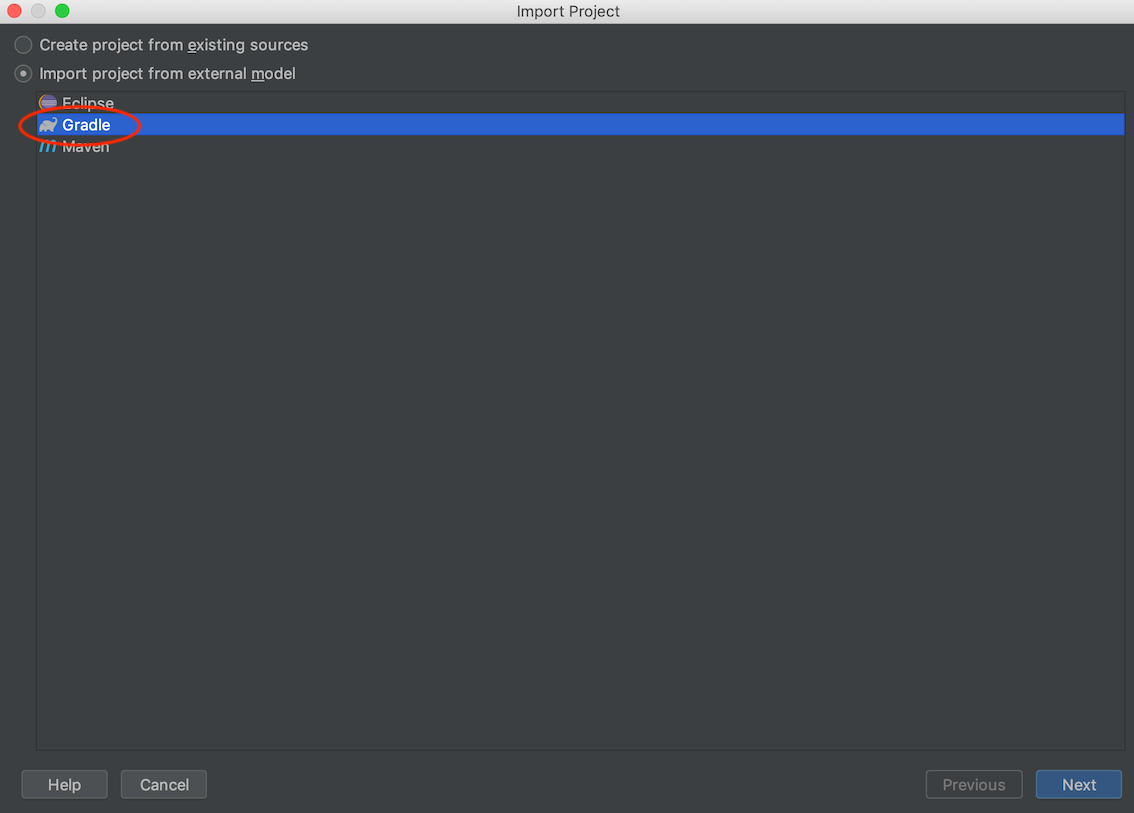
3. Select Import project from external model -> Gradle, and then click on Next.
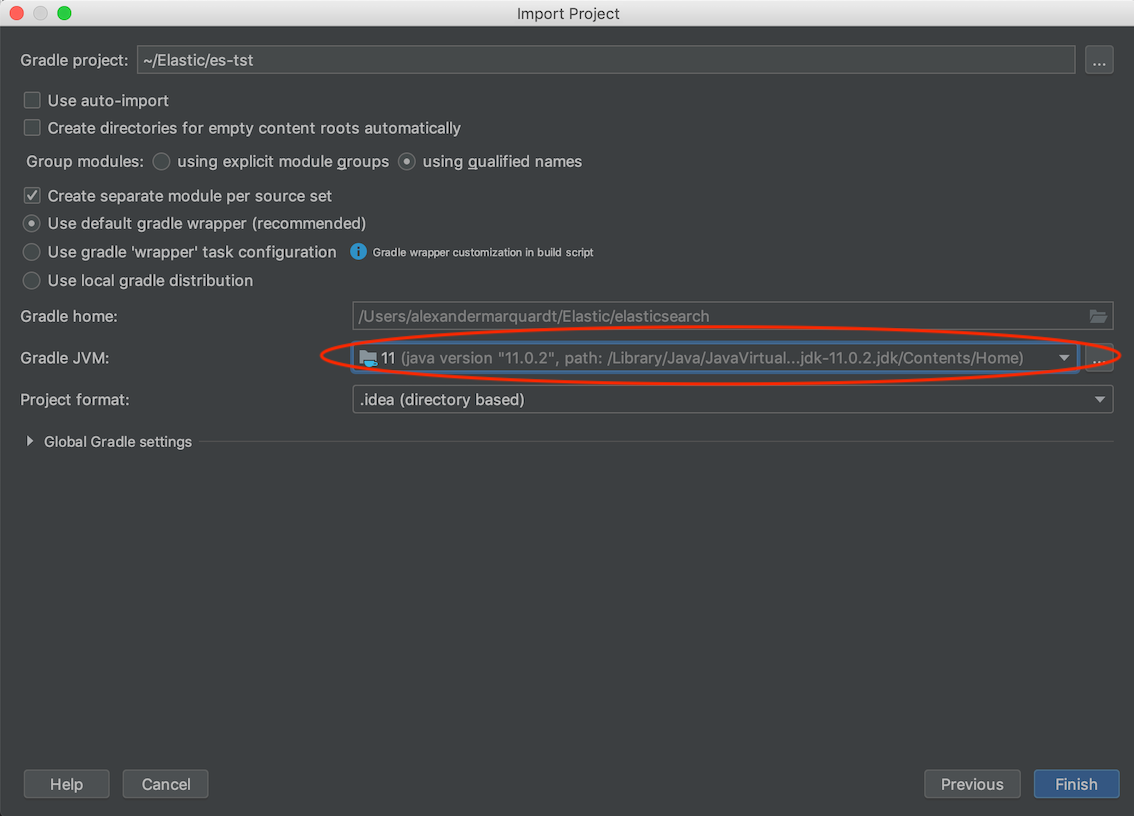
4. Set Gradle JVM to 11, as shown below. Then click on Finish.
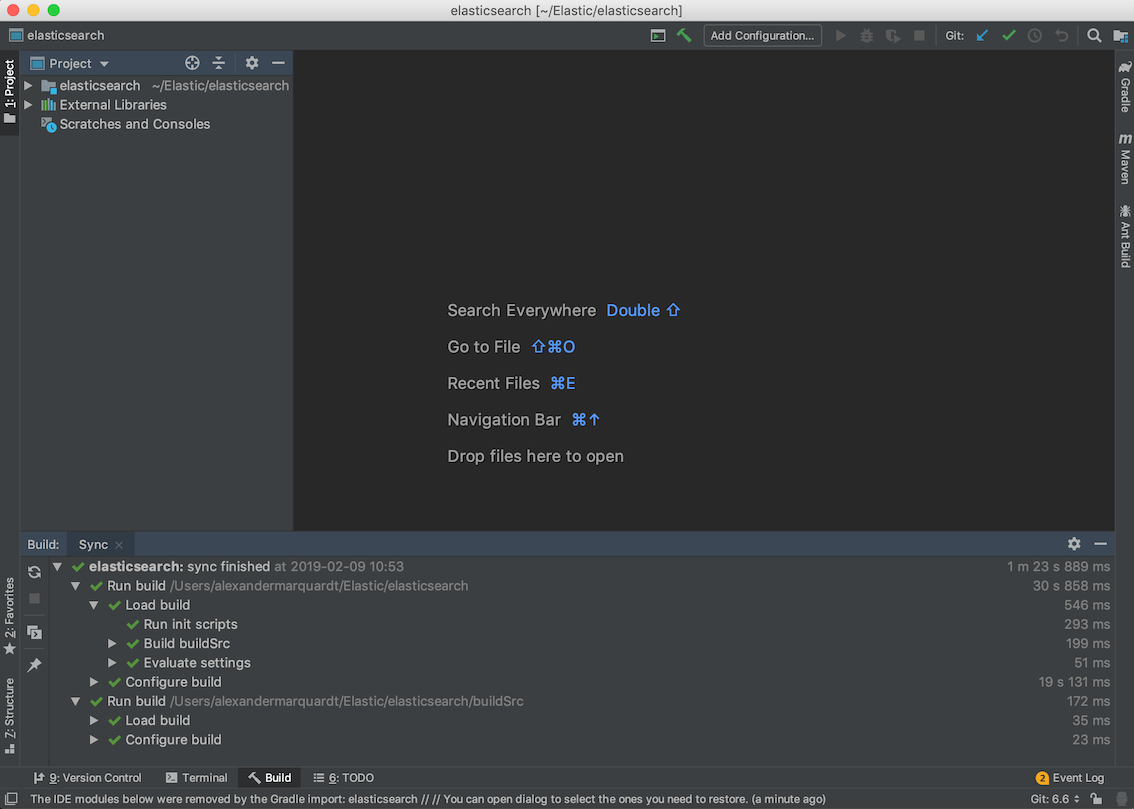
5. After completing the above steps, IntelliJ IDEA will start building the source code. The IntelliJ IDEA window should look similar to the image below once the build has completed.
Start Elasticsearch for debugging
One way to debug Elasticsearch is to start the project in debug mode from a terminal with the following command:
./gradlew run --debug-jvm
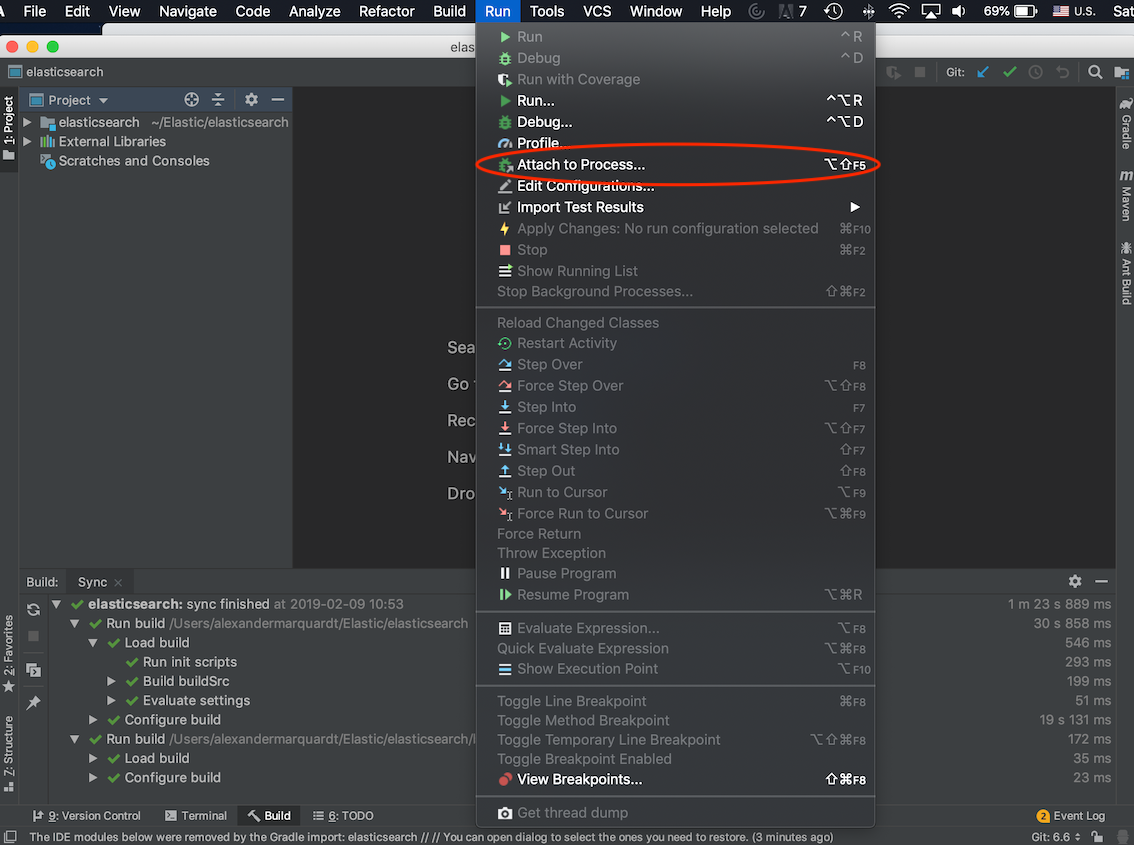
It may take a few minutes for the above process to fully start, at which point you can connect to the process from IntelliJ IDEA by clicking on Run -> Attach to Process as shown below:
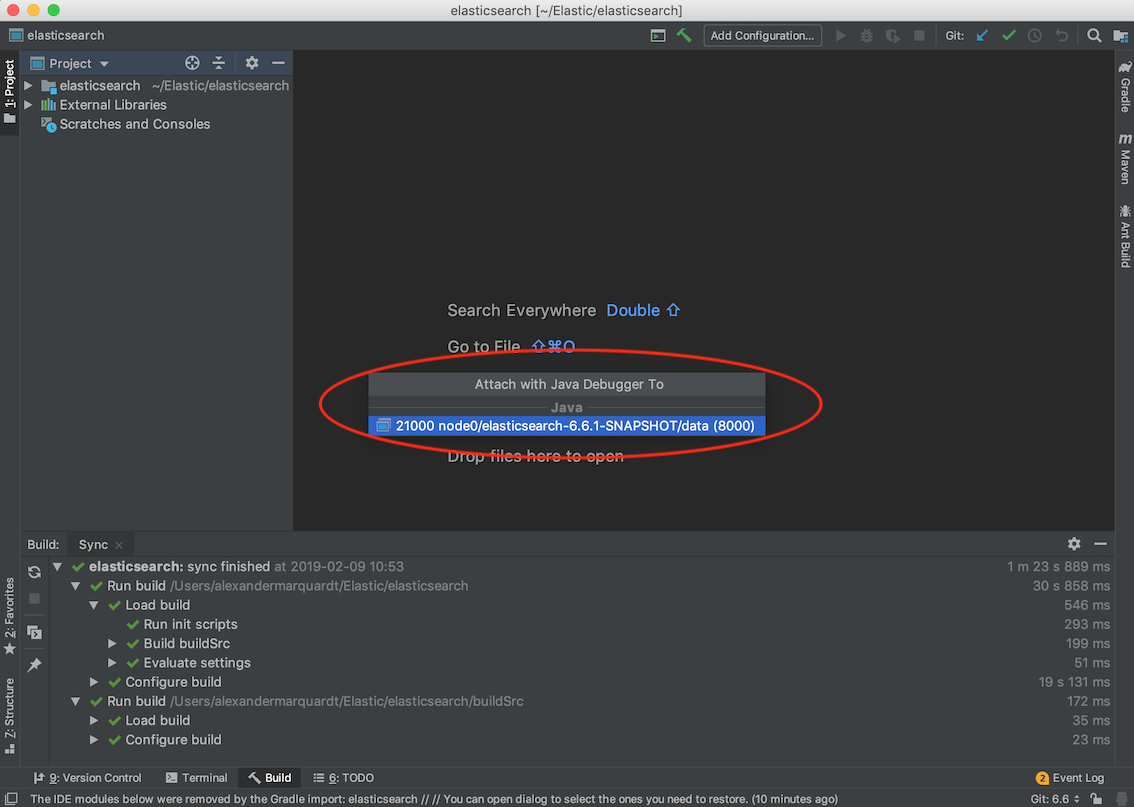
This will allow you to select the process to attach to, which should look similar to the following:
You should now be able to set breakpoints and step through both Elasticsearch and Lucene code!
Note that if you are unfamiliar with using IntelliJ IDEA for debugging, help can be found in the IntelliJ IDEA Documentation.
Conclusion
In this blog post, I have demonstrated how to setup a project in IntelliJ IDEA that will allow interactive debugging of Elasticsearch and Lucene source code. You are now ready to dig deep into the inner workings of Elasticsearch! As always, if you have any questions, reach out on our Discuss forums.