Quick Start Guide - Configuring Elasticsearch with Shield and Active Directory
When learning a new system, I always find it useful to have instructions on how to install and configure a feature with minimum steps in a cookbook style format. It allows me to get up and running quickly without having to reference several pages with the multitude of optional settings. From that point, I can take a look at the reference manuals and the more advanced options to configure the components according to my end architecture requirements.
In this post, I’ll go through installing and configuring Elastic Shield with Elasticsearch to use Windows Active Directory domain authentication for Elasticsearch Administrators.
This article assumes that you have already have the following prerequisites:
- Installed a 2.X elasticsearch cluster on Linux (I used CentOS 6.7)
- DNS has been configured on each node.
- Hosts have access to the Internet.
A. Configure the Elasticsearch Yum Repository
(Repeat steps below for every node in the cluster)
*You can skip this section, if you’ve already configured it.
1. Download and install the public signing key:
rpm --import https://packages.elastic.co/GPG-KEY-elasticsearch
2. Create the new yum repo file for Elasticsearch:
vi /etc/yum.repos.d/elasticsearch.repo
3. Copy and paste the following entries in the new repo file:
[elasticsearch-2.x]
name=Elasticsearch repository for 2.x packages
baseurl=https://packages.elastic.co/elasticsearch/2.x/centos
gpgcheck=1
gpgkey=https://packages.elastic.co/GPG-KEY-elasticsearch
enabled=1
B. Configure Active Directory
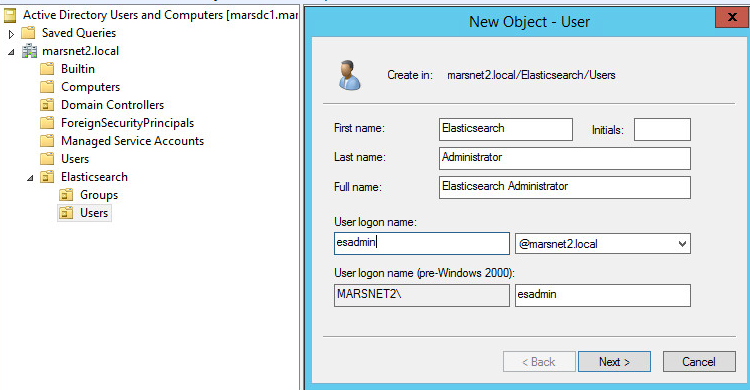
1. Create a user who will be the Elasticsearch administrative user in Active Directory Users and Computers (ADUC). See example below for user named Elasticsearch Administrator.
2. Create an Active Directory security group for the Elasticsearch Admins. This group will be used to hold our new user account.
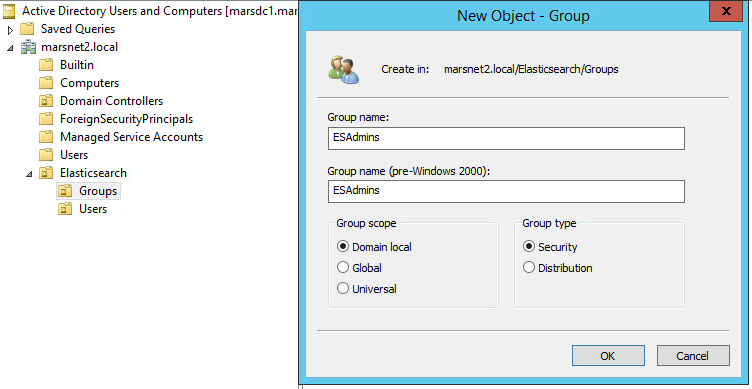
Next, note the location of this user group, we will use this group’s Distinguished Name (DN) in the Shield role mapping in the steps to follow. See example below for the security group named ESAdmins.
C. Installing the License and Shield Plugins
(Repeat steps below for every node in the cluster)
1. Install the license plugin.
*The license plugin is required to run commercial plugins from Elastic.
/usr/share/elasticsearch/bin/plugin install license
*The license will be installed in a 30 day trial mode, you can update the license once a production license is purchased.
2. Install the Shield plugin.
/usr/share/elasticsearch/bin/plugin install shield
*Note that starting with Elasticsearch 5.0, Elastic Shield and License plugins will be part of X-Pack as Elastic Security.
D. Configuring Shield with an Active Directory Domain
*There are many options related to protocols, ports, multiple domains, encryption and automated security group mapping. For more information about these refer to the links at the bottom of this article.
1. Open the elasticsearch.yml file.
vi /etc/elasticsearch/elasticsearch.yml
2. Add the following entries at the bottom of the file, replacing the sample domain entry with your specific domain:
#-----SHIELD CONFIG------
shield:
  authc:
    realms:
      active_directory:
        type: active_directory
        order: 0
        domain_name: mydomain.local
        url: ldap://mydomain.local:389
        unmapped_groups_as_roles: false
3. Repeat Steps 1 and 2 for all nodes in the cluster.
4. Open the role_mapping.yml file.
vi /etc/elasticsearch/shield/role_mapping.yml
5. Add the following entry at the bottom of the file, replacing the sample DN location with the location noted above in Section B, Step 2.
admin:
   - "cn=ESAdmins, ou=Groups, ou=Elasticsearch, dc=mydomain, dc=local"
6. Copy the role_mapping.yml file to all nodes in the cluster as in the examples below replacing sample node names with your node names:
scp /etc/elasticsearch/shield/role_mapping.yml root@esnode2:/etc/elasticsearch/shield/
7. Restart elasticsearch service on each node.
service elasticsearch restart
E. Test the new user and credentials
You can test by simply performing the following query replacing the sample node name with yours:
curl -XGET ‘esnode1:9200’ -u esadmin
*note that only the username, esadmin, is specified since the shield configuration has the domain information.
Command and output should look something like this:
[root@esnode1 ~]# curl -XGET 'esnode1:9200' -u esadmin
Enter host password for user 'esadmin':
{
  "name" : "esnode1",
  "cluster_name" : "marscluster1",
  "version" : {
    "number" : "2.3.2",
    "build_hash" : "b9e4a6acad4008027e4038f6abed7f7dba346f94",
    "build_timestamp" : "2016-04-21T16:03:47Z",
    "build_snapshot" : false,
    "lucene_version" : "5.5.0"
  },
  "tagline" : "You Know, for Search"
}
And that’s it!
There are many options and combinations that are possible. Once you are able to set up this basic Shield and Elasticsearch combination, you can find additional resources below to customize for your architecture requirements and needs.
For additional information on:
Active Directory authentication options:
https://www.elastic.co/guide/en/shield/current/active-directory-realm.html
Role-based access:
https://www.elastic.co/guide/en/shield/current/configuring-rbac.html
Mapping groups to roles:
https://www.elastic.co/guide/en/shield/current/mapping-roles.html
Encrypting Active Directory communication with SSL/TLS:
https://www.elastic.co/guide/en/shield/current/active-directory-realm.html#active-directory-ssl
Installing and managing Elastic licenses:
https://www.elastic.co/guide/en/shield/current/license-management.html
Setting up Elasticsearch repositories:
https://www.elastic.co/guide/en/elasticsearch/reference/current/setup-repositories.html