Connecting
editConnecting
editThis page contains the information you need to connect and use the Client with Elasticsearch.
On this page
Elastic Cloud
editYou can connect to Elastic Cloud using an API key and a Cloud ID:
$client = ClientBuilder::create()
   ->setElasticCloudId('<cloud-id>')
   ->setApiKey('<api-key>')
   ->build();
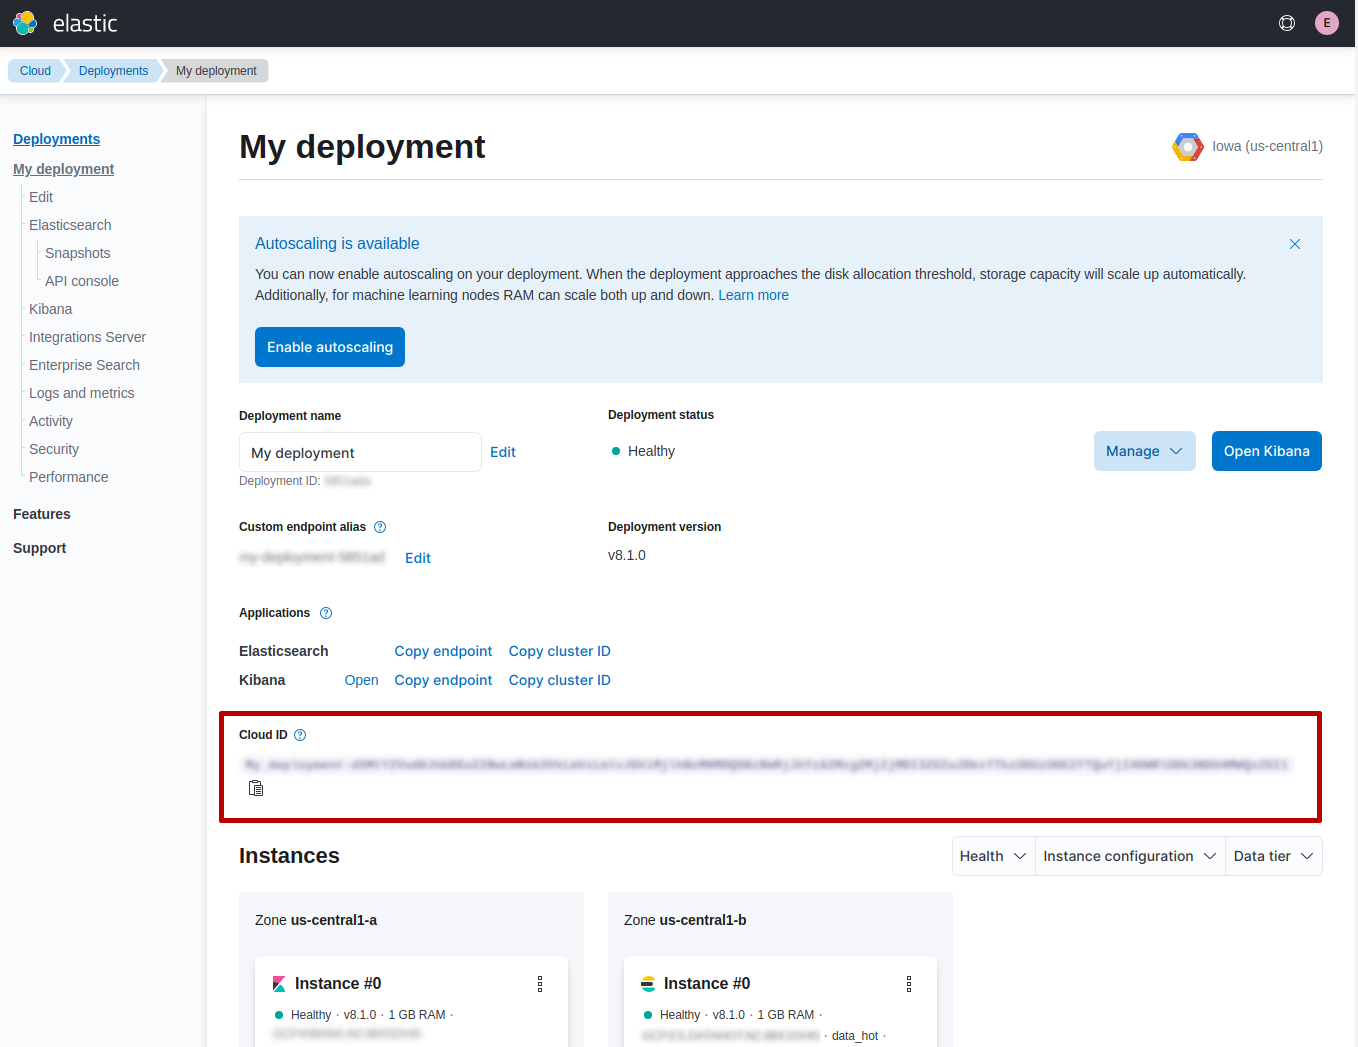
Where <cloud-id> and <api-key> can be retrieved using the Elastic Cloud web UI.
You can get the Cloud ID from the My deployment page of your dashboard (see the red
rectangle reported in the screenshot).
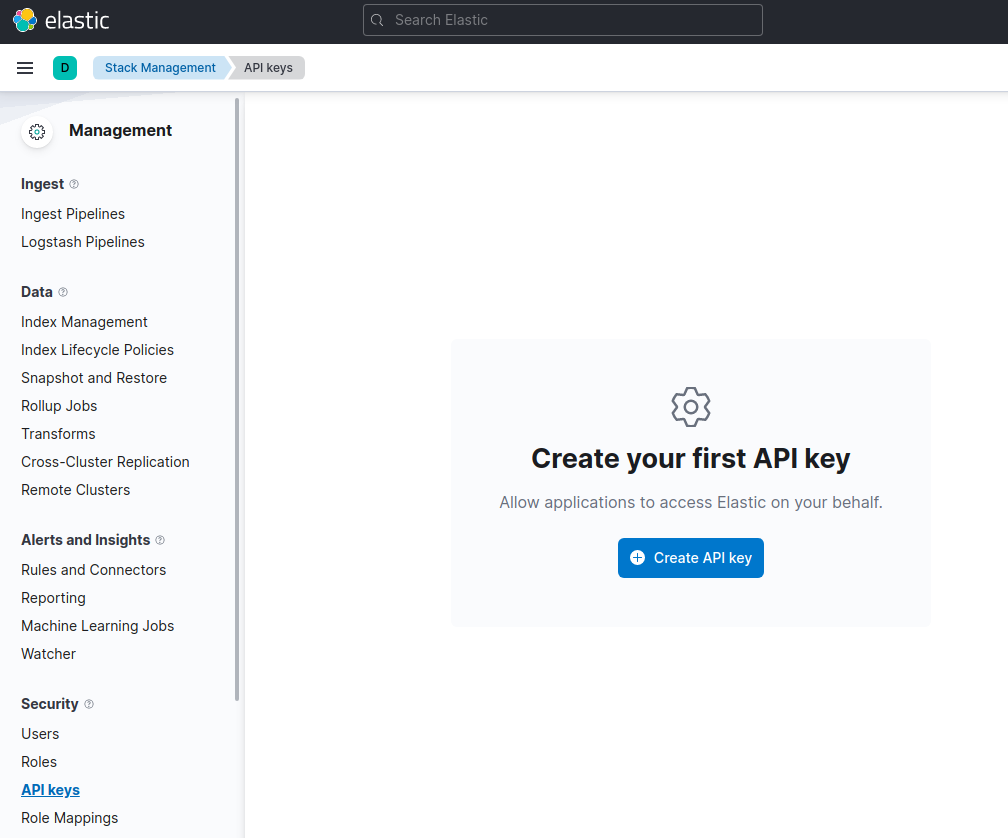
You can generate an API key in the Management page under the section Security.
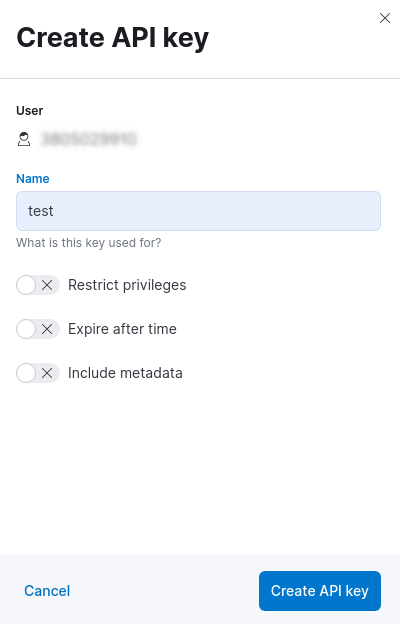
When you click on Create API key button you can choose a name and set the other
options (eg. restrict privileges, expire after time, etc).
After this step you will get the `API key`in the API keys page.
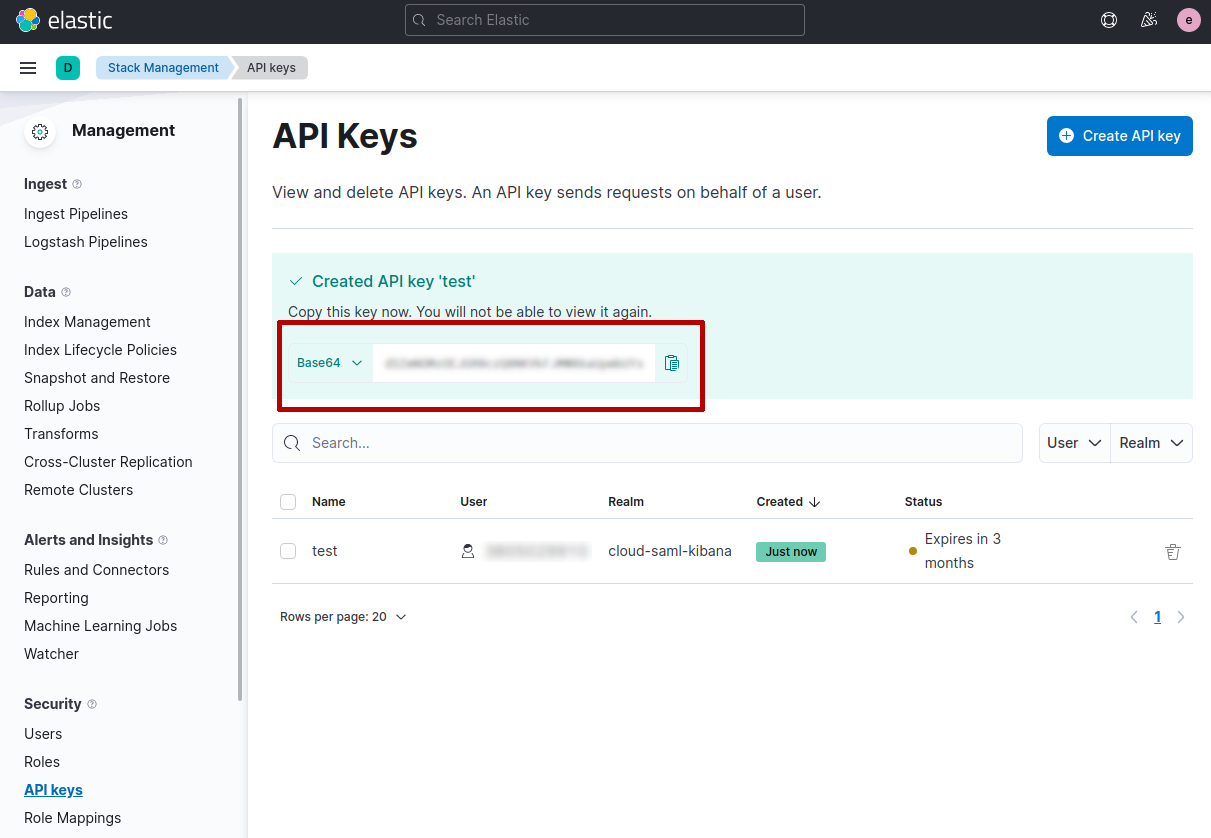
IMPORTANT: you need to copy and store the `API key`in a secure place, since you will not be able to view it again in Elastic Cloud.
Security by default (HTTPS)
editElasticsearch 8.0 offers security by default, that means it uses TLS for protect the communication between client and server.
In order to configure elasticsearch-php for connecting to Elasticsearch 8.0 we
need to have the certificate authority file (CA).
You can install Elasticsearch in different ways, for instance using Docker you need to execute the followind command:
docker pull docker.elastic.co/elasticsearch/elasticsearch:8.0.1
Once you have the docker image installed you can execute Elasticsearch, for instance using a single-node cluster configuration, as follows:
docker network create elastic
docker run --name es01 --net elastic -p 9200:9200 -p 9300:9300 -it docker.elastic.co/elasticsearch/elasticsearch:8.0.1
This command creates an elastic Docker network and start Elasticsearch
using the port 9200 (default).
When you run the docker imnage a password is generated for the elastic user
and it’s printed to the terminal (you might need to scroll back a bit in the terminal
to view it). You have to copy it since we will need to connect to Elasticsearch.
Now that Elasticsearch is running we can get the http_ca.crt file certificate.
We need to copy it from the docker instance, using the following command:
docker cp es01:/usr/share/elasticsearch/config/certs/http_ca.crt .
Once we have the http_ca.crt certificate and the password, copied during the
start of Elasticsearch , we can use it to connect with elasticsearch-php
as follows:
$client = ClientBuilder::create()
    ->setHosts(['https://localhost:9200'])
    ->setBasicAuthentication('elastic', 'password copied during Elasticsearch start')
    ->setCABundle('path/to/http_ca.crt')
    ->build();
For more information about the Docker configuration of Elasticsearch you can read the official documentation here.
Usage
editThis section is a crash-course overview of the client and its syntax. If you are familiar with Elasticsearch, you’ll notice that the methods are named just like REST endpoints.
You may also notice that the client is configured in a manner that facilitates
easy discovery via your IDE. All core actions are available under the $client
object (indexing, searching, getting, etc). Index and cluster management are
located under the $client->indices() and $client->cluster() objects,
respectively.
Info API
editYou can get information about the Elasticsearch instance using the info() API,
as follows:
$response = $client->info();
The response that you get back contains the information about Elasticsearch.
The $response is an object of Elastic\Elasticsearch\Response\Elasticsearch
class that implements ElasticsearchInterface, PSR-7 ResponseInterface
and ArrayAccess.
This means the $response is a PSR-7
object:
echo $response->getStatusCode(); // 200
echo (string) $response->getBody(); // Response body in JSON
and also an "array", meaning you can access the response body as an associative array, as follows:
echo $response['version']['number']; // 8.0.0

var_dump($response->asArray());  // response body content as array
Moreover, you can also access the response body as object, string or bool:
echo $response->version->number; // 8.0.0

var_dump($response->asObject()); // response body content as object
var_dump($response->asString()); // response body as string (JSON)
var_dump($response->asBool());   // true if HTTP response code between 200 and 300
Indexing a document
editTo index a document, we need to specify three pieces of information: index, id and a document body. This is done by constructing an associative array of key:value pairs. The request body is itself an associative array with key:value pairs corresponding to the data in your document:
$params = [
    'index' => 'my_index',
    'id'    => 'my_id',
    'body'  => ['testField' => 'abc']
];

$response = $client->index($params);
print_r($response->asArray());
The response that you get back indicates that the document was created in the
index that you specified. The response can be rendered as associatve array
using the asArray() function. The array response contains a
decoded version of the JSON that Elasticsearch returns:
Array
(
    [_index] => my_index
    [_type] => _doc
    [_id] => my_id
    [_version] => 1
    [created] => 1
)
Set the body as JSON string
editIf you want you can specify the `body`parameter as JSON string. This can be useful for testing (eg. copy & paste from online code examples) or if you have already some JSON documents to be stored in Elasticsearch.
For instance, the previous index example can be re-written as follows:
$params = [
    'index' => 'my_index',
    'id'    => 'my_id',
    'body'  => '{"testField" : "abc"}'
];

$response = $client->index($params);
print_r($response->asArray());
Getting a document
editLet’s get the document that we just indexed. This returns the document:
$params = [
    'index' => 'my_index',
    'id'    => 'my_id'
];

$response = $client->get($params);
print_r($response->asArray());
The response contains metadata such as index, version, and so on as well as a
_source field, which is the original document you sent to Elasticsearch.
Array
(
    [_index] => my_index
    [_type] => _doc
    [_id] => my_id
    [_version] => 1
    [found] => 1
    [_source] => Array
        (
            [testField] => abc
        )

)
Searching for a document
editSearching is a hallmark of Elasticsearch, so let’s perform a search. We are going to use
the match query as a demonstration:
$params = [
    'index' => 'my_index',
    'body'  => [
        'query' => [
            'match' => [
                'testField' => 'abc'
            ]
        ]
    ]
];

$response = $client->search($params);
print_r($response->asArray());
The response here is different from the previous ones. You can see metadata
(took, timed_out, etc.) and an array named hits. This represents your
search results. Inside of hits is another array named hits, which contains
individual search results:
Array
(
    [took] => 1
    [timed_out] =>
    [_shards] => Array
        (
            [total] => 5
            [successful] => 5
            [failed] => 0
        )

    [hits] => Array
        (
            [total] => 1
            [max_score] => 0.30685282
            [hits] => Array
                (
                    [0] => Array
                        (
                            [_index] => my_index
                            [_type] => _doc
                            [_id] => my_id
                            [_score] => 0.30685282
                            [_source] => Array
                                (
                                    [testField] => abc
                                )
                        )
                )
        )
)
Deleting a document
editAlright, let’s go ahead and delete the document that we added previously:
$params = [
    'index' => 'my_index',
    'id'    => 'my_id'
];

$response = $client->delete($params);
print_r($response->asArray());
This syntax is identical to the get syntax. The only difference is the
operation: delete instead of get. The response confirms the document is
deleted:
Array
(
    [found] => 1
    [_index] => my_index
    [_type] => _doc
    [_id] => my_id
    [_version] => 2
)
Deleting an index
editDue to the dynamic nature of Elasticsearch, the first document you added automatically built an index with some default settings. Delete that index and specify your own settings later:
$deleteParams = [
    'index' => 'my_index'
];
$response = $client->indices()->delete($deleteParams);
print_r($response->asArray());
The response:
Array
(
    [acknowledged] => 1
)
Creating an index
editNow that you are starting fresh (no data or index), add a new index with custom settings:
$params = [
    'index' => 'my_index',
    'body' => [
        'settings' => [
            'number_of_shards' => 2,
            'number_of_replicas' => 0
        ]
    ]
];

$response = $client->indices()->create($params);
print_r($response->asArray());
Elasticsearch now creates that index with your chosen settings and return an acknowledgement:
Array
(
    [acknowledged] => 1
)