Automating the install of Elastic Cloud Enterprise on AWS with Ansible
So you want to install Elastic Cloud Enterprise (you know, the orchestration solution for the Elastic Stack that simplifies and standardizes how you deploy, upgrade, resize, configure, and monitor one to many clusters from a single UI/API)
Installing ECE on one host isn’t tough. Installing it on two isn’t much harder. However, when you start dealing with 3, 5, 7, 11, etc., the complexity grows, as does the work involved in operating and maintaining (upgrading!) it all. The typical way to deal with the increase in complexity brought by scaling is to start automating deployment and configuration.
There are many tools that you can use to automate both infrastructure provisioning as well as application deployment. In this case I’m going to focus on the latter, and in particular on Ansible.
Why Ansible? Because we began providing an Ansible role for ECE deployments with version 2.2.
Why me? I’m totally new to Ansible, but wanted to play with it a bit to understand how it worked and get a feel for how hard it was to use to deploy and configure a multi-node ECE environment. The good news is, it’s pretty easy.
In this blog I’m going to set up a small ECE environment that could be used as a proof of concept, a test environment, or to host a very small production cluster. Typically, ECE users will attach many large machines so that they can host many different clusters and apps within it.
Tasks
We’re going to follow the small baseline installation example in the ECE docs. To do so we’ll need to:
- Create a Security Group
- Launch three EC2 instances
- Install ansible on your machine
- Download the ECE Ansible role
- Setup an Ansible project for our ECE deployment
- Create an Ansible inventory for our ECE environment
- Create an ECE playbook
- Run the playbook
- Celebrate
Create a Security Group
Not the most exciting way to get started, but is kinda necessary. Alternatively, you can open up all inbound and outbound ports (1-65535) to the world (please don’t) or to your own IP (better). We’re going to do it right though, because whatever is worth doing at all is worth doing well.
The port documentation will be our guide to wellness.
It’s worth noting that we’re only creating a single Security Group because each of our hosts are running all the ECE components. In a larger production environment, you’d likely have different Security Groups for each role (e.g. “ece-director”, “ece-allocator”, “ece-proxy”, etc) to ensure the fewest open ports possible. The single group also means the documentation will repeat some of the port ranges since they apply to multiple ECE components.
- Log in to the AWS console
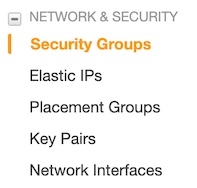
- Navigate to the Security Groups page on the EC2 network and security menu.
- Click the Create Security Group button.
- Fill out the basic form with a name (maybe put “ECE” in there somewhere), a description (for fun, totally avoid the use of “ECE”), and the right VPC.
- Add all the outbound traffic ports (HTTP and HTTPS) from "Anywhere".
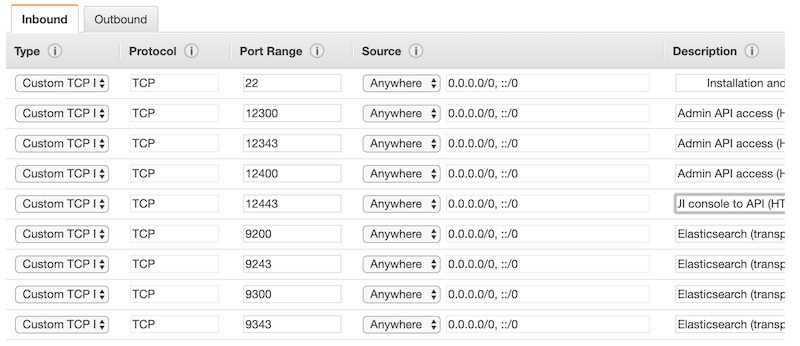
- Add SOME inbound traffic ports.
At this point, we only want to add the inbound ports that need to be allowed from any source. - Click Create.
- Select the Security Group you just created, and click the Edit button on the Inbound tab at the bottom of the screen.
- Add the internal inbound ports using the Security Group ID as the Source.
- Click Add Rule at the bottom of the popup modal window.
- Add everything else. It’ll look something like this:
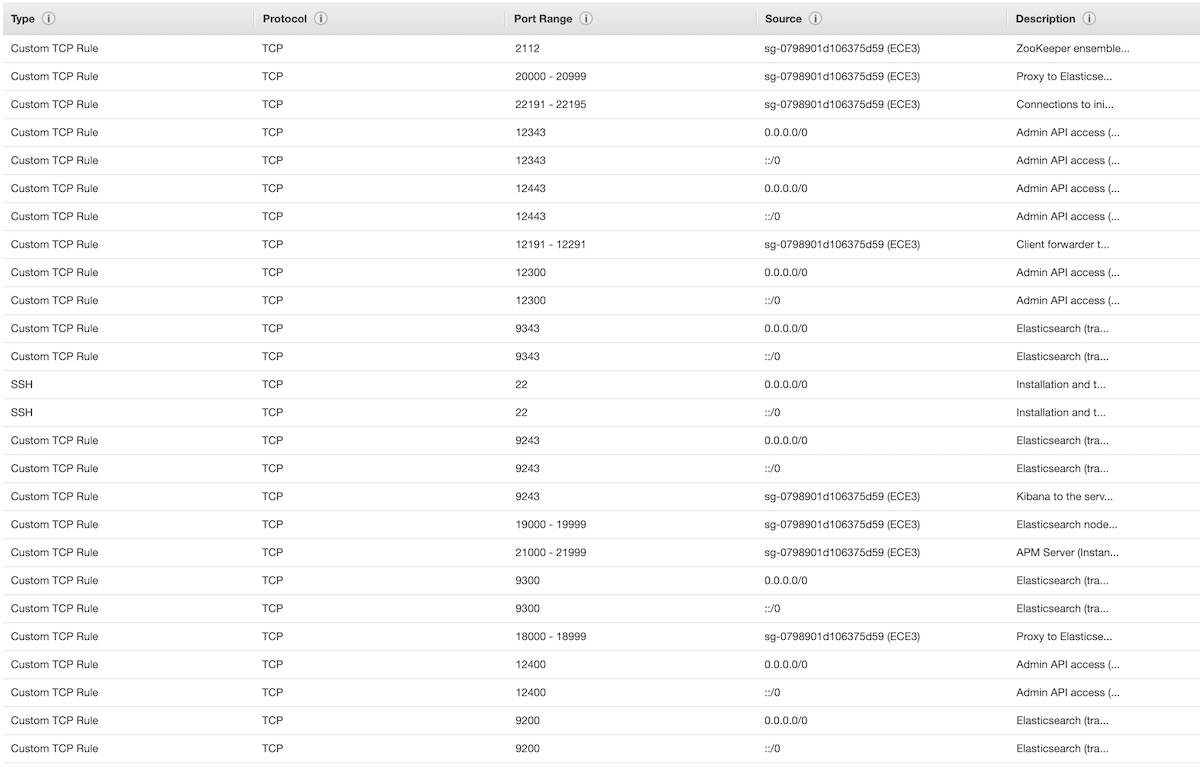
- Click Save

I just use the text from the Purpose column in the documentation for the rule Description
Launch three EC2 instance
We recommend installing Elasticsearch in three separate zones (racks or cloud availability zones, not data centers or regions) for production clusters to provide high availability. To deploy a three zone Elasticsearch cluster within ECE, we need to have ECE machines in three separate zones. Makes sense! Since we’re in AWS, these “zones” are availability zones within an AWS region.
- In the AWS console, navigate to the EC2 service dashboard, and click the Launch Instances button.
- Select an AMI. I’m going to use CentOS.
- Select an instance type.
- Click Review and Launch.
- Select the Security Group.
- Click the Edit Security Groups link.
- Select the option to select an existing group.
- Select the group you created.
- Click Review and Launch.
- Click the Launch button.
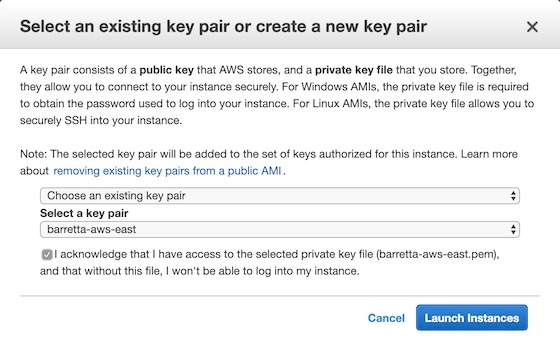
- Select a key pair and Launch (yet again...).
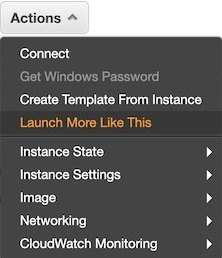
- Launch another instance “like this”.
- Deploy the new instance to a different availability zone.
- Click the Edit Instance Details.
- Select a subnet in a different zone than the first instance.
- Click the Review and Launch button, then the Launch button, select the key pair, and click Launch again.

- Repeat steps 8 & 9 to deploy the third instance into yet another availability zone.

The ECE docs recommend that host machines have a minimum of 128GB of memory for small deployments. Since I’m just spinning up a small test environment, and am interested in reducing my spend, I’m going a touch smaller. ECE also recommends SSDs for hosts running the ECE management services.
Given the above, I’ve selected the storage optimized i3.xl instances which give us 30.5GB of memory and 950GB of SSD disk.
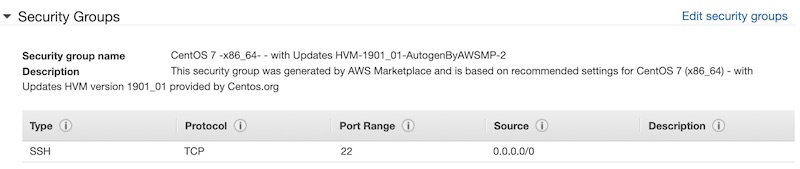
The default Security Group isn’t going to be enough for our needs, so we’ll use the one we just created.

If you don’t have one yet, follow the directions to create a new one. Otherwise, select an existing one and check the checkbox if you do actually have the private key.
To launch another instances like the last, navigate back to the EC2 dashboard, select your newly launched (or launching) instance (make a note of the availability zone it’s in), click the Actions button, and select Launch More Like This.
At this point you should have three i3.2xls running in different AZs within a single region, just itching to get some ECE magic sprinkled on them.
Install Ansible on your machine
I’m not going to walk through this one step by step. Check out the Ansible install guide for install guidance. As a Mac guy, I’ll do this
brew install ansible
Download the ECE Ansible role
The Elastic provides an Ansible role for ECE on GitHub.
The easiest way to get it is to use the Ansible Galaxy command-line tool.
ansible-galaxy install git+https://github.com/elastic/ansible-elastic-cloud-enterprise.git
On MacOS, the role ends up in ~/$HOME/.ansible/roles/ansible-elastic-cloud-enterprise
Setup an Ansible project for our ECE deployment
Ansible appears to like operating inside of a filesystem folder that has all the bits it expects. I could be wrong. I don’t know, I’m just starting out, back off!
What worked for me was creating a folder with a couple configuration files: one that described my AWS hosts and one that described the actions to perform, i.e. the playbook.
- Create a directory.
mkdir -p /workspace/ansible/ece-test
Yeah, I -P’d it: you will do things my way! ...or you can do it yours and put it wherever you like.
Create an Ansible inventory for our ECE environment
For our needs, the only thing we need to do is setup the inventory. There’s a ton you can do with an Ansible inventory, but our needs are basic, and so is our inventory setup
- Create a new file named hosts in our project directory.
- Build the inventory.
vi /workspace/ansible/ece-test/hosts
Use the below as reference, substituting your public DNS info, AZ info, and private keys.
[primary]
ec2-100-26-213-139.compute-1.amazonaws.com

[primary:vars]
availability_zone=us-east-1e

[secondary]
ec2-3-83-78-122.compute-1.amazonaws.com

[secondary:vars]
availability_zone=us-east-1d

[tertiary]
ec2-54-204-78-126.compute-1.amazonaws.com

[tertiary:vars]
availability_zone=us-east-1a

[aws:children]
primary
secondary
tertiary

[aws:vars]
ansible_ssh_private_key_file=/Users/barretta/.ssh/barretta-aws-east.pem
ansible_user=centos
ansible_become=yes
device_name=nvme0n1
What this does is:
- Define three host groups, one for each availability zone - we must use “primary” as the group name with our primary host.
- Set the avalilability_zone variable for each host group.
- These can be set to any values, but I used the actual AZ name where my hosts reside.
- Group the groups under a parent named “aws”.
- Setup some variables on that parent so Ansible will:
- ssh into our machines with our key.
- use the centos user when connecting.
- su to root
- Tell the elastic-cloud-enterprise role to use /dev/nvme0n1 as the main filesystem device. This value depends entirely on your environment, but is the right value for i3s in AWS.
It’s also important to use the public DNS for your hosts vs using the IP. This is because of how AWS networking works for intra-security groups rules. Briefly, when you create a security group rule and have it apply for hosts within the same security group, the private IPs of the hosts are used, not the public IPs. So while you could specify the public IP CIDR block when defining some outbound security group rules, this method is faster and easier IMHO.
Create an ECE playbook
We’re almost there. We’re going to look back to the GitHub project page and grab the example playbook it contains as part of the README. Basically, we’re going to copy and paste the playbook into a file.
- Create a new file named ece.yml in our project directory.
- Paste in what’s below:
vi /workspace/ansible/ece-test/ece.yml
---
- hosts: primary
  gather_facts: true
  roles:
    - ansible-elastic-cloud-enterprise
  vars:
    ece_primary: true

- hosts: secondary
  gather_facts: true
  roles:
    - ansible-elastic-cloud-enterprise
  vars:
    ece_roles: [director, coordinator, proxy, allocator]

- hosts: tertiary
  gather_facts: true
  roles:
    - ansible-elastic-cloud-enterprise
  vars:
    ece_roles: [director, coordinator, proxy, allocator]
The playbook is pretty straight forward: we list our three hosts by the names we’ve given them in the inventory file, mapped each host to the Elastic-created Ansible role we installed via Ansible Galaxy to do the ECE install and configuration, and specified which specific ECE roles each host should take. As you can see, by assigning the “ece_primary” role, that host becomes the First Host (which is important in ECE installations) and also implicitly gains all ECE roles.
Run the playbook
And here we go! Nono, this will go smoothly.
- Run it
ansible-playbook -i hosts ece.yml
Celebrate!
Or fix any mistakes...doh
If you messed up a bit as you went (like me), and hit an error like “Container frc-directors-director was not found” then the simplest thing to do is go in and delete all the docker images and delete the data directory thusly:
- Log in to the host with the error (you can see the IP from preceding log lines).
- Switch to the elastic user.
- Kill all the docker containers.
- Delete the data directory a resource busy error is ok.
- Switch back to your "main" machine and run the playbook again.
- Return to previous section and celebrate.
sudo su - elastic
docker kill $(docker ps -q)
sudo rm -rf /mnt/data
ansible-playbook -i hosts ece.yml
Conclusion
At this point, you should be the proud new owner of a three node, three zone ECE environment. Congrats!
Open a browser and navigate to the console using the info Ansible output at the end of the playbook execution. Mine looks like:
TASK [elastic-cloud-enterprise : debug]
***************************************************************
ok: [ec2-54-204-78-126.compute-1.amazonaws.com] => {
    "msg": "Adminconsole is reachable at: https://ec2-100-26-213-139.compute-1.amazonaws.com:12443"
}
TASK [elastic-cloud-enterprise : debug]
***************************************************************
ok: [ec2-54-204-78-126.compute-1.amazonaws.com] => {
    "msg": "Adminconsole password is: somethinglongandnarly"
}
Once in, click on the Platform link to verify you have three machines in three zones.
You now face a choice: bask in the glow of your newfound powers over the dark forces of modern devops technology or use ECE to spin up some Elasticsearch clusters. Or, do one first and then the other...that’s what I’d do, perhaps spending too long basking in the warm glowing warming glow.