SAML based Single Sign-On with Elasticsearch and Azure Active Directory
|
Editor's Note (August 10, 2020): This post has been updated: 1) The section on configuring the role claim has been updated, as Azure now automatically configures this claim, and 2) A section has been added to optionally configure group claims. Additionally, this post refers to X-Pack. Starting with the 6.3 release, the X-Pack code is now open and fully integrated as features into the Elastic Stack. |
With the release of the SAML realm within X-Pack security feature of Elasticsearch 6.2, implementing Single Sign-On (SSO) with a SAML 2.0 compliant identity provider is now just a simple case of configuration. We've written previously about how to enable SAML authentication in Kibana and Elasticsearch. In this post, we'll introduce you to a new feature of the Elastic Azure Resource Manager (ARM) template that makes it simple to integrate Azure Active Directory (AAD) for SAML SSO with a cluster deployed by the template.
Why use SAML SSO with Azure Active Directory?
Using SAML SSO for Elasticsearch with AAD means that Elasticsearch does not need to be seeded with any user accounts from the directory. Instead, Elasticsearch is able to rely on the claims sent within a SAML token in response to successful authentication to determine identity and privileges. As a company using Azure, there's a good chance that you already have all of your users, groups and roles set up within AAD, along with Azure Policy, to govern what individuals can do within Azure, so it makes a lot of sense to allow Elasticsearch to leverage this information to determine who can access the cluster and what they have access to therein.
Let's now take a look at the necessary components needed and walk through deploying a cluster to Azure with SAML SSO configured.
Azure Active Directory Premium
Enabling SSO features for a non-gallery application in Azure Active Directory requires a premium tier of AAD. If you're running on the free or basic tier, it's possible to try the P2 premium tier features for free for a trial period, after which you need to decide whether to continue with it and be billed for usage, or to revert back to the free tier. For the purposes of this post, a trial of Azure Premium P2 will suffice.
Create an Enterprise application
After upgrading AAD to a premium tier, it's necessary to create an Enterprise Application within AAD and configure it for SAML SSO. Consider an Enterprise application to be the management interface between AAD and the application that you wish to connect, in which users within AAD can be given access to the application and what attributes those users have in regards to the application.
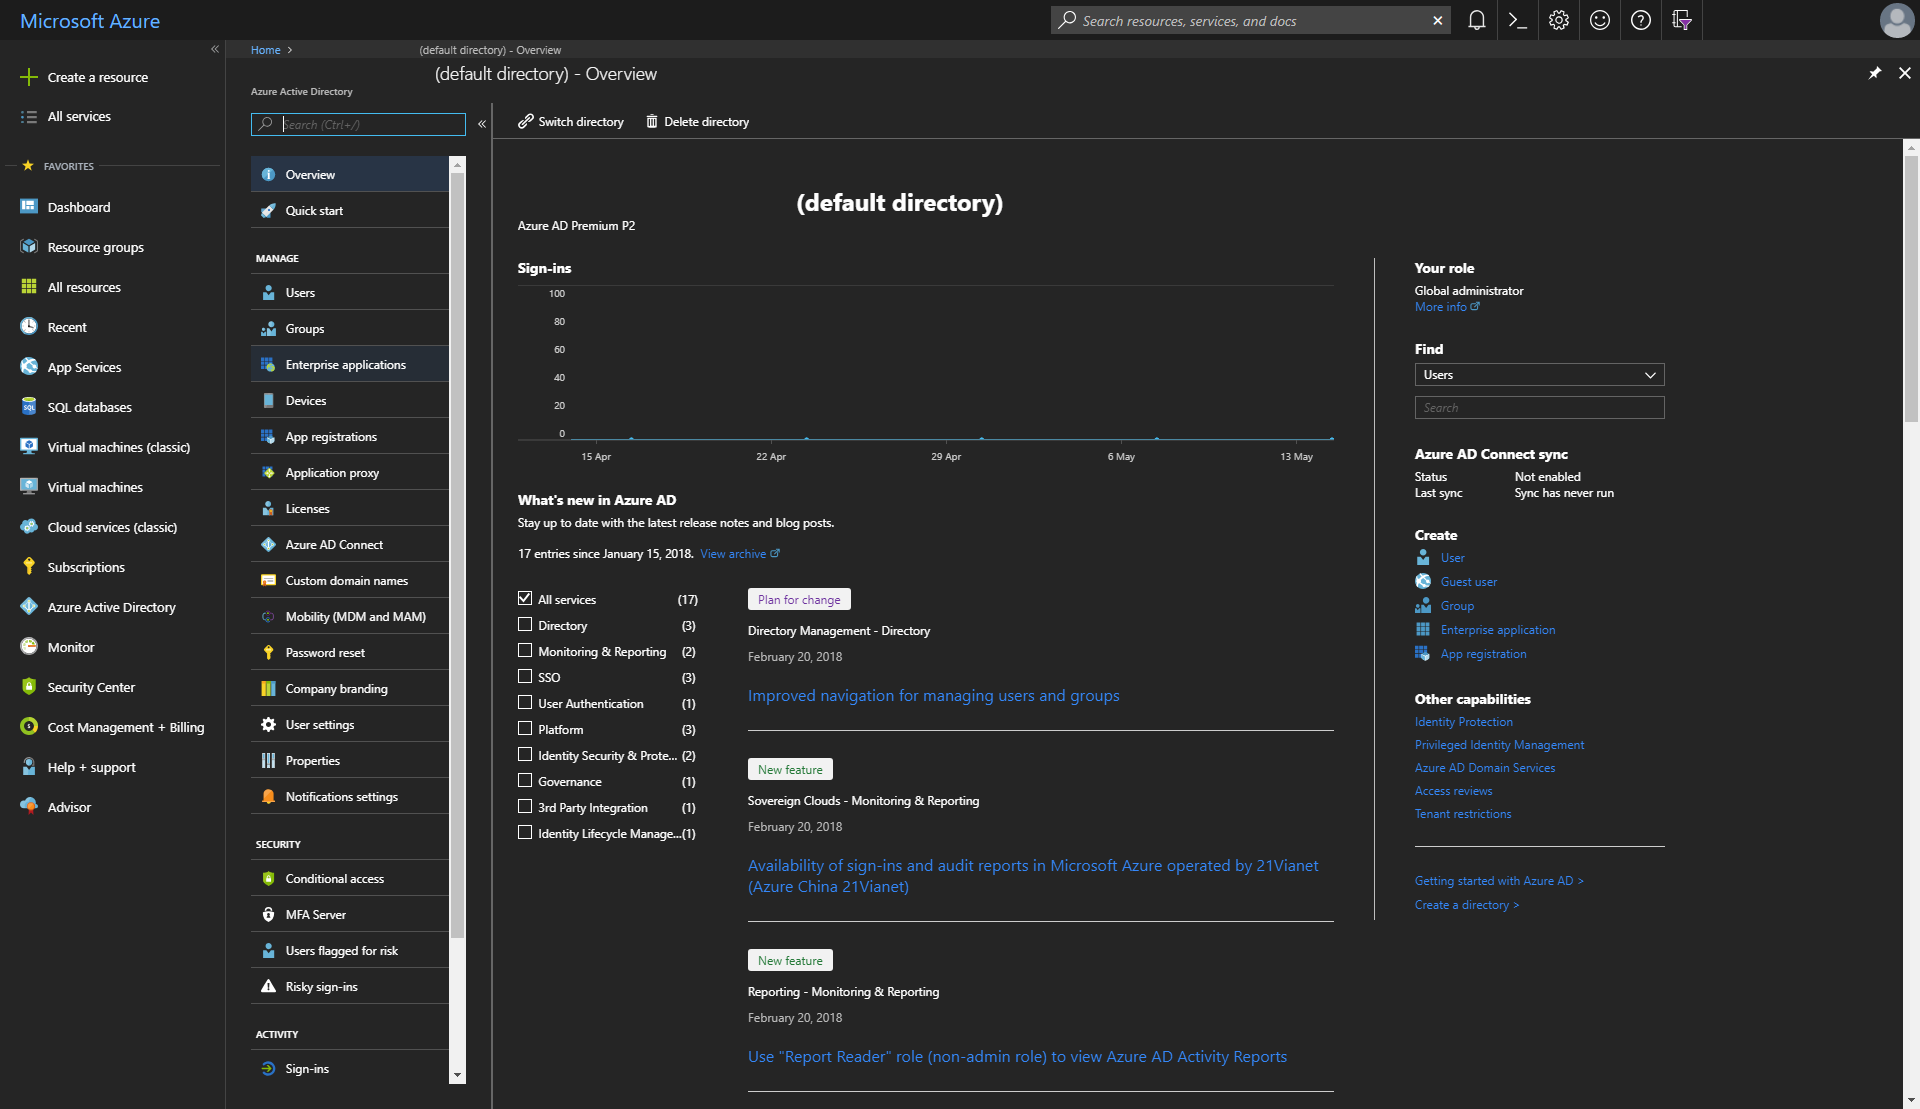
An Enterprise application can be created in the Azure Portal by first navigating to Azure Active Directory:
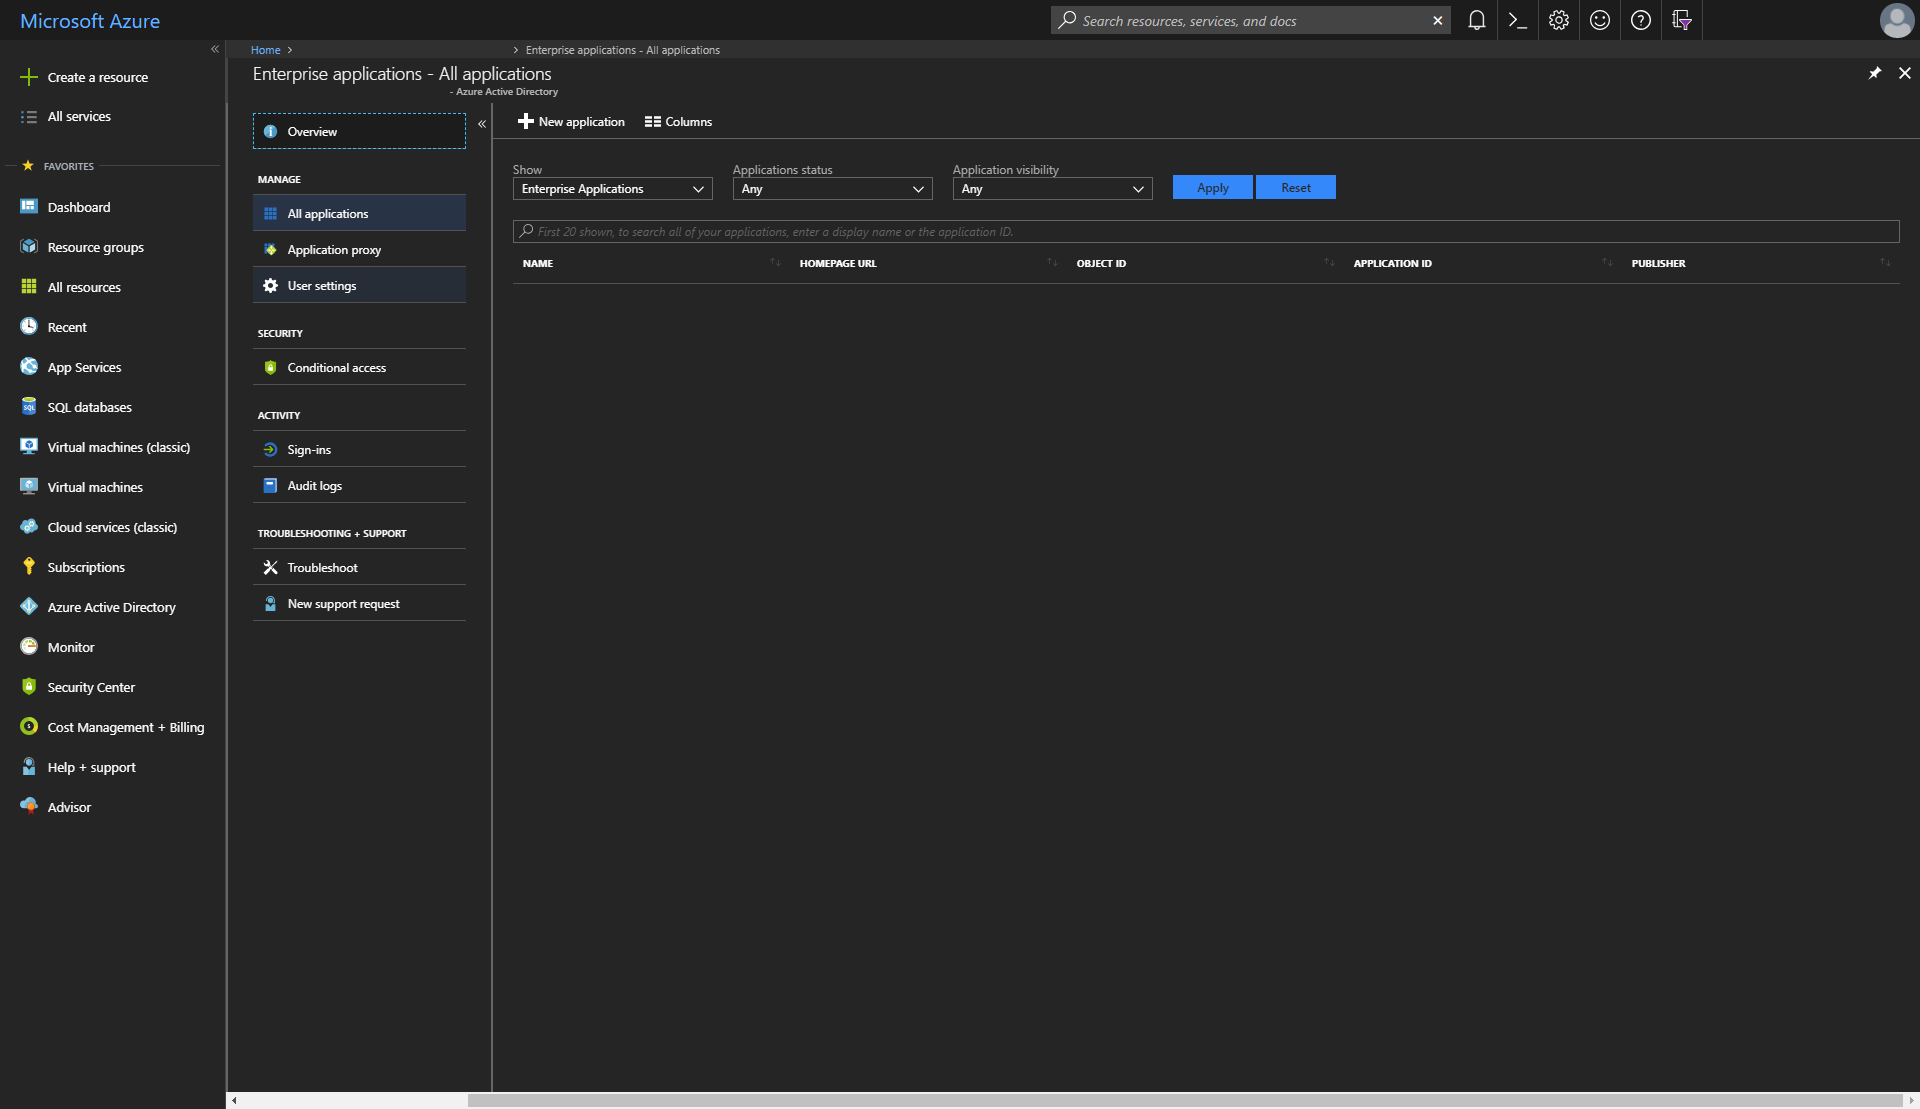
Choosing Enterprise applications from the AAD blade:
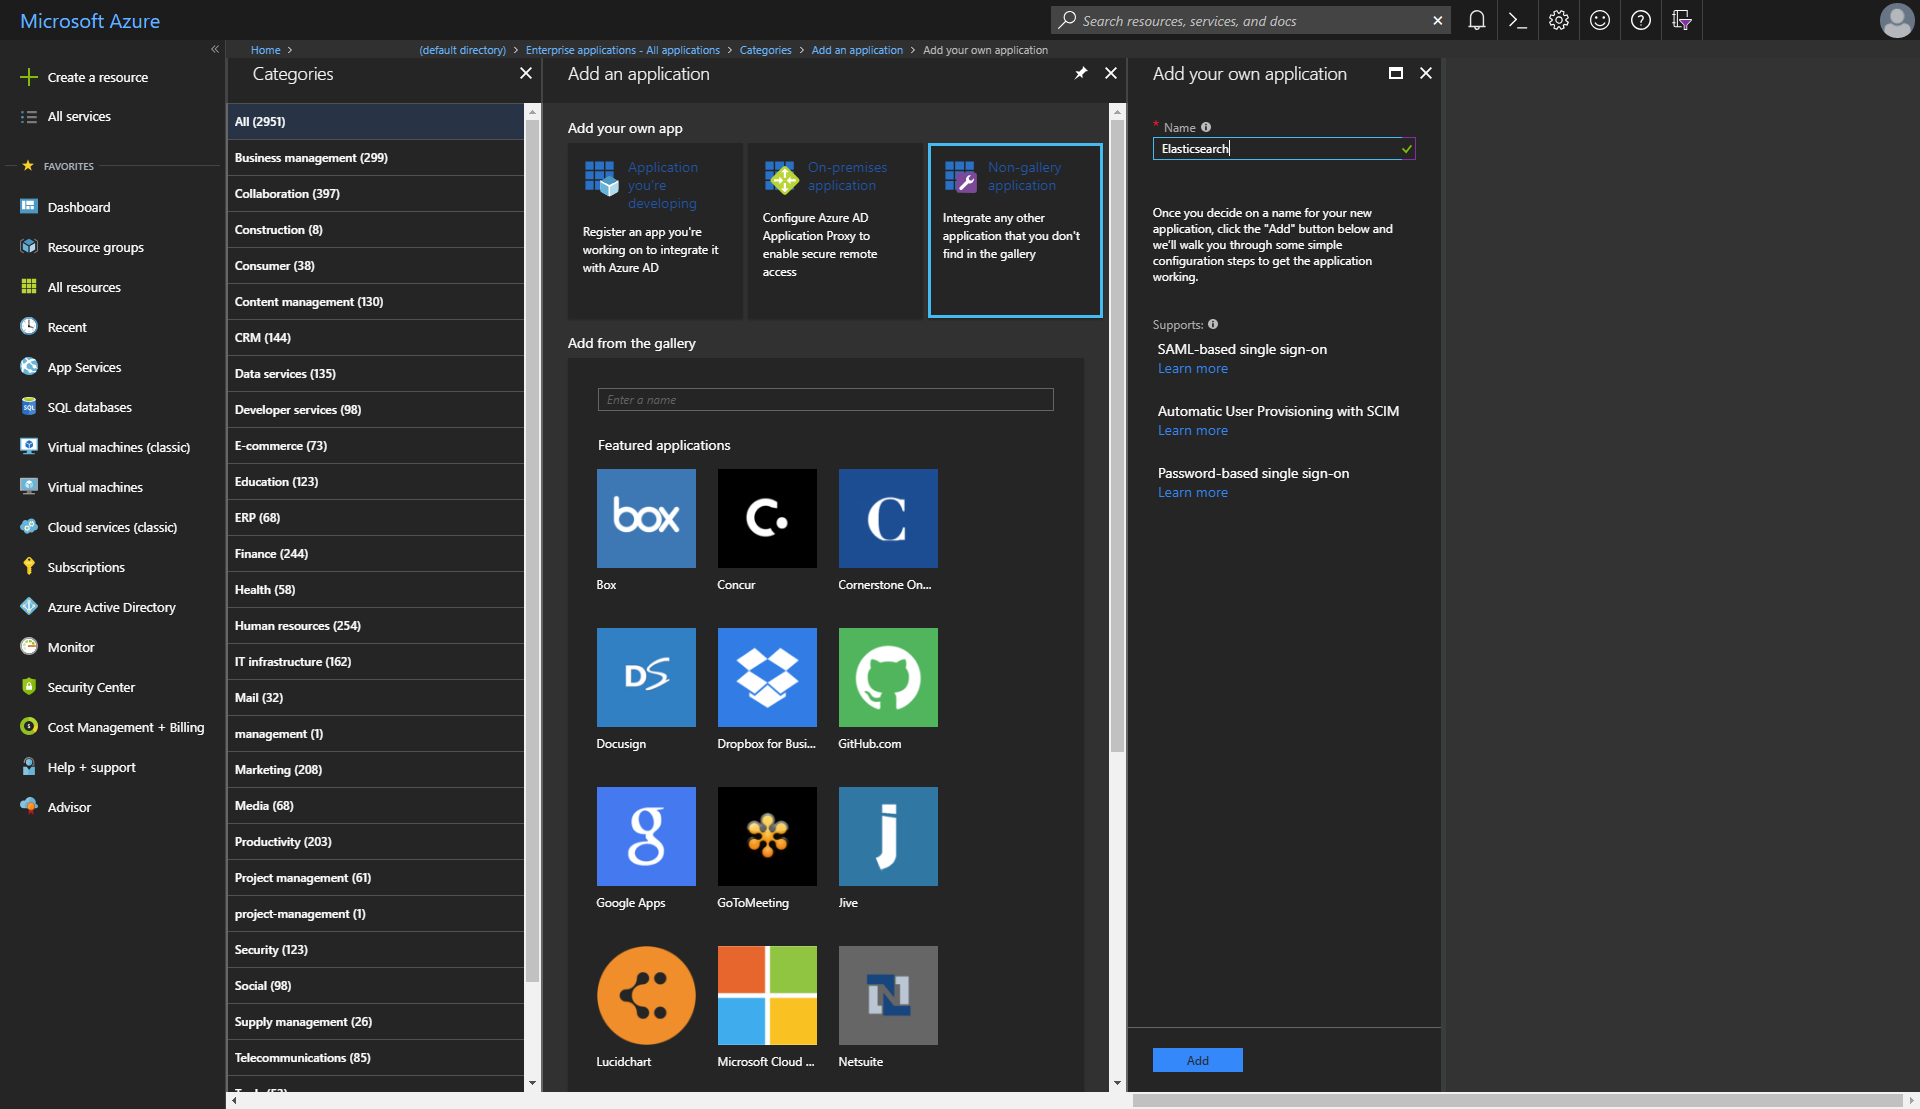
And then creating a new application using the + New application button. This will bring up a new blade where a new Enterprise application can be added, by choosing either an app from the Azure Active Directory app gallery, an on-premises application or a non-gallery application. There is no app in the app gallery for Elasticsearch as of yet, so choose a non-gallery application and give it a name, such as Elasticsearch.
The newly created application will now be listed under Enterprise applications.

Configure the Enterprise Application for Single Sign-On
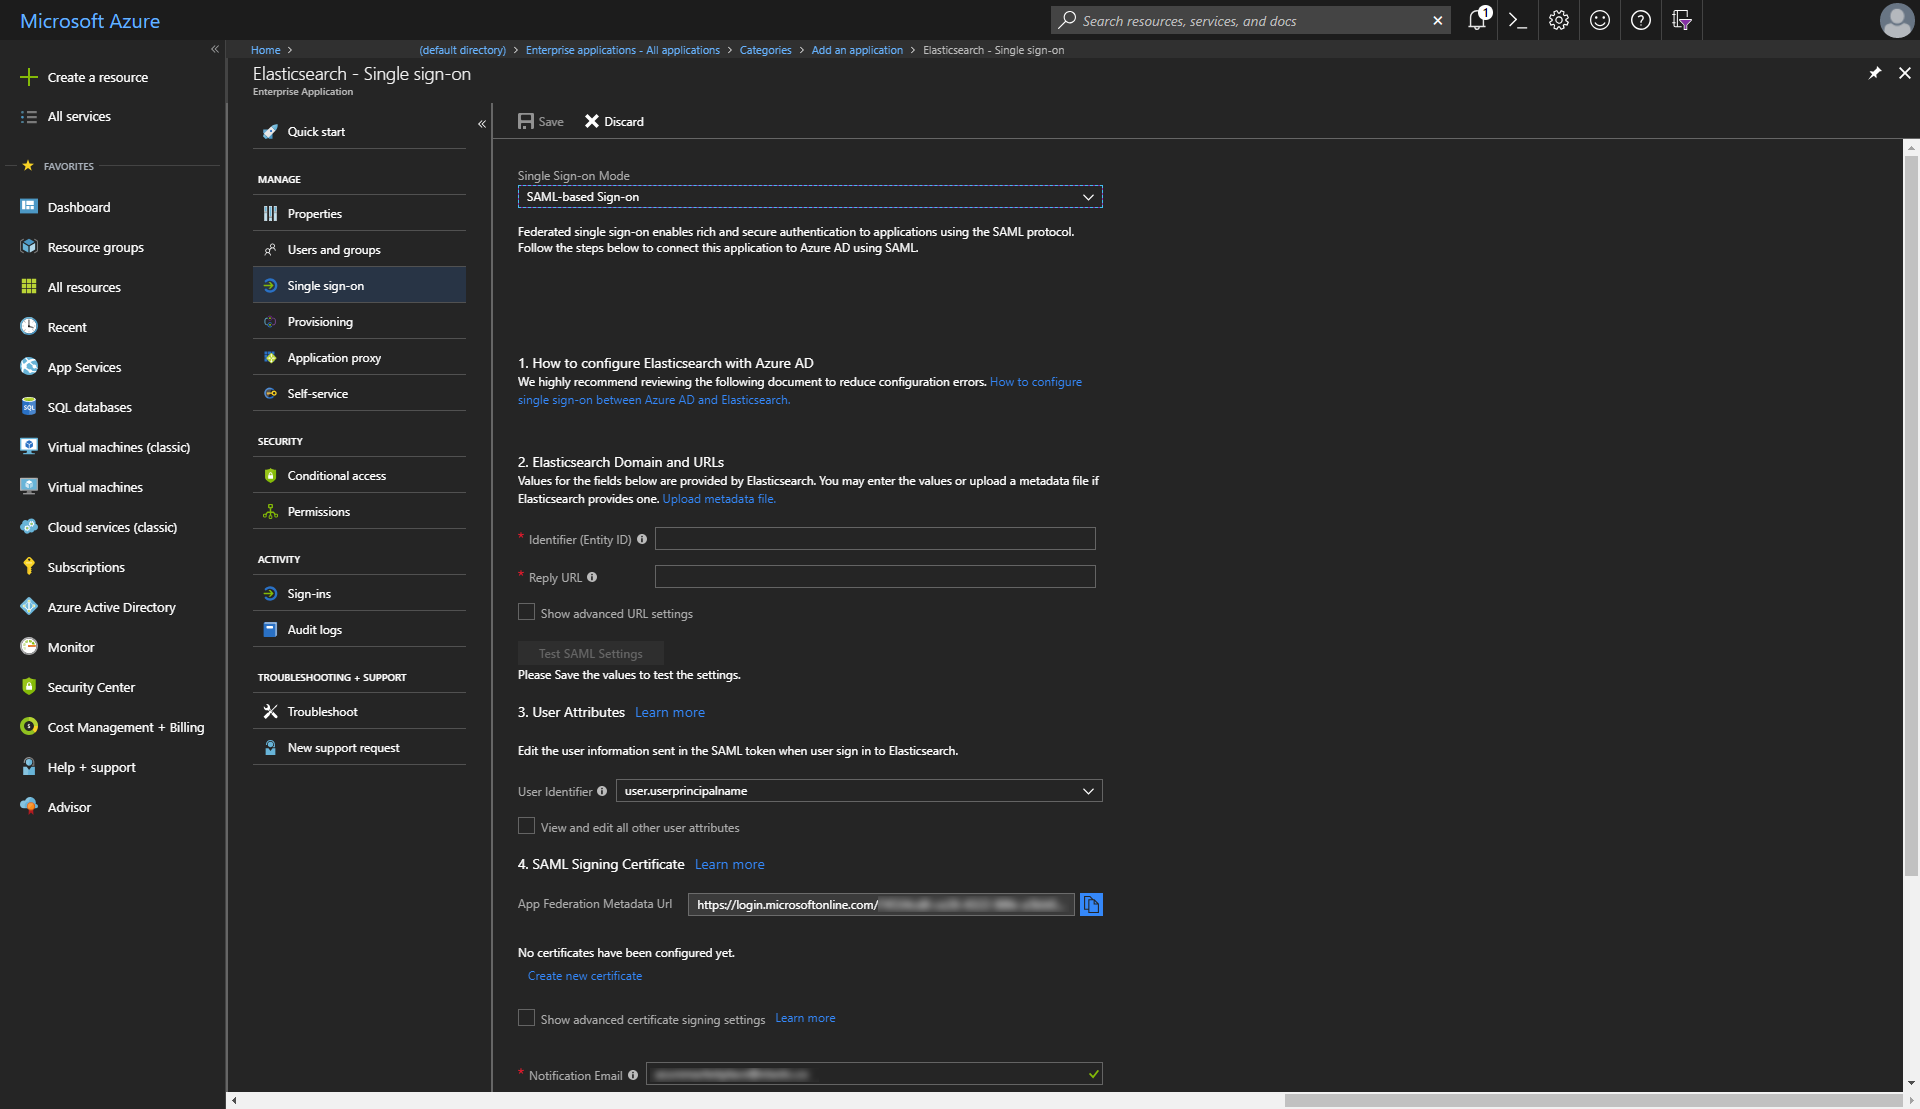
With an Enterprise application now created, it needs to be configured for SAML-based single sign-on. This is done by selecting Enterprise application within the Enterprise applications menu item of AAD, and selecting the Single sign-on menu item in the Enterprise application blade that appears.
At this point, it's worth noting a few things:
- The Identifier (EntityID) field maps to the
sp.entity_idfield within the SAML realm configuration of Elasticsearch, and represents the unique identifier for the instance(s) of Kibana for which SAML SSO will be enabled. When deploying Elasticsearch on Azure using the Elastic Azure Resource Manager (ARM) template, an instance of Kibana can be deployed with a public IP address, and the fully qualified domain name associated with this public IP address can be used for the value of the Identifier (EntityID) field here. What's more likely to be the case for a production environment however, is that SSL/TLS is configured for Kibana with a certificate and key generated for a domain name that you control, and aCNAMEDNS record is configured with an alias name pointing to the canonical domain name for Kibana in Azure. With such a setup, your domain name will be used in the Identifier (EntityID) field. For the purposes of this post, we're going to usehhttps://saml-aad.elastictest.co:5601as the value for this field. - The Reply URL field maps to the
sp.acsfield within the SAML realm configuration of Elasticsearch. This will be the same value as the Identifier (EntityID) field but with/api/security/v1/samlappended. For this blog post, we'll usehttps://saml-aad.elastictest.co:5601/api/security/v1/saml. - The App Federation Metadata Url is a URI from which the metadata for the Identity Provider can be retrieved, and maps to the
idp.metadata.pathfield within the SAML realm configuration of Elasticsearch. This value will be needed shortly when deploying Elasticsearch on Azure.
Inspecting the XML returned from the App Federation Metadata Url indicates what Claims are offered by AAD acting as a SAML 2.0 Identity Provider:
<?xml version="1.0" encoding="utf-8"?>
<EntityDescriptor ID="_<guid>" entityID="https://sts.windows.net/<guid>/"
    xmlns="urn:oasis:names:tc:SAML:2.0:metadata">
    <!-- elements omitted for brevity -->
    <RoleDescriptor xsi:type="fed:SecurityTokenServiceType" protocolSupportEnumeration="http://docs.oasis-open.org/wsfed/federation/200706"
            xmlns:xsi="http://www.w3.org/2001/XMLSchema-instance"
            xmlns:fed="http://docs.oasis-open.org/wsfed/federation/200706">
        <!-- elements omitted for brevity -->
        <fed:ClaimTypesOffered>
            <auth:ClaimType Uri="http://schemas.xmlsoap.org/ws/2005/05/identity/claims/name"
                xmlns:auth="http://docs.oasis-open.org/wsfed/authorization/200706">
                <auth:DisplayName>Name</auth:DisplayName>
                <auth:Description>The mutable display name of the user.</auth:Description>
            </auth:ClaimType>
            <auth:ClaimType Uri="http://schemas.xmlsoap.org/ws/2005/05/identity/claims/nameidentifier"
                xmlns:auth="http://docs.oasis-open.org/wsfed/authorization/200706">
                <auth:DisplayName>Subject</auth:DisplayName>
                <auth:Description>An immutable, globally unique, non-reusable identifier of the user that is unique to the application for which a token is issued.</auth:Description>
            </auth:ClaimType>
            <!-- etc... -->
            <auth:ClaimType Uri="http://schemas.microsoft.com/ws/2008/06/identity/claims/role"
                xmlns:auth="http://docs.oasis-open.org/wsfed/authorization/200706">
                <auth:DisplayName>Role Claim</auth:DisplayName>
                <auth:Description>Roles that the user or Service Principal is attached to</auth:Description>
            </auth:ClaimType>
        <fed:ClaimTypesOffered>
    </RoleDescriptor>
</EntityDescriptor>
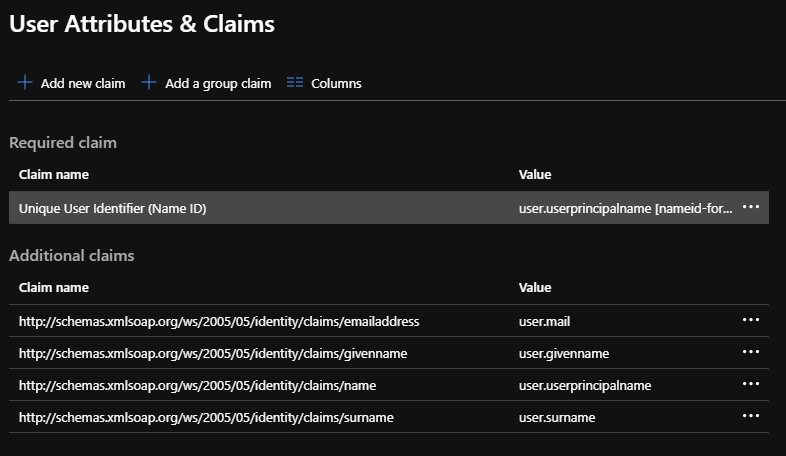
Currently, there are 19 different claims offered, and the SAML Token Attributes subsection of the User Attributes section within the Azure portal controls which claims will be sent in the response to a successful authentication request.

Any other offered claims can also be added here. Note that the Name value will be appended to the Namespace value to form a URI that must match the Uri attribute of an offered auth:ClaimType within the metadata.
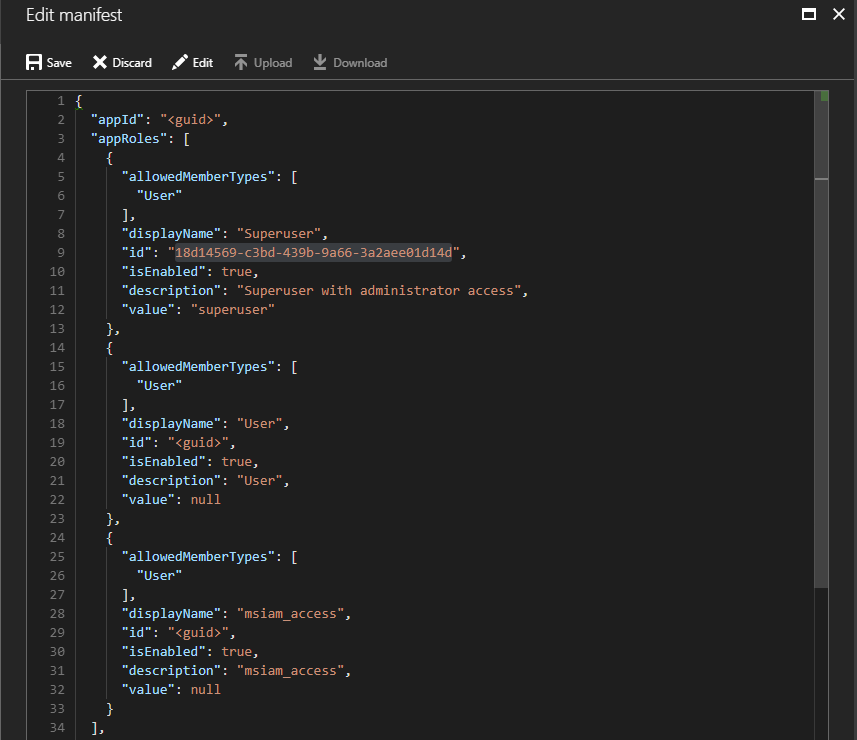
Application Manifest and appRoles
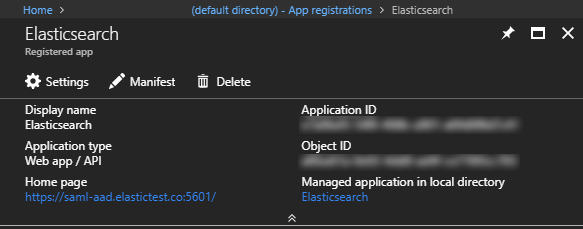
When an Enterprise application is first created, an Application Manifest is also created that controls the application's identity configuration with respect to AAD. Amongst other things, the app manifest specifies which roles can be declared for the Enterprise application, in the appRoles array. With the default configuration, two appRoles are created, User and msiam_access, which can be viewed by choosing the App registrations menu item within the Azure Active Directory blade, selecting the Enterprise application in question, and clicking the Manifest button
The manifest is a JSON object that looks similar to:
{
  "appId": "<guid>",
  "appRoles": [
    {
      "allowedMemberTypes": [
        "User"
      ],
      "displayName": "User",
      "id": "<guid>",
      "isEnabled": true,
      "description": "User",
      "value": null
    },
    {
      "allowedMemberTypes": [
        "User"
      ],
      "displayName": "msiam_access",
      "id": "<guid>",
      "isEnabled": true,
      "description": "msiam_access",
      "value": null
    }
  ],
  // ... etc.
}
There are many different ways we might decide to map how users within AAD will be assigned roles within Elasticsearch, for example, using the tenantid claim to map users in different directories to different roles, using the domain part of the name claim, etc.
The appRole to which an AAD user is assigned will be sent as the value of the role claim within the SAML token, allowing:
- Arbitrary appRoles to be defined within the manifest
- Assigning users within the Enterprise application to these roles
- Using the Role Claim sent within the SAML token to determine access within Elasticsearch.
For the purposes of this post, let's define a Superuser role within the appRoles:
{
  "appId": "<guid>",
  "appRoles": [
    {
      "allowedMemberTypes": [
        "User"
      ],
      "displayName": "Superuser",
      "id": "18d14569-c3bd-439b-9a66-3a2aee01d14d",
      "isEnabled": true,
      "description": "Superuser with administrator access",
      "value": "superuser"
    },
    // ... other roles
  ],
  // ... etc.
And save the changes to the manifest:
Optional: Configure group claims
Azure Active Directory can also provide a users group membership information within token claims, which can be used to determine which roles a user should be assigned in Elasticsearch. For example, users who are assigned the Application Administrator role within Azure Active Directory may be configured to have the superuser role within Elasticsearch.
Group claims can be added in the Enterprise application > Single sign-on > User Attributes & Claims subsection
For example, Directory roles can be sent in the claims by choosing Directory roles in the Group Claims blade
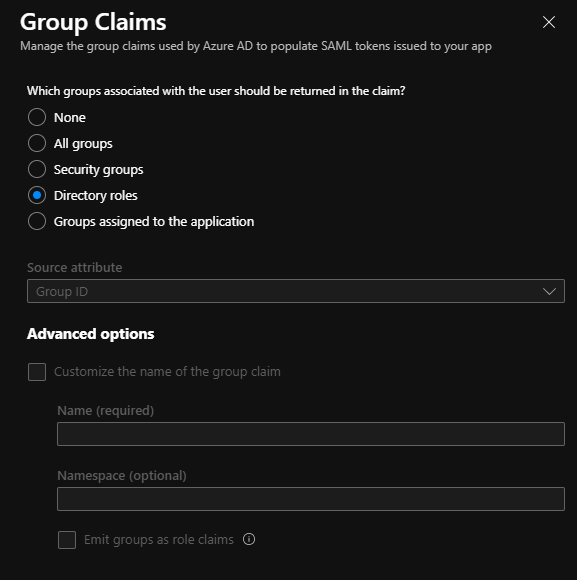
This will cause the RoleTemplate Id claim to be populated with the ids of the directory roles of the user.
AAD user access to Enterprise application
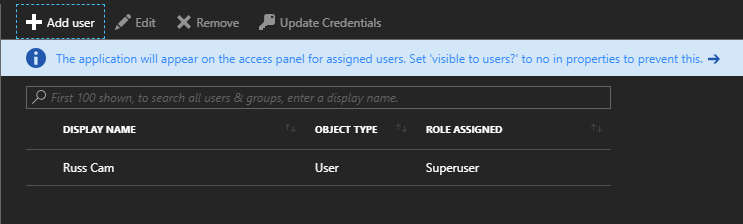
One final piece of configuration remains within the Azure portal, and that is to select which users within Azure Active Directory have access to the Enterprise application, and what role they should be assigned. This configuration is accessed through the Users and groups menu item within the chosen Enterprise application blade:
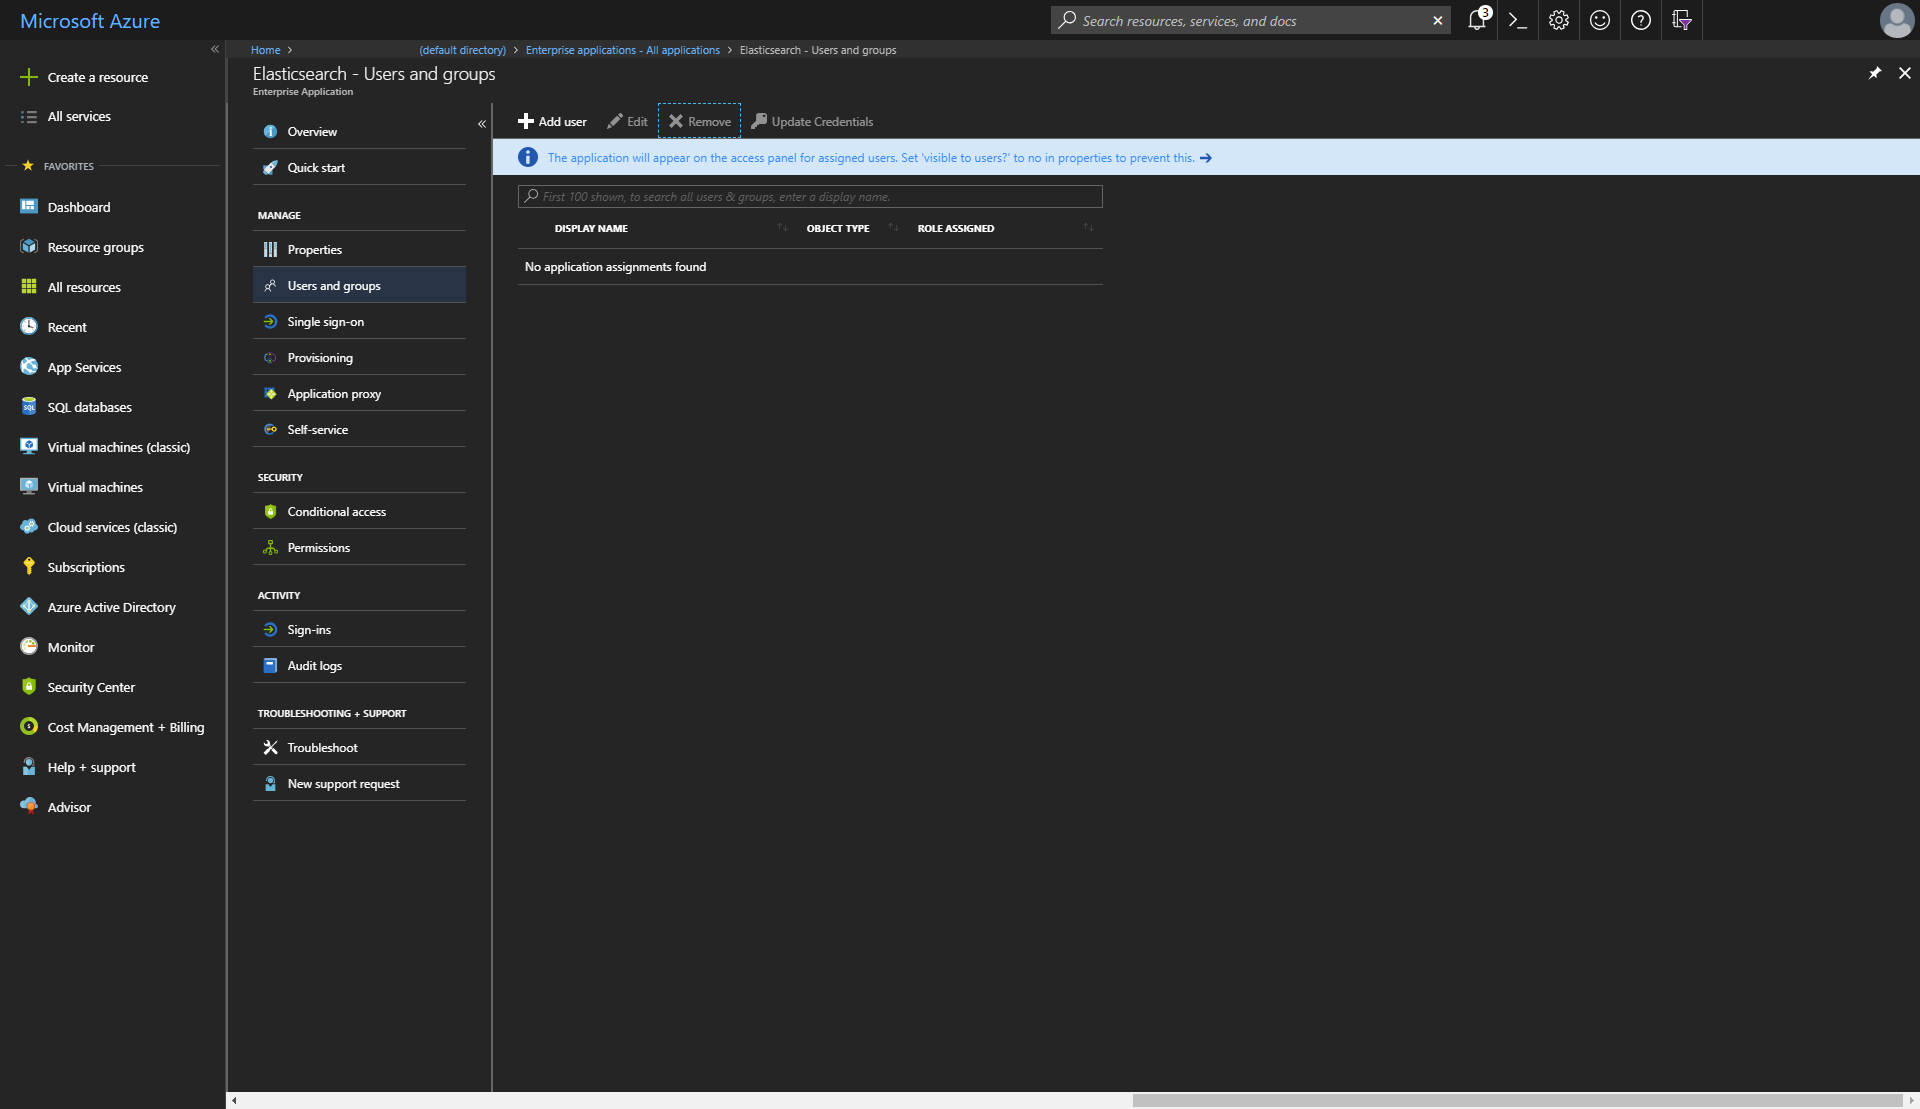
For this post, we'll assign access to one user and give that user the Superuser role created earlier:
And that's it for the minimal amount of Azure configuration needed for SAML-based Single Sign-on! All that's needed now is an Elasticsearch cluster and Kibana configured with AAD as an Identity Provider.
Deploy Elasticsearch on Azure
At the start of the post, we announced a new feature within the Elastic ARM template to configure SAML SSO with AAD. There are two new input parameters to the template for this
samlMetadataUri: the URI from which the metadata for the Identity Provider can be retrieved. For this, we can use the App Federation Metadata Url of the Enterprise application createdsamlServiceProviderUri: the optional URI of the Service Provider. In our case, this will be the same value that we supplied for the Identifier (EntityID) field in the portal (https://saml-aad.elastictest.co:5601). If not specified, the value used for this will be the fully qualified domain name of the public IP address assigned to Kibana.
In addition to providing a value for samlMetadataUri and optionally, samlServiceProviderUri, the following input parameter conditions also need to be satisfied
esVersionneeds to be one that supports the SAML realm i.e. Elasticsearch 6.2.0 or laterxpackPluginsmust beYes(default) to install a trial license of X-Packkibanamust beYes(default) to also deploy an instance of KibanaesHttpCertBloboresHttpCaCertBlobmust be provided to configure SSL/TLS for the HTTP layer of Elasticsearch. The value for this is the Base-64 encoded form of a PKCS#12 archive containing the certificate and key, or CA certificate and key in the case ofesHttpCaCertBlob, that will be used to generate certificates.
For a production environment, it's strongly recommended to also configure SSL/TLS for communication with Kibana using kibanaCertBlob and kibanaKeyBlob.
A minimum deployment with the template using Azure PowerShell looks like:
$templateVersion = "6.3.0"
$templateUrl = "https://raw.githubusercontent.com/elastic/azure-marketplace/$templateVersion/src"
$elasticTemplate = "$templateUrl/mainTemplate.json"
$httpCert = [Convert]::ToBase64String([IO.File]::ReadAllBytes("C:\http-cert.pfx"))
$kibanaCert = [Convert]::ToBase64String([IO.File]::ReadAllBytes("C:\saml-aad.crt"))
$kibanaKey = [Convert]::ToBase64String([IO.File]::ReadAllBytes("C:\saml-aad.key"))
$resourceGroup = "my-azure-cluster"
$name = $resourceGroup
$location = "Australia Southeast"
$clusterParameters = @{
    "artifactsBaseUrl"= $templateUrl
    "esVersion" = "6.3.0"
    "esClusterName" = $name
    "esHttpCertBlob" = $httpCert
    "adminUsername" = "russ"
    "authenticationType" = "password"
    "adminPassword" = "Password1234"
    "securityBootstrapPassword" = "Password123"
    "securityAdminPassword" = "AdminPassword123"
    "securityReadPassword" = "ReadPassword123"
    "securityKibanaPassword" = "KibanaPassword123"
    "securityLogstashPassword" = "LogstashPassword123"
    "kibanaCertBlob" = $kibanaCert
    "kibanaKeyBlob" = $kibanaKey
    "samlMetadataUri" = "https://login.microsoftonline.com/<guid>/federationmetadata/2007-06/federationmetadata.xml?appid=<guid>"
    "samlServiceProviderUri" = "https://saml-aad.elastictest.co:5601"
}
New-AzureRmResourceGroup -Name $resourceGroup -Location $location
New-AzureRmResourceGroupDeployment -Name $name -ResourceGroupName $resourceGroup -TemplateUri $elasticTemplate -TemplateParameterObject $clusterParameters
Or using Azure CLI 2.0:
template_version="6.3.0"
template_url="https://raw.githubusercontent.com/elastic/azure-marketplace/$template_version/src"
elastic_template="$template_url/mainTemplate.json"
http_cert=$(base64 /mnt/c/http-cert.pfx)
kibana_cert=$(base64 /mnt/c/saml-aad.crt)
kibana_key=$(base64 /mnt/c/saml-aad.key)
resource_group="my-azure-cluster"
name=$resource_group
location="Australia Southeast"
metadata_uri="https://login.microsoftonline.com/<guid>/federationmetadata/2007-06/federationmetadata.xml?appid=<guid>"
az group create --name $resource_group --location $location
az group deployment create \
    --name $name \
    --resource-group $resource_group \
    --template-uri $elastic_template \
    --parameters artifactsBaseUrl=$template_url esVersion=6.2.4 esClusterName=$name \
                 esHttpCertBlob=$http_cert adminUsername=russ authenticationType=password \
                 adminPassword=Password1234 securityAdminPassword=AdminPassword123 \
                 securityReadPassword=ReadPassword123 securityKibanaPassword=KibanaPassword123 \
                 securityLogstashPassword=LogstashPassword123 kibanaCertBlob=$kibana_cert \
                 kibanaKeyBlob=$kibana_key samlMetadataUri=$metadata_uri \
                 samlServiceProviderUri=https://saml-aad.elastictest.co:5601
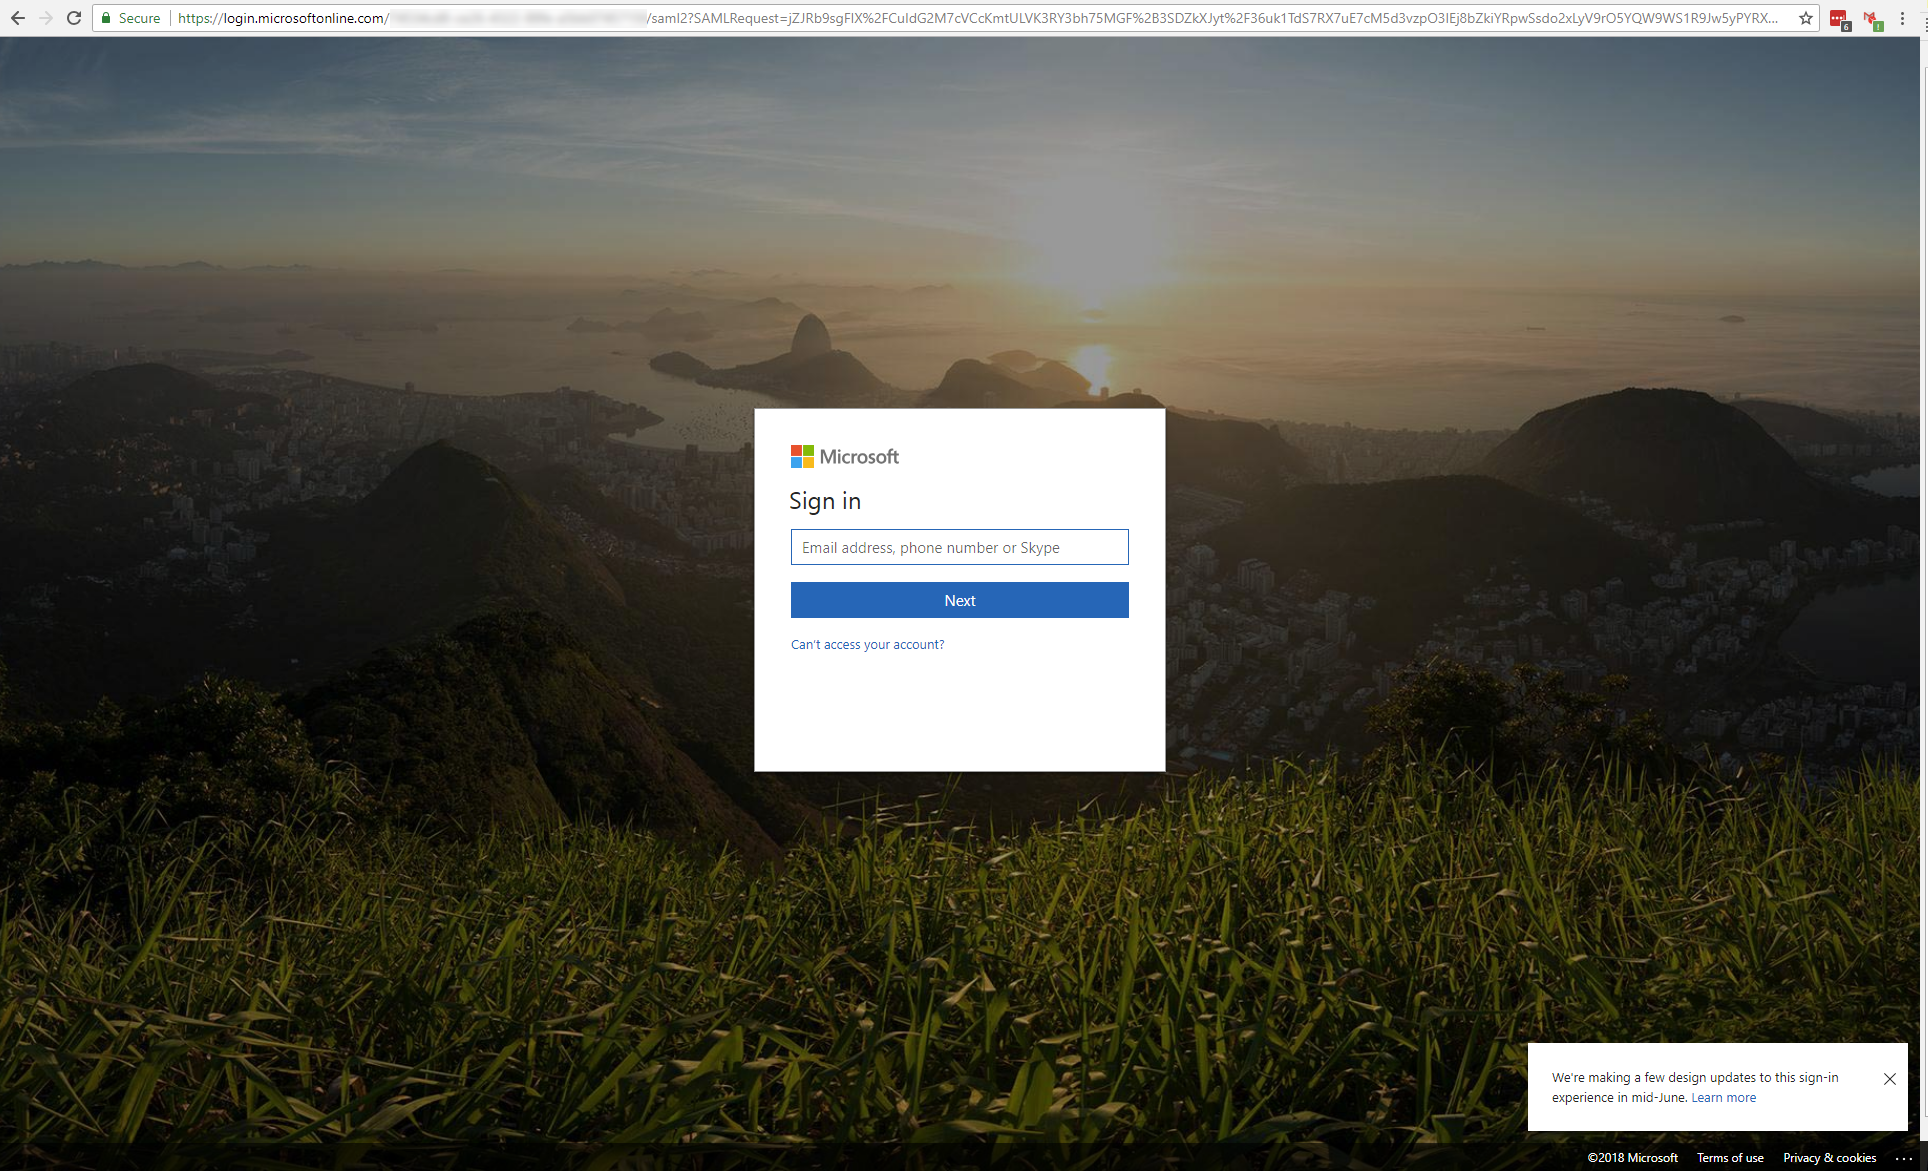
Testing Sign-On
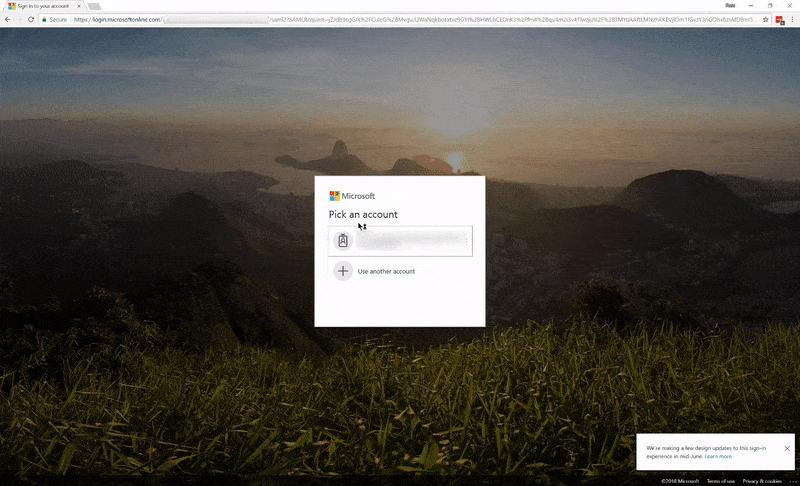
After waiting for the deployment to finish, we can now log in to Kibana at https://saml-aad.elastictest.co:5601. We'll be redirected to Microsoft to log in:
And after successful sign in, we'll be redirected back to Kibana:
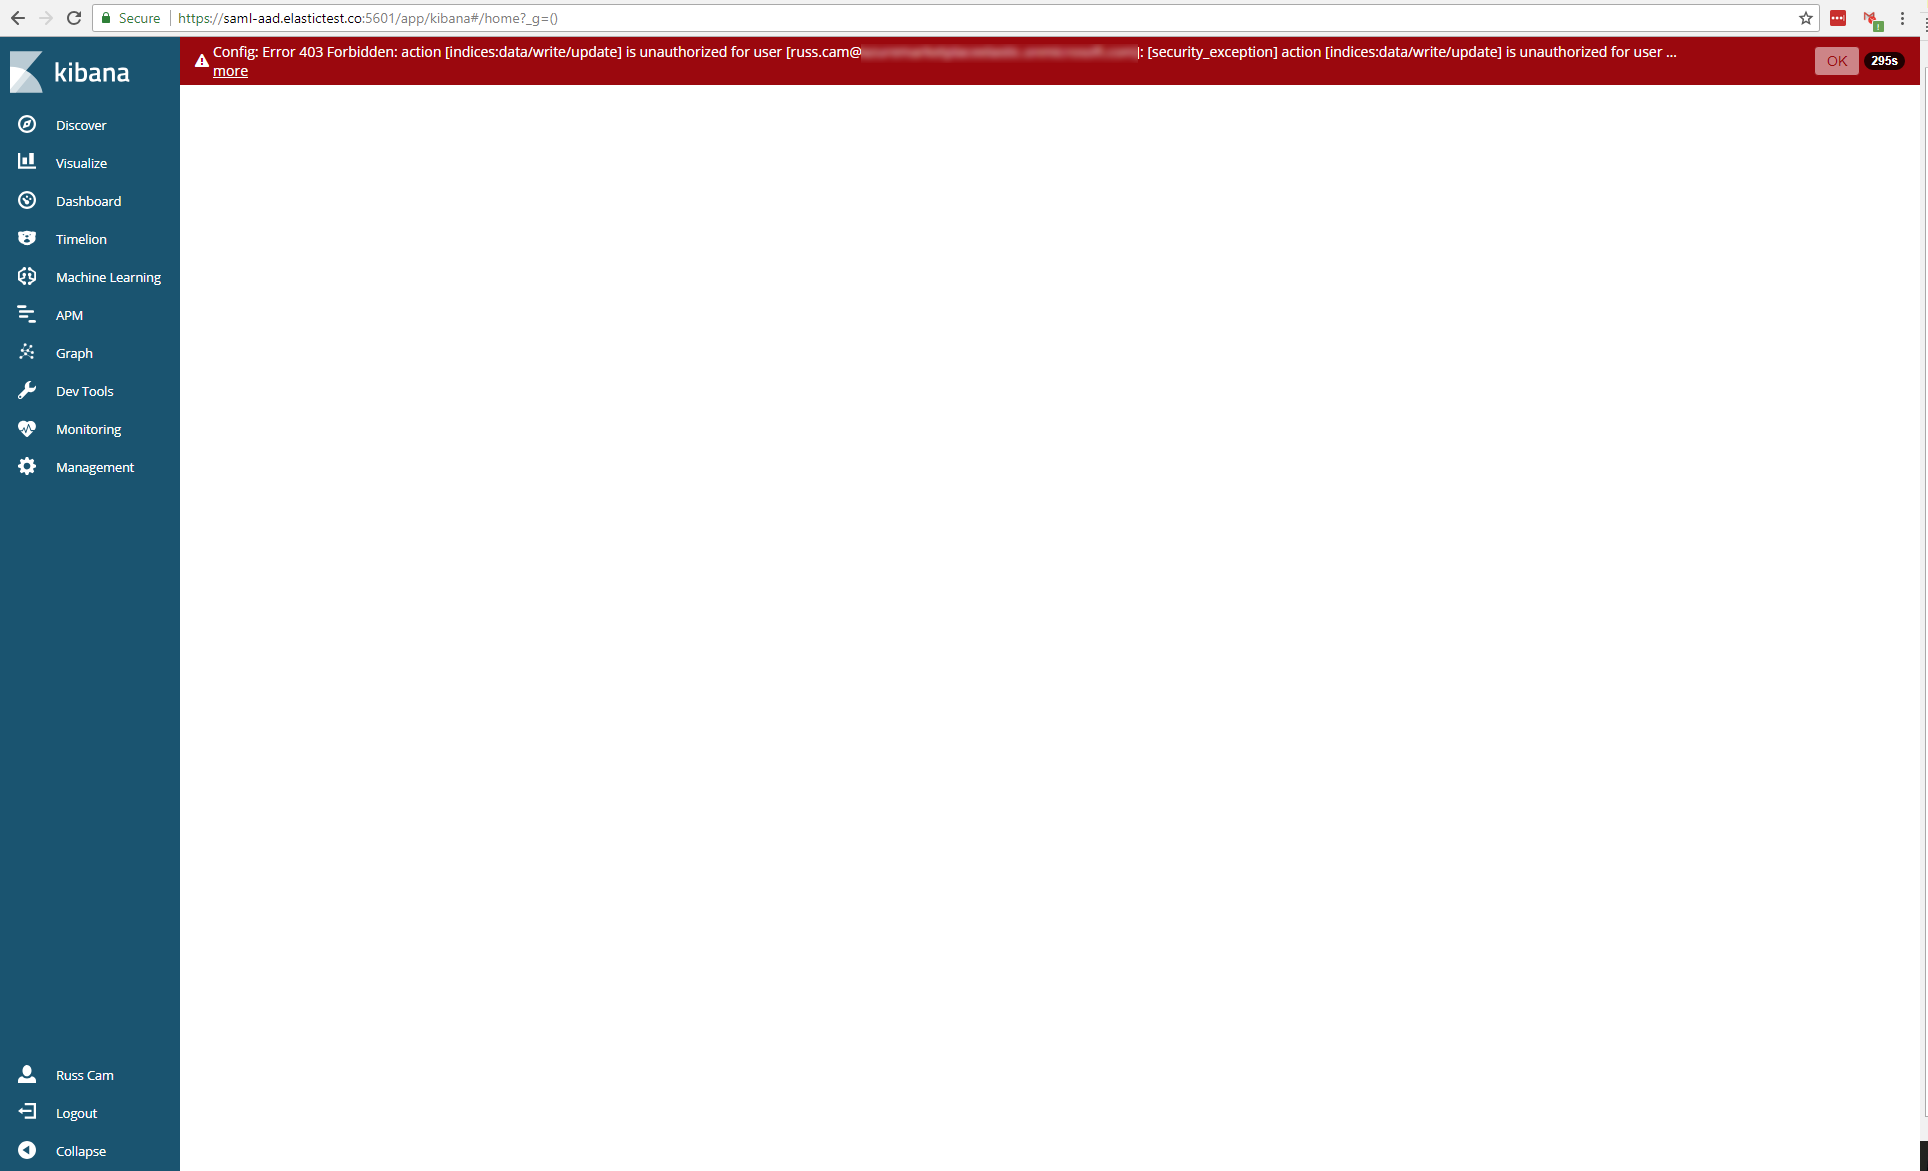
Success, we're now logged into Kibana! There's just one problem though, as can be seen in the red alert at the top of the main viewport in Kibana; we don't have access to anything within Elasticsearch or Kibana right now. Elasticsearch needs to be configured to map the claims presented in the SAML token to roles within Elasticsearch.
SAML Metadata and role mappings
Details about the currently logged in user can be retrieved within Kibana from the /api/security/v1/me endpoint. Looking at https://saml-aad.elastictest.co:5601/api/security/v1/me for the currently logged in user, we see:
{
  "username": "russ.cam@example.com",
  "roles": [
  ],
  "full_name": "Russ Cam",
  "email": null,
  "metadata": {
    "saml(http://schemas.microsoft.com/identity/claims/objectidentifier)": [
      "<guid>"
    ],
    "saml_nameid_format": "urn:oasis:names:tc:SAML:2.0:nameid-format:transient",
    "saml(http://schemas.microsoft.com/claims/authnmethodsreferences)": [
      "http://schemas.microsoft.com/ws/2008/06/identity/authenticationmethod/password"
    ],
    "saml(http://schemas.xmlsoap.org/ws/2005/05/identity/claims/name)": [
      "russ.cam@example.com"
    ],
    "saml_nameid": "<nameid>",
    "saml(http://schemas.microsoft.com/identity/claims/identityprovider)": [
      "https://sts.windows.net/<guid>/"
    ],
    "saml(http://schemas.microsoft.com/ws/2008/06/identity/claims/wids)": [
      "<guid>"
    ],
    "saml(http://schemas.microsoft.com/identity/claims/tenantid)": [
      "<guid>"
    ],
    "saml(http://schemas.microsoft.com/ws/2008/06/identity/claims/role)": [
      "superuser"
    ],
    "saml(http://schemas.microsoft.com/identity/claims/displayname)": [
      "Russ Cam"
    ]
  },
  "enabled": true,
  "scope": [
  ]
}
The superuser role that we configured within the appRoles of the Enterprise application manifest is coming through in the Role Claim, but the roles array is empty, meaning we have no roles assigned to this user for Elasticsearch. This is where the Role Mapping APIs come in, allowing rules to be defined to identify users and the roles they should be granted within Elasticsearch. The Single Sign-On support for Azure AAD within the ARM template configures a SAML realm called saml_aad within the Elasticsearch configuration, and maps the Role Claim to the groups attribute.
Let's now configure two role mappings for users signing in through the configured saml_aad SAML realm. First, give all users authenticating through the SAML realm the kibana_user built-in role, a role that grants access to Kibana indices and monitoring privileges to the cluster. Second, let's give users with the superuser Role Claim the superuser role within Elasticsearch. If group claims were also configured for the Enterprise application within AAD, we could also use this claim information within role mappings to give different Azure groups specific roles within Elasticsearch.
Since the ARM template SAML realm configuration also still allows access to the cluster using Basic authentication, the built-in elastic superuser account also configured by the ARM template can be used to add the role mappings, either by logging into Kibana through the /login endpoint directly, or if an external load balancer has also been deployed, by issuing a curl request to the external load balancer endpoint. We'll use the former method, and issue the following two requests in Kibana Dev Tools Console:
PUT /_xpack/security/role_mapping/saml-kibana-user
{
  "roles": [ "kibana_user" ],
  "enabled": true,
  "rules": {
    "field": { "realm.name": "saml_aad" }
  }
}
And:
PUT /_xpack/security/role_mapping/saml-superuser
{
  "roles": [ "superuser" ],
  "enabled": true,
  "rules": {
    "all": [
      { "field": { "realm.name": "saml_aad" } },
      { "field": { "groups": "superuser" } }
    ]
  }
}
With these two role mappings defined, when logging in using SAML SSO through AAD now, the user configured earlier has both kibana_user and superuser roles within Elasticsearch, which can be seen by looking at the response to the /api/security/v1/me endpoint:
{
  "username": "russ.cam@example.com",
  "roles": [
    "kibana_user",
    "superuser"
  ],
  ...
}
And that's it, we're all set up for SAML based Single Sign-On through Azure Active Directory! Since SAML SSO with AAD supports SAML logout, the overall SAML login/logout flow looks like:
Summary
I hope you'll agree that we've made it easy to configure Azure Active Directory for SAML Single Sign-On with a cluster deployed using the ARM template! As we continue to invest in our Azure offering, we expect to make this even easier in the future with the introduction of an Elasticsearch application in the Azure Active Directory gallery. As ever, we're keen to hear your thoughts and if you have questions about the integration, feel free to open a topic in the Elasticsearch Discuss forums.