Accelerate actions on anomaly detection jobs with the Kibana alerting framework


 Share on Twitter
Share on Twitter

 Share on LinkedIn
Share on LinkedIn

 Share on Facebook
Share on Facebook

 Share by Email
Share by Email

 Print this page
Print
In Elastic 7.15, anomaly detection has become an easier to use and more powerful tool for users who need advanced analytics capabilities. In addition to retrospective analysis, users can enable real-time monitoring to alert their organizations to data anomalies. Kibana Alerts and Actions that use our newly updated Machine Learning (ML) rule types make it easier for users to receive anomaly notifications.
The integration with the new Kibana Alerting framework allows users to define custom logic and provides an easy and flexible way of setting up conditions. And users don’t have to worry about keeping the actual implementation up-to-date, as the framework will handle all the hard work.
This blog covers the basic setup for the new ML alerting rule types and provides useful hints and insights about what happens under the hood. You’ll better understand your anomaly detection alerts when they happen, and have a better idea of what to do next. For other alerting rules that rely on anomaly detection results, such as security detection rules, please refer to the appropriate documentation.
Why Kibana Alerts and Actions and key differences with Watcher
Older Elastic Stack versions provided Watcher as a go-to solution for ML alerting. Starting with the 7.12 release, we migrated to the Kibana Alerting framework which is a more intuitive way of managing alerts. The critical difference between these alerting frameworks is the execution environment. While Watches run on the Elasticsearch side, Alerts and Actions are part of the Kibana platform.
In general, Kibana’s alerting solution has vital advantages. While Watcher has some limitations with security integration, Alerts and Actions enable you to leverage Kibana’s roles and permissions. Watcher also requires you to define input in JSON format which is very flexible, but not user-friendly. It also relies on you to adjust the implementation yourself with version upgrades.
For those wanting to continue to use Watcher for anomaly detection, we have documented examples here, which can be adapted to suit your use case. These are examples of alerting on anomaly results. We do not provide examples for using Watcher to alert on the health of anomaly detection jobs as this information is not available using the elasticsearch query DSL.
Requirements
With Elastic Cloud deployments, you shouldn’t worry about any additional setup. Try it yourself if you haven’t experienced the fully-featured cloud environment already! For on-premises Elastic Stack deployment, you might need some additional configuration. Please make sure you have the basic setup steps completed first. ML alerting also requires a Platinum license as with all ML features in Elastic Stack.
Anomaly detection alerting rule
The first rule introduced is for alerting upon the anomalies found by your anomaly detection jobs. It’d be helpful to get familiar with the way anomaly scoring works and the difference between a bucket, record, and influencer result. This blog provides a clear explanation of how the choice of result type affects the rate of alerts you will receive.
There are multiple ways of initializing the alerting rule.
Right after creating your anomaly detection job and starting it in real-time, you’ll have an option to create your rule directly from the wizard.
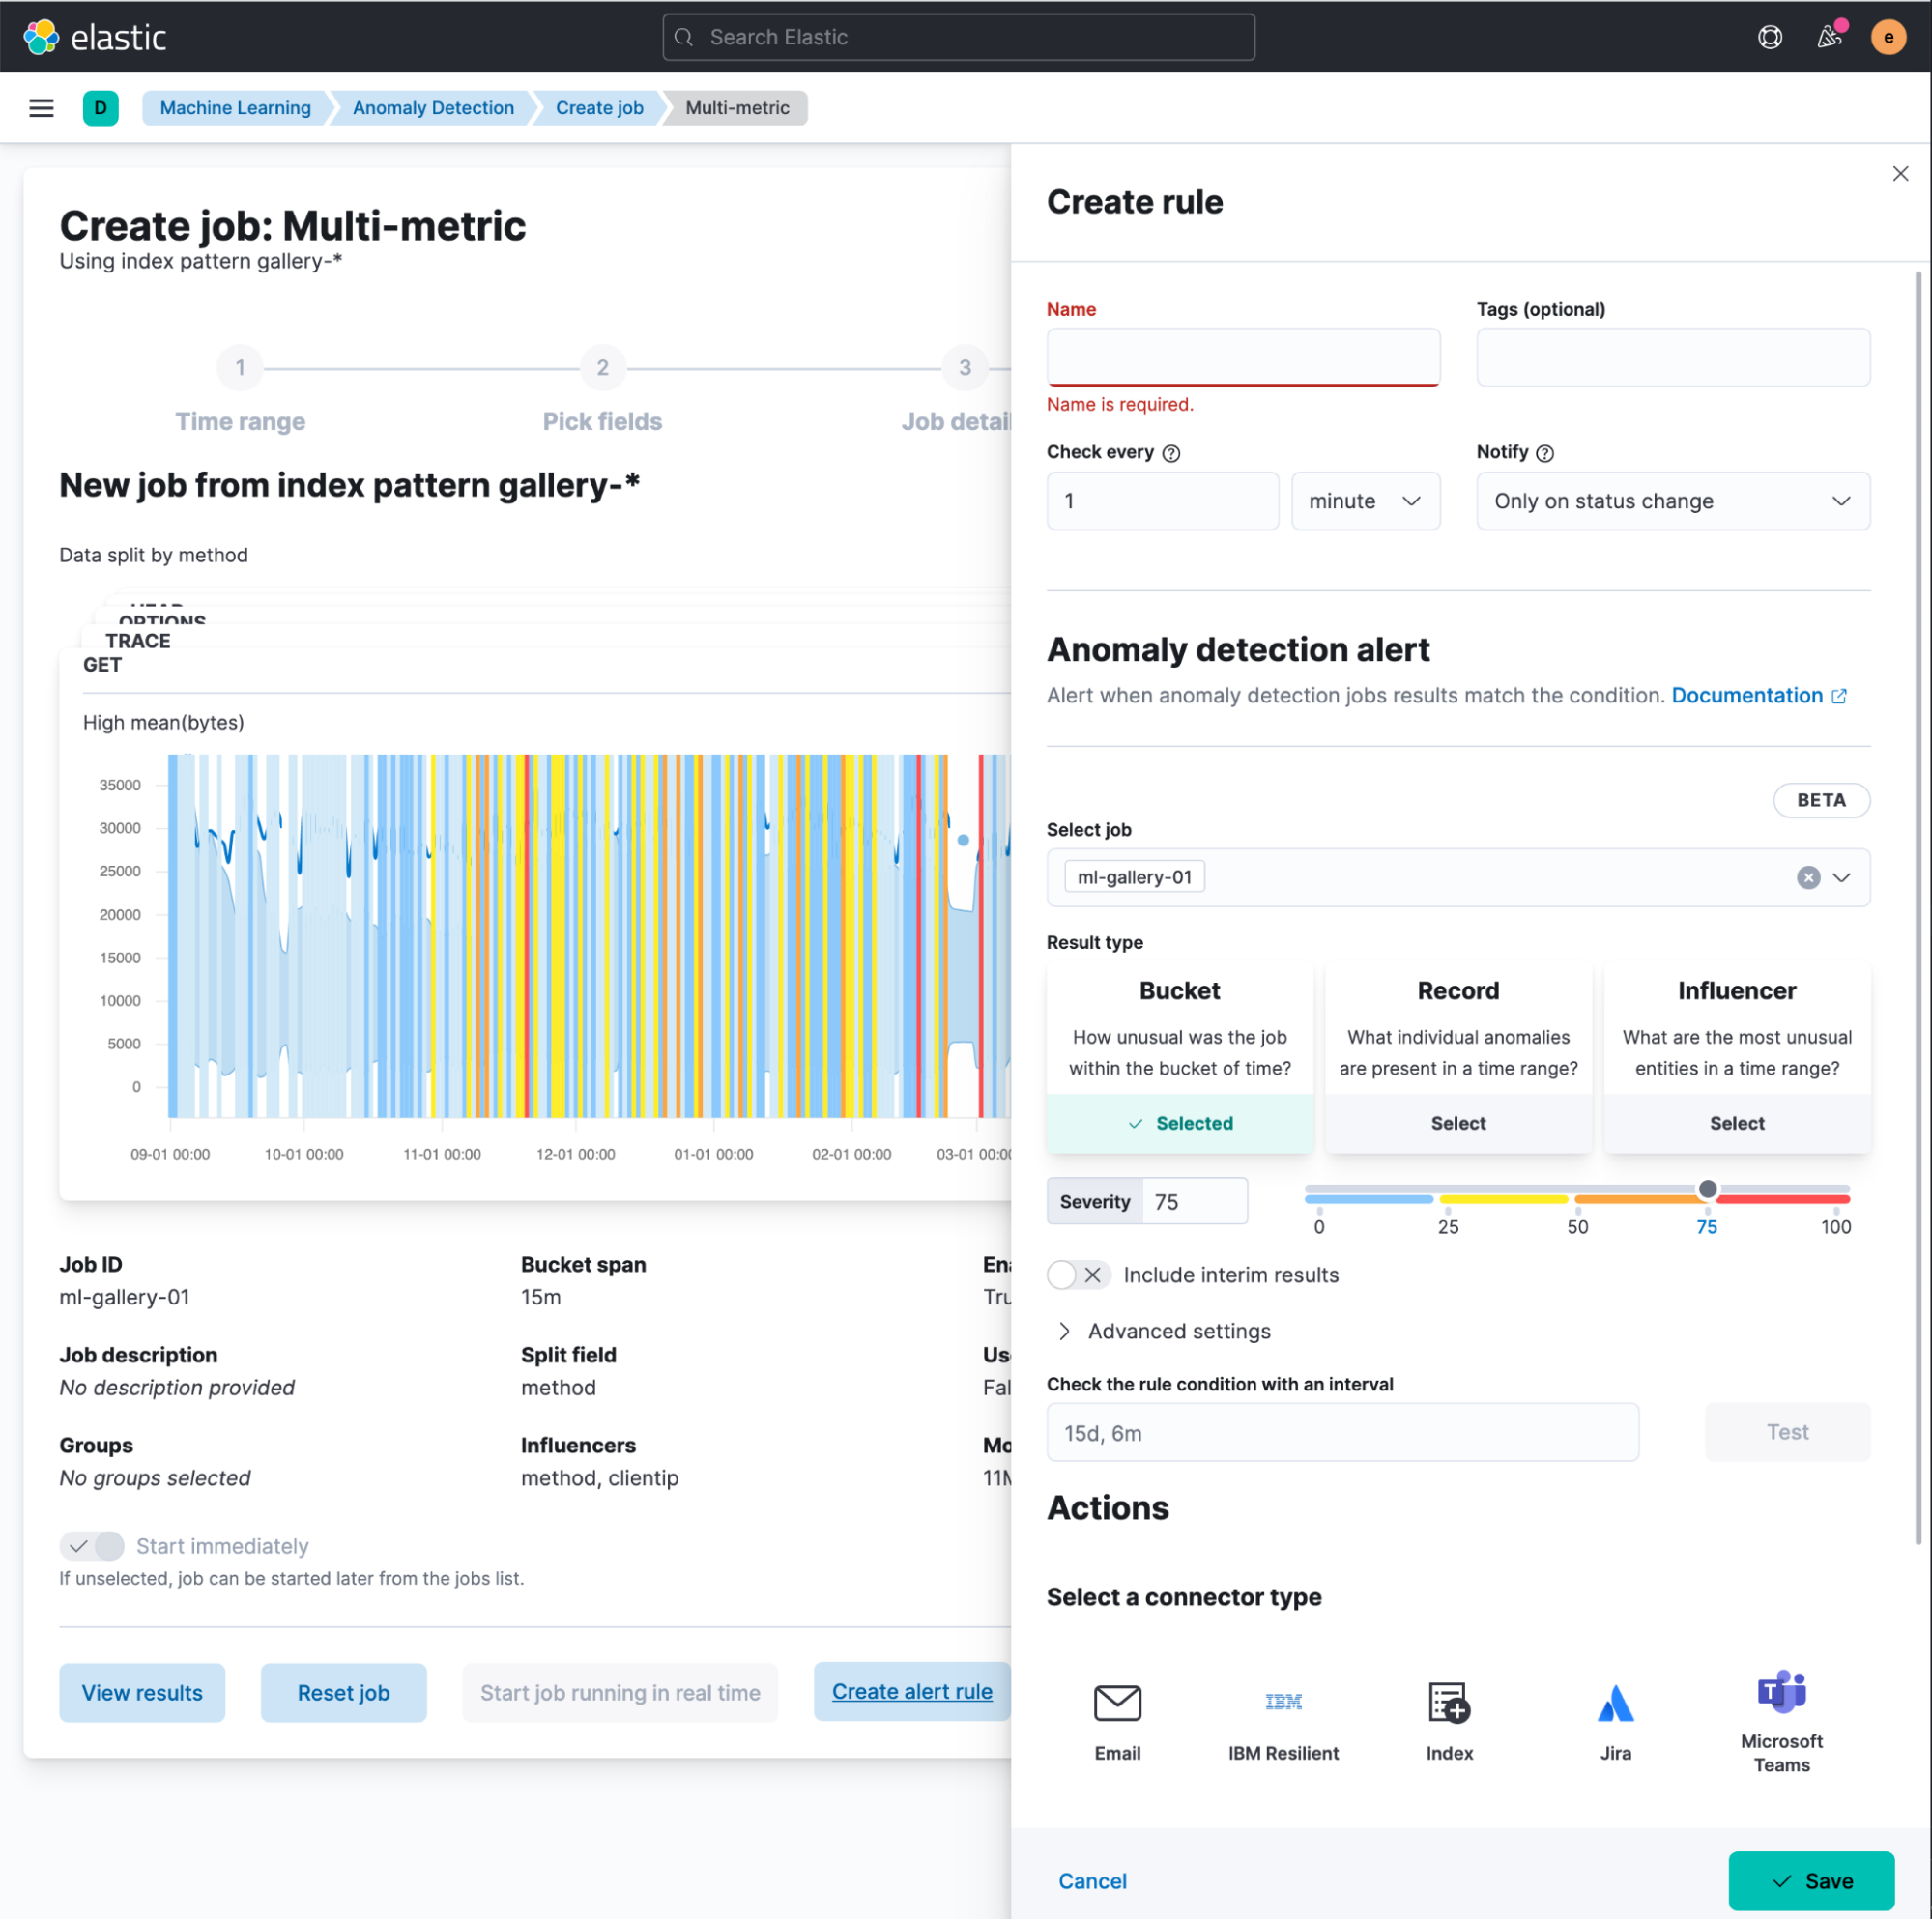
You then need to select the result type to alert upon:
- Bucket results represent the overall anomaly score for all detectors within the bucket span. This is the default option and most likely covers the vast majority of use cases. Your alerting context will include the most anomalous records and influencers. The severity you configure in the rule condition will be compared against the
anomaly_scorefield of the bucket result type in the ML results index. - Record results represent the individual anomalies in a bucket, and the rule will use the
record_scorefrom the record result type. Potentially this is the most “noisy” result, so you can expect more alerts coming in, especially with a notification policy that triggers whenever the rule is Active. - Influencer results represent the entities that contribute to an anomaly, and will be available if your job configuration contains influencers. If this result type is selected, the severity value is compared with the
influencer_scoreof the influencer result type.
Early notifications and interim results
Below the severity control, you can find the “Include interim results” switch. You can treat it as a “Notify early” control because interim results are calculated based on partial input data. The main benefit is to get notified earlier before the bucket processing is finalized. However, you should note that during the normalization process, the final score might be adjusted and you may see some false positives that passed the severity threshold set in your rule.
Advanced settings
The advanced settings section provides recommended defaults based on the job and datafeed configurations, so be cautious amending these settings. If you want to tune these values, it’s important to understand the difference between your rule condition’s “Check interval” and the “Lookback interval”.
The “Check interval” defines the schedule for the condition evaluation. The “Lookback interval” defines the time range used in the query to find anomalies. At first glance, it might seem redundant because why not simply check the time gap between rule executions?
It’s important to account for two factors:
- Bucket span. If you need more details about what it is and why it’s important, take a look at this blog.
- Query delay of the dafafeed. Refer to the documentation for more details.
During analysis, your time series data is split by fixed time intervals based on the bucket_span, and anomalies are marked with the start time of the bucket for which these results were calculated (which is likely to be different from the actual timestamp of the document from the source index). Hence, if the check interval is too short and it’s used as a time range to look for anomalies, one can be easily missed. Setting it to the bucket span size is also dangerous because you can overlook the beginning of the previous bucket. By default, the lookback interval is set to be double the bucket span and sum it with the query delay.
The “Number of latest buckets” setting defines how many buckets are checked to obtain the highest anomaly from all the anomalies that are found during the Lookback interval. An alert is created based on the anomaly with the highest anomaly score from the most anomalous bucket.
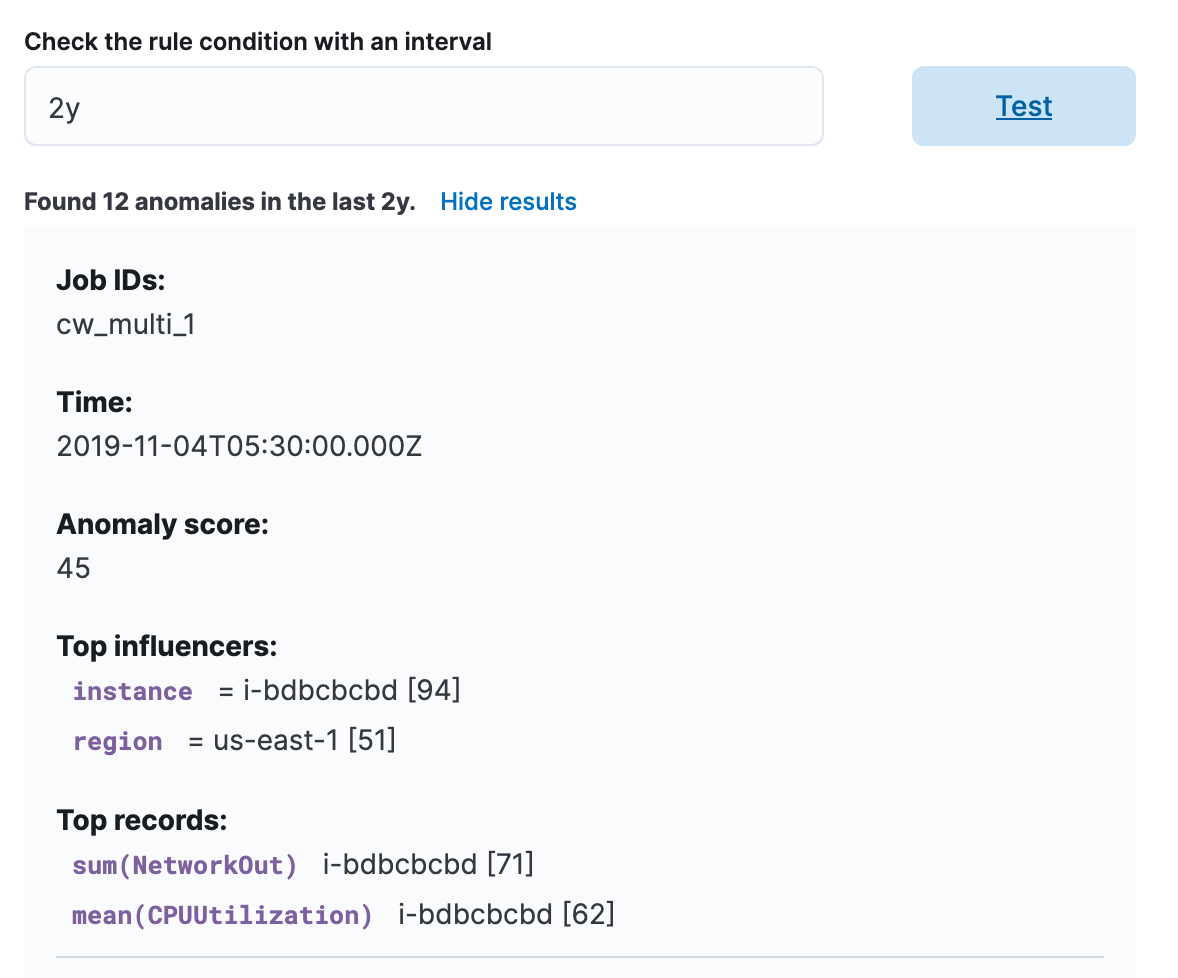
You can also test your rule condition to see how many anomalies have occurred during the specified interval. This way you’ll get an idea of how frequently you would receive an alert from the rule.
Anomaly detection jobs health alerting rule
Certain issues may occur in the lifecycle of the anomaly detection job like the unexpecting stopping of the datafeed or exceeding the memory limit, which eventually prevents it from running and detecting anomalies. If the job is not running, then it won’t be producing results and it therefore cannot alert based upon the results. Because of this, there is a new additional alerting rule type that monitors the health of your jobs. One rule can be used to monitor multiple jobs, with the form containing controls allowing you to include or exclude specific jobs from the check.
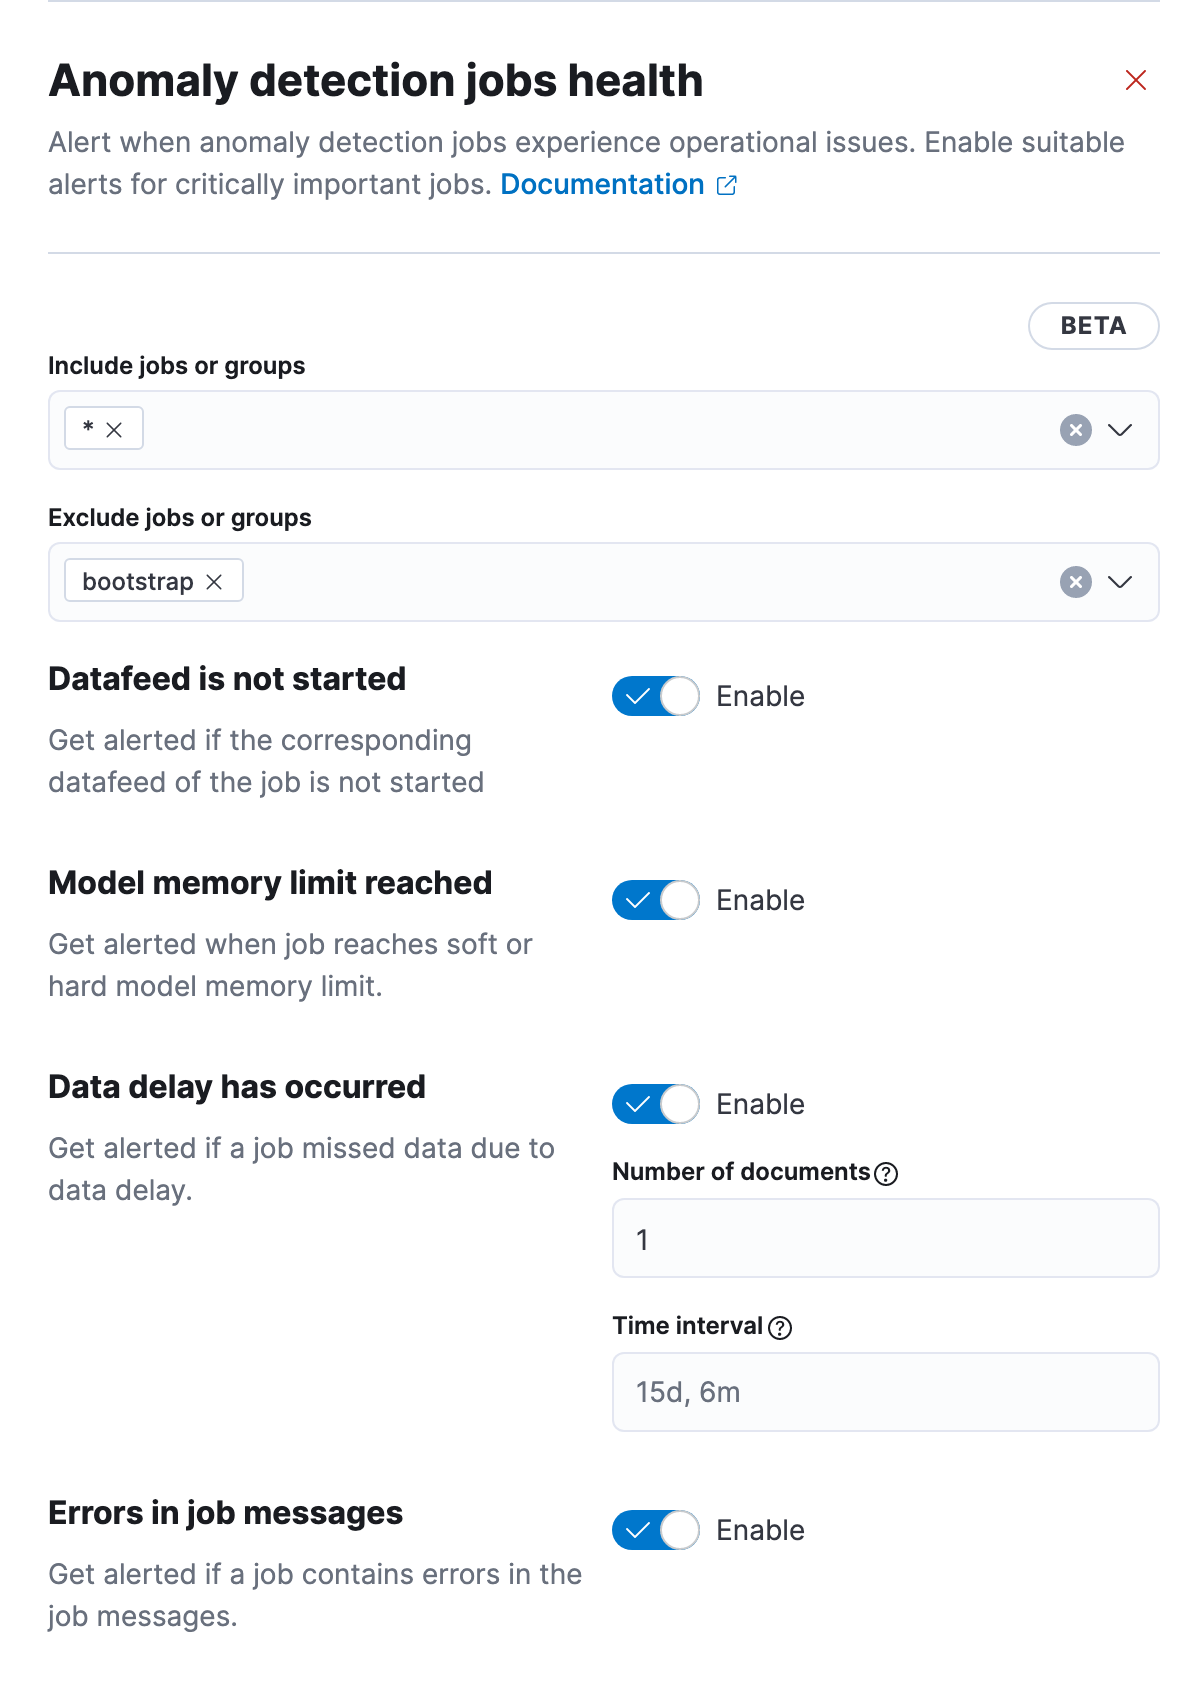
Right below, potential health checks are listed. By default, all of them are invoked, but you can disable particular checks if you’re not interested in getting notifications about specific issues like delayed data. More details on these settings can be found in the documentation.
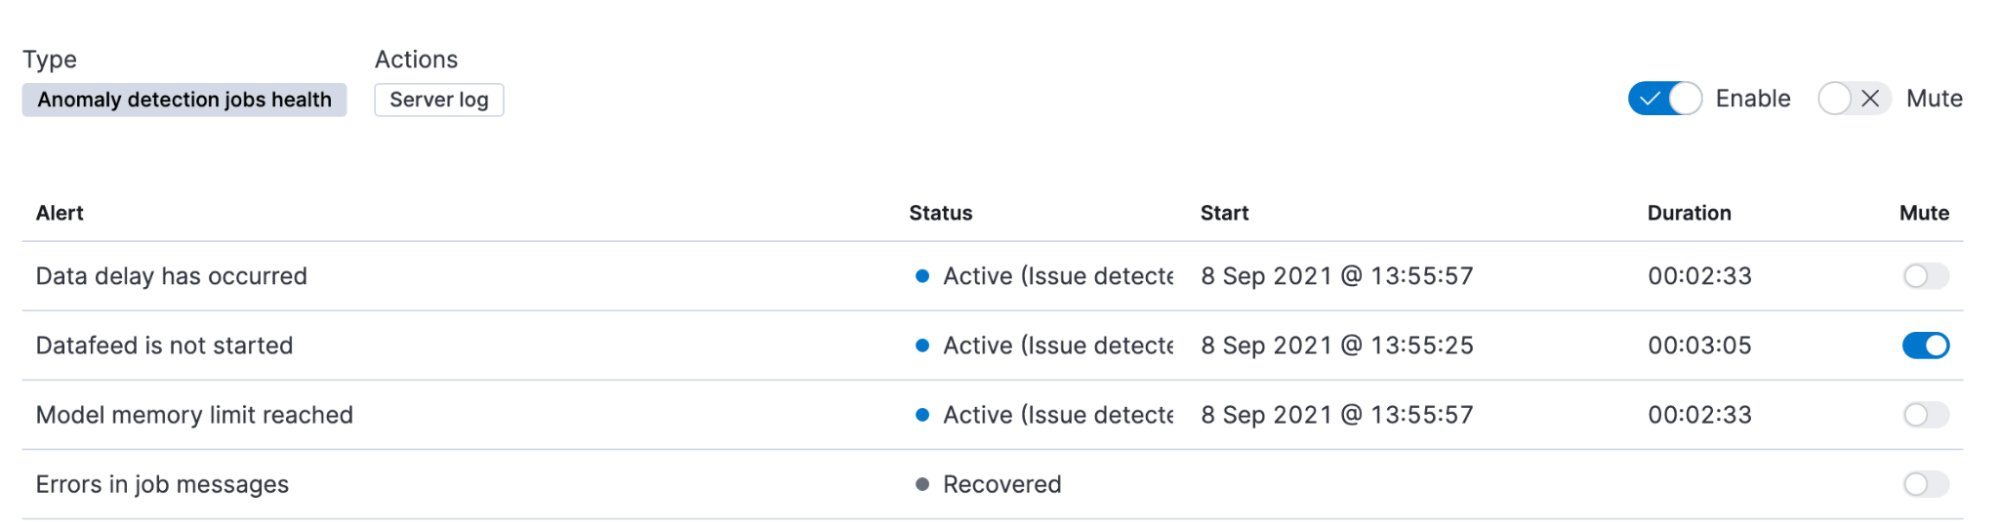
Alerts produced by this rule are grouped by the health check, making it possible to mute particular notifications without changing the rule parameters.
The health checks commence at the point at which the rule is created, and will not analyze historical behavior. The time interval for the delayed data check is very similar to the lookback interval for the Anomaly detection rule type, and it’s not recommended to set a value lower than the default.
Configuring actions and alert context
When you configure an action for a connector (Slack, Email, etc.), “Run when” represents an action group (the outcome of the rule execution) that varies according to the rule type. Due to the nature of the Anomaly detection rule, alerts are “recovered” automatically; there is no manual intervention involved because it only indicates that there is no anomaly in the next check interval. However, for the Anomaly detection health rule, you need to take actions to resolve the problem. For example, restarting the datafeed, so notification about the recovered state is more valuable. The other action groups, “Anomaly score matched the condition” and “Issue detected” reflect the Active state of alert.
The “Notify” setting is a critical factor in the amount of notifications you’re going to receive. By default, notification actions are scheduled only on status change, so if there is an anomaly that satisfies the criteria, you’re only going to receive a notification about it once, and if there is an anomaly in the following bucket, you won’t receive another notification as the alert status remains “Active”.
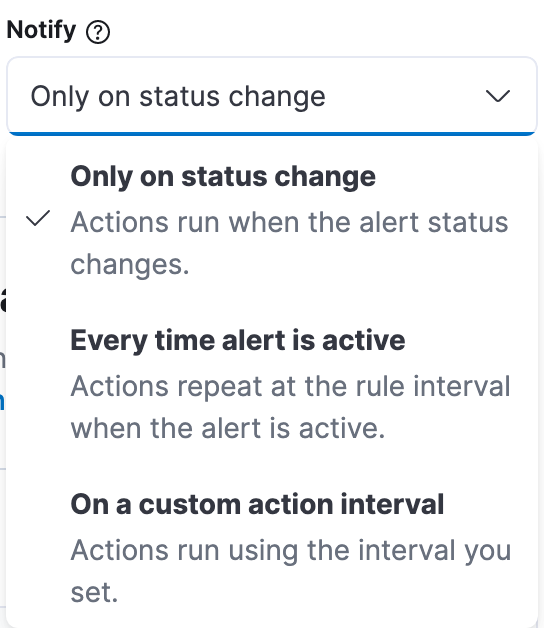
Changing the value to “Every time alert is active” means that notifications are sent on every rule interval while there are anomalies in your data. The main drawback is that you receive duplicate notifications about the same anomaly for the entire duration of the bucket span. For example, with a bucket span of 15 minutes and check interval of 1 minute, you’re going to receive 15 notifications about the same anomaly.
Templates for your action messages are powered by Mustache. The default messages we supply for our two new rule types include full contextual information on the alert so there shouldn’t be a need to adjust them. But if you want to tailor a custom message, check the documentation about extra context variables that can be added to messages.
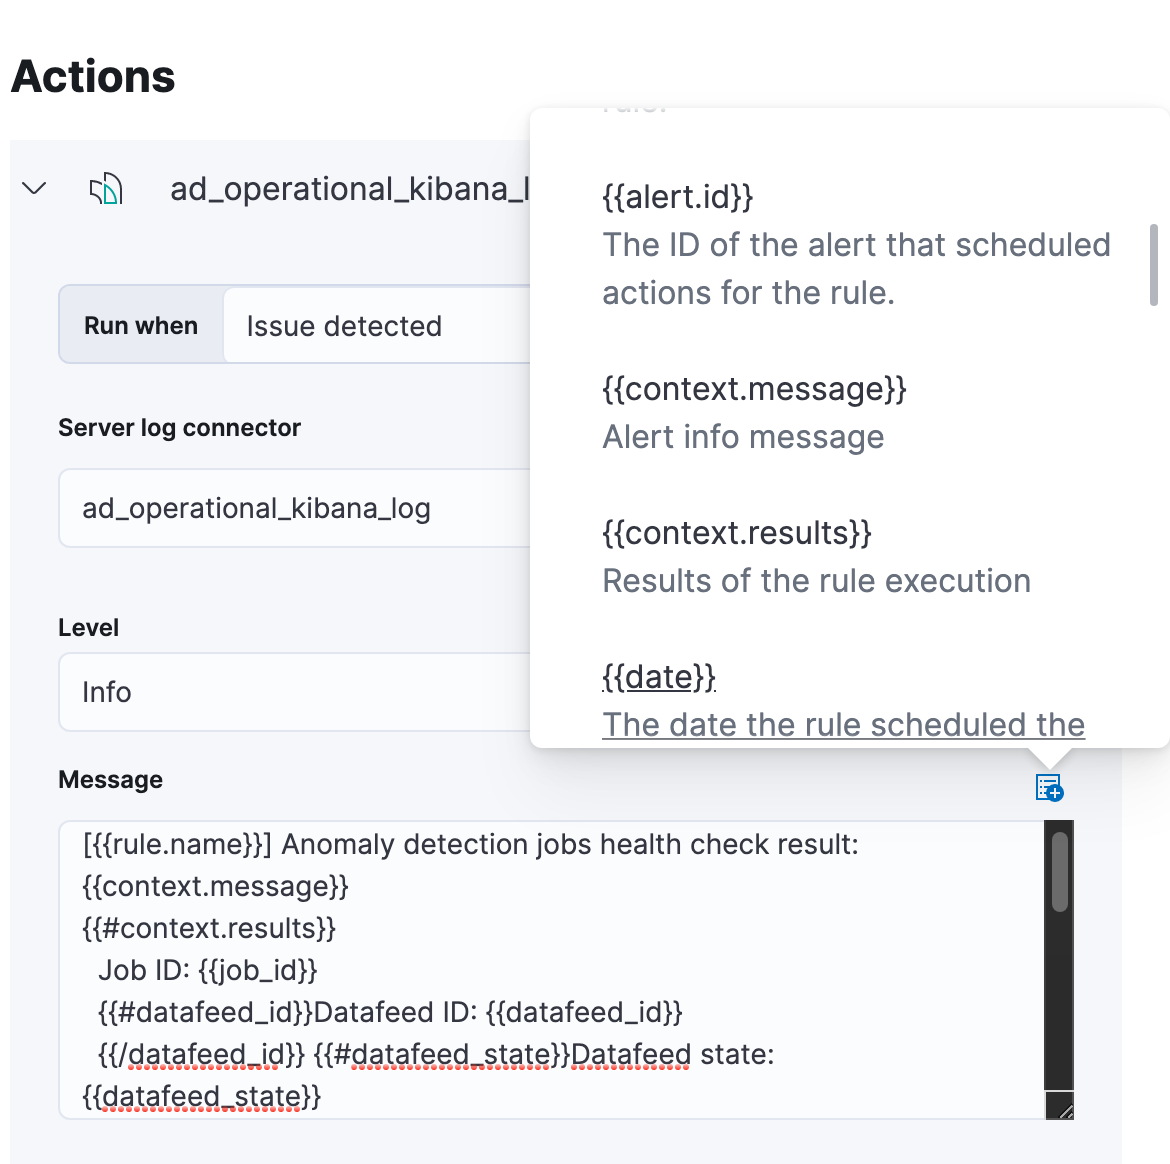
This is an example of an alerting message you can expect to receive for the Slack action.
[004] Anomaly detection jobs health check result:
Job rt-ad-operational-hard-limit reached the hard model memory limit. Assign the job more memory and restore from a snapshot from prior to reaching the hard limit.
Job ID: rt-ad-operational-hard-limit
Memory status: hard_limit
Model size: 1.2MB
Model memory limit: 1MB
Peak model bytes: 1.2MB
Model exceeded: 1.2KB
Memory logging time: Aug 25, 2021 @ 14:15:35.109
Conclusion
The new Machine Learning rule types will help expedite your notifications and enable you to configure alerts faster than before with Watcher. These rule types not only take your anomaly hunting game to the next level but also introduce monitoring for the health of your jobs.
We are always keen to hear your feedback! If you have any questions or suggestions, please reach out to us on the discuss forum or create an issue on Github!
The release and timing of any features or functionality described in this post remain at Elastic's sole discretion. Any features or functionality not currently available may not be delivered on time or at all.
Share
- Share on Twitter
Share on Twitter
- Share on LinkedIn
Share on LinkedIn
- Share on Facebook
Share on Facebook
- Share by Email
Share by Email
- Print this page
Print