How to migrate from self-managed Elasticsearch to Elastic Cloud on AWS
Increasingly, we are seeing on-prem workloads being moved onto the cloud. Elasticsearch has been around for many years with our users and customers typically managing it themselves on-prem. Elasticsearch Service on Elastic Cloud — our managed Elasticsearch service that runs on Amazon Web Services (AWS), Google Cloud, and Microsoft Azure across many different regions, is the best way to consume the Elastic Stack and our solutions for enterprise search, observability, and security.
If you’re looking to move from self-managed Elasticsearch, Elasticsearch Service takes care of:
- Provisioning and managing the underlying infrastructure
- Creating and managing Elasticsearch clusters
- Scaling clusters up and down
- Upgrades, patching, and snapshotting
This gives you more time to focus your time and effort on solving other challenges.
This blog explores how to migrate to Elasticsearch Service by taking a snapshot of your Elasticsearch cluster and then restoring it on Elasticsearch Service.
Take a snapshot of the cluster
The first thing to consider when moving from self-managed Elasticsearch to Elasticsearch Service is which cloud provider and region you would like to use. This will typically depend on your existing workloads deployed, cloud strategy, and a range of other factors.
Here we’ll go through the process for Elasticsearch Service on AWS. We’ll follow up how to do the same for Google Cloud and Azure soon.
The easiest way to move Elasticsearch cluster data to another cluster is to take a snapshot of the cluster and then use that snapshot to restore it in the new Elasticsearch Service cluster.
There are several ways to perform a cluster snapshot. The easiest is to perform a one-off snapshot operation.
Assuming that your Elasticsearch is constantly ingesting data, the disadvantage of the one-off snapshot operation is that there is a time lag and loss of data between the time the snapshot is taken and when the snapshot is restored in the new cluster. In order to minimize this lag, it’s advisable to create a snapshot lifecycle policy. If your Elasticsearch cluster is not ingesting data constantly, such as for a search use case, then a one-off snapshot is okay.
Before creating a local cluster snapshot, you need to configure the AWS S3 bucket where the local cluster snapshot will be stored. This is the location where the new Elasticsearch Service cluster running on AWS will restore the cluster state from.
The high-level steps required to do this include:
- Configuring the cloud storage (in this case the AWS S3 bucket)
- Configuring the local snapshot repository
- Setting up your snapshot policy
- Provisioning the new cluster on Elasticsearch Service
- Configuring the Elasticsearch Service cluster custom snapshot repository
- Restoring the Elasticsearch Service cluster from a local snapshot
Configure the cloud storage
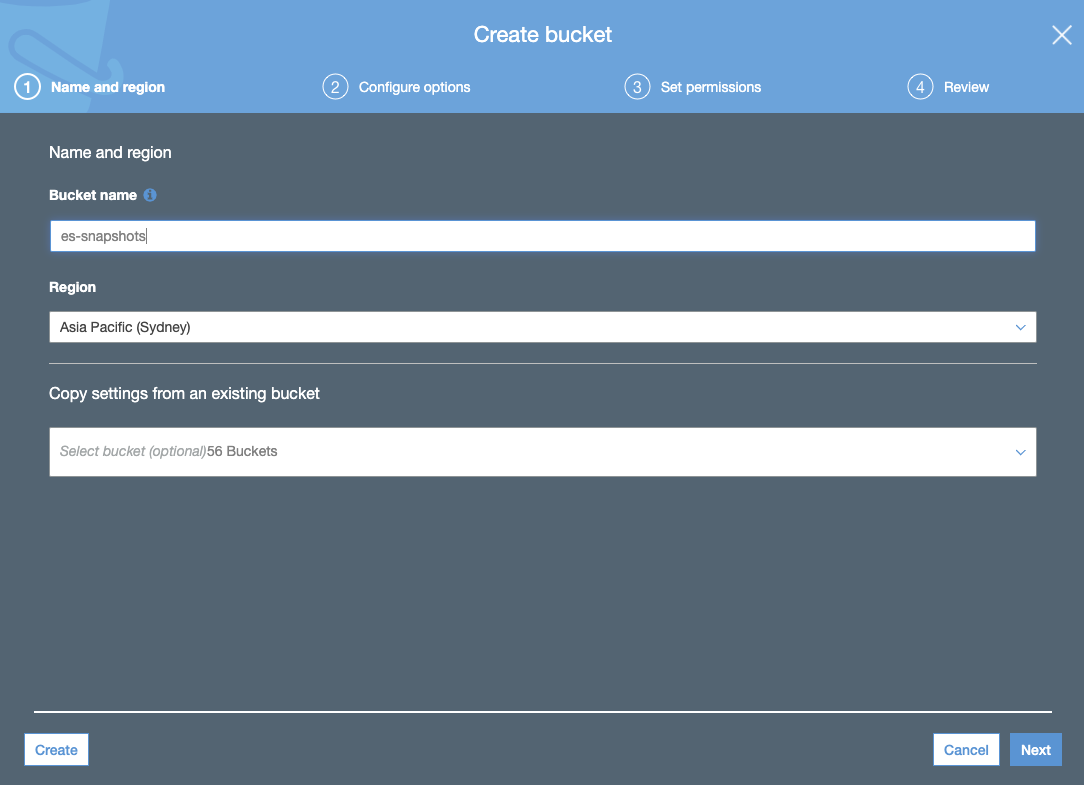
- Create an S3 bucket. The S3 bucket should be in the same region selected for your Elasticsearch Service cluster:
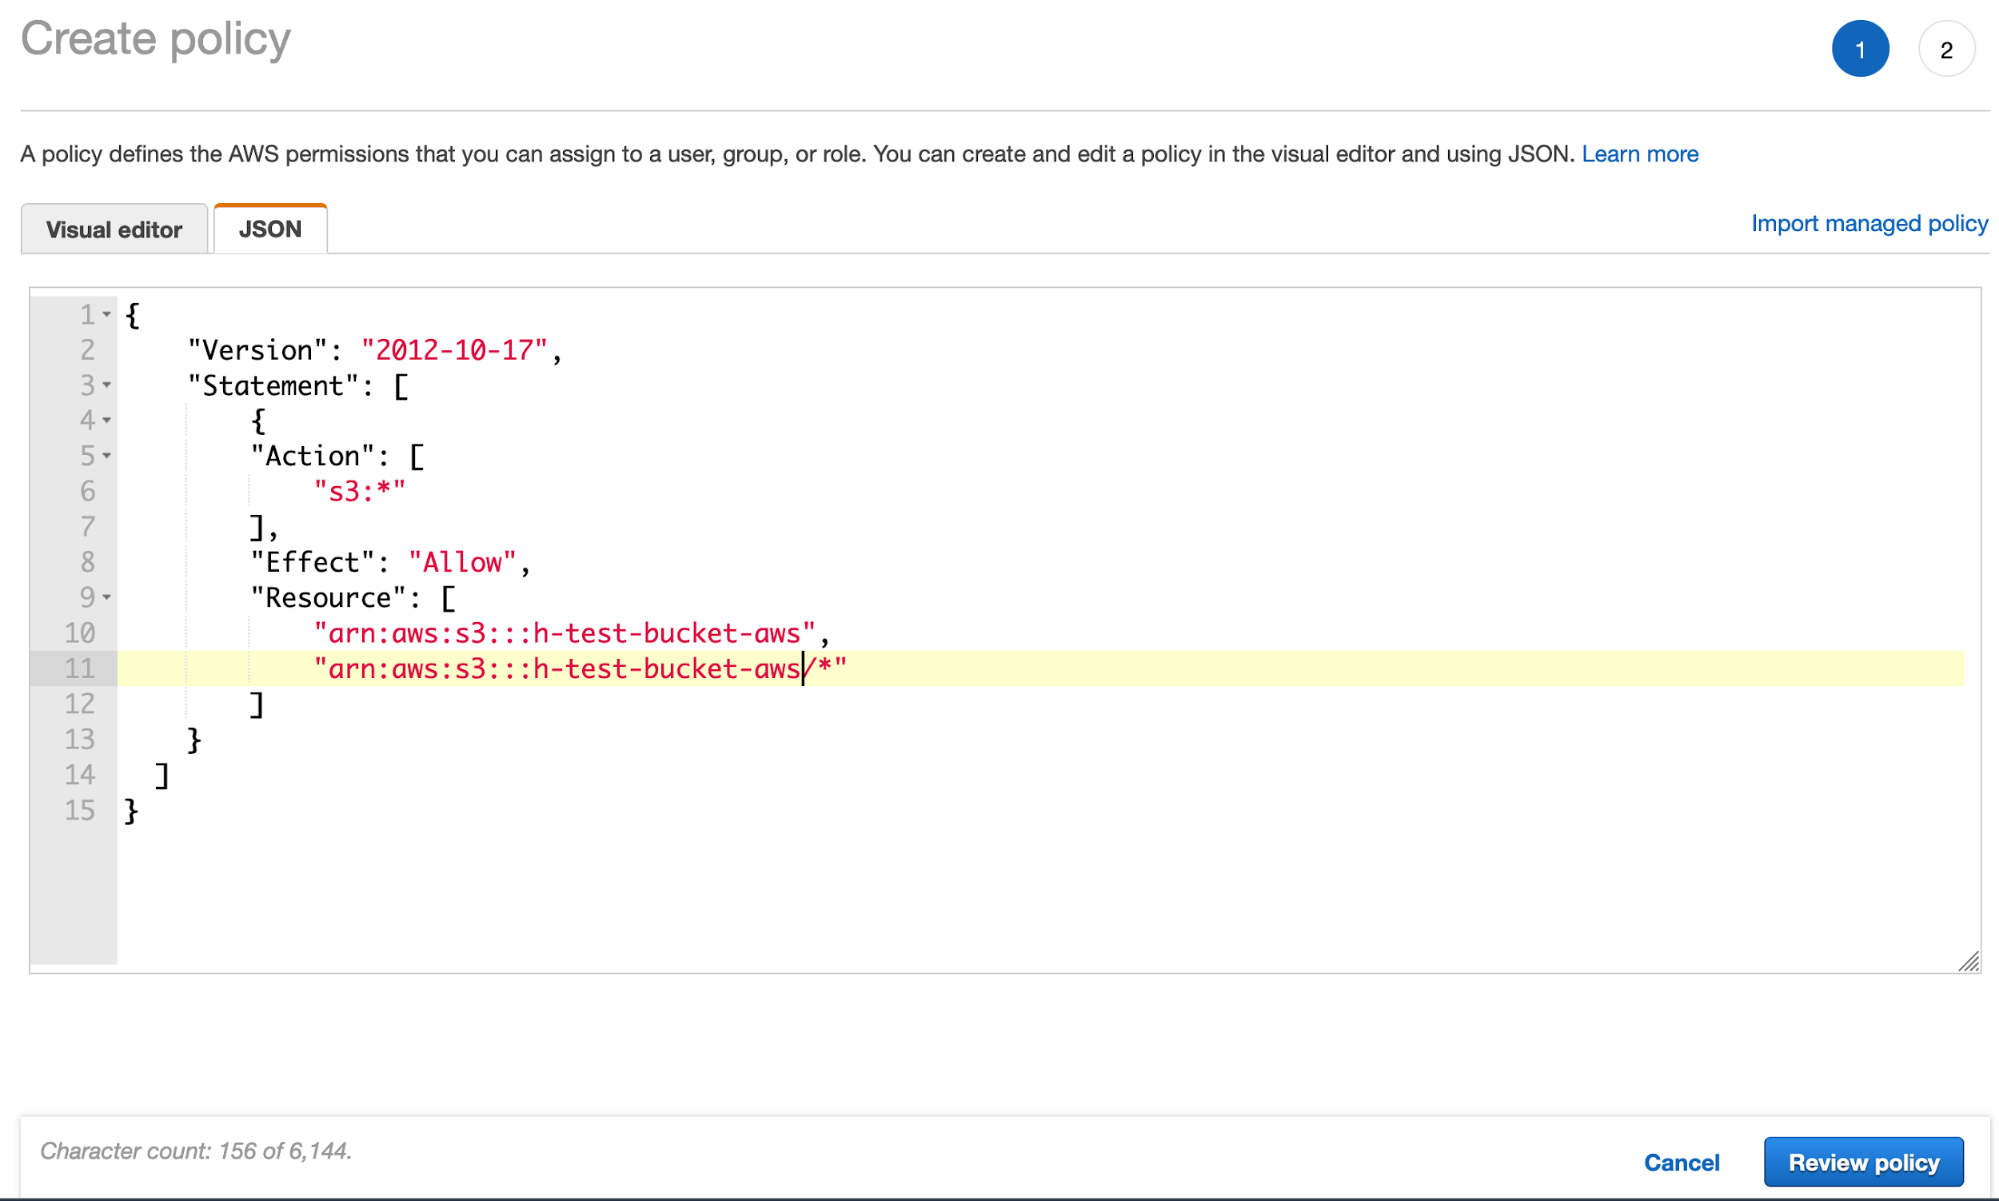
- Create the S3 bucket policy via the JSON tab and add the S3 bucket policy JSON (using your bucket name):
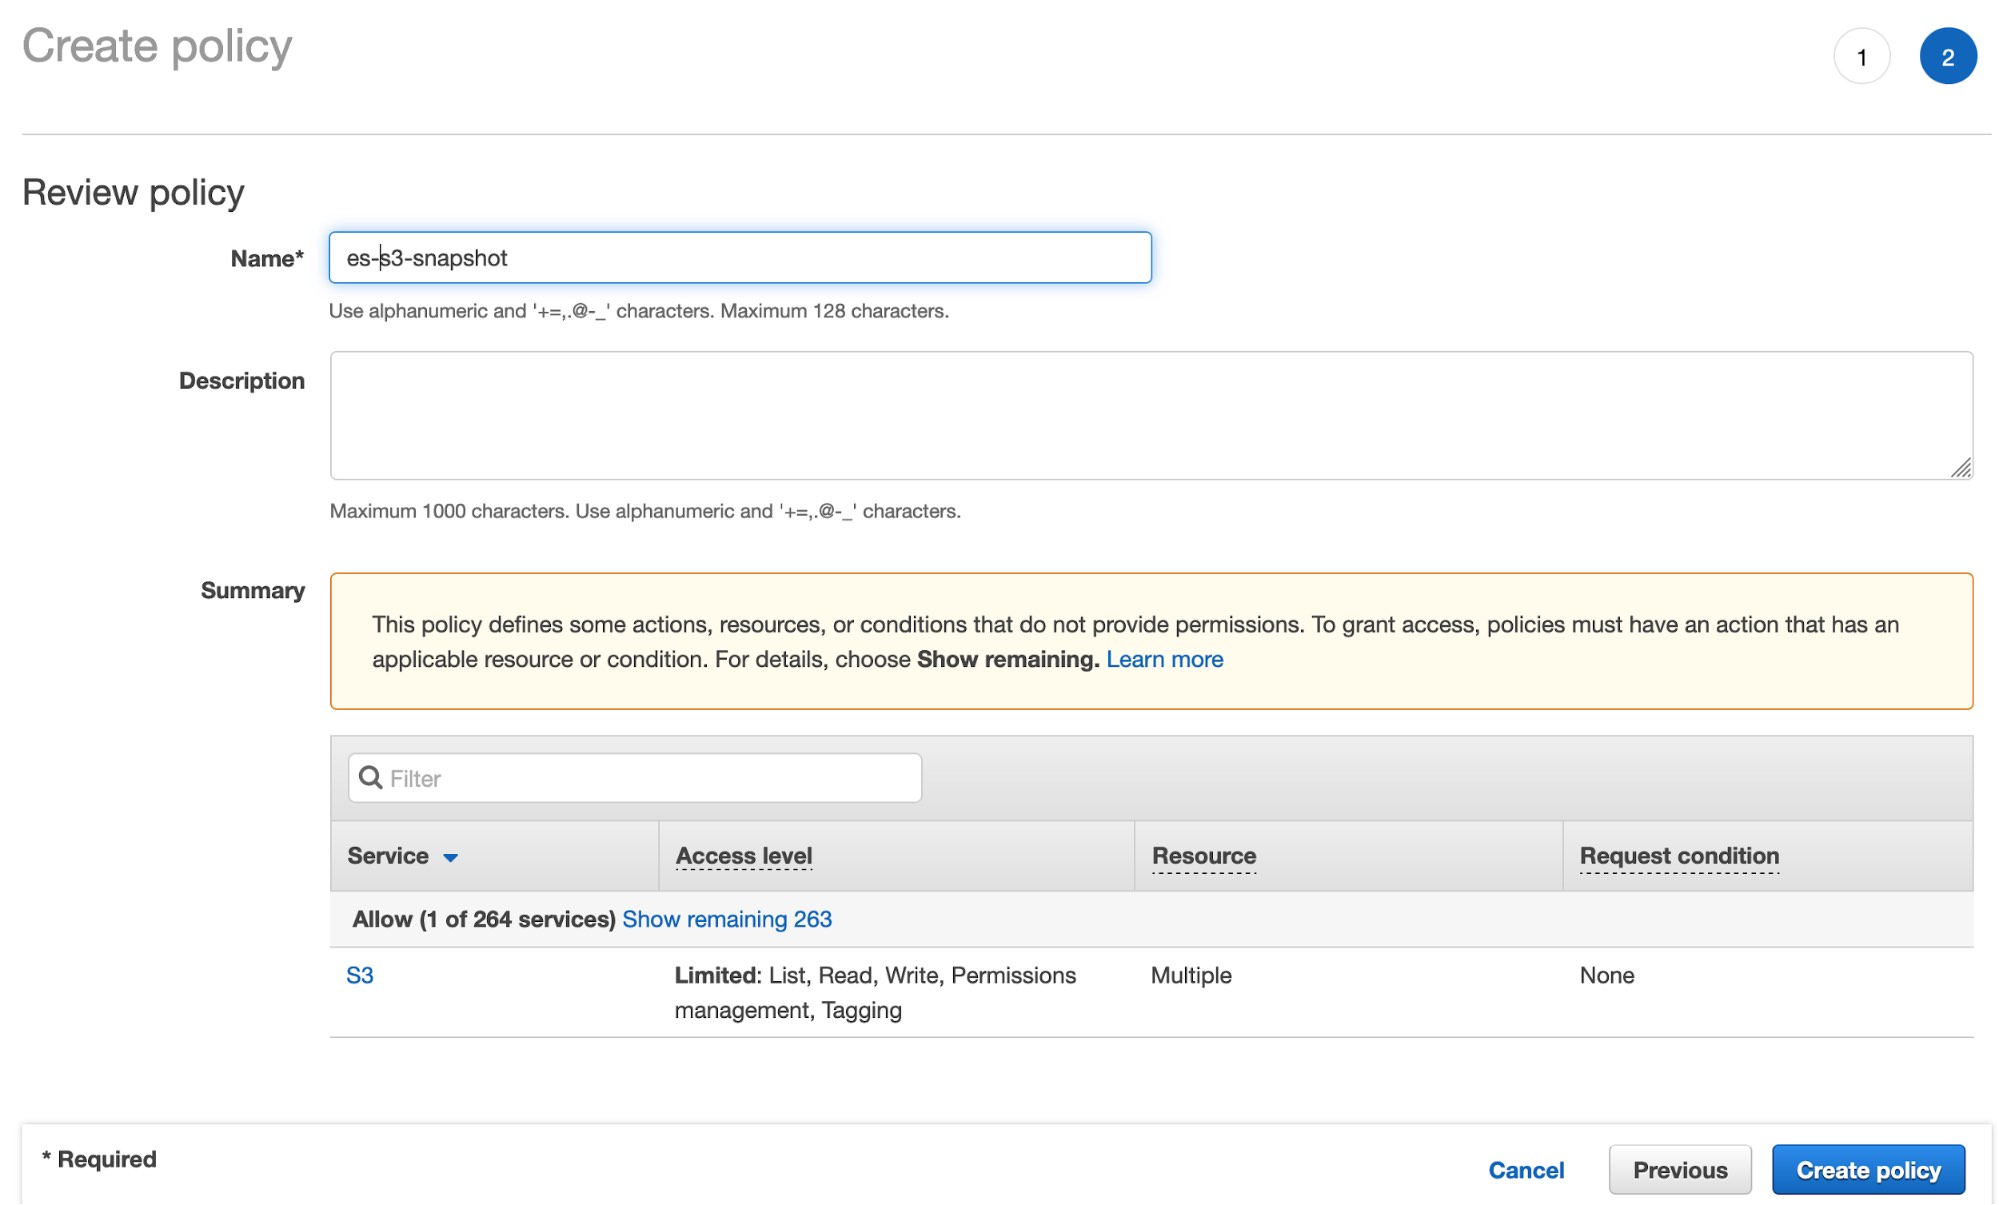
- Click Review policy and give your policy a name:
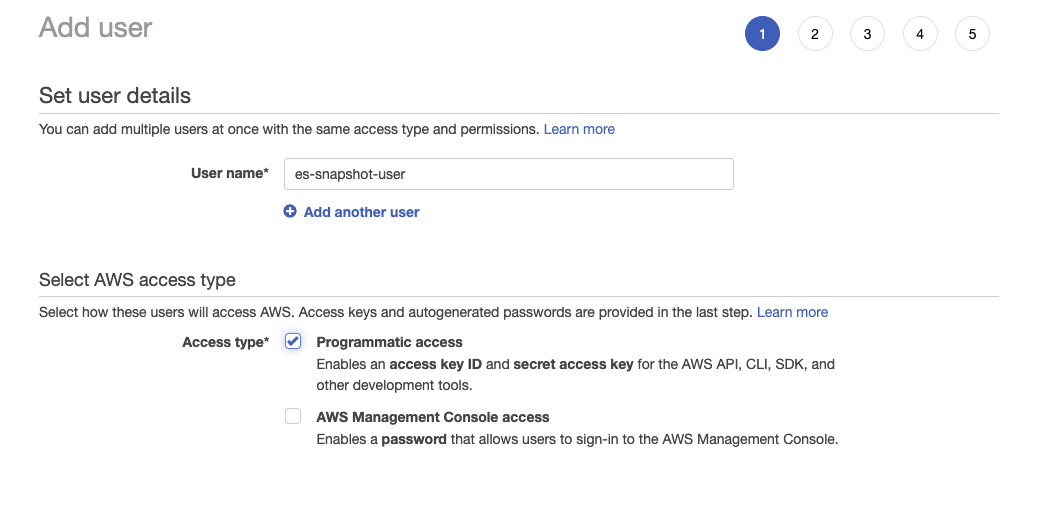
- Create the IAM user and assign the S3 bucket policy created above:
- Click Next: Permissions, select Attach existing policies directly and look up the policy you created in the prior step:
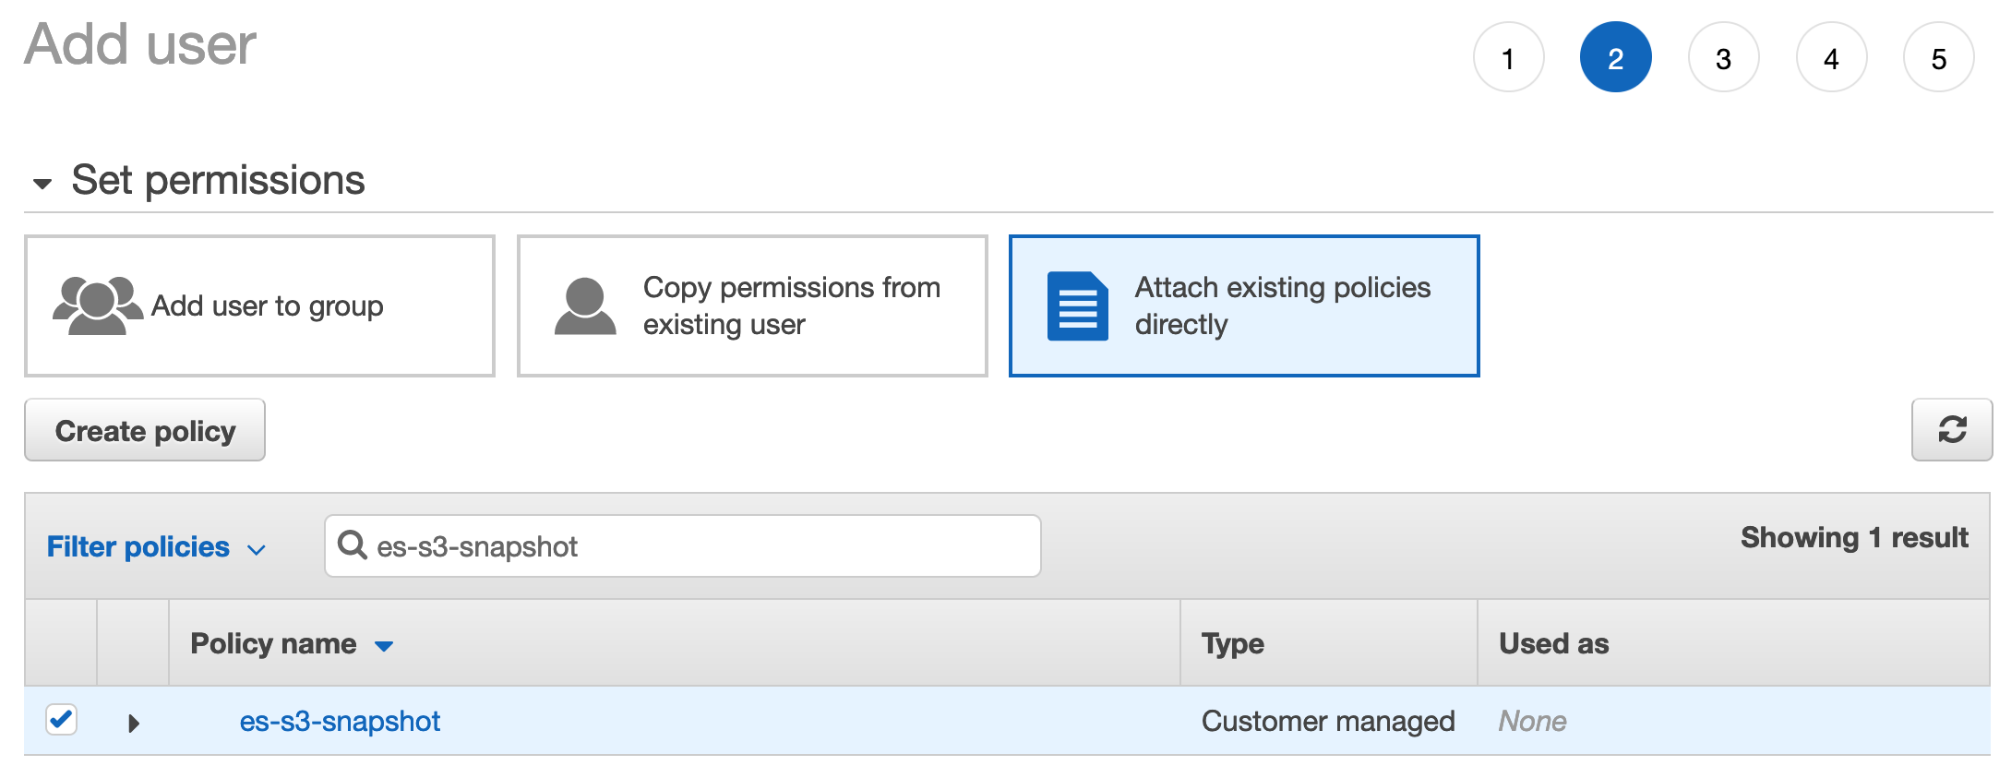
- Ensure this policy is ticked, then click Next:tags. You can skip adding tags and click Create User.
- Download the user security credentials.
Configure the local snapshot repository
1. Install the S3 plugin
Install the Elasticsearch S3 plugin on your on-prem deployment by running the following command on each local Elasticsearch node from your Elasticsearch home directory:
sudo bin/elasticsearch-plugin install repository-s3
You’ll have to restart the node after running this command.
2. Configure S3 client permissions
Configure the on-prem cluster S3 client permissions by running the following commands:.
bin/elasticsearch-keystore add s3.client.default.access_key
bin/elasticsearch-keystore add s3.client.default.secret_key
This is required so that the local cluster has the credentials required to write the snapshots to S3. Access_key and secret_key are available from the IAM user created in the previous step.
Set up your snapshot policy
1. Configure the snapshot repo
Configure the S3 snapshot repo in your local cluster by running the following in Kibana Dev Tools. Here we are telling the local cluster which S3 bucket to write the snapshot to. The IAM user you just created should have the permissions to write and read into this S3 bucket.
PUT _snapshot/<my_s3_repository>
{
  "type": "s3",
  "settings": {
    "bucket": "<bucket-name>"
  }
}
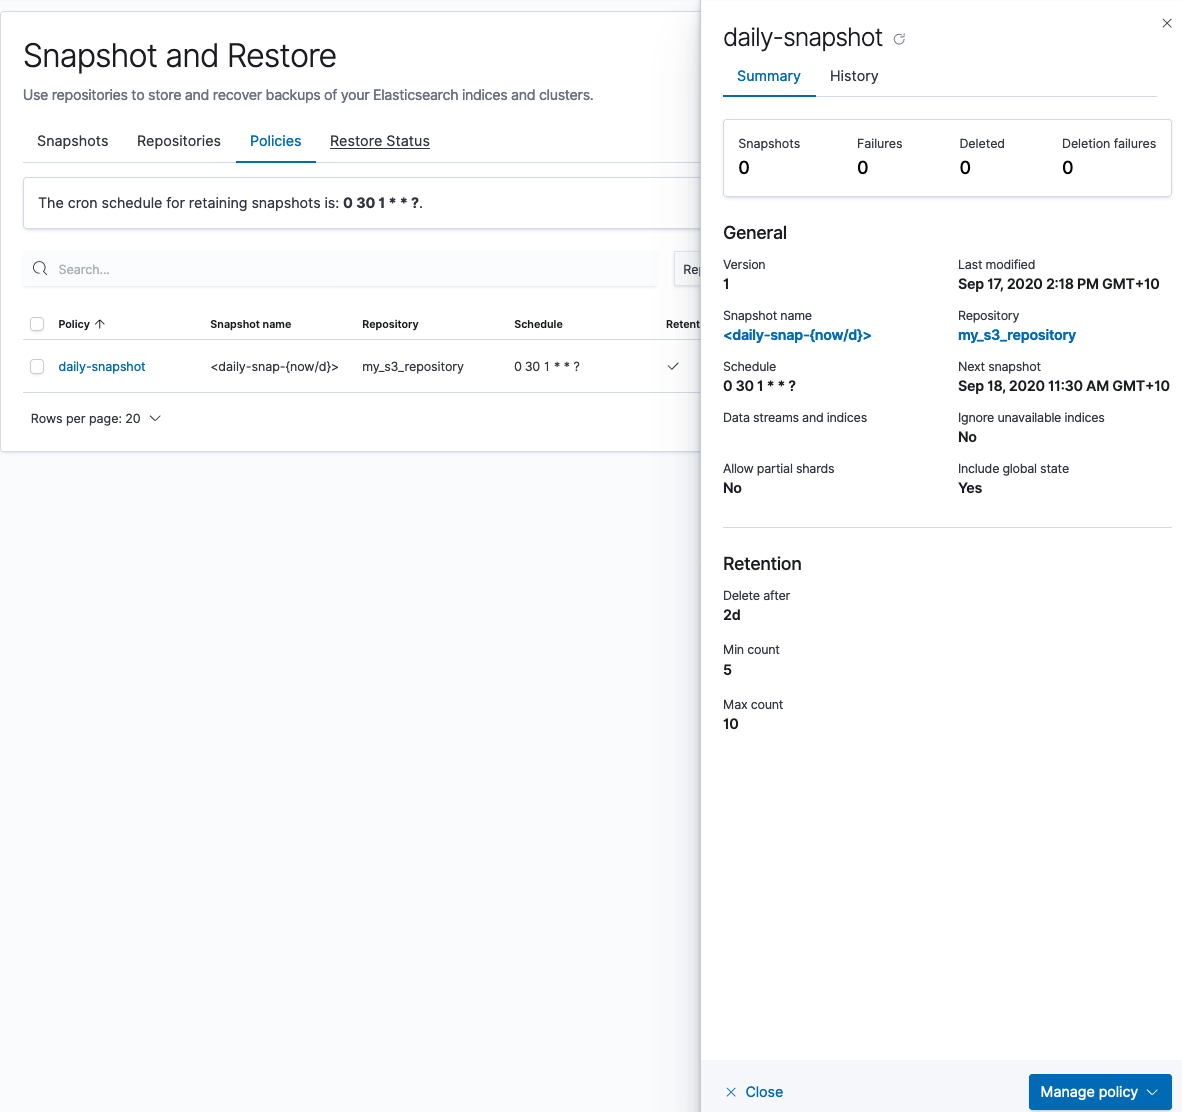
2. Create a snapshot policy
Next, you'll create a snapshot policy in your local cluster that will store the snapshot in the newly created S3 bucket:
You can also create a one-off snapshot in Kibana Dev Tools:
PUT /_snapshot/<your repo_name>/<your_snapshotname>?wait_for_completion=true
{
  "indices": "*",
  "ignore_unavailable": true,
  "include_global_state": false
}
Verify that snapshots are working by running the following command in Dev Tools:
GET _snapshot/<your_repo_name>/_all
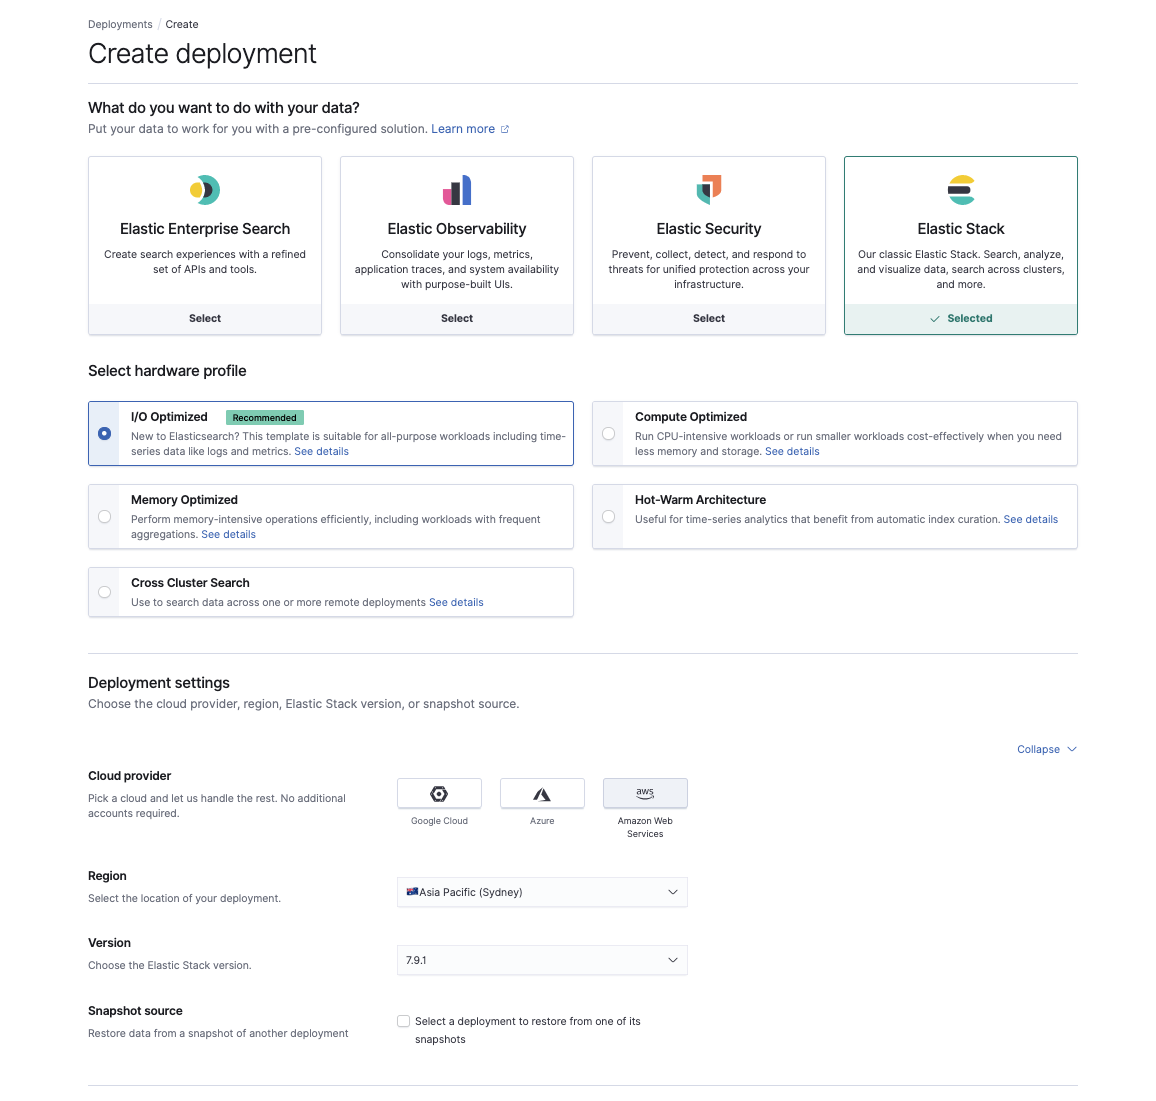
Provision the new cluster on Elasticsearch Service
Once we have snapshots working on S3, it’s time to provision a new cluster on Elasticsearch Service at cloud.elastic.co. Here you can choose the use case that best reflects your existing workload, the AWS region, and your version of Elasticsearch.
In the Elasticsearch Service console, configure the cluster keystore settings:
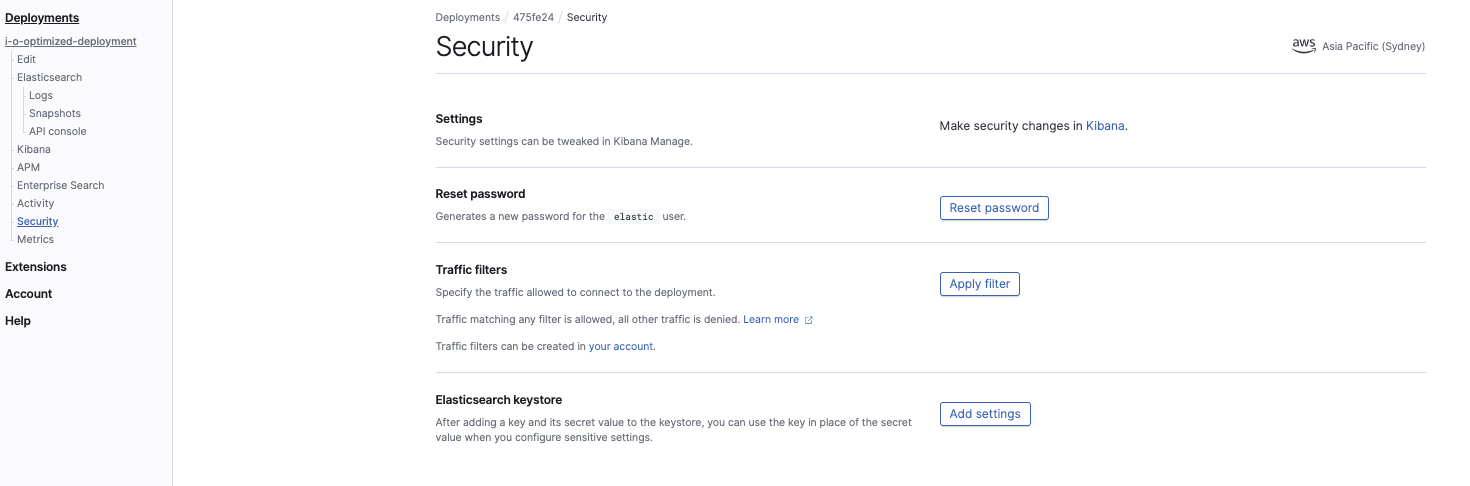
The two settings we need to configure are:
s3.client.default.access_key
s3.client.default.secret_key
This is required so that Elasticsearch Service cluster has the permission to read the snapshot from the S3 bucket. These will be the same as the IAM user security credentials.
Configure the Elasticsearch Service cluster custom snapshot repository
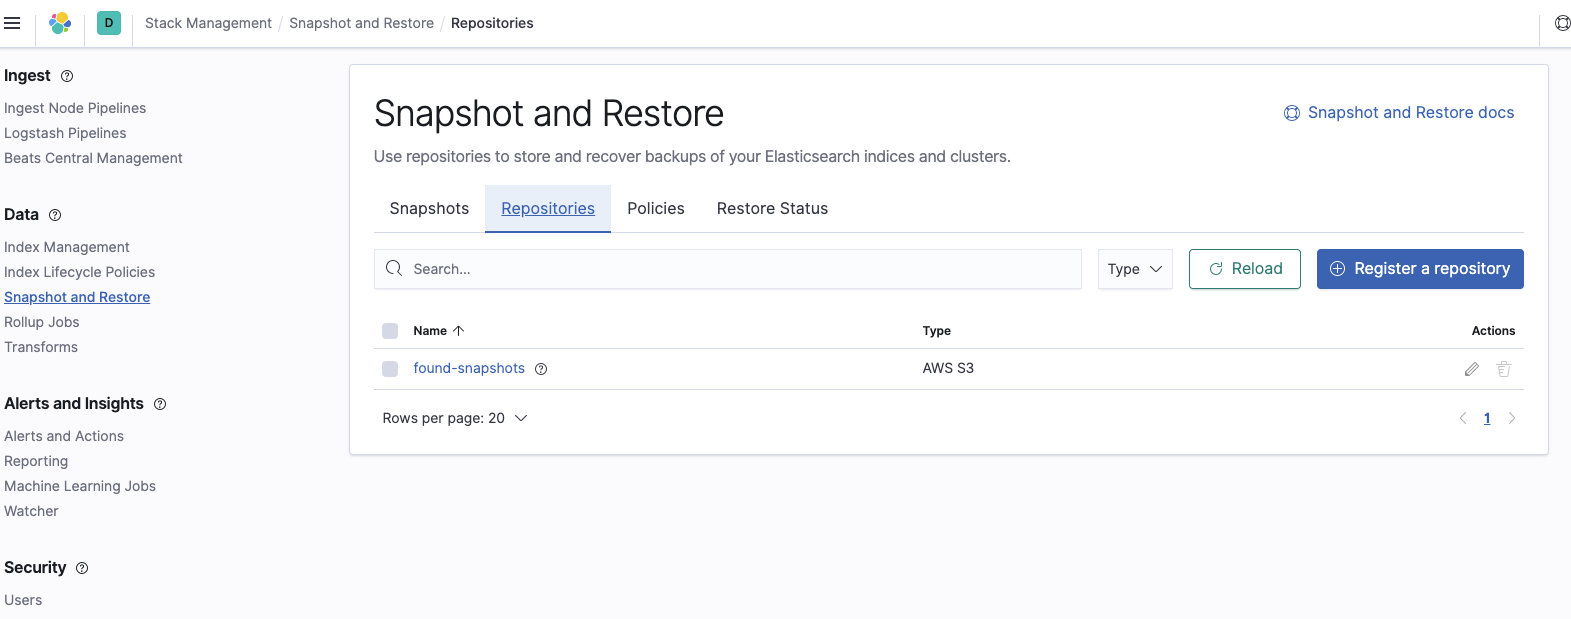
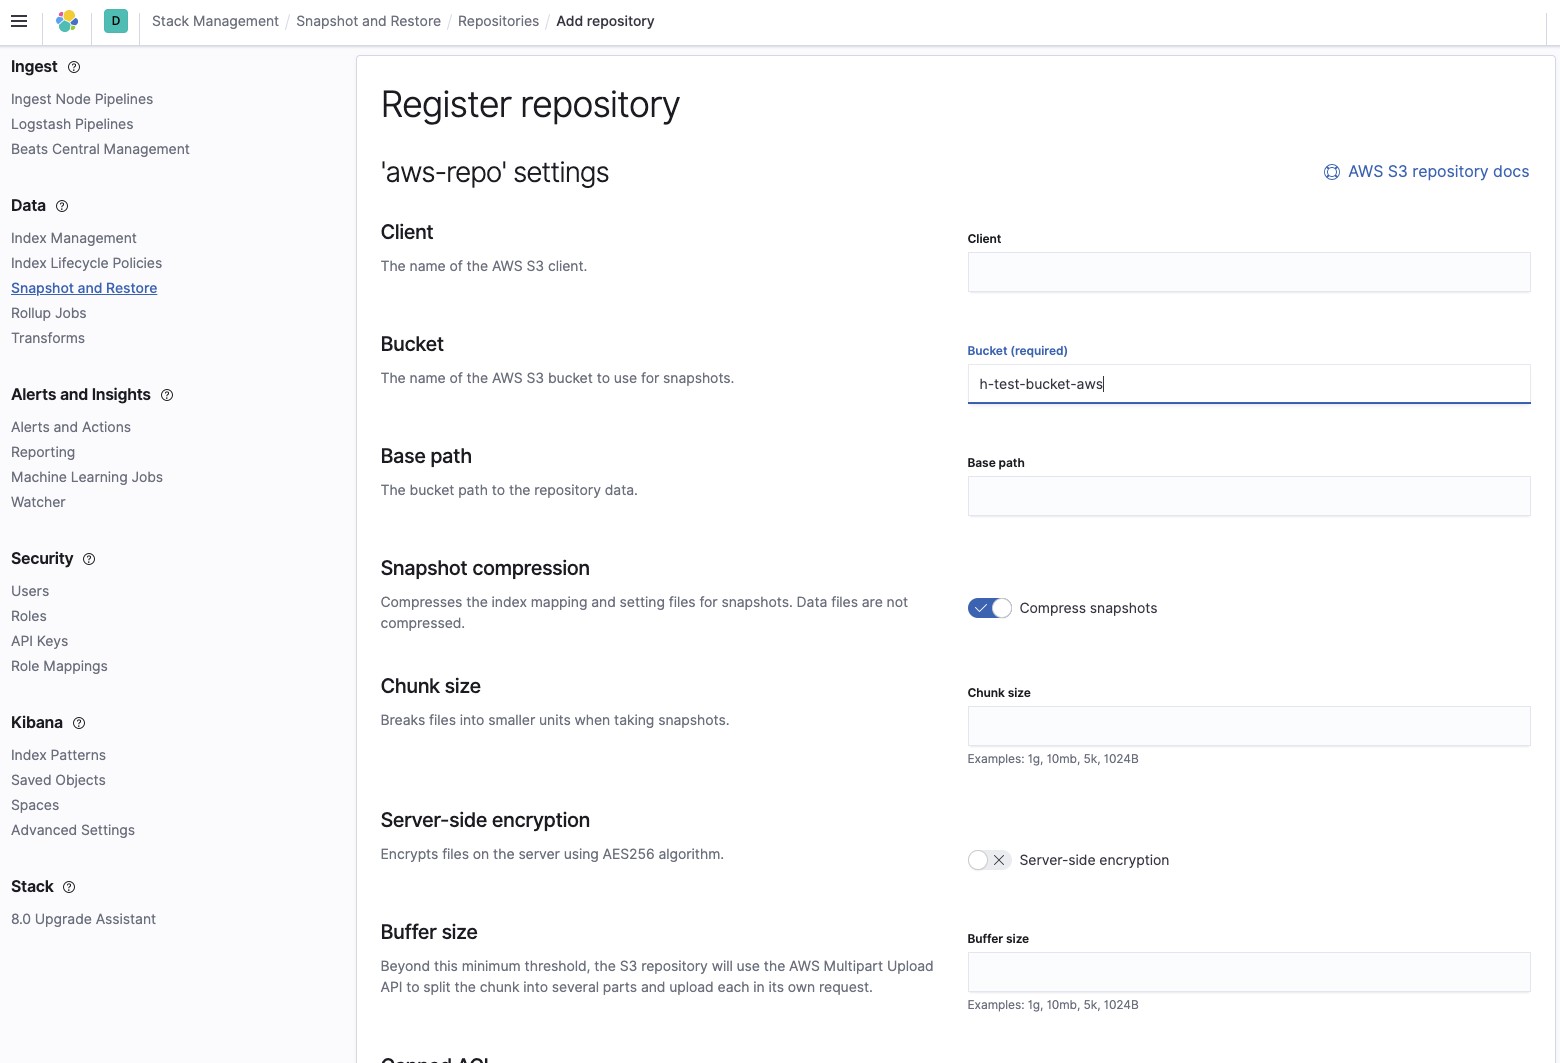
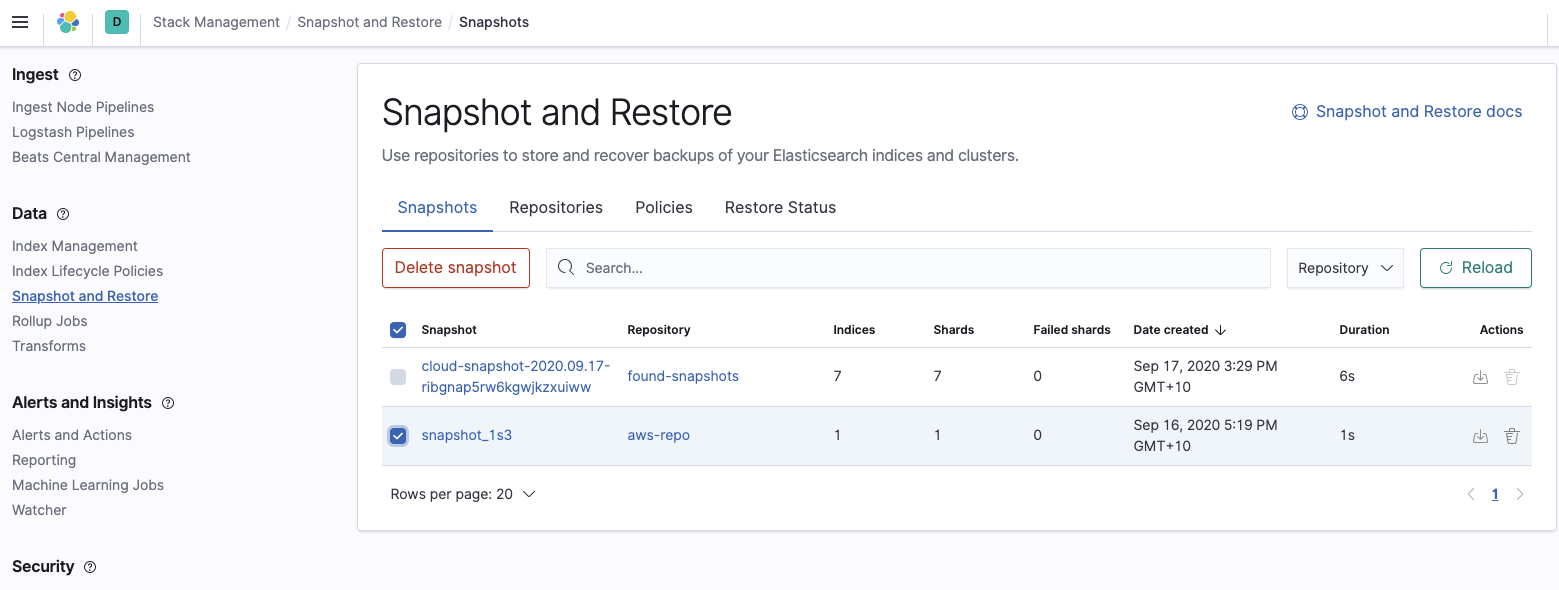
Now we have to create a new snapshot repository on the Elasticsearch Service cluster. This tells Elasticsearch Service where the snapshot that we want to restore from is located in S3. To do so, log in to Kibana, select Stack Management, and navigate to Snapshot and Restore settings. Select Register a repository:
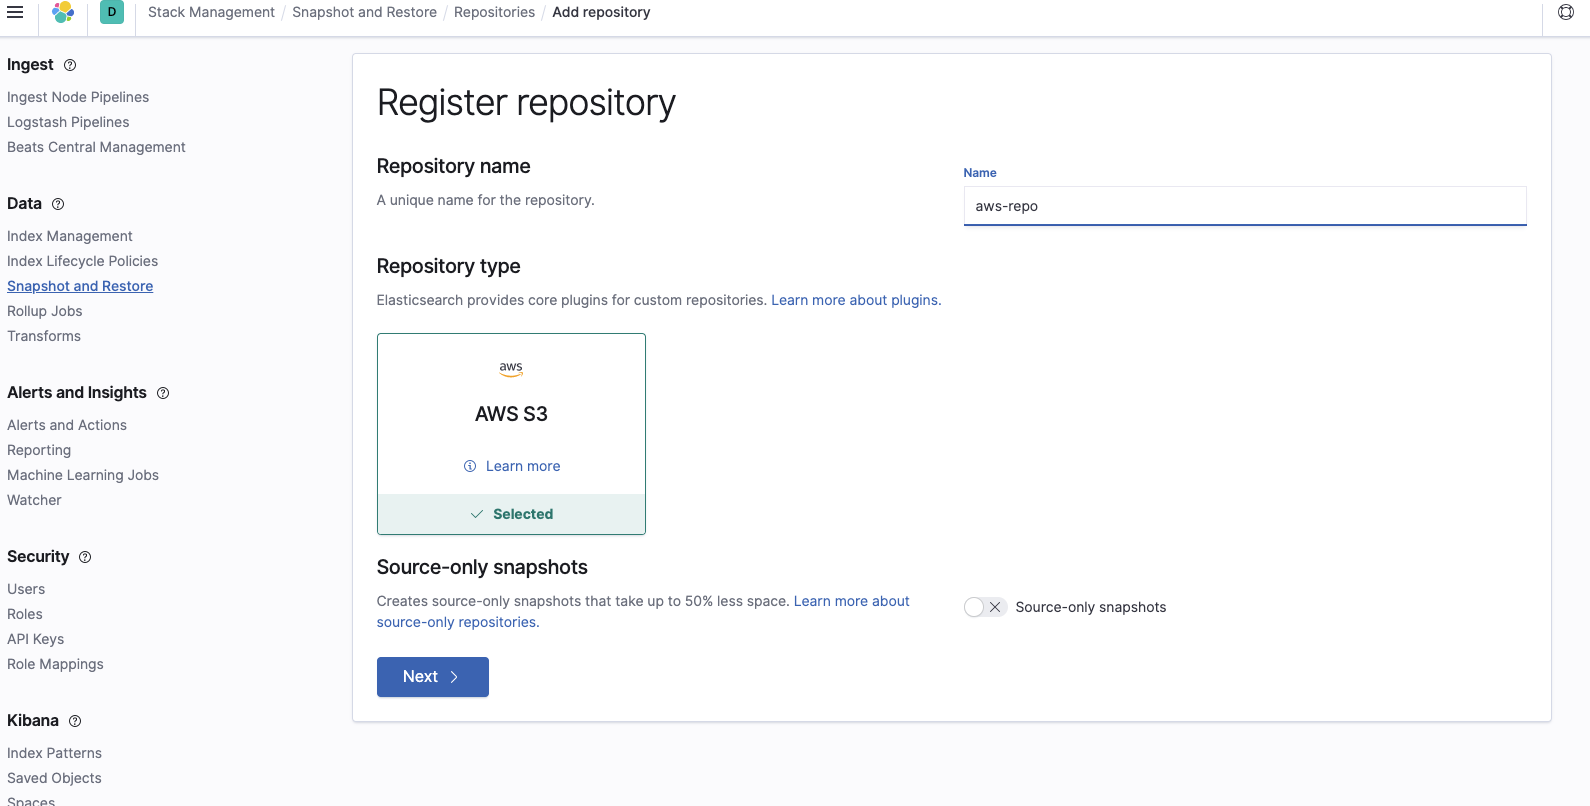
Add the bucket name where the snapshots are located:
And then verify that the repository has been configured correctly:
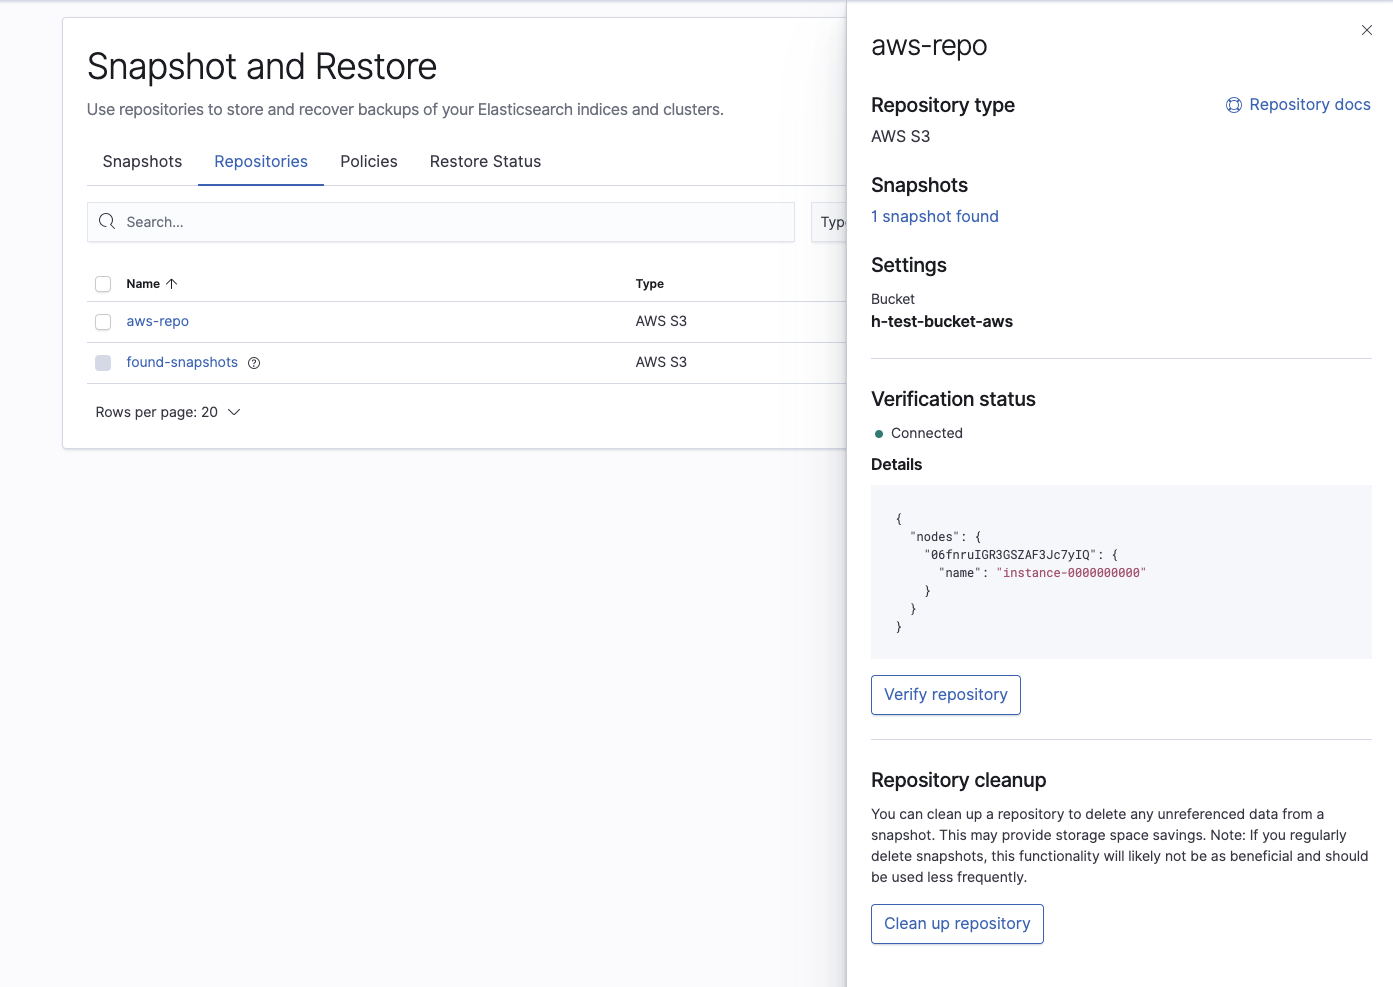
Finally, confirm that the Elasticsearch Service cluster can see the snapshot we want to restore:
Restore the Elasticsearch Service cluster from the snapshot
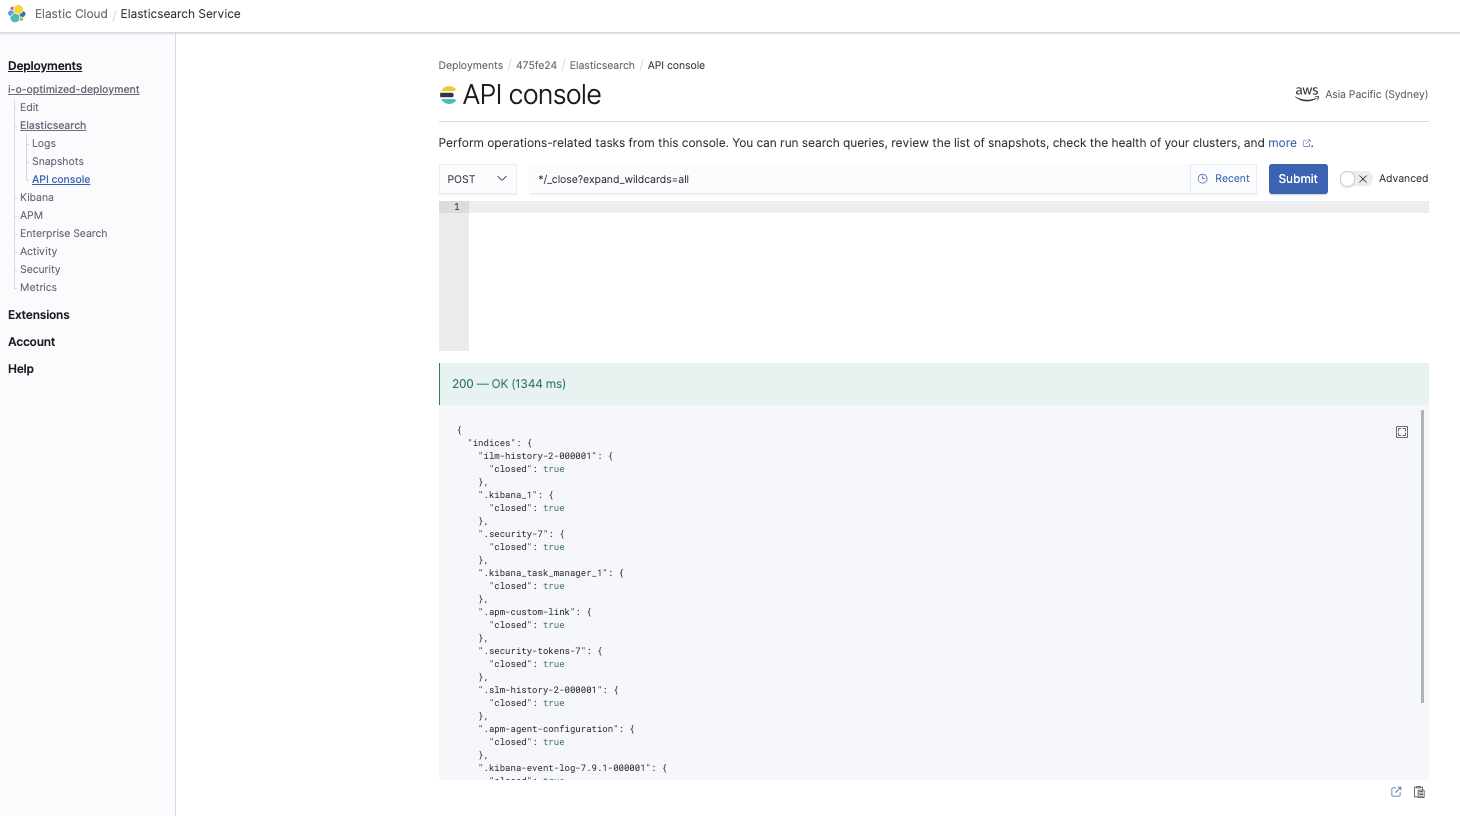
To restore the snapshot, go to the Elasticsearch Service cluster API console in the Elasticsearch Service console and execute the following three commands. Note that all three commands are executed as POST in the API console.
Close all indices
*/_close?expand_wildcards=all
This is to ensure we close all indices first so there are no conflicts during the restore phase:
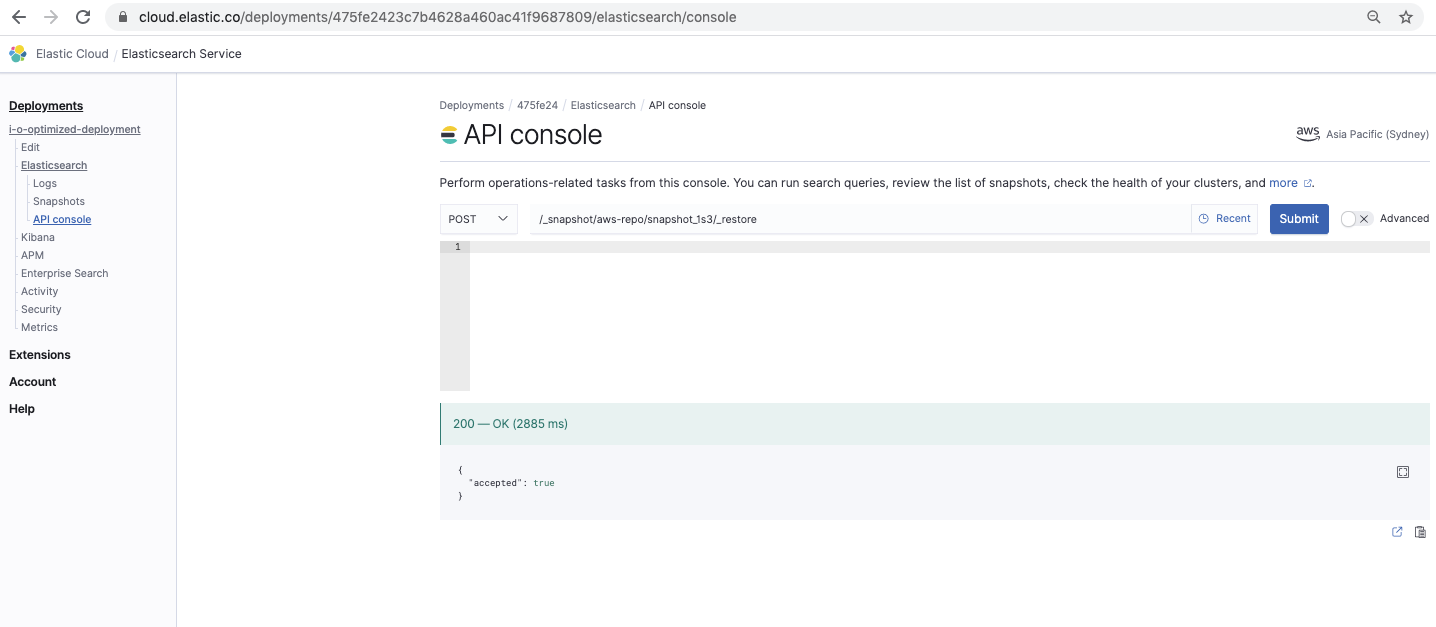
Restore the snapshot
/_snapshot/<your-repo-name>/<your-snapshot-name>/_restore
This command restores the snapshot:
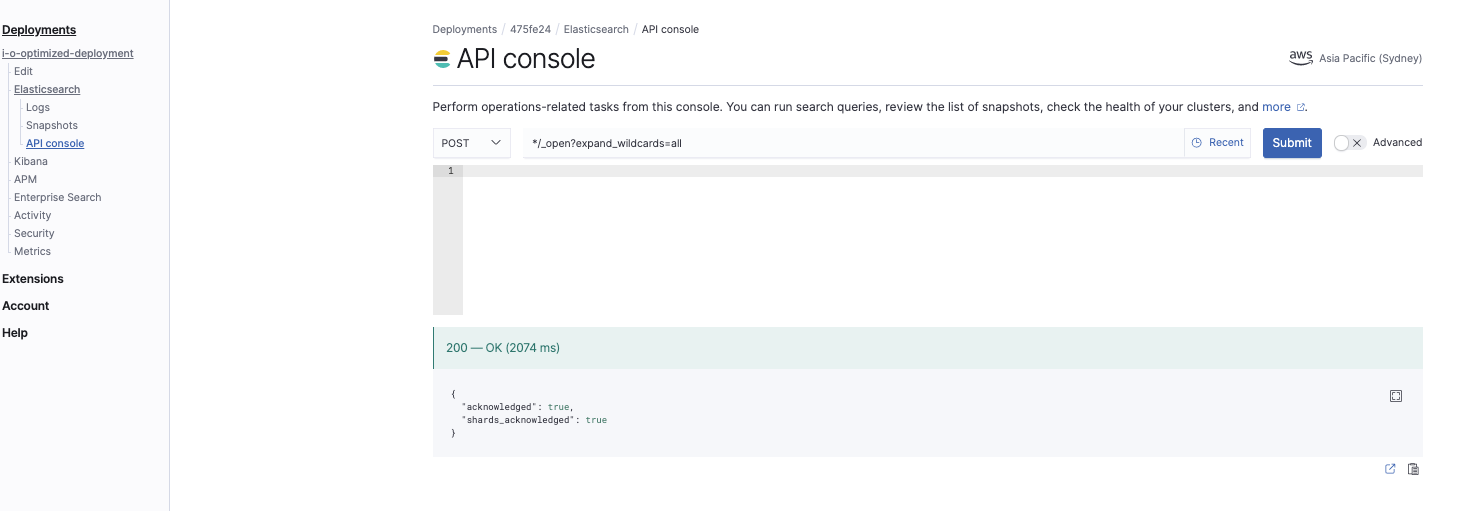
Open all indices
*/_open?expand_wildcards=all
This command opens all indices:
Verify the snapshot restore
Verify that you have restored the snapshot with all the indices. Go into Kibana and run the following command in Dev Tools:
GET _cat/indices
At this point you should have the new cluster running on Elasticsearch Service with the same data as from the self-managed cluster that you took the snapshot from. Now you can repoint your ingest sources such as Beats or Logstash to the new Elasticsearch Service endpoint, which you can find in the Elastic Cloud console.