How to ingest custom data into Elastic Workplace Search: A simple CSV example
Elastic Workplace Search offers the ability to ingest data from a wide range of content sources right out of the box, such as Google Drive, GitHub, and Salesforce. But you may need additional flexibility for your own unique organizational data needs.
The Workplace Search Custom Source API offers a lightweight, API-driven way of ingesting content into Workplace Search. This flexible tool helps you keep your custom content from getting siloed off, and allows it to appear in Workplace Search search results exactly as if it had originated from an out-of-the-box content source integration.
What exactly are custom sources?
Custom sources target organizational-level sources where a data source’s content would be appropriate to expose to many users of Workplace Search. A custom source would typically be initially configured by a system administrator, who would in turn provide the API credentials to development for pushing content to Workplace Search. These credentials, along with providing authentication, identify the source itself to ensure that any pushed data appears in the appropriate custom source.
Custom sources therefore typically contain content from repositories with information that is useful and pertinent to many individuals in your organization. A simple example might be a CSV file of contacts. A complex example might be a custom repository such as Trello. We will address the simpler of these here before tackling Trello in the follow-up to this post.
Adding a custom source requires the use of a REST API. This involves a little coding, which we’ve chosen to implement here in Python where required. Although no Python skills are required to follow along, the more technical reader is welcome to practically follow. If you haven’t already set up an Elastic Cloud deployment, you can spin one up for a free 14-day trial to follow along.
Starting simple
Organizational data more commonly resides in managed repositories, but you might still have legacy data in file formats such as CSV. This example, although a little contrived, allows us to approach custom sources with a simple tutorial before tackling a more complex use case.
Exposing contact information in Workplace Search results can potentially shorten the time required for users to find colleagues or customer details. Here we assume these contacts exist as CSV. Feel free to use our dataset or generate an equivalent of your own.
When we create a custom source in Workplace Search we effectively create an individual container for content. This content will have a unique schema and its own relevance model. Once configured, the source will be exposed in results like any other document repository and gain all of the associated benefits, such as relevance prioritization by groups.

Prior to ingesting contact data, we must first create the Custom API Source in Workplace Search.
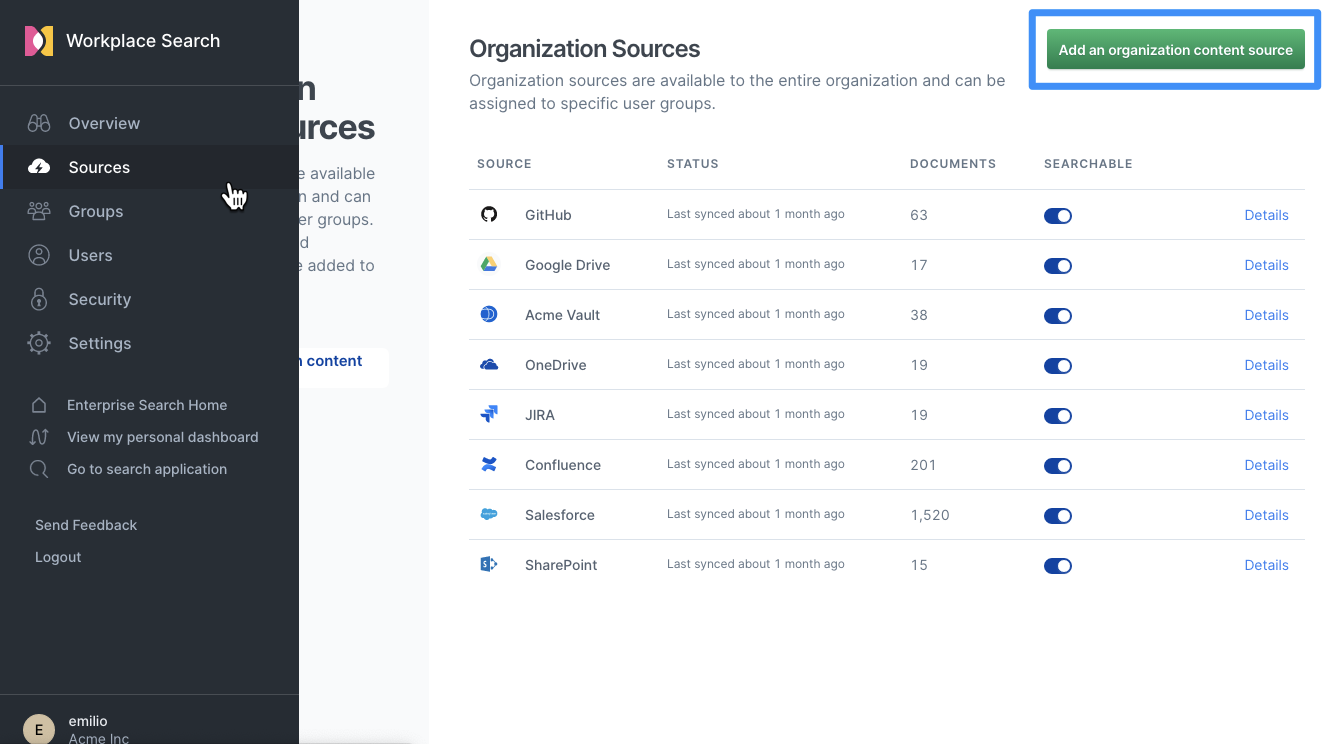
- Navigate to the Sources page and click Add an organization content source.
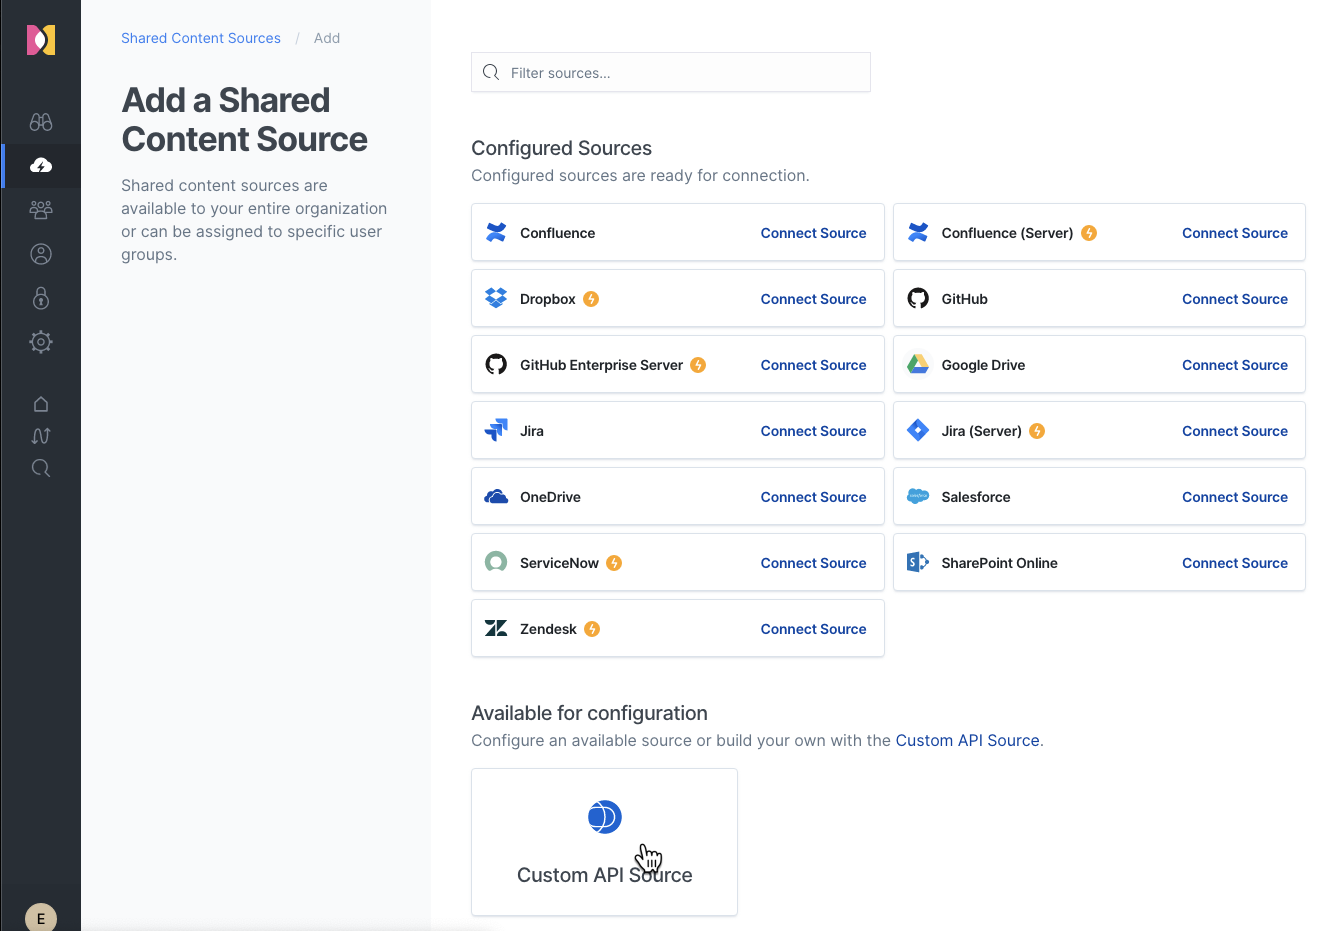
- Click Custom API Source.
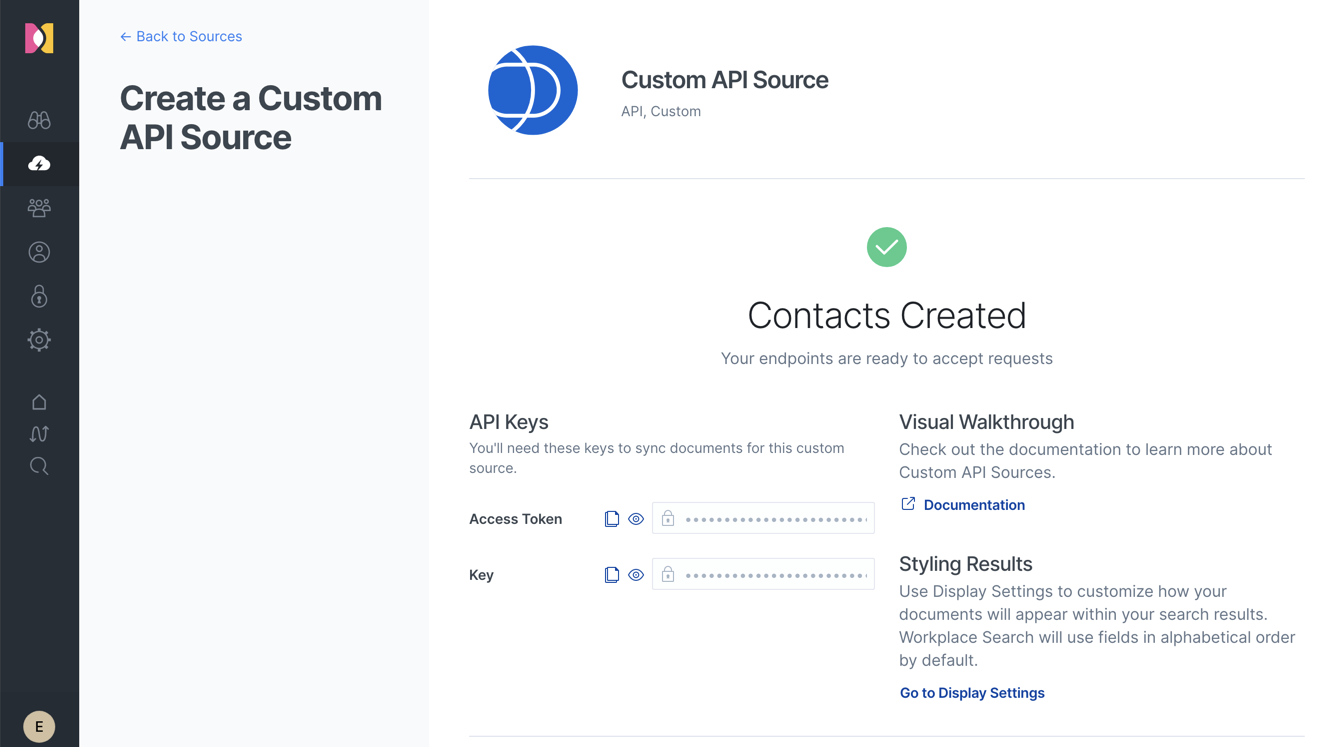
- Name your new source Contacts and click Create Custom API Source.
Token and keys
Next you will be presented with an access token and key. The access token provides authentication, while the key uniquely identifies the custom source. Make a note of these as they will be needed for ingestion.
Using the Workplace Search APIs
Workplace Search provides an intuitive REST API for ingesting content to custom sources. In our case we simply need to send our contacts to the _bulk_create endpoint. To keep things simple, we limited the number of rows in our CSV to 100, as this means we can send all the contacts in a single request. Should the user have more data or need more resilience around indexing, we’d suggest using one of our client libraries in the language of your choice, such as Python.
A quick look at requests
Before we dive into sending our data, let's take a quick look at the Workplace Search request itself:
POST http://localhost:3002/api/ws/v1/sources/[KEY]/documents/bulk_create
We are required to issue a HTTP POST to a Workplace Search URL. The operation here is indicated by the url suffix documents/bulk_create. The [KEY] here is the value you noted above, which uniquely identifies our new source. The documents to add to this source are sent in the body payload as JSON. In addition, we are required to set two http headers: an authorization header containing the token noted above, with a Bearer prefix, and a Content-Type indicating that the POST body contains JSON. Assuming we are using curl, this results in the following request structure:
curl -X POST http://localhost:3002/api/ws/v1/sources/[KEY]/documents/bulk_create \-H "Authorization: Bearer [AUTH_TOKEN]" \-H "Content-Type: application/json" \-d '[
{
    "id" : 1,
    "first_name" : "Emilio",
    "last_name" : "Hughes",
    "email" : "emilio.hughes@magiciansinc.co",
    "created_at": "2019-06-01T12:00:00+00:00",
    "company": "Magicians Inc",
    "job_title": "Procurement Manager"
},
{
    "id" : 2,
    "first_name" : "Joe",
    "last_name" : "Blogs",
    "email" : "joe.blogs@magiciansinc.co",
    "created_at": "2019-06-01T12:00:00+00:00",
    "company": "Magicians Inc",
    "job_title": "Technical Specialist"
}
]'
We don’t consider permissions at this stage and assume that all users of Workplace Search can find any contact. The above request sends two documents using three different field types: number, date, and text. The number field here is also an id that uniquely identifies our contact. In reality, this is likely to be more complex and consideration should be given to an appropriate value.
A bit of scripting
As mentioned above, the Workplace Search API requires documents be provided in JSON format. To convert our CSV file to JSON, we use the popular tool jq and pass the result to curl:
jq --slurp --raw-input --raw-output \
  'split("\n") | .[1:101] | map(split(",")) |
      map({"id": .[0],
           "first_name": .[1],
           "last_name": .[2],
           "title": (.[1] + " " + .[2]),
           "description":  (.[1] + " " + .[2] +" works as a "+.[7] + " at " + .[8] + " in the "+ .[6] +" department. Their email is " + .[3]+"."),
           "email": .[3],
           "gender": .[4],
           "skills": .[5],
           "department": .[6],
           "job_title": .[7],
           "company": .[8],
           "url": .[8] })' \
  customer_contacts.csv  | \
curl -X POST --data-binary @- http://localhost:3002/api/ws/v1/sources/[KEY]/documents/bulk_create \
-H "Authorization: Bearer [API_TOKEN]" \
-H "Content-Type: application/json"
Here jq simply splits the file content by new lines and uses a map function to generate each JSON document. The [1:101] ensures we don’t consider the first row and also don’t exceed the 100 document limit imposed by the Workplace Search bulk API. Finally this is passed to curl, which accepts the input because of the --data-binary @- parameter.
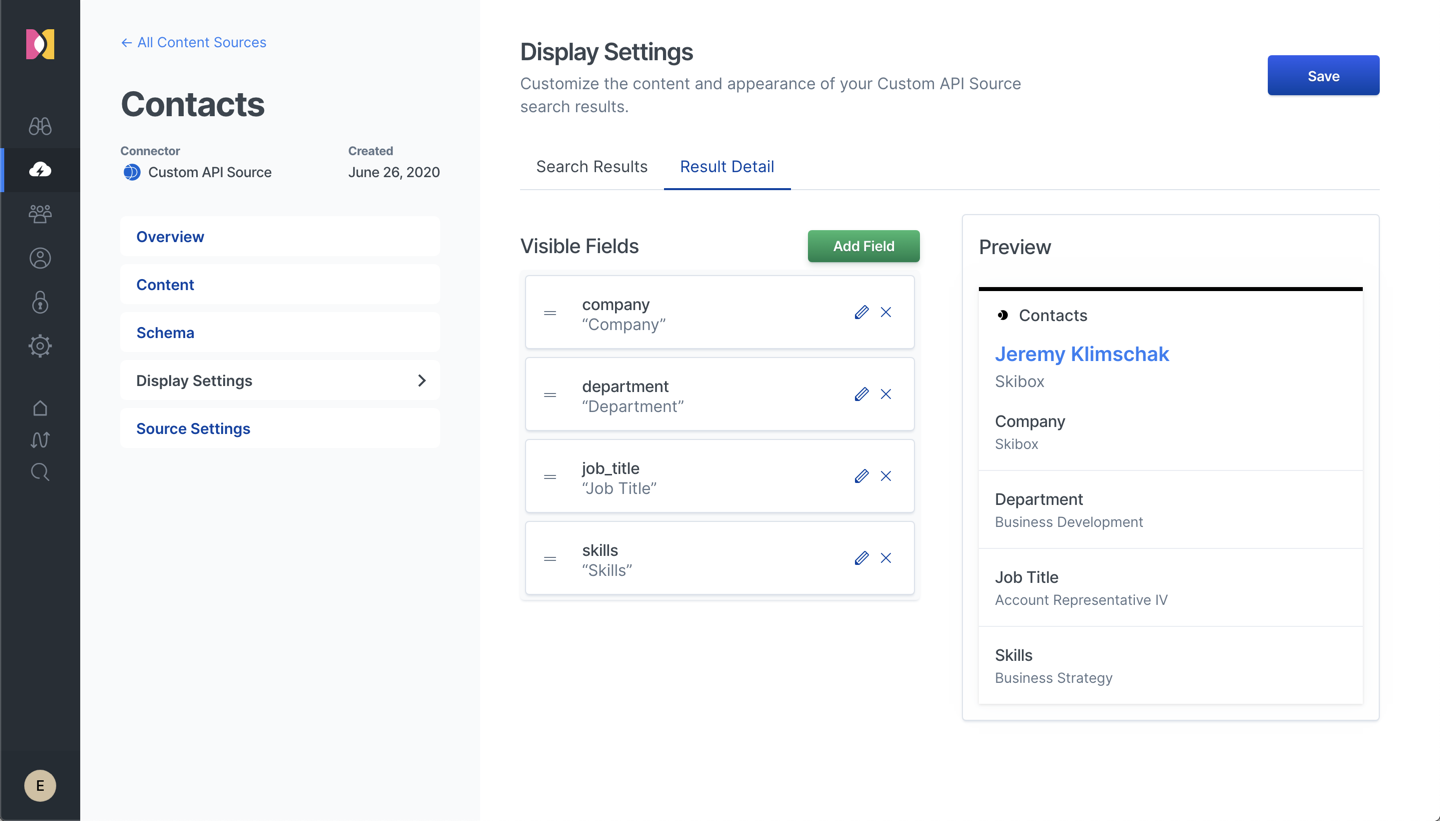
Customizing result display
You may have noticed that in addition to mapping each column in the CSV file to a field in the JSON, we also create the fields title, description, and url. While Workplace Search will use these automatically for display, as well as using the url field to make the results linkable, it also provides a simple means to further refine a source’s presentation. From the source’s configuration page, navigate to Display Settings. Our changes here will determine how Contact results are displayed to the user. Given our limited set of fields, the required settings are simple.

Finally, select the Result Detail tab to modify how the results will be displayed when clicked. A little bit of work here can go a long way to ensure results are presented optimally.
Seeing the search results
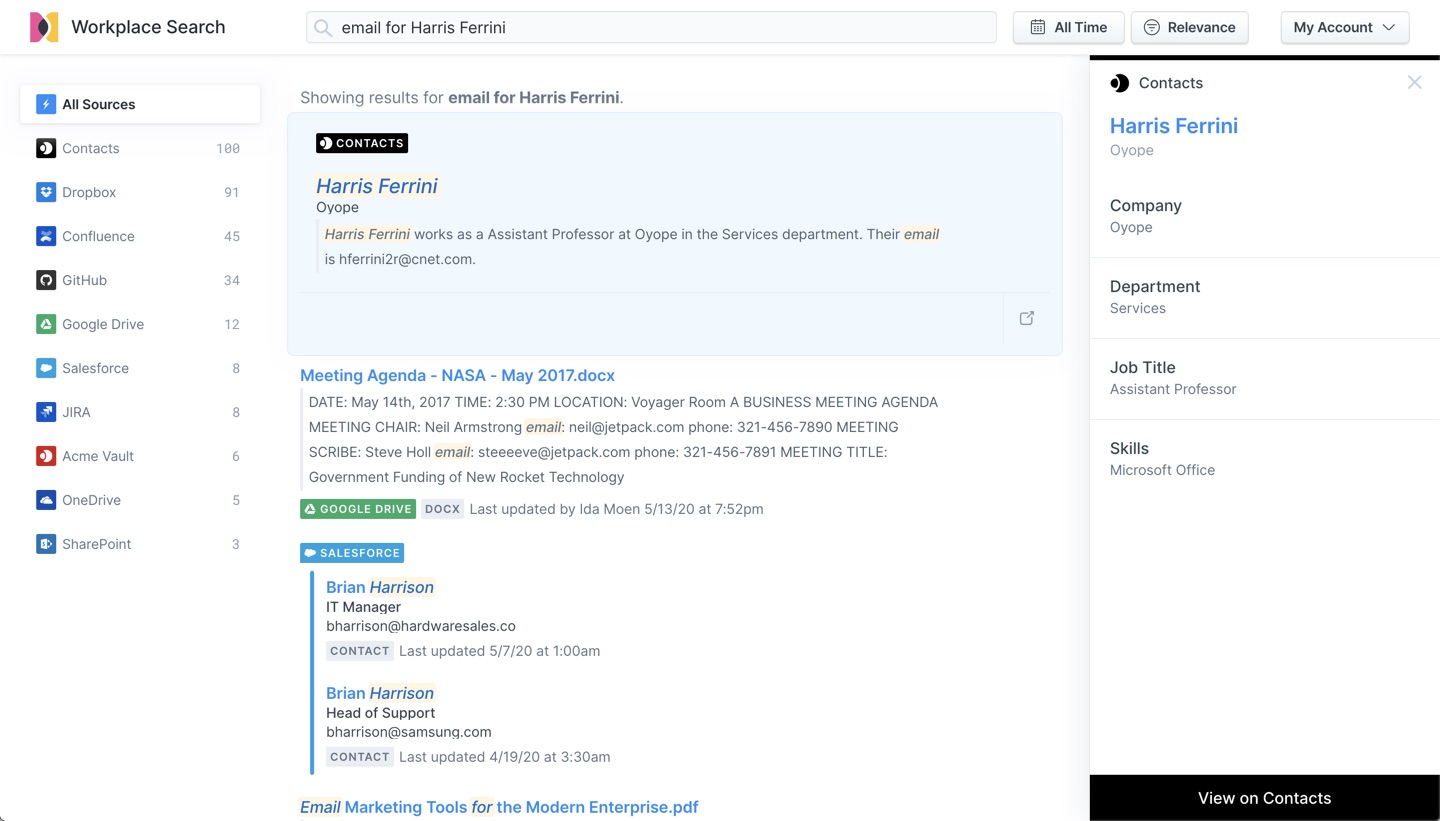
We can now see our contact data is available in Workplace Search. These results appear fully integrated and benefit from the classic advantages of a unified search experience.
Next steps
By first addressing a simple use case of a contact list file on disk, we have shown how the Custom Source API can be easily used to add organizational level sources to Workplace Search. In the next post in this series, we will explore adding data from a more complex repository: Trello. To do this, we’ll dive into more Workplace Search features, including schema refinement and display settings for a source.
And, if you haven’t done so already, you can always try out Workplace Search on Elastic Cloud with a free 14-day trial.