How to deploy Elastic Agents in air-gapped environments
From manual downloads to automated artifact management


 Share on Twitter
Share on Twitter

 Share on LinkedIn
Share on LinkedIn

 Share on Facebook
Share on Facebook

 Share by Email
Share by Email

 Print this page
Print
The problem: When "just download it" isn't an option
Picture this scenario: You need to deploy Elastic Agents in sensitive/classified networks, critical infrastructure, or financial systems with strict network isolation policies. The network is locked down — no internet access, no external downloads, and definitely no calling home to artifacts.elastic.co — when an Elastic Agent needs an update or when Endpoint security requires the latest threat detection artifacts.
This is the reality for many organizations that need Elastic's powerful agent-based observability and security capabilities but operate in air-gapped or restricted environments. What should be a straightforward agent deployment becomes a logistical nightmare of manual artifact downloads, USB drives, and repetitive processes that need to be repeated for every Elastic release.
I faced this exact challenge repeatedly while supporting enterprise Elastic Agent deployments as a senior Elastic engineer. I found myself manually chasing down URLs and downloading agent binaries, Endpoint artifacts, and security signatures over and over again for different customer sites. Each new Elastic release meant hours of manual work, and the process was prone to errors.
The solution: Automating artifact management
Rather than accepting this as just how things work, I built a solution that transforms hours of manual work into a single command. The artifacts-bundler tool automates the entire process of downloading, packaging, and serving Elastic Stack components for offline environments.
What it actually does
The tool tackles three core challenges that I encountered in the field:
Bulk downloads: Automatically fetches Elastic Agent binaries, Beats, application performance monitoring (APM) server, Fleet Server, and critical Endpoint security artifacts from artifacts.elastic.co and artifacts.security.elastic.co
Intelligent packaging: Creates timestamped, versioned bundles that include manifest files for traceability and verification
- Local distribution: Optionally builds a self-contained NGINX container that serves as an internal artifact mirror
The technical architecture
Download intelligence
I built it to use Elastic's official APIs intelligently:
Query current artifact manifests from artifacts.elastic.co and artifacts.security.elastic.co
Verify checksums and signatures where available
Create detailed manifest files documenting what was downloaded and when
Support incremental updates with the --update flag to avoid redownloading existing files
Flexible deployment options
I designed the NGINX container approach to provide several advantages:
Self-contained: No external dependencies or complex server setup
Portable: Runs consistently across different container platforms like Docker, Podman, containerd
Scalable: Can be deployed in Kubernetes with horizontal scaling
- Secure: Supports SSL/TLS termination with custom certificates
Version management
The tool handles multiple Elastic versions simultaneously, which I found essential for environments that need to:
Support gradual rollouts across different systems
Maintain multiple versions for testing and production
Quickly roll back to previous versions when needed
Real-world walkthrough: From zero to running
Let me walk you through the complete process of setting up an offline Elastic Agent artifact server using artifacts-bundler — the same workflow I use for customer deployments.
Step 1: Initial setup
Starting with a system that has internet access (your build/staging environment):
Clone repository
git clone https://github.com/pkward/artifacts-bundler.git
cd artifacts-bundlerInstall prerequisites (RHEL/CentOS example)
sudo dnf install -y curl tar jq gzip docker|podmanStep 2: Choose your deployment strategy
The artifacts-bundler supports two distinct deployment approaches that I designed for different environments:
Option A: Bundle for bare metal/traditional servers
 ./scripts/download-artifacts.sh \
     --versions 8.18.5,9.1.2 \
     --bundle

This creates a timestamped tarball (`elastic-artifacts-bundle-20250813-154323.tar.gz`) that you can extract and serve with any web server.Option B: Self-contained container image
./scripts/download-artifacts.sh \
     --versions 8.18.5,9.1.2 \
     --build-nginx-image

This builds a ready-to-deploy NGINX Docker image (`elastic-artifacts-nginx:latest`) with artifacts preloaded.Both commands trigger the same comprehensive download process that I automated:
Elastic Agent binaries for Linux, Windows, and macOS
Security endpoint artifacts, including detection signatures and behavioral models
APM server and Fleet Server for the specified versions
Manifest files documenting exactly what was downloaded and when
Step 3: Transfer to air-gapped environment
The approach varies based on your chosen deployment strategy:
For bare metal deployment (bundle option)
Transfer the bundle to your target server
scp elastic-artifacts-bundle-20250813-154323.tar.gz target-server:/tmp/Alternative: Copy to mounted USB drive for physical transfer
First mount your USB drive: sudo mount /dev/sdb1 /mnt/usb
cp elastic-artifacts-bundle-20250813-154323.tar.gz /mnt/usb/For container deployment
Save the container image (do this in your build environment before transfer)
docker|podman save elastic-artifacts-nginx:latest | gzip > elastic-artifacts-nginx.tar.gzTransfer to target server
scp elastic-artifacts-ningx.tar.gz target-server:/tmp/Alternative: Copy to mounted USB drive for physical transfer
First mount your USB drive: sudo mount /dev/sdb1 /mnt/usb
cp elastic-artifacts-nginx.tar.gz /mnt/usb/The beauty of this approach becomes apparent during the transfer phase. Instead of managing dozens of individual files (which I used to do manually), you have a single, self-contained package to move between environments whether over the network or via physical media like USB drives.
Step 4: Deploy your artifact server
Deployment Option A: Bare metal NGINX server
For traditional server environments, extract and serve the bundle with NGINX:
# In the air-gapped environment, extract to web directory
sudo mkdir -p /var/www/elastic-artifacts
cd /var/www/elastic-artifacts
sudo tar -xzf /tmp/elastic-artifacts-bundle-20250813-154323.tar.gz

# Set proper ownership and permissions (check NGINX user first)
# Check which user NGINX runs as: ps aux | grep nginx
sudo chown -R nginx:nginx /var/www/elastic-artifacts
# Use www-data:www-data on Ubuntu/Debian
sudo chmod -R 755 /var/www/elastic-artifacts

# Configure SELinux context for NGINX to serve static files
sudo semanage fcontext -a -t httpd_sys_content_t "/var/www/elastic-artifacts(/.*)?"
sudo restorecon -Rv /var/www/elastic-artifacts

# Verify SELinux labels are correct
sudo ls -laZ /var/www/elastic-artifacts/
# Expected output should show: unconfined_u:object_r:httpd_sys_content_t:s0Install and configure NGINX:
# Install NGINX (RHEL/CentOS example)
sudo dnf install -y nginx

# Create NGINX configuration
sudo tee /etc/nginx/conf.d/elastic-artifacts.conf << 'EOF'
server {
    listen 80;
    server_name elastic-artifacts.local;

    root /var/www/elastic-artifacts;
    index index.html;

    # Enable ETags globally - REQUIRED for Elastic Endpoint artifact updates
    etag on;

    location /downloads/ {
        alias /var/www/elastic-artifacts/;
        autoindex on;
        autoindex_exact_size off;
        autoindex_localtime on;

        # Enable CORS for cross-origin requests
        add_header Access-Control-Allow-Origin *;
        add_header Access-Control-Allow-Methods "GET, OPTIONS";
        add_header Access-Control-Allow-Headers "Origin, Content-Type, Accept";

        # Ensure ETags are sent for all files (critical for Endpoint)
        add_header Cache-Control "public, must-revalidate";

        # Set appropriate MIME types
        location ~* \.(tar\.gz|tgz)$ {
            add_header Content-Type application/gzip;
        }

        location ~* \.zip$ {
            add_header Content-Type application/zip;
        }
    }

    # Optional: Create a simple index page
    location = / {
        return 301 /downloads/;
    }
}
EOF

# Enable and start NGINX
sudo systemctl enable nginx
sudo systemctl start nginx

# Configure firewall (if needed)
sudo firewall-cmd --permanent --add-service=http
sudo firewall-cmd --reloadYour artifact server is now available at http://your-server/downloads/ with a browsable directory listing and proper ETag support for Elastic Endpoint artifact update detection.
Important note: The ETag header configuration is mandatory for Elastic Endpoint functionality. Without ETags, Elastic Endpoint cannot determine when global artifacts have been updated and won't download new versions when they become available.
Verify ETag configuration:
Test that ETags are working properly:
curl -I http://your-server/downloads/endpoint/manifest/artifacts-8.18.5.zipShould show: ETag: "hexadecimal-value"

Deployment Option B: Container deployment
For containerized environments, use the prebuilt image:
# In the air-gapped environment, load and run the pre-built image

 docker|podman load < /tmp/elastic-artifacts-nginx.tar.gz
docker|podman run -d -p 80:80 elastic-artifacts-nginx:latestDeployment Option C: Kubernetes deployment
# Deploy using the included manifests
 kubectl apply -f k8s/nginx-deploy.yaml
kubectl apply -f k8s/nginx-nodeport.yamlStep 5: Configure Elastic Stack to use the local mirror
This is where the solution pays dividends. Instead of each component trying to reach external servers, everything points to your local mirror.
Fleet configuration
In Kibana, navigate to Fleet > Settings and configure the Agent Binary Download URL:
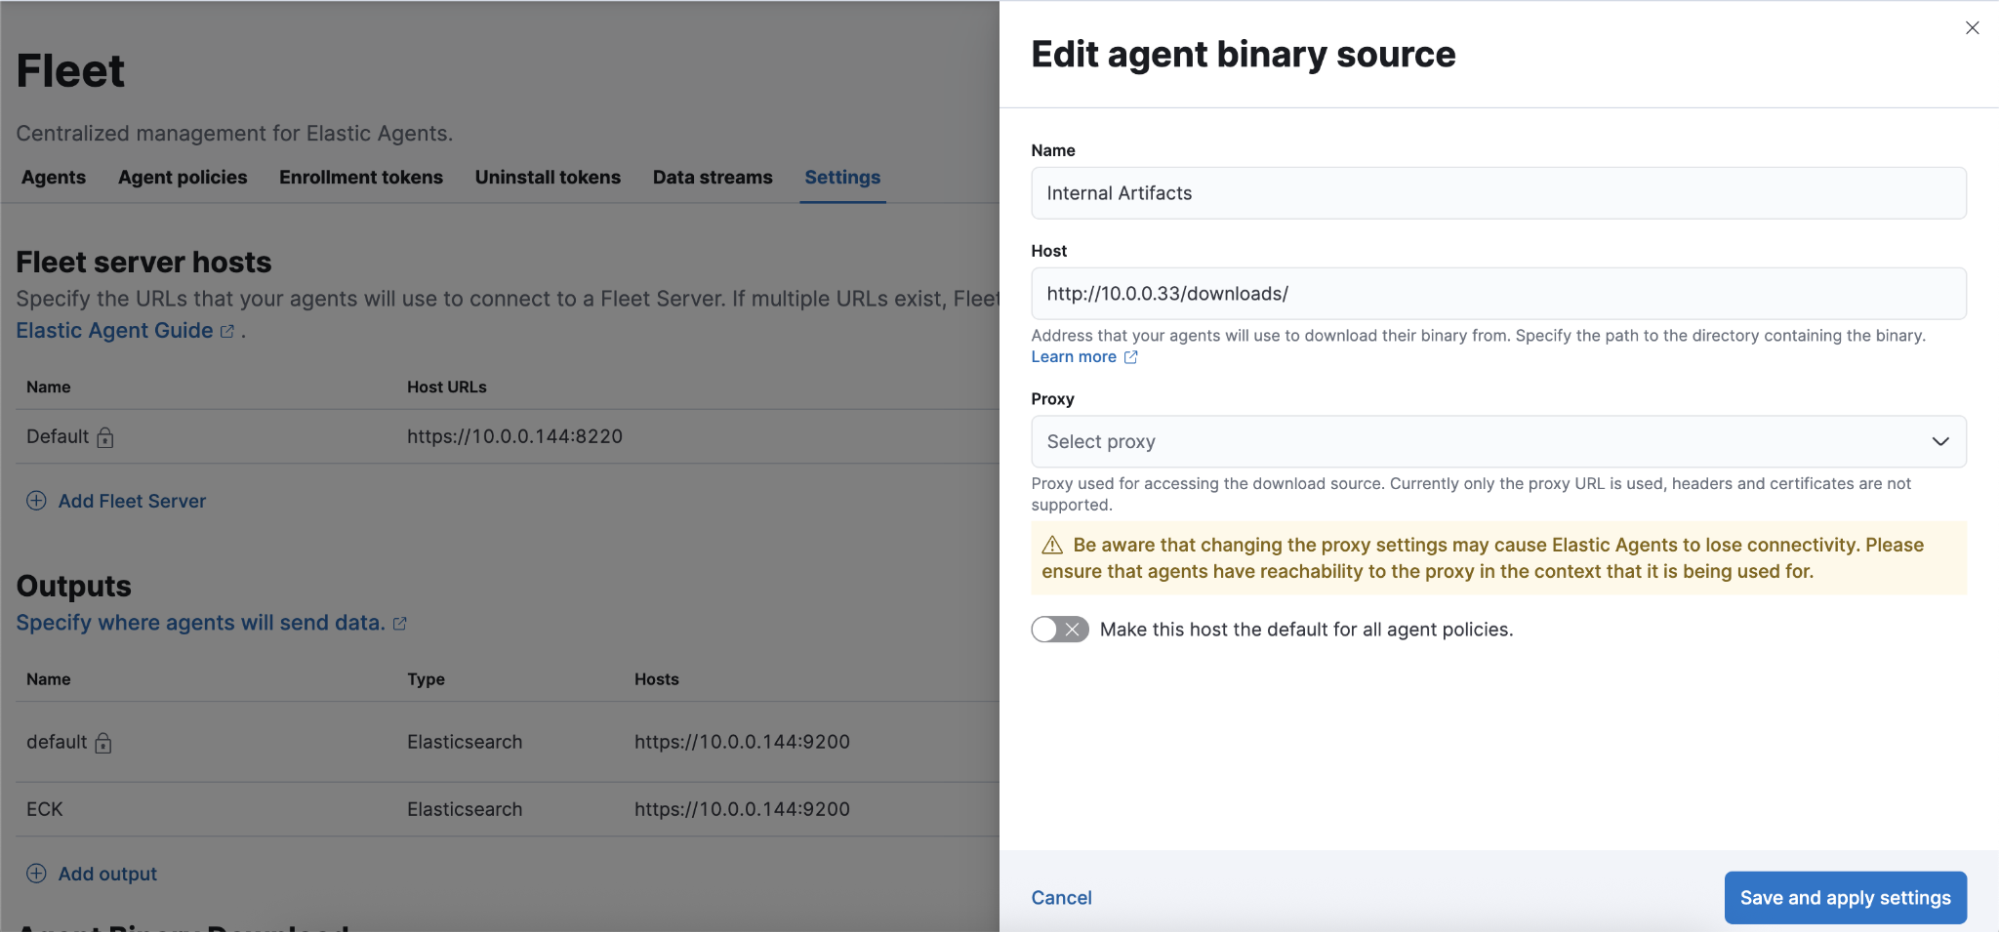
The key is setting the Host field to point to your local artifact server (e.g., http://10.0.0.33/downloads/). This tells Fleet where to download Elastic Agent binaries for all agent installations and updates.
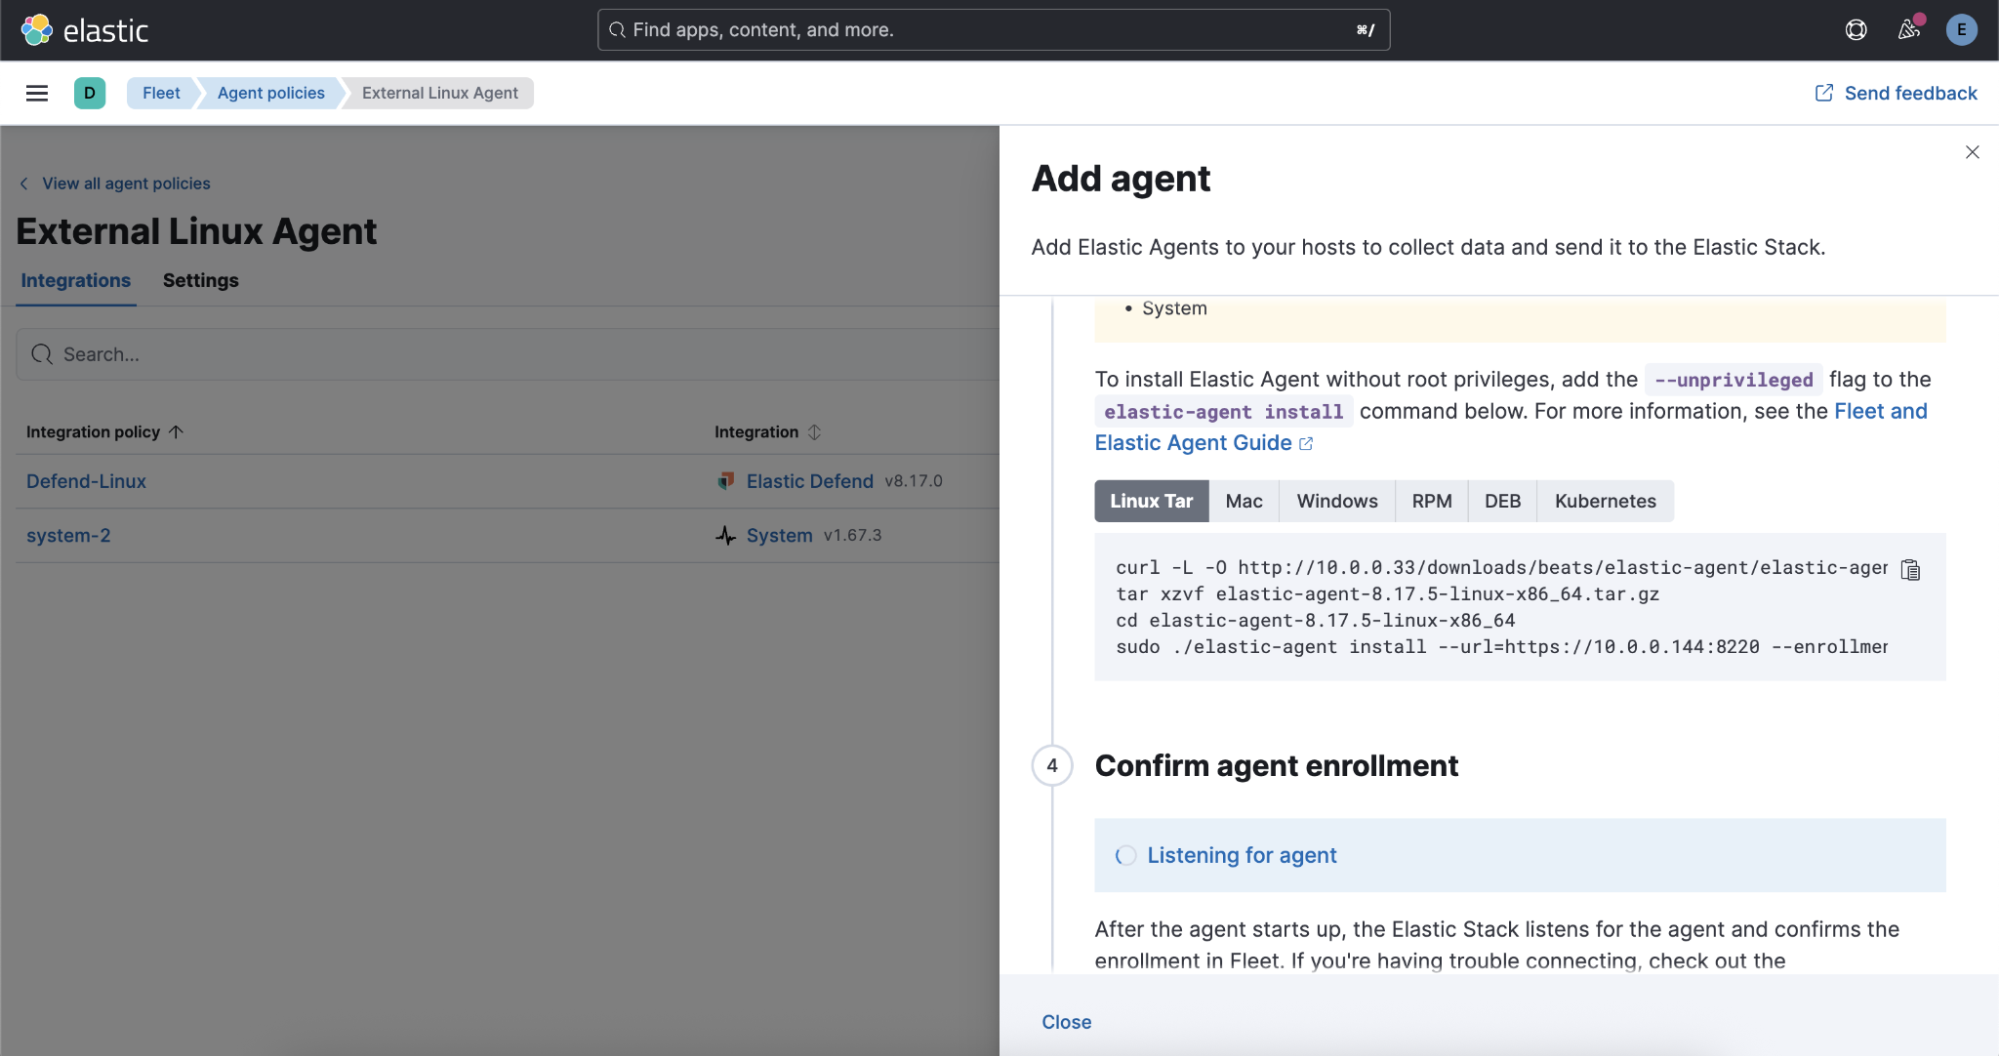
From this point forward, all Elastic Agent deployments, updates, and policy changes pull binaries from your local server rather than the internet.
Endpoint security configuration
For Elastic Defend (Endpoint security), configure the global artifact download source in your Endpoint policy by navigating to Security > Endpoint > Policies > [Your Defend Policy] > Edit > Advanced Settings.
Configure the global artifact download source for each platform:


Set each platform to point to your local mirror URL, such as`http://10.0.0.33`. This ensures that security signature updates, behavioral models, and other critical Endpoint components are served locally.
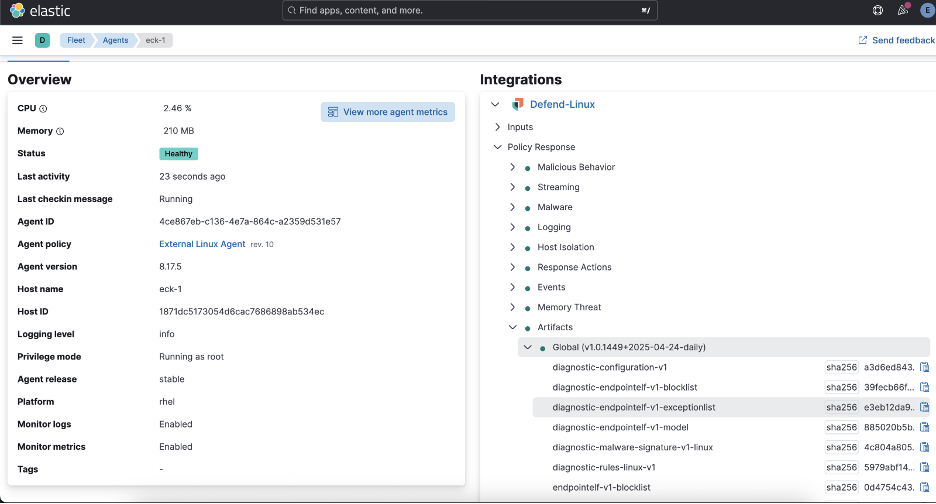
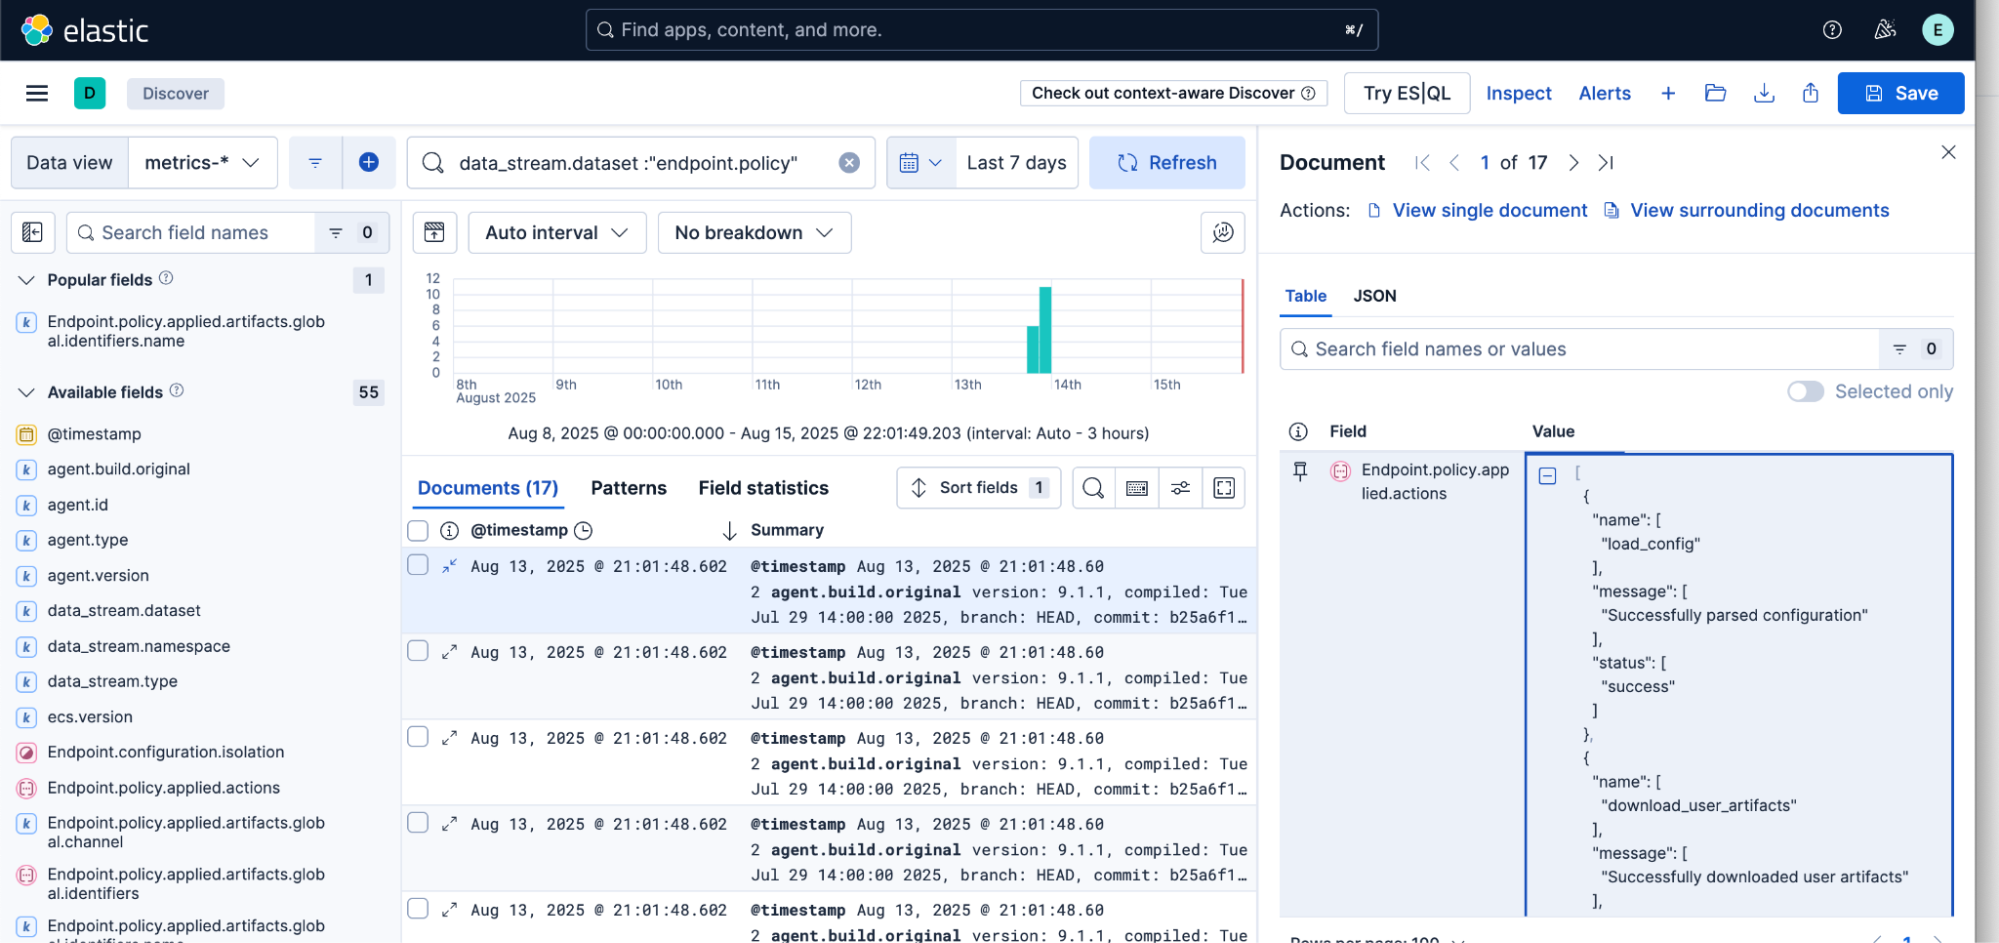
Once configured, you can verify that agents are successfully using your local artifact server:
Production considerations
Based on my experience deploying this in various environments, here are key considerations:
Storage requirements
Storage needs scale with the number of versions and platforms supported. A typical bundle for two Elastic versions across three platforms (Linux, Windows, macOS) plus endpoint security files weigh in around 2GB–3GB. Plan accordingly for multiple versions.
Update workflows
I recommend establishing a regular cadence for updating your component bundles:
Staging: Download and test new releases in your connected environment.
Validation: Verify file integrity and compatibility.
Transfer: Move validated packages to the production environment.
- Deployment: Update your artifact server with new content.
Security considerations
While the tool simplifies artifact management, maintain security best practices by:
Verifying artifact checksums when possible
Using HTTPS for artifact distribution in production
Implementing access controls on your artifact server
Monitoring download logs for unusual activity
Beyond the tool: Community impact
The artifacts-bundler represents more than just a technical solution; it also demonstrates how we in the Elastic community can identify real-world challenges and build practical solutions. I've made the tool available on GitHub under an MIT license to encourage organizations facing similar challenges to adopt and extend it.
The tool has already proven valuable across different sectors where I've seen it deployed, such as:
Government agencies preparing deployment media for classified networks and secure facilities
Healthcare systems maintaining HIPAA compliance while monitoring medical device networks and patient data systems
- Critical infrastructure including power grids, water treatment facilities, and transportation systems where security takes precedence over connectivity
Looking forward
While I built this initially for internal testing and Kubernetes deployments, the artifacts-bundler addresses a common challenge across the Elastic ecosystem. As air-gapped and edge deployments become more common, tools like this bridge the gap between Elastic's cloud-native architecture and the realities of restricted environments.
I continue to evolve the tool based on community feedback and real-world usage with recent additions, including support for multiple container runtimes and enhanced SSL configuration options.
For organizations operating in restricted environments, the artifacts-bundler proves that air-gapped doesn't have to mean difficult; sometimes, it just means thinking differently about the problem.
Getting started
The artifacts-bundler is available on GitHub with comprehensive documentation, usage examples, and Kubernetes deployment manifests.
For organizations considering air-gapped Elastic deployments, the tool eliminates one of the most time-consuming aspects of the process. What once required hours of manual work and careful documentation now happens with a single command.
As I like to put it: the goal was to turn a repetitive, error-prone manual process into something reliable and repeatable. When you're dealing with production security systems, you want to spend your time on configuration and optimization, not chasing down download URLs.
The release and timing of any features or functionality described in this post remain at Elastic's sole discretion. Any features or functionality not currently available may not be delivered on time or at all.
Share
- Share on Twitter
Share on Twitter
- Share on LinkedIn
Share on LinkedIn
- Share on Facebook
Share on Facebook
- Share by Email
Share by Email
- Print this page
Print