Setting up SAML for Elastic Enterprise Search: Okta edition
Editor’s Note — July 6, 2022: This blog post contains SAML configuration that is now out of date. Please see the documentation for the latest configuration.
In this post, we’ll show how you can secure your Elastic Enterprise Search deployment by using a Security Assertion Markup Language (SAML) identity provider (IdP) — in this case, we’ll be using Okta — for cross-domain, single sign-on authentication. IdPs are responsible for confirming that a user is who they say are, and then sending that data (and the user’s access rights) to a service provider — in this case to Elastic.
Get your cluster going with SAML on Elastic Cloud
To get started, you’ll need the Enterprise Search endpoint (we’ll refer to that as the [ENTERPRISE SEARCH ENDPOINT]): You can find it in the Deployment details in the Elastic Cloud console. Select Copy endpoint next to Enterprise Search. Note that Elastic Cloud appends /login to the end of this URL — please make sure to remove it for all the links shown below.
You’ll begin by setting up your application in Okta. Then you’ll adjust a few settings to enable SAML on Enterprise Search.
Okta: Set up your application
First you’ll work within Okta to add Enterprise Search as an app integration.
- To create a new app, choose Add Application > Create New App.
If you don’t see the option, you may have to switch to Classic UI using the upper-left menu.

- Select Web and SAML 2.0.
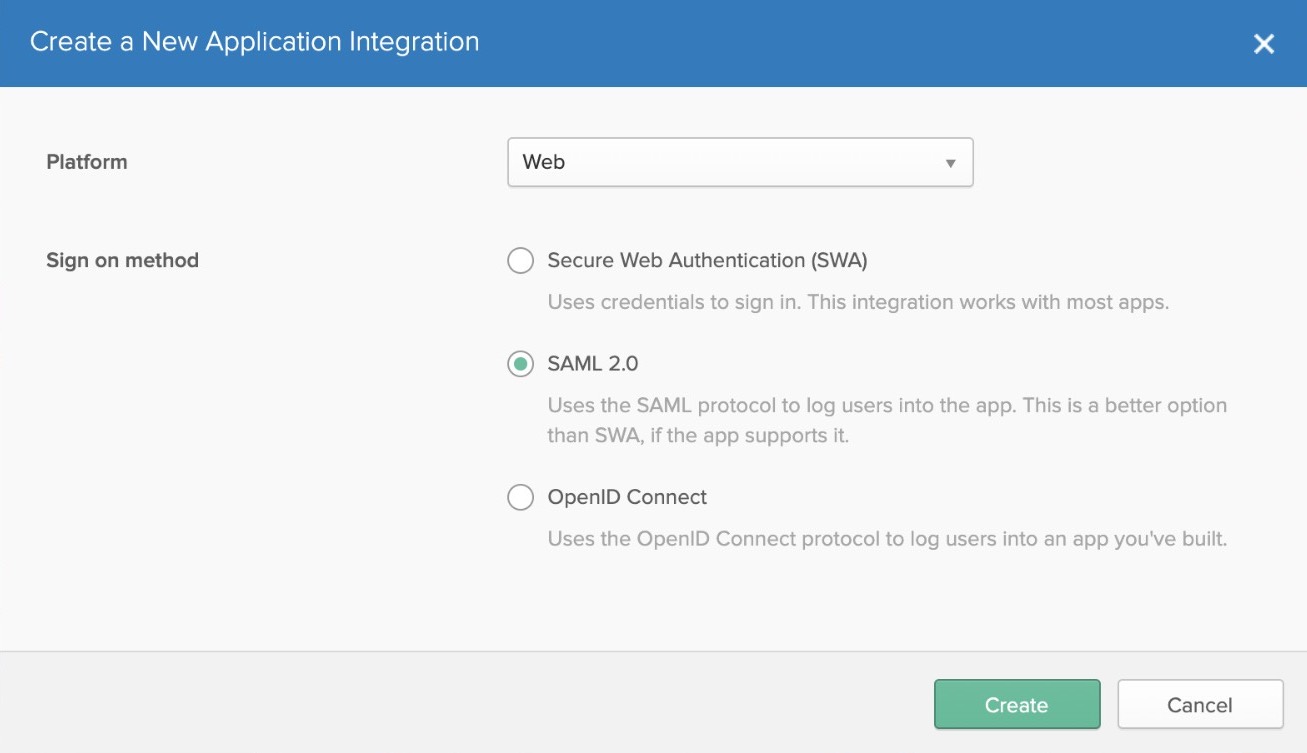
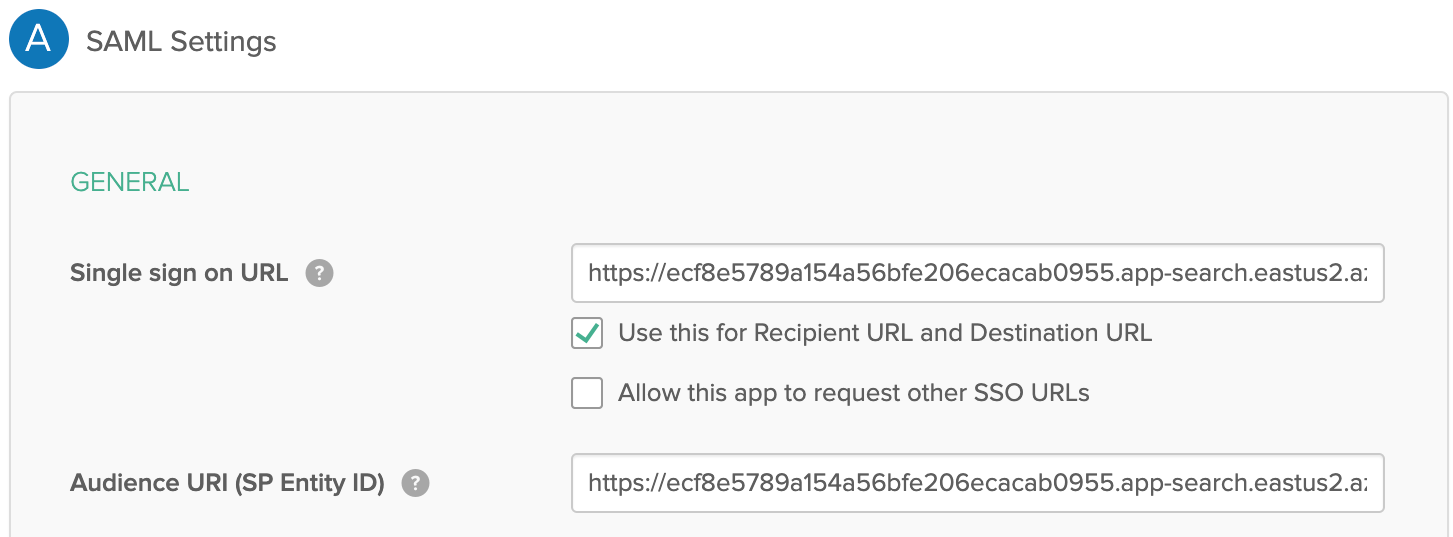
- Name your app whatever you’d like. Then you’ll be asked for some SAML settings:
- Single sign-on URL: [ENTERPRISE SEARCH ENDPOINT]/users/saml_login
- Audience URI (SP Entity ID): [ENTERPRISE SEARCH ENDPOINT]/
- Everything else can be left as default
- Click Next to finish setting up the application. If you haven’t already, don’t forget to assign some users to this new application.
Enterprise Search configuration
We’ll need to add two pieces of information from Okta to your Elasticsearch.yml config. Your Elasticsearch.yml file can be found in the Elastic Cloud console. Select Edit under your deployment, then add the following to the User overrides settings:
xpack.security.authc.realms.saml:
         saml1:
           order: 2
           attributes.principal: "nameid"
           attributes.groups: "groups"
           idp.metadata.path: "[METADATA PATH]"
           idp.entity_id: "[SAML ENTITY ID]"
           sp.entity_id: "[ENTERPRISE SEARCH ENDPOINT]/" # Match these with your external_url.
           sp.acs: "[ENTERPRISE SEARCH ENDPOINT]/users/saml_login"
           sp.logout: "[ENTERPRISE SEARCH ENDPOINT]/logout"
[METADATA PATH]
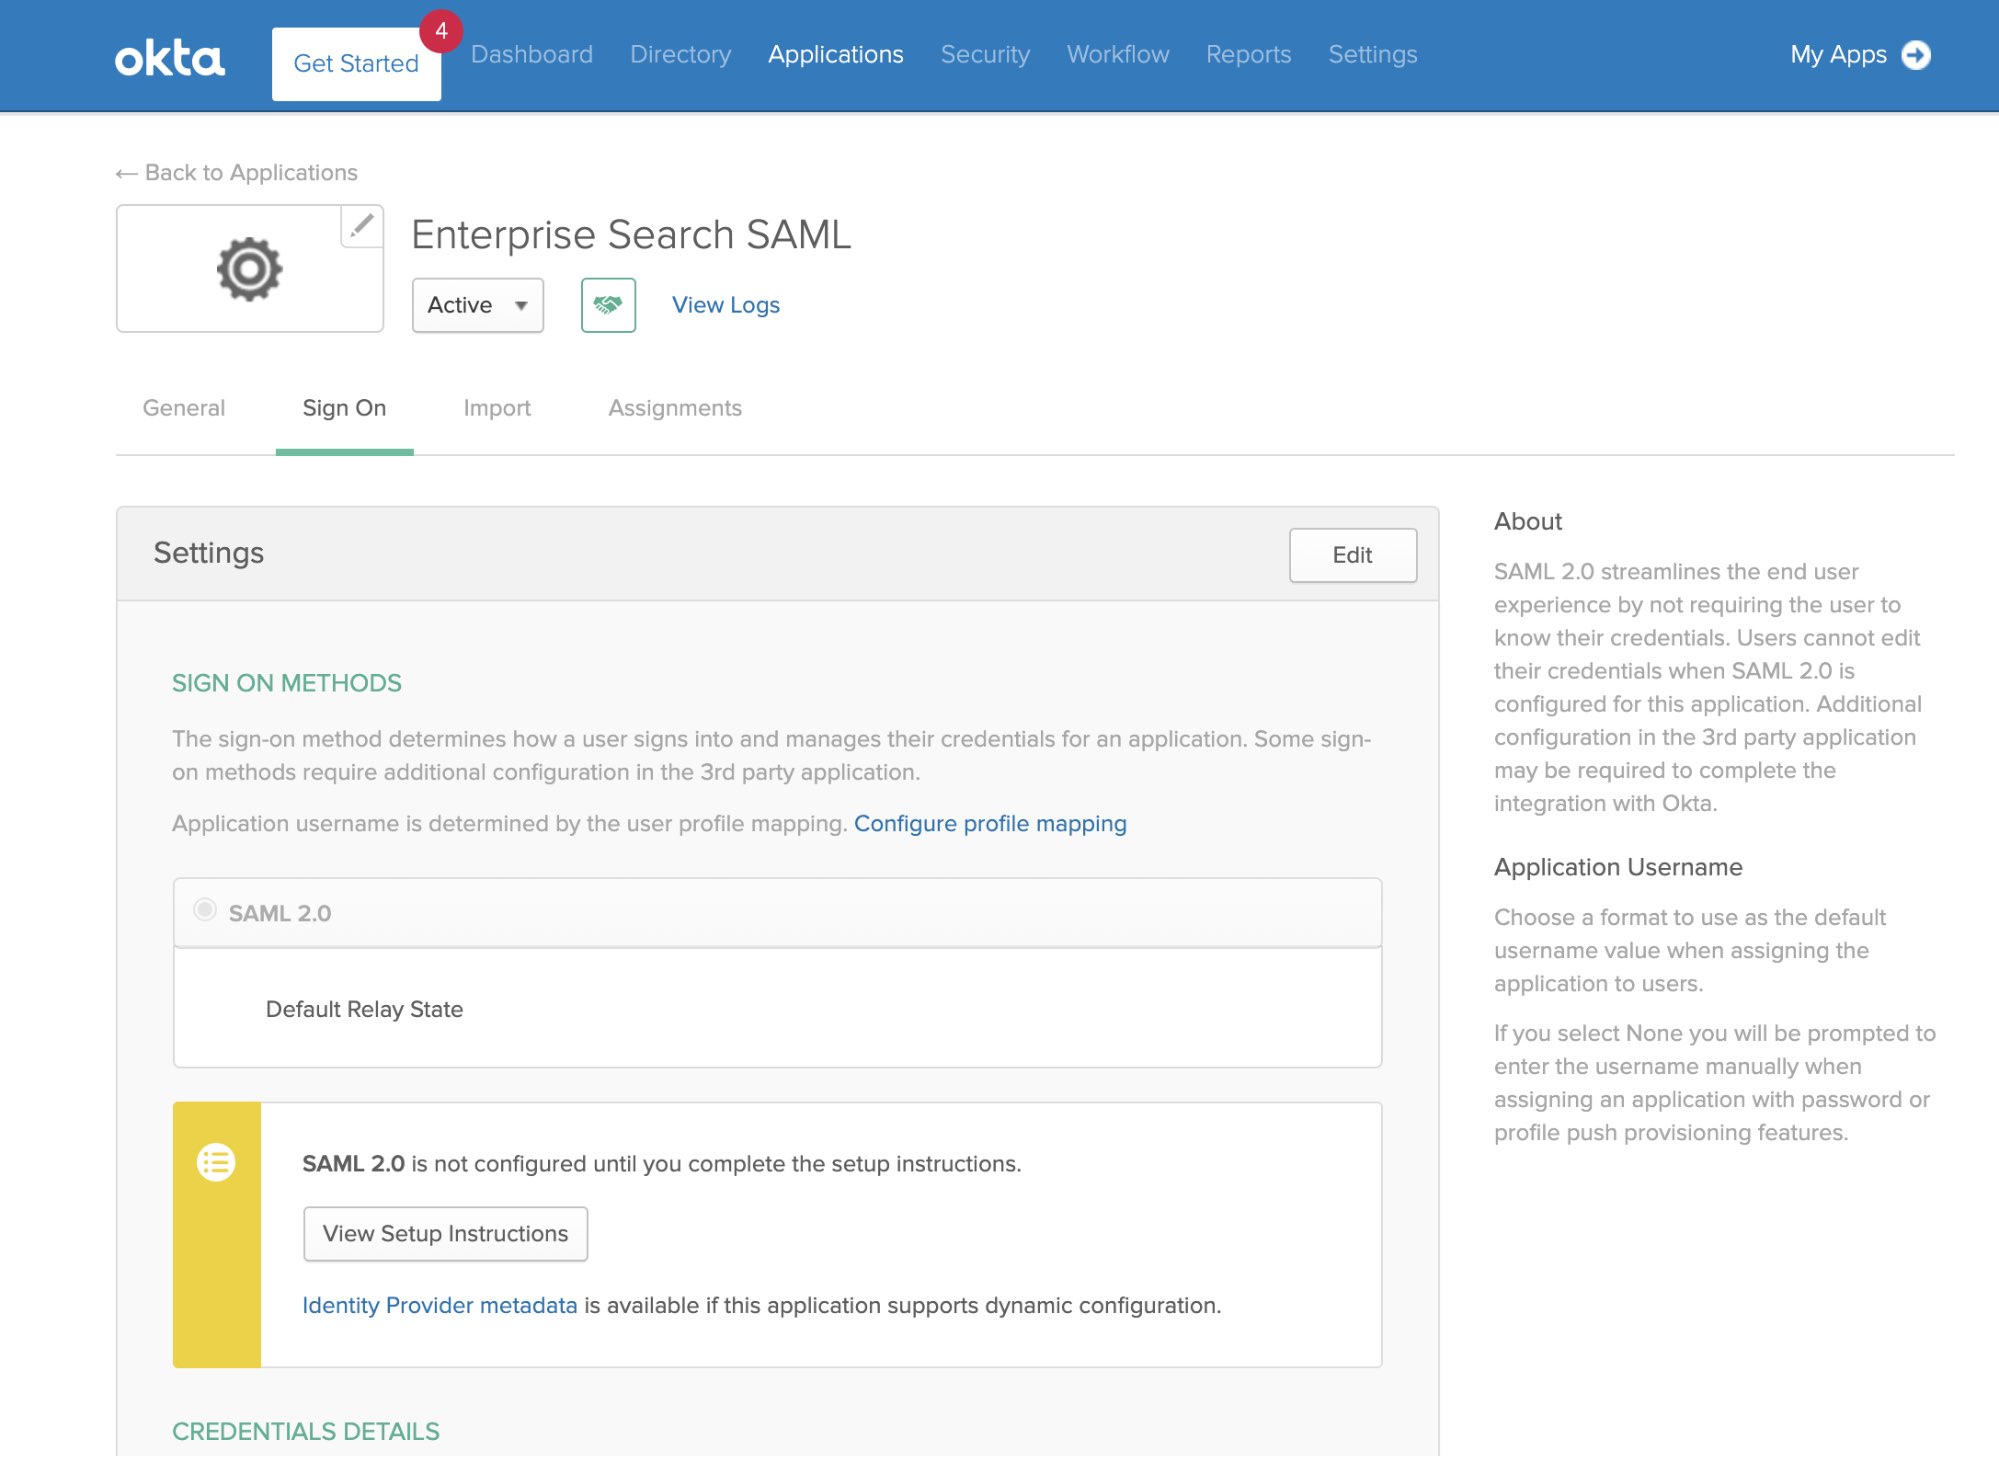
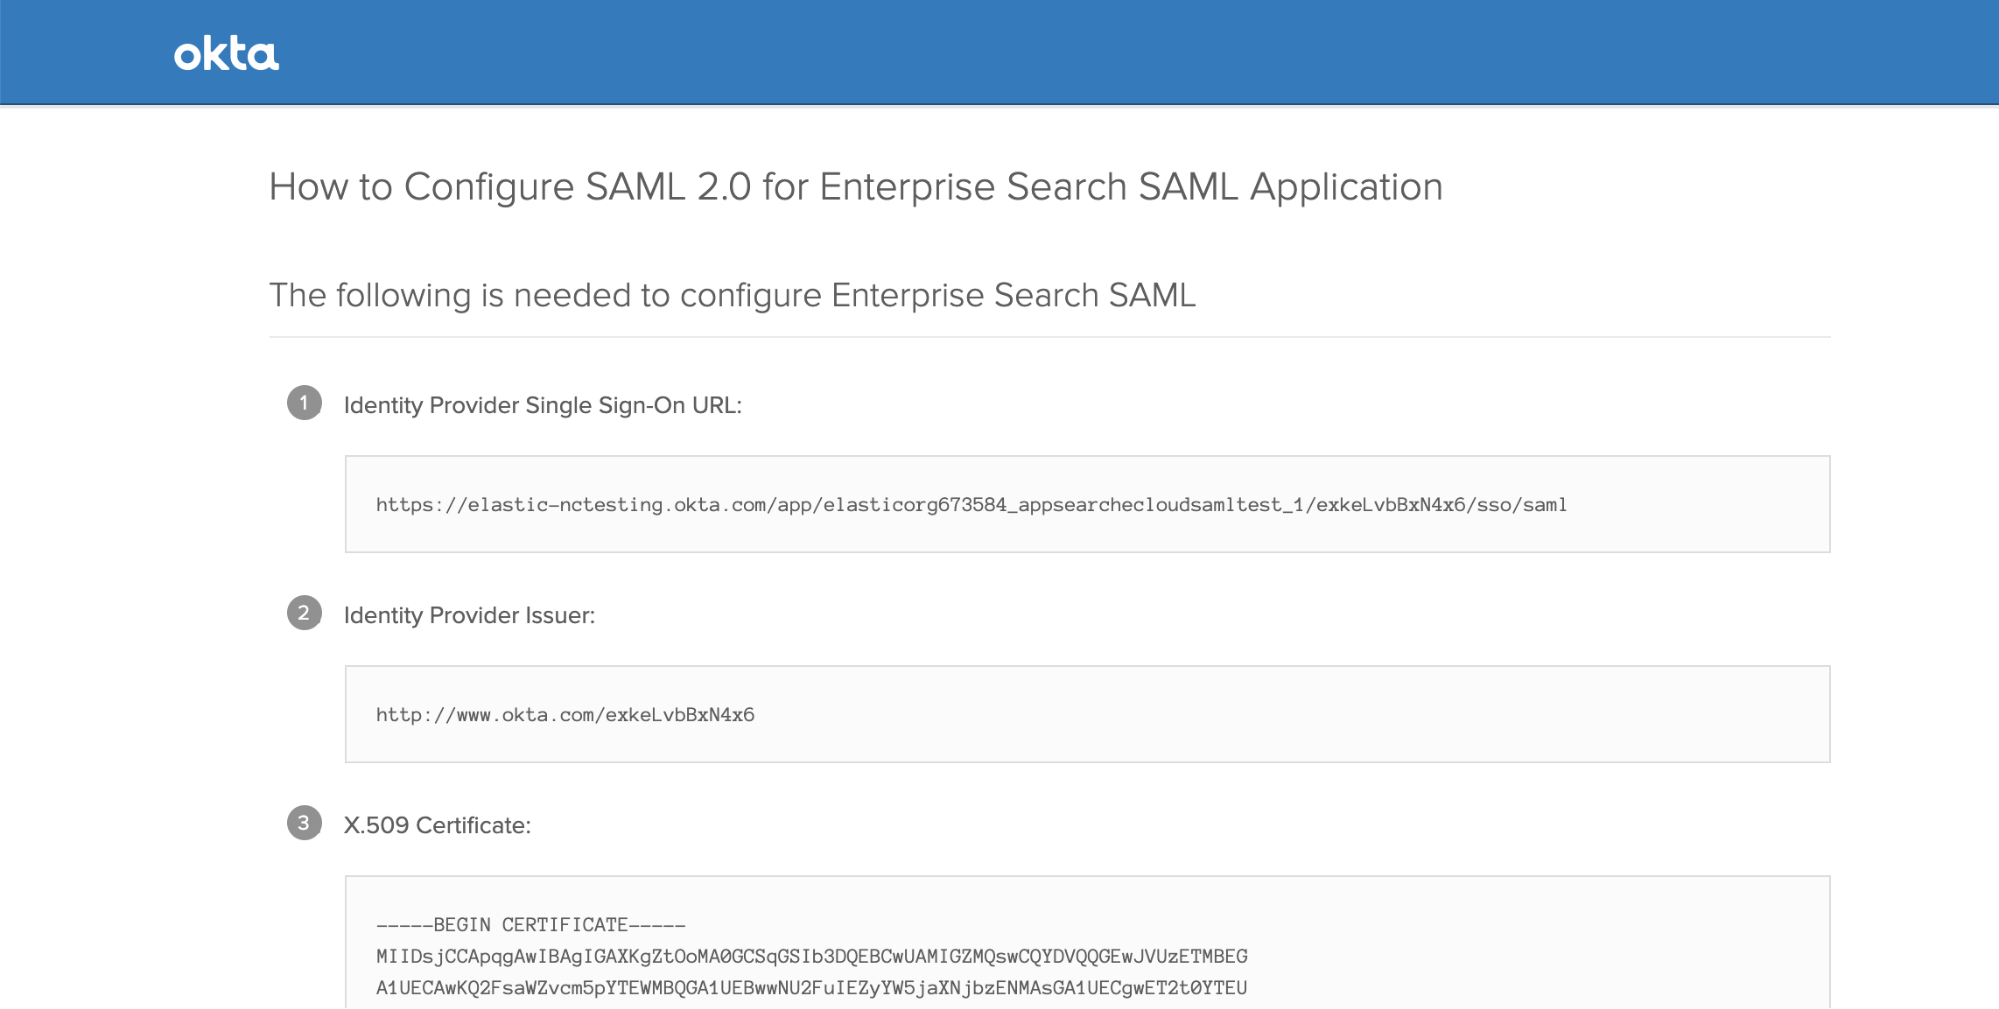
In Okta, underneath the View Setup Instructions button is a link to Identity Provider metadata. Add that link, which will look something like "https://[name].okta.com/app/[appid]/sso/saml/metadata".
[SAML ENTITY ID]
In Okta, you can find this under the Sign On tab of your Applications: Click View Setup Instructions, and you’ll see Identity Provider Issuer.
We’ll also need to add the same [ENTERPRISE SEARCH ENDPOINT] from above with some URL path suffixes.
You may also want to set up SAML for Kibana. We won’t discuss that in detail here, but note that you will need separate SAML realms for Kibana and Enterprise Search, even if they share the same IdP (that is, there will be a separate entry in xpack.security.authc.realms.saml for Kibana).
Enable SAML on Enterprise Search
And finally, scroll further down the Elastic Cloud deployment configuration page to the Enterprise Search User setting overrides section. We’ll add two things there:
- The auth.source, which must be elasticsearch-saml (or another auth type)
- The name of the SAML auth configuration namespace used in elasticsearch.yml. You can’t use
cloud-saml*, which is a reserved name on Elastic Cloud. We’ve used saml1 in this example:
ent_search.auth.saml1.source: elasticsearch-saml
ent_search.auth.saml1.order: 1
ent_search.auth.saml1.description: "SAML login"
ent_search.auth.saml1.icon: "https://my-company.org/company-logo.png"
Scroll down, click Save, and wait for your cluster to restart. Now, when you select Launch next to Enterprise Search, you’ll have the option to log in with SAML SSO.
And you’re off to the races!
Additional information
Check out the Secure your clusters with SAML documentation for more info, including instructions for Enterprise Search versions 7.9.1 or earlier. If you’re not an existing Elastic Cloud customer and would like to try out the steps in this blog, you can sign up for a free 14-day trial.