New to Elasticsearch? Join our getting started with Elasticsearch webinar. You can also start a free cloud trial or try Elastic on your machine now.
This article is part of a series that explores how to utilize Elasticsearch with various providers.
Elastic Cloud is the easiest way to spin up a production-grade Elasticsearch cluster in minutes. Azure Marketplace allows you to use your own Azure account to manage your Elastic Cloud subscription, giving you the same seamless Elastic Cloud experience but within your provider’s billing account.
In this article, you’ll learn to deploy Elasticsearch via Azure Marketplace. Stay tuned! We’ll soon publish guides on deploying Elasticsearch on Azure AKS and Azure VM.
Elasticsearch deployment effort
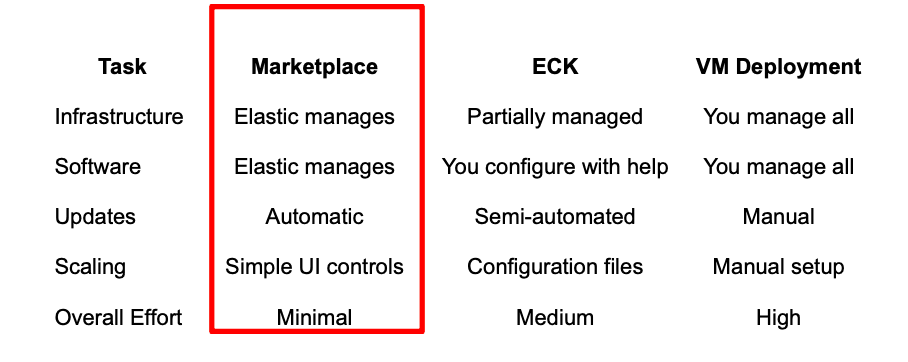
When to use Marketplace?
Elastic Cloud provides even greater flexibility but requires managing a new billing account. So, if you already have an Azure Cloud subscription and want to keep your cloud spending consolidated under one vendor, it makes sense to install Elastic Cloud from the marketplace.
How to set up Elasticsearch via Azure Marketplace
Step 1: Access Azure Marketplace
1. Log in to Azure.
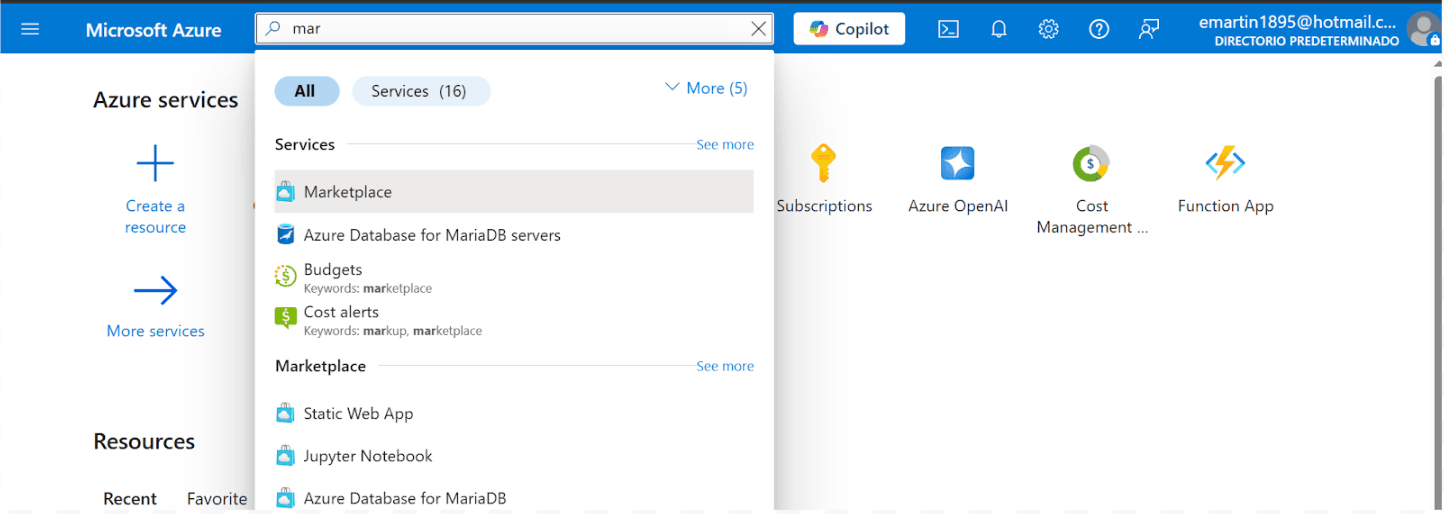
2. In the top search bar (as shown in the image below), type "Marketplace". Click on "Marketplace" from the search results.
3. Once in the Marketplace, use the search field and input Elasticsearch. This will display various Elasticsearch-related offerings and deployment options.
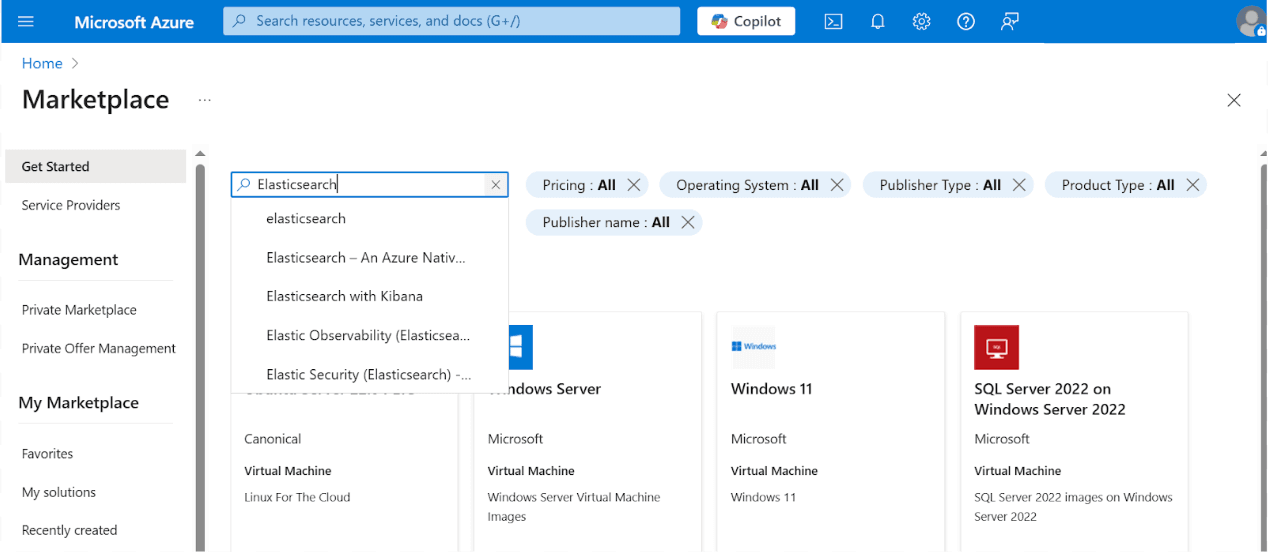
4. From the search results, locate and click Elasticsearch - An Azure Native ISV Service. This is typically provided by Elastic and offers a fully managed service integration.

Step 2: Subscribe to the service
1. Select the default Plan, “Consumption Based Pricing,” and click the Subscribe button. This subscription charges a fee based on a pricing formula. For more details, you can review the Azure integrated billing page.
Notes:
- By default, an Enterprise subscription will be provided.
- The Elastic service is charged directly to your Azure account.

2. Complete the plan details
- Select a subscription and resource group
- Fill in the resource name
- Select the region for your deployment
- Select the Elasticsearch version

3. Complete the logs configuration. In this case, we leave the settings as default.

4. Configure OpenAI details.

5. Add Tags.

6. Review the Elastic creation, Terms of Service and Privacy Statements, then click the Create button.

7. Wait for the deployment to set up.

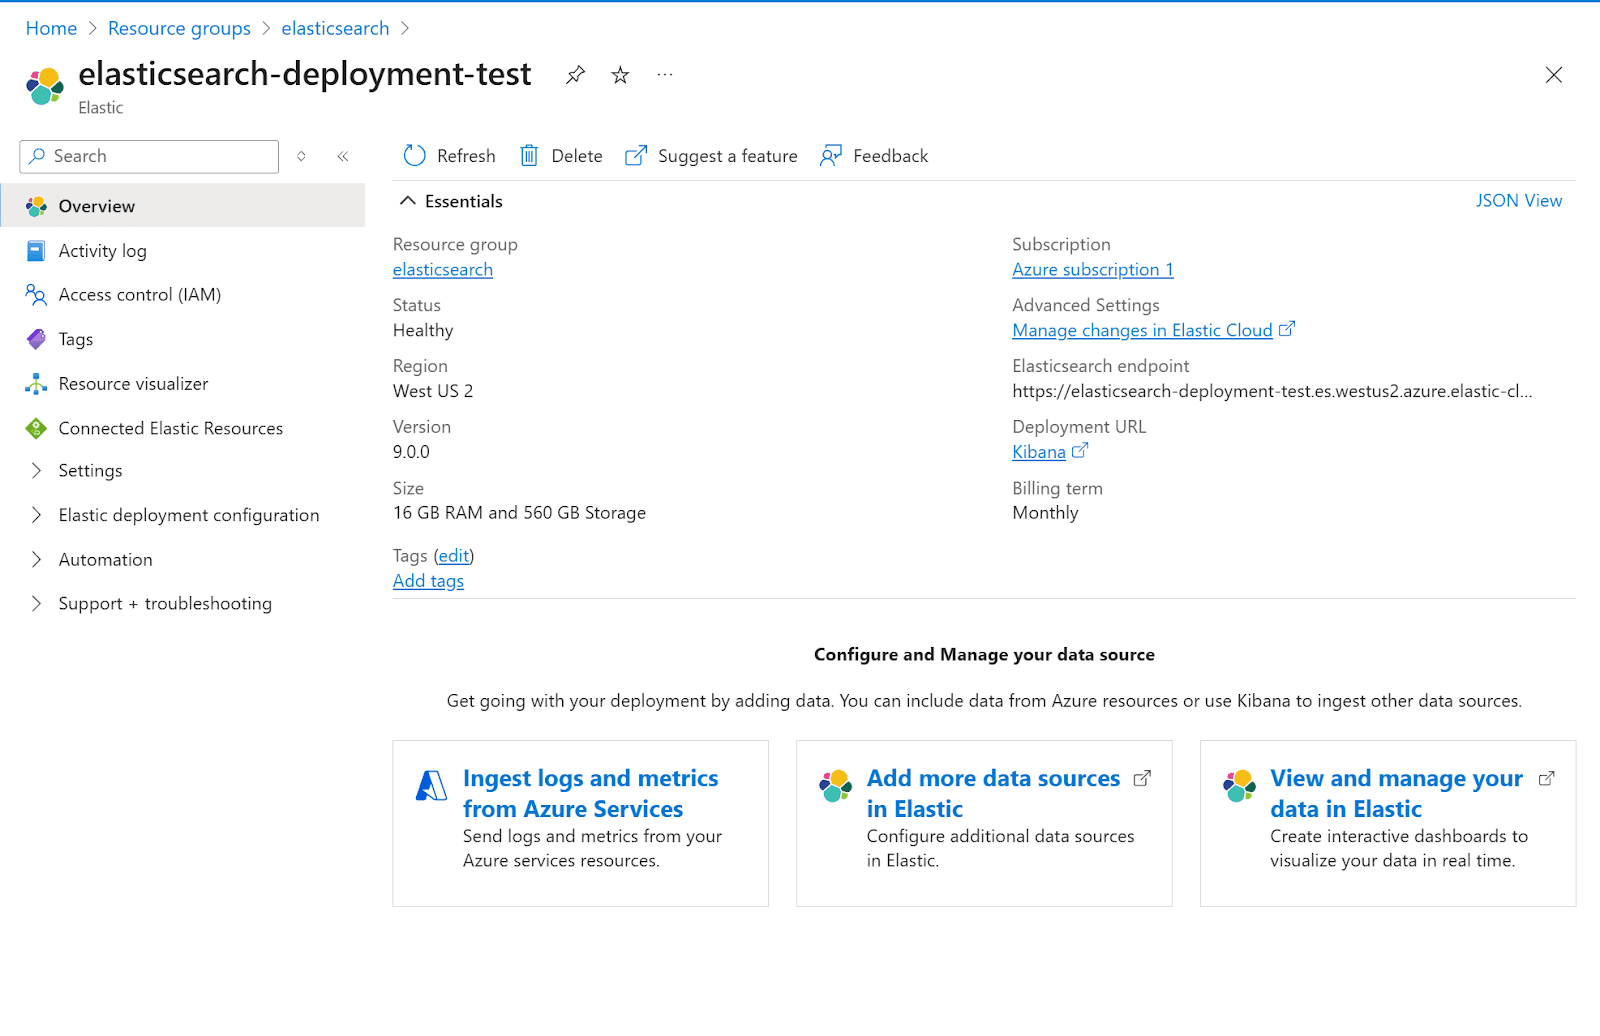
8. Once the Deployment is complete, click the Go to resource button.

9. To access deployment, click the Deployment URL link to Kibana.

10. Pick the Azure account.

11. Click the Accept button to grant Elastic access to your user profile.

12. We have now deployed Elastic Cloud from Azure Marketplace.


Cancel your subscription
To cancel your subscription
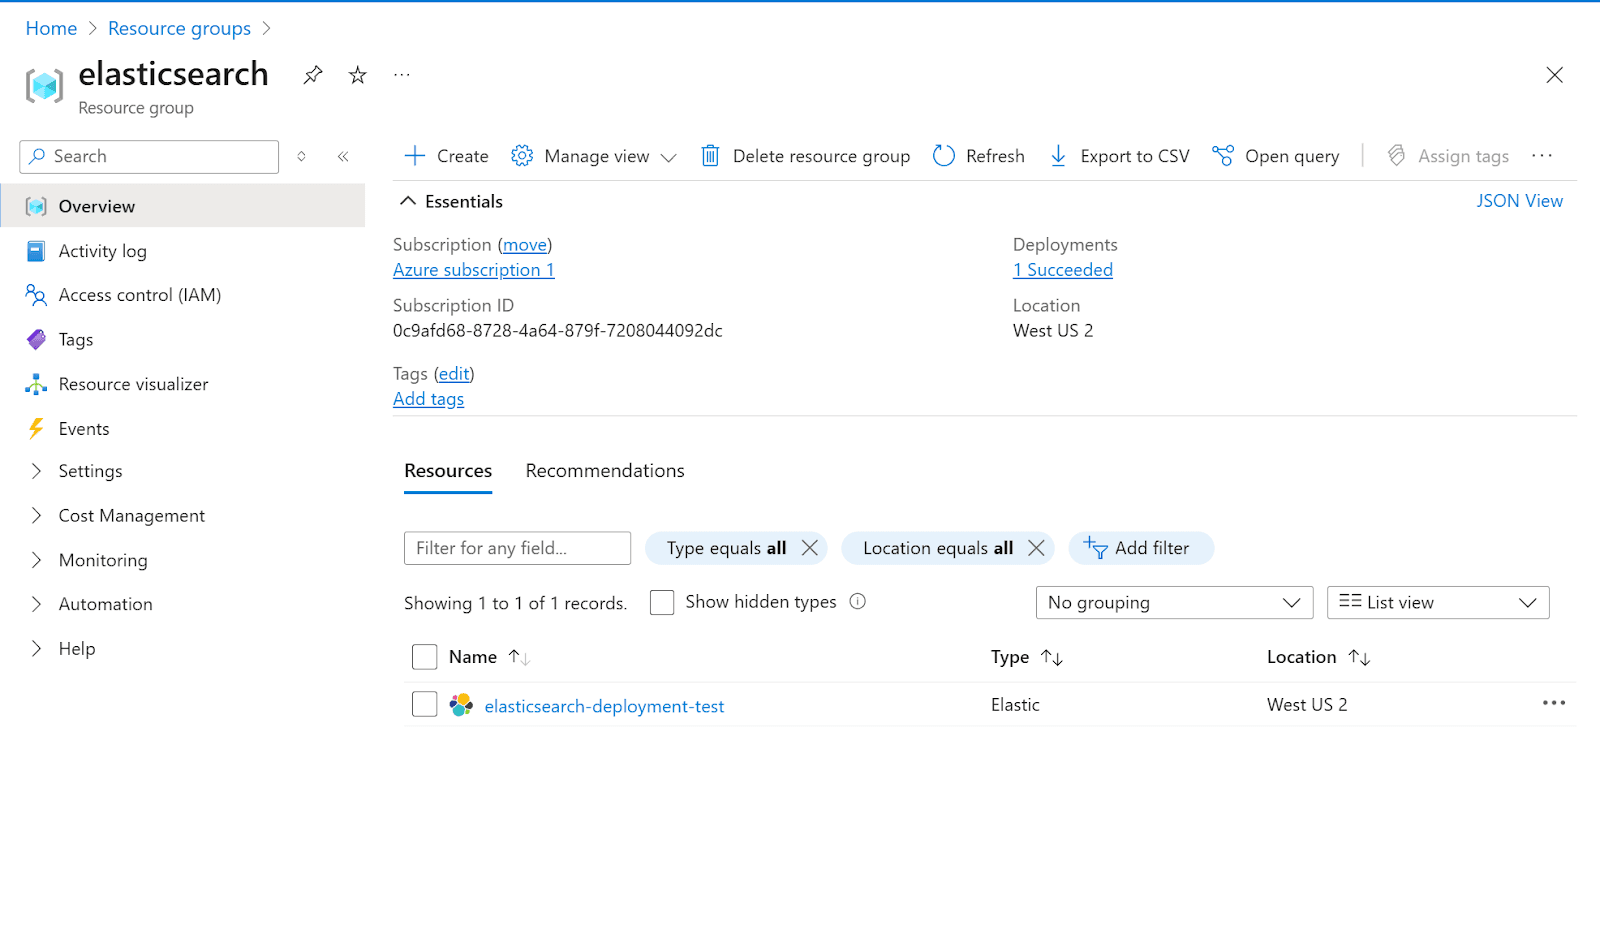
1. Go to Azure Resource Groups and click the Elasticsearch Resource Group:

2. Click the Elasticsearch deployment. In this case, it is elasticsearch-deployment-test.
3. Click delete.
4. Confirm delete, complete the survey, and click the Delete button.

Next steps
Start your Elastic Cloud journey with a 14-day free trial, then convert to Azure Marketplace for consolidated billing. Deploy Elasticsearch directly within the Azure portal and manage it like any native Azure service Microsoft Azure Marketplace.
相关内容
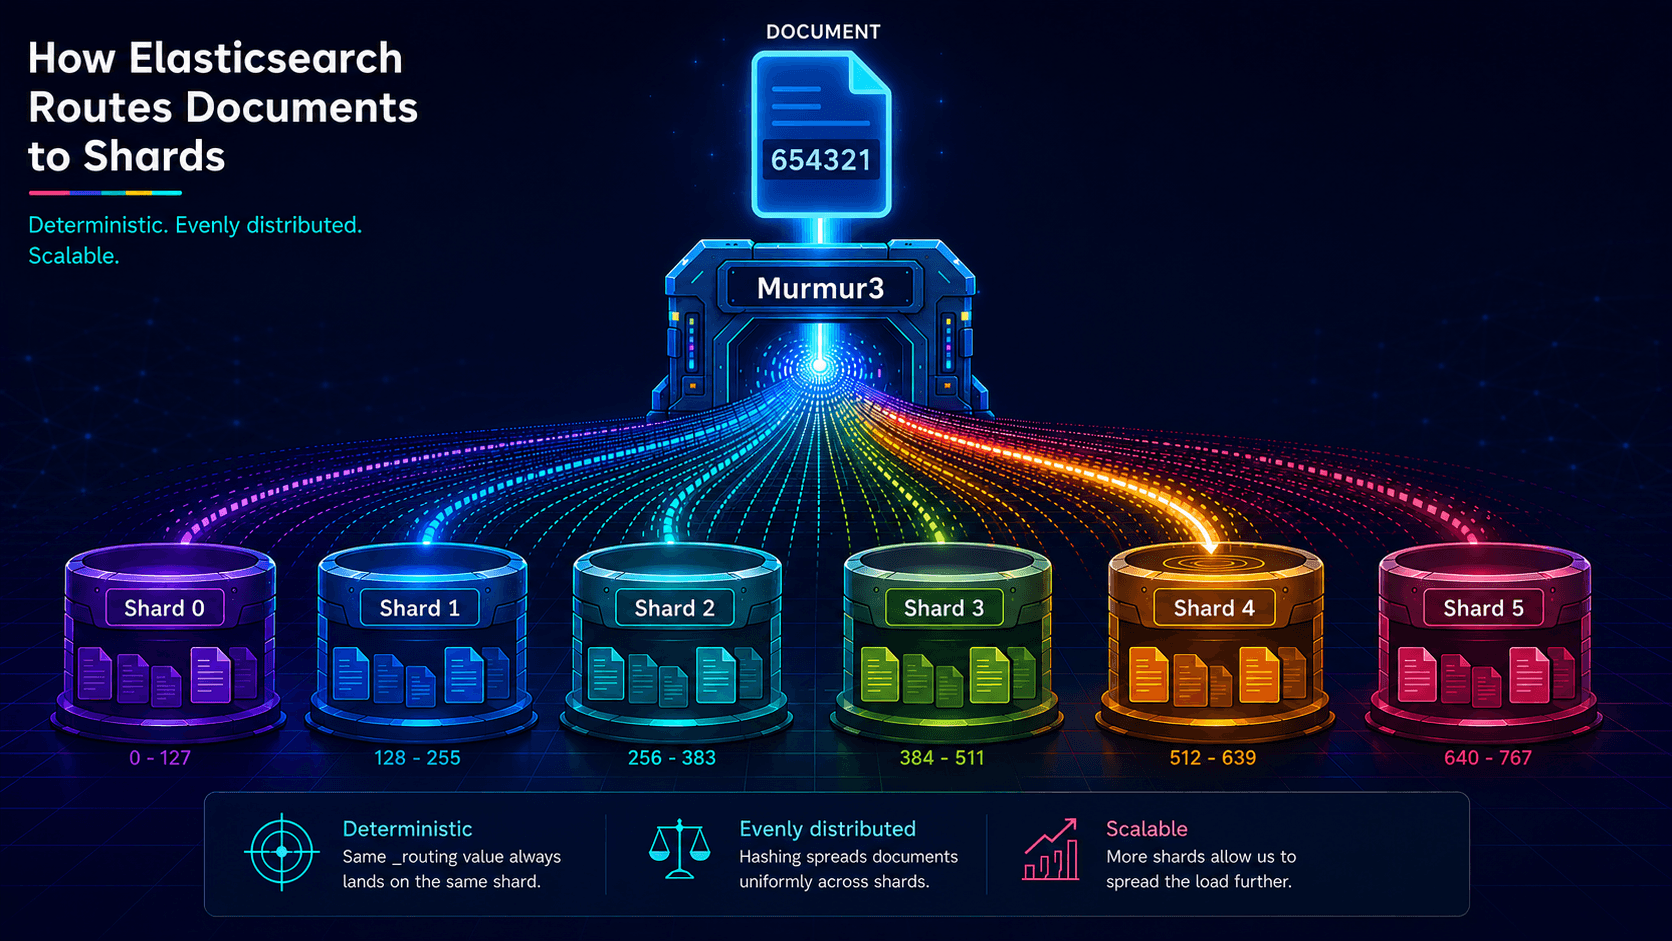
The hash() Elasticsearch won't name and the 12 bytes that prove it's Murmur3
Elasticsearch's routing formula uses MurmurHash3, but the docs never say so. This post names the function, walks through the full shard calculation, and shows you how to reproduce it externally.

2026年5月12日
Elasticsearch query logs: One coordinator-level line per query for ES|QL, DSL, SQL, and EQL
Easily understand query impact on cluster performance with Elasticsearch query logs. One coordinator-level line records ES|QL, DSL, SQL, and EQL per request and provides full query text, tracing, optional user context, and CCS hints
2026年4月6日
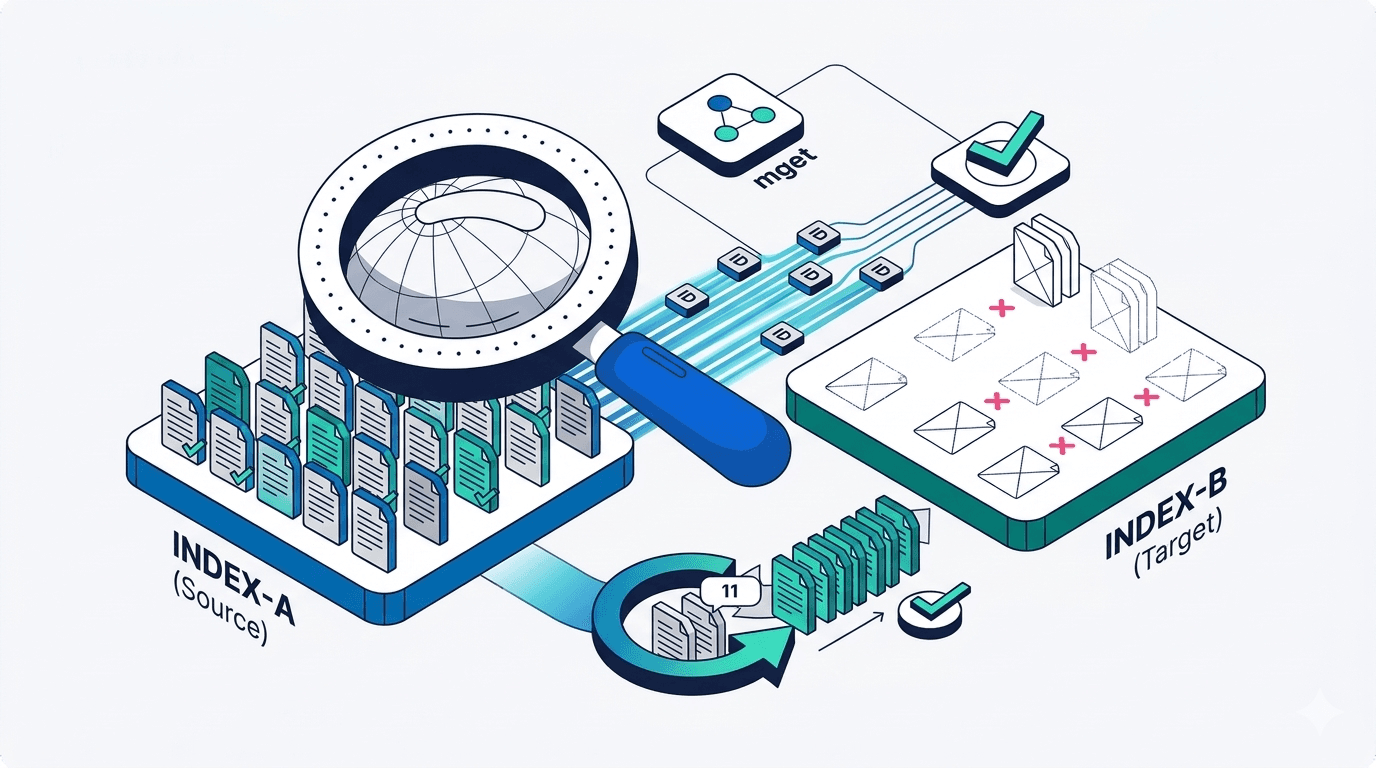
How to compare two Elasticsearch indices and find missing documents
Exploring approaches for comparing two Elasticsearch indices and finding missing documents.

Testing Elasticsearch. It just got simpler.
Explaining how Elasticsearch integration tests have become simpler thanks to improvements in Elasticsearch 9.x, the modern Java client, and Testcontainers 2.x.

2025年12月19日
Elasticsearch Serverless pricing demystified: VCUs and ECUs explained
Learn how Elasticsearch Serverless pricing works for Elastic’s fully-managed deployment offering. We explain VCUs (Search, Ingest, ML) and ECUs, detailing how consumption is based on actual allocated resources, workload complexity, and Search Power.