Get started with Elastic on AWS Marketplace in 3 clicks

 Share on Twitter
Share on Twitter

 Share on LinkedIn
Share on LinkedIn

 Share on Facebook
Share on Facebook

 Share by Email
Share by Email

 Print this page
Print
Now it's easier than ever for you to get the most value out of your data with Elastic on Amazon Web Services (AWS). We’re pleased to announce a new improvement to help you easily get set up with Elastic on AWS in just a few minutes.
Simplified onboarding: Get set up with Elastic on AWS with just a few clicks
Elastic and AWS have collaborated to build a streamlined UX that greatly simplifies onboarding. Beginning today, you can subscribe to Elastic Cloud with an easier signup and setup experience directly through the AWS Marketplace console. This simplified experience reduces the need to navigate between multiple applications and lets you easily set up Elastic in just a few clicks. The new UX allows you to:
- Subscribe to Elastic
- Deploy the Elastic Stack in any of Elastic’s supported AWS regions
- Provision the Elastic Agent via AWS CloudFormation to simplify data collection from your AWS environment
This blog describes the end-to-end flow of the new onboarding experience. It also outlines integration and technical steps to configure and deploy Elastic in AWS.
Subscribe to Elastic Cloud from the AWS Marketplace
As announced previously, Elastic launched a 7-day free trial when you subscribe via the AWS Marketplace. So how do you start? Head over to the Elastic Cloud offer page on the AWS Marketplace.
From there, you can subscribe to Elastic Cloud by clicking on the orange Continue to Subscribe button on the top right of the page.
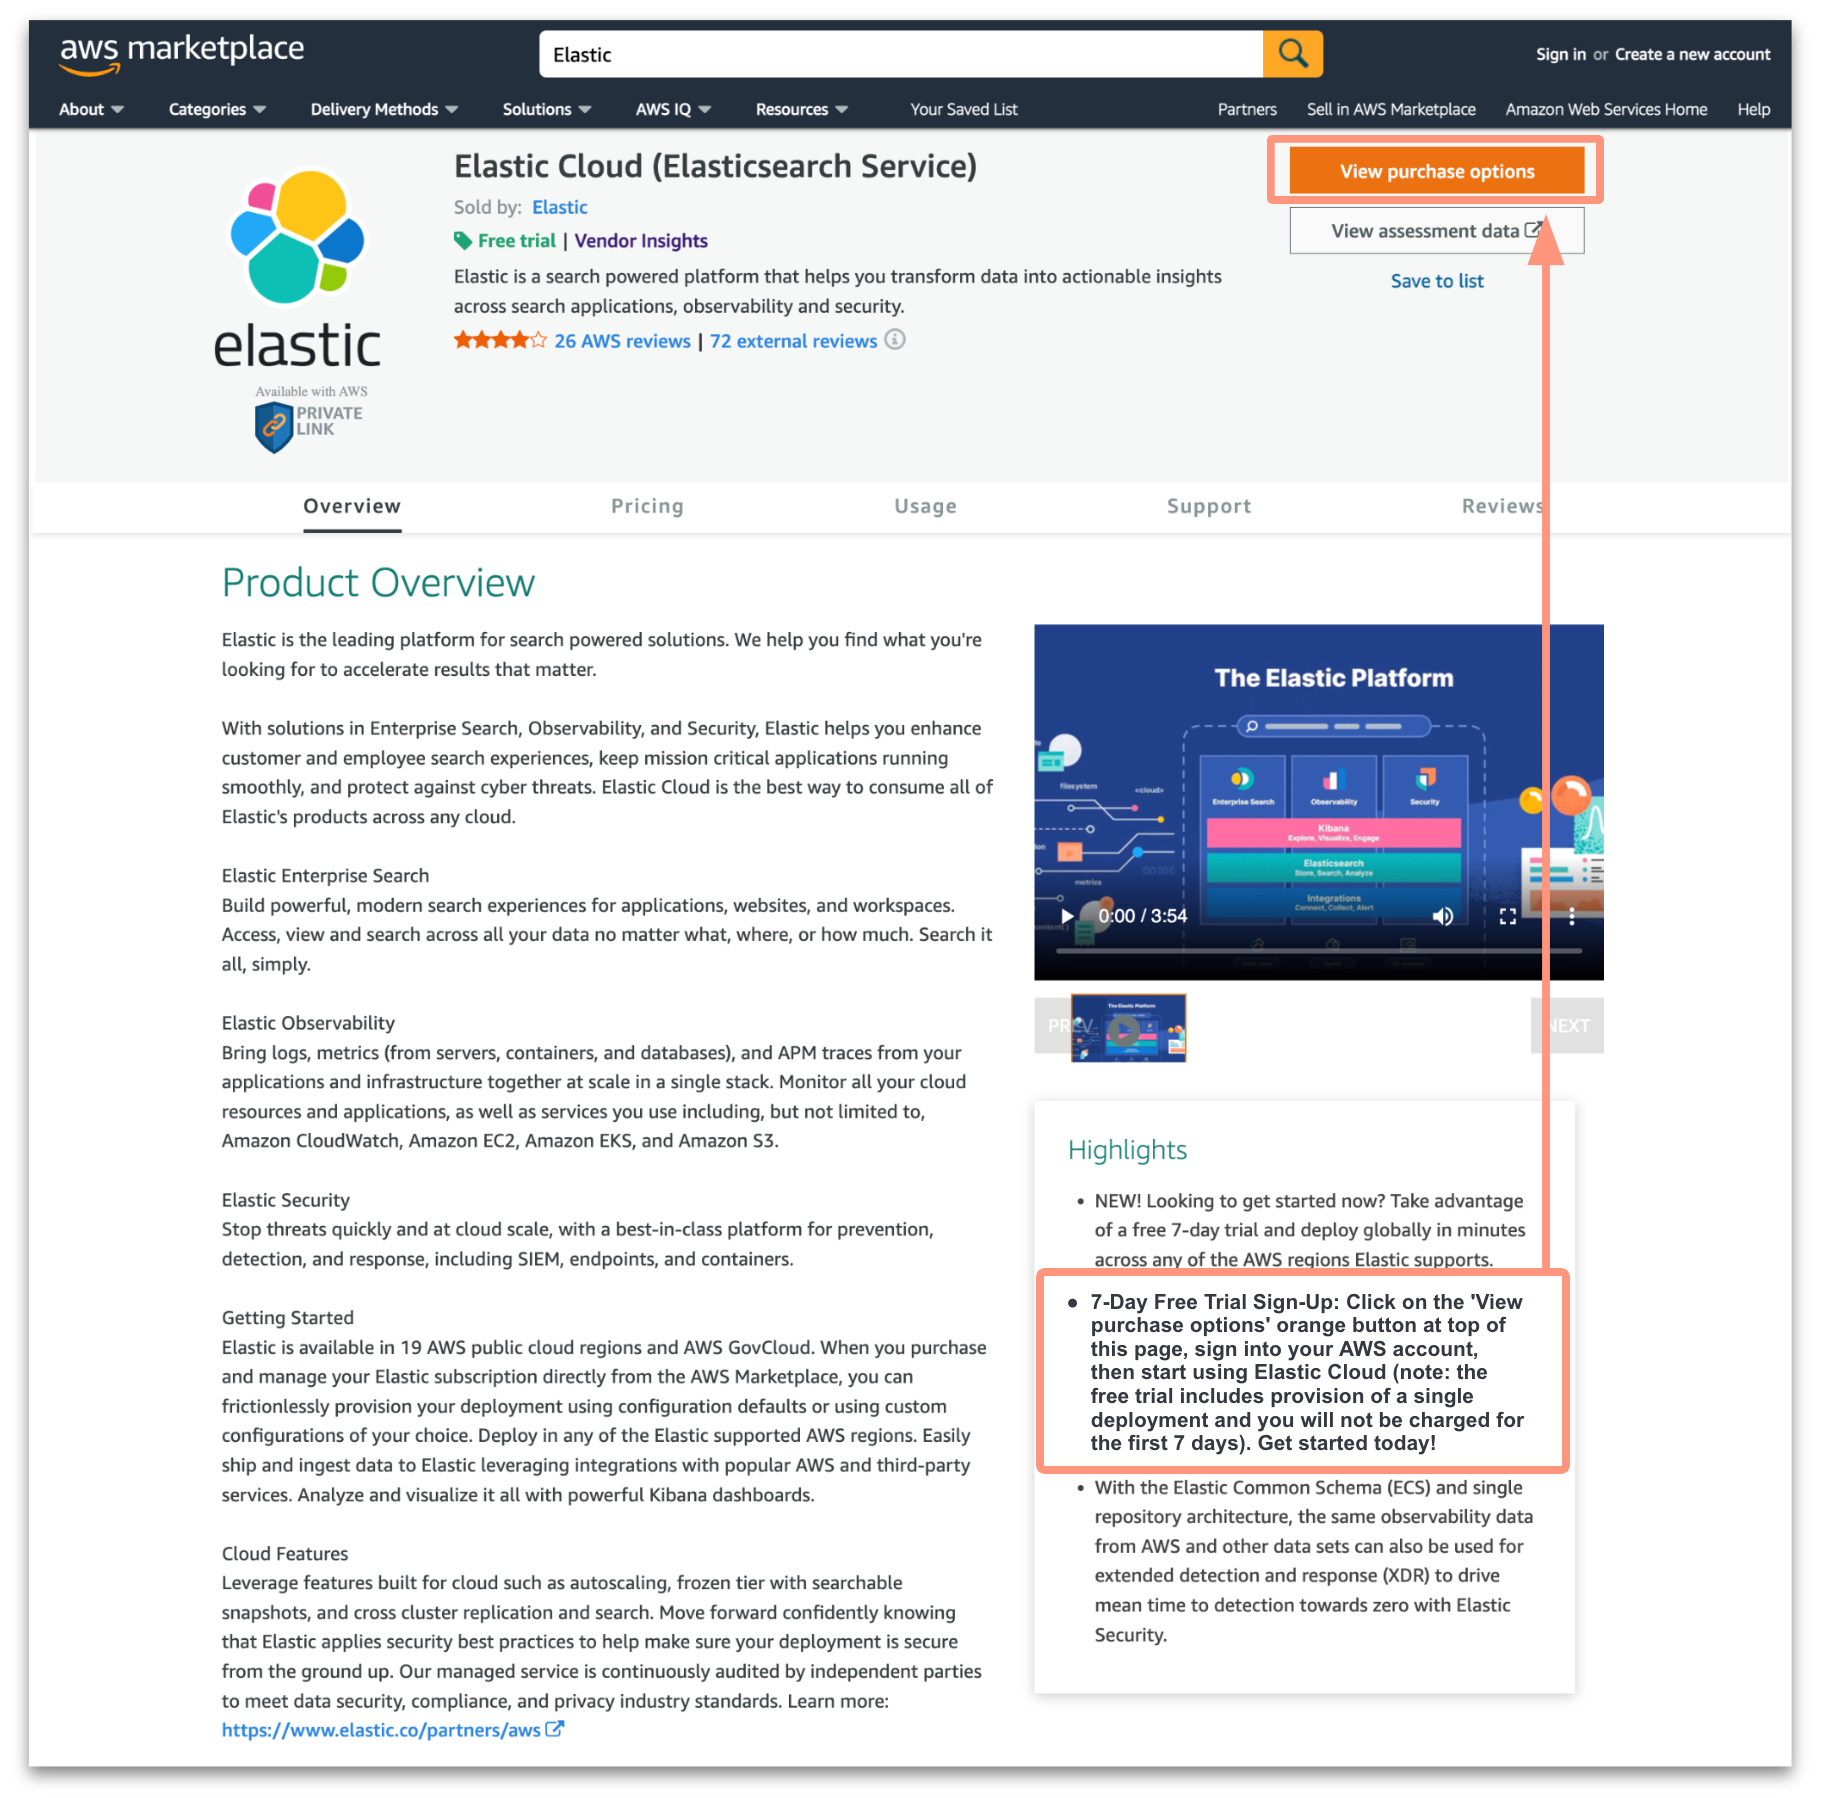
After you subscribe from the offer page, follow the prompts and you will reach the Elastic Cloud setup page on the AWS Marketplace console. Here you can follow the steps outlined on the UI to get set up.
Create an Elastic Cloud account
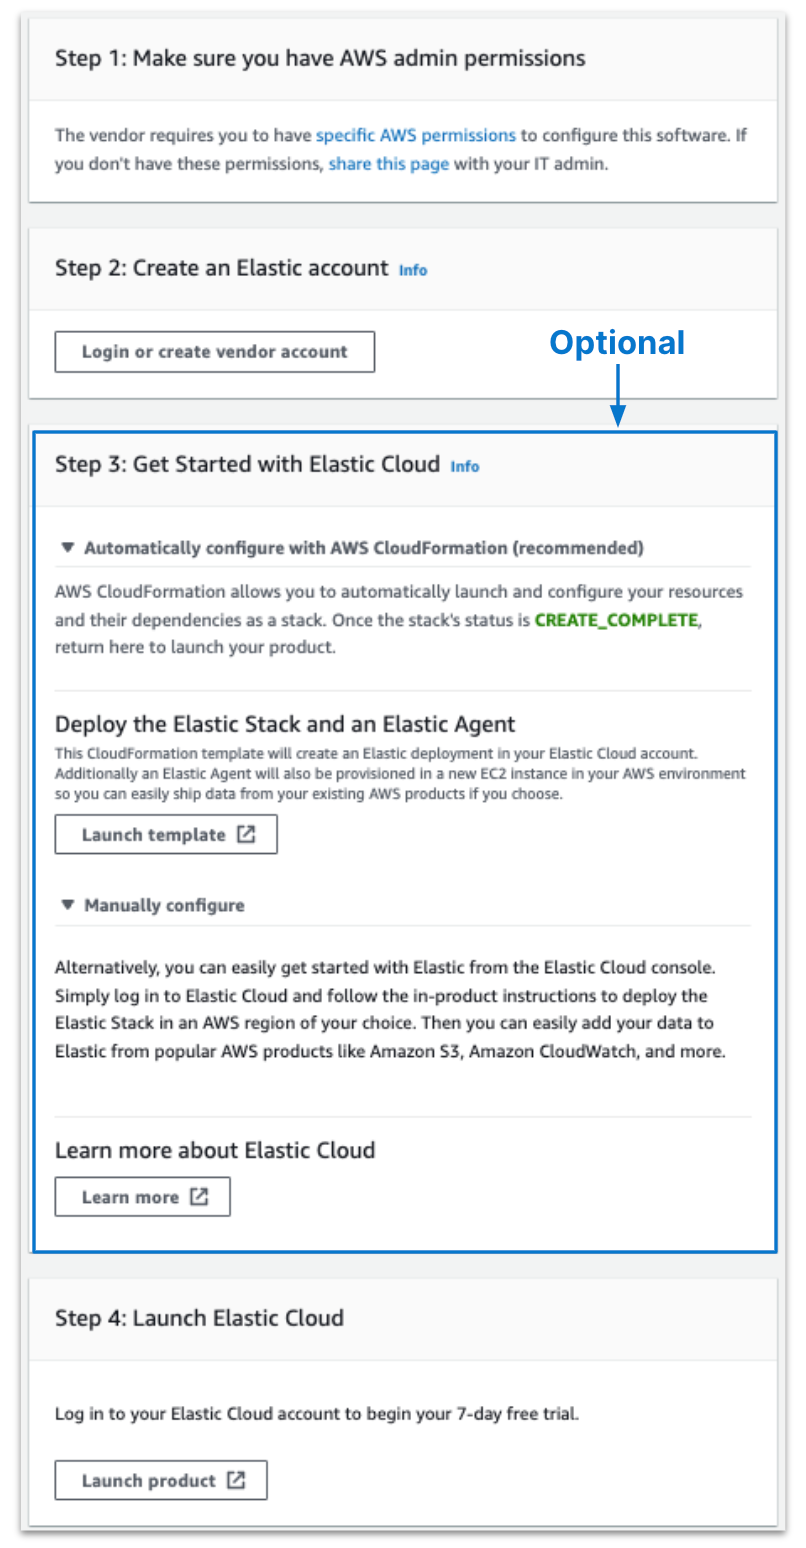
First, you’ll want to ensure that you have the correct AWS IAM permissions required to continue. Note: These are automatically assigned using default settings. Therefore, manual entry is an optional step. For more information, check out this documentation.
Next, under Step 2, click on Login or create vendor account. Then, enter your email address and password to create a new Elastic Cloud account. This will be linked to your new AWS Marketplace subscription. Any charges from your Elastic Cloud account will appear as a line item on your AWS bill.
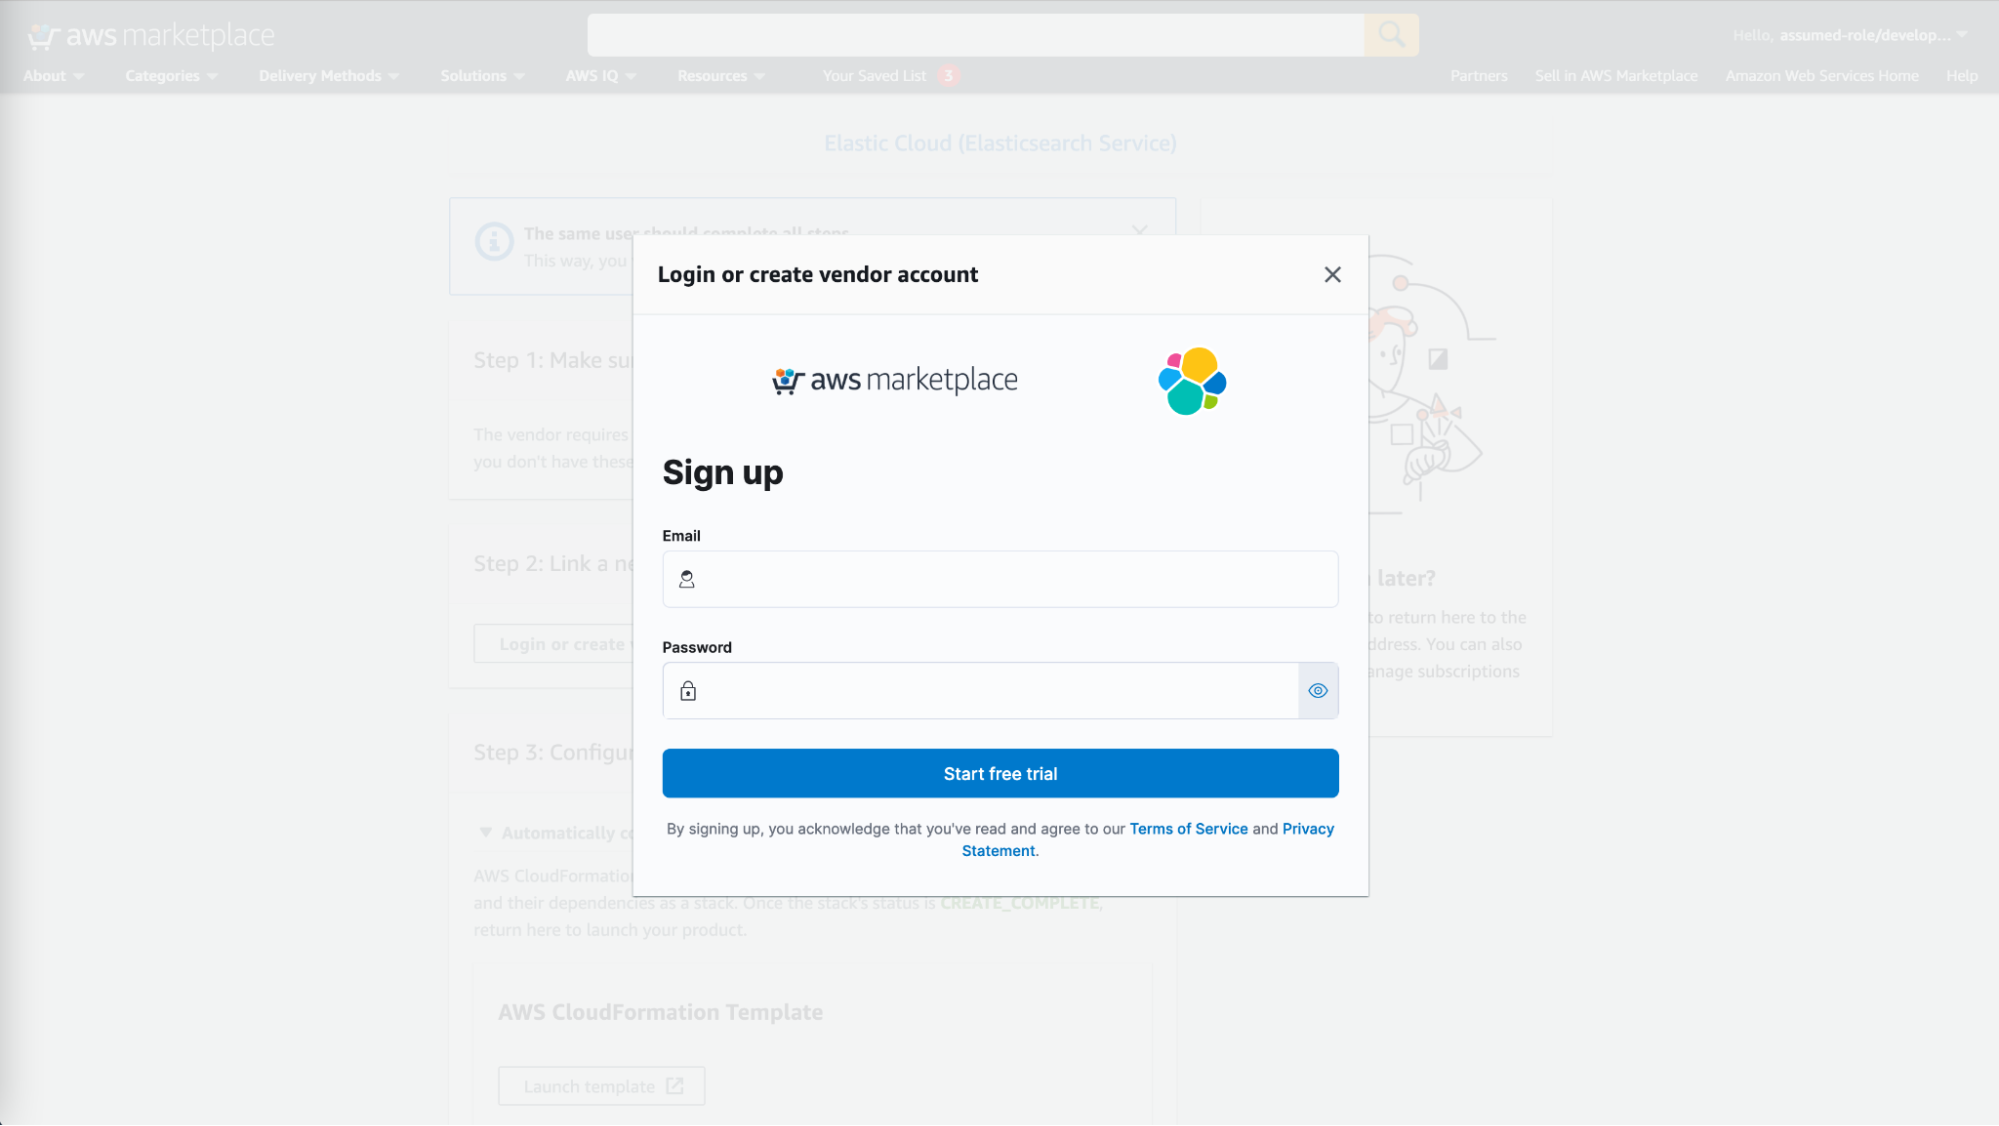
Note: At this time, you cannot yet link an existing Elastic Cloud account to an AWS Marketplace subscription. You will need to make a new Elastic Cloud account to continue. If you’ve already created an account under your email address, reference our documentation on how to proceed.
Deploy Elastic Cloud and the Elastic Agent
Next, you can follow Step 3 to deploy the Elastic Stack in your Elastic Cloud account, along with an Elastic Agent in your AWS environment. Note: this is an optional step. If your use case doesn’t require the need for the Elastic Agent, you can simply continue on to Step 4.
This will deploy the latest version of the Elastic Stack into an AWS region of your choice. An EC2 instance will also be created which will host the Elastic Agent. The agent helps to move data from your AWS environment over to your Elastic deployment using any of our pre-built AWS integrations.
To get started, click Launch template to open the Elastic Quick Start CloudFormation template.
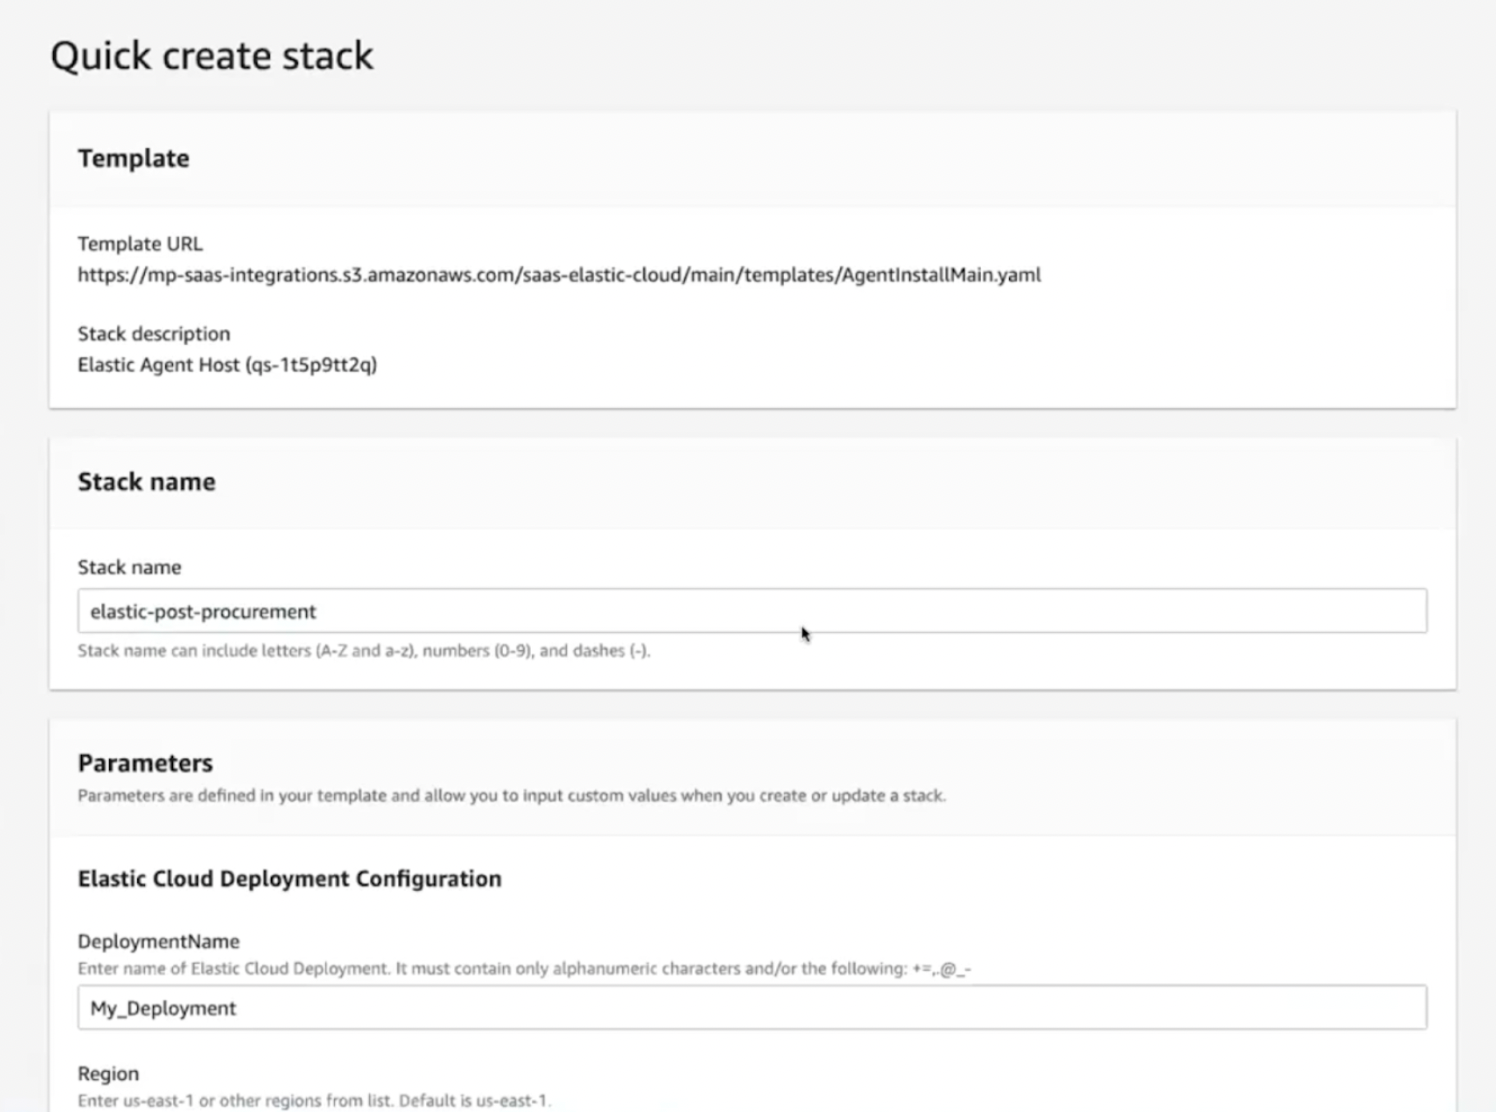
Under Elastic Cloud deployment configuration, provide a name for your Elastic Cloud deployment and enter the region where you want Elastic deployed to. Elastic supports a number of different regions on AWS.
Next, under Amazon Network configuration, enter VPC details and EC2 details. The template will use this information to provision an EC2 instance where the Elastic Agent will be deployed.
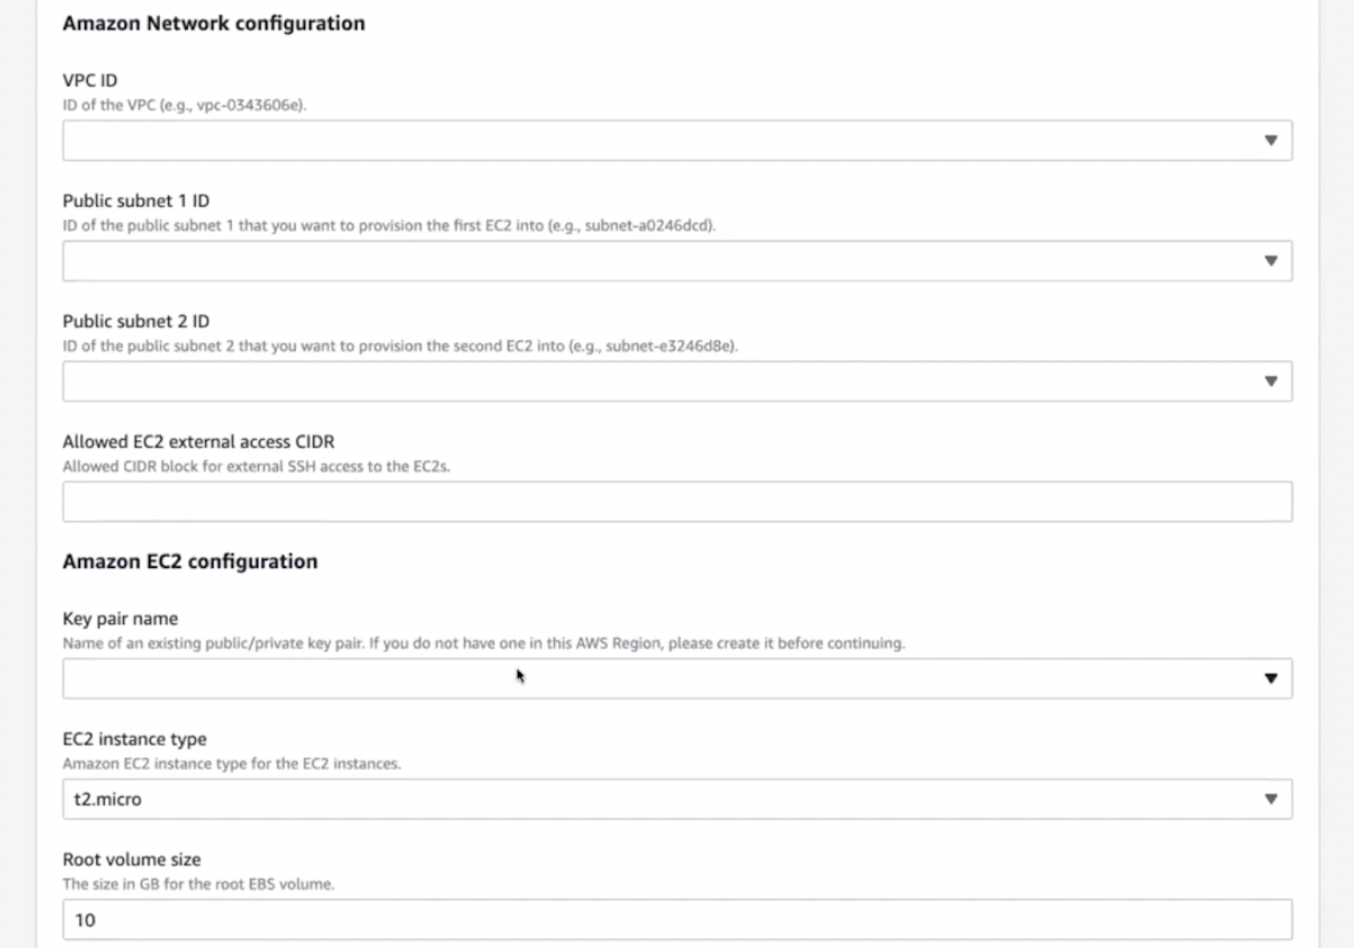
Deploy the template and then simply wait a few minutes for the components to get successfully deployed. Great work!
Explore Elastic Cloud and connect your data
Now you’re ready to dive into Elastic. Under Step 4, click Launch product to head on over to Elastic Cloud. You’ll see the deployment that you created in Step 3 in the Elastic Cloud console. Click into the deployment to launch it.

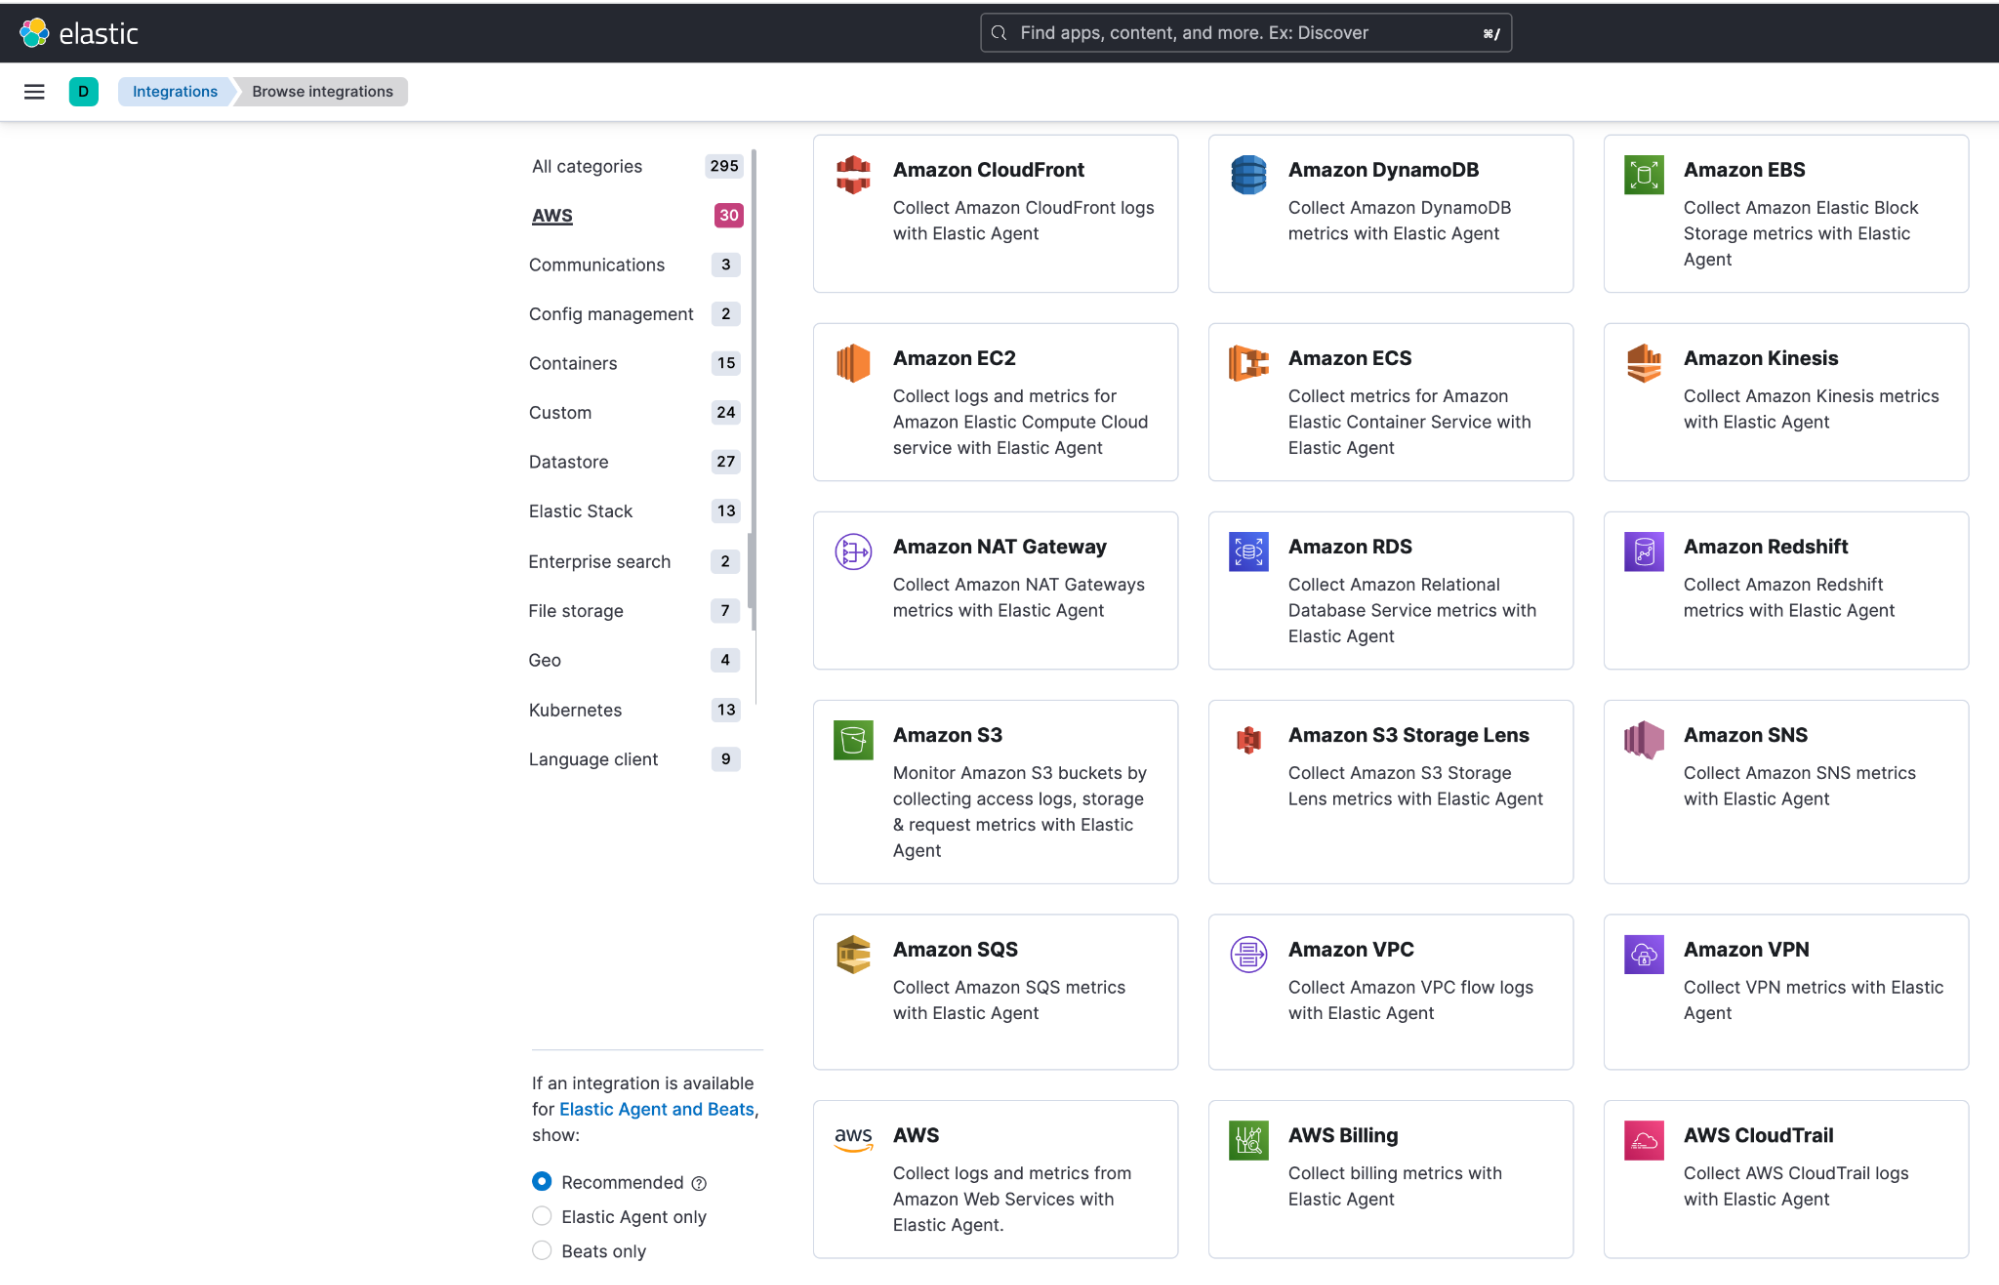
You’re now on your way to easily explore Elastic Cloud. A great place to get started is with the Integrations page. There are a number of AWS integrations that allow you to easily move in your data from popular AWS products like Amazon S3, Amazon CloudWatch, and more. Within Elastic, navigate to the Integrations page and select the AWS category.
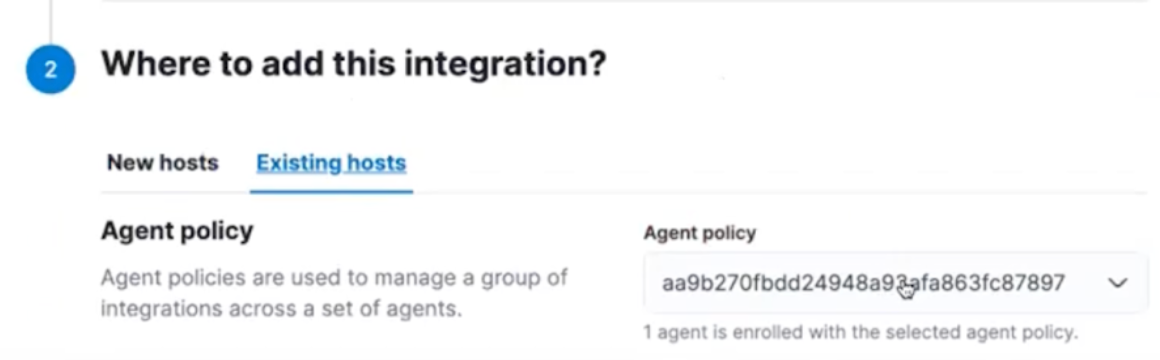
Select an integration and follow the prompts to configure the integration details. Under Step 2 of the Integration, you’ll be asked where you want to configure this integration. Select Existing hosts. Under Agent policy, you can select the Elastic Agent that you deployed via the AWS CloudFormation template in Step 3 of the sign-up process.
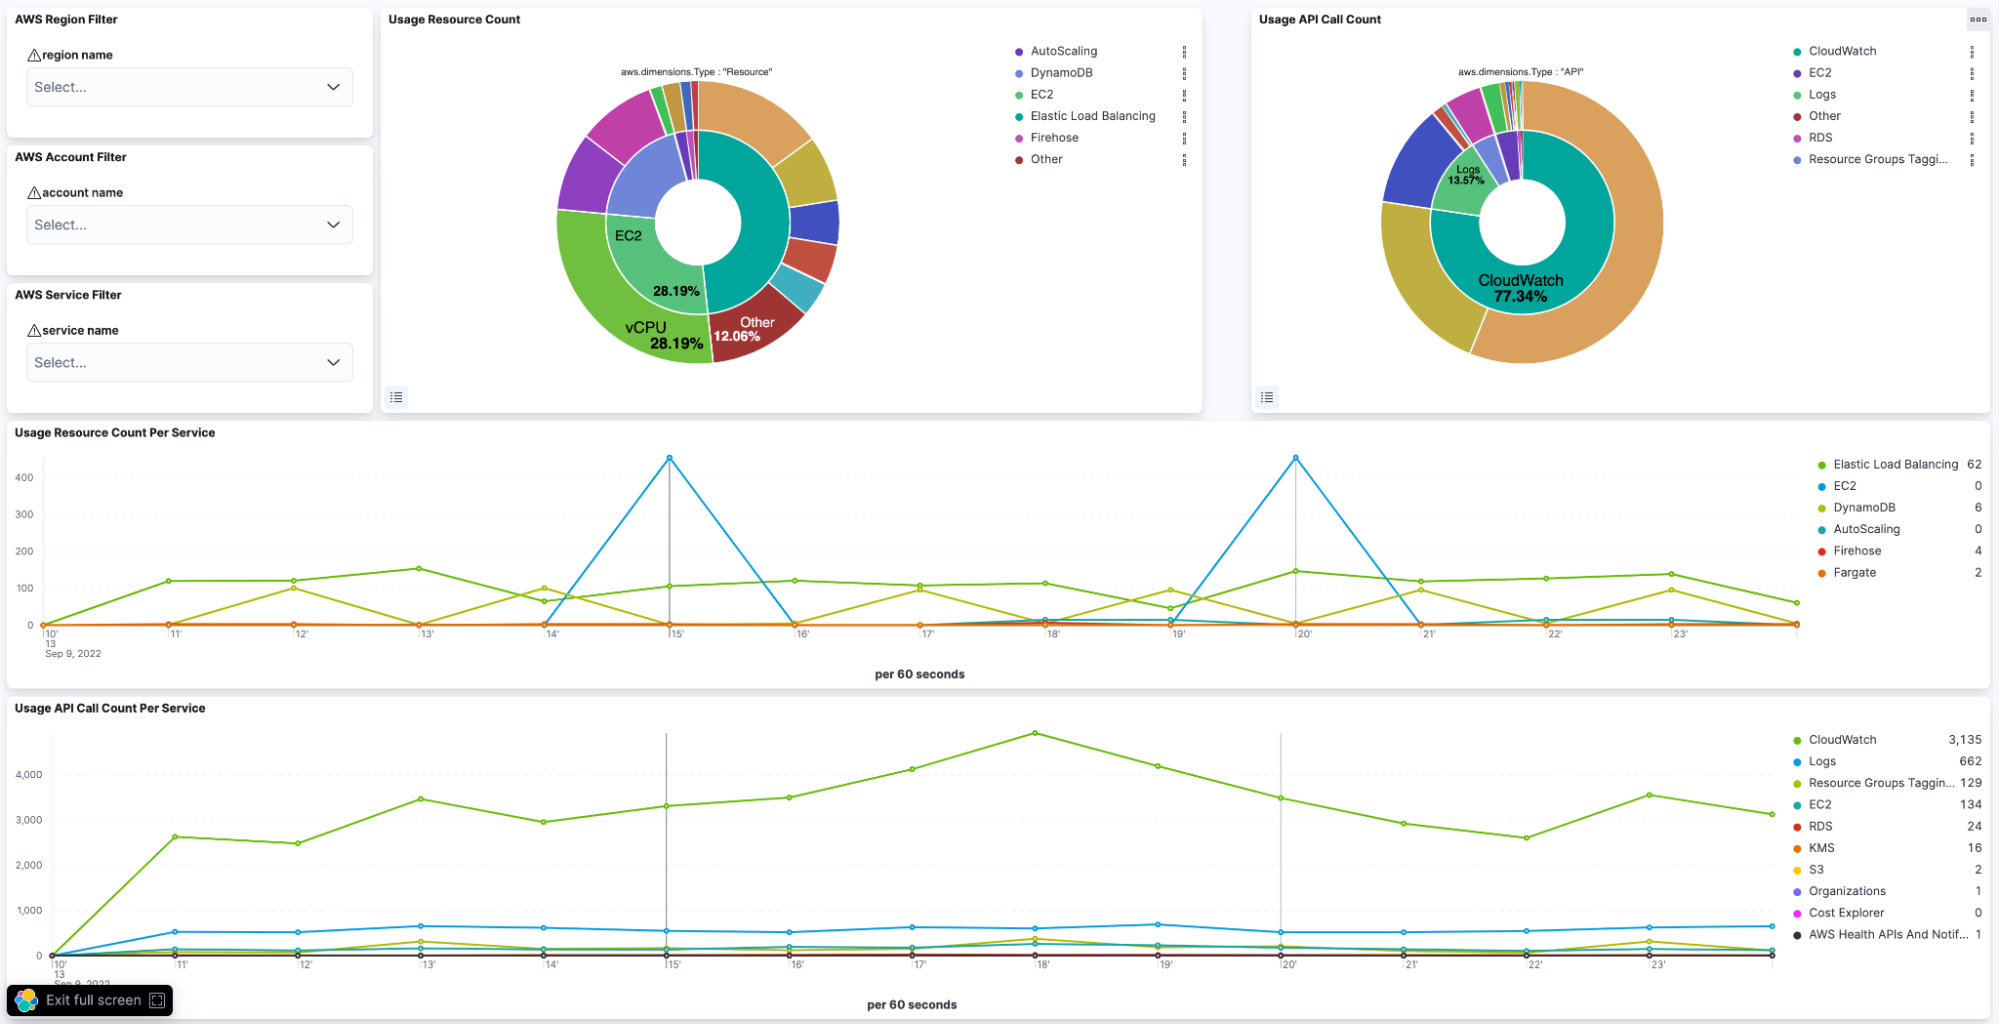
Continue on with setting up the integration and you’ll soon see your data flowing into Elastic Cloud. The integration includes pre-built dashboards so you can easily visualize your AWS data in seconds.
Deploy anywhere, worldwide and get started with a free trial in AWS Marketplace today
Ready to transform endless amounts of data into endless possibilities? Start your own 7-day free trial by signing up via AWS Marketplace and quickly spin up a deployment in minutes on any of the Elastic Cloud regions on AWS around the world. Your AWS Marketplace purchase of Elastic will be included in your monthly consolidated billing statement and will draw against your Enterprise Discount Program (EDP) purchase commitment.
The release and timing of any features or functionality described in this post remain at Elastic's sole discretion. Any features or functionality not currently available may not be delivered on time or at all.
Share
- Share on Twitter
Share on Twitter
- Share on LinkedIn
Share on LinkedIn
- Share on Facebook
Share on Facebook
- Share by Email
Share by Email
- Print this page
Print