How to setup TLS for Elasticsearch, Kibana, Logstash and Filebeat with offline install in Linux
Editor's Note (August 3, 2021): This post uses deprecated features. Please reference the map custom regions with reverse geocoding documentation for current instructions.
| Running Elastic Stack 6.8 / 7.1 or later? Then check out the “How to set up TLS...” blog for help securing communications within your versions. It covers implementing free security features that are included within Elastic Stack 6.8 / 7.1 or later. |
Elasticsearch 6.x will require Elasticsearch TLS node to node communication when using X-Pack security.
We have already published one super cool blog talking about understanding TLS / Certs and how to setup TLS on Elasticsearch, Kibana, Logstash and Filebeat. The blog mainly described how to perform setup on zip or tar file.
Recently, we got many questions about how to setup TLS with RPM, along with how to perform an offline install. As many environments could not connect to the Internet directly because of various reasons, we decided to post the steps about how to setup TLS for Elasticsearch, Kibana, Logstash and Filebeat with offline install on a 2 node cluster. The steps mentioned are basically based on the previous blog.
Hope this will become a guide when you face problems with installation.
Notes:
This blog serves as a quick reference for a sandbox setup to demonstrate offline installation and TLS setup across the stack with RPM. One should review and adjust accordingly for production setup, eg. 3 nodes with HA (high availability) at least for production, commercially signed certificates as applicable, etc.
Tested Environment
OS : CentOS 7
Version : Elasticsearch 6.2.3, Kibana 6.2.3, Logstash 6.2.3, Filebeat 6.2.3
Installation User : root (We will use root user to perform the installation steps.)
Basic Flow
Step 1. Preparations
Step 2. Install Elasticsearch + X-Pack offline on node1
Step 3. Create SSL certificates and enable TLS for Elasticsearch on node1
Step 4. Install Kibana + X-Pack offline on node1
Step 5. Enable TLS for Kibana on node1
Step 6. Install Elasticsearch + X-Pack offline on node2
Step 7. Enable TLS for Elasticsearch on node2
Step 8. Install Logstash + X-Pack offline on node1
Step 9. Enable TLS for Logstash on node1
Step 10. Install Filebeat and setup TLS on node1
Step 11. Use Filebeat to ingest data
Download Link
Setup Steps
Step 1. Preparations
[1-1] Cleanup directory (skip this step if not needed)
rm -rf /usr/share/elasticsearch
rm -rf /etc/elasticsearch
rm -rf /var/log/elasticsearch
rm -rf /var/lib/elasticsearch
rm -rf /usr/share/kibana
rm -rf /etc/kibana
rm -rf /var/log/kibana
rm -rf /var/lib/kibana
rm -rf /usr/share/logstash
rm -rf /etc/logstash
rm -rf /var/log/logstash
rm -rf /var/lib/logstash
[1-2] Prepare installation packages
[root@node1 ~]# pwd
/root
[root@node1 ~]# ll
total 554684
-rwxrwx---. 1 root vboxsf  28987839 Apr 12 08:07 elasticsearch-6.2.3.rpm
-rwxr-x---. 1 root vboxsf  12697944 Apr 20 00:10 filebeat-6.2.3-x86_64.rpm
-rwxrwx---. 1 root vboxsf  85347950 Apr 12 08:23 kibana-6.2.3-x86_64.rpm
-rwxrwx---. 1 root vboxsf 139187704 Apr 12 08:10 logstash-6.2.3.rpm
-rwxrwx---. 1 root vboxsf      3466 Apr 12 21:14 logstash-tutorial.log.gz
-rwxr-x---. 1 root root       24464 Apr 20 00:26 logstash-tutorial.log
-rwxrwx---. 1 root vboxsf 314464819 Apr 12 08:32 x-pack-6.2.3.zip
[1-3] Configure /etc/hosts file
# /etc/hosts file for [node1] (we need kibana.local and logstash.local)
::1         localhost localhost.localdomain localhost6 localhost6.localdomain6
127.0.0.1 localhost kibana.local logstash.local
192.168.0.2 node1.elastic.test.com node1
192.168.0.3 node2.elastic.test.com node2
# /etc/hosts file for [node2] (we don't need kibana.local and logstash.local here)
127.0.0.1   localhost localhost.localdomain localhost4 localhost4.localdomain4
::1         localhost localhost.localdomain localhost6 localhost6.localdomain6
192.168.0.2 node1.elastic.test.com node1
192.168.0.3 node2.elastic.test.com node2
[1-4] Ping test
[root@node1 elasticsearch]# ping node2
PING node2.elastic.test.com (192.168.0.3) 56(84) bytes of data.
64 bytes from node2.elastic.test.com (192.168.0.3): icmp_seq=1 ttl=64 time=0.268 ms
64 bytes from node2.elastic.test.com (192.168.0.3): icmp_seq=2 ttl=64 time=0.651 ms
[root@node2 elasticsearch]# ping node1
PING node1.elastic.test.com (192.168.0.2) 56(84) bytes of data.
64 bytes from node1.elastic.test.com (192.168.0.2): icmp_seq=1 ttl=64 time=0.029 ms
64 bytes from node1.elastic.test.com (192.168.0.2): icmp_seq=2 ttl=64 time=0.050 ms
Step 2. Install Elasticsearch + X-Pack offline on node1
[2-1] Install Elasticsearch
[root@node1 ~]# rpm --install -v  elasticsearch-6.2.3.rpm
Preparing packages...
Creating elasticsearch group... OK
Creating elasticsearch user... OK
elasticsearch-0:6.2.3-1.noarch
### NOT starting on installation, please execute the following statements to configure elasticsearch service to start automatically using systemd
 sudo systemctl daemon-reload
 sudo systemctl enable elasticsearch.service
### You can start elasticsearch service by executing
 sudo systemctl start elasticsearch.service
[2-2] Install X-Pack
[root@node1 ~]# /usr/share/elasticsearch/bin/elasticsearch-plugin install file:///root/x-pack-6.2.3.zip
-> Downloading file:///root/x-pack-6.2.3.zip
[=================================================] 100%
@@@@@@@@@@@@@@@@@@@@@@@@@@@@@@@@@@@@@@@@@@@@@@@@@@@@@@@@@@@
@     WARNING: plugin requires additional permissions     @
@@@@@@@@@@@@@@@@@@@@@@@@@@@@@@@@@@@@@@@@@@@@@@@@@@@@@@@@@@@
* java.io.FilePermission \\.\pipe\* read,write
* java.lang.RuntimePermission accessClassInPackage.com.sun.activation.registries
* java.lang.RuntimePermission getClassLoader
* java.lang.RuntimePermission setContextClassLoader
* java.lang.RuntimePermission setFactory
* java.net.SocketPermission * connect,accept,resolve
* java.security.SecurityPermission createPolicy.JavaPolicy
* java.security.SecurityPermission getPolicy
* java.security.SecurityPermission putProviderProperty.BC
* java.security.SecurityPermission setPolicy
* java.util.PropertyPermission * read,write
See http://docs.oracle.com/javase/8/docs/technotes/guides/security/permissions.html
for descriptions of what these permissions allow and the associated risks.
Continue with installation? [y/N]y
@@@@@@@@@@@@@@@@@@@@@@@@@@@@@@@@@@@@@@@@@@@@@@@@@@@@@@@@@@@
@        WARNING: plugin forks a native controller        @
@@@@@@@@@@@@@@@@@@@@@@@@@@@@@@@@@@@@@@@@@@@@@@@@@@@@@@@@@@@
This plugin launches a native controller that is not subject to the Java
security manager nor to system call filters.
Continue with installation? [y/N]y
Elasticsearch keystore is required by plugin [x-pack-security], creating...
-> Installed x-pack with: x-pack-core,x-pack-deprecation,x-pack-graph,x-pack-logstash,x-pack-ml,x-pack-monitoring,x-pack-security,x-pack-upgrade,x-pack-watcher
Step 3. Create SSL certificates and enable TLS for Elasticsearch on node1
[3-1] Set environment variables
[root@node1 ~]# ES_HOME=/usr/share/elasticsearch
[root@node1 ~]# ES_PATH_CONF=/etc/elasticsearch
[3-2] Create tmp folder
[root@node1 elasticsearch]# mkdir ~/tmp
[root@node1 elasticsearch]# cd $_
[root@node1 tmp]# pwd
/root/tmp
[root@node1 tmp]# mkdir cert_blog
[3-3] Create instance yaml file
[root@node1 cert_blog]# vi ~/tmp/cert_blog/instance.yml
# add the instance information to yml file
instances:
  - name: 'node1'
    dns: [ 'node1.elastic.test.com' ]
  - name: "node2"
    dns: [ 'node2.elastic.test.com' ]
  - name: 'my-kibana'
    dns: [ 'kibana.local' ]
  - name: 'logstash'
    dns: [ 'logstash.local' ]
[3-4] Generate CA and server certificates
[root@node1 tmp]# cd $ES_HOME
[root@node1 elasticsearch]# bin/x-pack/certutil cert ca --pem --in ~/tmp/cert_blog/instance.yml --out ~/tmp/cert_blog/certs.zip
This tool assists you in the generation of X.509 certificates and certificate
signing requests for use with SSL/TLS in the Elastic stack.
The 'cert' mode generates X.509 certificate and private keys.
    * By default, this generates a single certificate and key for use
       on a single instance.
    * The '-multiple' option will prompt you to enter details for multiple
       instances and will generate a certificate and key for each one
    * The '-in' option allows for the certificate generation to be automated by describing
       the details of each instance in a YAML file
    * An instance is any piece of the Elastic Stack that requires a SSL certificate.
      Depending on your configuration, Elasticsearch, Logstash, Kibana, and Beats
      may all require a certificate and private key.
    * The minimum required value for each instance is a name. This can simply be the
      hostname, which will be used as the Common Name of the certificate. A full
      distinguished name may also be used.
    * A filename value may be required for each instance. This is necessary when the
      name would result in an invalid file or directory name. The name provided here
      is used as the directory name (within the zip) and the prefix for the key and
      certificate files. The filename is required if you are prompted and the name
      is not displayed in the prompt.
    * IP addresses and DNS names are optional. Multiple values can be specified as a
      comma separated string. If no IP addresses or DNS names are provided, you may
      disable hostname verification in your SSL configuration.
    * All certificates generated by this tool will be signed by a certificate authority (CA).
    * The tool can automatically generate a new CA for you, or you can provide your own with the
         -ca or -ca-cert command line options.
By default the 'cert' mode produces a single PKCS#12 output file which holds:
    * The instance certificate
    * The private key for the instance certificate
    * The CA certificate
If you elect to generate PEM format certificates (the -pem option), then the output will
be a zip file containing individual files for the instance certificate, the key and the CA certificate
If you elect to generate multiple instances certificates, the output will be a zip file
containing all the generated certificates
Certificates written to /root/tmp/cert_blog/certs.zip
This file should be properly secured as it contains the private keys for
all instances.
After unzipping the file, there will be a directory for each instance.
Each instance has a certificate and private key.
For each Elastic product that you wish to configure, you should copy
the certificate, key, and CA certificate to the relevant configuration directory
and then follow the SSL configuration instructions in the product guide.
For client applications, you may only need to copy the CA certificate and
configure the client to trust this certificate.
[3-5] Unzip the certificates
[root@node1 elasticsearch]# cd ~/tmp/cert_blog
[root@node1 cert_blog]# unzip certs.zip -d ./certs
Archive:  certs.zip
   creating: ./certs/ca/
  inflating: ./certs/ca/ca.crt
   creating: ./certs/node1/
  inflating: ./certs/node1/node1.crt
  inflating: ./certs/node1/node1.key
   creating: ./certs/node2/
  inflating: ./certs/node2/node2.crt
  inflating: ./certs/node2/node2.key
   creating: ./certs/my-kibana/
  inflating: ./certs/my-kibana/my-kibana.crt
  inflating: ./certs/my-kibana/my-kibana.key
   creating: ./certs/logstash/
  inflating: ./certs/logstash/logstash.crt
  inflating: ./certs/logstash/logstash.key
[3-6] Elasticsearch TLS setup
[3-6-1] Copy cert file to config folder
[root@node1 ~]# cd $ES_PATH_CONF
[root@node1 elasticsearch]# pwd
/etc/elasticsearch
[root@node1 elasticsearch]# mkdir certs
[root@node1 elasticsearch]# cp ~/tmp/cert_blog/cert/ca/ca.crt ~/tmp/cert_blog/certs/node1/* certs
[root@node1 elasticsearch]# ll certs
total 12
-rw-r--r--. 1 root elasticsearch 1834 Apr 12 08:47 ca.crt
-rw-r--r--. 1 root elasticsearch 1509 Apr 12 08:47 node1.crt
-rw-r--r--. 1 root elasticsearch 1679 Apr 12 08:47 node1.key
[root@node1 elasticsearch]#
[3-6-2] Configure elasticsearch.yml
[root@node1 elasticsearch]# vi elasticsearch.yml
## add the following contents
node.name: node1
network.host: node1.elastic.test.com
xpack.ssl.key: certs/node1.key
xpack.ssl.certificate: certs/node1.crt
xpack.ssl.certificate_authorities: certs/ca.crt
xpack.security.transport.ssl.enabled: true
xpack.security.http.ssl.enabled: true
discovery.zen.ping.unicast.hosts: [ 'node1.elastic.test.com', 'node2.elastic.test.com']
node.max_local_storage_nodes: 2
[3-6-3] Start node
[root@node1 elasticsearch]# systemctl start elasticsearch.service
[root@node1 elasticsearch]# systemctl status elasticsearch.service
● elasticsearch.service - Elasticsearch
   Loaded: loaded (/usr/lib/systemd/system/elasticsearch.service; disabled; vendor preset: disabled)
   Active: active (running) since Thu 2018-04-12 08:48:30 EDT; 28s ago
     Docs: http://www.elastic.co
 Main PID: 11015 (java)
   CGroup: /system.slice/elasticsearch.service
           ├─11015 /bin/java -Xms1g -Xmx1g -XX:+UseConcMarkSweepGC -XX:CMSInitiatingOccupancyFraction=75 -XX:+UseCMSInitiat...
           └─11071 /usr/share/elasticsearch/plugins/x-pack/x-pack-ml/platform/linux-x86_64/bin/controller
Apr 12 08:48:30 node1.elastic.test.com systemd[1]: Started Elasticsearch.
Apr 12 08:48:30 node1.elastic.test.com systemd[1]: Starting Elasticsearch...
Apr 12 08:48:30 node1.elastic.test.com elasticsearch[11015]: OpenJDK 64-Bit Server VM warning: If the number of process...ds=N
Hint: Some lines were ellipsized, use -l to show in full.
[root@node1 elasticsearch]#
[3-6-4] Check cluster log
[root@node1 elasticsearch]# grep '\[node1\] started' /var/log/elasticsearch/elasticsearch.log
[2018-04-12T08:51:57,403][INFO ][o.e.n.Node               ] [node1] started
[3-6-5] Set built in user password
[root@node1 elasticsearch]# cd $ES_HOME
[root@node1 elasticsearch]# bin/x-pack/setup-passwords auto -u "https://node1.elastic.test.com:9200"
Notes : You might get errors here
Failed to authenticate user 'elastic' against https://node1.elastic.test.com:9200/_xpack/security/_authenticate?pretty
Possible causes include:
 * The password for the 'elastic' user has already been changed on this cluster
 * Your elasticsearch node is running against a different keystore
   This tool used the keystore at /etc/elasticsearch/elasticsearch.keystore
ERROR: Failed to verify bootstrap passwor
Notes : To work around this, we need to set the bootstrap password at first
[root@node1 elasticsearch]# bin/elasticsearch-keystore add bootstrap.password
Enter value for bootstrap.password:
Notes : Use bootstrap password to access elastic (we set it to changeme)
[root@node1 elasticsearch]# curl --cacert ~/tmp/cert_blog/certs/ca/ca.crt -u elastic 'https://node1.elastic.test.com:9200/_cat/nodes'
Enter host password for user 'elastic':
192.168.0.2 15 94 10 0.21 0.21 0.23 mdi * node1
Notes : Next time we could set the password without errors
[root@node1 elasticsearch]# bin/x-pack/setup-passwords auto -u "https://node1.elastic.test.com:9200"
Initiating the setup of passwords for reserved users elastic,kibana,logstash_system.
The passwords will be randomly generated and printed to the console.
Please confirm that you would like to continue [y/N]y
Changed password for user kibana
PASSWORD kibana = vSD7bTFo5Xe30tpu8zXn
Changed password for user logstash_system
PASSWORD logstash_system = Y08KyrAJgudD2qPMDrsH
Changed password for user elastic
PASSWORD elastic = ky8xjm4Fq8Es93Os2VNT
[3-6-6] Access _cat/nodes API via https
[root@node1 elasticsearch]# curl --cacert ~/tmp/cert_blog/certs/ca/ca.crt -u elastic 'https://node1.elastic.test.com:9200/_cat/nodes?v'
Enter host password for user 'elastic':
ip          heap.percent ram.percent cpu load_1m load_5m load_15m node.role master name
192.168.0.2           16          95  10    0.76    0.59     0.38 mdi       *      node1
Step 4. Install Kibana + X-Pack offline on node1
[4-1] Install Kibana
[root@node1 ~]# pwd
/root
[root@node1 ~]# ll
total 554684
-rwxrwx---. 1 root vboxsf  28987839 Apr 12 08:07 elasticsearch-6.2.3.rpm
-rwxr-x---. 1 root root    12697944 Apr 20 00:10 filebeat-6.2.3-x86_64.rpm
-rwxrwx---. 1 root vboxsf  85347950 Apr 12 08:23 kibana-6.2.3-x86_64.rpm
-rwxrwx---. 1 root vboxsf 139187704 Apr 12 08:10 logstash-6.2.3.rpm
-rwxr-x---. 1 root root       24464 Apr 20 00:26 logstash-tutorial.log
-rwxrwx---. 1 root vboxsf      3466 Apr 12 21:14 logstash-tutorial.log.gz
drwxr-xr-x. 3 root root          23 Apr 12 08:44 tmp
-rwxrwx---. 1 root vboxsf 314464819 Apr 12 08:32 x-pack-6.2.3.zip
[root@node1 ~]# rpm --install -v kibana-6.2.3-x86_64.rpm
Preparing packages...
kibana-6.2.3-1.x86_64
[4-2] Install X-Pack
[root@node1 ~]# /usr/share/kibana/bin/kibana-plugin install file:///root/x-pack-6.2.3.zip
Attempting to transfer from file:///root/x-pack-6.2.3.zip
Transferring 314464819 bytes....................
Transfer complete
Retrieving metadata from plugin archive
Extracting plugin archive
Extraction complete
Optimizing and caching browser bundles...
Plugin installation complete
Step 5. Enable TLS for kibana on node1
[5-1] Set environment variables
[root@node1 ~]# KIBANA_HOME=/usr/share/kibana
[root@node1 ~]# KIBANA_PATH_CONFIG=/etc/kibana
[5-2] Create config and config/certs folder and copy certs
Notes : In order not to change the description from blog, we create config and config/certs 2 folders here.
[root@node1 kibana]# cd $KIBANA_PATH_CONFIG
[root@node1 kibana]# mkdir config
[root@node1 kibana]# mkdir config/certs
[root@node1 kibana]# cp ~/tmp/cert_blog/certs/ca/ca.crt ~/tmp/cert_blog/certs/my-kibana/* config/certs
[root@node1 kibana]#
[5-3] Configure kibana.yml
Notes : Remember to use the password generated for built-in user above.
[root@node1 kibana]# vi kibana.yml
server.name: "my-kibana"
server.host: "kibana.local"
server.ssl.enabled: true
server.ssl.certificate: /etc/kibana/config/certs/my-kibana.crt
server.ssl.key: /etc/kibana/config/certs/my-kibana.key
elasticsearch.url: "https://node1.elastic.test.com:9200"
elasticsearch.username: "kibana"
elasticsearch.password: "vSD7bTFo5Xe30tpu8zXn"
elasticsearch.ssl.certificateAuthorities: [ "/etc/kibana/config/certs/ca.crt" ]
[5-4] Start kibana
[root@node1 kibana]# service kibana start
kibana started
[root@node1 kibana]# service kibana status
kibana is running
[5-5] Test kibana login
Access https://kibana.local:5601/ from browser.

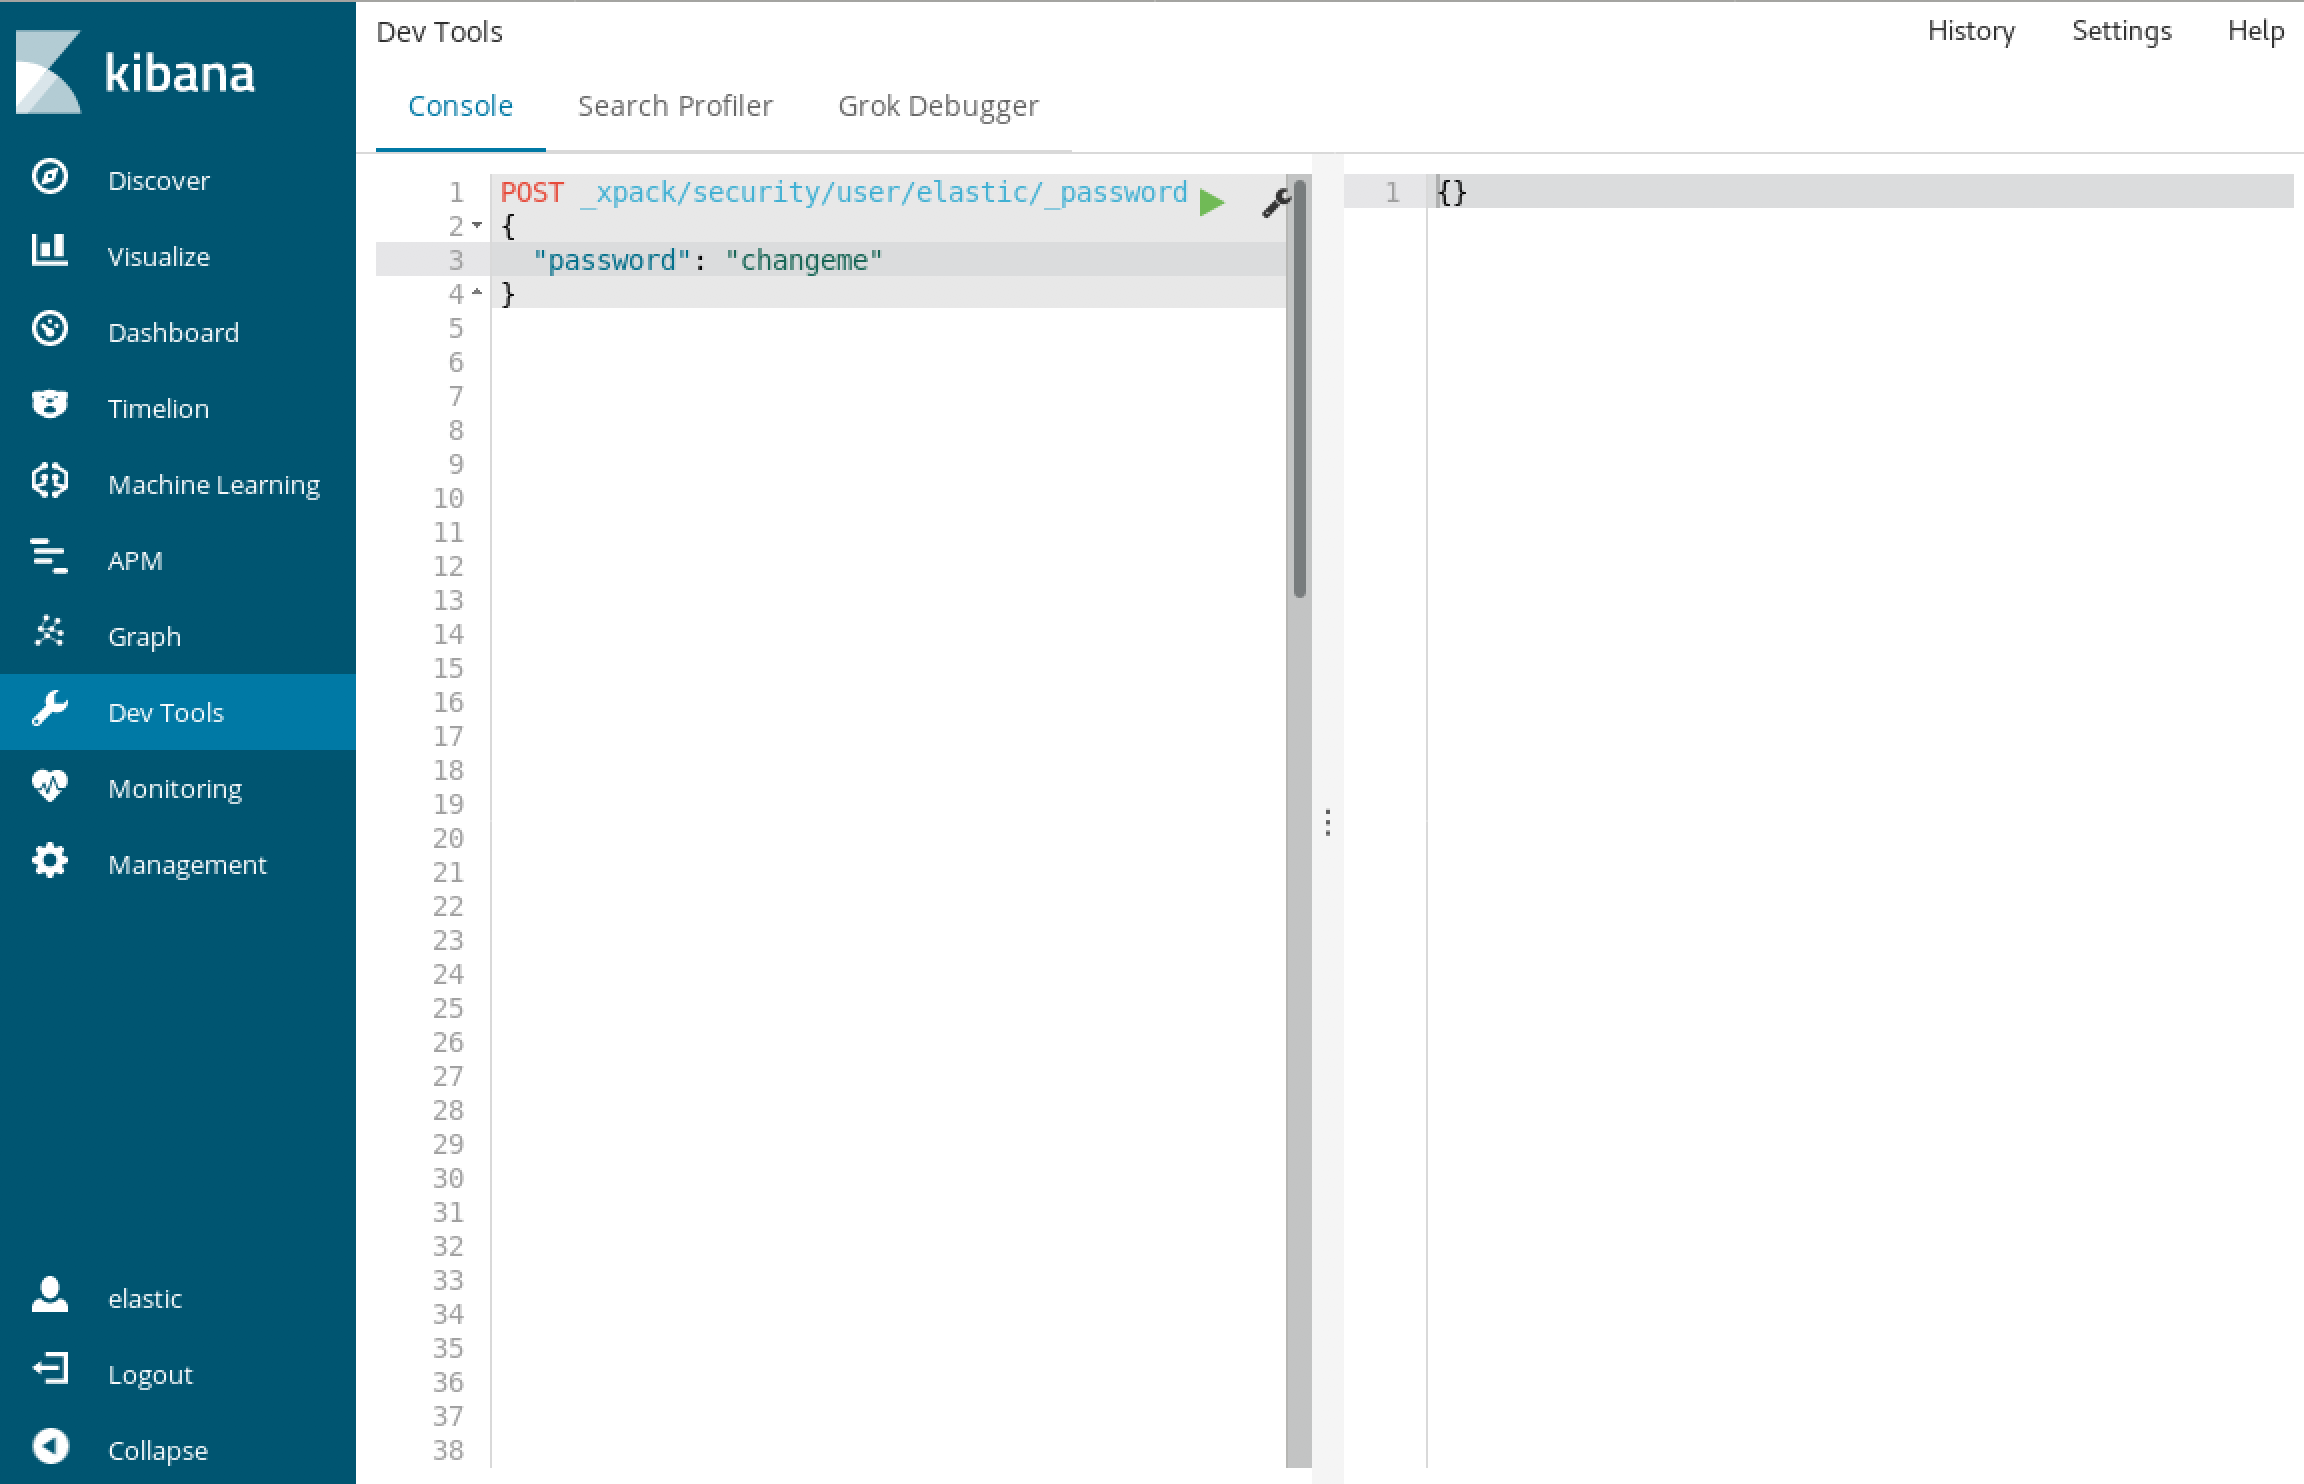
[5-6] Change password of elastic user (optional)
Notes: We run this query in Dev Tools
POST _xpack/security/user/elastic/_password
{
  "password": "changeme"
}
[5-7] Check _cat/nodes API via https again with new password (optional)
[root@node1 elasticsearch]# curl --cacert ~/tmp/cert_blog/certs/ca/ca.crt -u elastic:changeme 'https://node1.elastic.test.com:9200/_cat/nodes?v'
ip          heap.percent ram.percent cpu load_1m load_5m load_15m node.role master name
192.168.0.2           19          80  12    0.63    0.50     0.56 mdi       *      node1
Step 6. Install Elasticsearch + X-Pack offline on node2
[6-1] Install Elasticsearch
[root@node2 ~]# pwd
/root
[root@node2 ~]# ll
total 335408
-rwxrwx---. 1 root vboxsf  28987839 Apr 12 08:07 elasticsearch-6.2.3.rpm
-rwxrwx---. 1 root vboxsf 314464819 Apr 12 08:32 x-pack-6.2.3.zip
[root@node2 ~]# rpm --install -v  elasticsearch-6.2.3.rpm
Preparing packages...
Creating elasticsearch group... OK
Creating elasticsearch user... OK
elasticsearch-0:6.2.3-1.noarch
### NOT starting on installation, please execute the following statements to configure elasticsearch service to start automatically using systemd
 sudo systemctl daemon-reload
 sudo systemctl enable elasticsearch.service
### You can start elasticsearch service by executing
 sudo systemctl start elasticsearch.service
[6-2] Install x-pack
[root@node2 ~]# /usr/share/elasticsearch/bin/elasticsearch-plugin install file:///root/x-pack-6.2.3.zip
-> Downloading file:///root/x-pack-6.2.3.zip
[=================================================] 100%
@@@@@@@@@@@@@@@@@@@@@@@@@@@@@@@@@@@@@@@@@@@@@@@@@@@@@@@@@@@
@     WARNING: plugin requires additional permissions     @
@@@@@@@@@@@@@@@@@@@@@@@@@@@@@@@@@@@@@@@@@@@@@@@@@@@@@@@@@@@
* java.io.FilePermission \\.\pipe\* read,write
* java.lang.RuntimePermission accessClassInPackage.com.sun.activation.registries
* java.lang.RuntimePermission getClassLoader
* java.lang.RuntimePermission setContextClassLoader
* java.lang.RuntimePermission setFactory
* java.net.SocketPermission * connect,accept,resolve
* java.security.SecurityPermission createPolicy.JavaPolicy
* java.security.SecurityPermission getPolicy
* java.security.SecurityPermission putProviderProperty.BC
* java.security.SecurityPermission setPolicy
* java.util.PropertyPermission * read,write
See http://docs.oracle.com/javase/8/docs/technotes/guides/security/permissions.html
for descriptions of what these permissions allow and the associated risks.
Continue with installation? [y/N]y
@@@@@@@@@@@@@@@@@@@@@@@@@@@@@@@@@@@@@@@@@@@@@@@@@@@@@@@@@@@
@        WARNING: plugin forks a native controller        @
@@@@@@@@@@@@@@@@@@@@@@@@@@@@@@@@@@@@@@@@@@@@@@@@@@@@@@@@@@@
This plugin launches a native controller that is not subject to the Java
security manager nor to system call filters.
Continue with installation? [y/N]y
Elasticsearch keystore is required by plugin [x-pack-security], creating...
-> Installed x-pack with: x-pack-core,x-pack-deprecation,x-pack-graph,x-pack-logstash,x-pack-ml,x-pack-monitoring,x-pack-security,x-pack-upgrade,x-pack-watcher
Step 7. Enable TLS for Elasticsearch on node2
[7-1] Set environment variables
[root@node2 ~]# ES_HOME=/usr/share/elasticsearch
[root@node2 ~]# ES_PATH_CONF=/etc/elasticsearch
[7-2] Setup TLS on node2
Notes : We use scp command to copy certificates from node1 to node2
[root@node2 elasticsearch]# mkdir ~/tmp
[root@node2 elasticsearch]# cd $_
[root@node2 tmp]# pwd
/root/tmp
[root@node2 tmp]# mkdir cert_blog
[root@node2 tmp]# ll
drwxr-xr-x. 2 root root 6 Apr 12 10:53 cert_blog
[root@node2 tmp]#
[root@node2 tmp]# scp -r node1:~/tmp/cert_blog/* cert_blog/
root@node1's password:
ca.crt                                        100% 1915     2.7MB/s   00:00
node1.crt                                     100% 1590     2.4MB/s   00:00
node1.key                                     100% 1679     2.3MB/s   00:00
node2.crt                                     100% 1590     3.0MB/s   00:00
node2.key                                     100% 1679     1.3MB/s   00:00
my-kibana.crt                                 100% 1582   525.7KB/s   00:00
my-kibana.key                                 100% 1675     1.5MB/s   00:00
logstash.crt                                  100% 1582     1.6MB/s   00:00
logstash.key                                  100% 1675     1.7MB/s   00:00
certs.zip                                     100%   11KB  23.3MB/s   00:00
MyExample_Global_CA.zip                       100% 4286    10.0MB/s   00:00
[root@node2 ~]# cd $ES_PATH_CONF
[root@node2 elasticsearch]# pwd
/etc/elasticsearch
[root@node2 elasticsearch]# mkdir certs
[root@node2 elasticsearch]# cp ~/tmp/cert_blog/certs/ca/ca.crt ~/tmp/cert_blog/certs/node2/* certs
[root@node2 elasticsearch]#
[root@node2 elasticsearch]# ll certs
total 12
-rw-r--r--. 1 root elasticsearch 1834 Apr 12 10:55 ca.crt
-rw-r--r--. 1 root elasticsearch 1509 Apr 12 10:55 node2.crt
-rw-r--r--. 1 root elasticsearch 1675 Apr 12 10:55 node2.key
[7-3] Configure elasticsearch.yml
[root@node2 elasticsearch]# vi elasticsearch.yml
node.name: node2
network.host: node2.elastic.test.com
xpack.ssl.key: certs/node2.key
xpack.ssl.certificate: certs/node2.crt
xpack.ssl.certificate_authorities: certs/ca.crt
xpack.security.transport.ssl.enabled: true
xpack.security.http.ssl.enabled: true
discovery.zen.ping.unicast.hosts: [ 'node1.elastic.test.com', 'node2.elastic.test.com']
node.max_local_storage_nodes: 2
[7-4] Start node
[root@node2 ~]# systemctl start elasticsearch.service
[root@node2 elasticsearch]# systemctl status elasticsearch.service
● elasticsearch.service - Elasticsearch
   Loaded: loaded (/usr/lib/systemd/system/elasticsearch.service; disabled; vendor preset: disabled)
   Active: active (running) since Thu 2018-04-12 10:56:22 EDT; 8s ago
     Docs: http://www.elastic.co
 Main PID: 10994 (java)
   CGroup: /system.slice/elasticsearch.service
           ├─10994 /bin/java -Xms1g -Xmx1g -XX:+UseConcMarkSweepGC -XX:CMSInitiatingOccupancyFraction=75 -XX:+UseCMSInit...
           └─11050 /usr/share/elasticsearch/plugins/x-pack/x-pack-ml/platform/linux-x86_64/bin/controller
Apr 12 10:56:22 node2.elastic.test.com systemd[1]: Started Elasticsearch.
Apr 12 10:56:22 node2.elastic.test.com systemd[1]: Starting Elasticsearch...
Apr 12 10:56:22 node2.elastic.test.com elasticsearch[10994]: OpenJDK 64-Bit Server VM warning: If the number of proc...ds=N
Hint: Some lines were ellipsized, use -l to show in full.
[7-5] Check cluster log
[root@node2 elasticsearch]# grep '\[node2\] started' /var/log/elasticsearch/elasticsearch.log
[2018-04-12T10:56:46,544][INFO ][o.e.n.Node               ] [node2] started
[7-6] Access _cat/nodes API via https
[root@node2 elasticsearch]# curl --cacert ~/tmp/cert_blog/certs/ca/ca.crt -u elastic:changeme 'https://node1.elastic.test.com:9200/_cat/nodes?v'
ip          heap.percent ram.percent cpu load_1m load_5m load_15m node.role master name
192.168.0.2           25          80   5    0.18    0.14     0.30 mdi       *      node1
192.168.0.3           14          96  44    0.57    0.47     0.25 mdi       -      node2
Step 8. Install Logstash + X-Pack offline on node1
[8-1] Create logstash_write_role
Notes : In this document, we create the role from console.
[root@node1 kibana]# curl --cacert ~/tmp/cert_blog/certs/ca/ca.crt -u elastic:changeme -XPOST "https://node1.elastic.test.com:9200/_xpack/security/role/logstash_write_role" -H 'Content-Type: application/json' -d'
{
    "cluster": [
      "monitor",
      "manage_index_templates"
    ],
    "indices": [
      {
        "names": [
          "logstash-*"
        ],
        "privileges": [
          "write",
          "delete",
          "create_index"
        ],
        "field_security": {
          "grant": [
            "*"
          ]
        }
      }
    ],
    "run_as": [],
    "metadata": {},
    "transient_metadata": {
      "enabled": true
    }
}'
{"role":{"created":true}}
[8-2] Create logstash_writer user
Notes : In this document, we create the user from console
[root@node1 kibana]# curl --cacert ~/tmp/cert_blog/certs/ca/ca.crt -u elastic:changeme -XPOST "https://node1.elastic.test.com:9200/_xpack/security/user/logstash_writer" -H 'Content-Type: application/json' -d'
{
  "username": "logstash_writer",
  "roles": [
    "logstash_write_role"
  ],
  "full_name": null,
  "email": null,
  "password": "changeme",
  "enabled": true
}'
{"user":{"created":true}}
[8-3] Install Logstash offline
[root@node1 ~]# pwd
/root
[root@node1 ~]# ll
total 554684
-rwxrwx---. 1 root vboxsf  28987839 Apr 12 08:07 elasticsearch-6.2.3.rpm
-rwxr-x---. 1 root root    12697944 Apr 20 00:10 filebeat-6.2.3-x86_64.rpm
-rwxrwx---. 1 root vboxsf  85347950 Apr 12 08:23 kibana-6.2.3-x86_64.rpm
-rwxrwx---. 1 root vboxsf 139187704 Apr 12 08:10 logstash-6.2.3.rpm
-rwxr-x---. 1 root root       24464 Apr 20 00:26 logstash-tutorial.log
-rwxrwx---. 1 root vboxsf      3466 Apr 12 21:14 logstash-tutorial.log.gz
drwxr-xr-x. 3 root root          23 Apr 12 08:44 tmp
-rwxrwx---. 1 root vboxsf 314464819 Apr 12 08:32 x-pack-6.2.3.zip
[root@node1 ~]# rpm --install -v  logstash-6.2.3.rpm
Preparing packages...
logstash-1:6.2.3-1.noarch
Using provided startup.options file: /etc/logstash/startup.options
Successfully created system startup script for Logstash
[8-4] Install X-Pack for Logstash offline
Notes : No worry about the "Invalid date/time in zip entry" message. see the following docs for more details
Unable to install logstash-core gem
'Invalid date/time in zip entry' during x-pack install
[root@node1 ~]# /usr/share/logstash/bin/logstash-plugin install file:///root/x-pack-6.2.3.zip
Installing file: /root/x-pack-6.2.3.zip
Invalid date/time in zip entry
Invalid date/time in zip entry
(... skip ...)
Invalid date/time in zip entry
Install successful
Step 9. Enable TLS for Logstash on node1
[9-1] Create folder and copy certificates
[root@node1 ~]# cd /etc/logstash/
[root@node1 logstash]# ll
total 24
drwxrwxr-x. 2 root root    6 Mar 13 20:55 conf.d
-rw-r--r--. 1 root root 1738 Mar 13 20:55 jvm.options
-rw-r--r--. 1 root root 1334 Mar 13 20:55 log4j2.properties
-rw-r--r--. 1 root root 6378 Apr 13 00:25 logstash.yml
-rw-r--r--. 1 root root  285 Mar 13 20:55 pipelines.yml
-rw-------. 1 root root 1659 Mar 13 20:55 startup.options
[root@node1 logstash]# mkdir config
[root@node1 logstash]# mkdir config/certs
[root@node1 logstash]# cp ~/tmp/cert_blog/certs/ca/ca.crt ~/tmp/cert_blog/certs/logstash/* config/certs
[root@node1 logstash]# ll config/certs/
total 12
-rw-r--r--. 1 root root 1834 Apr 13 00:53 ca.crt
-rw-r--r--. 1 root root 1501 Apr 13 00:53 logstash.crt
-rw-r--r--. 1 root root 1679 Apr 13 00:53 logstash.key
[9-2] Convert logstash.key to PKCS#8 format for beats input plugin
[root@node1 logstash]# openssl pkcs8 -in config/certs/logstash.key -topk8 -nocrypt -out config/certs/logstash.pkcs8.key
[9-3] Configure logstash.yml
Notes : Remember to use the auto-generated the password for logstash_system user
[root@node1 logstash]# vi logstash.yml
node.name: logstash.local
path.config: /etc/logstash/conf.d/*.conf
xpack.monitoring.elasticsearch.username: logstash_system
xpack.monitoring.elasticsearch.password: 'Y08KyrAJgudD2qPMDrsH'
xpack.monitoring.elasticsearch.url: https://node1.elastic.test.com:9200
xpack.monitoring.elasticsearch.ssl.ca: /etc/logstash/config/certs/ca.crt
[9-4] Create and configure conf.d/example.conf
[root@node1 logstash]# vi conf.d/example.conf
input {
  beats {
    port => 5044
    ssl => true
    ssl_key => '/etc/logstash/config/certs/logstash.pkcs8.key'
    ssl_certificate => '/etc/logstash/config/certs/logstash.crt'
  }
}
output {
  elasticsearch {
    hosts => ["https://node1.elastic.test.com:9200","https://node2.elastic.test.com:9200"]
    cacert => '/etc/logstash/config/certs/ca.crt'
    user => 'logstash_writer'
    password => 'changeme'
    index => 'logstash-%{+YYYY.MM.dd}'
  }
}
[9-5] Start logstash with the example configuration
[root@node1 logstash]# pwd
/etc/logstash
[root@node1 logstash]# cd conf.d/
[root@node1 conf.d]# ll
total 4
-rw-r--r--. 1 root root 414 Apr 19 20:45 example.conf
[root@node1 conf.d]# cd ..
[root@node1 logstash]# systemctl start logstash.service
[root@node1 logstash]# systemctl status logstash.service
● logstash.service - logstash
   Loaded: loaded (/etc/systemd/system/logstash.service; disabled; vendor preset: disabled)
   Active: active (running) since Thu 2018-04-19 20:58:17 JST; 8s ago
 Main PID: 4580 (java)
   CGroup: /system.slice/logstash.service
           └─4580 /bin/java -Xms256m -Xmx1g -XX:+UseParNewGC -XX:+UseConcMarkSweepGC -XX:CMSInitiatingOccupancyFraction=75 -XX:+UseCMSInitiatingOc...
Apr 19 20:58:17 node1.elastic.test.com systemd[1]: Started logstash.
Apr 19 20:58:17 node1.elastic.test.com systemd[1]: Starting logstash...
[root@node1 logstash]#
[9-6] Check the logstash log
Notes : We should see the following log messages.
[root@node1 logstash]# less /var/log/logstash/logstash-plain.log
[2018-04-19T21:11:51,848][INFO ][logstash.pipeline        ] Pipeline started succesfully {:pipeline_id=>".monitoring-logstash", :thread=>"#<Thread:0x640c14d2@/usr/share/logstash/logstash-core/lib/logstash/pipeline.rb:246 run>"}
(... skip ...)
[2018-04-19T21:11:53,277][INFO ][logstash.pipeline        ] Pipeline started succesfully {:pipeline_id=>"main", :thread=>"#<Thread:0x30690cba@/usr/share/logstash/logstash-core/lib/logstash/pipeline.rb:246 run>"}
[2018-04-19T21:11:53,323][INFO ][logstash.agent           ] Pipelines running {:count=>2, :pipelines=>[".monitoring-logstash", "main"]}
[2018-04-19T21:11:53,324][INFO ][logstash.inputs.metrics  ] Monitoring License OK
[2018-04-19T21:11:53,354][INFO ][org.logstash.beats.Server] Starting server on port: 5044
Step 10. Install Filebeat and setup TLS on node1
[10-1] Install Filebeat rpm package
[root@node1 ~]# pwd
/root
[root@node1 ~]# ll
total 567088
-rwxrwx---. 1 root vboxsf  28987839 Apr 12 21:07 elasticsearch-6.2.3.rpm
-rwxrwx---. 1 root vboxsf  12697944 Apr 20 00:08 filebeat-6.2.3-x86_64.rpm
-rwxrwx---. 1 root vboxsf  85347950 Apr 12 21:23 kibana-6.2.3-x86_64.rpm
-rwxrwx---. 1 root vboxsf 139187704 Apr 12 21:10 logstash-6.2.3.rpm
-rwxr-x---. 1 root root       24464 Apr 20 00:26 logstash-tutorial.log
-rwxrwx---. 1 root vboxsf      3466 Apr 12 21:14 logstash-tutorial.log.gz
drwxr-xr-x. 3 root root          23 Apr 12 21:44 tmp
-rwxrwx---. 1 root vboxsf 314464819 Apr 12 21:32 x-pack-6.2.3.zip
[root@node1 ~]# rpm --install -v  filebeat-6.2.3-x86_64.rpm
Preparing packages...
filebeat-6.2.3-1.x86_64
[10-2] Create folder and copy certificates
[root@node1 ~]# cd /etc/filebeat/
[root@node1 filebeat]# pwd
/etc/filebeat
[root@node1 filebeat]# ll
total 108
-rw-r--r--. 1 root root 44384 Mar 13 18:52 fields.yml
-rw-r-----. 1 root root 52193 Mar 13 18:52 filebeat.reference.yml
-rw-------. 1 root root  7264 Mar 13 18:52 filebeat.yml
drwxr-xr-x. 2 root root  4096 Apr 20 00:16 modules.d
[root@node1 filebeat]# mkdir config
[root@node1 filebeat]# mkdir config/certs
[root@node1 filebeat]# cp ~/tmp/cert_blog/certs/ca/ca.crt config/certs
[root@node1 filebeat]# ll config/certs/
total 4
-rw-r--r--. 1 root root 1834 Apr 20 00:18 ca.crt
[10-3] Create a new filebeat.yml
[root@node1 filebeat]# pwd
/etc/filebeat
[root@node1 filebeat]# mv filebeat.yml filebeat.yml.old
[root@node1 filebeat]# vi filebeat.yml
[10-4] Configure filebeat.yml
filebeat.prospectors:
- type: log
  paths:
    - /etc/filebeat/logstash-tutorial-dataset
output.logstash:
  hosts: ["logstash.local:5044"]
  ssl.certificate_authorities:
    - /etc/filebeat/config/certs/ca.crt
Step 11. Use Filebeat to ingest data
[11-1] Prepare input log data (logstash-tutorial.log) for filebeat
Notes: The input log data could be downloaded from here.
[root@node1 filebeat]# pwd
/etc/filebeat
[root@node1 filebeat]# mkdir logstash-tutorial-dataset
[root@node1 filebeat]# cp /root/logstash-tutorial.log logstash-tutorial-dataset/.
[root@node1 filebeat]# ll logstash-tutorial-dataset/
total 24
-rwxr-x---. 1 root root 24464 Apr 20 00:29 logstash-tutorial.log
[11-2] Start filebeat
[root@node1 filebeat]# systemctl start filebeat
[root@node1 filebeat]# systemctl enable filebeat
Created symlink from /etc/systemd/system/multi-user.target.wants/filebeat.service to /usr/lib/systemd/system/filebeat.service.
[11-3] Check the log
Notes : We should see the following log messages
2018-04-20T00:38:00.276+0900    INFO    instance/beat.go:468    Home path: [/usr/share/filebeat] Config path: [/etc/filebeat] Data path: [/var/lib/filebeat] Logs path: [/var/log/filebeat]
2018-04-20T00:38:00.292+0900    INFO    instance/beat.go:475    Beat UUID: b9526a2d-2bfc-4022-ba3b-adc83fbffb1e
2018-04-20T00:38:00.292+0900    INFO    instance/beat.go:213    Setup Beat: filebeat; Version: 6.2.3
2018-04-20T00:38:00.292+0900    INFO    pipeline/module.go:76   Beat name: node1.elastic.test.com
2018-04-20T00:38:00.307+0900    INFO    instance/beat.go:301    filebeat start running.
2018-04-20T00:46:54.128+0900    INFO    log/harvester.go:216    Harvester started for file: /etc/filebeat/logstash-tutorial-dataset/logstash-tutorial.log
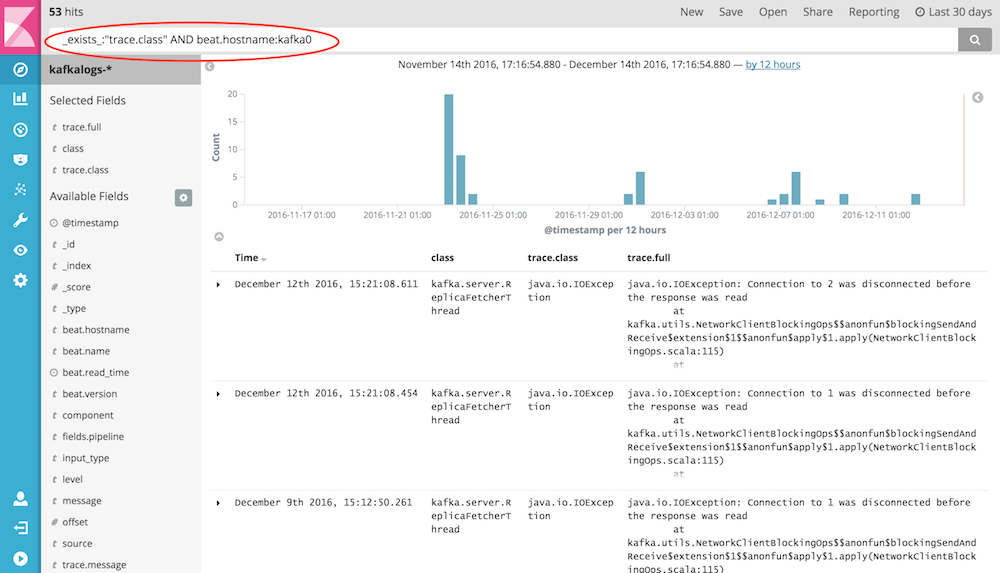
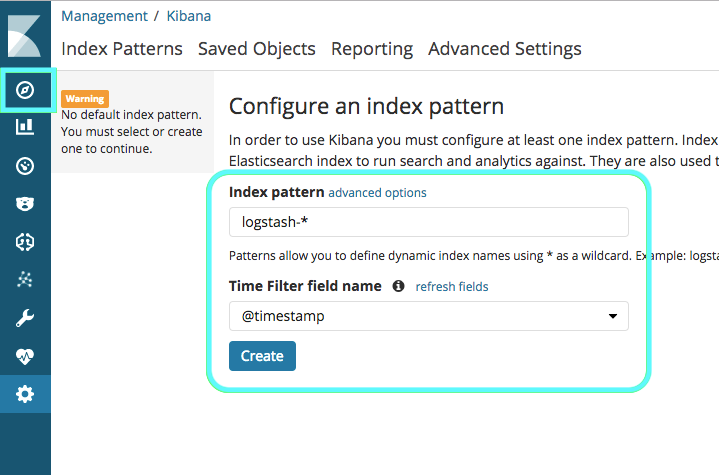
[11-4] Create index pattern
[11-5] Search the index in Discover