Manage detection rules
editManage detection rules
editThe Rules page allows you to view and manage all prebuilt and custom detection rules.
On the Rules page, you can:
- Sort and filter the rules list
- Check the current status of rules
- Load and activate Elastic prebuilt rules
- Prebuilt rule tags
- Select and duplicate all prebuilt rules
- Download latest Elastic prebuilt rules
- Confirm rule prerequisites
- Modify existing rules settings
- Manage rules
- Export and import rules
- Troubleshoot missing alerts
Sort and filter the rules list
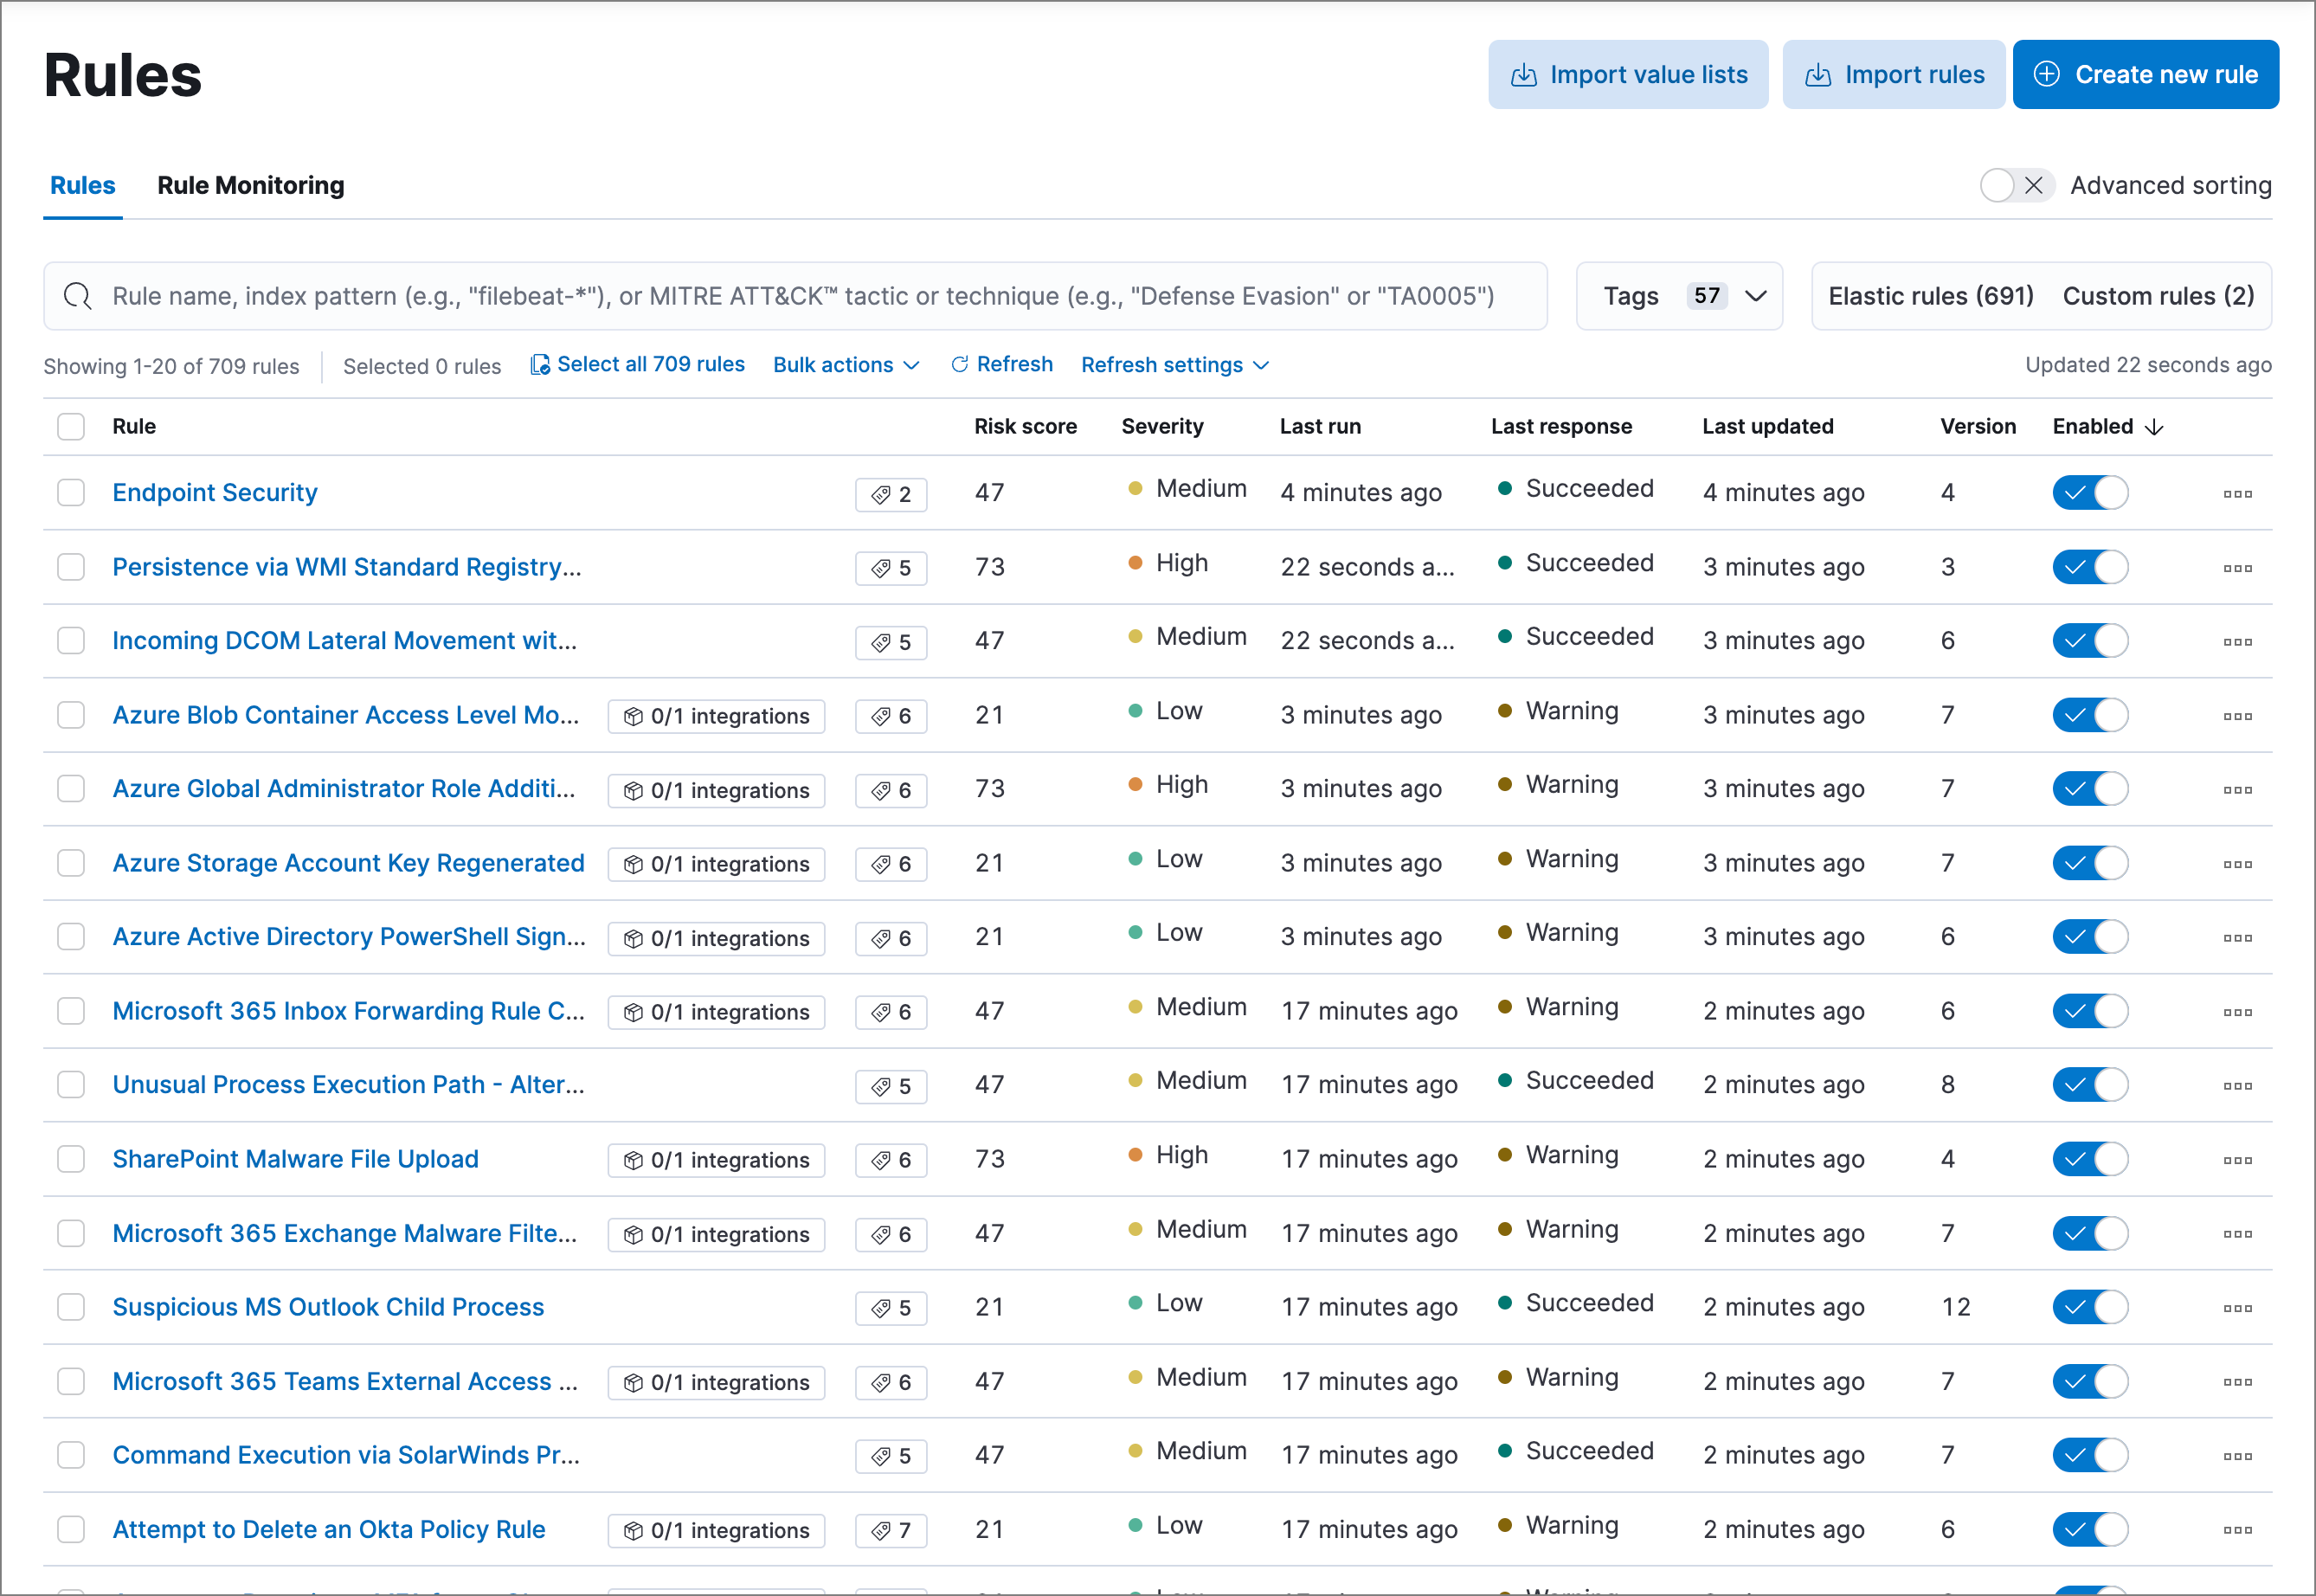
editTo sort the rules list, click the Rule, Last updated, or Enabled column header.
To sort by any other column, turn on the Advanced sorting toggle above the table. If you experience performance issues when working with the table, you can turn this setting off.
To filter the rules list, enter a search term in the search bar and press Return:
- Rule name — Enter a word or phrase from a rule’s name.
-
Index pattern — Enter an index pattern (such as
filebeat-*) to display all rules that use it. -
MITRE ATT&CK tactic or technique — Enter a MITRE ATT&CK tactic name (such as
Defense Evasion) or technique number (such asTA0005) to display all associated rules.
Searches for index patterns and MITRE ATT&CK tactics and techniques must match exactly, are case sensitive, and do not support wildcards. For example, to find rules using the filebeat-* index pattern, the search term filebeat-* is valid, but filebeat and file* are not because they don’t exactly match the index pattern. Likewise, the MITRE ATT&CK tactic Defense Evasion is valid, but Defense, defense evasion, and Defense* are not.
Check the current status of rules
editThe Last response column displays the current status of each rule, based on the most recent attempt to run the rule:
- Succeeded: The rule completed its defined search. This doesn’t necessarily mean it generated an alert, just that it ran without error.
- Failed: The rule encountered an error that prevented it from running. For example, a machine learning rule whose corresponding machine learning job wasn’t running.
- Warning: Nothing prevented the rule from running, but it might have returned unexpected results. For example, a custom query rule tried to search an index pattern that couldn’t be found in Elasticsearch.
For machine learning rules, an indicator icon (![]() ) also appears in this column if a required machine learning job isn’t running. Click the icon to list the affected jobs, then click Visit rule details page to investigate to open the rule’s details page, where you can start the machine learning job.
) also appears in this column if a required machine learning job isn’t running. Click the icon to list the affected jobs, then click Visit rule details page to investigate to open the rule’s details page, where you can start the machine learning job.
Load and activate Elastic prebuilt rules
editTo load the Elastic Security app’s prebuilt rules, go to Manage → Rules → Load Elastic prebuilt rules and Timeline templates.
You can then activate whichever rules you want. If you delete any prebuilt rules, a button appears that enables you to reload all of the deleted ones.
-
Apart from the Elastic Endpoint rule, prebuilt rules are not activated by default. If you want to modify a prebuilt rule, you must first duplicate it, then make your changes to the duplicated rule. All Elastic prebuilt rules are tagged with the word
Elastic.To learn how to enable detection rules in Elastic Security, watch the tutorial at the end of this topic.
- Automatic updates of Elastic prebuilt rules are supported for the current Elastic Security version and the latest three previous minor releases. For example, if you’re on Elastic Security 8.10, you’ll be able to use the Rules UI to update your prebuilt rules until Elastic Security 8.14 is released. After that point, you can still manually download and install updated prebuilt rules, but you must upgrade to the latest Elastic Security version to receive automatic updates.
Prebuilt rule tags
editEach prebuilt rule includes several tags identifying the rule’s purpose, detection method, associated resources, and other information to help categorize your rules. These tags are category-value pairs; for example, OS: Windows indicates rules designed for Windows endpoints. Categories include:
-
Data Source: The application, cloud provider, data shipper, or Elastic integration providing data for the rule. -
Domain: A general category of data source types (such as cloud, endpoint, or network). -
OS: The host operating system, which could be considered another data source type. -
Resources: Additional rule resources such as investigation guides. -
Rule Type: Identifies if the rule depends on specialized resources (such as machine learning jobs or threat intelligence indicators), or if it’s a higher-order rule built from other rules' alerts. -
Tactic: MITRE ATT&CK tactics that the rule addresses. -
Threat: Specific threats the rule detects (such as Cobalt Strike or BPFDoor). -
Use Case: The type of activity the rule detects and its purpose. Use cases include:-
Active Directory Monitoring: Detects changes related to Active Directory. -
Asset Visibility: Detects changes to specified asset types. -
Configuration Audit: Detects undesirable configuration changes. -
Guided Onboarding: Example rule, used for Elastic Security’s guided onboarding tour. -
Identity and Access Audit: Detects activity related to identity and access management (IAM). -
Log Auditing: Detects activity on log configurations or storage. -
Network Security Monitoring: Detects network security configuration activity. -
Threat Detection: Detects threats. -
Vulnerability: Detects exploitation of specific vulnerabilities.
-
Select and duplicate all prebuilt rules
edit- Go to Manage → Rules.
- Click Select all x rules above the rules table.
- Click Bulk actions → Duplicate.
- Select the Custom rules tab.
You can then modify the duplicated rules and, if required, delete the prebuilt ones.
Download latest Elastic prebuilt rules
editAs of Elastic Stack >=7.13.0, you can download the latest version of Elastic prebuilt rules outside of a regular release cycle. This feature ensures you have the latest detection capabilities before upgrading to the latest Elastic Stack.
To download the latest version of prebuilt rules:
- In Kibana, go to Management → Integrations.
- Search for "Prebuilt Security Detection Rules."
-
Select the integration, then select the Settings tab. The integration settings page is displayed.
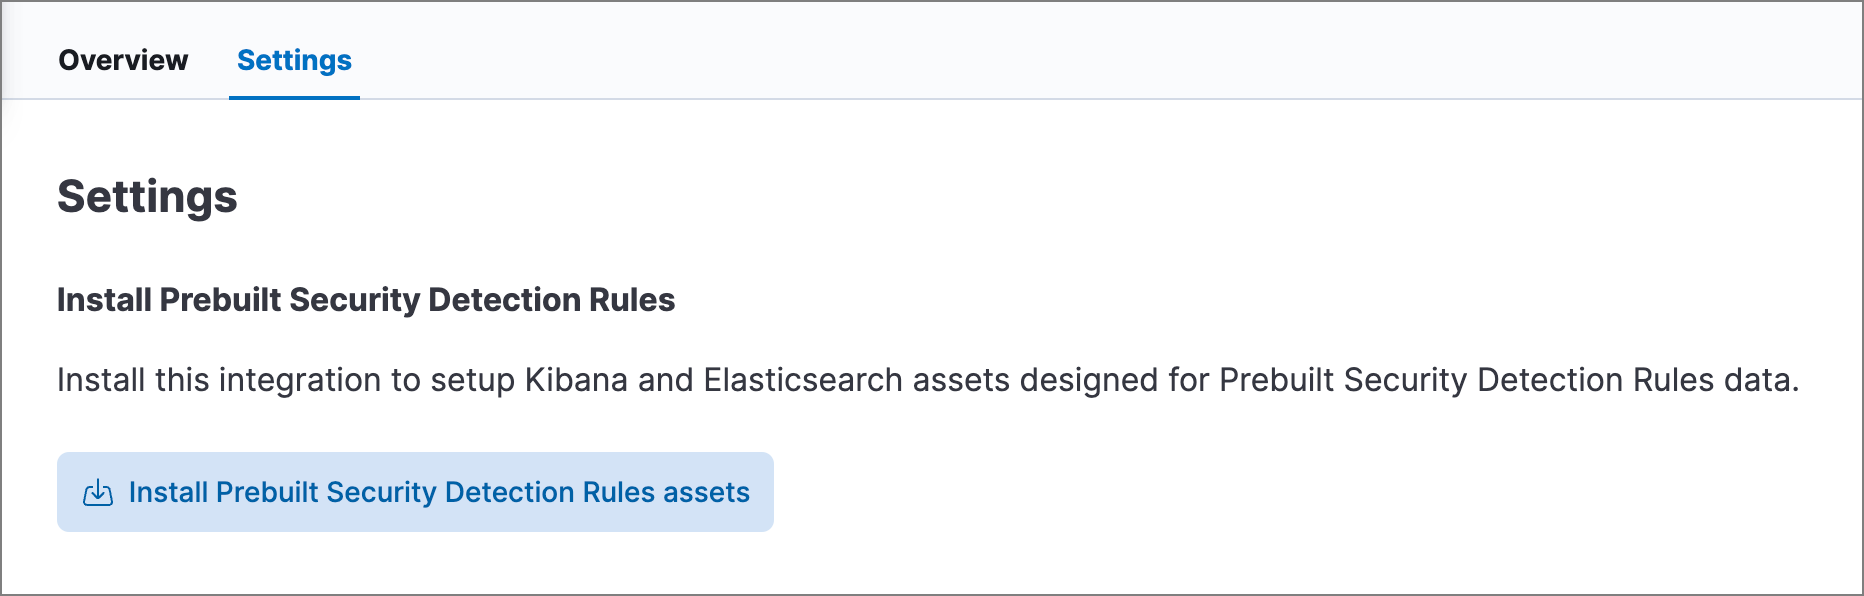
- Click Install Prebuilt Security Detection Rules assets.
-
Click Install Prebuilt Security Detection Rules to confirm the installation.

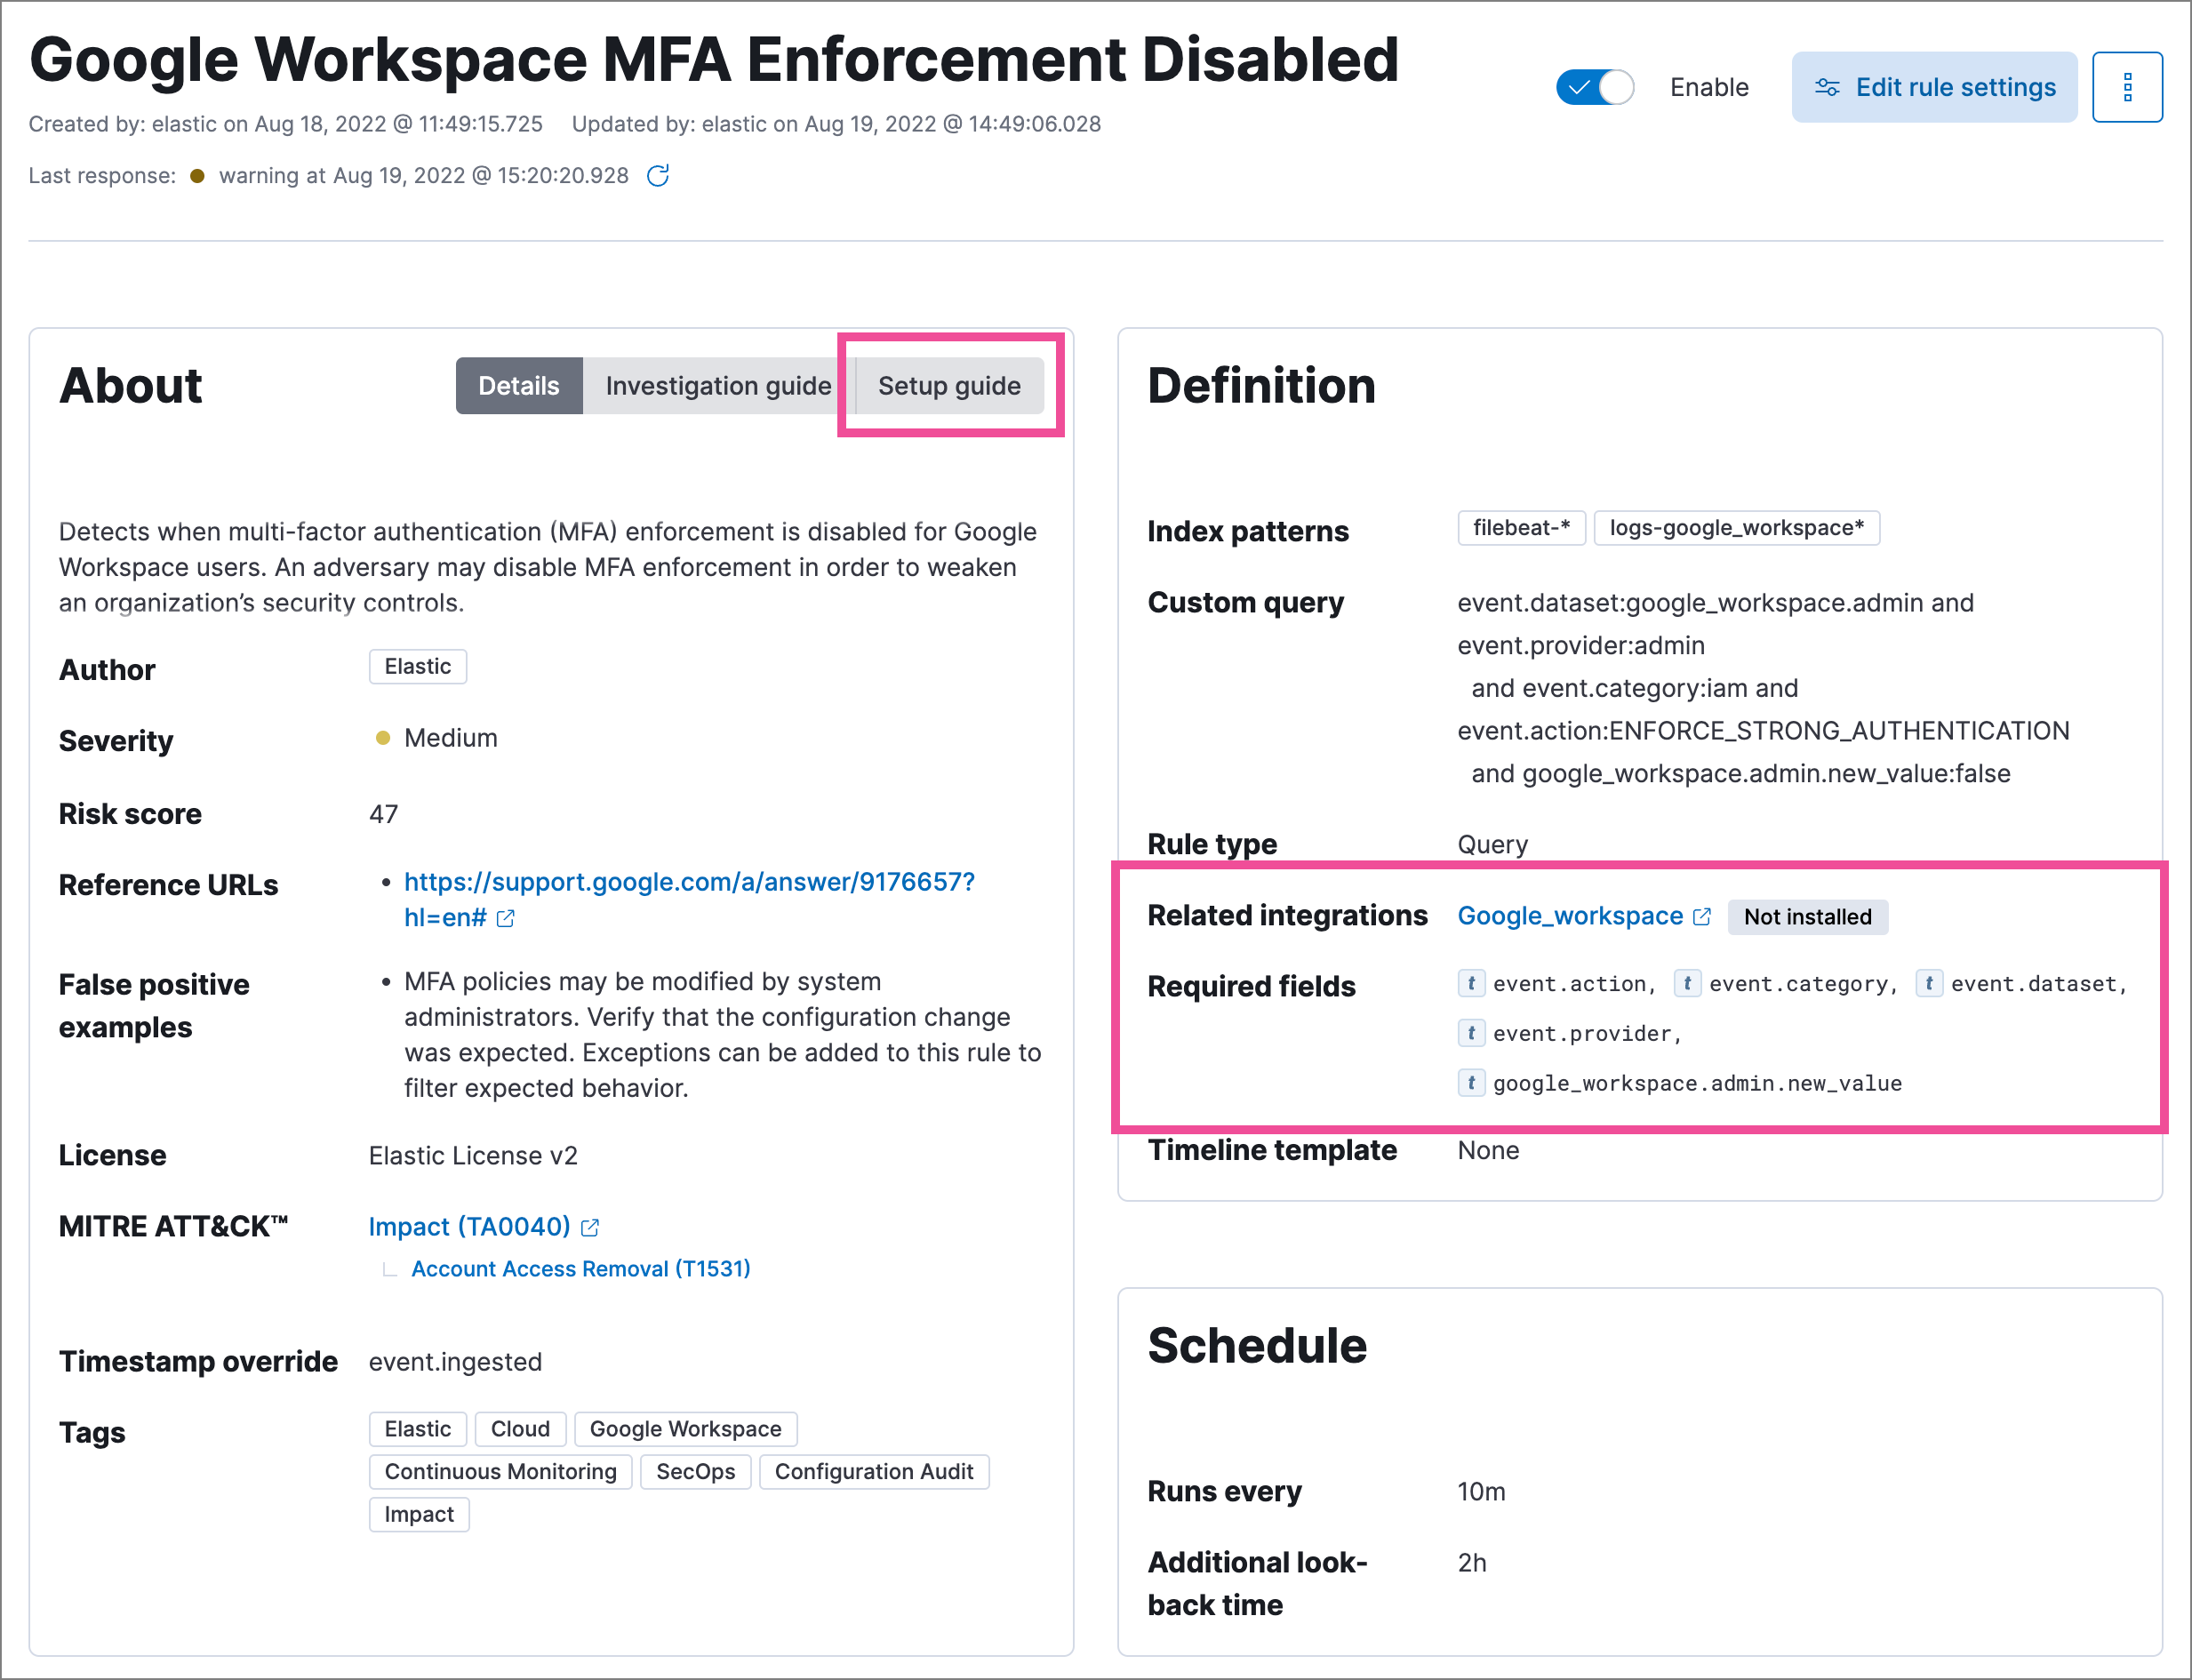
Confirm rule prerequisites
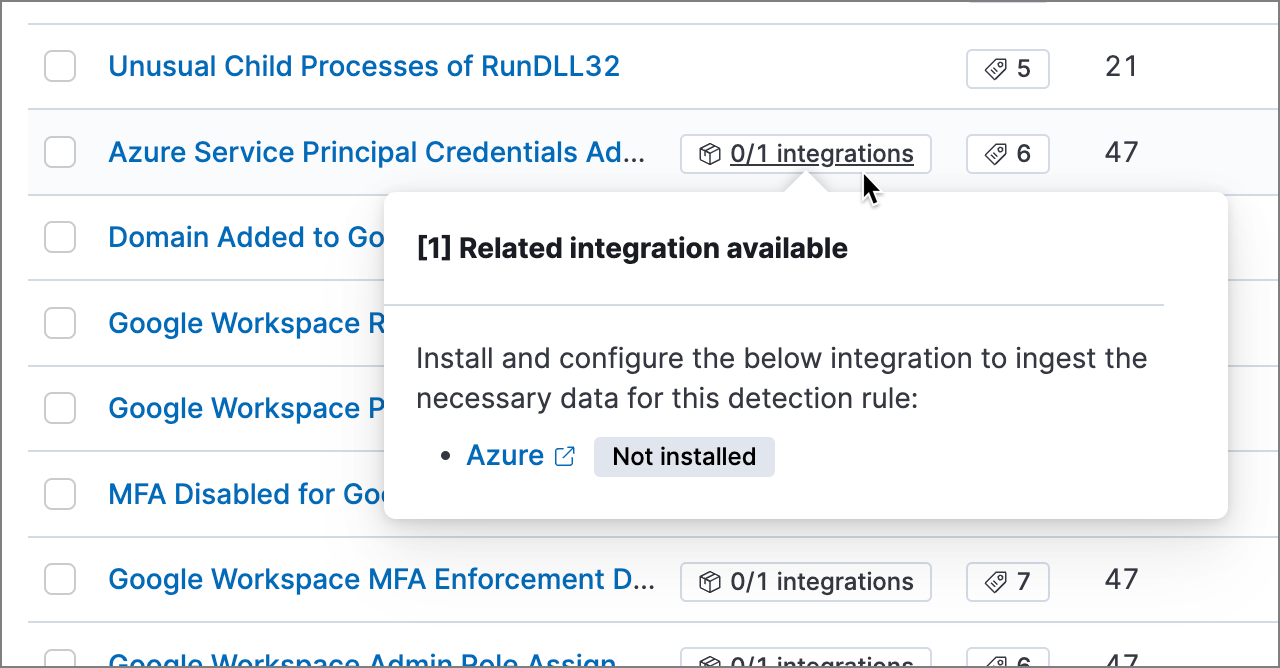
editMany Elastic prebuilt rules are designed to work with specific Elastic integrations and data fields. These prerequisites are identified in the Related integrations and Required fields fields on a rule’s details page (Manage → Rules, then click a rule’s name). Related integrations also displays each integration’s installation status and includes links for installing and configuring the listed integrations.
Additionally, the Setup guide section provides guidance on setting up the rule’s requirements.
You can also check rules' related integrations in the Rules and Rule Monitoring tables. Click the integrations badge to display the related integrations in a popup.
You can hide the integrations badge in the Rules tables. Go to Kibana → Stack Management → Advanced Settings, then turn off securitySolution:showRelatedIntegrations.
Modify existing rules settings
editYou can edit an existing rule’s settings, and can bulk edit settings for multiple rules at once.
For prebuilt Elastic rules, you can’t modify most settings. You can only edit rule actions and add exceptions.
If you try to bulk edit with both prebuilt and custom rules selected, the action will affect only the rules that can be modified.
- Go to Manage → Rules.
-
Do one of the following:
- Edit a single rule: Select the All actions menu (…) on a rule, then select Edit rule settings. The Edit rule settings view opens, where you can modify the rule’s settings.
-
Bulk edit multiple rules: Select the rules you want to edit, then select an action from the Bulk actions menu:
- Index patterns: Add or delete the index patterns used by all selected rules.
- Tags: Add or delete tags on all selected rules.
-
Add rule actions: Add notification actions on all selected rules.
The action frequency you select applies to all actions (both new and existing) on all selected rules. If you don’t want to change the frequency of existing actions, update the rules separately.
- Update rule schedules: Update the schedules and look-back times on all selected rules.
- Apply Timeline template: Apply a specified Timeline template to the selected rules. You can also choose None to remove Timeline templates from the selected rules.
- On the flyout that opens, update the settings.
- If available, select Overwrite all selected x to overwrite the settings on the rules. For example, if you’re adding tags to multiple rules, selecting Overwrite all selected rules tags removes all the rules' original tags and replaces them with the tags you specify.
- Click Save.
Manage rules
editYou can duplicate, enable, disable, and delete rules:
When duplicating a rule that has exceptions, you can choose to duplicate the rule and its exceptions or duplicate the rule only. If you choose to duplicate the rule and its exceptions, copies of the exceptions are created and added to the duplicated rule’s default rule list. In addition, if the original rule uses exceptions from a shared exception list, the duplicated rule will reference the same shared exception list.
- Go to Manage → Rules.
-
Do one of the following:
- Select the All actions menu (…) on a rule, then select an action.
- Select all the rules you want to modify, then select an action from the Bulk actions menu.
- To enable or disable a single rule, switch on the rule’s Enabled toggle.
Export and import rules
editYou can export custom detection rules to an .ndjson file, which you can then import into another Elastic Security environment.
You cannot export Elastic prebuilt rules, but you can duplicate a prebuilt rule, then export the duplicated rule.
If you try to export with both prebuilt and custom rules selected, only the custom rules are exported.
The .ndjson file also includes any actions and exception lists related to the exported rules. However, other configuration items require additional handling when exporting and importing rules:
-
Data views: For rules that use a Kibana data view as a data source, the exported file contains the associated
data_view_id, but does not include any other data view configuration. To export/import between Kibana spaces, first use the Saved Objects UI (Stack Management → Kibana → Saved Objects) to share the data view with the destination space.To import into a different Elastic Stack deployment, the destination cluster must include a data view with a matching data view ID (configured in the data view’s advanced settings). Alternatively, after importing, you can manually reconfigure the rule to use an appropriate data view in the destination system.
- Actions and connectors: Rule actions are included in the exported file, but the connectors used by the actions are not included. Use Kibana’s Saved Objects UI (Stack Management → Kibana → Saved Objects) to export and import any necessary connectors before you export and import the detection rules.
- Value lists: Any value lists used for rule exceptions are not included in rule exports or imports. Use the Import value lists UI (Manage → Rules → Import value lists) to export and import value lists separately.
To export and import detection rules:
- Go to Manage → Rules.
-
To export rules:
- In the rules table, select the rules you want to export.
- Select Bulk actions → Export, then save the exported file.
-
To import rules:
You need at least
Readprivileges for theAction and Connectorsfeature to import rules with actions. If you’re importing rules without actions,Action and Connectorsfeature privileges are not required. Refer to Enable and access detections for more information.- Click Import rules.
-
Drag and drop the file that contains the detection rules.
Imported rules must be in an
.ndjsonfile. -
(Optional) Select Overwrite existing detection rules with conflicting "rule_id" to update existing rules if they match the
rule_idvalue of any rules in the import file. Configuration data included with the rules, such as actions, is also overwritten. -
(Optional) Select Overwrite existing exception lists with conflicting "list_id" to replace existing exception lists with exception lists from the import file if they have a matching
list_idvalue. - Click Import rule.
Tutorial: Enable detection rules
editTo learn how to enable detection rules in Elastic Security, watch the following tutorial.