Website search tutorial
editWebsite search tutorial
editThis document guides you through an implementation of website search using the web crawler and Elastic App Search.
For a quicker introduction, see Website search quickstart.
This guide focuses on a concrete use case: building a search experience for a website. For this example, we chose the Elastic blog at https://www.elastic.co/blog.
There are many ways to implement website search, but it usually involves the following steps:
- Get your website content into Elasticsearch and keep it up to date.
- Integrate search into your website UI.
- Improve your search results and continually evaluate the performance of your search results.
In this guide, we’ll accomplish the above using the following tools:
- Index content into Elasticsearch: We will use the web crawler UI to crawl the website, ingest webpage content, to be stored as documents in an Elasticsearch index.
- Search content: We will create an App Search engine based on the Elasticsearch index. This will allow us to use App Search’s out-of-the-box capabilities to generate a Search UI.
- Optimize search results We will use relevance tuning to optimize the search results.
- Analytics and insights: We will use App Search analytics to refine and improve the search experience with synonyms and curations.
Follow the instructions to crawl the Elastic blog. Once you’re comfortable with the steps involved, use this guide as a blueprint for your own website search use cases.
Table of contents:
Prerequisites
editTo use Enterprise Search features you need a subscription, a deployment, and a user. You get all three when you start an Elastic Cloud trial.
Create an Elastic Cloud deployment
editThis step assumes you are a new Elastic Cloud user. Skip this step if your team already has an Elastic Cloud deployment.
Start by signing up for a free Elastic Cloud trial. After creating an account, you’ll have an active subscription, and you’ll be prompted to create your first deployment.
Follow the steps to Create a new deployment. For more details, refer to Create a deployment in the Elastic Cloud documentation.
The Elastic web crawler was introduced in Enterprise Search 8.4.0, so be sure to use version 8.4.0 or later. The web crawler is not available at all Elastic subscription levels, but free trial users have access to all features.
Ingestion mechanism: the web crawler
editWe will use the web crawler UI to extract and transform webpage content into Elasticsearch documents.
Create an Elasticsearch index
editThe crawler will store the indexed content in a search-optimized Elasticsearch index.
When you create a new deployment, you will be taken to a landing page with a number of options. Select Search my data to be taken directly to the Search overview page, where you can create an Elasticsearch index. Alternatively, in the main menu navigate to Search → Content → Indices.
Follow these steps in Kibana to create your index:
- Select Create an Elasticsearch index.
- Choose Use the web crawler as your ingestion method.
-
Name your new index, for example
elastic-blog. - Choose your document language. We’ll use English in this example.
You are now ready to add domains.
When you create a search-optimized Elasticsearch index using a Search ingestion method the index name is automatically prefixed with search-.
In this example your index will be named:search-elastic-blog
Add domain and entry points
editWe now need to add our domain, which will be validated by the crawler. Follow these steps to add your domain and entry points:
-
When you create your index you will be automatically navigated to Manage domains for that index.
To navigate there manually go to Search > Content > Indices > elastic-blog> Manage domains.
-
Enter the domain to be crawled:
https://www.elastic.co. The web crawler will not crawl any webpages outside of the defined domains. - Review any warnings flagged by the domain validation process. For this exercise, you can ignore any indexing restrictions that are reported.
- Add the domain.
-
Under Entry points, select Edit and append
/blogto the domain URL:https://www.elastic.co/blog/.
The crawler now knows where to start crawling.
Add crawl rules
editUse crawl rules to restrict which domain paths get crawled. We’ll set crawl rules to disallow any pages that aren’t part of the blog.
For this example we want to focus on blog post titles that contain the term elasticsearch.
We don’t need all pages under https://www.elastic.co/blog, so we’ll also disallow any path that begins with /blog/author and /blog/category.
Add the following crawl rules:
-
Policy
Disallow, ruleRegex, path pattern.* -
Policy
Allow, ruleBegins with, path pattern/blog/ -
Policy
Allow, ruleContains, path pattern/blog/*elasticsearch -
Policy
Disallow, ruleBegins with, path pattern/blog/author -
Policy
Disallow, ruleBegins with, path pattern/blog/category
Here’s what the crawl rules should look like in the Kibana UI:
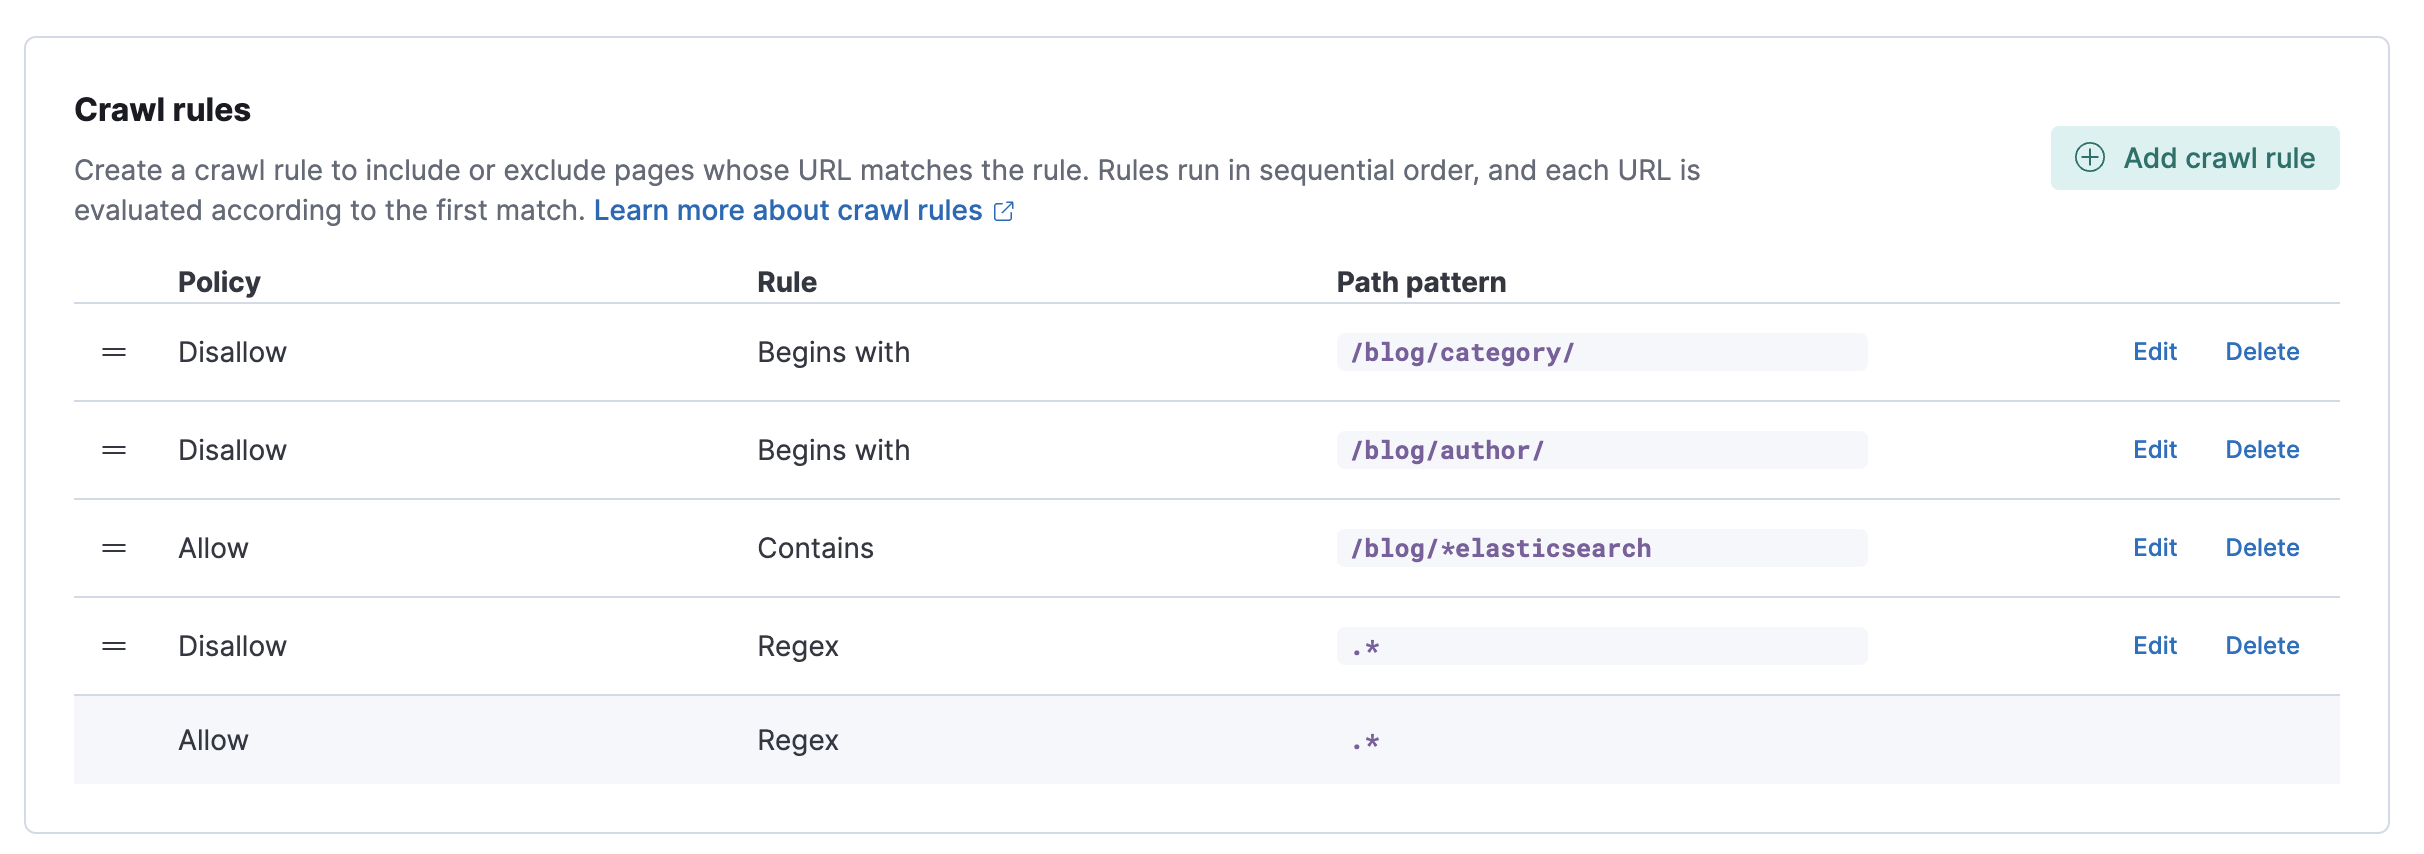
Rules are evaluated in sequential order. Therefore, order matters. You can drag and drop the rows to adjust as needed. Don’t worry about the final rule in the list. This default rule simply allows all pages in the domain to be searched.
We’re ready to start crawling.
Launch and monitor crawl
editIt’s time to launch your crawl. This should take around 8 minutes.
- Select Start a crawl > Crawl all domains on this engine.
- Browse the Documents tab for your index to check that pages are being indexed. Each record includes a document’s unique ID, a list of indexed fields, and the field contents.
- Next, from the Kibana menu, go to Observability > Logs to monitor the web crawling activity as a live stream.
-
Search for
indexed. You should see entries for pages in the/blog/directory that were successfully crawled and ingested into your deployment.For example:
Indexed the document into Elasticsearch with doc_id=622827583d8203857b45e77b -
Search for
denied. An entry appears for each page that was skipped, and the log message indicates the crawl rule by which the page was excluded. The bulk of these entries will look like this:Denied by crawl rule: domain=https://www.elastic.co policy=deny rule=regex pattern=.*These log entries help you fine tune your crawling rules, to only include relevant website content in your search engine experience.
It may take a few test crawls to get things exactly right. If a crawl finishes very quickly, without indexing any documents, your crawl rules are too restrictive. Verify your domains and entry points, and check that crawl rules are ordered correctly.
Build your search experience
editWhen the crawl has successfully completed, and we’re happy that the crawler has indexed the content we want, it’s time to build our search experience.
We will create an App Search engine from our elastic-blog index.
This will allow us to quickly generate, monitor, and refine a search experience.
We’ll then add some relevance tuning to optimize search results for our blog content.
Create an App Search engine
editFirst, we need to create an App Search engine. To create an engine, choose your search engine type and configure it:
- Open Search > App Search > Engines.
- Select Create engine.
- Select Elasticsearch index-based.
- Name your engine.
-
Select the Elasticsearch index you’d like to use.
This will be our
search-elastic-blogindex.
Add relevance tuning
editApp Search allows you to add relevance tuning to your engine. This ensures users get the best possible results from their search queries.
- Open the Relevance Tuning page.
- In the Preview pane, type in a search term, for example "security".
-
Check the search results.
If you expect that users will find the results with the word
securityin the title field more important, then consider adjusting the weight of that field. - In Manage fields, find the title and open the collapsed section.
- Use the slider to adjust the weight level while watching the search results. Notice that as the weight of title is increased the results change.
- Use the Save and Restore buttons at the top of the Relevance Tuning page to save or undo your changes.
Configure your search experience
editThe query results are optimized, so it’s now time to set up our search experience.
Search UI is a React library maintained by Elastic that allows you to quickly implement search experiences. We’ll use App Search’s built-in Search UI page to bootstrap a Search UI based on our engine in a few clicks.
You can see a live preview of your search experience within App Search. You can also download the generated source code, as a blueprint for your own development.
To set up the search experience:
- Open the Search UI page.
- In the Filter fields menu, select headings.
- In the Sort fields menu, select title.
- Leave all other fields at their defaults and select Generate search experience. This will open a complete search UI based on your indexed documents.
-
Test out a few queries, and note some of the powerful search features, all of which you can customize for your users:
- Search results can be sorted by titles or by any other field.
- Results can be filtered into configurable buckets.
- Typeahead query suggestions help guide users to the most effective search terms.
- Queries with truncated or misspelled terms still produce highly relevant results.
You should now have a fully customizable search engine experience. Try a few queries to test it out.
You might want to download the source code and run your search UI locally. To do so, follow the instructions in the optional next step.
(Optional) Download and run Search UI package locally
editYou’ll need to have node.js and npm installed for this optional step.
Follow these steps to download and run the search UI locally:
- On the generated search experience page, select Download.
-
Save and then open up the package.
The
src/config/engine.jsonfile contains all of the preset configuration settings, and setting options are listed in the README file. -
Open a terminal window and
cdinto the package directory. -
Run
npm installto set everything up. -
Run
npm startto launch the application.
If you run into any problems, refer to the Search UI or App Search Troubleshooting documentation.
Once you’re comfortable running your Search UI locally, you can think about deploying to production environments.
Improve search results using analytics
editWhen people start using your search engine, you can use analytics to refine and improve their experience. This is actionable data.
Open App Search > Engines > your_engine_name > Analytics to see how users are interacting with your search experience. You’ll see a cumulative table and graph showing:
- Total queries: what people are searching for the most.
- Queries with no results: users are looking for something on your site and not finding it.
- Total clicks: what people are clicking on the most.
Use analytics to continually optimize search results to match user needs.
Synonyms and curations
editBased on these analytics, you may choose to refine your relevance tuning, or add synonym sets and curations to your search engine.
Synonyms allow you to group queries that have the same meaning in your dataset. They are most useful when you know the precise terms users are searching for.
Example:
You can see from the analytics that the query golang is not returning results.
You understand that these users are interested in blogs related to the Go programming language.
Create a synonym set that relates the terms go and golang.
This ensures that the term golang produces relevant results, such as blogposts about the Elasticsearch Go client.
To create a synonym set follow these steps:
- Navigate to App Search > Engines > your_engine_name > Synonyms.
- Select Create a Synonym Set.
- Add your synonyms.
- Select Add value to add as many synonyms as you need.
To provide even more precise and curated results, use curations.
Curations allow you to customize search results for specific queries. Use promoted documents to guarantee certain documents match a query and receive the highest relevance scores.
Example:
People might be using the generic query "latest" when searching the blog content. However, this query is vague and matches too many documents. You can tell from the analytics that users are not clicking on many pages when they see the results for this query. Use a curation to ensure that the blog post about the latest Elastic release is returned as the first result.
To add a curation for the term latest follow these steps:
- Navigate to App Search > Engines > your_engine_name > Curations.
- Select Create a curation.
-
Enter the query you want to curate, in this case the term
latest. - The UI will display the top organic results for that query. Star documents from the organic results, or select Add a result manually.
Curations also allow you to hide results you’d prefer users were not directed to. In this example, you might want to hide blog posts that discuss an older version of the Elastic stack, which your team doesn’t use.
Summary and next steps
editIf you followed along with this guide, you’ve learned how to:
- Use the Elastic web crawler to index webpage content into an Elasticsearch index
- Create an App Search engine based on that index
- Configure a refined Search UI experience to search over the content
- Use analytics to understand how users interact with the search results
- Use synonyms and curations to improve the search experience
Learn more:
- The web crawler documentation contains more details about this tool, such as advanced crawl management and troubleshooting techniques.
- The Search UI documentation has detailed tutorials and use case driven docs, such as how to build an ecommerce search experience.
- What is Enterprise Search? provides an overview of all Enterprise Search tools and their compatability. Refer to this if you’re exploring other use cases.