Synthetics Recorder
editSynthetics Recorder
editThis functionality is in beta and is subject to change. The design and code is less mature than official GA features and is being provided as-is with no warranties. Beta features are not subject to the support SLA of official GA features.
As with any script recording technology, the Elastic Synthetics Recorder should be used as a tool to help create the main structure of the script. For simpler sites, you may be able to use the Synthetics Recorder’s output directly to create a synthetic monitor, but for more complex and dynamic sites, or to limit flakiness, you’ll likely need to edit its output before using it to create a monitor.
You can use the Synthetics Recorder to write a synthetic test by interacting with a web page and exporting journey code that reflects all the actions you took.
Set up
editDownload and install the Elastic Synthetics Recorder from the GitHub repository’s release page.
Record a journey
editTo record a journey:
- Enter a starting URL in the search box. This URL will be the starting point of the journey script the recorder will create.
- Click Start or press Enter on your keyboard. This will launch a Chromium window open to the page you specified and start recording.
- Start interacting with the browser. This can include clicking on text, navigation, focusing on inputs like buttons and text fields, and more.
- (Optional) You can click Pause to temporarily stop recording actions while you continue to interact with the browser. Click again to start recording actions again. Note: It’s especially important to test the journey if you paused recording at any point.
- When you’re done interacting with the browser window, click Stop or close the browser to stop recording.
Edit a journey
editOnce you’ve started recording, you can use the Synthetics Recorder UI to edit steps and individual actions before generating the journey code. You can also edit the journey after you’ve stopped recording.
Name steps
editNaming steps can help make the resulting journey code easier to understand. If you provide a step name, the name will be used in both the UI and the resulting code. If you don’t name steps, the UI will show "Step 1", "Step 2", and so on, and the resulting code will use the first action in the step as the step text.
To edit a step name:
- Hover over the current step name and click the pencil icon that appears.
- Edit the text in the text box.
- Click Return or Enter on your keyboard to save the updated name.
Split into multiple steps
editSteps represent groups of actions that should be completed in a specific order. Breaking a journey into steps can make it easier to read the resulting code. It can also make it easier to interpret results in the Uptime app since each step is displayed individually in the Uptime app along with screenshots for convenient debugging and error tracking.
By default, the Synthetics Recorder will group all actions in a single step, but you can break actions into any number of steps.
To add a step:
- Click the plus icon between two actions to create a new step.
- (Optional) Consider naming the step.
Use the trash can icon to delete the step divider, adding the actions from the deleted step into the previous step.
Edit or delete recorded actions
editYou can fine-tune a journey by editing actions that were generated by the recorder. You can’t change the type of command (for example, "click" or "navigate"), but you can change the value that is passed to the command.
To edit an action:
- Hover over an action and click the pencil icon that appears.
- Edit the value as needed.
- Click Save.
To delete an action:
- Hover over the action you want to delete and click the three dots for more options.
- Click Delete action.
If you changed or deleted any actions to ensure the journey still works, it’s especially important to test the journey.
Add assertions
editAssertions can play an important role in effective synthetic journeys by making determinations about the state of the page you are testing. This can include checking if an element is visible or checking the contents of a text field. You can’t generate an assertion just from interacting with the browser window. Instead, you can add assertions between generated actions.
To add an assertion:
- Find the generated action that should be done right before you want to assert a condition.
- Hover over that action and click the three dots for more options.
- Click Add assertion. This will add a new "assert" action in the UI.
- Provide the type of assertion, selector, and value.
- Click Save.
If you added any assertions after you’ve finished recording to ensure the journey still works, it’s especially important to test the journey.
Test the journey
editAt any point during or after the recording process concludes, you can test your script.
When you click the Test button, Elastic Synthetics will run the journey. As the test runs, the recorder will display results on a per-step basis. If there are any errors that prevent the journey from running, the recorder will display the relevant error message to help you debug.
If you paused recording, updated actions, or added assertions manually in the recorder it is especially important that you test the journey to verify that the actions work in sequence.
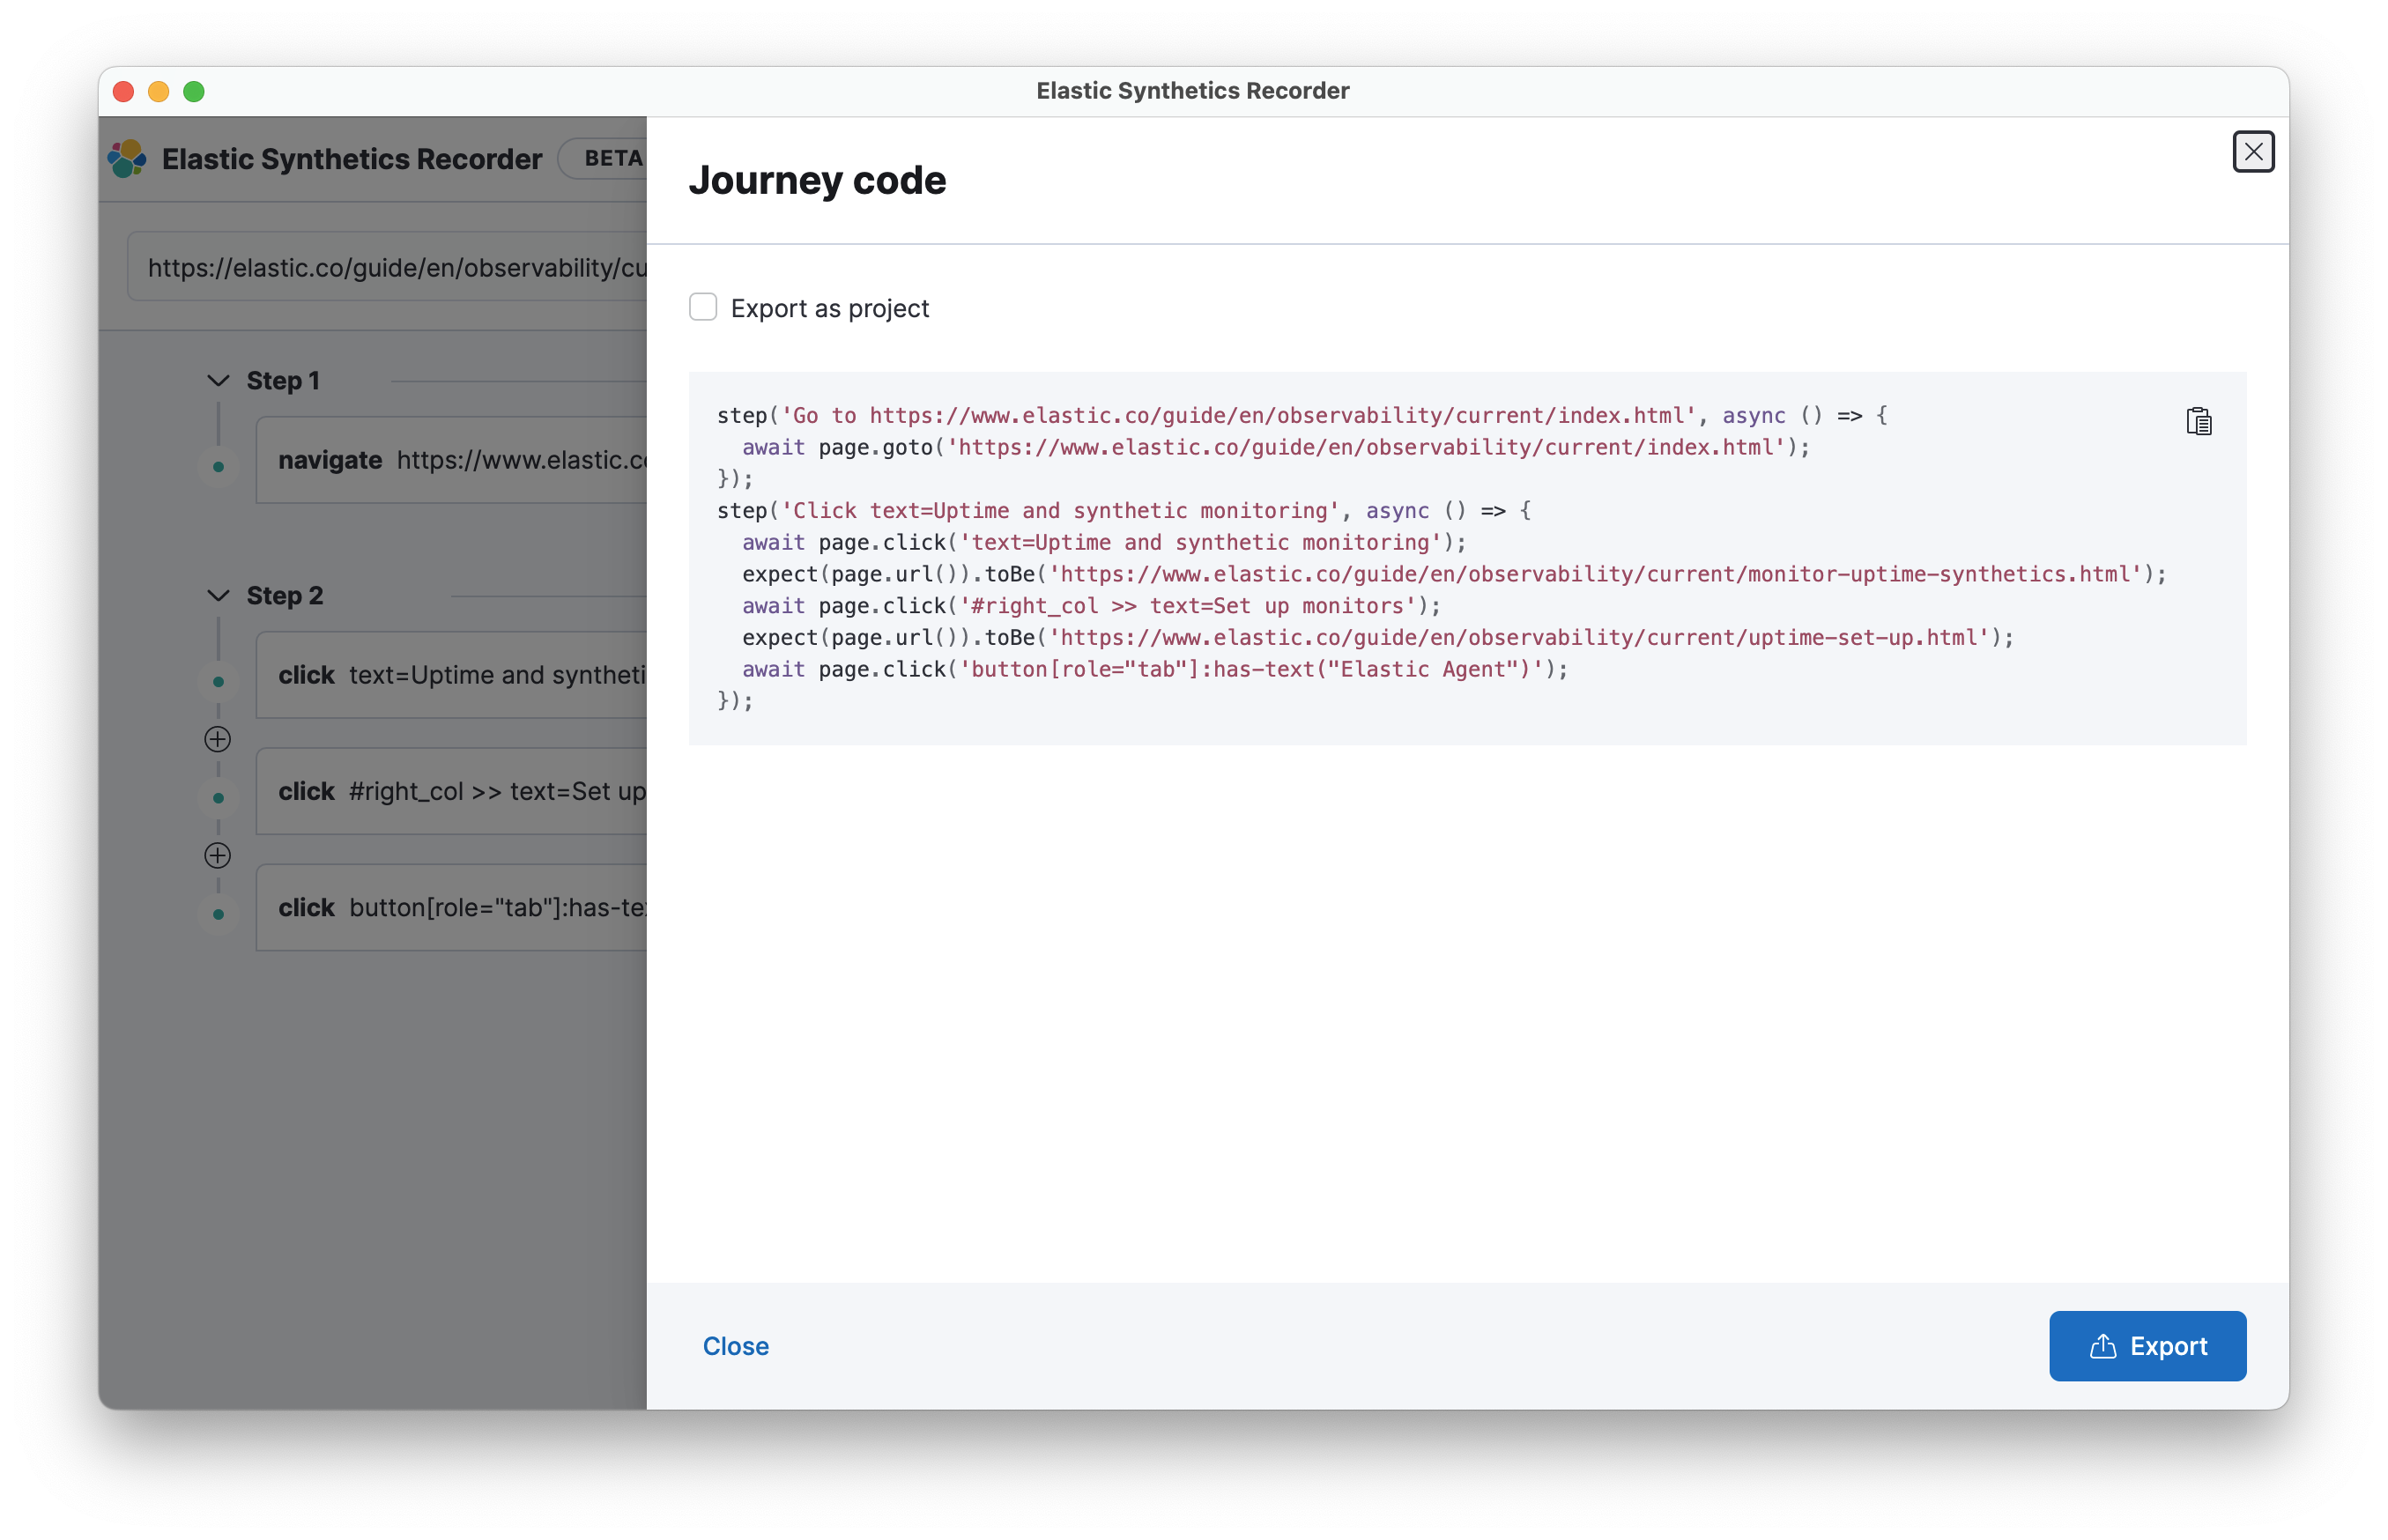
Export
editWhen you are satisfied with journey you’ve created, you can export it from the recorder.
Click Export to view the final journey code. From there you can use the code by:
- Copy and pasting code containing all steps into a new or existing synthetics project or an inline monitor.
- Click Export to save a JavaScript file containing all steps.
You can also check Export as project and either copy and paste or Export
to get the full journey code including journey and imports for all dependencies.
Next steps
editAfter you’ve refined your journey and exported it, use it to create a monitor.