Archiving your event stream with Logstash
Logstash is a swiss army knife for event ingestion and transformation. You can configure it to stream and transform multiple data sources into Elasticsearch. You can then visualize this data easily with Kibana.
Logstash can also send to more outputs than just Elasticsearch -- we support over 70 outputs. In this post, we will be talking about the S3 output which allows you to store your events to an S3 bucket for long term archival or for batch processing at a later time. Logstash supports multiple outputs; so you can send data to Elasticsearch as well as archive it to S3. Using conditional logic, you can even route certain streams of data you want sent to S3. If you want more control on the created S3 structure you can use event data and the field reference syntax to dynamic create the S3 prefixes. We will go in more details in the following examples.
A "Hello World" S3 archival
Before we dive into a complex example, a simple way to archive your data to S3. Just define a S3 block in the output section of your configuration, and all your data will be archived.
input {
    beats {
        port => 5544
    }
}
output {
    s3 {
        access_key_id => "SECRET"
        secret_access_key => "SECRET"
        bucket => "mybucket"
        codec => json_lines
    }
    elasticsearch { }
}
The codec option controls how your data will be serialized in the S3 item.
Controlling data archived to S3
Maybe you only need to send some of your data to S3. You can use our conditional syntax like you do in the filter section to select a subset of your events. You can also use this approach to send events to different buckets for different events. This could mean you have 2 separate S3 output blocks differing in bucket names.
input {
    beats {
        port => 5544
        tags => ["edge_firewall"]
    }
}
output {
    elasticsearch { }
    # Archive only some events to your s3bucket
    if "edge_firewall" in [tags] {
        s3 {
            access_key_id => "SECRET"
            secret_access_key => "SECRET"
            bucket => "edge_firewall"
            codec => json_lines
        }
    }
}
Here, only events tagged edge_firewall will be routed to S3.
Dynamically choosing prefixes
One of the popular feature requests in the S3 output was the ability to use field references or values in the event to control the prefix paths for the uploaded documents. This is great for a multi-tenant deployment where you want to separate paths for each tenant on S3. To be able to support that feature we had to do a complete rewrite of the plugin. Other recent changes include a move to an asynchronous upload model and be able to use the latest version of the AWS-SDK.
In the example below, we see how to dynamically choose your S3 destination. Beats by default sends the shipper name and the hostname, so we can use these event values to create the prefixes on your s3 bucket.
input {
beats {
port => 5044
codec => json
}
}
output {
s3 {
access_key_id => "SECRET"
secret_access_key => "SECRET"
bucket => "mybucket"
codec => json_lines
prefix => "/%{[beat][name]}/%{[beat][hostname]}/%{customerID}"
}
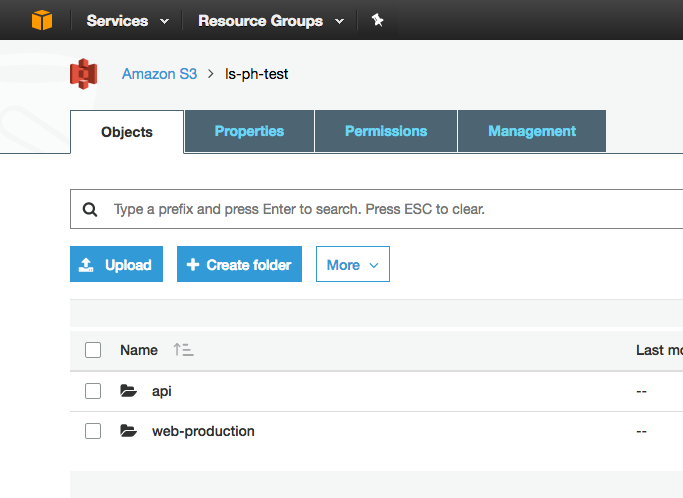
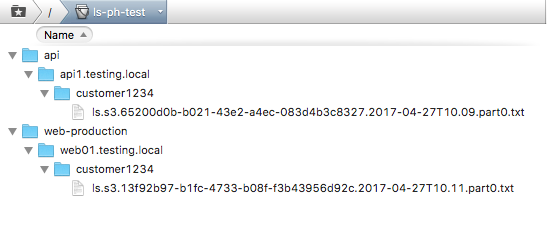
}The beats inputs will receive events with different values for fields name, hostname, customerID. These fields can now be used in the prefix option to configure the created path. For minimizing the collisions on the remote server we only allow you to set the prefix dynamically and we will generate the base name of the file for you. Assuming the events will come from multiple clients, the previous configuration will generate a structure similar to this on your S3 bucket:
If you expand the directory tree, it will look similar to the one shown below -- each **field reference** is a directory.
Under the hood
When you use S3 output, data is buffered to disk locally before uploading to S3. Each unique dynamic prefix will generate a file on disk with the matching events, and this file will be periodically and asynchronously uploaded to S3. This is controlled by the rotation_strategy option. By default, it will look for the size and the creation time of the file. These values can be changed by using the time_size and the size_file option.
Each file on disk will respect the rotation options independently of other files, so make sure that these options are configured correctly in relation to your event rate. The files might not be available right away in your bucket if the size or the creation date did not trigger a rotation or if the traffic is low for a specific dynamic prefix.
Conclusion
As you’ve seen in this post, archiving data using Logstash is super easy! With the recent changes, a few more options were added to give you better control the performance and flexibility. I invite you to review the documentation and give S3 output a try to simplify your archiving needs!