New to Elasticsearch? Join our getting started with Elasticsearch webinar. You can also start a free cloud trial or try Elastic on your machine now.
There's a good chance that your enterprise is drowning in internal data.
You've got your issue-tracking, your note-taking, your meeting transcripts, your wiki pages, your video recordings, your chats and IMs and DMs. And don't forget the emails!
It's no wonder that so many enterprises are trying to create workplace search experiences - giving their employees a centralized, one-stop-shop for searching for internal information.
With Elastic's catalog of connectors, this is relatively easy to do. But after you get all your data indexed and ready to be searched, how do you ensure that it is secured? After all, Tess (from Engineering) shouldn't be looking at Bob's (from HR) notes on performance reviews. How can you make sure that each separate user who comes to this unified search bar does gets their own unique view into only the data that they're authorized to view?
Enter, Document Level Security (DLS).
Understanding document level security (DLS) in Elasticsearch
Folks who've followed Elasticsearch for a while may already be aware that DLS has been an Elasticsearch feature for quite a long time. It's part of the larger theme of user authorization, and is really quite simple. You embed metadata in Elasticsearch documents, and then you craft an Elasticsearch query, filtering based on that document metadata, that describes the user's authorization. That query is used to create an Elasticsearch Role.
At query time, when the search user authenticates, their role(s) (if any) is identified, and the embedded query filter (if any) is applied to their searches.
Let's look at a simplistic example. Say we have two documents:
A query that would fetch only my data would be:
That query can be embedded into a Role, like:
So if my user is assigned the role my_role, if I just do
I will only see document 1, but not document 2.
While this example is simple in theory, it has a relatively large number of moving pieces.
- you must ensure that the documents contain the relevant metadata (
"my-data": truevs"my-data": false) - you must trust that the metadata on those documents is accurate
- you must create a Role for every search user with a finely crafted Elasticsearch query
- you must ensure that every role you create correctly maps to the right user at query time
- you mush ensure that all of the above stays up to date.
That last one is particularly difficult. When people in your enterprise join, leave, switch teams, or get promoted, that requires changes - potentially to both your (meta)data AND your Roles. And if you add in data sources that support sharing or access editing, you're definitely needing to make sure that your (meta)data stays up-to-date.
DLS with Elastic connectors
Connector document level security builds off of the Elasticsearch DLS primitives. For many connectors, this includes syncing the relevant metadata and Role Descriptors to support DLS. This results in the documents in your content index automatically containing metadata (usually in a _allow_access_control field) to describe the people/groups who are authorized to search for this document, as well as documents in a special .search-acl-filter-<index-name> index that contain the Role Descriptor JSON necessary to build a concrete Role or an API key for a given search user.
You can find which connectors have DLS available here. For this blog, we're going to reference an example application which utilizes the Sharepoint Online connector. This was the first connector we enabled DLS on, but the example could be easily adapted to work with any DLS-enabled connector.
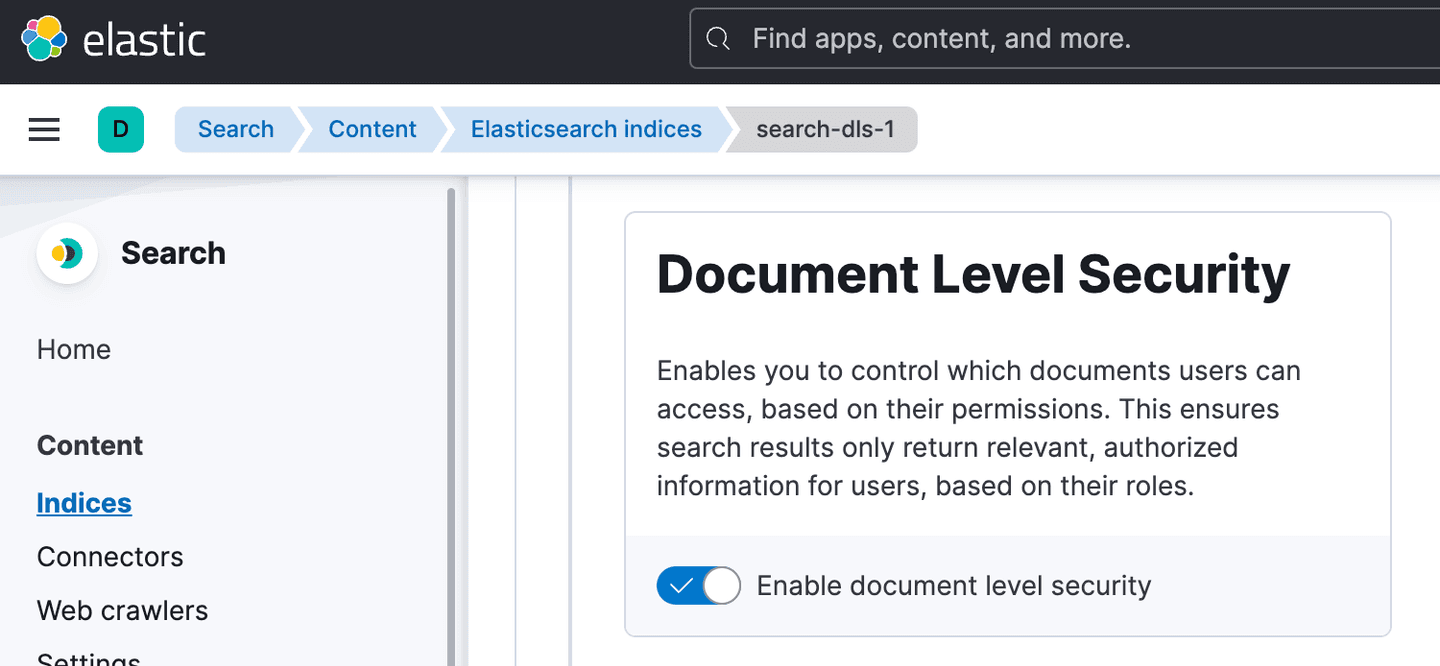
If your connector is eligible, and you have a Platinum+ Elasticsearch license, you can enable DLS through a toggle on the connector configuration page.
From there, it's just a matter of running a Full sync and an Access Control sync, and Elasticsearch will have all the data it needs.
DLS implementation example
And then what?
Once Elasticsearch has Role Descriptors and document data with sufficient metadata for those role filters, you're ready to build a secure search experience.
We've built an example knowledge search app that we'll use for this blog, and you're welcome to go take a look at its source code. However, we do want to stress that this is an example only - it is not ready to be run in production on its own. Please exercise good judgement and do not run code that you have not read or do not understand.
This application has a pretty simple architecture.
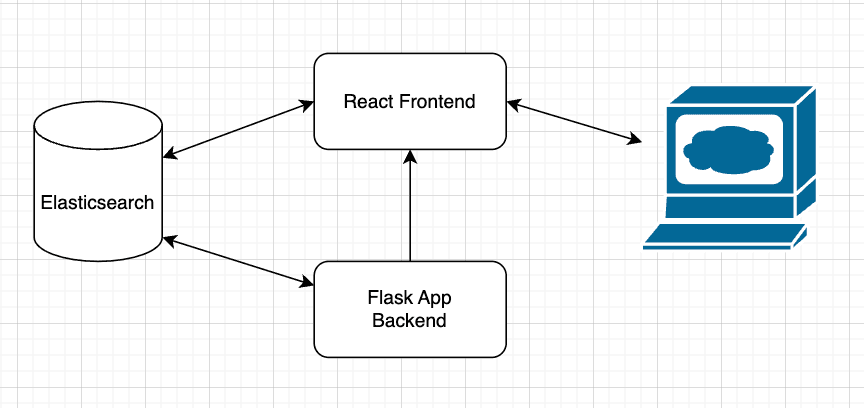
It is composed of a Flask backend and a React frontend. The backend is configured with environment variables to establish a connection with Elasticsearch.
Using this connection, the backend provides three endpoints:
GET /api/personaThis endpoint lists the identifiers for the "identities" or "personas" that the connector found during the Access Control sync. The frontend uses this list to populate a dropdown of personas so to demonstrate how search results change depending on the selected persona.GET /api/indicesThis endpoint lists which indices have been included in your Search Application. The frontend uses this list to allow you to choose which ones to search against.GET /api/api_key?persona=<persona>This endpoint creates and returns an Elasticsearch API key based off of a selected persona. In a production system,personawouldn't be a request argument, but would be inferred from the authentication credentials. This API key is then used by the frontend to issue search requests to Elasticsearch.
Caveats
As stated above, this example should not be used in production. Gaps include:
- It does not implement authentication. A production-ready app would need a way for users to authenticate, and have their identities verified, rather than selecting a user from a dropdown.
- It does not utilze SSL/TLS. The backend currently transmits Elasticsearch API Keys to the frontend over HTTP, not HTTPS.
- The frontend issues
/_searchrequests directly to Elasticsearch. Depending on the production use case, you may not want to expose Elasticsearch to your end user like this. Instead, it may be advisable to issue requests from the frontend to your backend (again, with authentication implemented), and have the backend translate those requests to Elasticsearch queries.
Source Code
Below we link to the critical pieces of code that are necessary to implement search with DLS.
Creating the authenticated user's role descriptor
You may notice that the query template in this role descriptor is significantly more complex than the simple example provided earlier in this blog. This query does several things:
- It uses a query template, instead of an explicit query. This makes it easier when reading to separate a long list of permissions from the query syntax.
- It uses a
boolquery. This allows us to combine several logical checks. - It grants access to any documents that do not contain the
_allow_access_controlfield - It grants access to documents where the
_allow_access_controlfield contains a value found in this user'spermissions
Creating an API Key from that Role Descriptor
Searching with the API Key
Related Content
The hash() Elasticsearch won't name and the 12 bytes that prove it's Murmur3
Elasticsearch's routing formula uses MurmurHash3, but the docs never say so. This post names the function, walks through the full shard calculation, and shows you how to reproduce it externally.
May 12, 2026
Elasticsearch query logs: One coordinator-level line per query for ES|QL, DSL, SQL, and EQL
Easily understand query impact on cluster performance with Elasticsearch query logs. One coordinator-level line records ES|QL, DSL, SQL, and EQL per request and provides full query text, tracing, optional user context, and CCS hints
April 6, 2026
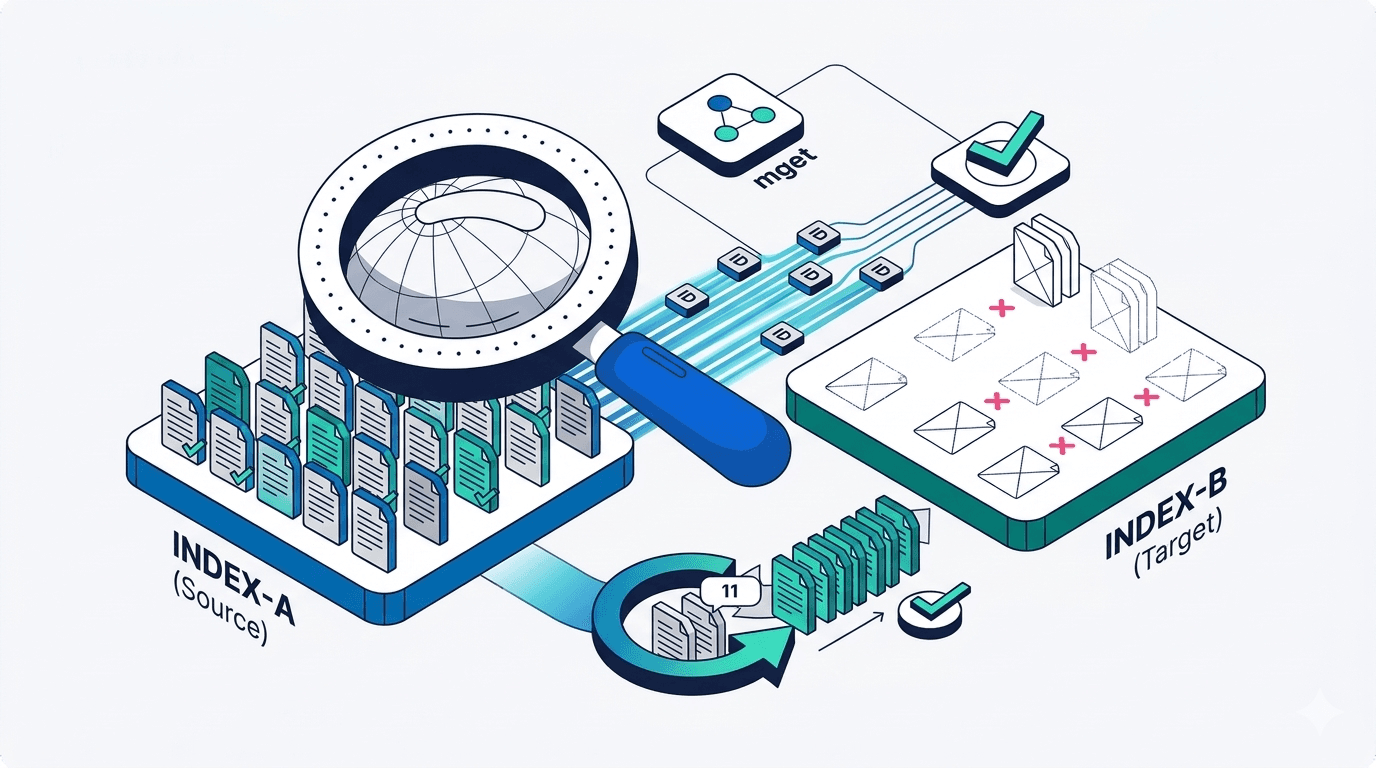
How to compare two Elasticsearch indices and find missing documents
Exploring approaches for comparing two Elasticsearch indices and finding missing documents.

Testing Elasticsearch. It just got simpler.
Explaining how Elasticsearch integration tests have become simpler thanks to improvements in Elasticsearch 9.x, the modern Java client, and Testcontainers 2.x.

December 19, 2025
Elasticsearch Serverless pricing demystified: VCUs and ECUs explained
Learn how Elasticsearch Serverless pricing works for Elastic’s fully-managed deployment offering. We explain VCUs (Search, Ingest, ML) and ECUs, detailing how consumption is based on actual allocated resources, workload complexity, and Search Power.