User Management and Security
editUser Management and Security
edit"How do I setup and manage self managed Workplace Search security, users, and access roles?"
Workplace Search offers three robust user management modes that are directly backed by the Elastic Stack Security features:
- Standard Mode: With the Standard mode, users are managed by Workplace Search. Using this mode maintains user management within the Workplace Search experience. Users are invited and managed by an administrator via the Workplace Search administrative dashboard.
- Elasticsearch Native Realm: With the Elasticsearch Native Realm, users are managed at the Elasticsearch layer. If your cluster is already configured to manage users (and their respective role mappings), this may be a straightforward way to roll out user management for your organization. Whether you’re using Kibana or automating user creation via Elasticsearch APIs, you can configure Workplace Search to inherit user attributes and rely on Role Mapping to tie existing roles to Workplace Search users and associated permissions.
- Elasticsearch SAML: With Elasticsearch SAML, you may delegate user management to third-party authentication providers and identity management platforms like Auth0 or Okta. In other words, Workplace Search inherits SAML settings and configuration from Elasticsearch itself. Role Mapping provides an interface to associate SAML-governed roles with Workplace Search users and permissions.
Standard Mode
editStandard mode requires configuration for both Elasticsearch and Workplace Search. It is the default user management and security mode.
Within the target Elasticsearch directory, open up the config/elasticsearch.yml file and enable security features:
xpack.security.enabled: true
Next, we must set up a password so that Workplace Search can securely connect to Elasticsearch. Elasticsearch provides a password setup utility. Two options are available:
-
auto- Elasticsearch generates passwords automatically and prints them to the console. -
interactive- Use to manually set your own secure passwords.
$ bin/elasticsearch-setup-passwords auto
Changed password for user apm_system
PASSWORD apm_system = xxxxxxxxxxxxxx

Changed password for user kibana
PASSWORD kibana = xxxxxxxxxxxxxx

Changed password for user logstash_system
PASSWORD logstash_system = xxxxxxxxxxxxxx

Changed password for user beats_system
PASSWORD beats_system = xxxxxxxxxxxxxx

Changed password for user remote_monitoring_user
PASSWORD remote_monitoring_user = xxxxxxxxxxxxxx

Changed password for user elastic <<<
PASSWORD elastic = [ELASTIC_PW]
Retrieve and store the elastic user credential using care and best practices, and keep them handy for the following Workplace Search configuration steps.
Workplace Search Configuration
From the Workplace Search directory, locate the config/enterprise-search.yml configuration file and add your Elasticsearch credentials:
ent_search.auth.source: standard
elasticsearch.username: elastic
elasticsearch.password: [ELASTIC_PW]
Our configuration is complete, with the exception of our default Workplace Search users' password. These are the credentials used to log in to the Workplace Search administrative dashboard:
Default User |
|
Default Password |
Printed in the console window on the first successful boot sequence of Workplace Search |
If you fail to retrieve the password on the initial boot sequence, you must start the installation over with a fresh cluster.
You may alternatively choose to set the default user’s password via an environment variable on the first boot sequence:
$ ENT_SEARCH_DEFAULT_PASSWORD=some_secure_password bin/enterprise-search
You can now use the instructions for User invitations: SMTP setup and Group management to finish settings up Workplace Search for your team.
Elasticsearch Native Realm
editElasticsearch offers user management via its Native Realm. Conveniently, Workplace Search can use the Elasticsearch user information as a source of truth for identity and access management.
Elasticsearch Configuration
From the Elasticsearch directory, locate config/elasticsearch.yml and povide the following configuration:
xpack.security.enabled: true
xpack:
  security:
    authc:
      realms:
        native:
          native1:
            order: 0
The Native Realm is now configured. As such, users are stored and managed via Elasticsearch directly.
We’ve also set xpack.security.enabled to true. Additional steps are required to connect to Elasticsearch: follow the standard instructions to use Elasticsearch to create a password.
Refer to the Elasticsearch Native Realm guide for more information.
Workplace Search Configuration
From the Workplace Search directory, locate the config/enterprise-search.yml configuration file and update the value of the ent_search.auth.source configuration to elasticsearch-native:
elasticsearch.username: elastic
elasticsearch.password: [ELASTIC_PW]
ent_search.auth.source: elasticsearch-native
Restart Workplace Search. Once back up, Workplace Search will now be synchronized with the Native Realm. That’s the half-way point. Next, we must introduce role mapping.
Native Realm Role Mapping
editWorkplace Search relies on Role Mapping to synchronize user information provided by Elasticsearch. In other words: you can use Elasticsearch to create a user and manage your users.
For example, if we create a user named example_mcuser and provide a password:
curl -u elastic:[YOUR_KEY] -X POST "localhost:9200/_security/user/example_mcuser" \
-H 'Content-Type: application/json' \
-d '{
  "password" : "example-password"
}'
We can then login with example_mcuser and the example-password.
Any user you create in this way will have admin privileges until you setup a custom role mapping to define a user’s access level. The first step is to create a new role within Elasticsearch.
For example, we can create a new blank role called example_role:
curl -u elastic:[YOUR_KEY] -X POST "localhost:9200/_xpack/security/role/example_role" \
-H 'Content-Type: application/json' \
-d'{
  "cluster": [],
  "indices": [],
  "applications": [],
  "run_as": [],
  "metadata": {},
  "transient_metadata": {
    "enabled": true
  }
}'
{
  "role":{
    "created":true
  }
}
This new role now requires a Role Mapping to assign permissions within Workplace Search.
Locate Roles in the main navigation.
Select Add Mapping:
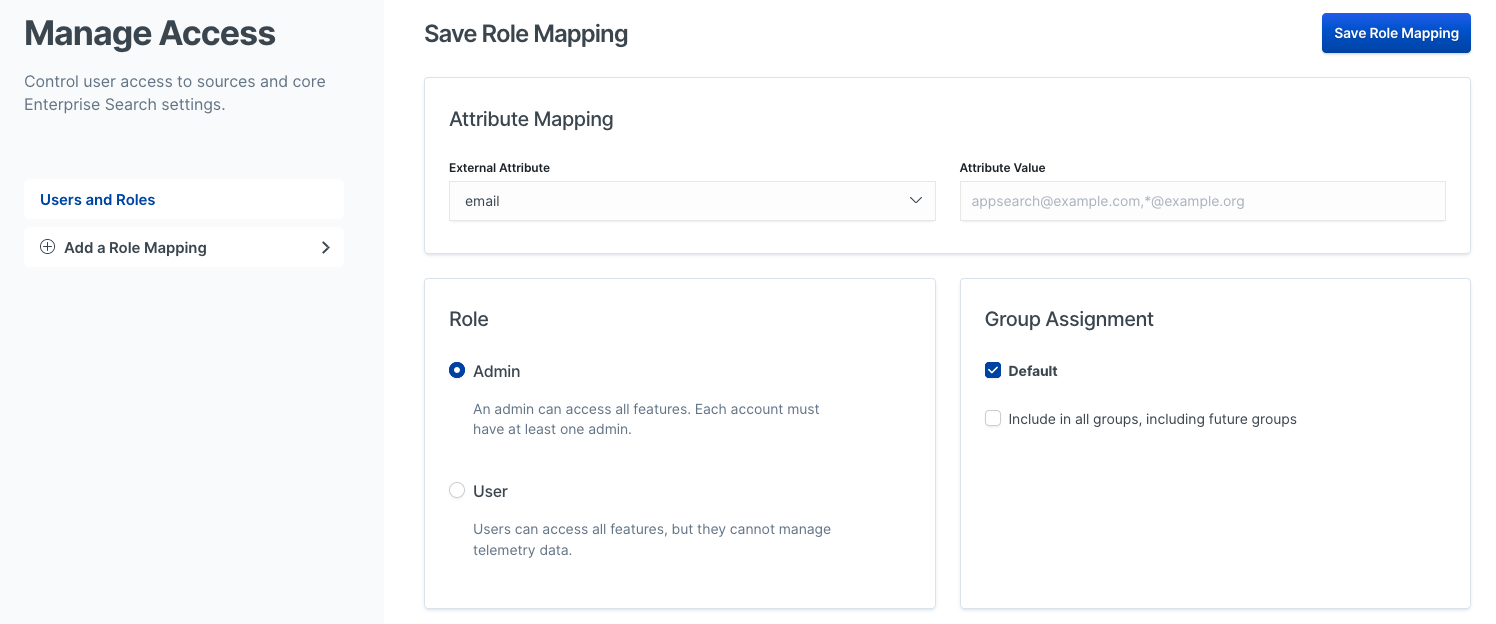
We must define an Attribute Value for a given External Attribute.
External in this case means in Elasticsearch.
| External Attribute | Attribute Value |
|---|---|
Workplace Search requires an email within the Native Realm. Wildcard characters are accepted, i.e. |
|
metadata |
Workplace Search uses metadata to create generic, flexible role mappings. |
username |
Workplace Search matches roles on username. Accepts wildcard characters, like: |
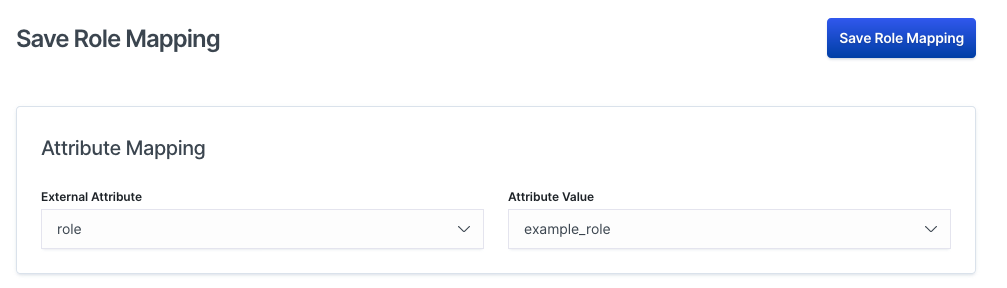
role |
The Elasticsearch users must contain at least one role. The value list contains a pre-populated list of Elasticsearch roles that are part of the cluster by default. |
Our new example_role now appears as an Attribute Value under role:
Once you have selected an External Attribute and Attribute Value pair, you must then configure the Workplace Search role. You can provide an access level, Admin or User, and Group assignment:
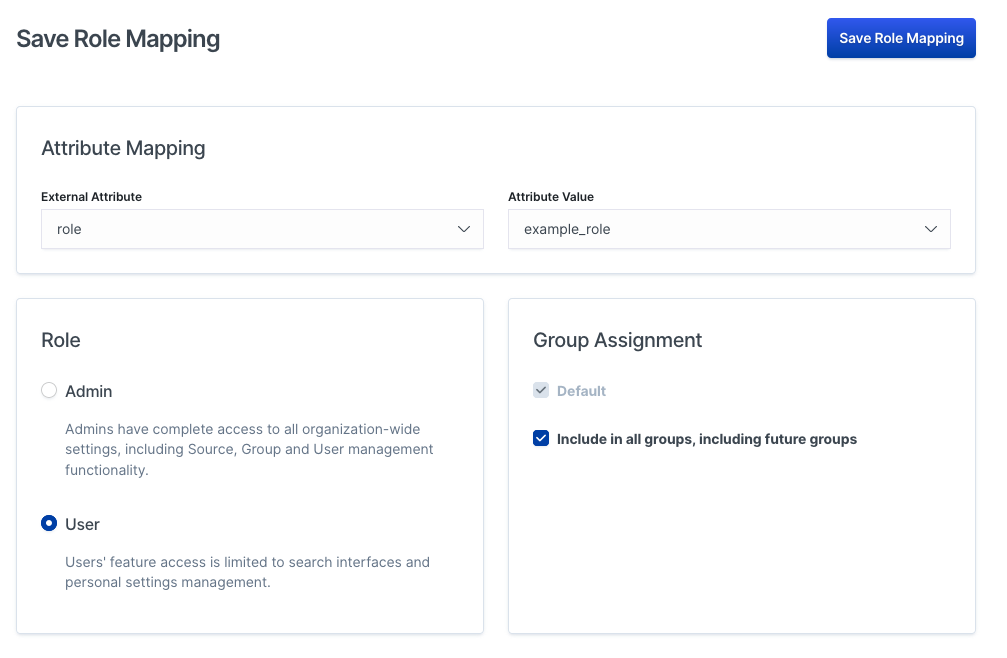
It helps to create your admin group first so that you can login safely while configuring Workplace Search.
Click Save Role Mapping.
Using Kibana? Once you have your first role created, you can use Kibana to create users. Learn more →
Now that we have created a role mapping, all new users need to match at least one mapping to successfully log in to Workplace Search. In our example, any user with example_role will be able to access Workplace Search as a User with All Groups access. The following will create such a user:
curl -u elastic:[YOUR_KEY] -X POST "localhost:9200/_security/user/example_mcuser" \
-H 'Content-Type: application/json' \
-d '{
  "password" : "example-password",
  "roles" : [ "example-role" ]
}'
Heads up! If a user matches two mappings, Workplace Search will select the one which is more permissive. In other words, if role A provides read access and role B provides write access, a user will inherit the permissions of role B if they have both roles applied.
Elasticsearch SAML
editSAML support for Workplace Search is provided via Elasticsearch. For the sake of this guide, we’ll use Auth0 to demonstrate how to configure SAML for your orgnization.
SAML support is agnostic and applies to other platforms such as Okta, for example.
Configuring SAML with Auth0
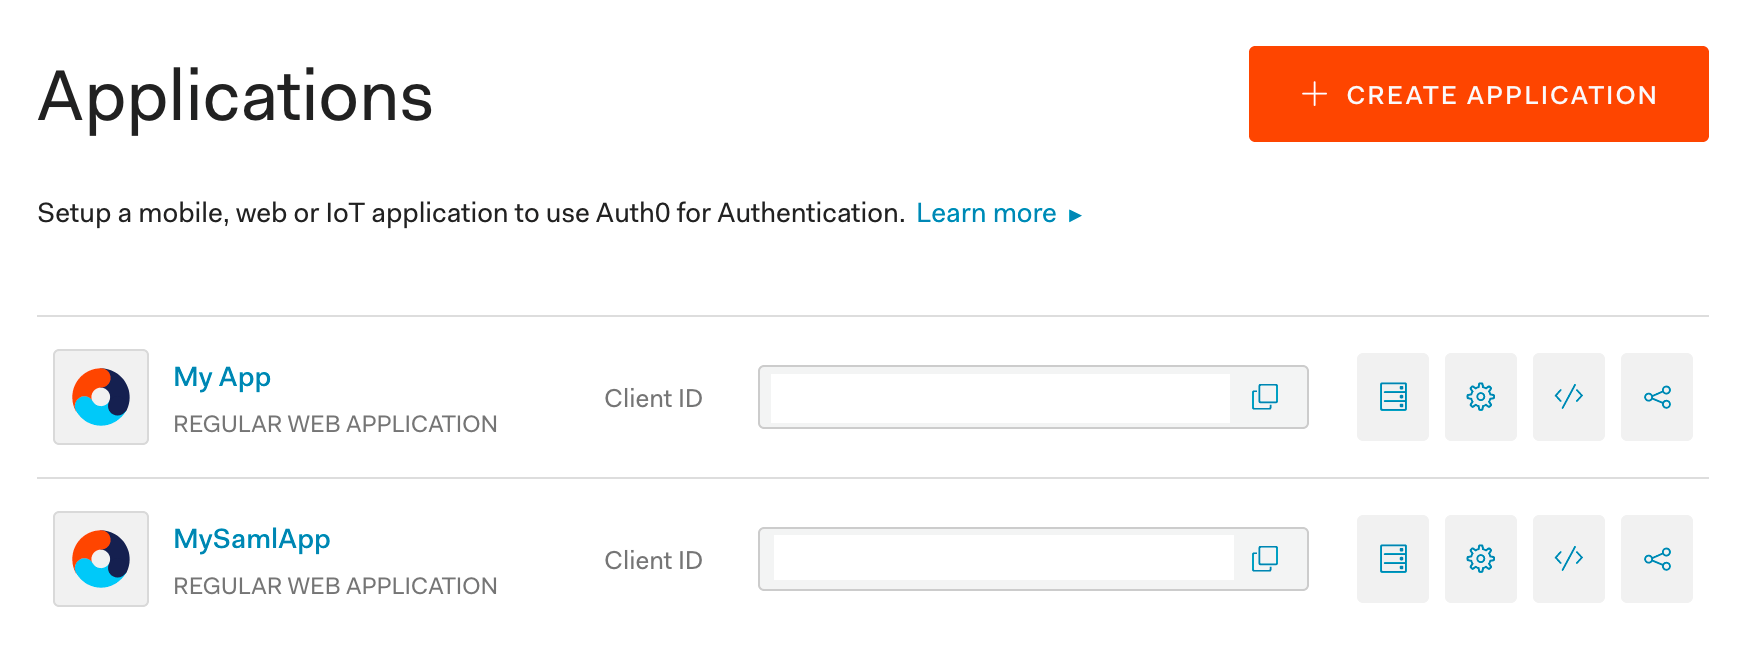
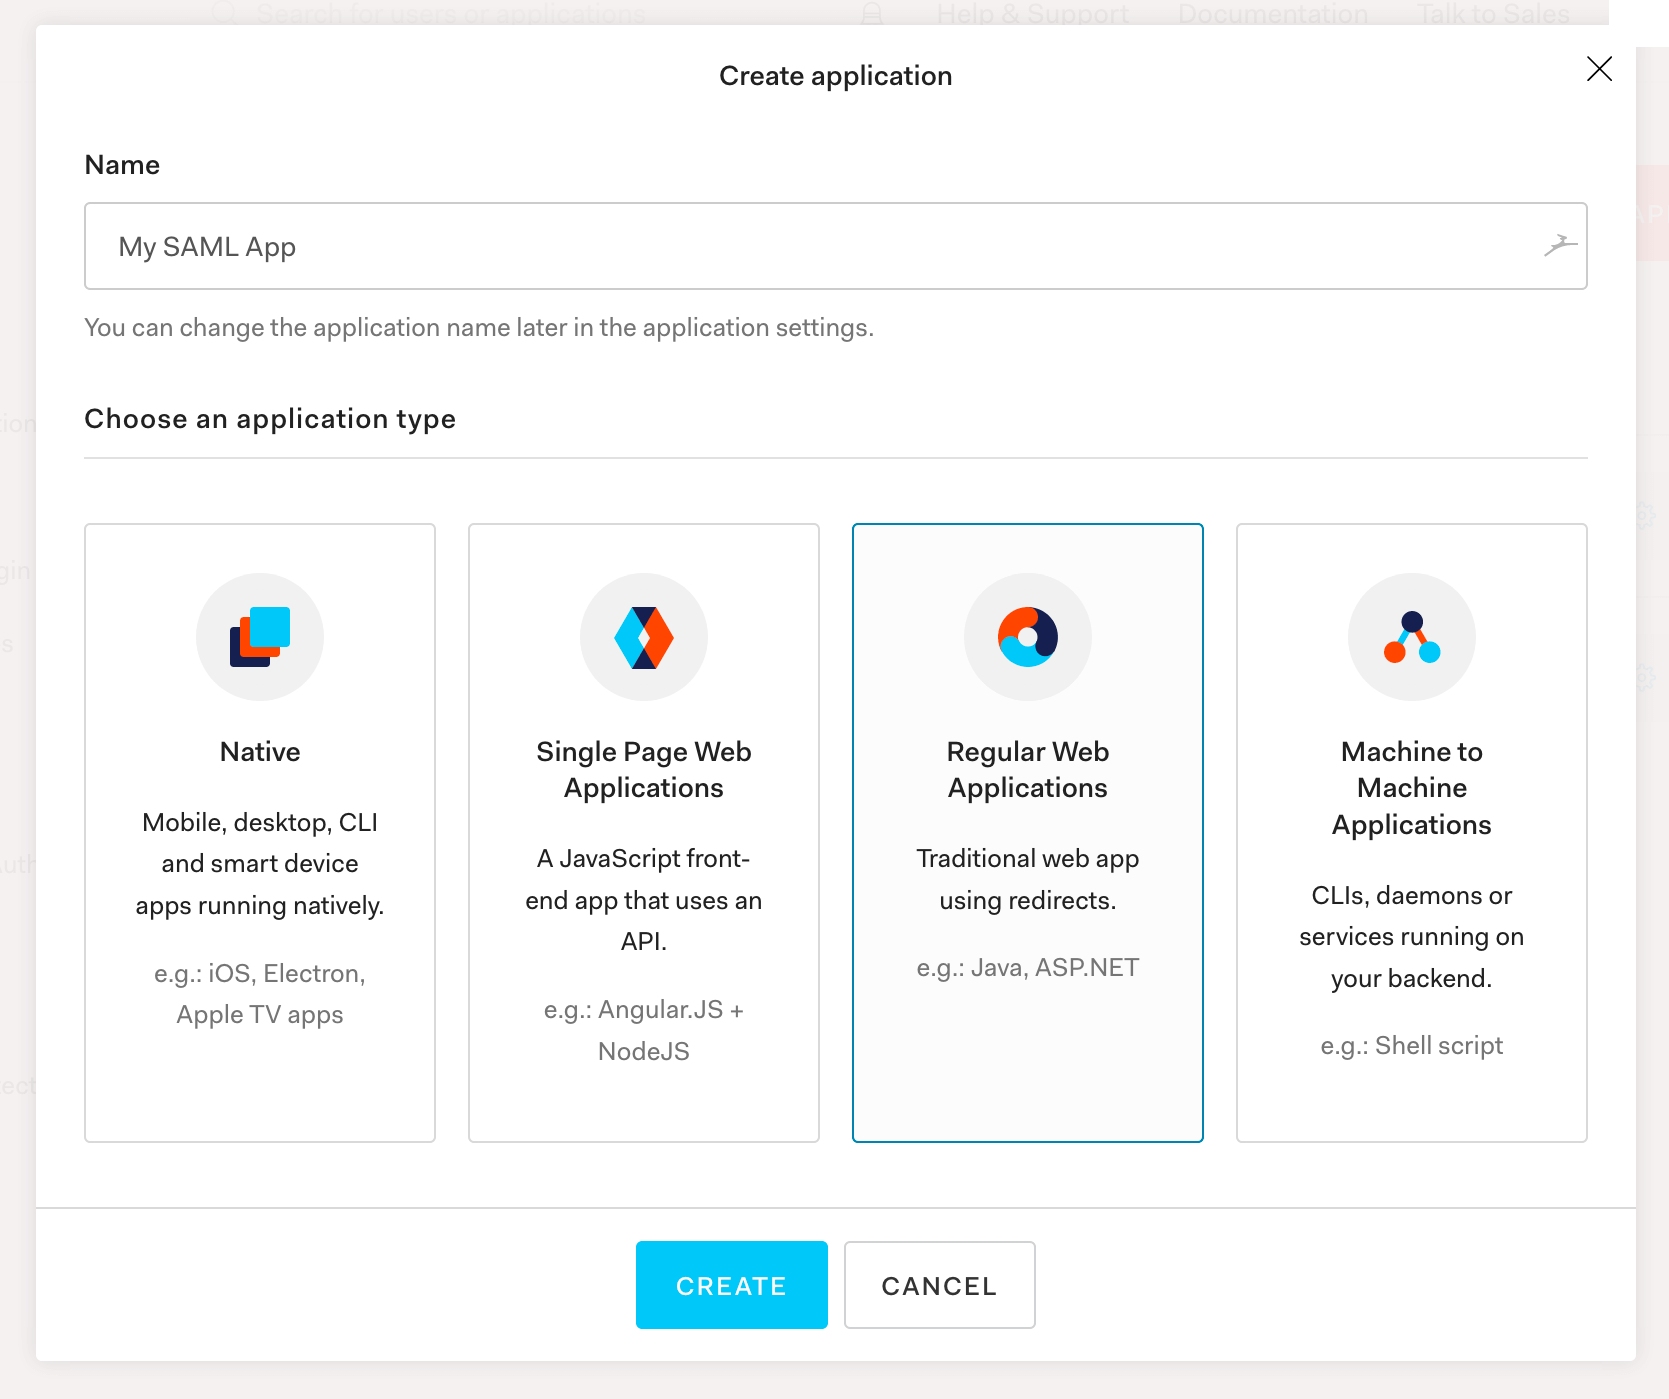
Step 1. Log in to Auth0 and create a new application:
Step 2. You’ll want to give it a name - like My SAML App, then select Regular Web Applications:
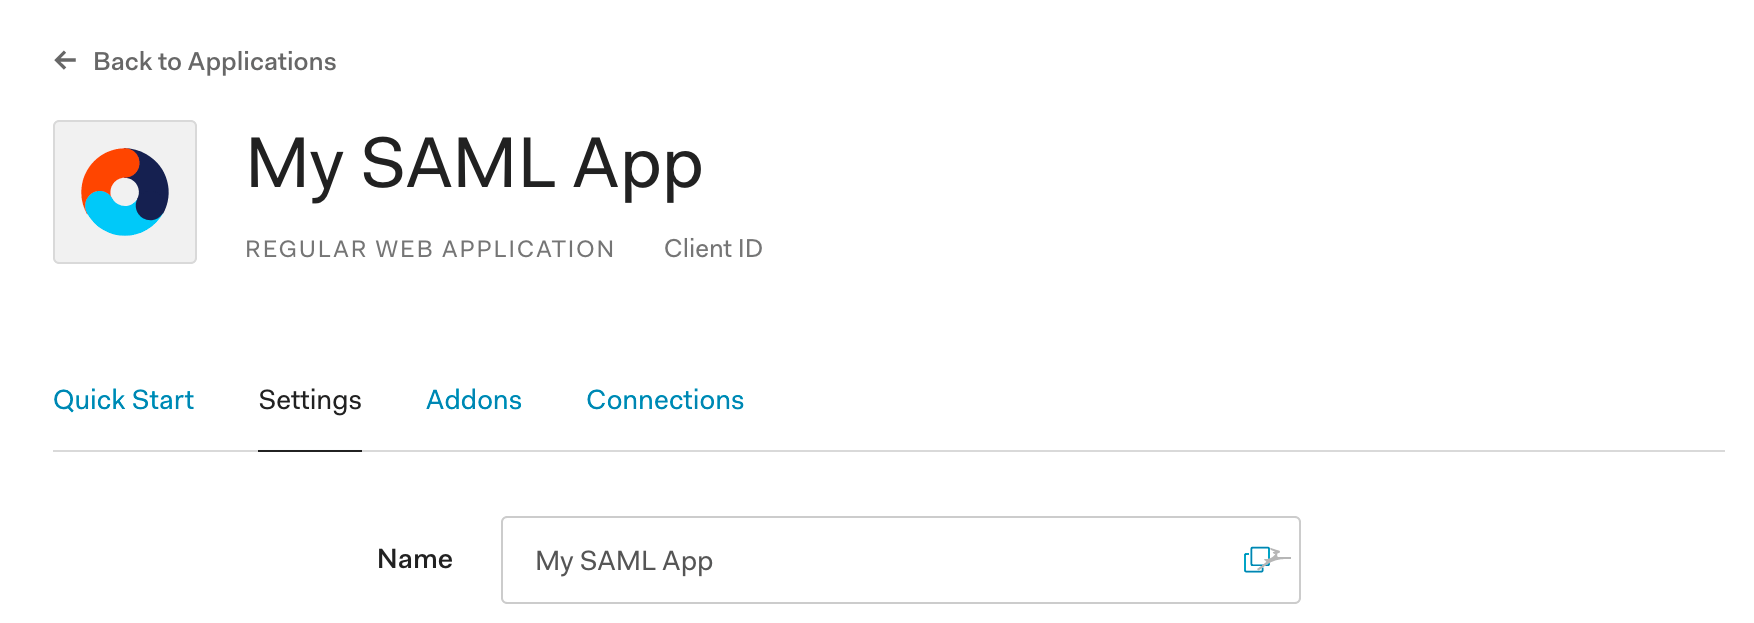
Step 3. Next, access the newly created application and locate Settings:
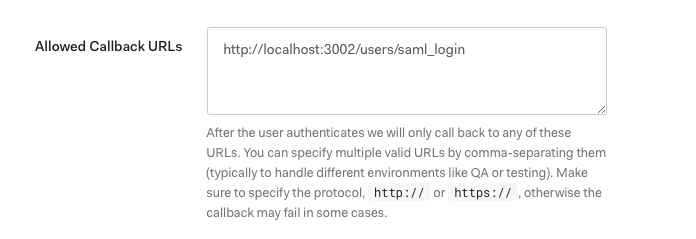
Step 4. Find Allowed Callback URL. Enter one that is relative to your ent_search.external_url, such as http://localhost:3002/users/saml_login, and save:
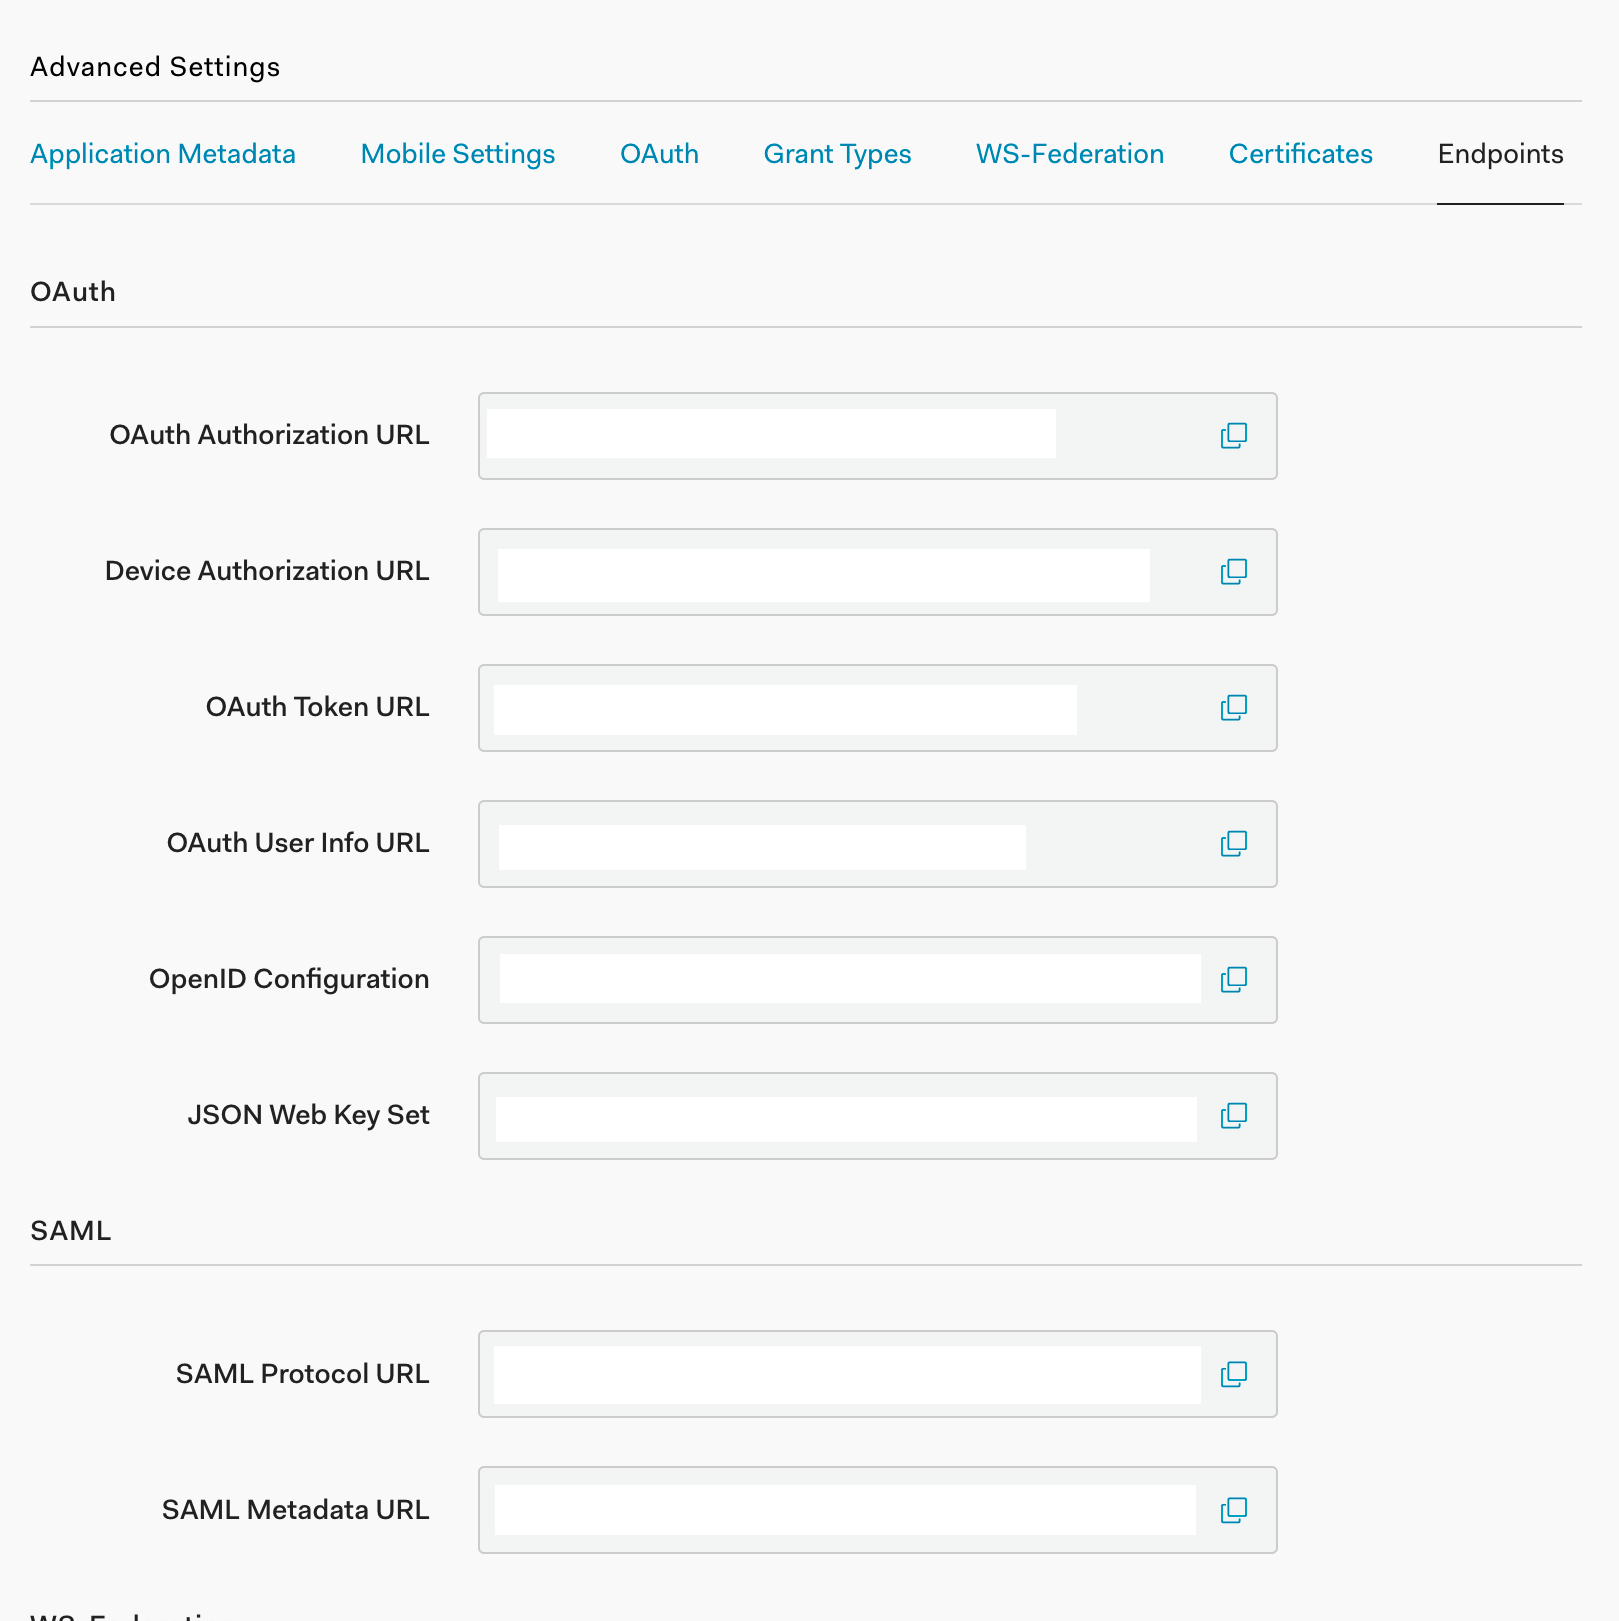
Step 5. Locate Advanced Settings and securely copy the contents of SAML Metadata URL. This Metadata URL contains XML which we must provide to our cluster. We’ll do so in the Elasticsearch Configuration step. :

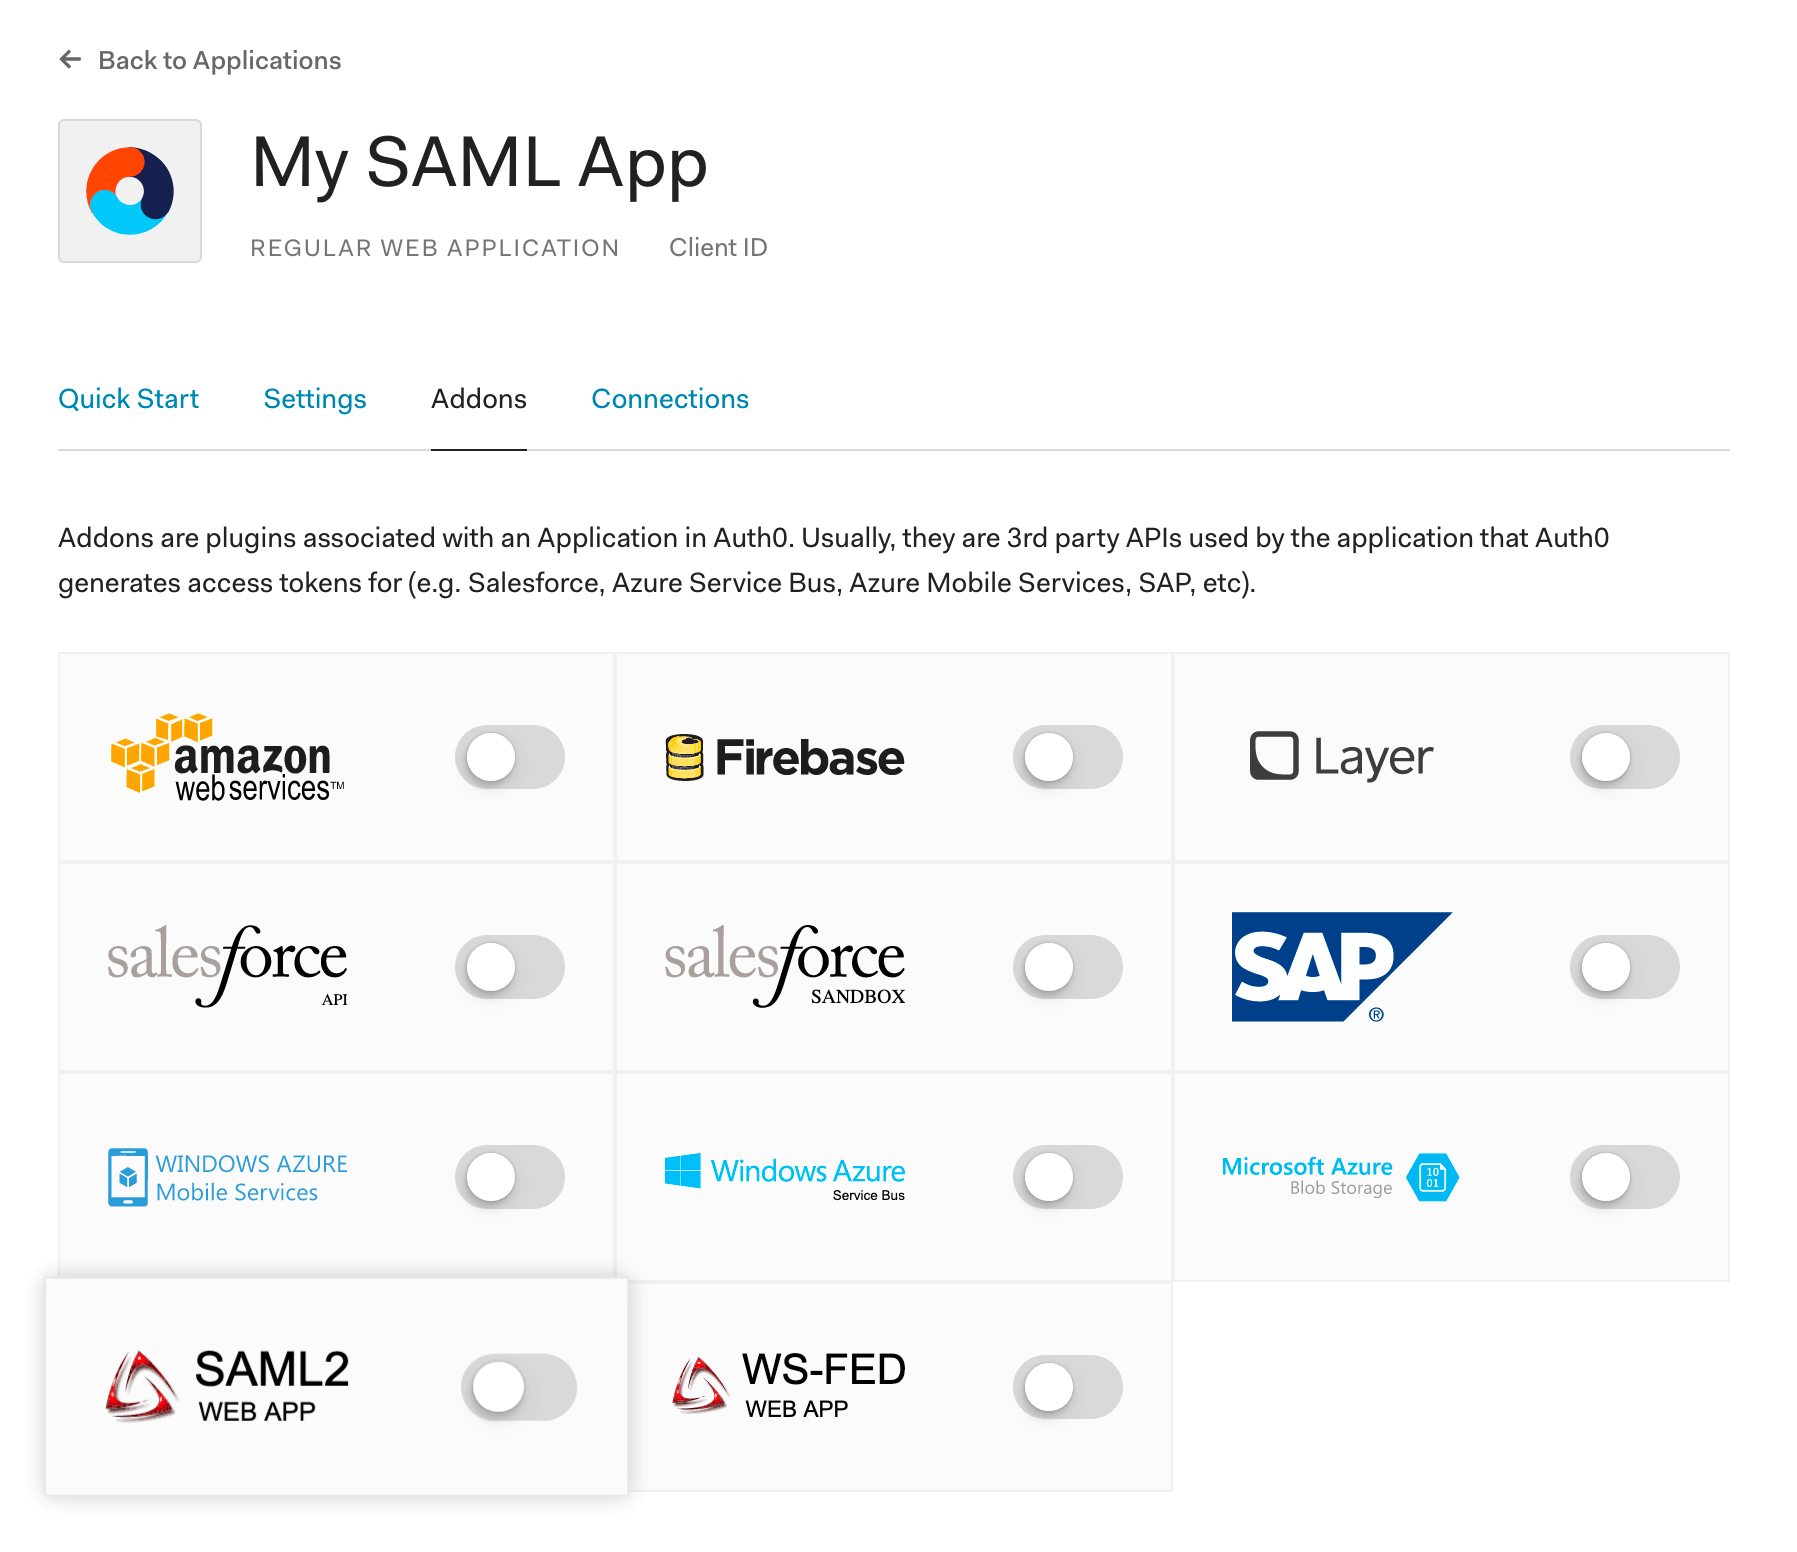
Step 6. Back in your application menu, head to the Addons section. From there, locate and activate SAML 2.0:
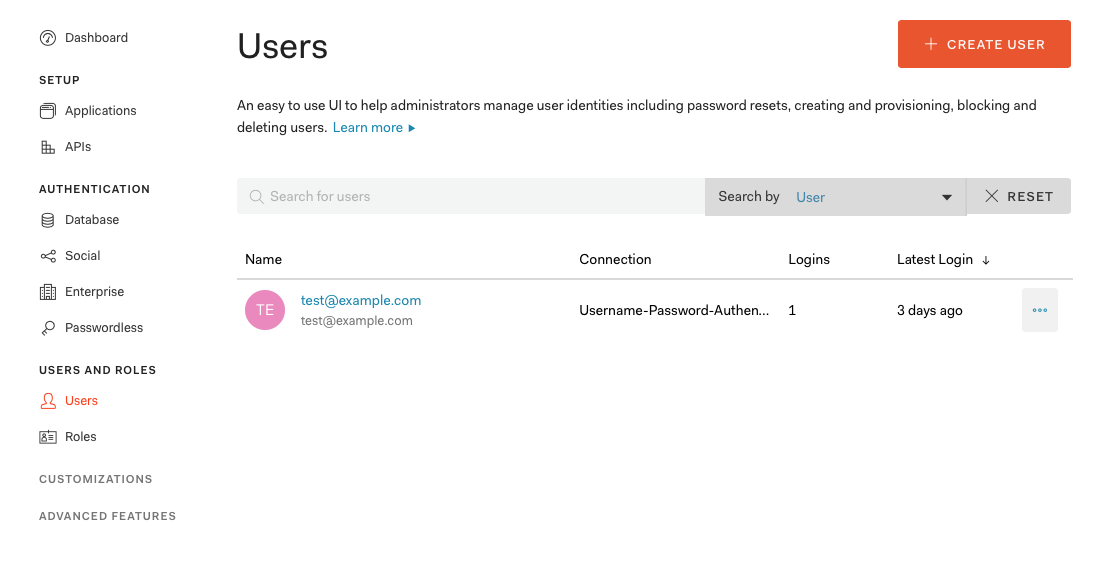
Step 7. Finally, create a user by selecting Users from the main menu and then clicking the + Create User button. Fill out the email, a password, and leave connection to its default.
Elasticsearch Configuration
Step 1. Within the Elasticsearch directory, locate the config/elasticsearch.yml file and append:
xpack.security.enabled: true
xpack.security.authc.token.enabled: true
xpack.security.transport.ssl.enabled: true

xpack.security.authc.realms.saml.saml_test: # saml_test is our "auth.name" -- we can name anything we'd like: auth0, enterprise_search, etc.
 order: 1
 idp.metadata.path: saml/idp-metadata.xml # We need to create this directory and place the file here.
 idp.entity_id: "urn:dev-abc-1234.auth0.com" # Taken from the SAML Metadata URL
 sp.entity_id: "http://localhost:3002/" # Match these with your external_url.
 sp.acs: "http://localhost:3002/users/saml_login"
 sp.logout: "http://localhost:3002/logout"
 attributes.principal: "http://schemas.xmlsoap.org/ws/2005/05/identity/claims/emailaddress"
 attributes.mail: "http://schemas.xmlsoap.org/ws/2005/05/identity/claims/emailaddress"
Step 2. Within the config directory, create a saml directory and a idp-metadata.xml file within it.
Step 3. Paste the contents of the SAML Metadata URL file into the idp-metadata.xml file. The URL has a prefix similar to the example: dev-abc-1234.auth0.com.
Be sure you have added that string as the idp.entity_id, prefixed with urn: as shown above.
Step 4. Restart Elasticsearch. Changes will take effect upon reboot.
Step 5. Follow the Standard Mode instructions to create a password for the elastic user for Elasticsearch. We’ll use these credentials and resume the SAML configuration within Workplace Search next.
Workplace Search Configuration
From the Workplace Search directory, locate the config/enterprise-search.yml configuration file and update the ent_search.auth.source value to elasticsearch-saml as well as the elastic password:
elasticsearch.username: elastic
elasticsearch.password: [ELASTIC_PW]

ent_search.auth.source: elasticsearch-saml
ent_search.auth.name: saml_test
Visit Workplace Search and log in with your SAML provider using the user previously created with Auth0.
From here, you must use Workplace Search’s Role Mapping to coordinate user attributes with Elasticsearch.
Refer to the Role Mapping section above on the Elasticsearch native realm for more information.
Document-level permissions are not supported with SAML-enabled Workplace Search deployments.