Snapshot and Restore
editSnapshot and Restore
editSnapshot and Restore enables you to backup your Elasticsearch indices and clusters using data and state snapshots. Snapshots are important because they provide a copy of your data in case something goes wrong. If you need to roll back to an older version of your data, you can restore a snapshot from the repository.
You’ll find Snapshot and Restore under Management > Elasticsearch. With this UI, you can:
Before using this feature, you should be familiar with how snapshots work. Snapshot and Restore is a good source for more detailed information.
Register a repository
editThe Repositories view provides an overview of your repositories. You can drill down into each repository for further investigation.
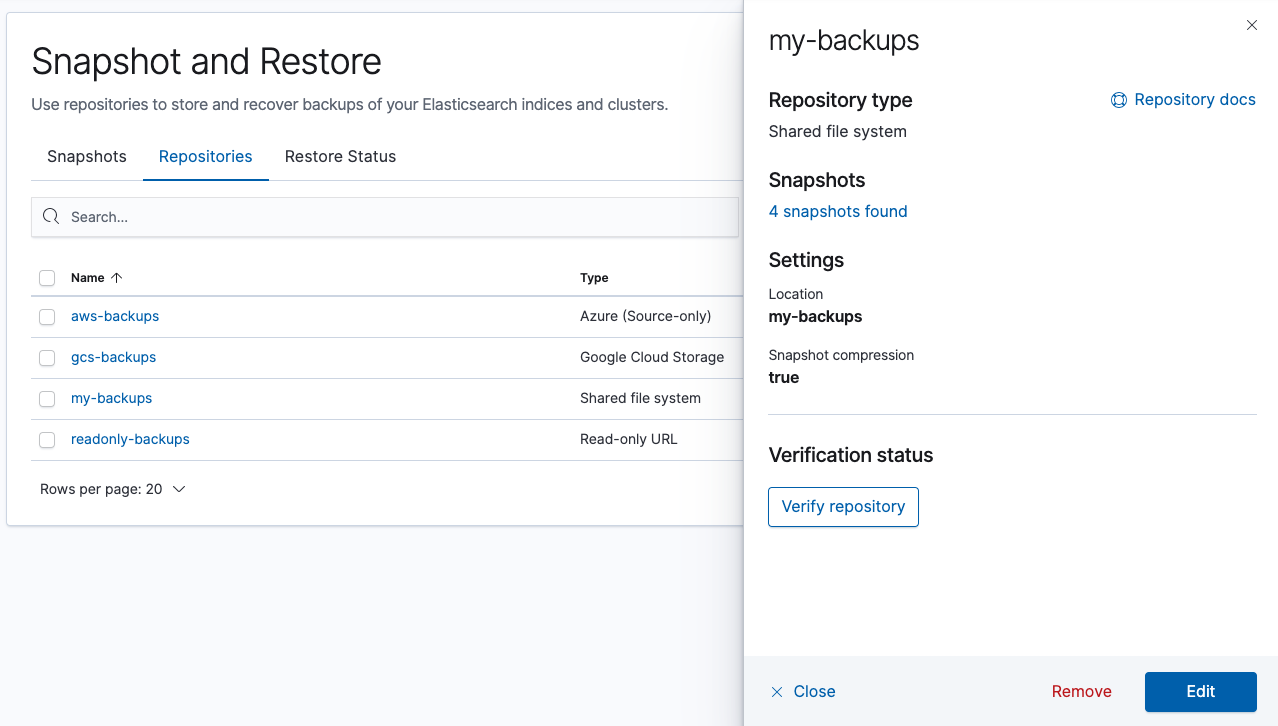
If you don’t have a repository, you’re prompted to register one. The Register repository wizard supports three repository types out of the box: shared file system, read-only URL, and source-only. For details about these repositories and their settings, see Repositories. For an example, see registering a shared file system repository.
To use other repositories, such as S3, you can install plugins. See Repository plugins.
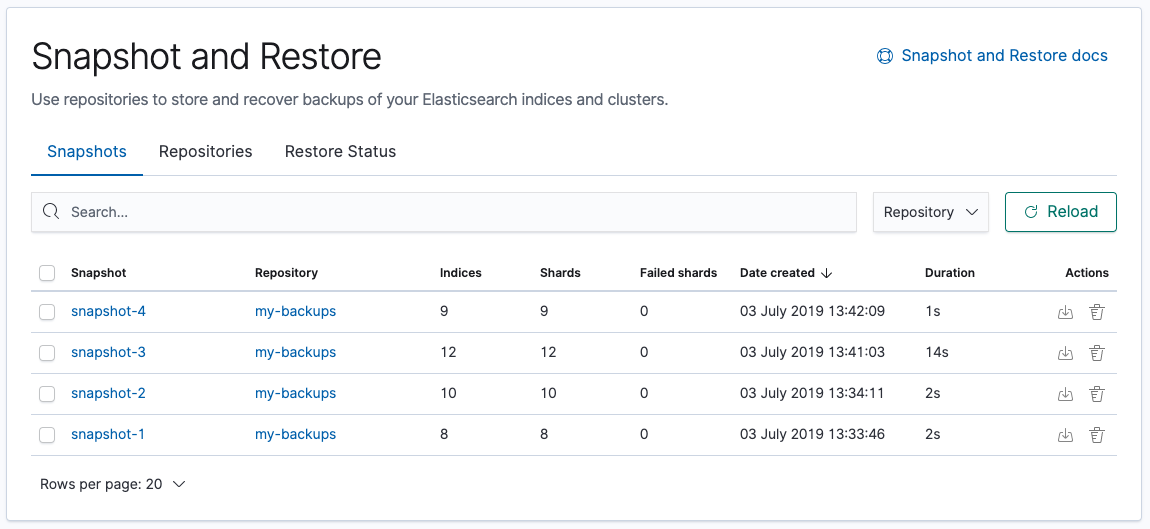
View your snapshots
editThe Snapshots view gives an overview of your snapshots. You can drill down into each snapshot for further investigation.
To create snapshots, use the Kibana Console. The snapshot API takes the current state and data in your index or cluster, and then saves it to a shared repository.
The snapshot process is "smart." Your first snapshot is a complete copy of the data in your index or cluster. All subsequent snapshots save the changes between the existing snapshots and the new data.
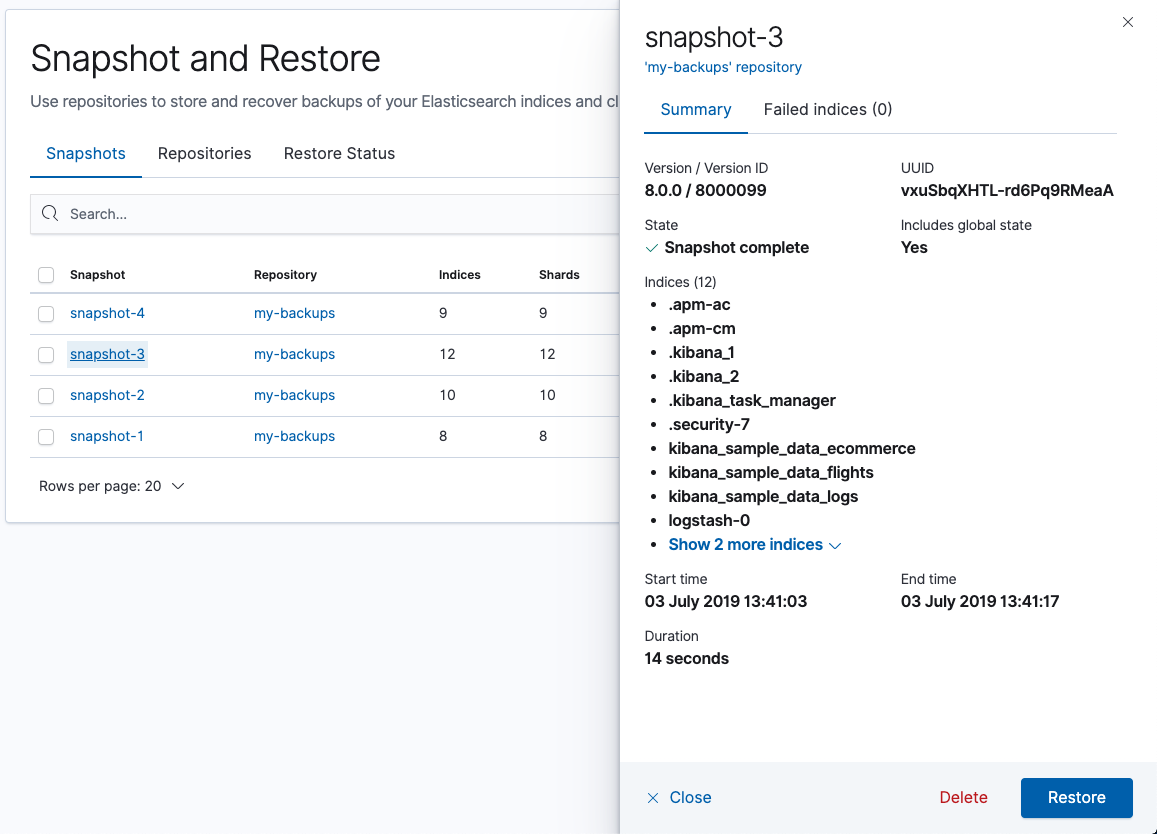
Restore a snapshot
editThe Restore wizard walks you through the process of restoring a snapshot into a running cluster. To get started, go to the Snapshots view, find the snapshot, and click the restore icon in the Actions column. You’re presented options for defining the restore, including which indices to restore and whether to modify the index settings.
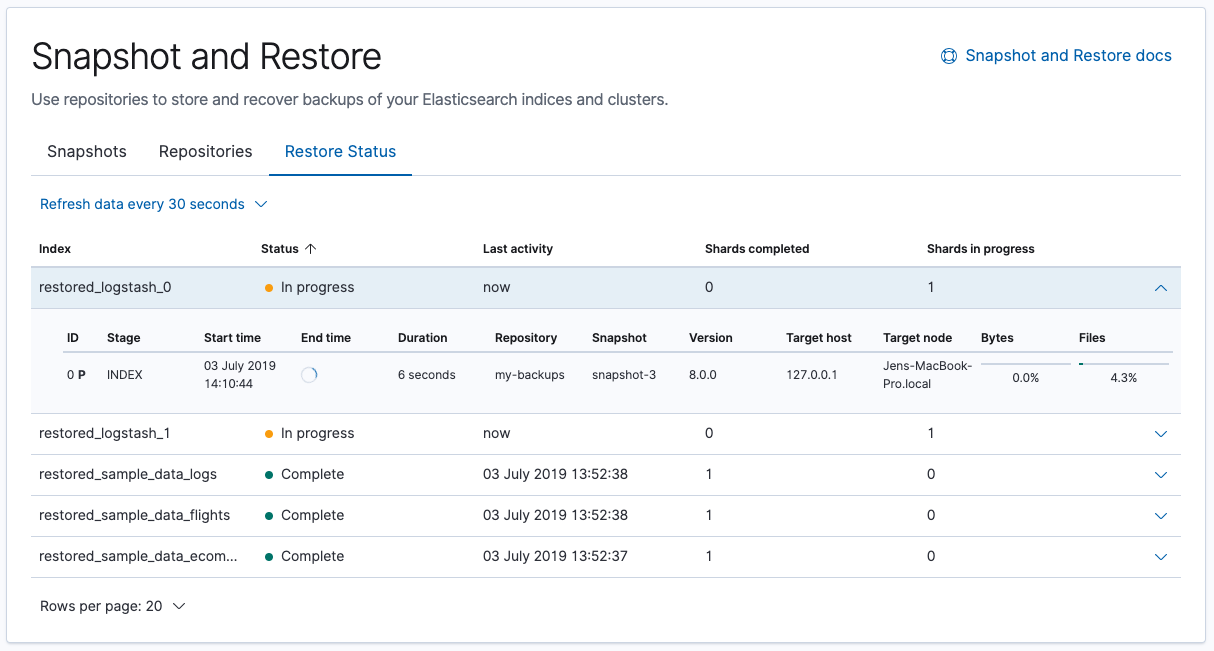
To track the progress of a restore, use the Restore Status view. You’ll see the current state for each shard in the snapshot.
Delete a snapshot
editDelete snapshots to manage your repository storage space. Find the snapshot in the Snapshots view and click the trash icon in the Actions column. To delete snapshots in bulk, select their checkboxes, and then click Delete snapshots.
Example: Register a shared file system repository
editThis example shows how to register a shared file system repository and store snapshots.
Register the repository location
editYou must register the location of the repository in the path.repo setting on
your master and data nodes. You can do this in one of two ways:
-
Edit your
elasticsearch.ymlto include thepath.reposetting. -
Pass the
path.reposetting when you start Elasticsearch.bin/elasticsearch -E path.repo=/tmp/es-backups
Register the repository
editUse Snapshot and Restore to register the repository where your snapshots will live.
- Go to Management > Elasticsearch > Snapshot and Restore.
- Open the Repositories view.
- Click Register a repository.
-
Enter a name for your repository. For example,
my_backup. -
Set Repository type to Shared file system.
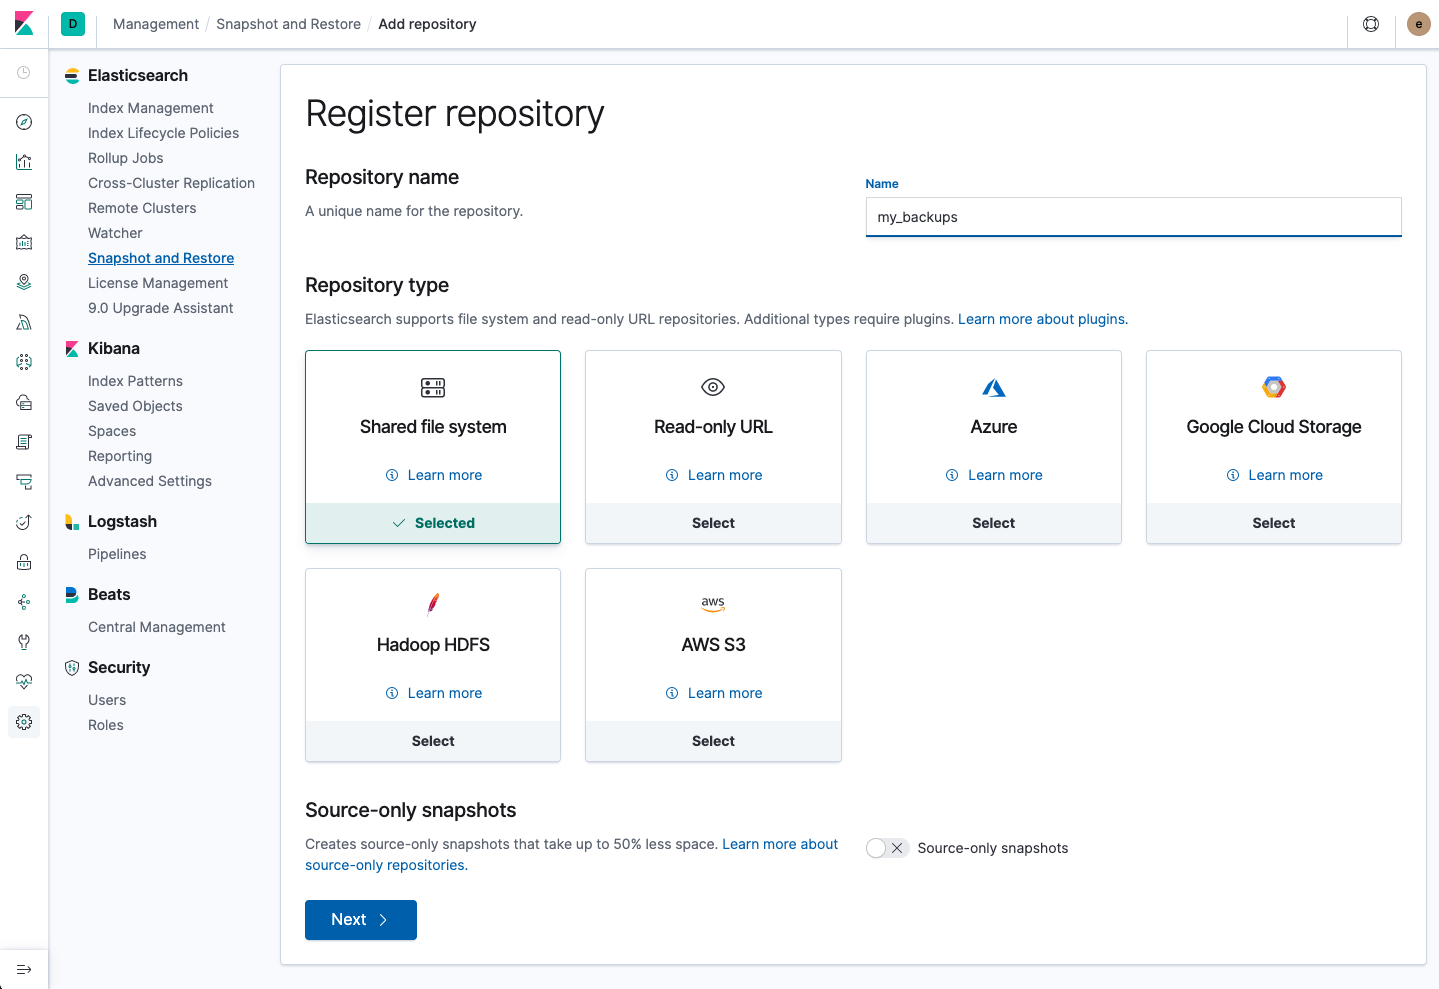
- Click Next.
-
In Location, enter the path to the snapshot repository,
/tmp/es-backups. - In Chunk size, enter 100mb so that snapshot files are not bigger than that size.
- Use the defaults for all other fields.
-
Click Register.
Your new repository is listed on the Repositories tab.
-
Click the respository and inspect its details.
The repository currently doesn’t have any snapshots.
Add a snapshot to the repository
editUse the snapshot API to create a snapshot.
- Go to Dev Tools > Console.
-
Create the snapshot.
In this example, the snapshot name is
2019-04-25_snapshot. You can also use date math expression for the snapshot name.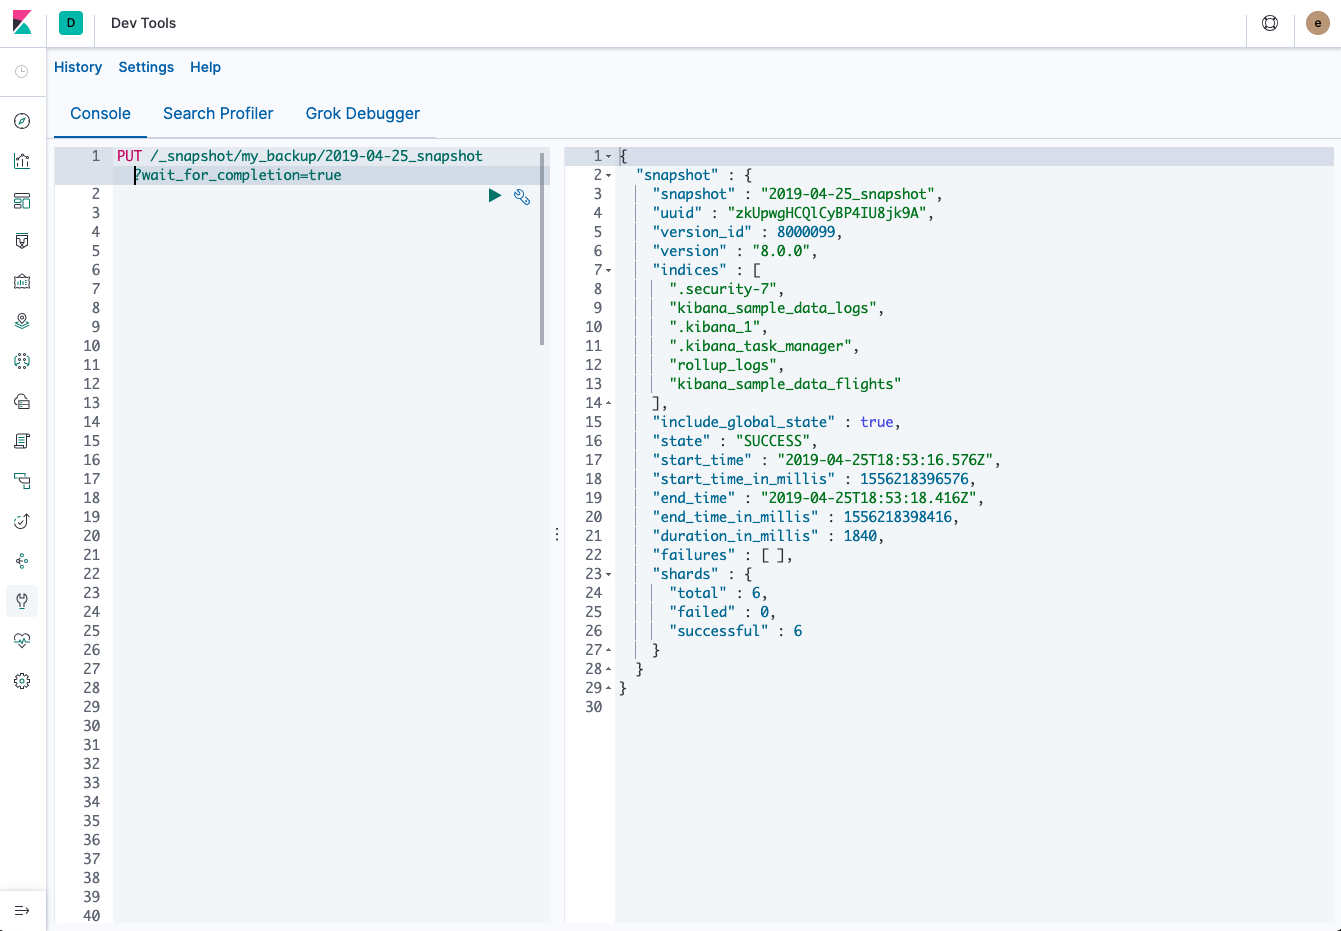
-
Open Snapshot and Restore.
Your new snapshot is available in the Snapshots view.