Security & Users
editSecurity & Users
edit"How do I manage self managed App Search security, users, and access roles?"
App Search offers three security modes that tie into identity management.
Elasticsearch security features - with a Basic license - are robust.
App Search leverages a similar security model, offering strong security as part of the same Basic Elasticsearch license.
If Elasticsearch security is disabled, anyone with access to the internal address will become an owner of the App Search instance, as well as access to the Enterprise Search Management APIs without needing to authenticate.
The permissive, security disabled setting is not recommended! It’s for experimentation and configuration only.
Please note that certain features described in this guide are only available with an Elasticsearch Platinum License.
Choose from one of three security modes to securely manage access to App Search:
- Standard: The default method: Users are managed by App Search. Use this to keep user management coupled to App Search. Users are invited and administrated by an App Search account owner.
- Elasticsearch Native Realm: Users are managed by the Elasticsearch native realm. If your Elasticsearch cluster is already managing users and their roles, then you can prevent duplication of effort. Whether you’re using Kibana or automating user creation via Elasticsearch APIs, you can set App Search to inherit that configuration and then use Role Mapping to tie those existing roles to App Search users and their own permissions.
- Elasticsearch SAML: Allow a third-party authentication provider like Auth0 or Okta to manage users within Elasticsearch. Inherits SAML settings from Elasticsearch. Role Mapping associates third-party governed roles with App Search users and their own permissions.
Elasticsearch Platinum License Features
editCertain Security and User Management features are only available with an Elasticsearch Platinum license. They are as follows:
- Elasticsearch SAML authentication.
- Advanced User Roles - This includes all roles described in our Role Based Access Control Guide. Otherwise, you will be limited to the "Admin" and "Owner" role.
Standard
editStandard security requires configuration of both Elasticsearch and App Search.
It is the default security method when Elasticsearch security is enabled.
Within Elasticsearch
editWithin the Elasticsearch directory, open up the config/elasticsearch.yml file and add:
xpack.security.enabled: true
xpack.security.authc.api_key.enabled: true
Next, you’ll need to setup a password so that App Search can reach Elasticsearch.
Elasticsearch comes with a password setup utility.
It takes two different options:
-
autoto have Elasticsearch generate passwords. -
interactiveto manually set your own secure passwords.
Either mode will result in a set of passwords for Elasticsearch users.
You’ll need the password for the elastic user — it’s the default user.
bin/elasticsearch-setup-passwords auto
The output will look like so:
Changed password for user apm_system
PASSWORD apm_system = xxxxxxxxxxxxxx

Changed password for user kibana
PASSWORD kibana = xxxxxxxxxxxxxx

Changed password for user logstash_system
PASSWORD logstash_system = xxxxxxxxxxxxxx

Changed password for user beats_system
PASSWORD beats_system = xxxxxxxxxxxxxx

Changed password for user remote_monitoring_user
PASSWORD remote_monitoring_user = xxxxxxxxxxxxxx

Changed password for user elastic <<<
PASSWORD elastic = [ELASTIC_PW]
Retrieve and store the elastic user credential using care and best practices!
To recap, we:
- Enabled security settings within Elasticsearch.
- Generated and securely stored credentials.
The rest happens within App Search’s configuration files.
Within App Search
editWithin App Search directory, edit config/enterprise-search.yml and add your credentials:
ent_search.auth.default.source: standard
elasticsearch.username: elastic
elasticsearch.password: [ELASTIC_PW]
That’s it!
Now user settings are managed by App Search.
The default username is: enterprise_search
The default password is generated for you upon start-up. Look into your console log to retrieve it.
You can also pass in your own default password via an environment variable on first start-up:
ENT_SEARCH_DEFAULT_PASSWORD=password bin/enterprise-search
Follow the Role Based Access Control guide for more information on how roles work.
And if you haven’t done so, set up a mailer so that users can receive invitations. See Configuring a mailer in the Enterprise Search documentation.
Elasticsearch Native Realm
editElasticsearch can manage users using the Elasticsearch internal native realm.
App Search can use the Elasticsearch native realm as its source of truth for identity management.
Within Elasticsearch
editWithin the Elasticsearch directory, open config/elasticsearch.yml and add if it is not present:
xpack.security.enabled: true
xpack.security.authc.api_key.enabled: true
xpack:
  security:
    authc:
      realms:
        native:
          native1:
            order: 0
The internal native realm within Elasticsearch is on by default and its where users will be "stored" and managed.
Learn more within the Elasticsearch native realm documentation.
We’ve also set xpack.security.enabled and xpack.security.authc.api_key.enabled to true.
Follow the standard instructions to use Elasticsearch to create a password.
We’ll set that password and resume the Elasticsearch native realm configuration within App Search.
Within App Search
editWithin App Search, edit config/enterprise-search.yml and change the ent_search.auth configuration.
You’ll also need to add a secure password as xpack.security.enabled is now true.
Your config/enterprise-search.yml will look as such:
elasticsearch.username: elastic
elasticsearch.password: [ELASTIC_PW]

ent_search.auth.native1.source: elasticsearch-native
Restart App Search.
Upon restart, App Search will now be synchronized with the native realm.
Next, we’ll introduce user management.
Native Realm User Management
editUser management is done through Elasticsearch.
App Search connects to Elasticsearch user management via Role Mapping.
A Role Mapping makes it so that roles - as App Search understands them - can map to roles as Elasticsearch defines them.
In this way, users are created and managed within the Elasticsearch native realm via API or via Kibana.
Instead of making you manage different sets of users, this allows you to inherit them.
In other words: App Search communicates with Elasticsearch to control user access.
For example, if you wanted to create a user named app-search and provide a password, you’d do that like so:
curl -u elastic:[YOUR_KEY] -X POST "localhost:9200/_security/user/app-search" \
-H 'Content-Type: application/json' \
-d '{
  "password" : "example-password",
  "roles" : [ "app-search-user" ]
}'
A role is required — we provided app-search-user.
If you were creating users within Kibana instead of the Elasticsearch API, it looks like this.
Login using this new user: app-search / example-password
Click Users & Roles within the sidebar.
Select Add Mapping.
You’ll see a screen which allows you to select various mapping configurations:
User Management - Create a mapping.
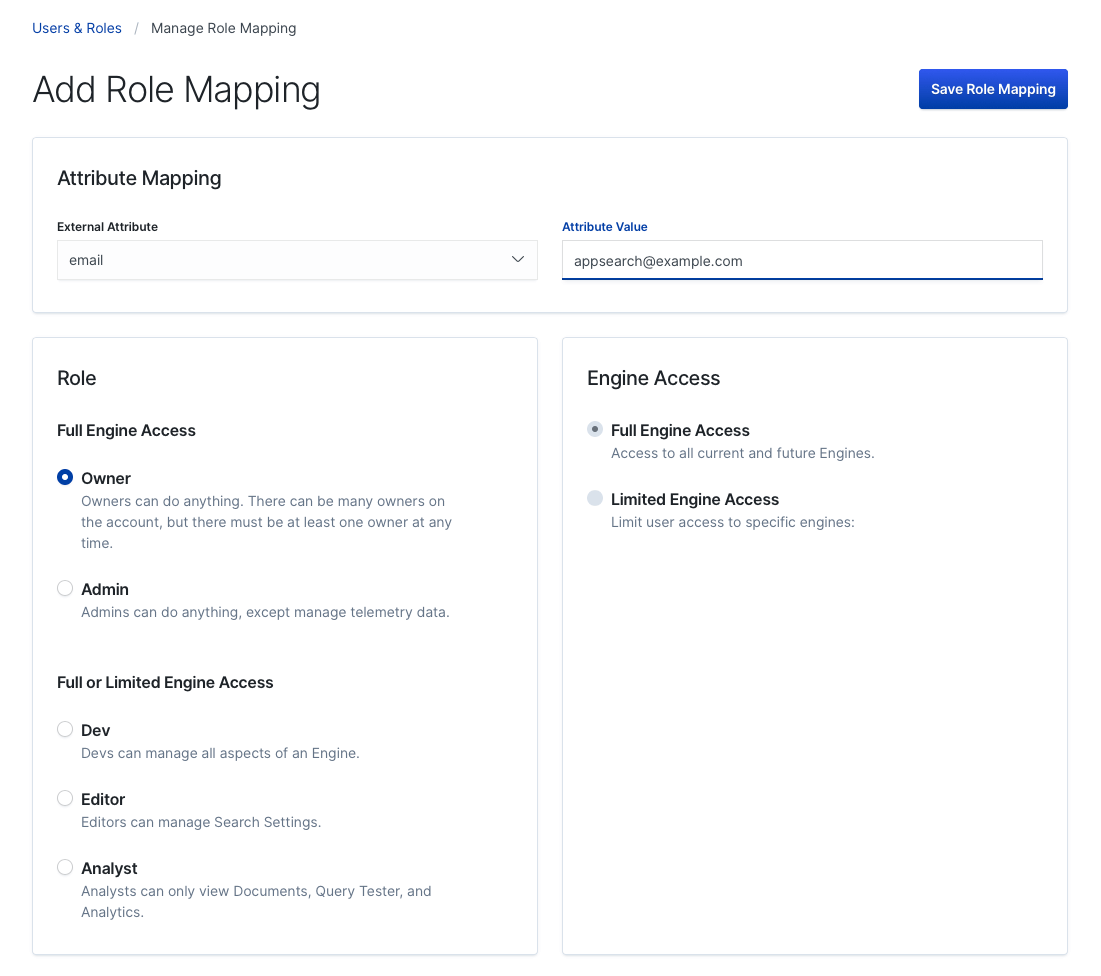
The goal here is to define a Attribute Value for a given External Attribute.
External - in this case - means Elasticsearch.
External Attribute |
Attribute Value |
"email" |
App Search will look for an email within the native realm. Accepts wildcard characters, like |
"metadata" |
App Search will look for metadata to create generic, flexible role mappings. |
"username" |
App Search will match on username. Accepts wildcard characters, like: |
"role" |
Elasticsearch users must contain at least one role. The value list contains a list of pre-populated Elasticsearch roles that are part of the cluster by default. See below on more information on how to add a role. |
We created a user above using a role: app-search-user.
If we select "role" as our External Attribute, app-search-user will not be present in the default list.
Elasticsearch accepted the role, but it isn’t considered a "proper role" until the role definition has been added to Elasticsearch via the Role API.
An example API request to create a role looks like so:
curl -u elastic:[YOUR_KEY] -X POST "localhost:9200/_security/role/app-search-user" \
-H 'Content-Type: application/json' \
-d'{
  "cluster": ["all"],
  "indices": [
    {
      "names": [ "index1", "index2" ],
      "privileges": ["all"]
    }
  ],
  "applications": [
    {
      "application": "app-search",
      "privileges": [ "admin", "read" ],
      "resources": [ "*" ]
    }
  ]
}'
In response, you’ll receive:
{
  "role":{
    "created":true
  }
}
The "role" app-search-user will now appear under the list of roles available to the role External Value.
Read more within the Elasticsearch Role API documentation
Once you have selected an External Attribute and Attribute Value pair, you must then configure the App Search role.
You can provide a "role", like Admin or Editor and then scope Engine access.
These roles provide access control parameters as App Search understands them.
The mapping is a link between two interpretations of a role:
- App Search and how users interact with Engines, documents, and features.
- Elasticsearch and how users are organized in the native realm.
Learn more about App Search roles and their permissions within the Role Based Access Control guide.
Click Save Mapping.
Now, any Elasticsearch user which matches the mapping will be able to access App Search.
A user needs to match at least one one mapping so that they can login!
Heads up! If a user matches two mappings, App Search will select the one which is more permissive. In other words, if role A provides read access to one Engine and role B provides write access to all Engines, if a user has both roles, they will inherit the permissions of role B.
Elasticsearch SAML
editSAML support requires an Elasticsearch platinum license.
SAML support leverages the Elasticsearch SAML realm.
It requires a third party SAML provider, like Auth0 or Okta.
We’ll demonstrate how to set-up with Auth0.
Auth0, SAML
editLogin to Auth0.
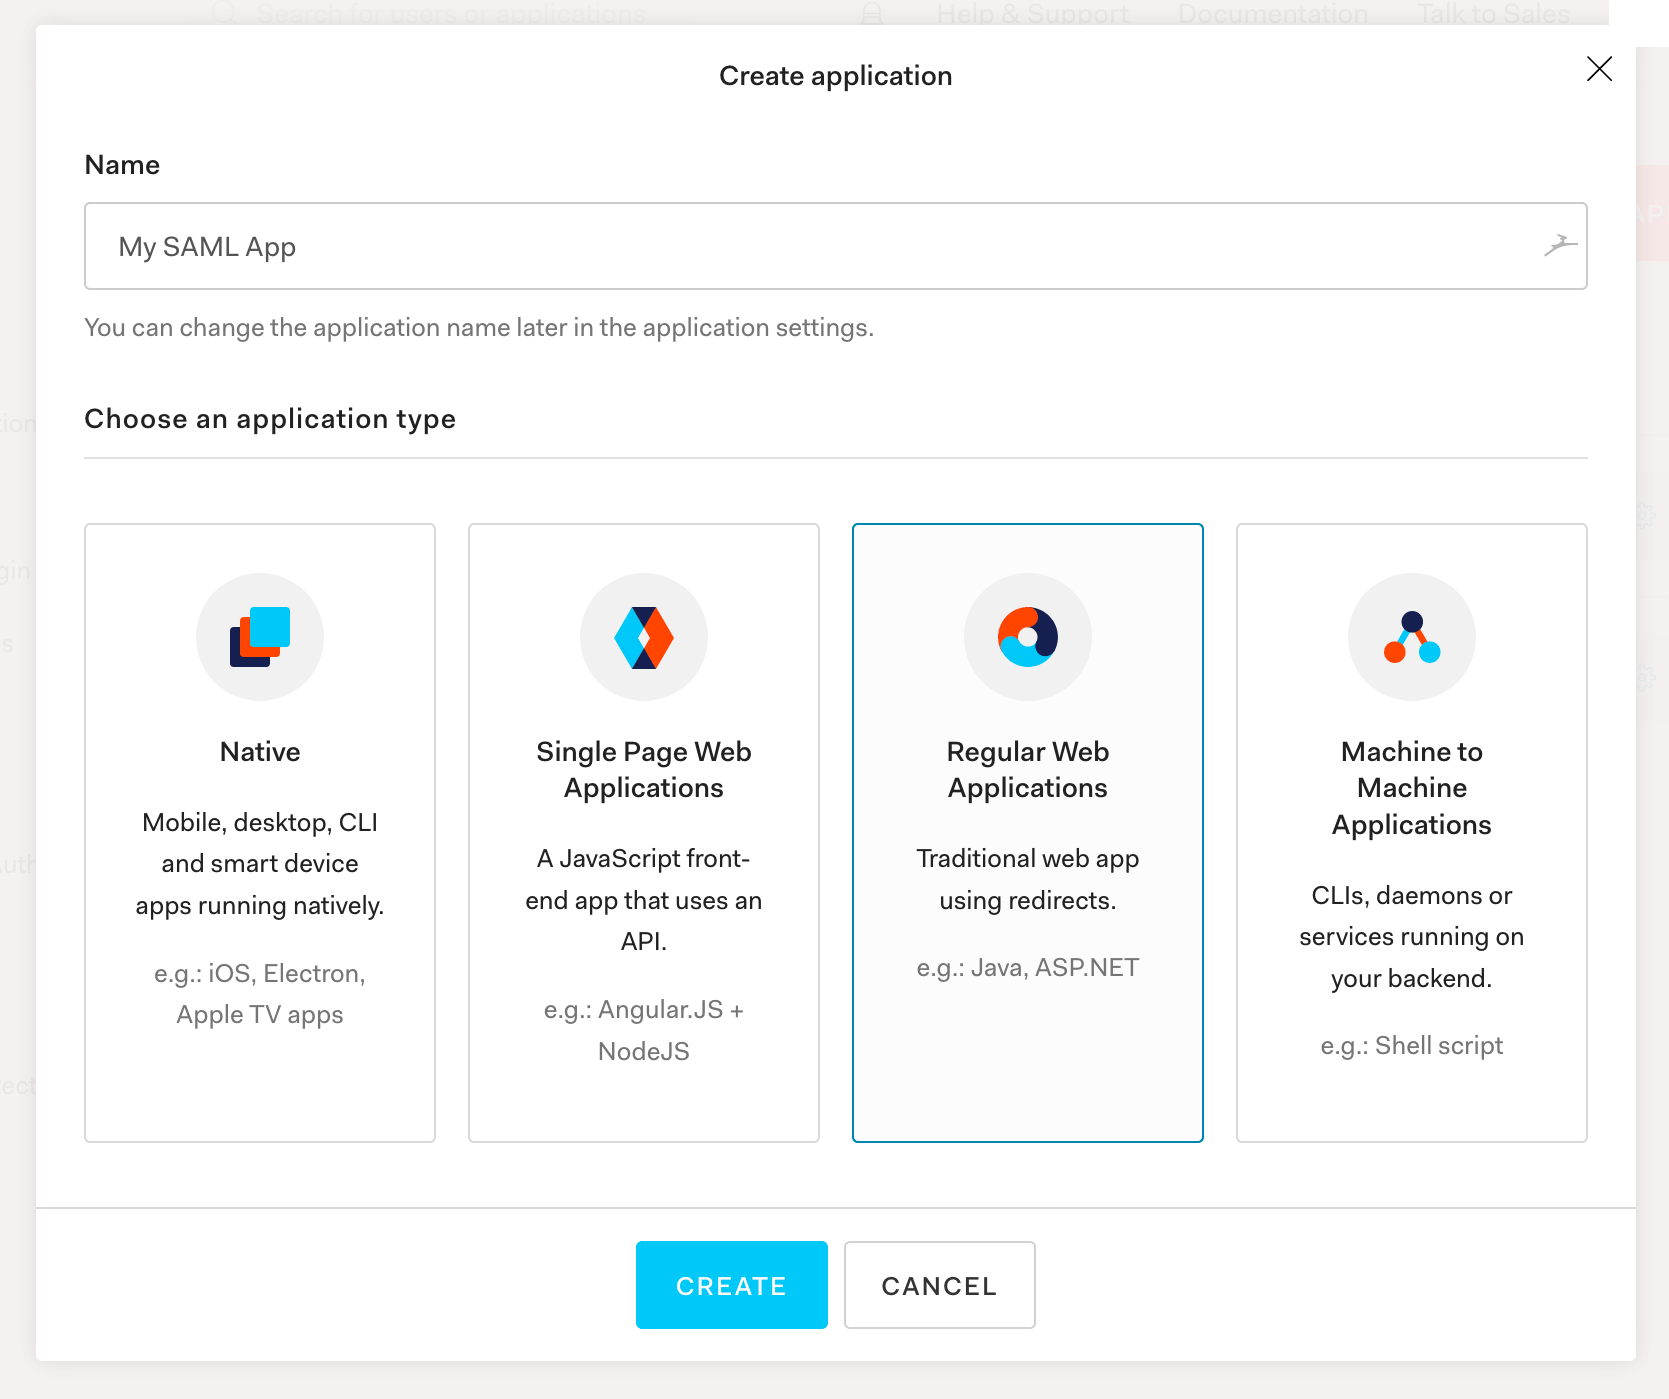
Create a new application:
SAML User Management

You’ll want to give it a name - like My Saml App, then select Regular Web Applications:
SAML User Management
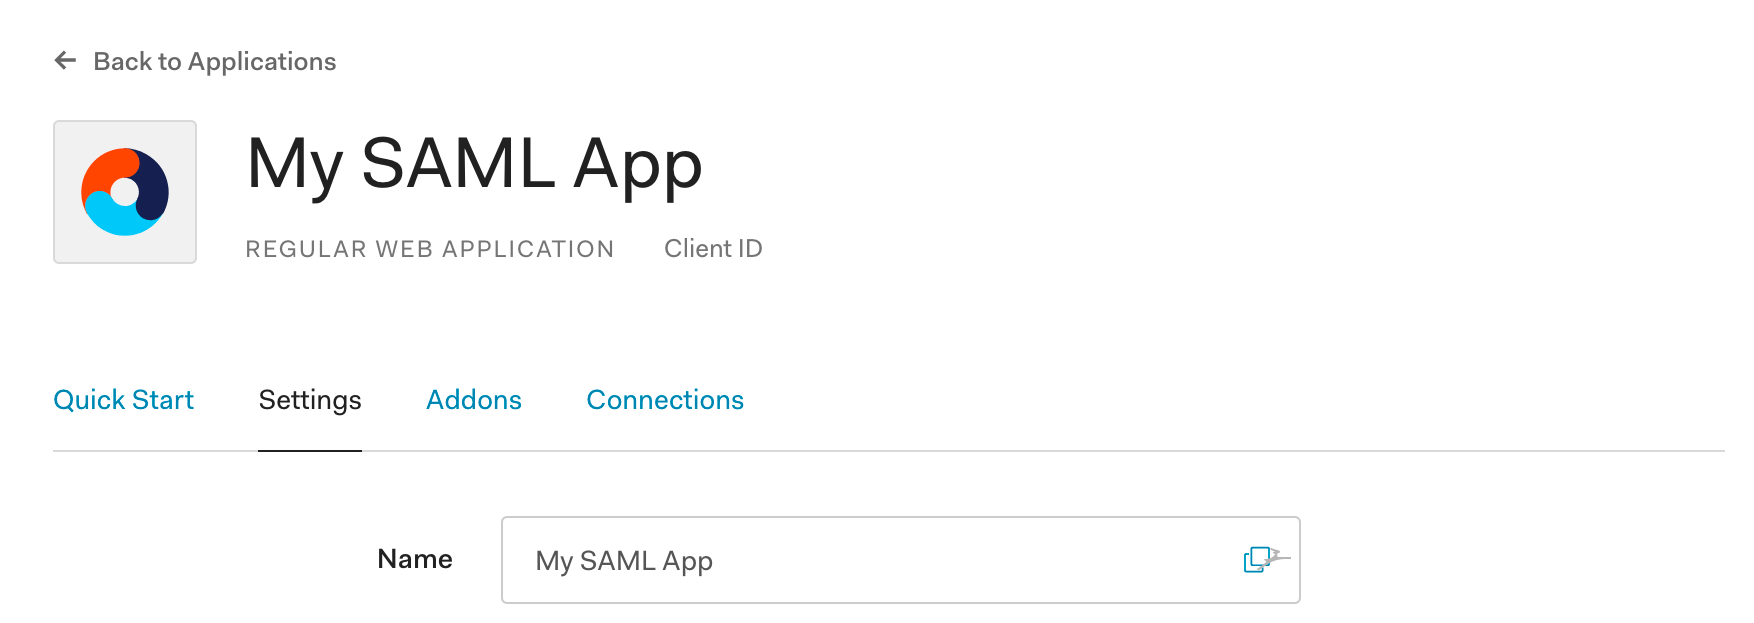
Next, click into your application and go into Settings:
SAML User Management
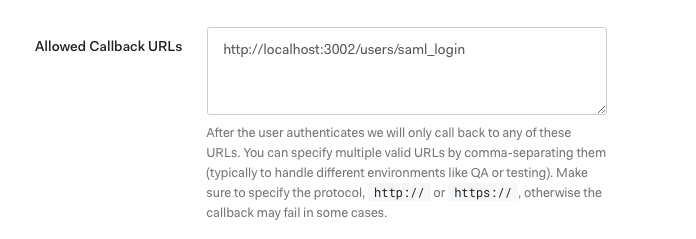
Scroll down until you see Allowed Callback URL.
Enter one that is relative to your app.search.external_url, such as +http://localhost:3002/users/saml_login+, then save:
SAML User Management
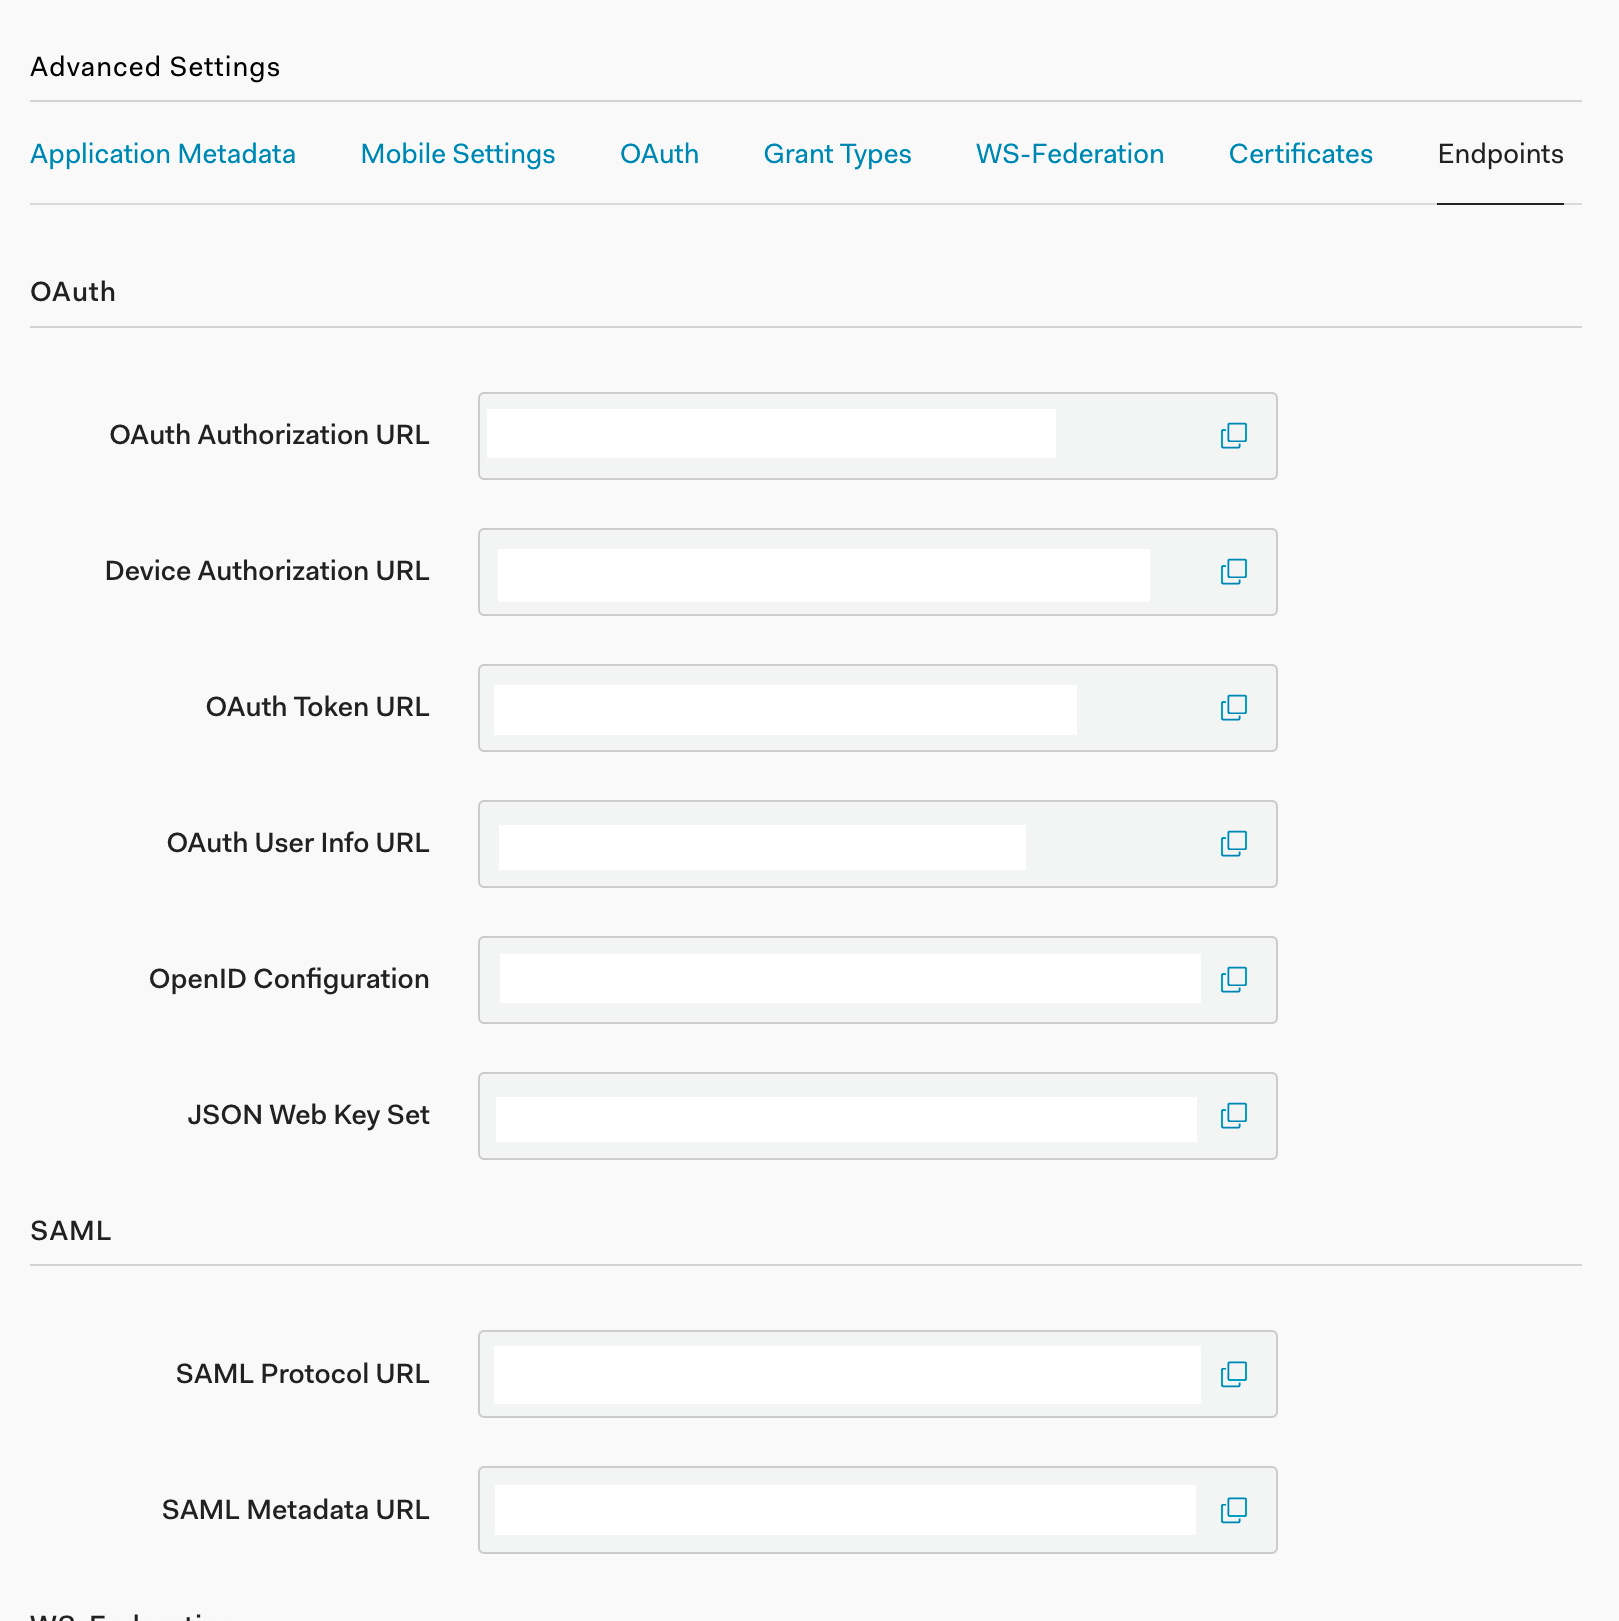
Keep scrolling down until you reach Advanced Settings:
SAML User Management

We need the SAML Metadata URL. Securely copy its contents.
That metadata URL contains XML which we need to position close to Elasticsearch. We’ll do so in the Within Elasticsearch step.
The SAML Metadata URL is near the bottom:
SAML User Management
Back in your application menu, head to the Addons section.
From there, locate and activate SAML 2.0:
SAML User Management

Finally, create a user by selecting Users from the main menu and then clicking the + Create User button:
SAML User Management
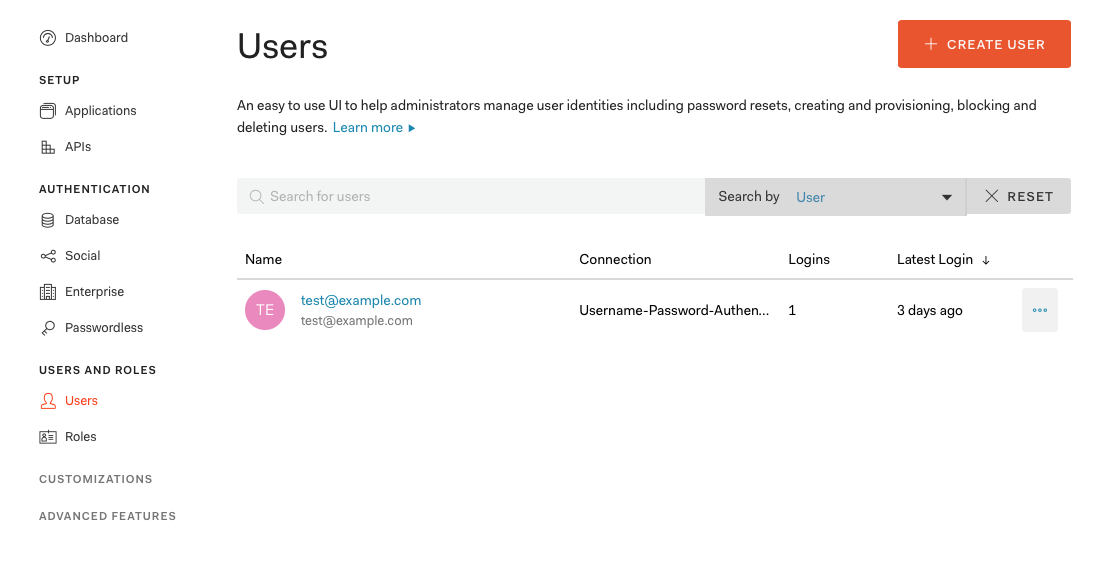
Fill out the email, a password, and leave connection to its default.
Within Elasticsearch
editWithin the Elasticsearch directory, open config/elasticsearch.yml and add:
(Note the comments!)
xpack.security.enabled: true
xpack.security.authc.api_key.enabled: true
xpack.security.authc.token.enabled: true
xpack.security.transport.ssl.enabled: true

xpack.security.authc.realms.saml.saml_test: # saml_test is our "auth.name" -- we can name anything we'd like: auth0, ent_search, etc.
 order: 1
 idp.metadata.path: saml/idp-metadata.xml # We need to create this directory and place the file here.
 idp.entity_id: "urn:dev-abc-1234.auth0.com" # Taken from the SAML Metadata URL
 sp.entity_id: "http://localhost:3002/" # Match these with your external_url.
 sp.acs: "http://localhost:3002/users/saml_login"
 sp.logout: "http://localhost:3002/logout"
 attributes.principal: "http://schemas.xmlsoap.org/ws/2005/05/identity/claims/emailaddress"
 attributes.mail: "http://schemas.xmlsoap.org/ws/2005/05/identity/claims/emailaddress"
Within the config directory, create a saml directory and a idp-metadata.xml file within it.
Paste the contents of the SAML Metadata URL file into the idp-metadata.xml file.
The URL has a prefix similar to the example: dev-abc-1234.auth0.com.
Be sure you have added that string as the idp.entity_id, prefixed with urn: as shown above.
Restart Elasticsearch.
Follow the standard instructions to use Elasticsearch to create a password.
We’ll set that password and resume the SAML configuration within App Search.
Within App Search
editWithin App Search directory, edit config/enterprise-search.yml:
elasticsearch.username: elastic
elasticsearch.password: [ELASTIC_PW]

ent_search.auth.saml_test.source: elasticsearch-saml
Note that the auth.<auth_name> must match what is within Elasticsearch’s SAML realm.
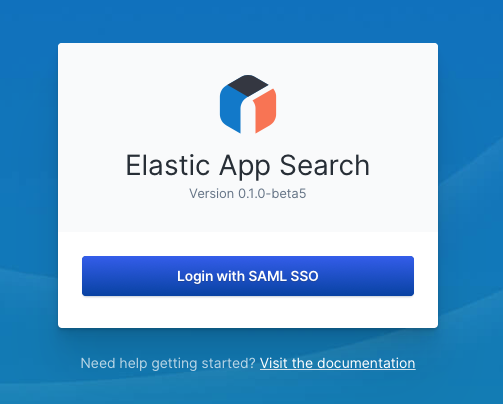
Visit your App Search URL and try to login.
You will be prompted to do so — if you created an Auth0 user in the step above, use its credentials.
App Search is now aware of users managed within Auth0. However, for those users to access App Search, you must map App Search roles to those users based on their attributes stored in Auth0 (e.g. email, username, role).
Map App Search roles from within App Search. Although Elasticsearch and Kibana have interfaces for assigning and mapping roles, those settings don’t apply to App Search.
Use App Search’s Role Mapping feature to define all App Search roles. Refer to the steps in Native Realm User Management, but remember that in this instance you are mapping roles onto users managed in your SAML provider based on their attributes stored within that provider.
That’s it! You’ve successfully connected SAML.
SAML and Elastic Cloud
editYou can find the sp.* host for App Search (the [APP SEARCH ENDPOINT] in the examples below) on Elastic Cloud by clicking on "Copy endpoint" next to the App Search application in the Deployment details page.
An example of how the elasticsearch.yml file would differ on Elastic Cloud. Note that you would change this in the "User setting overrides" section of your edit deployment page.
xpack.security.enabled: true
xpack.security.authc.api_key.enabled: true
xpack.security.authc.token.enabled: true
xpack.security.transport.ssl.enabled: true

xpack.security.authc.realms.saml.saml_test: # saml_test is our "auth.name" -- we can name anything we'd like: auth0, ent_search, etc.
 order: 1
 idp.metadata.path: "[METADATA URL]" # This could be a link to your identity provider's metadata, or an XML file.
 idp.entity_id: "[SAML ENTITY ID]" # This is provided by your identity provider, as the "Identity Provider Issuer" or "Domain".
 sp.entity_id: "[APP SEARCH ENDPOINT]/" # Match these with your external_url.
 sp.acs: "[APP SEARCH ENDPOINT]/users/saml_login"
 sp.logout: "[APP SEARCH ENDPOINT]/logout"
 attributes.principal: "http://schemas.xmlsoap.org/ws/2005/05/identity/claims/emailaddress" # This will depend on your identity provider.
 attributes.groups: "groups"
Reset Password
editRun the binary with an attached --reset-auth command:
- Standard Auth: Resets login and generates new random password.
- elasticsearch-native and elasticsearch-saml: Removes the current role mappings. All users are granted the owner role.