Connecting Slack
editConnecting Slack
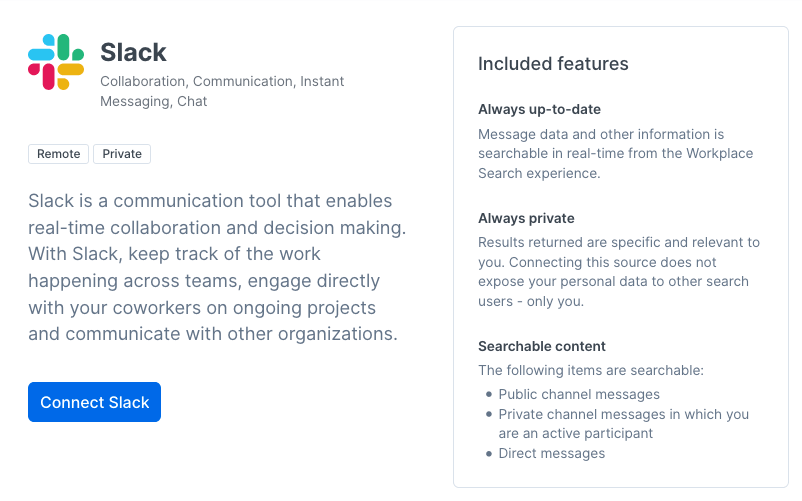
editSlack is the new digital office space. Teams of all shapes and sizes use Slack to stay in touch. People share videos, pictures, GIFs and lots of emojis.
You can now connect Slack to Workplace Search, and search through all your public channels, private channels, and direct messages.
Remote sources like Slack are private sources. Once you have configured the connector, each individual member must add it as a unique private source via their personal settings. The connecting person can access their own private channels and direct messages, and only they have access. Each member may connect only one Slack private content source.
The Slack connector searches the following data from Slack:
Fetched Slack Documents |
Including ID, File Metadata, Excerpt, Attachments, Sender, Recipient and Timestamps |
The connector will also index the following data from Slack for speedier retrieval:
Stored Slack Documents |
Users, Channels, Emojis |
Configuring the Slack Connector
editConfiguring the Slack connector is the first step prior to connecting the Slack service to Workplace Search, and requires that you create an OAuth App from the Slack platform.
Step 1. Login to the Slack Apps Portal.
Make sure that you create the app through a trusted and stable Slack account. We recommend using a team-owned account.
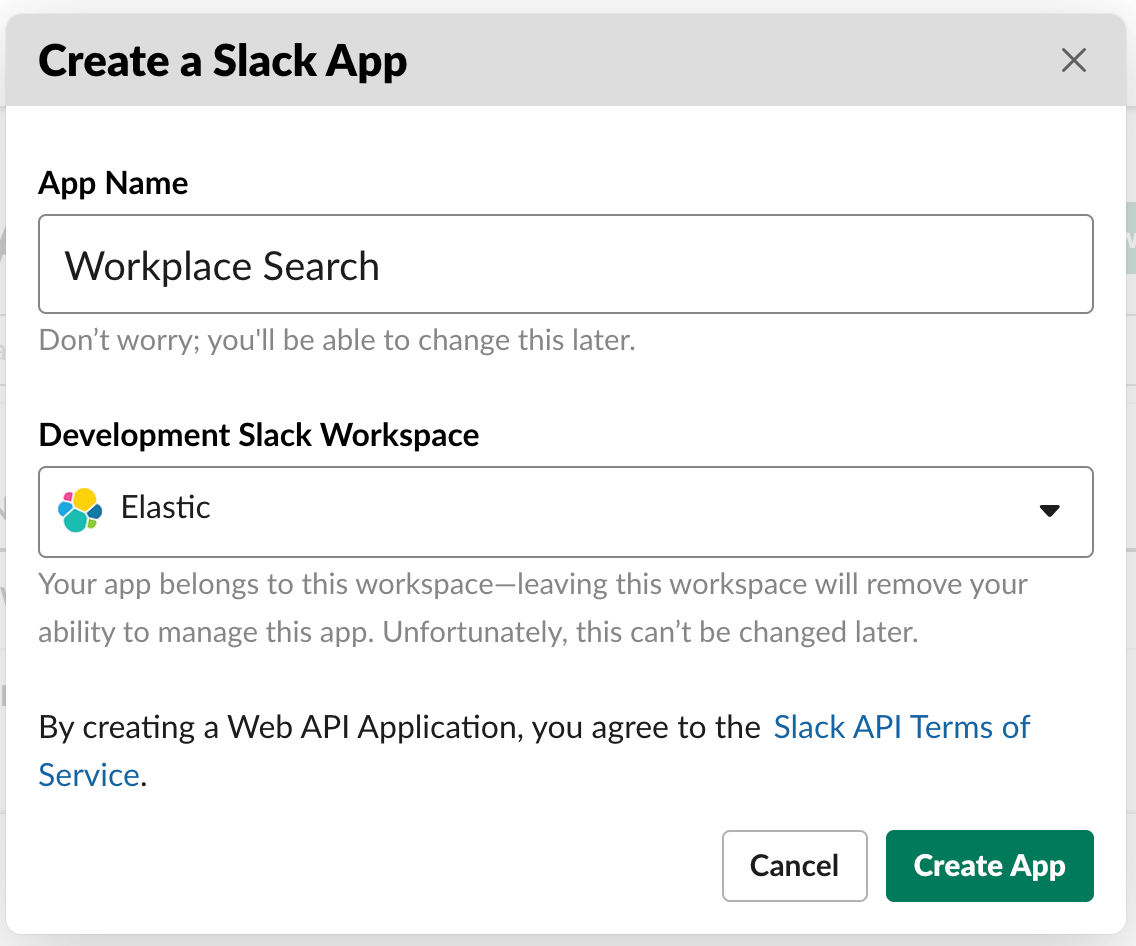
Step 2. Create an app, and then configure appropriate access levels. Click Create New App when prompted. In the modal, provide a name — like Workplace Search — and choose the right Workspace. After that, click Create App.
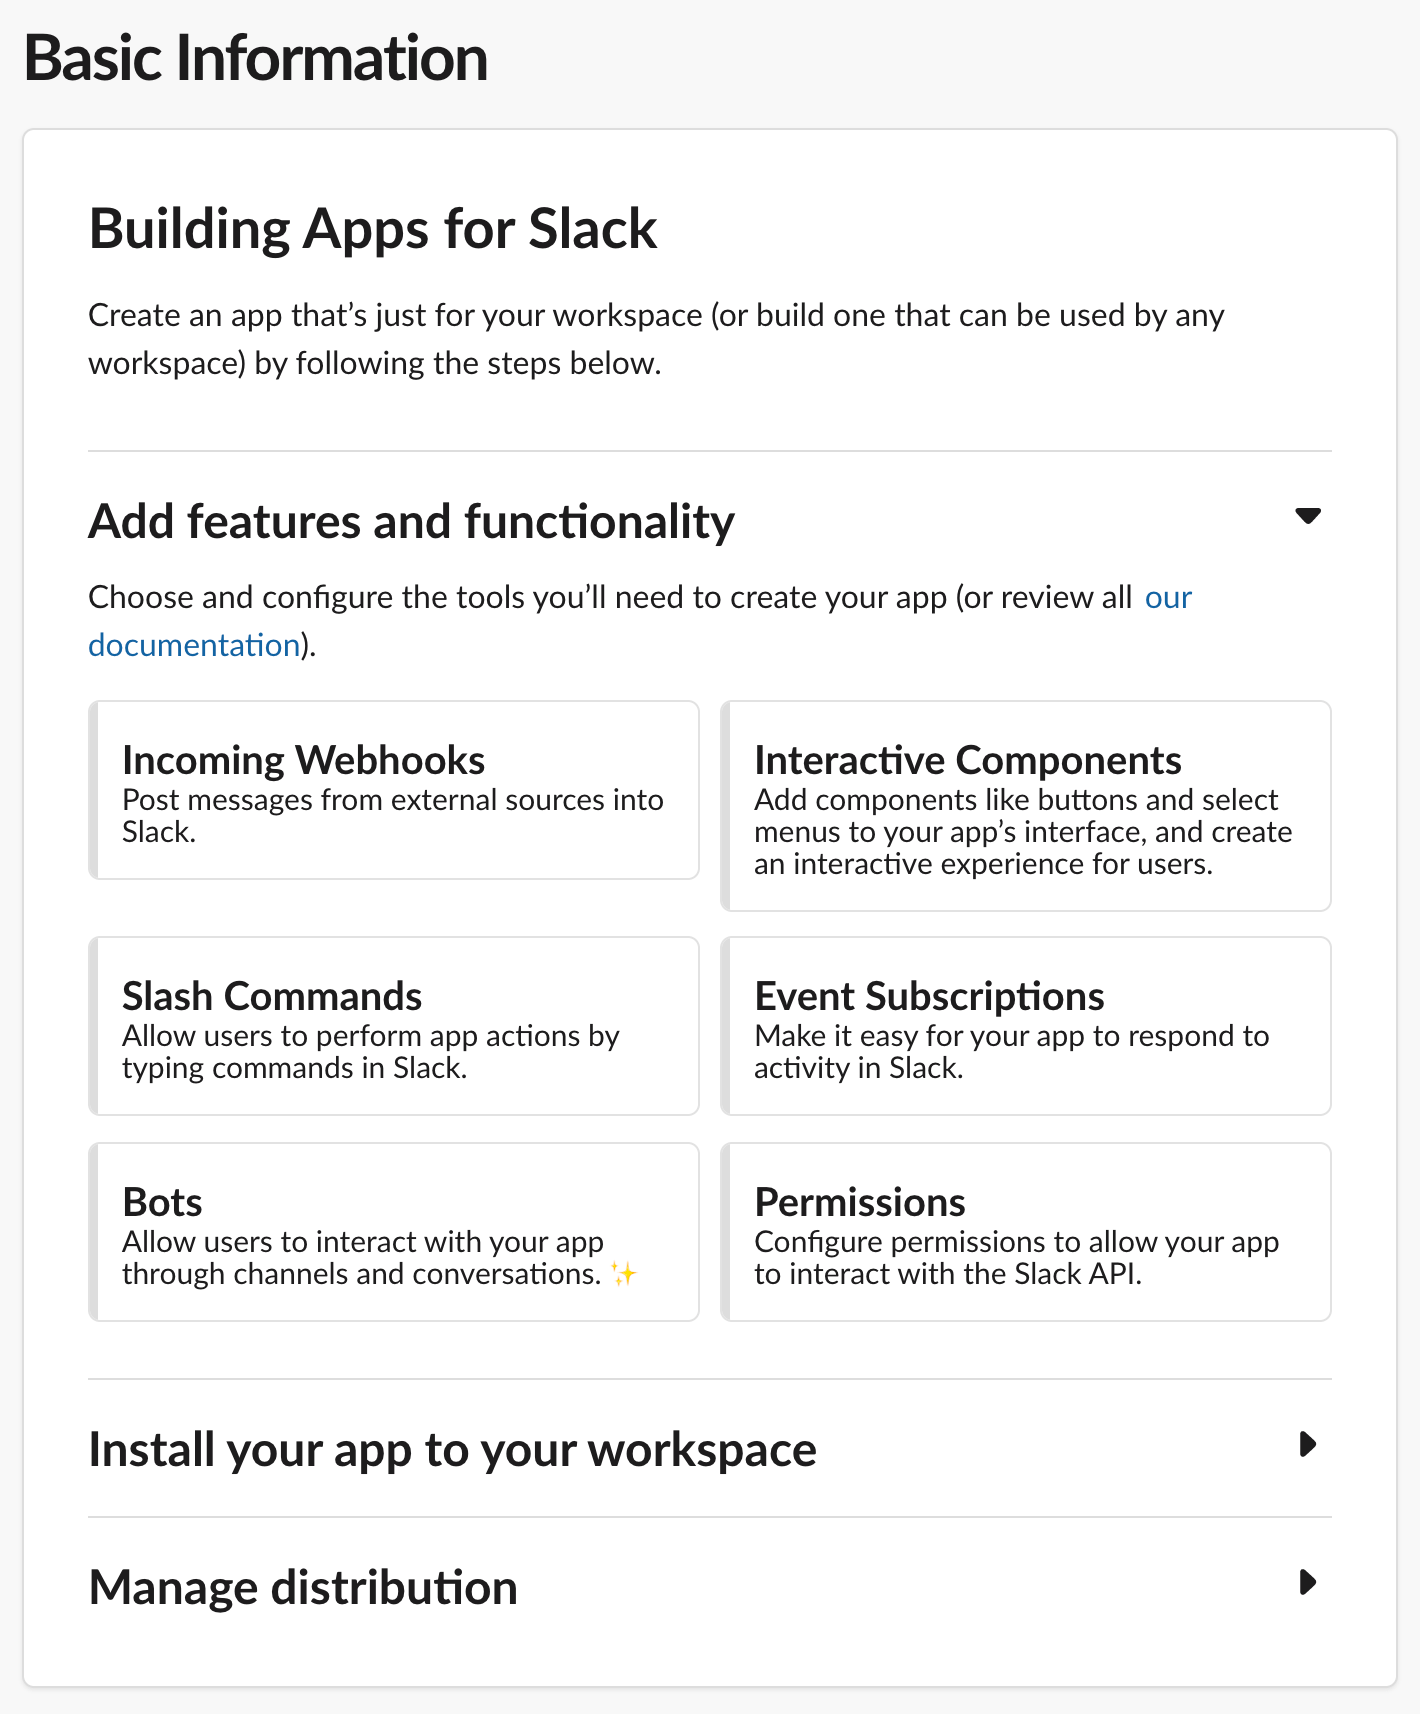
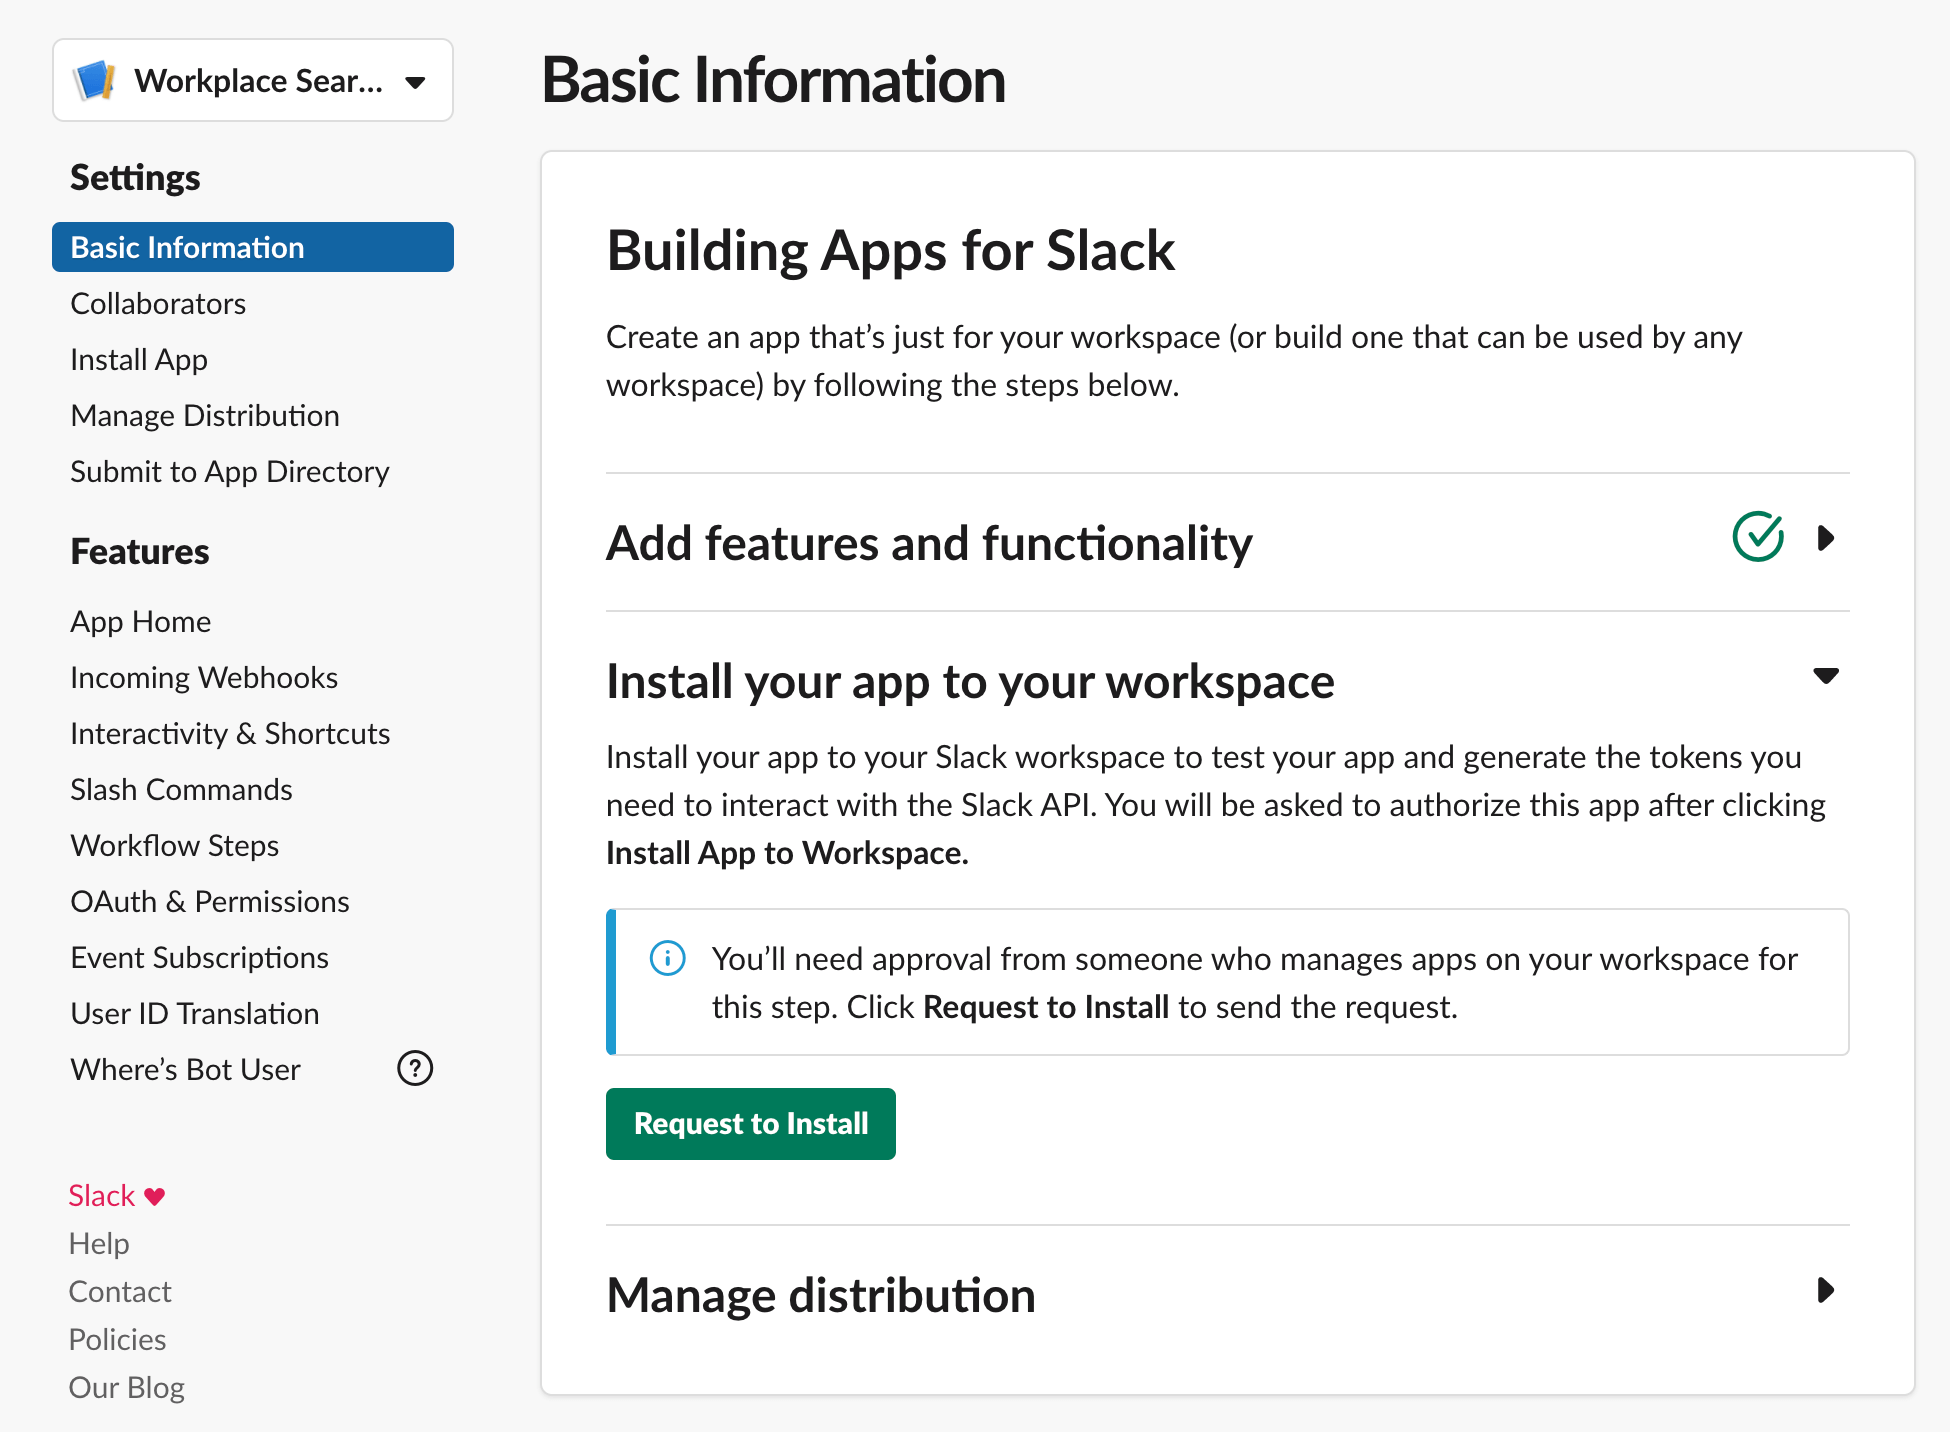
Step 3. A set of choices appears. Under Add features and functionality, click Permissions.
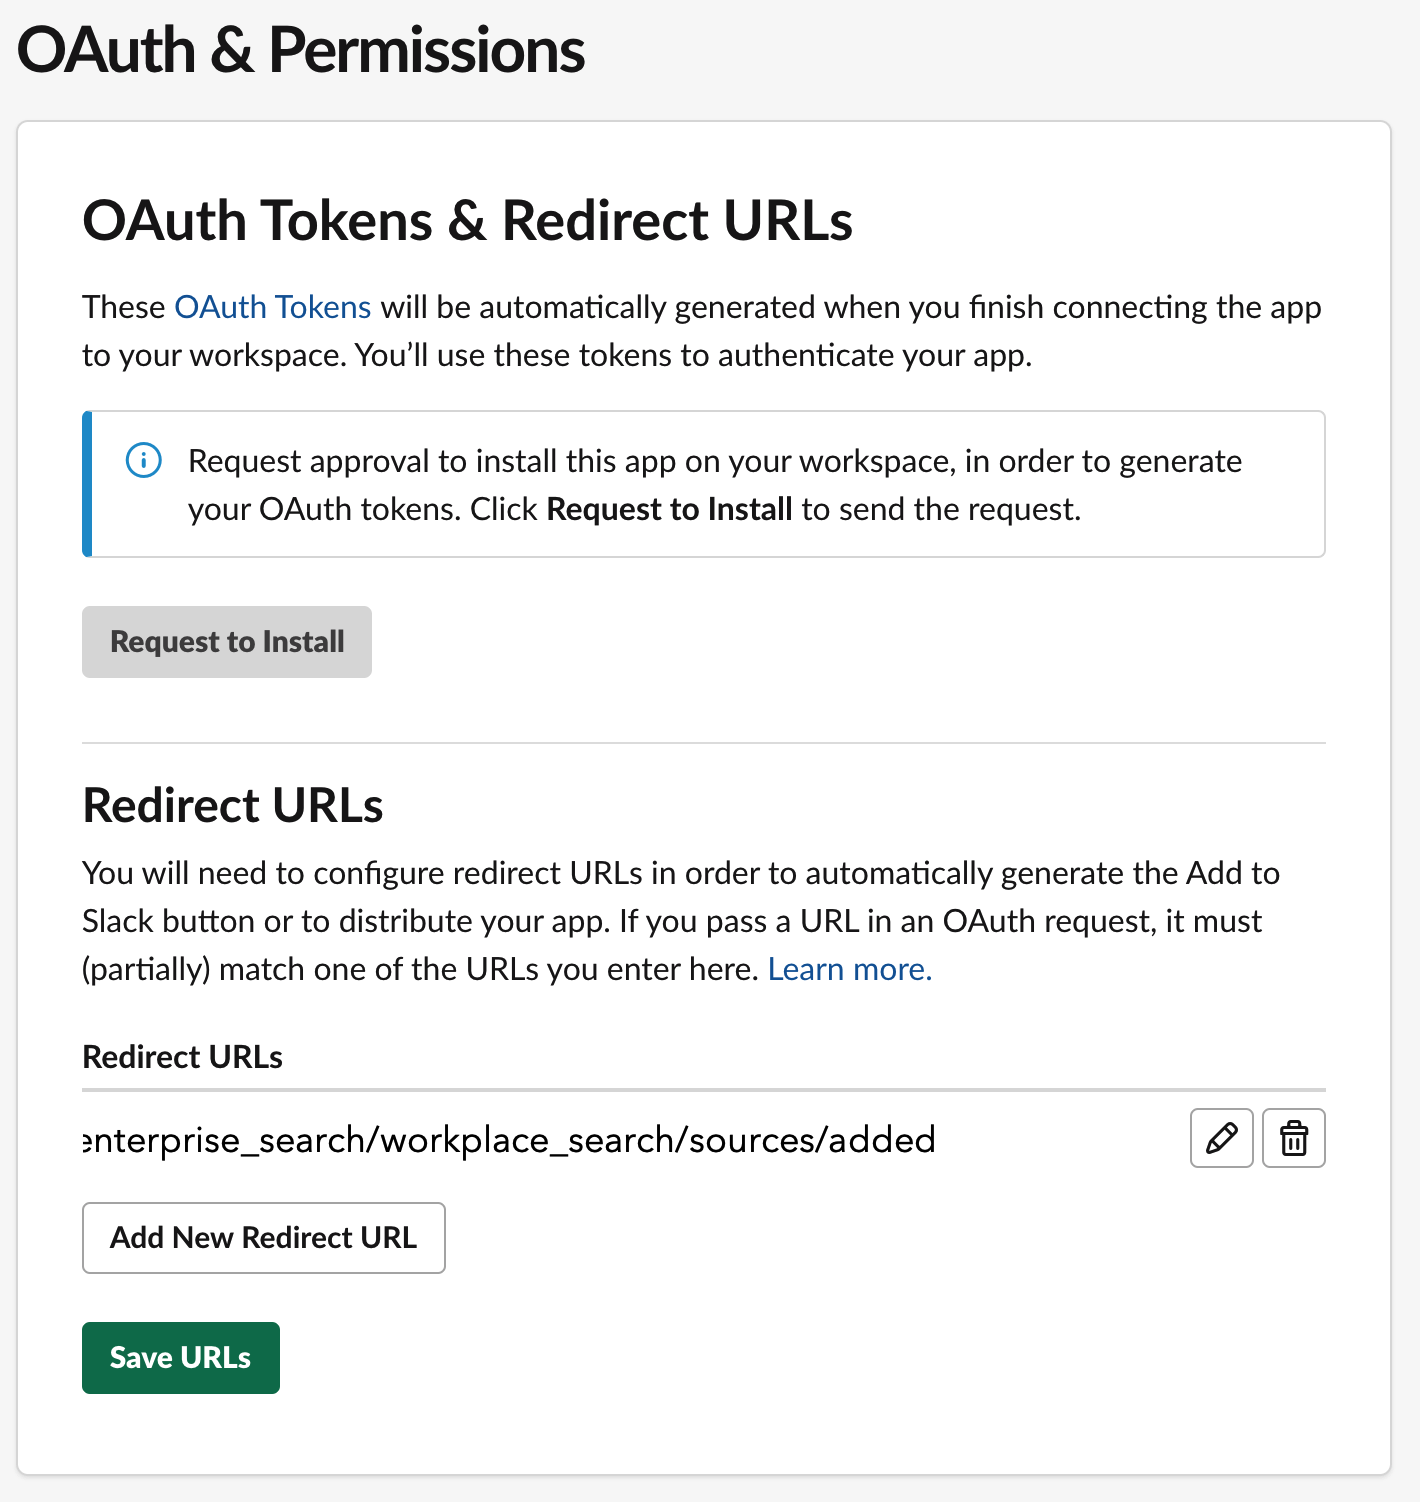
Step 4. Provide a redirect URL. Use the Workplace Search OAuth redirect URL for your deployment.
After you have added it, click Save URLs.
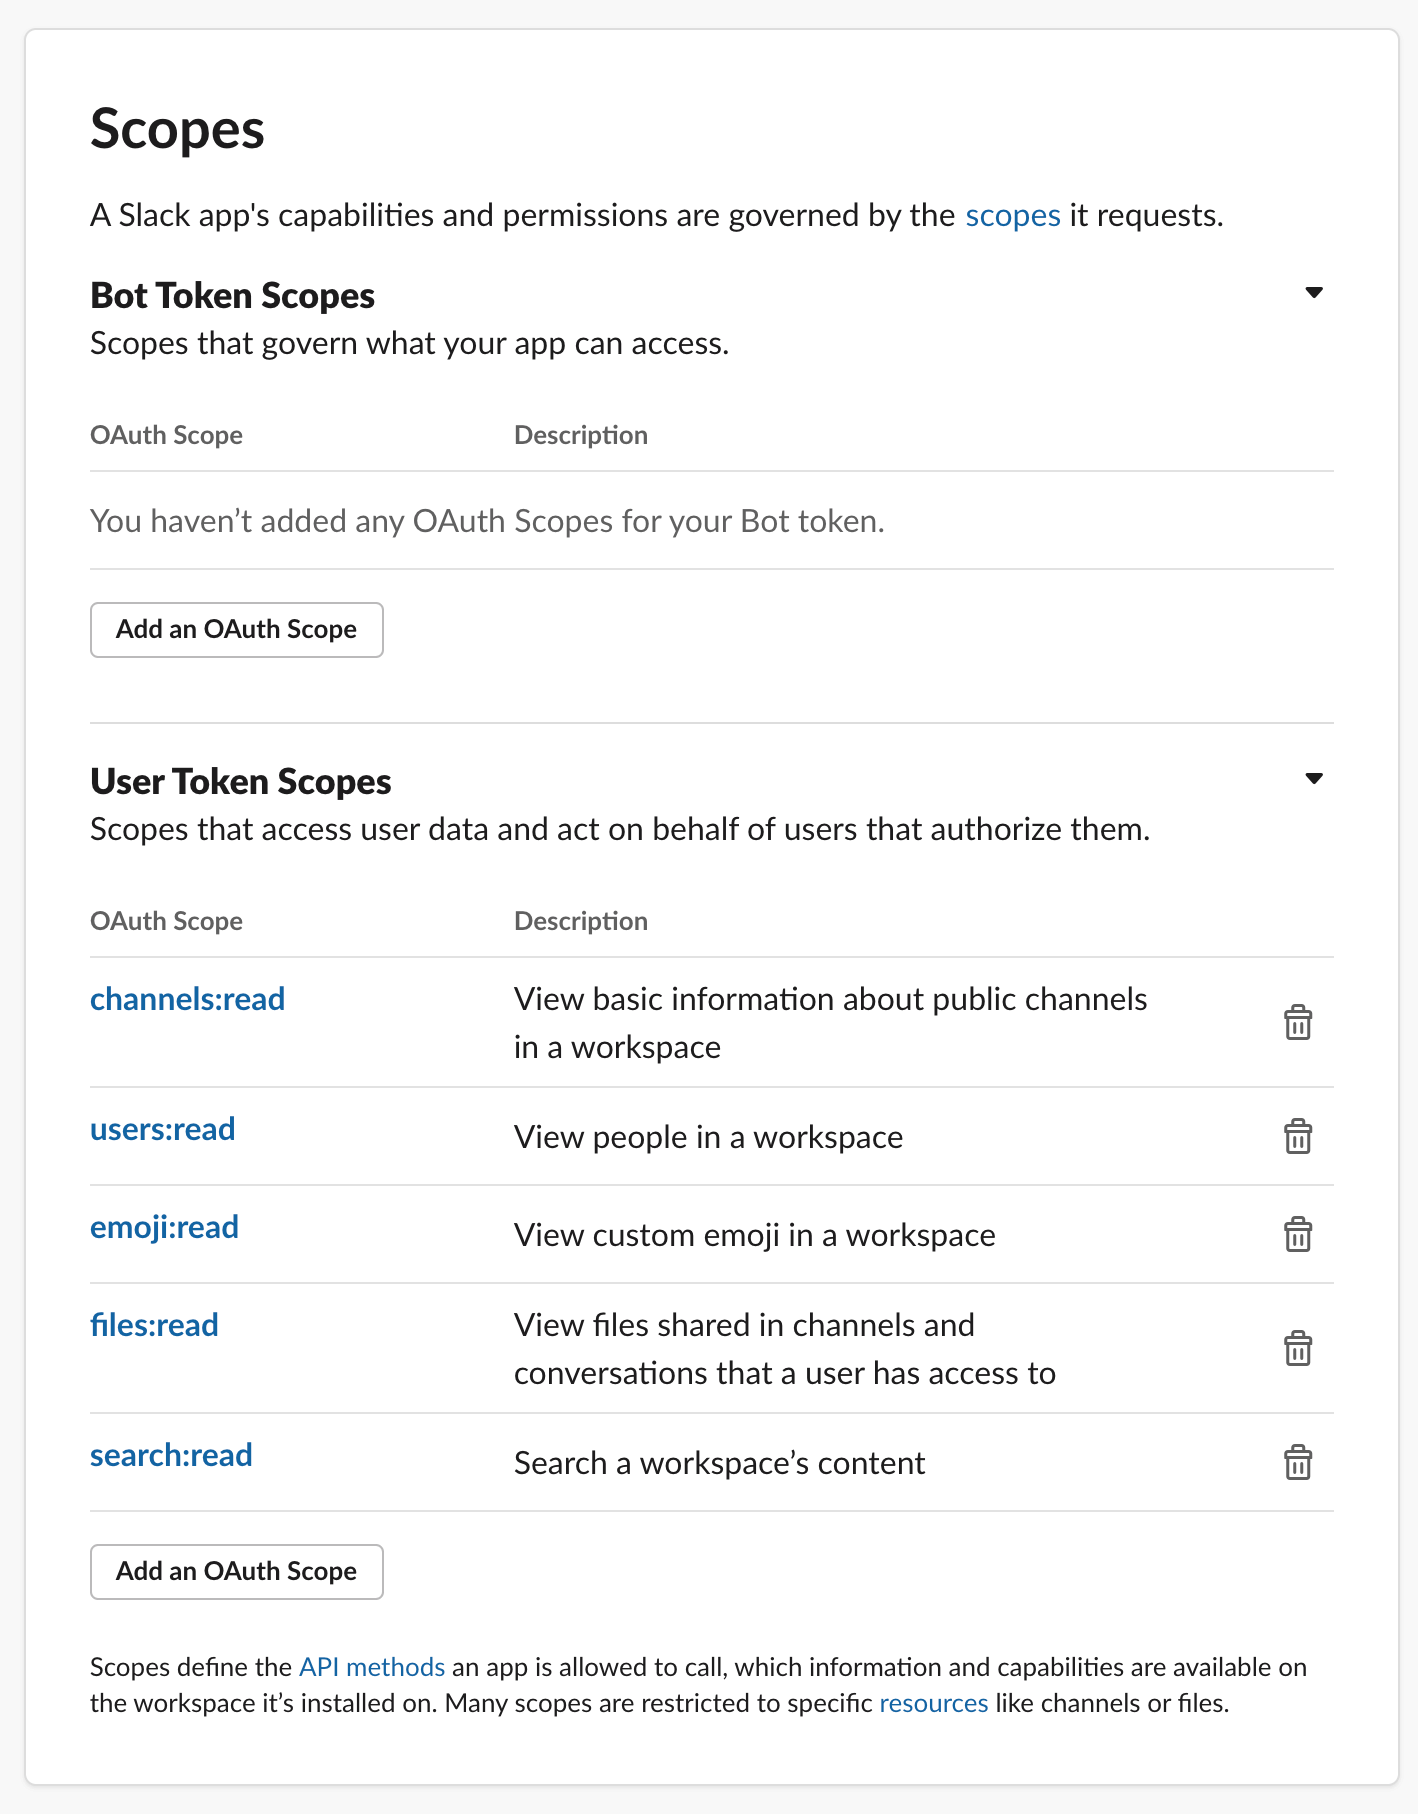
Step 5. Next, we must define scope. You will need to add five under User Token Scopes.
-
channels:read -
users:read -
emoji:read -
files:read -
search:read
Step 5. Next, on the left-hand side of the application menu, click Basic Information. Under the section Install your app to your workspace, select Install or Request to Install your application. Which you will see depends on your permissions. An admin must approve the application if you lack the permissions to do so.
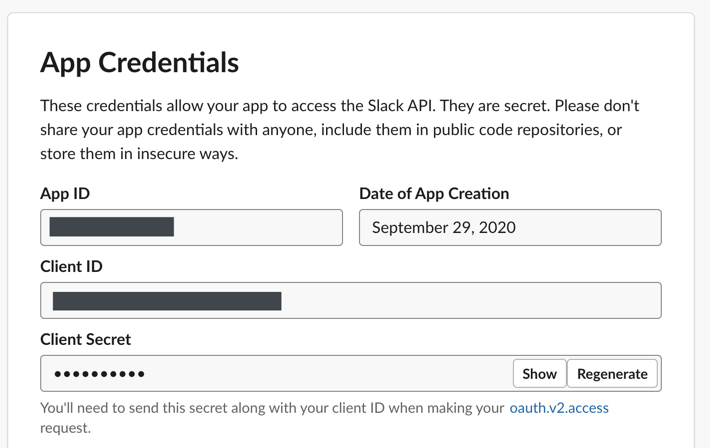
Step 6. Once approved, you will have the option to view your App Credentials. Retrieve your Client ID and Client Secret. Workplace Search will need them!
Step 7. Return to Workplace Search. From the Workplace Search administrative dashboard, click Sources, locate Slack, click Configure and provide both your Client ID and Client Secret. Proceed forward.
Voilà! The Slack connector is now configured, and ready to be used to synchronize content. To enable Slack, visit the Security menu and enable the Slack connector for your team.
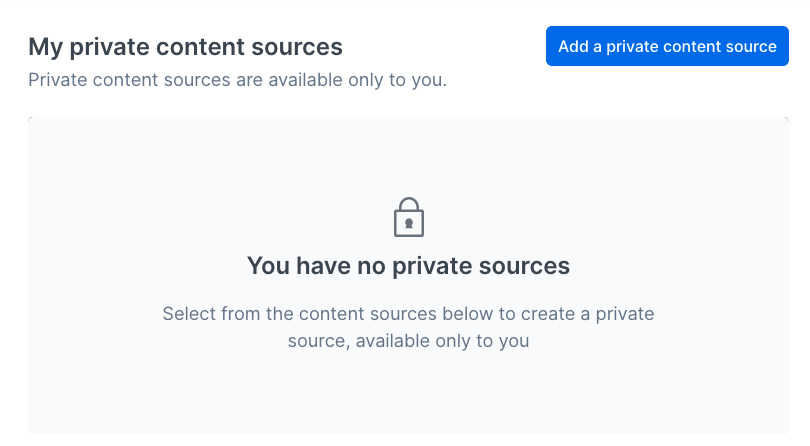
Reminder: Slack must be added as a private content source.
Connecting Slack to Workplace Search
editOnce the Slack connector has been configured, you may connect a Slack instance to your private search experience.
Step 1. Access your own Workplace Search search dashboard, and click the Manage button.
Step 2. Click Add a private content source.
Step 3. Click Connect Slack. You will see Slack’s OAuth screen.
Accept the permissions to connect your Slack account.
Step 4. Success! Your personal Slack is now available to your search experience.
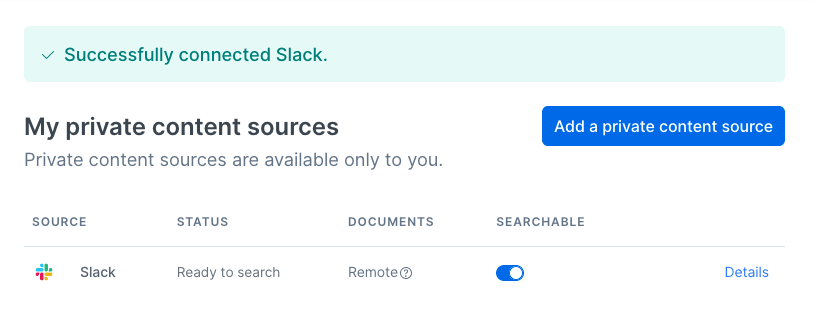
You will have the freshest content available each time you query.
Synchronized fields
editThe following table lists the fields synchronized from the connected source to Workplace Search. The attributes in the table apply to the default search application, as follows:
- Display name - The label used when displayed in the UI
- Field name - The name of the underlying field attribute
- Faceted filter - whether the field is a faceted filter by default, or can be enabled (see also: Customizing filters)
-
Automatic query refinement preceding phrases - The default list of phrases that must precede a value of this field in a search query in order to automatically trigger query refinement. If "None," a value from this field may trigger refinement regardless of where it is found in the query string. If
'', a value from this field must be the first token(s) in the query string. IfN.A., automatic query refinement is not available for this field by default. All fields that have a faceted filter (defaultorconfigurable) can also be configured for automatic query refinement; see also Update a content source, Get a content source’s automatic query refinement details and Customizing filters.
| Display name | Field name | Faceted filter | Automatic query refinement preceding phrases |
|---|---|---|---|
Id |
|
No |
N.A. |
Title |
|
No |
N.A. |
Type |
|
Configurable |
None |
Slack Id |
|
Configurable |
N.A. |
Username |
|
Configurable |
N.A. |
Real name |
|
Configurable |
N.A. |
Avatar |
|
No |
N.A. |
Is deleted |
|
Configurable |
N.A. |
Is bot |
|
Configurable |
N.A. |
URL |
|
No |
N.A. |