Building Custom Search Experiences
editBuilding Custom Search Experiences
editModern search experiences are provided with Workplace Search, allowing team members and collaborators to find information and files from a feature-rich, standalone platform. It is a fast, scalable, and intuitive way to rollout search across your organization, and will continue evolving over time.
In some instances, adding unified search to an area of your virtual workplace that already generates high levels of engagement or traffic is desirable. Intranet systems and other knowledge platforms are prime candidates as they represent a natural gravitational pole for members of your team. Workplace Search boasts flexible programmatic search capabilities via the Search API, allowing you to replace an existing search bar or add a new one to an internal application.
In this guide
editA typical search journey
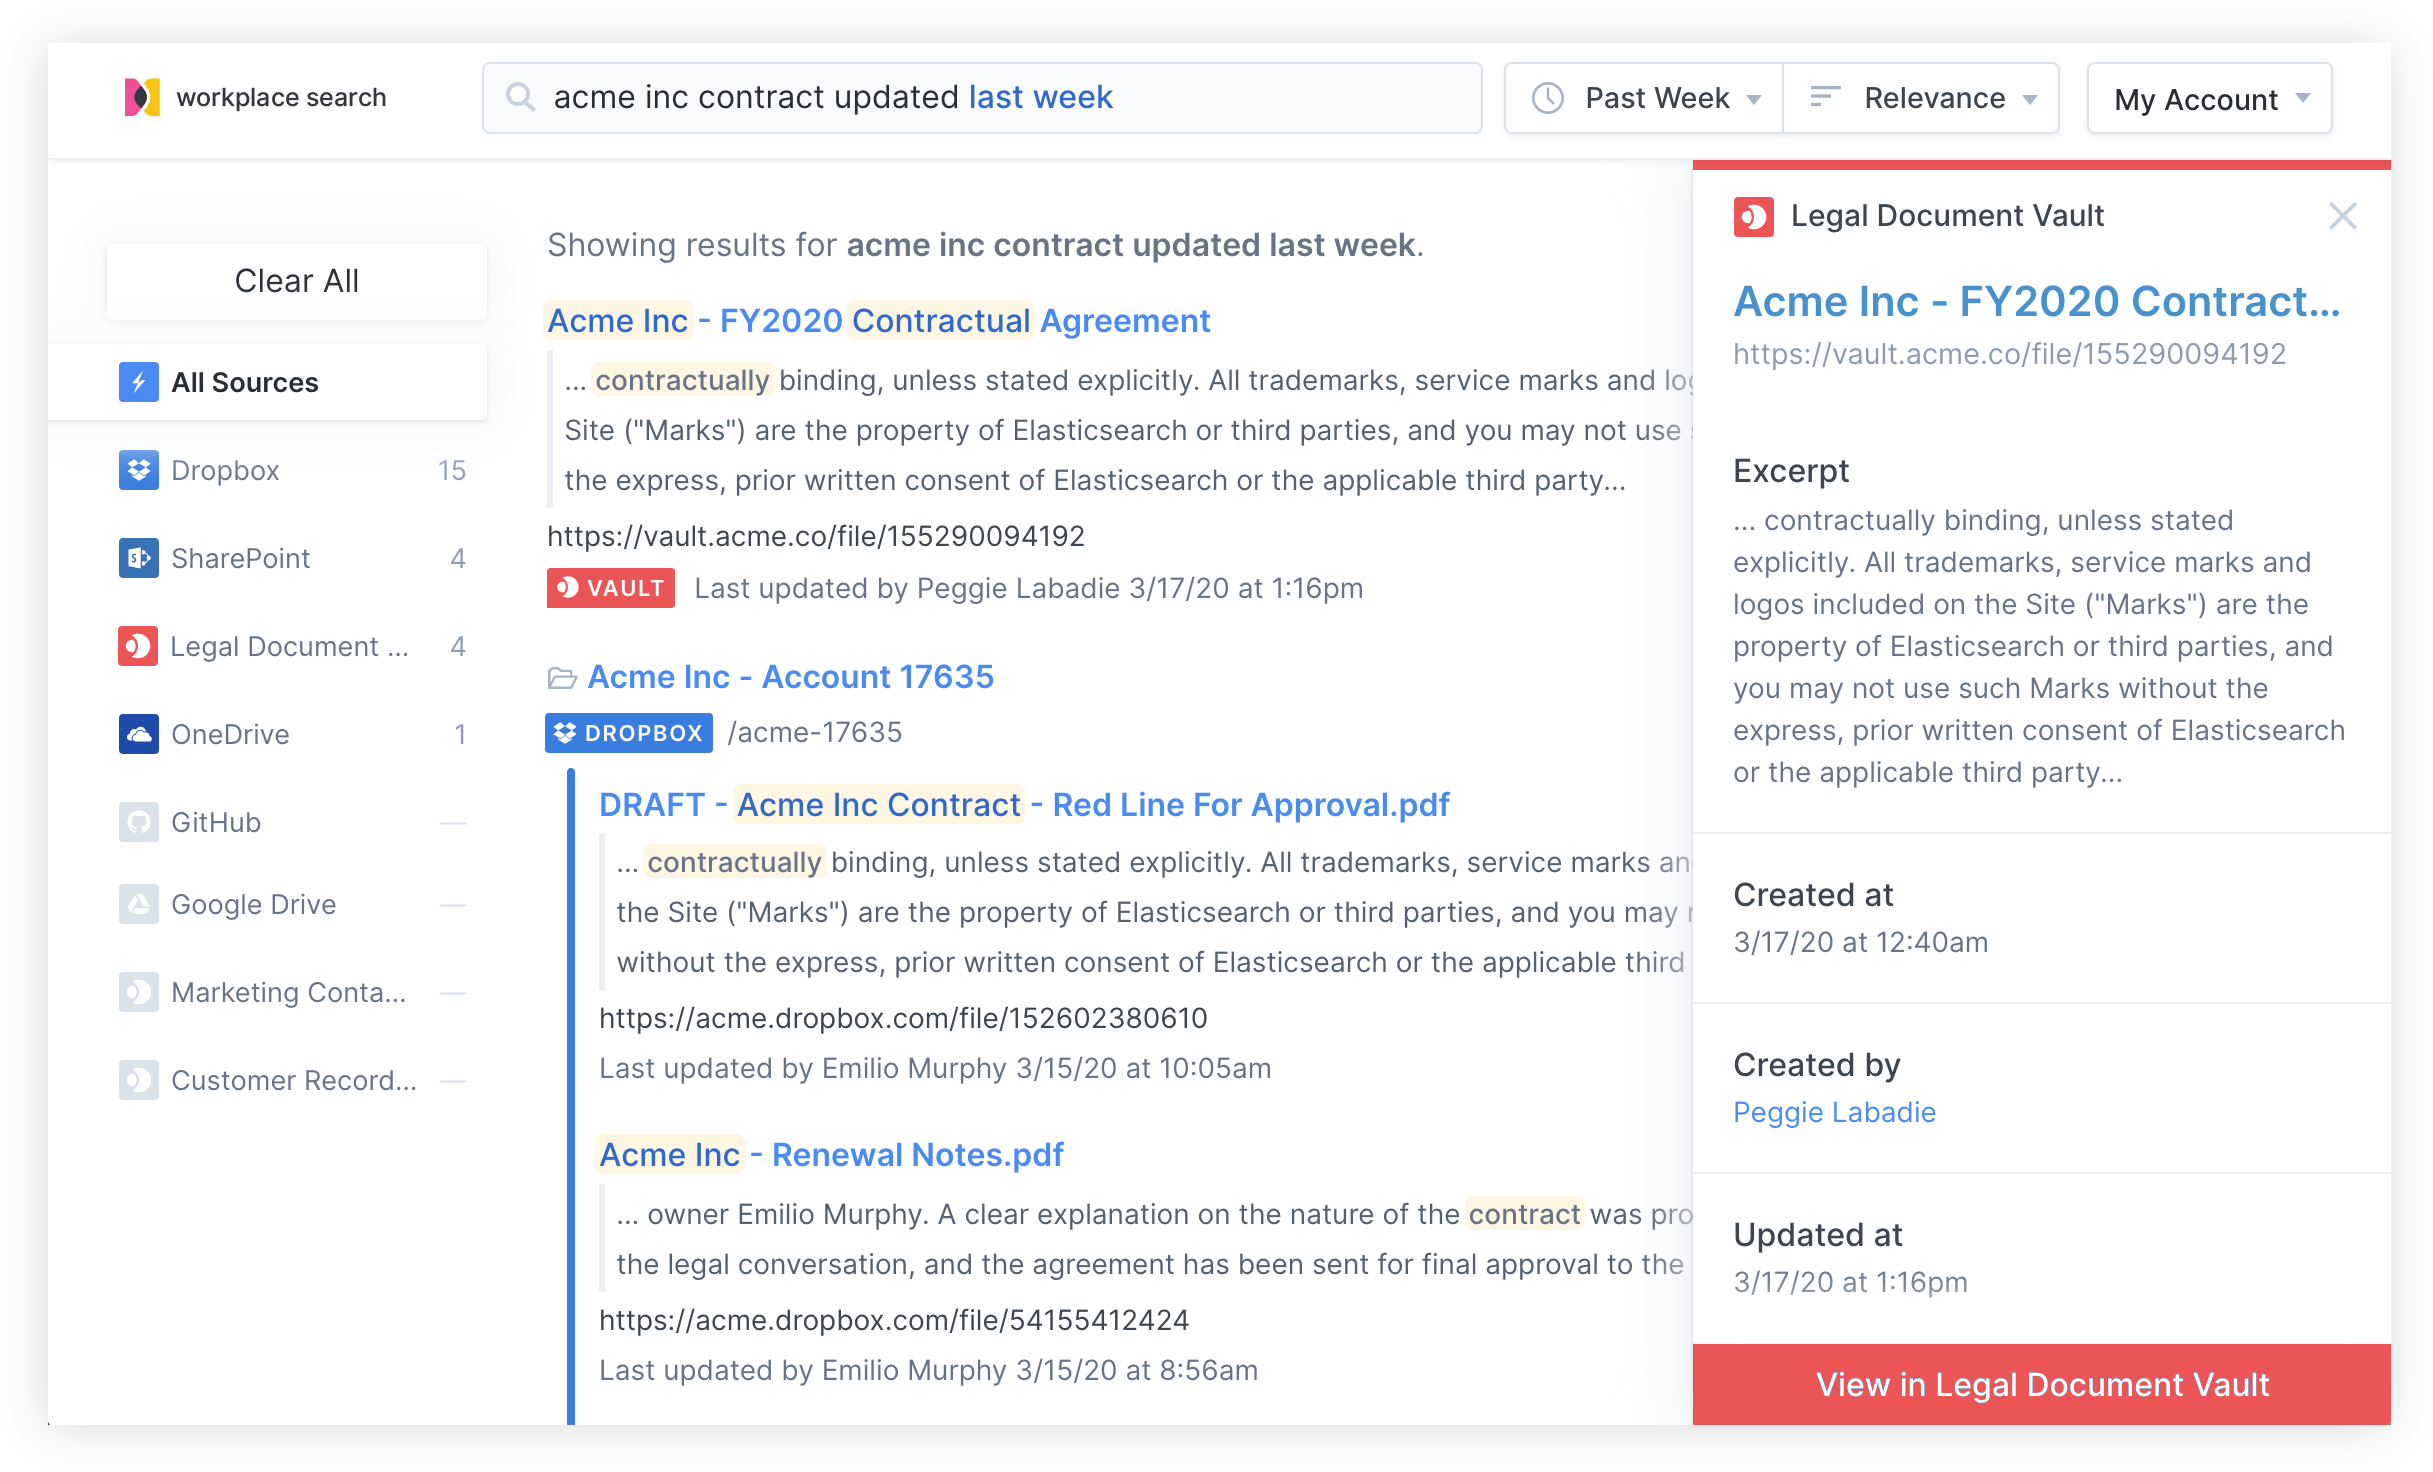
editUsing a simple example might be the best way to illustrate how custom search experiences are implemented with Workplace Search. For our purpose, let’s transport ourselves to Acme Inc, where an internal knowledge platform acts as the launch board for members of the organization on a daily basis. Given that our intranet-like application has already gained a fair amount of traction with the various teams across the organization, providing a unified search experience along with the useful actions already available is a great way to enhance the discovery experience.

One of our colleagues is looking for information about a specific project, where content and files may be found across a variety of sources, from cloud storage to internal knowledge bases. From the newly rolled out unified search experience found on the Acme Inc intranet, our teammate enters a search query and is immediately presented with results tailored specifically for them, taking into consideration their level of access to various pieces of content across the organization. This personalization drives both increased relevance and enhanced security, all backed by an effective authentication mechanism which relies on the OAuth standard.
Configuring the OAuth Application for Search
editThe first step towards designing and implementing a custom search experience for Workplace Search is to create an OAuth application from the administrative dashboard. This OAuth application will ensure proper authentication of users and secure access to content.
Step 1. Locate the Settings area in the Workplace Search administrative dashboard, and click OAuth Application.
Step 2. We must configure our OAuth application. Provide a name that matches the platform on which you intend to embed the unified search experience.
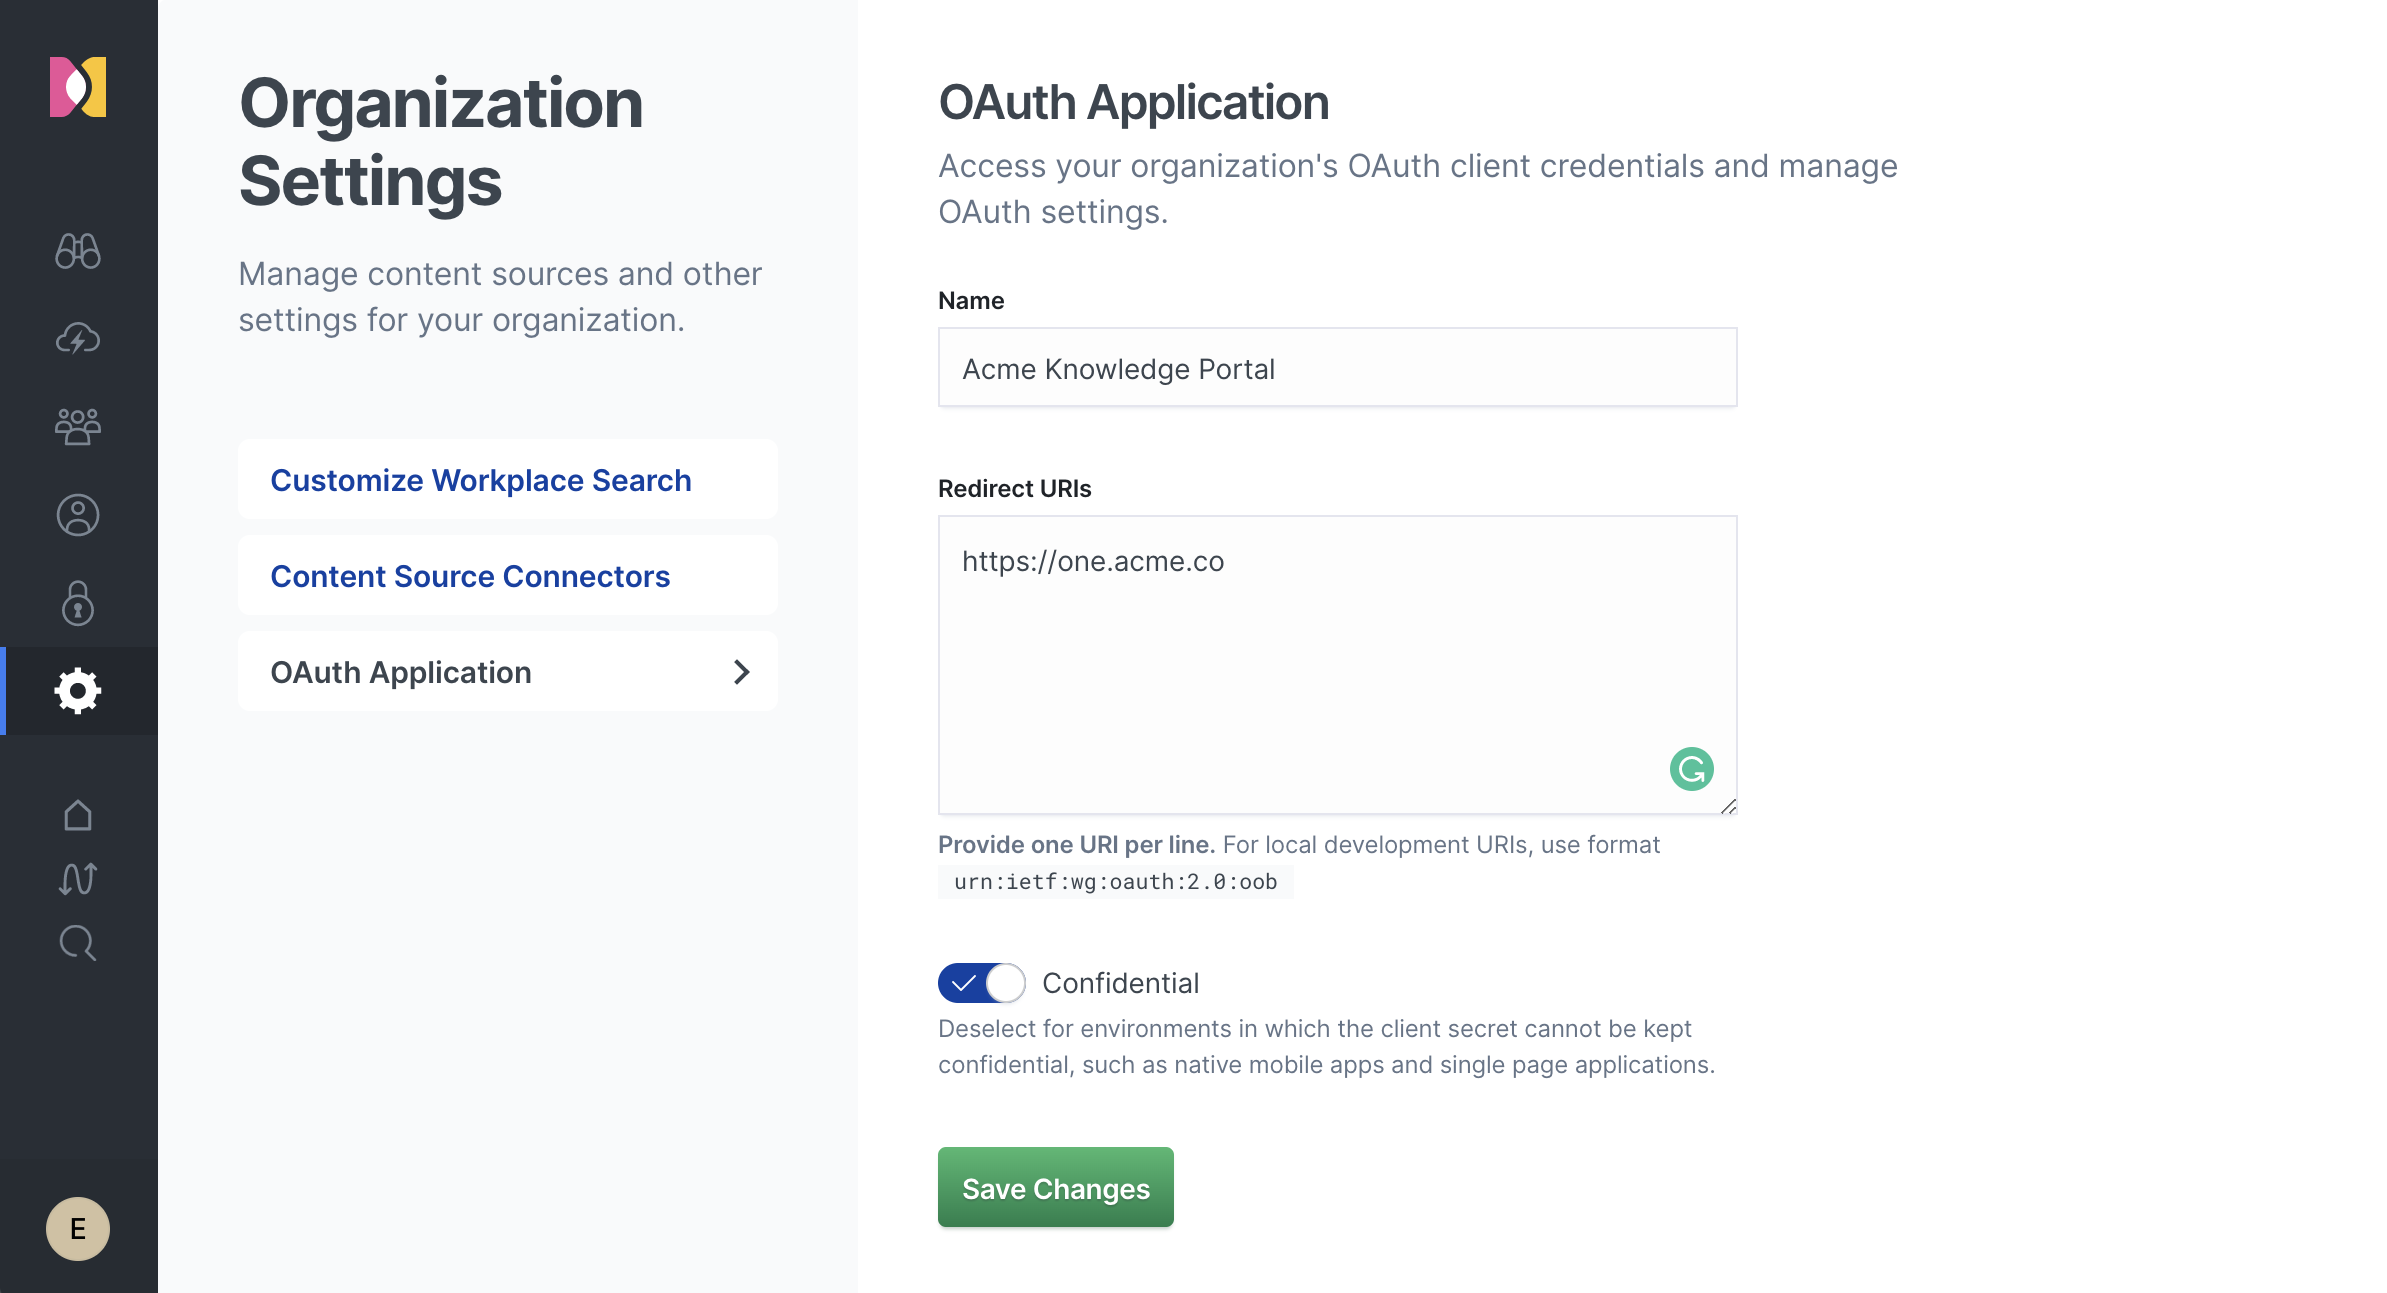
Step 3. Provide a list of authorized redirect URIs. These should match the target destination where you expect a user to return after successfully authenticating with the Workplace Search service.
Step 4. Select the type of application you would like to create.
- A Confidential application provides a Client Secret which can be used by the server to request tokens on behalf of a user.
- A Public application is better suited for environments in which the client secret cannot be kept confidential, such as native mobile applications and single-page applications. This is also known as the implicit approach.
The Confidential approach is recommended wherever possible, as it provides more control over the generation and refresh of access tokens.
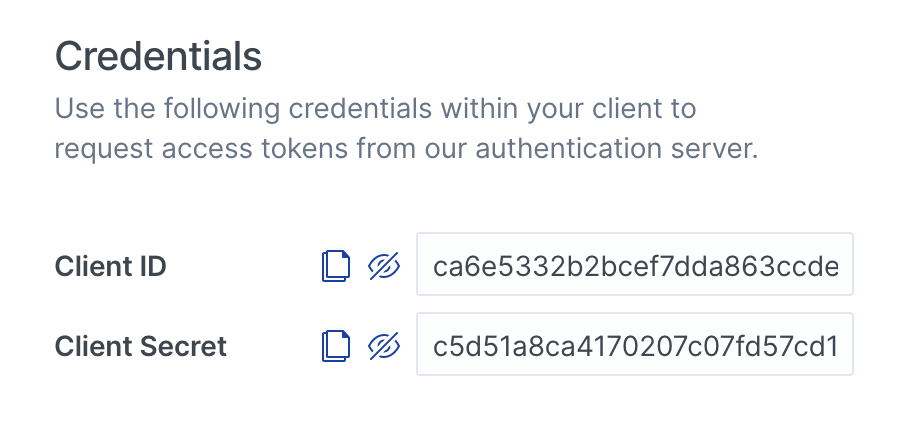
Step 5. Save the changes. A Client ID will be created, as well as a Client Secret if Confidential was previously set for the OAuth application.
With the help of our newly created OAuth application, we are now ready to implement unified search on the Acme Inc. internal knowledge platform. Depending on the strategy you chose, the access token and authentication sequence will differ slightly.
Authenticating Users with a Confidential OAuth Flow
editThe confidential OAuth flow requires that the application server (in this case our internal knowledge platform) handles the trading of a generated authorization code and client secret in exchange for an access token.
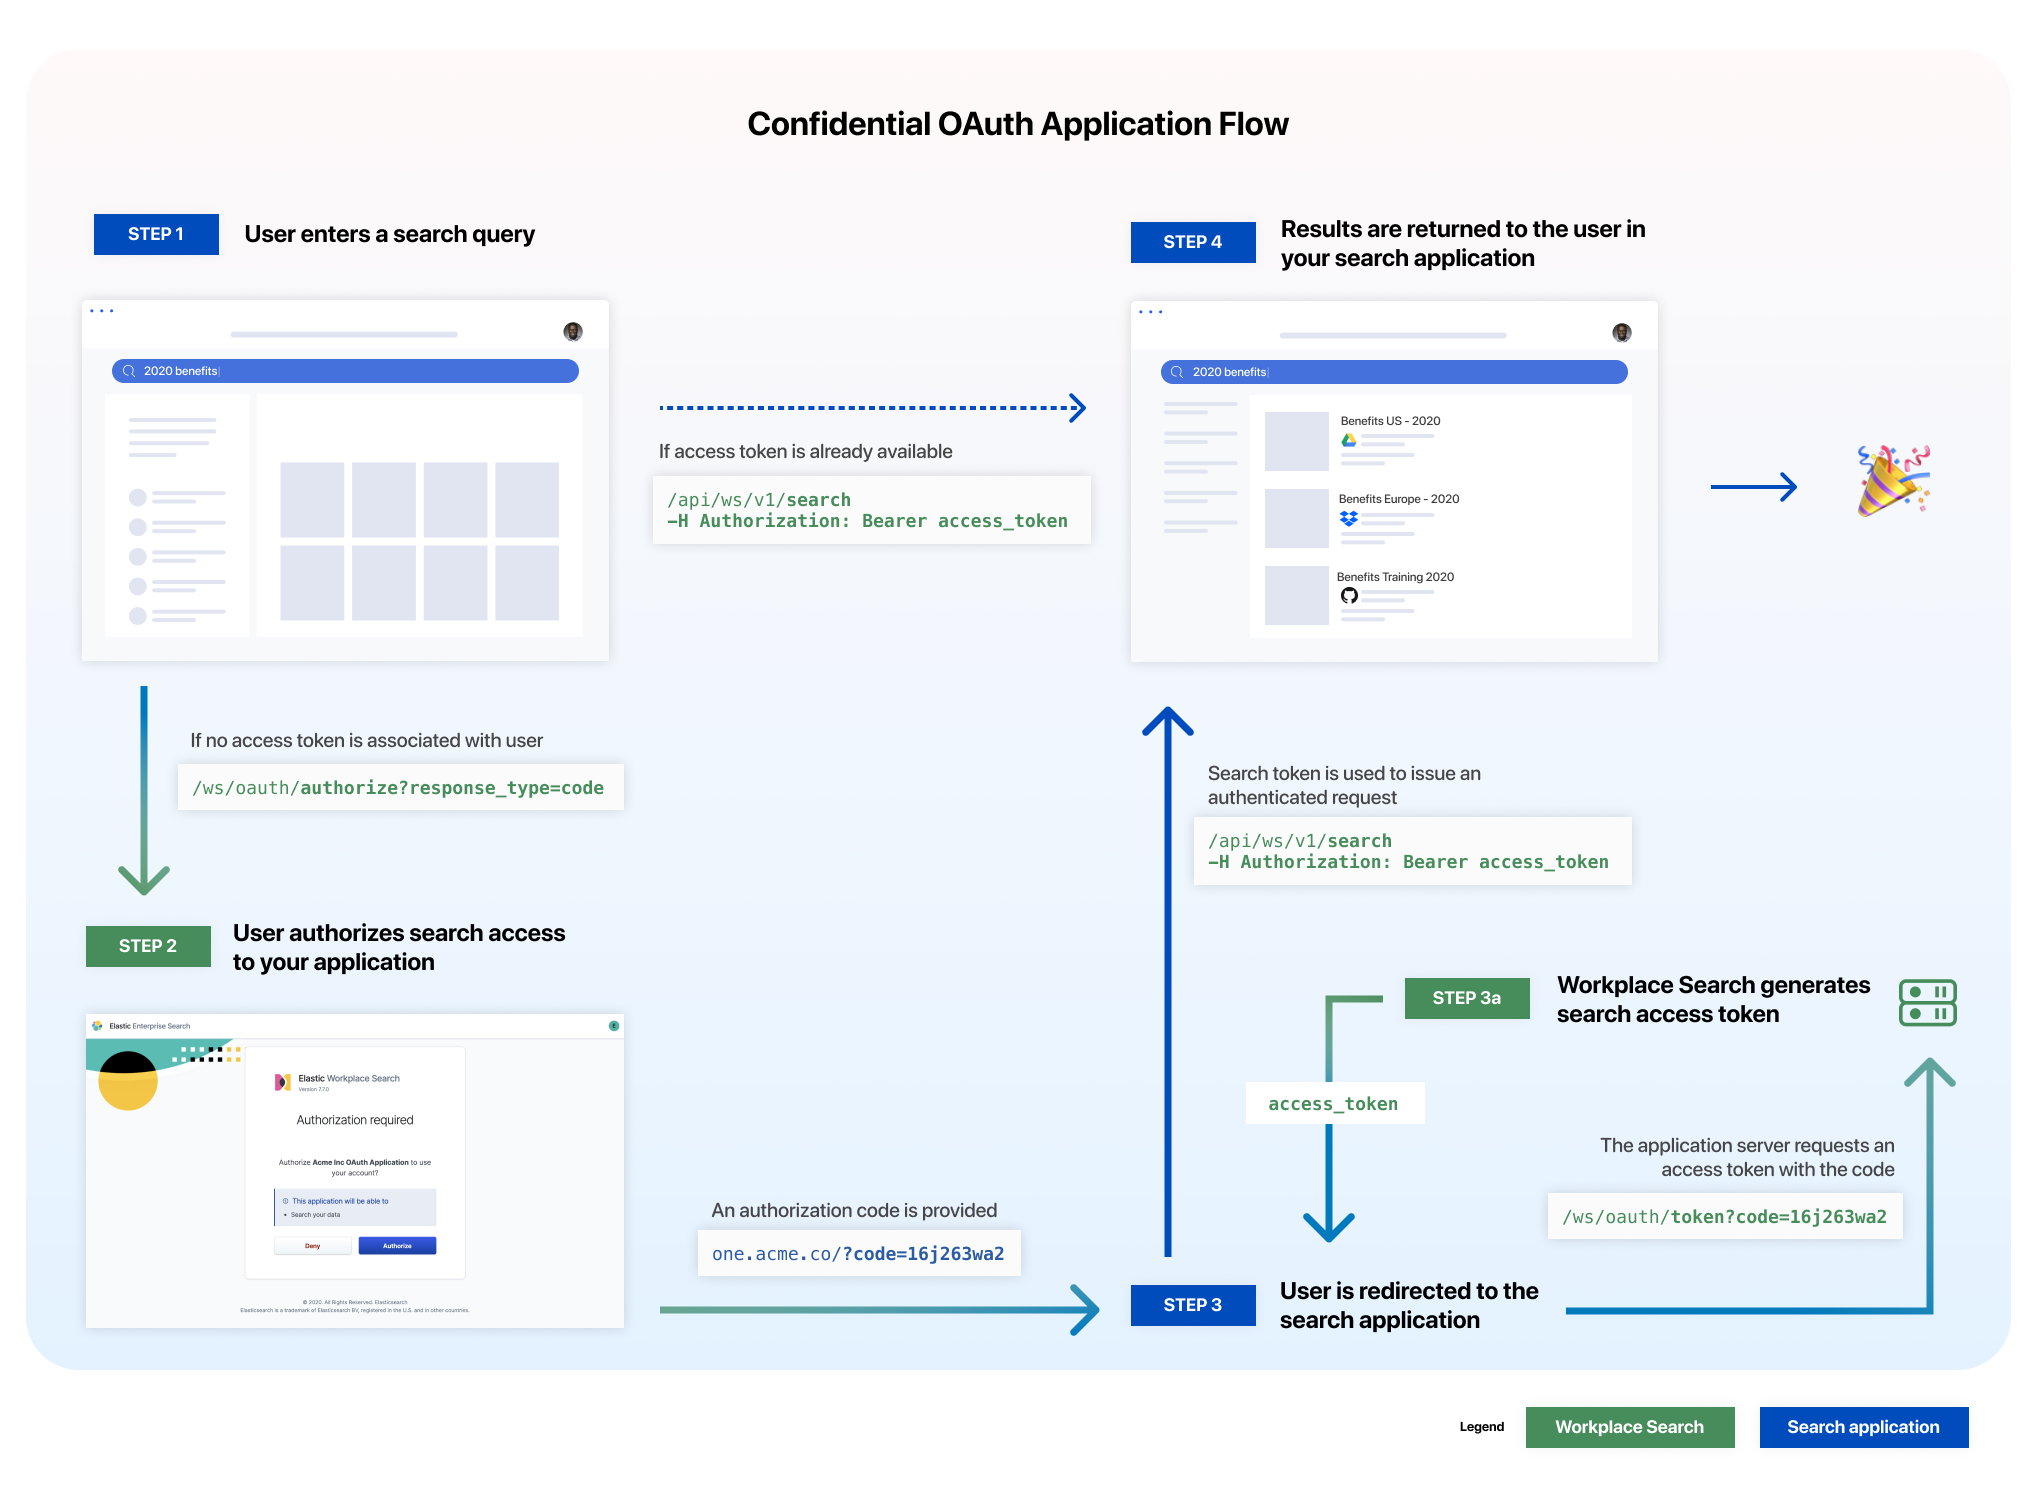
Step 1. The Client ID generated is first passed to the oauth/authorize endpoint to retrieve an authorization code.
# Important note: the hostname should be relative to the one you have configured.

http://localhost:3002/ws/oauth/authorize?response_type=code&client_id=ca6e5332...&redirect_uri=https://one.acme.co
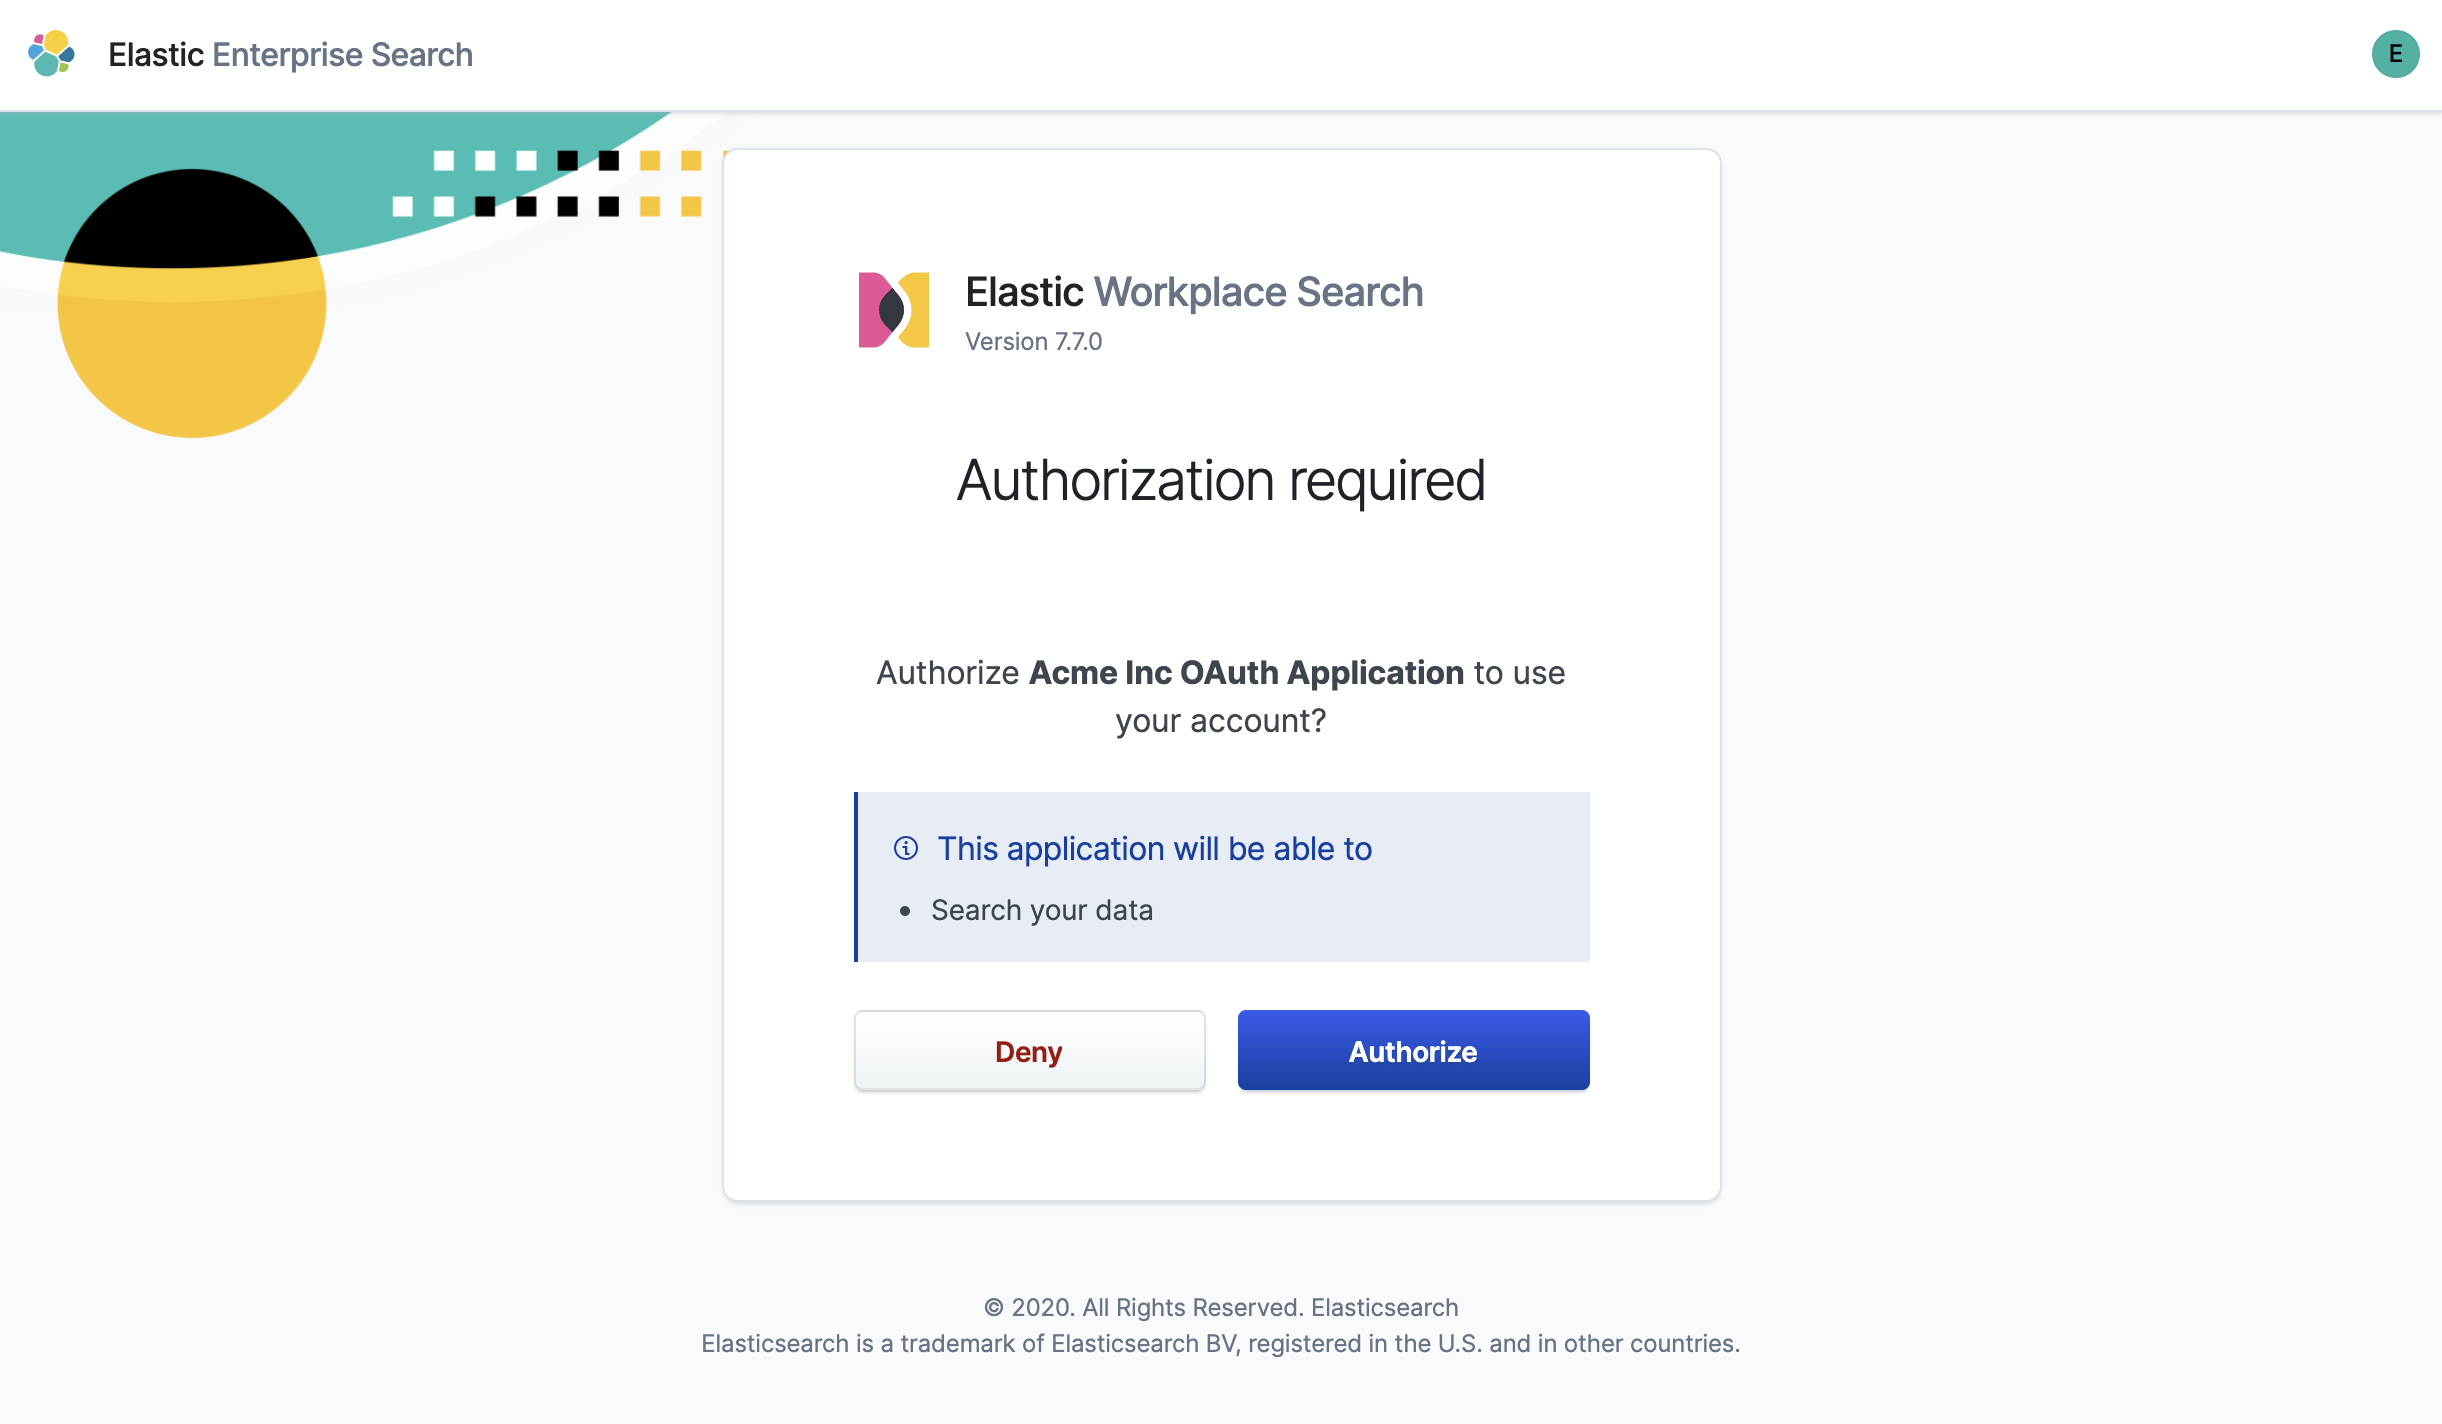
Step 2. The user must authorize the application to issue search requests on their behalf.
Step 3. Successful authorization redirects the user in accordance to the redirect URI provided (and configured for the application).
https://one.acme.co/?code=78hasd9h324h...
Step 3a. The application server must now request for a search access_token, which is generated by Workplace Search using the oauth/token endpoint, using the Client ID and Client Secret.
# Important note: the hostname should be relative to the one you have configured.

curl -X POST 'http://localhost:3002/ws/oauth/token?grant_type=authorization_code&client_id=ca6e5332b...&client_secret=c5d51a8c...&redirect_uri=https://one.acme.co&code=78hasd9h324h...'

{
  "access_token": "79e765efe18f5f5f2dbcb8404097d52c64ceb84a3cb0a51205157b4141cdd77d",
  "token_type": "Bearer",
  "expires_in": 7200,
  "refresh_token": "fe010bbca37279ae6b4c0f117cf15a37d992adb50a6d83c930ab827ec4081e07",
  "scope": "search"
}
Step 4. The access_token can now be used as an authorization header to issue a search request on behalf of the user.
# Important note: the hostname should be relative to the one you have configured.

curl -X POST 'localhost:3002/api/ws/v1/search'\
-H 'Authorization: Bearer 79e765efe18f5f5f2dbcb8404097d52c64ceb84a3cb0a51205157b4141cdd77d'
Refer to the OAuth Service API reference reference for more information.
Authenticating Users with an Implicit OAuth Flow
editThe implicit OAuth flow is generally better suited for environments in which the client secret cannot be kept confidential, such as native mobile applications and single-page applications.
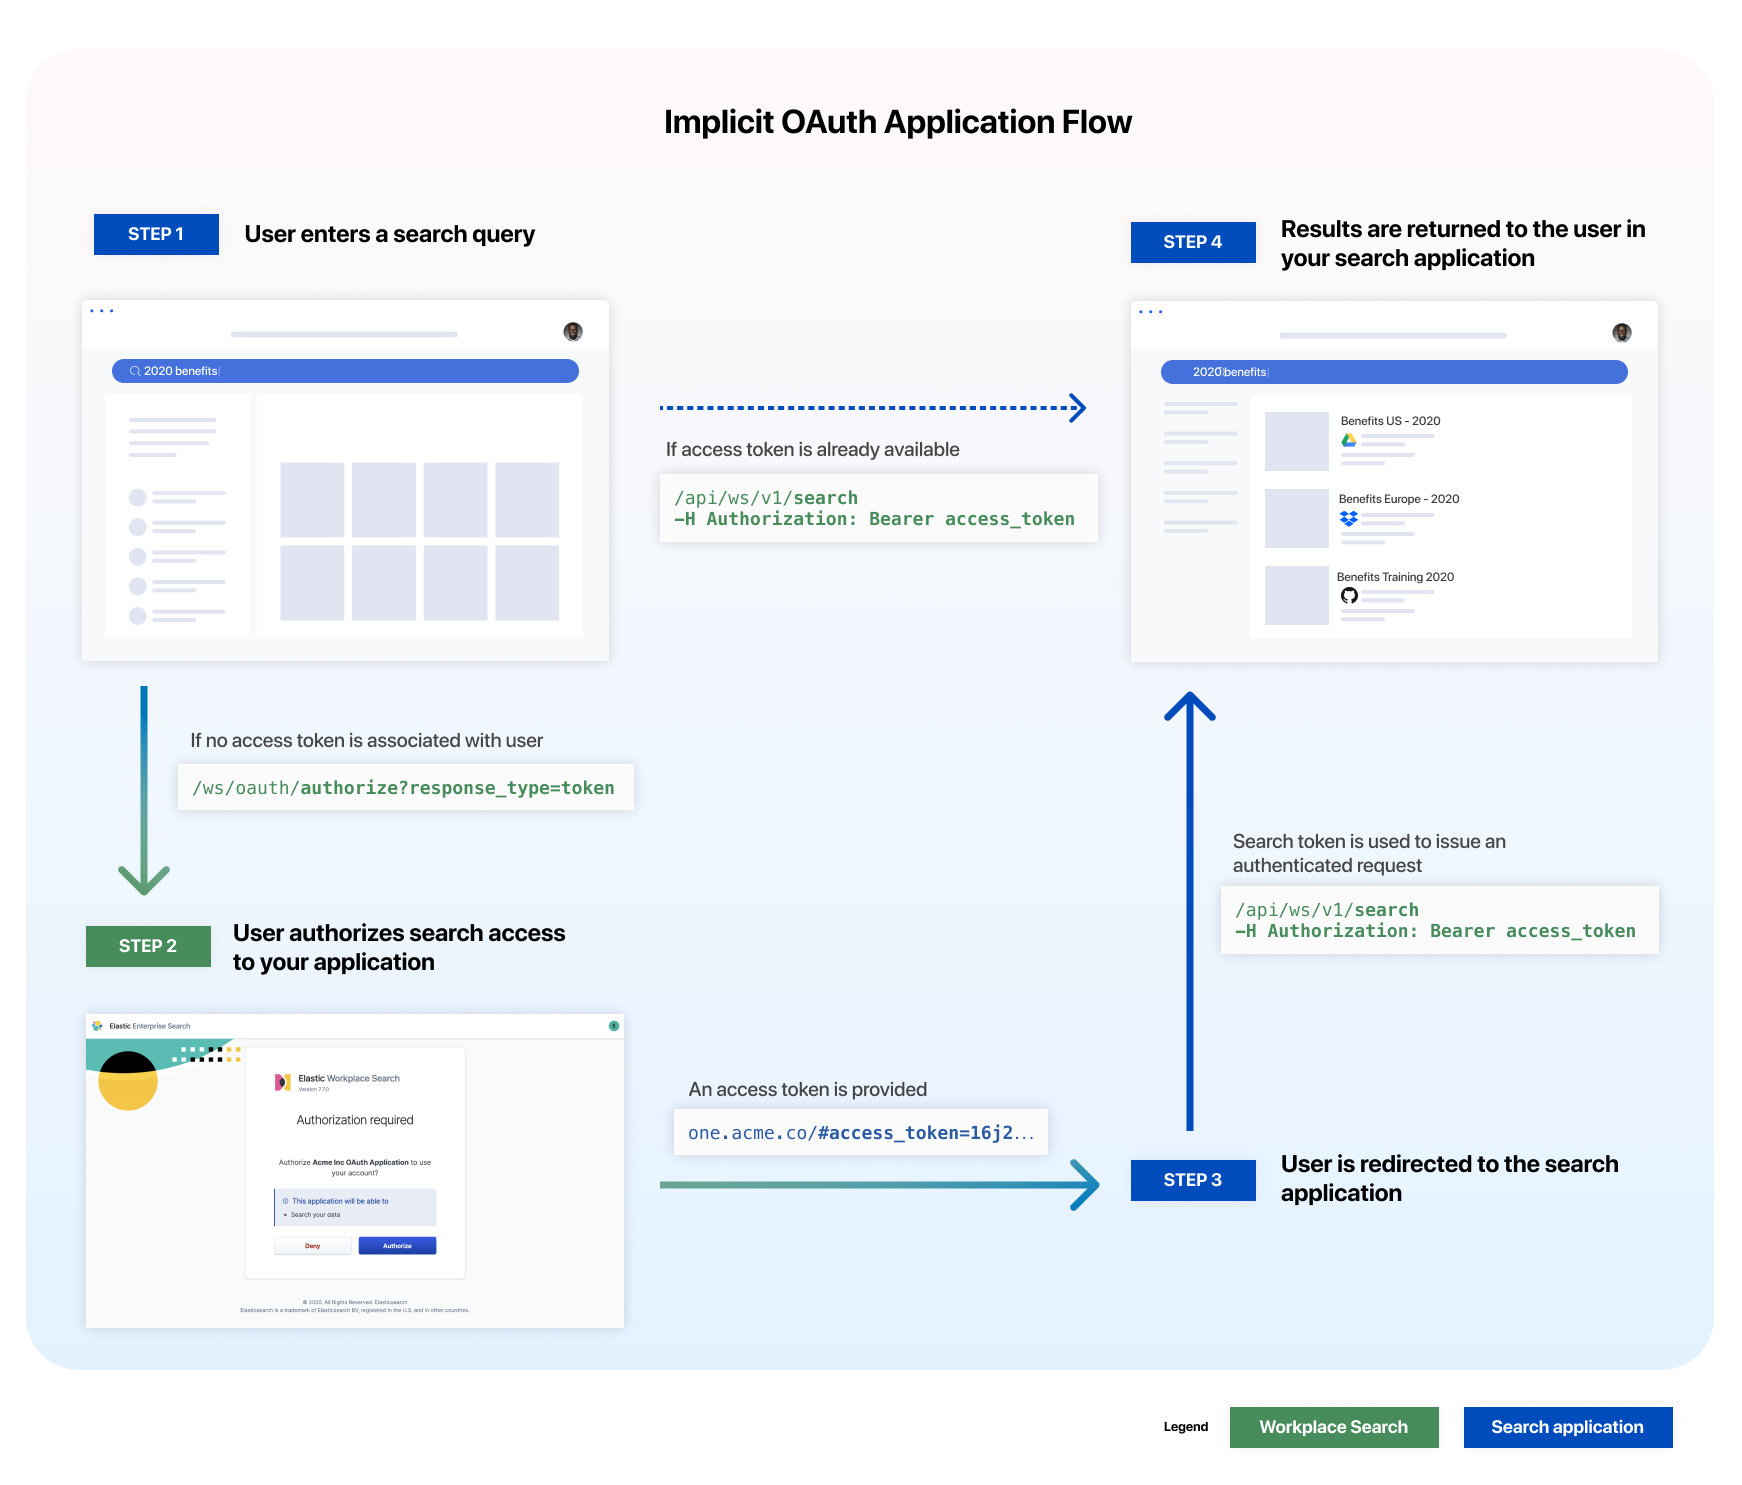
Step 1. The Client ID generated is first passed to the oauth/authorize endpoint to retrieve an access token.
# Important note: the hostname should be relative to the one you have configured.

http://localhost:3002/ws/oauth/authorize?response_type=token&client_id=ca6e5332...&redirect_uri=https://one.acme.co
Step 2. The user must authorize the application to issue search requests on their behalf.
Step 3. Successful authorization redirects the user in accordance to the redirect URI provided (and configured for the application).
https://one.acme.co/#access_token=16j212as76das...
Step 4. The access_token can now be used as an authorization header to issue a search request on behalf of the user.
# Important note: the hostname should be relative to the one you have configured.

curl -X POST 'localhost:3002/api/ws/v1/search'\
-H 'Authorization: Bearer 16j212as76das...'
Refer to the OAuth Service API reference reference for more information.
Issuing Search Requests
editNow that we’ve successfully generated an access token, our application can now issue search requests on behalf of our user. A typical search query requires three main items:
- An authorization header with a valid OAuth access token
- The query term(s) as entered by the user
- Optionally, query modifiers such as filters, sorting parameters, or pagination.
# Important note: the hostname should be relative to the one you have configured.

curl -X POST http://localhost:3002/api/ws/v1/search \
-H "Authorization: Bearer $ACCESS_TOKEN" \
-H "Content-Type: application/json" \
-d '{
  "query": "america",
  "search_fields": {
    "title": {
      "weight": 10
    },
    "description": {}
  },
  "sort": [
    { "square_km": "desc" },
    { "date_established": "asc" }
  ]
}'
The results are returned in JSON format, and can be displayed any way that suits your use case best. Sometimes, implementations with small footprints can complement the first-party Workplace Search experience; other times, complex integrations are required for a more immersive and contextually relevant search.
{
  "meta": {
    ...
  },
  "results": [
    {
      "title": {
        "raw": "American Samoa",
        "snippet": "<em>American</em> Samoa"
      },
      "_meta": {
        "source": "custom",
        "last_updated": "2020-03-27T20:10:33+00:00",
        "content_source_id": "5e7e5d911897c6dbb7e3e72a",
        "id": "park_american-samoa",
        "score": 6.359234
      },
      "source": {
        "raw": "custom"
      },
      "states": {
        "snippet": "<em>American</em> Samoa"
      },
      "description": {
        "raw": "The southernmost National Park is on three Samoan",
        "snippet": "The southernmost National Park is on three Samoan"
      },
      "last_updated": {
        "raw": "2020-03-27T20:10:33+00:00"
      },
      "content_source_id": {
        "raw": "5e7e5d911897c6dbb7e3e72a"
      },
      "id": {
        "raw": "park_american-samoa"
      }
    },
    {
      "title": {
        "raw": "Denali",
        "snippet": null
      },
      "_meta": {
        "source": "custom",
        "last_updated": "2020-03-27T20:10:33+00:00",
        "content_source_id": "5e7e5d911897c6dbb7e3e72a",
        "id": "park_denali",
        "score": 6.357545
      },
      "source": {
        "raw": "custom"
      },
      "states": {
        "snippet": null
      },
      "description": {
        "raw": "Centered on Denali, the tallest mountain in North",
        "snippet": " <em>America</em>, Denali is serviced by a single road"
      },
      "last_updated": {
        "raw": "2020-03-27T20:10:33+00:00"
      },
      "content_source_id": {
        "raw": "5e7e5d911897c6dbb7e3e72a"
      },
      "id": {
        "raw": "park_denali"
      }
    },
    ...
  ]
}
The Search API reference reference provides a more in-depth look at the various parameters, and query options.