Endpoint management
editEndpoint management
editThis topic covers common troubleshooting issues when using Elastic Security endpoint management tools.
Endpoints
editUnhealthy Elastic Agent status
In some cases, an Unhealthy Elastic Agent status may be caused by a failure in the Elastic Defend integration policy. In this situation, the integration and any failing features are flagged on the agent details page in Fleet. Expand each section and subsection to display individual responses from the agent.
Integration policy response information is also available from the Endpoints page in the Elastic Security app (Manage → Endpoints, then click the link in the Policy status column).
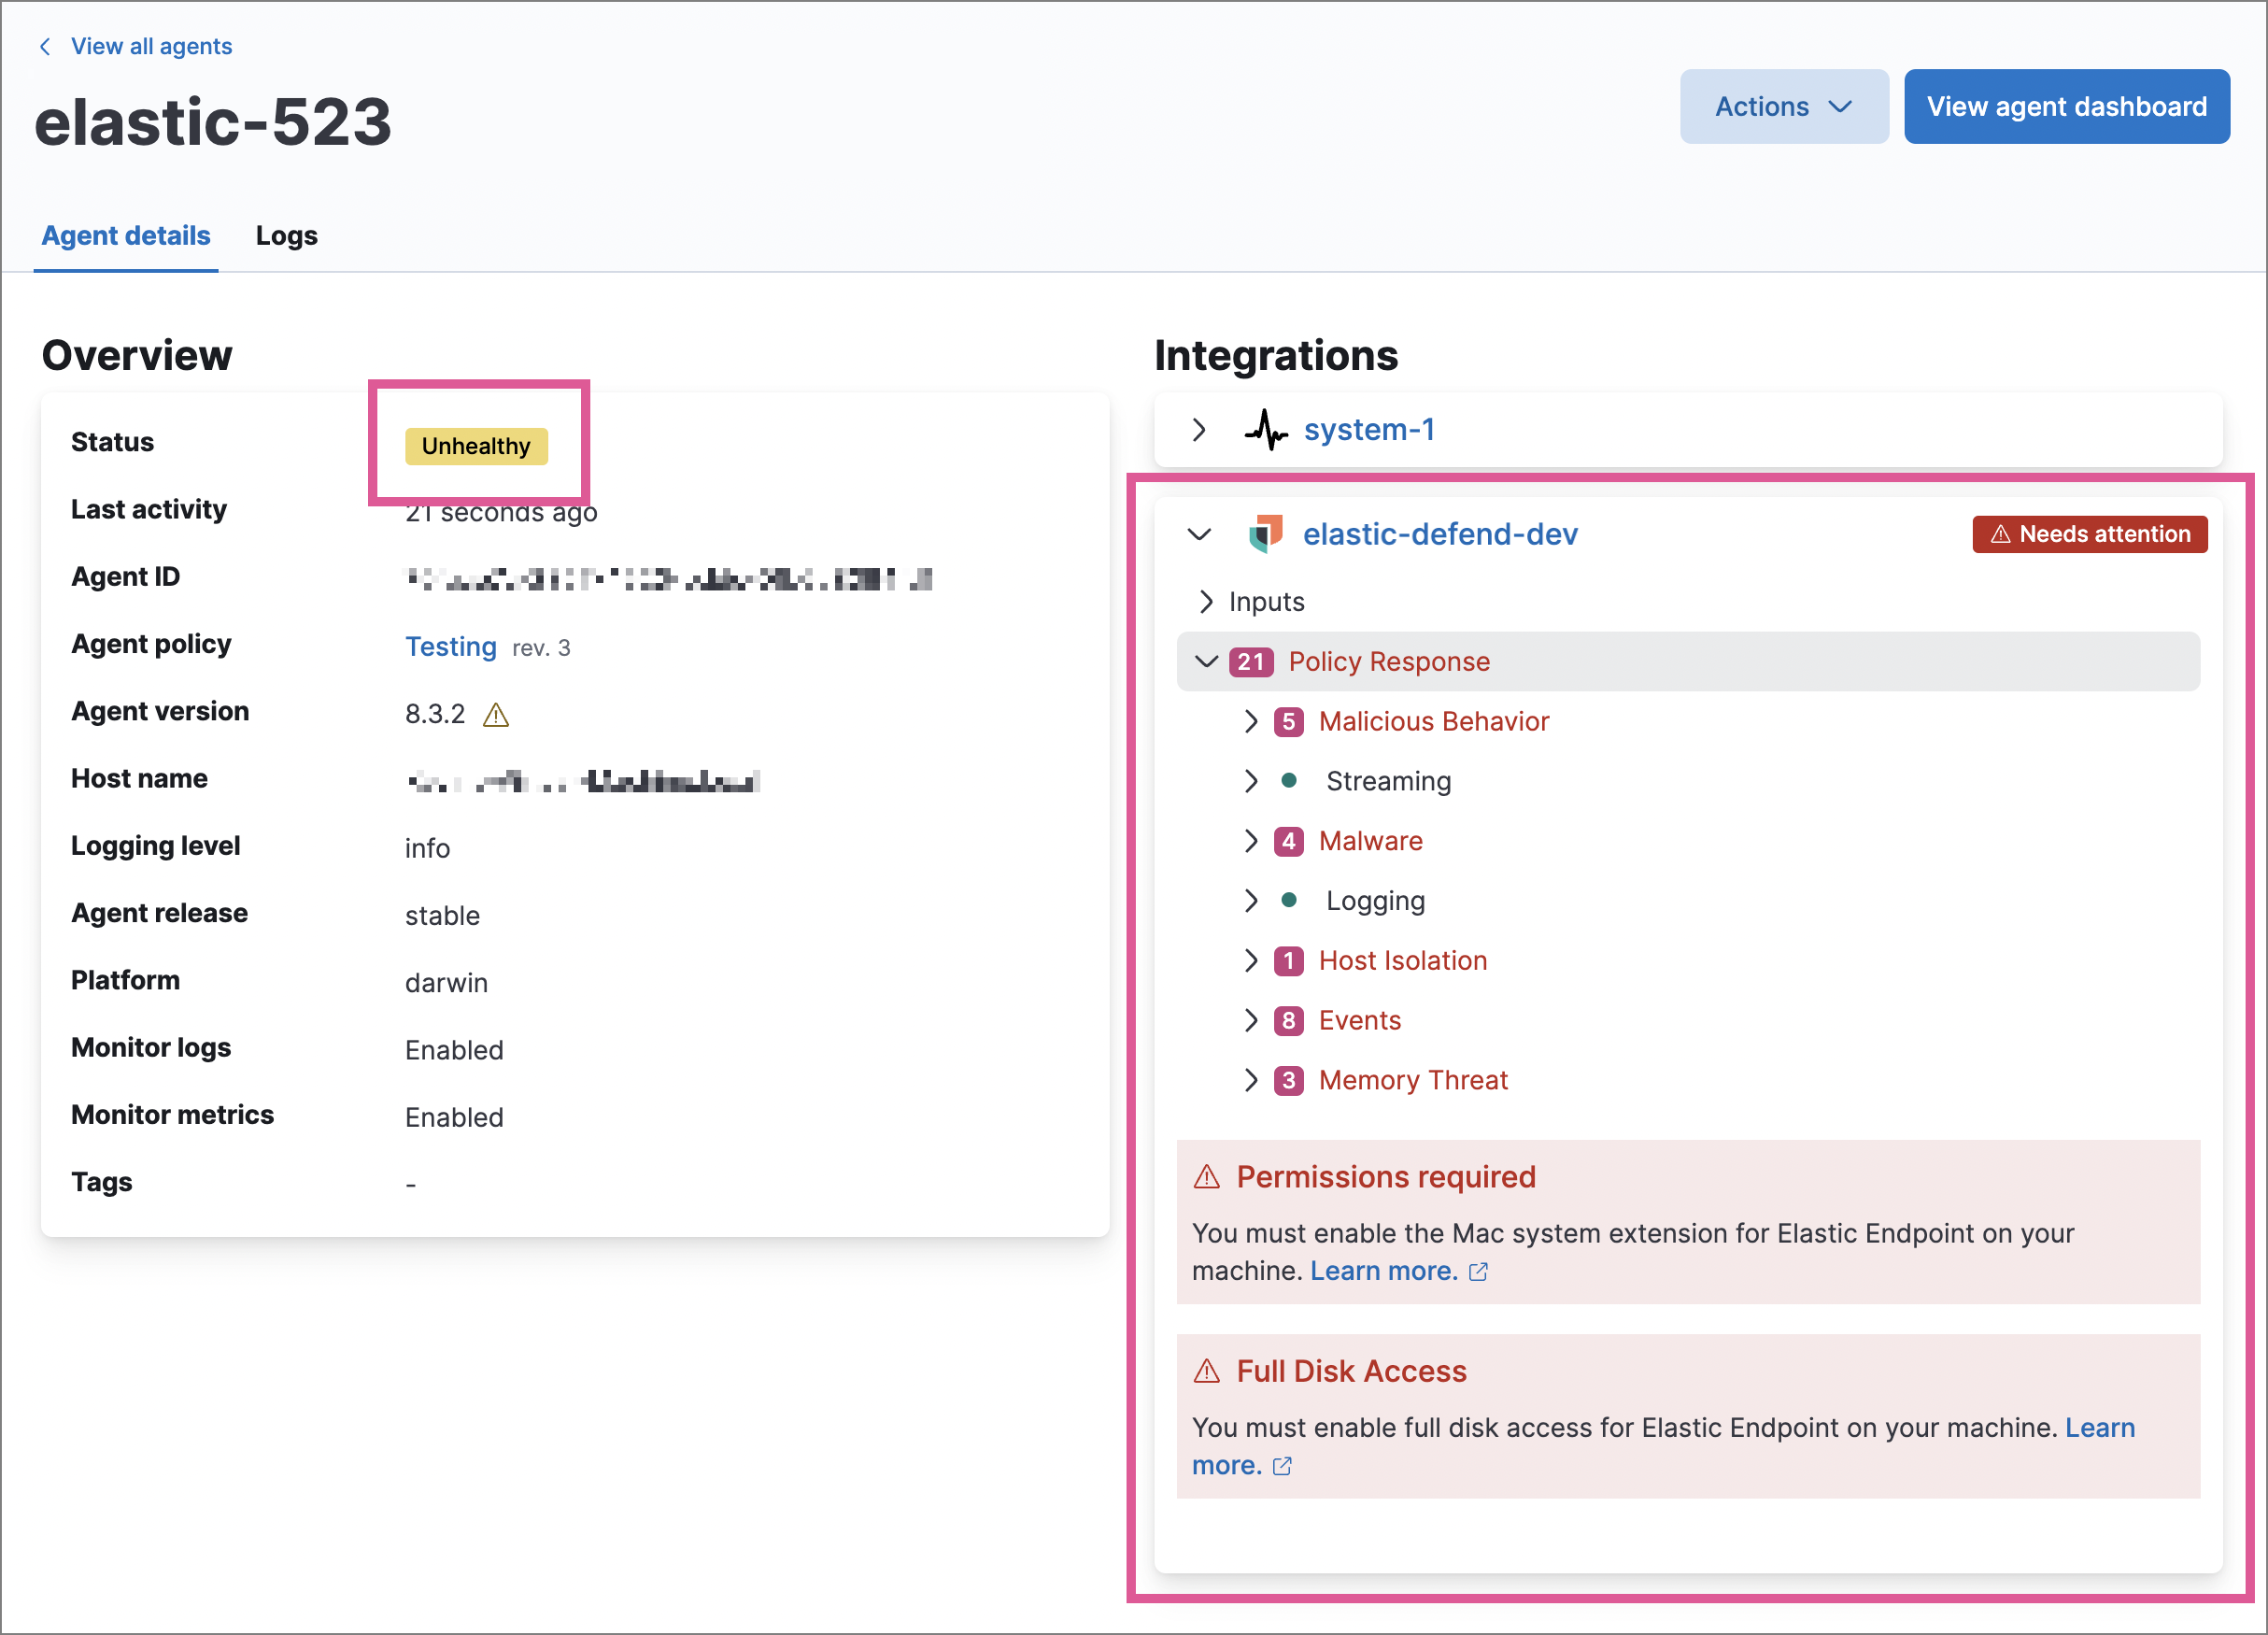
Common causes of failure in the Elastic Defend integration policy include missing prerequisites or unexpected system configuration. Consult the following topics to resolve a specific error:
If the Elastic Defend integration policy is not the cause of the Unhealthy agent status, refer to Fleet troubleshooting for help with the Elastic Agent.
Disabled to avoid potential system deadlock (Linux)
If you have an Unhealthy Elastic Agent status with the message Disabled due to potential system deadlock, that means malware protection was disabled on the Elastic Defend integration policy due to errors while monitoring a Linux host.
You can resolve the issue by configuring the policy’s advanced settings related to fanotify, a Linux feature that monitors file system events. By default, Elastic Defend works with fanotify to monitor specific file system types that Elastic has tested for compatibility, and ignores other unknown file system types.
If your network includes nonstandard, proprietary, or otherwise unrecognized Linux file systems that cause errors while being monitored, you can configure Elastic Defend to ignore those file systems. This allows Elastic Defend to resume monitoring and protecting the hosts on the integration policy.
Ignoring file systems can create gaps in your security coverage. Use additional security layers for any file systems ignored by Elastic Defend.
To resolve the potential system deadlock error:
- Go to Manage → Policies, then click a policy’s name.
- Scroll to the bottom of the policy and click Show advanced settings.
-
In the setting
linux.advanced.fanotify.ignored_filesystems, enter a comma-separated list of file system names to ignore, as they appear in/proc/filesystems(for example:ext4,tmpfs). Refer to Find file system names for more on determining the file system names. -
Click Save.
Once you save the policy, malware protection is re-enabled.
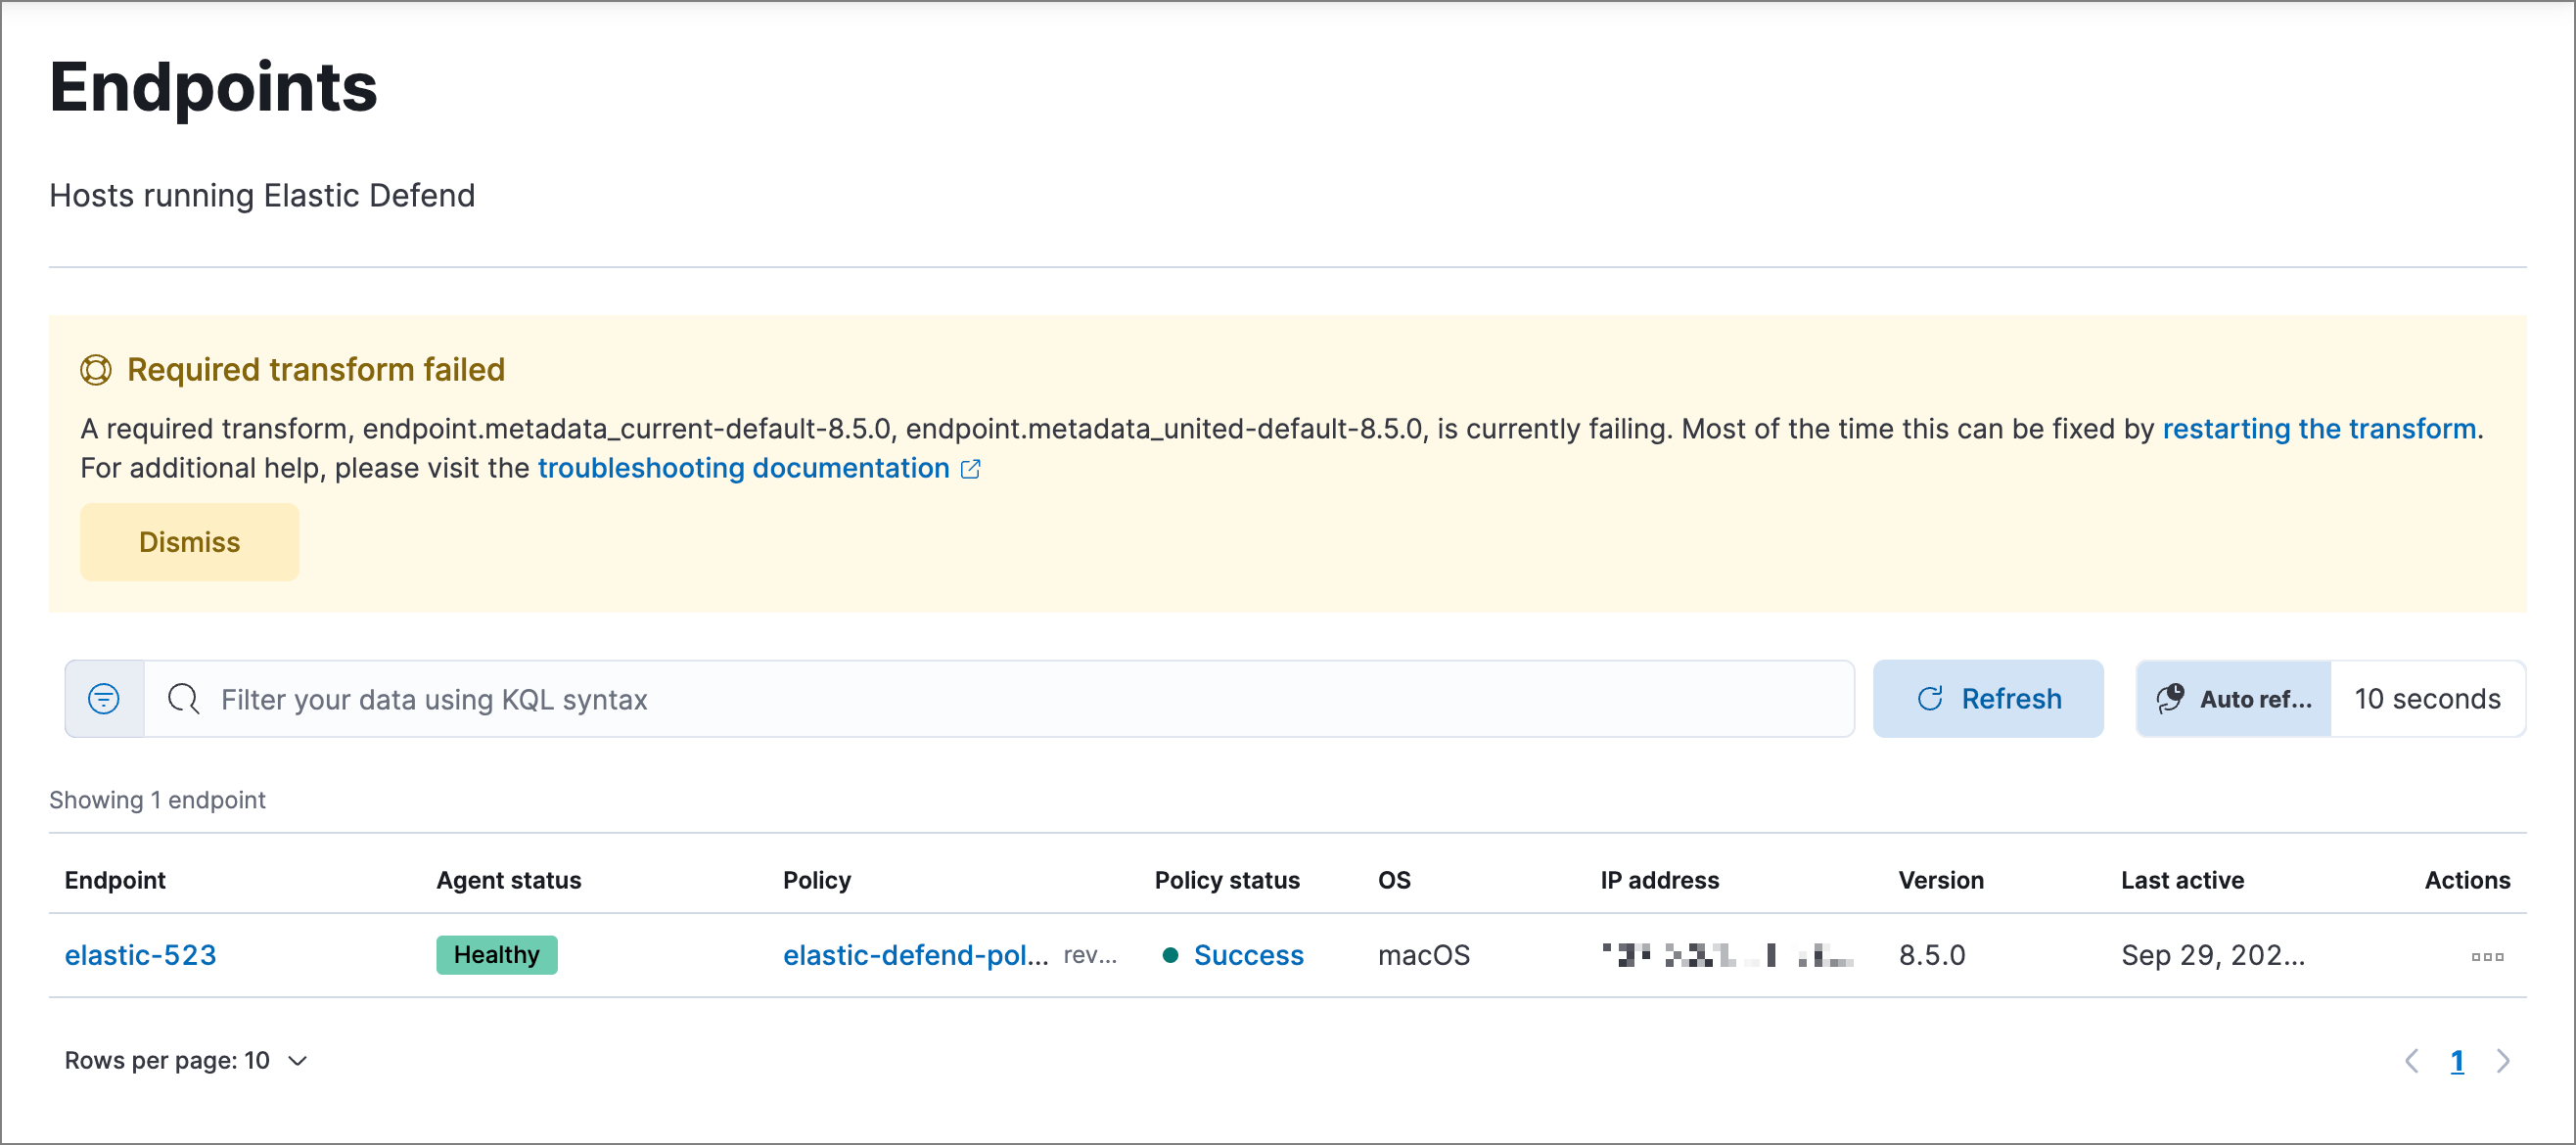
Required transform failed
If you encounter a “Required transform failed” notice on the Endpoints page, you can usually resolve the issue by restarting the transform. Refer to Transforming data for more information about transforms.
To restart a transform that’s not running:
- Go to Kibana → Stack Management → Data → Transforms.
-
Enter
endpoint.metadatain the search box to find the transforms for Elastic Defend. -
Click the Actions menu (…) and do one of the following for each transform, depending on the value in the Status column:
-
stopped: Select Start to restart the transform. -
failed: Select Stop to first stop the transform, and then select Start to restart it.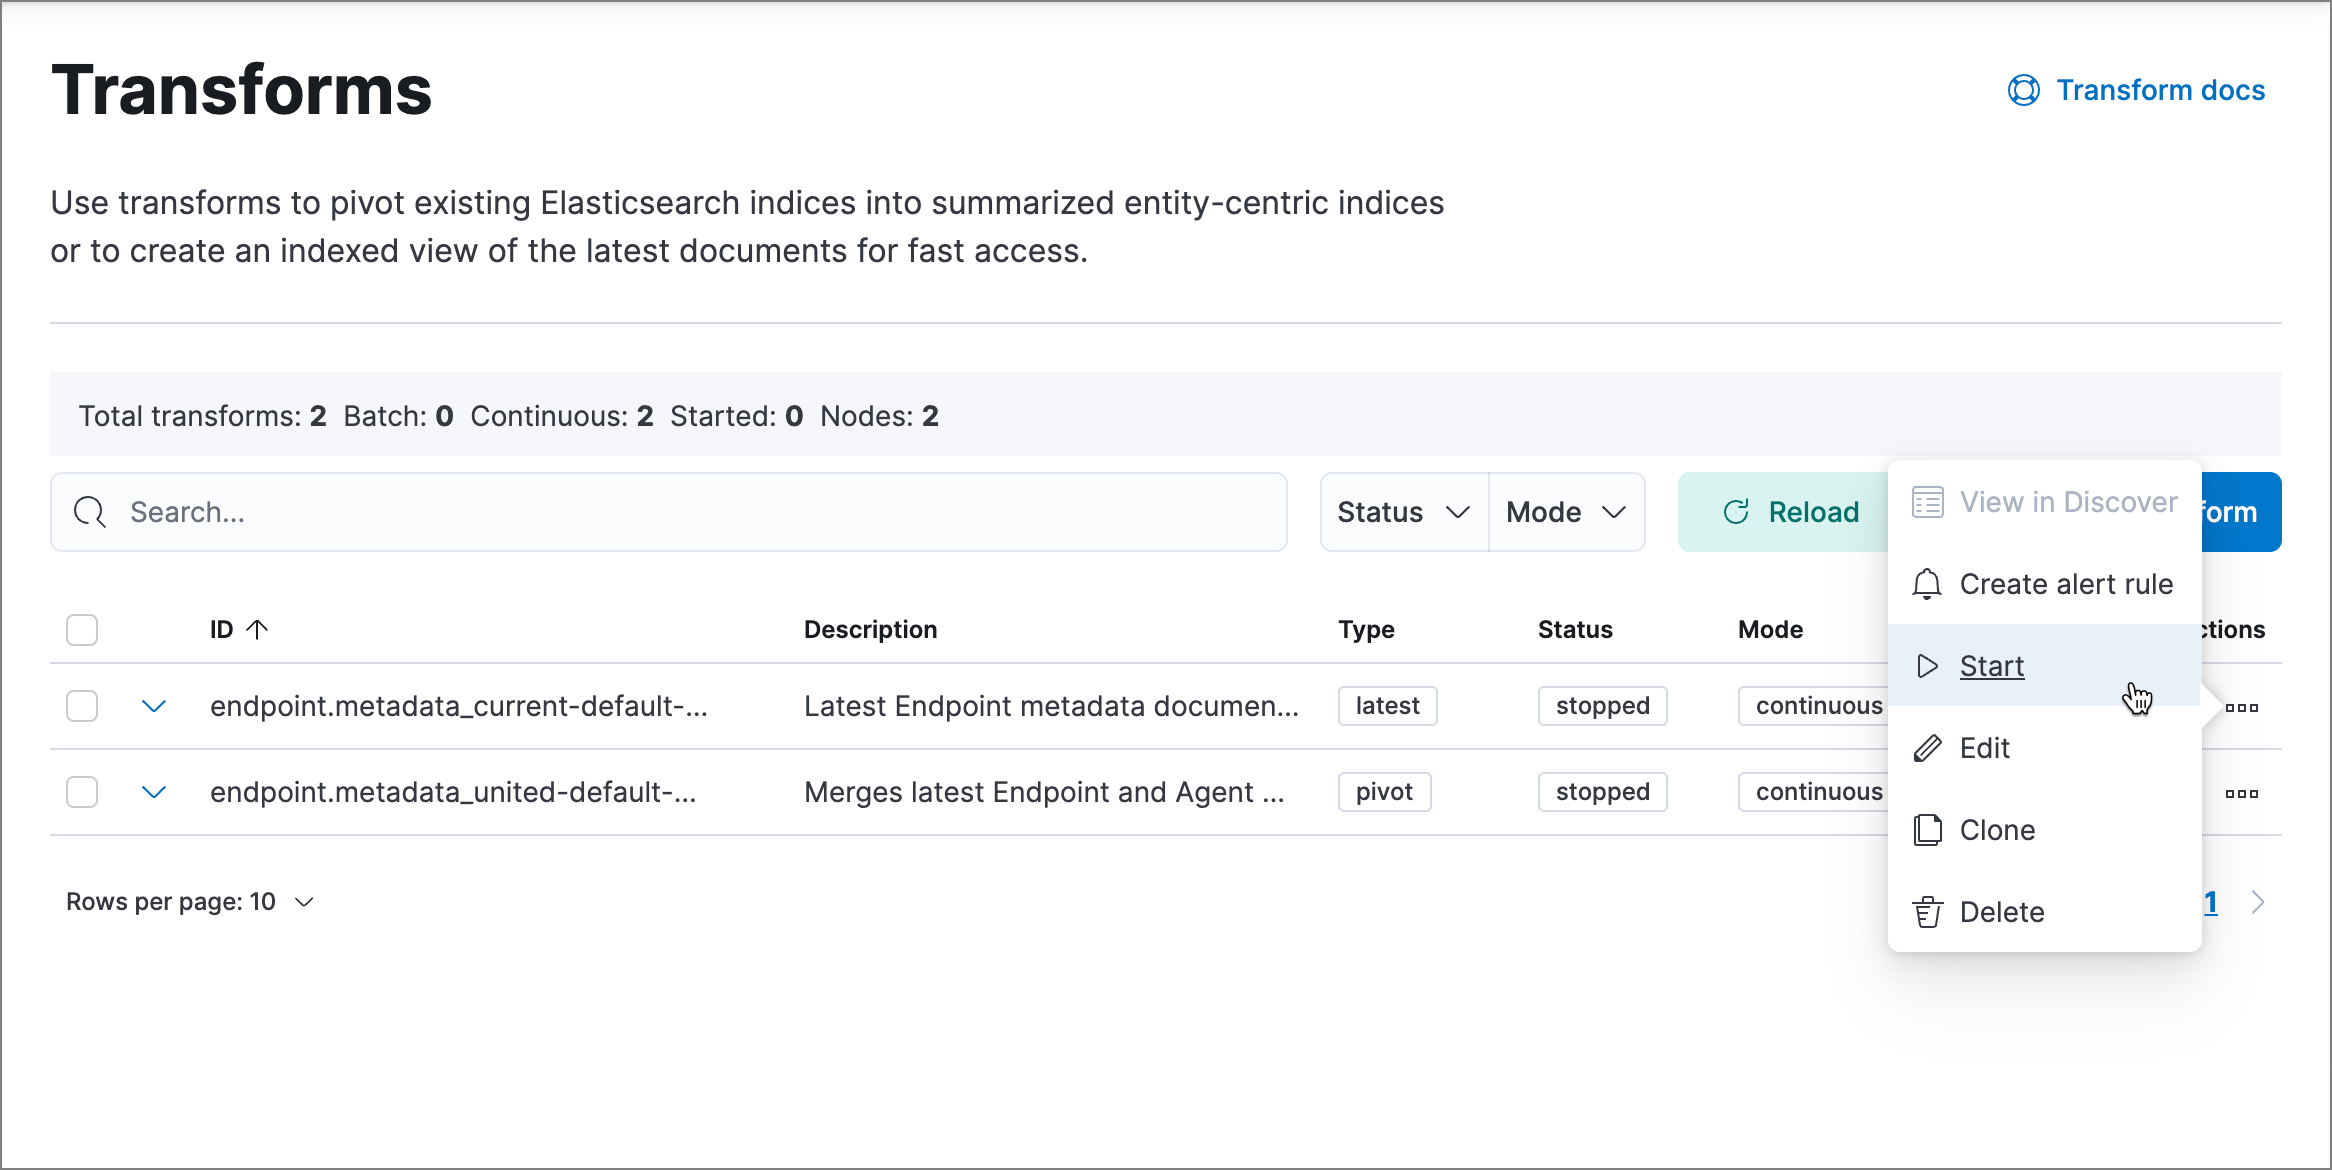
-
- On the confirmation message that displays, click Start to restart the transform.
-
The transform’s status changes to
started. If it doesn’t change, refresh the page.