Host isolation
editHost isolation
editHost isolation allows you to isolate hosts from your network, blocking communication with other hosts on your network until you release the host. Isolating a host is useful for responding to malicious activity or preventing potential attacks, as it prevents lateral movement across other hosts.
Isolated hosts, however, can still send data to Elasticsearch and Kibana. You can also create host isolation exceptions for specific IP addresses that isolated hosts are still allowed to communicate with, even when blocked from the rest of your network.
Host isolation is a Platinum or Enterprise subscription feature.
For Elastic Stack version >= 7.15.0, host isolation is supported for endpoints running Windows, macOS, and these Linux distributions:
- CentOS/RHEL 8
- Debian 11
- Ubuntu 18.04
- Ubuntu 20.04
- Ubuntu 22.04
- AWS Linux 2
To isolate and release hosts in any operating system, you must have the built-in superuser role. For more information, refer to Built-in users.
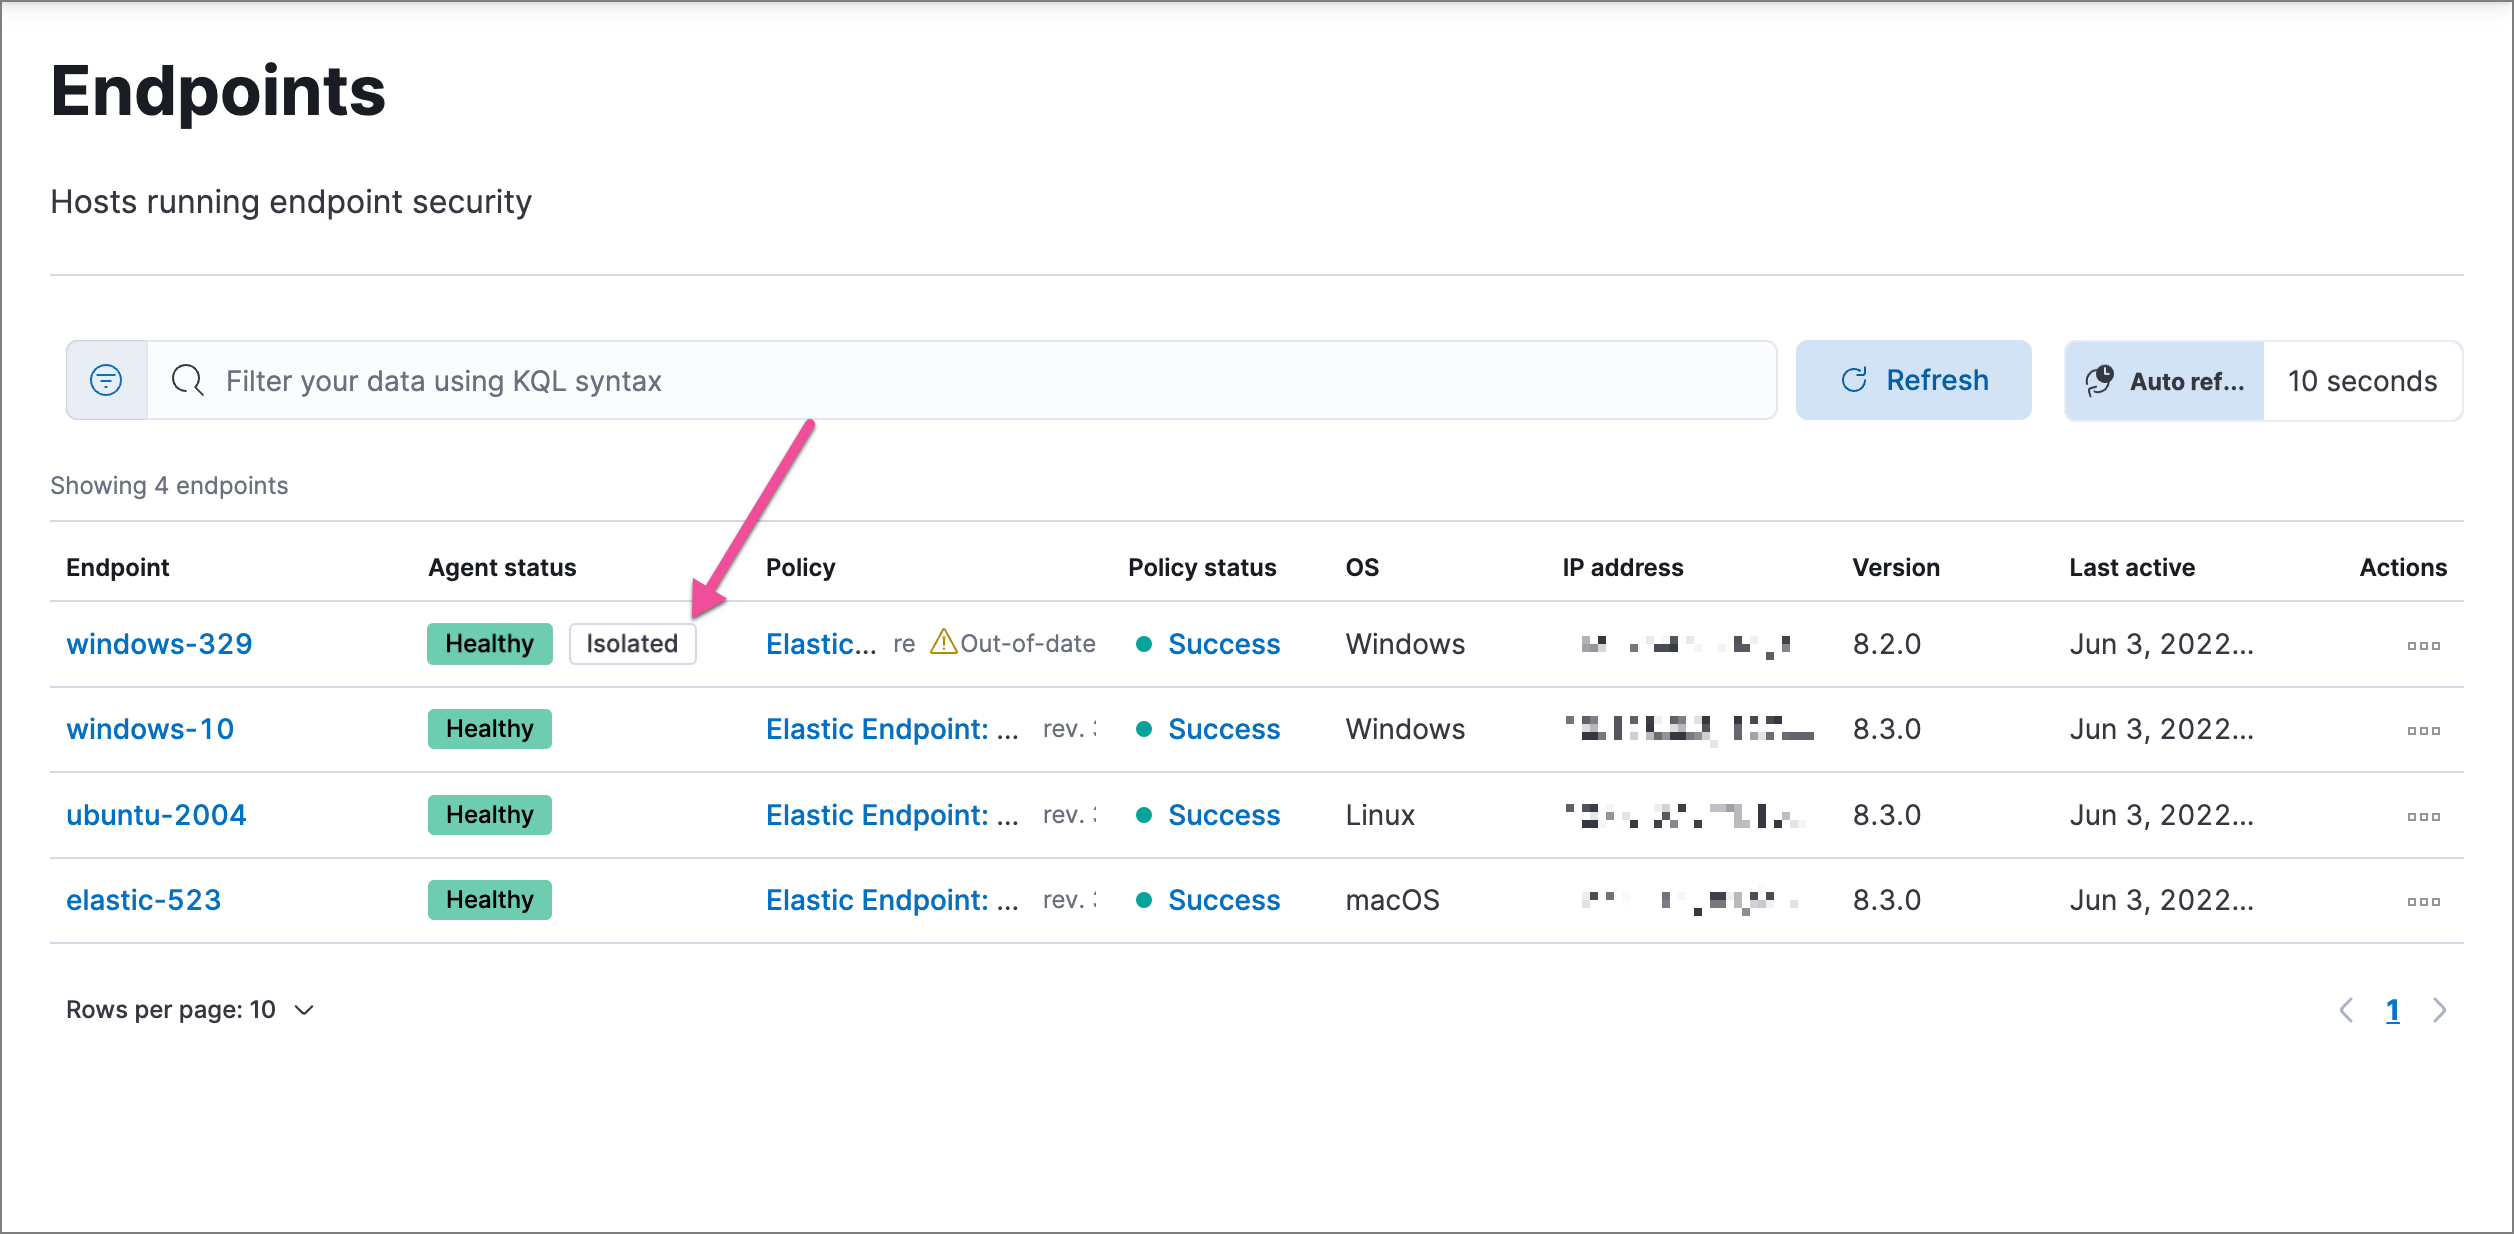
You can isolate a host from an alert attached to a case, from the Endpoints page, or (with an Enterprise subscription) from the endpoint response console. Once a host is successfully isolated, an Isolated status displays next to the Agent status field, which you can view on the alert details flyout or Endpoints list table.
If the request fails, verify that the Elastic Agent and your endpoint are both online before trying again.
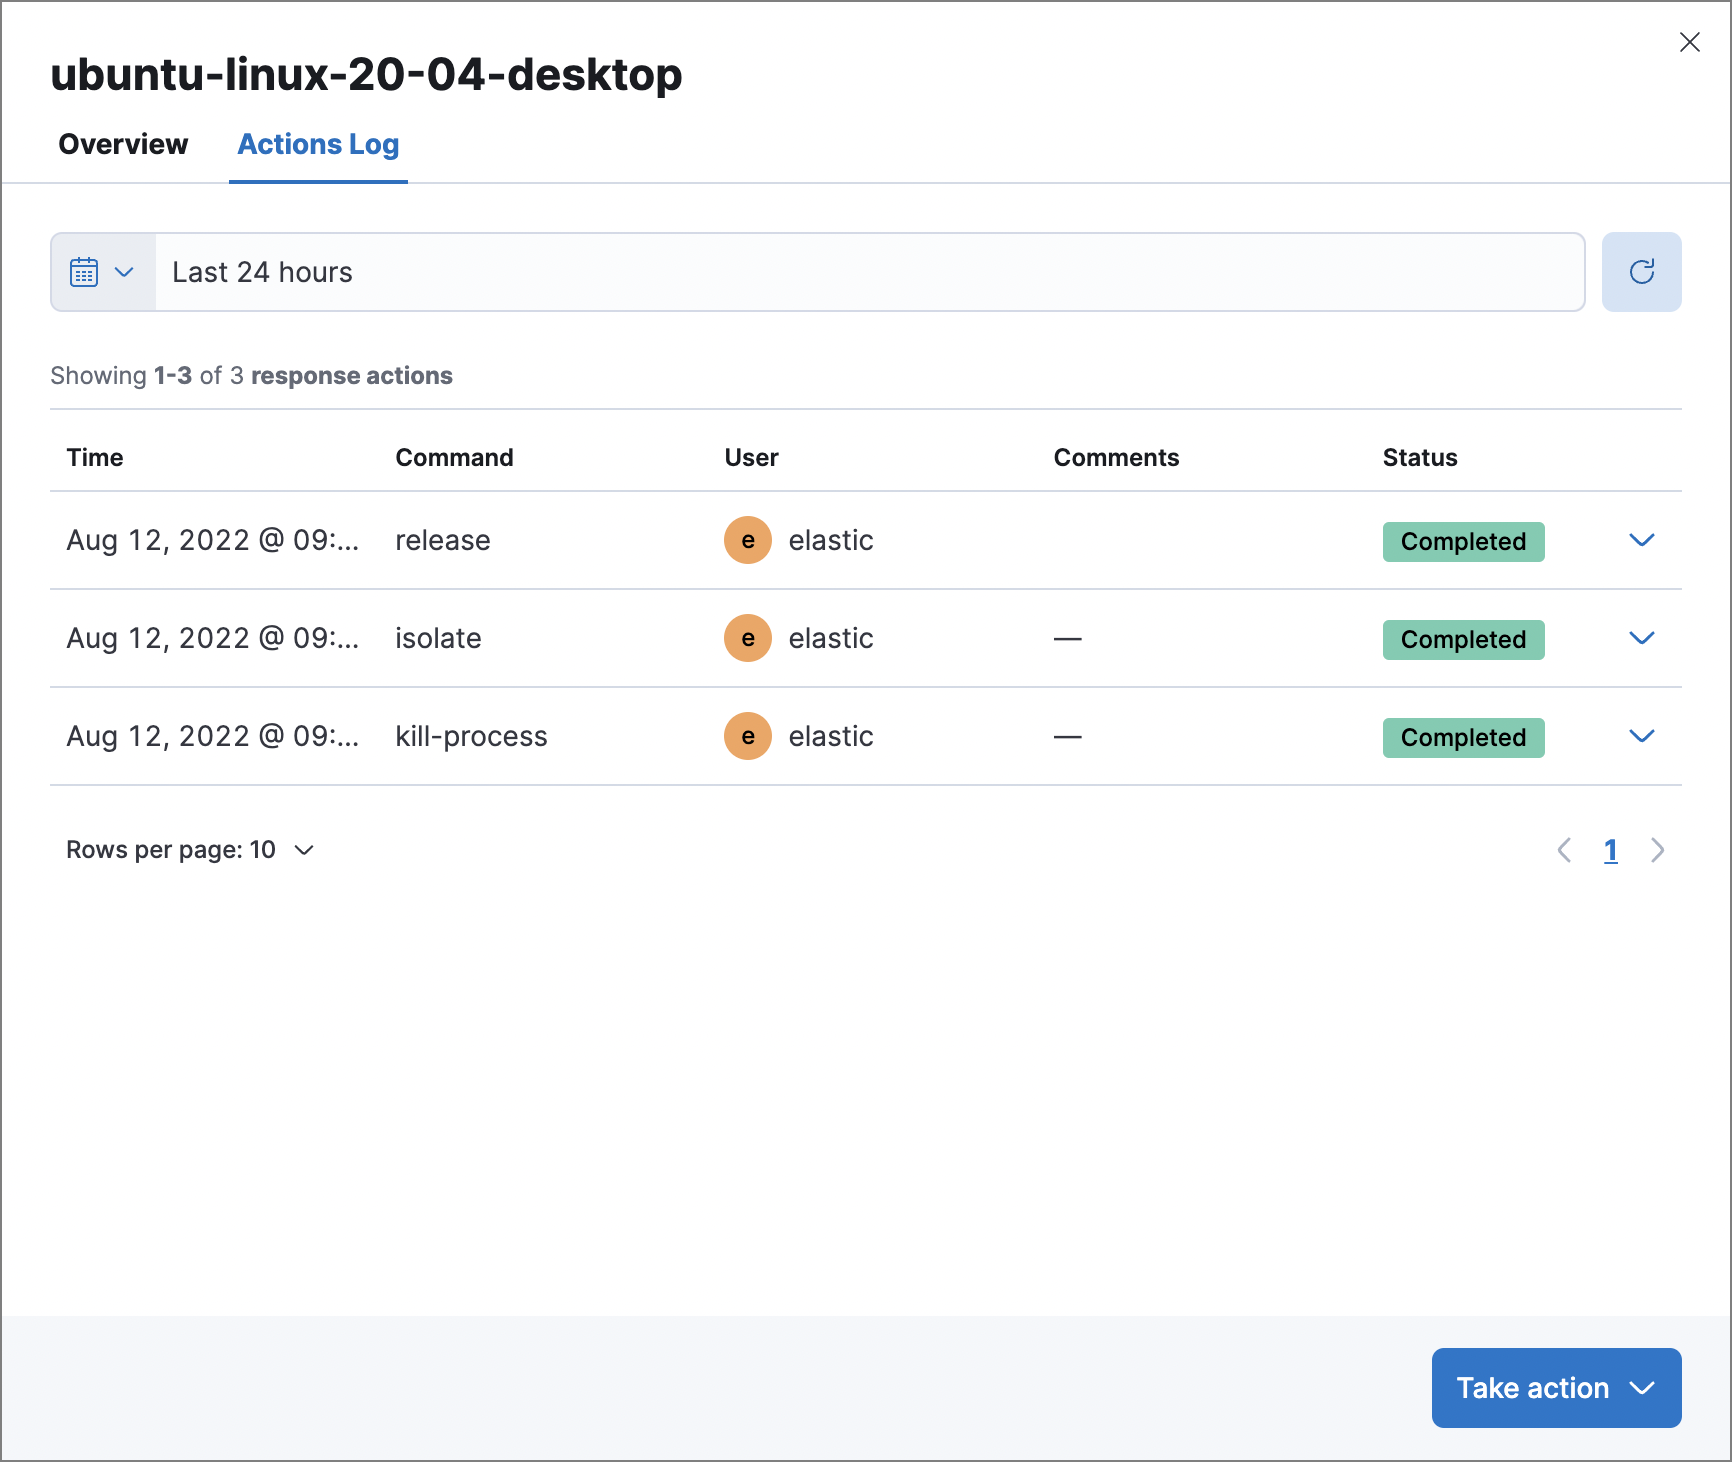
All actions executed on a host are tracked in the host’s actions log, which you can access from the Endpoints page. See View host isolation history for more information.
Isolate a host
editIsolate a host from a case alert
- Go to Cases, then select the appropriate case to view the case activity. Ensure you are viewing a case with at least one alert attached to it.
- Find the appropriate alert, then click the Show alert details button (>). The alert details flyout opens.
- Click Take action → Isolate host.
- Enter a comment describing why you’re isolating the host (optional).
- Click Confirm.
Isolate a host from an endpoint
-
Go to Manage → Endpoints, then either:
- Select the appropriate endpoint in the Endpoint column, and click Take action → Isolate host in the endpoint details flyout.
- Click the Actions menu (…) on the appropriate endpoint, then select Isolate host.
- Enter a comment describing why you’re isolating the host (optional).
- Click Confirm.
Isolate a host from the response console
The response console is an Enterprise subscription feature.
- Open the response console for the endpoint (Manage → Endpoints → Actions menu (…) → Respond).
-
Enter the
isolatecommand and an optional comment in the input area, for example:isolate --comment "Isolate this host" - Press Return.
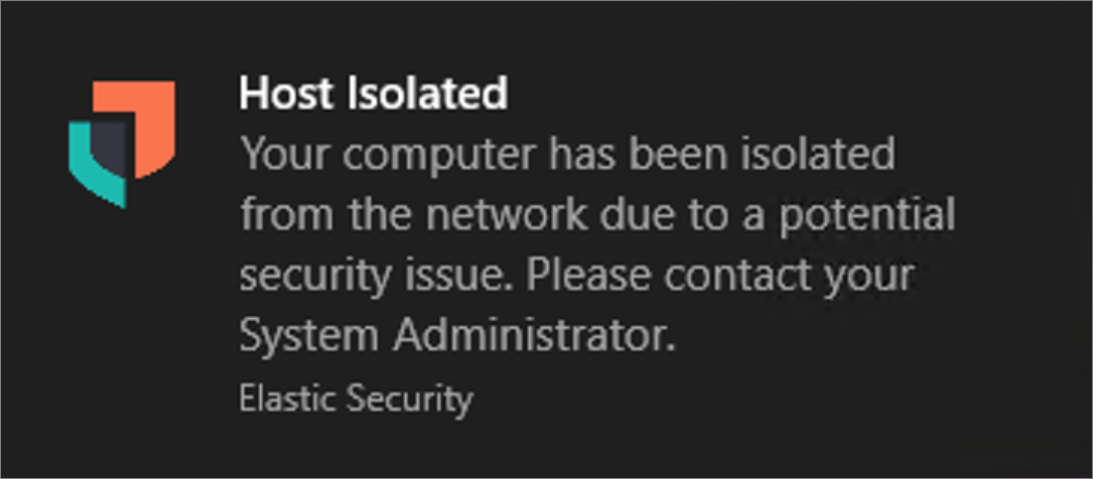
After the host is successfully isolated, an Isolated status is added to the endpoint. Active end users receive a notification that the computer has been isolated from the network:
Release a host
editRelease a host from a case alert
- Go to Cases, then click on the appropriate case to view the case activity its details.
- Find the appropriate alert, then click the Show alert details button (>). The alert details flyout opens.
- From the alert details flyout, click Take action → Release host.
- Enter a comment describing why you’re releasing the host (optional).
- Click Confirm.
Release a host from an endpoint
-
Go to Manage → Endpoints, then either:
- Select the appropriate endpoint in the Endpoint column, and click Take action → Release host in the endpoint details flyout.
- Click the Actions menu (…) on the appropriate endpoint, then select Release host.
- Enter a comment describing why you’re releasing the host (optional).
- Click Confirm.
Release a host from the response console
The response console is an Enterprise subscription feature.
- Open the response console for the endpoint (Manage → Endpoints → Actions menu (…) → Respond).
-
Enter the
releasecommand and an optional comment in the input area, for example:release --comment "Release this host" - Press Return.
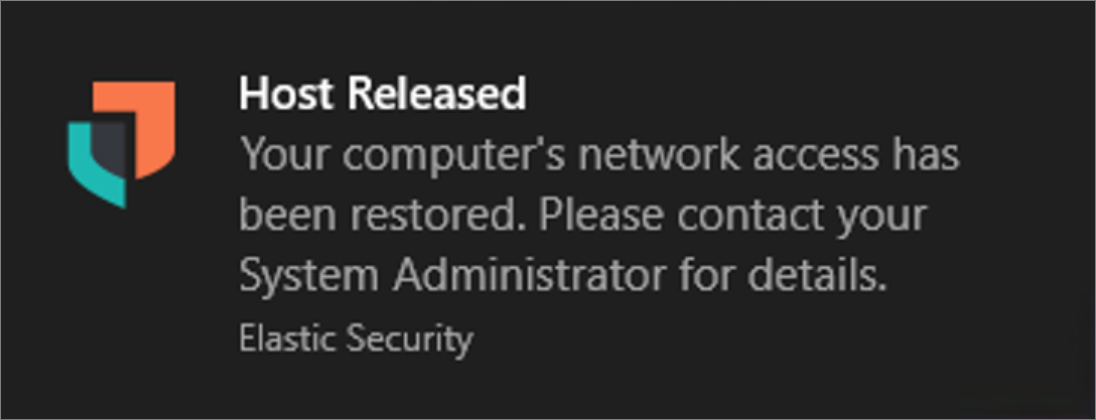
After the host is successfully released, the Isolated status is removed from the endpoint. Active end users receive a notification that the computer has been reconnected to the network:
View host isolation history
editThe actions log provides a history of response actions performed on a host, such as isolating the host or terminating a process. The log displays when each command was performed, the user who performed the action, any comments added to the action, and the action’s current status.
To view a host’s actions log:
- Go to Manage → Endpoints, then click the host’s name in the Endpoint column. The endpoint details flyout opens.
- Click Actions Log.
- Use the date and time picker to display actions within a specific time period.