How to deploy named entity recognition
editHow to deploy named entity recognition
editYou can use these instructions to deploy a named entity recognition (NER) model in Elasticsearch, test the model, and add it to an inference ingest pipeline. The model that is used in the example is publicly available on HuggingFace.
Requirements
editTo follow along the process on this page, you must have:
- an Elasticsearch Cloud cluster that is set up properly to use the machine learning features. Refer to Setup and security.
- The appropriate subscription level or the free trial period activated.
- Docker installed.
Deploy a NER model
editYou can use the Eland client to install the natural language processing model. Eland commands can be run in Docker. First, you need to clone the Eland repository then create a Docker image of Eland:
git clone git@github.com:elastic/eland.git
cd eland
docker build -t elastic/eland .
After the script finishes, your Eland Docker client is ready to use.
Select a NER model from the third-party model reference list. This example uses an uncased NER model.
Install the model by running the eland_import_model_hub command in the Docker
image:
docker run -it --rm elastic/eland \
    eland_import_hub_model \
      --cloud-id $CLOUD_ID \
      -u <username> -p <password> \
      --hub-model-id elastic/distilbert-base-uncased-finetuned-conll03-english \
      --task-type ner \
      --start
You need to provide an administrator username and its password and replace the
$CLOUD_ID with the ID of your Cloud deployment. This Cloud ID can be copied
from the deployments page on your Cloud website.
Since the --start option is used at the end of the Eland import command, Elasticsearch
deploys the model ready to use. If you have multiple models and want to select
which model to deploy, you can use the Machine Learning > Model Management user
interface in Kibana to manage the starting and stopping of models.
Go to the Machine Learning > Trained Models page and synchronize your trained models. A warning message is displayed at the top of the page that says "ML job and trained model synchronization required". Follow the link to "Synchronize your jobs and trained models." Then click Synchronize. You can also wait for the automatic synchronization that occurs in every hour, or use the sync machine learning objects API.
Test the NER model
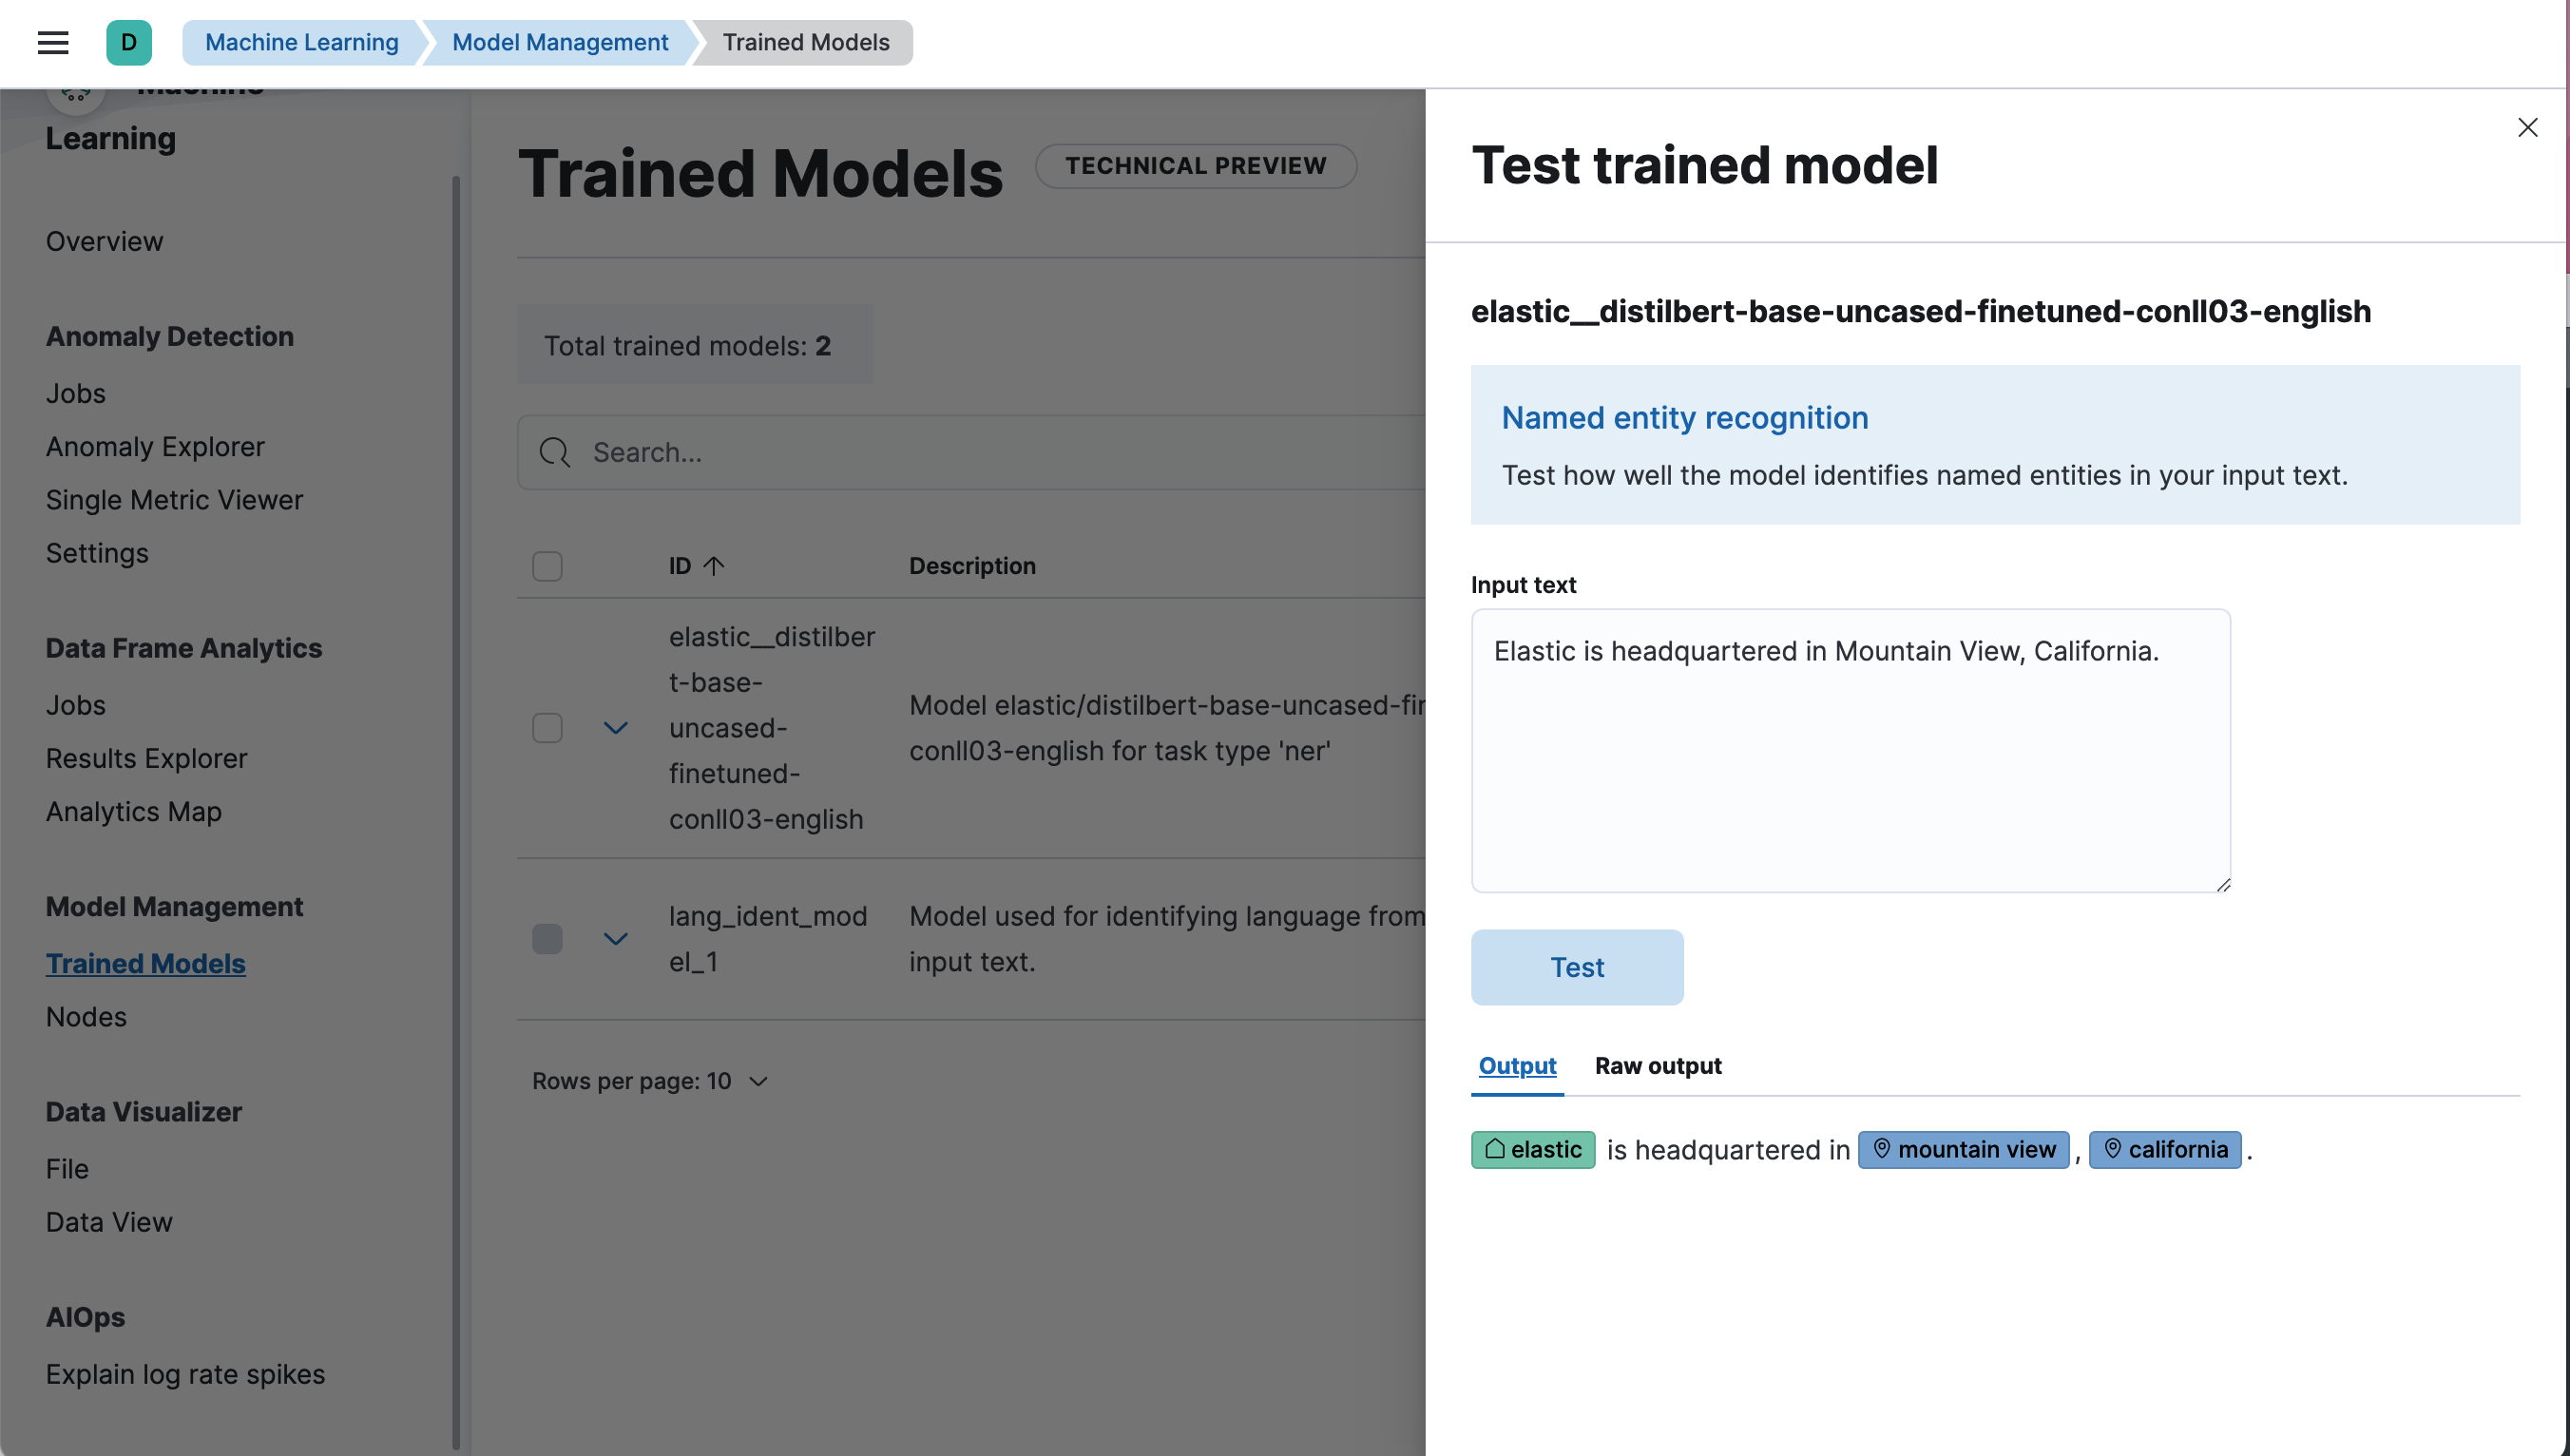
editDeployed models can be evaluated in Kibana under Machine Learning > Trained Models by selecting the Test model action for the respective model.
Test the model by using the _infer API
You can also evaluate your models by using the
_infer API. In the following request,
text_field is the field name where the model expects to find the input, as
defined in the model configuration. By default, if the model was uploaded via
Eland, the input field is text_field.
POST _ml/trained_models/elastic__distilbert-base-uncased-finetuned-conll03-english/_infer
{
  "docs": [
    {
      "text_field": "Elastic is headquartered in Mountain View, California."
    }
  ]
}
The API returns a response similar to the following:
{
  "inference_results": [
    {
      "predicted_value": "[Elastic](ORG&Elastic) is headquartered in [Mountain View](LOC&Mountain+View), [California](LOC&California).",
      "entities": [
        {
          "entity": "elastic",
          "class_name": "ORG",
          "class_probability": 0.9958921231805256,
          "start_pos": 0,
          "end_pos": 7
        },
        {
          "entity": "mountain view",
          "class_name": "LOC",
          "class_probability": 0.9844731508992688,
          "start_pos": 28,
          "end_pos": 41
        },
        {
          "entity": "california",
          "class_name": "LOC",
          "class_probability": 0.9972361009811214,
          "start_pos": 43,
          "end_pos": 53
        }
      ]
    }
  ]
}
Using the example text "Elastic is headquartered in Mountain View, California.", the model finds three entities: an organization "Elastic", and two locations "Mountain View" and "California".
Add the NER model to an inference ingest pipeline
editYou can perform bulk inference on documents as they are ingested by using an
inference processor in your ingest pipeline. The
novel Les Misérables by Victor Hugo is used as an example for inference in
the following example.
Download
the novel text split by paragraph as a JSON file, then upload it by using the
Data Visualizer.
Give the new index the name les-miserables when uploading the file.
Now create an ingest pipeline either in the Stack management UI or by using the API:
PUT _ingest/pipeline/ner
{
  "description": "NER pipeline",
  "processors": [
    {
      "inference": {
        "model_id": "elastic__distilbert-base-uncased-finetuned-conll03-english",
        "target_field": "ml.ner",
        "field_map": {
          "paragraph": "text_field"
        }
      }
    },
    {
      "script": {
        "lang": "painless",
        "if": "return ctx['ml']['ner'].containsKey('entities')",
        "source": "Map tags = new HashMap(); for (item in ctx['ml']['ner']['entities']) { if (!tags.containsKey(item.class_name)) tags[item.class_name] = new HashSet(); tags[item.class_name].add(item.entity);} ctx['tags'] = tags;"
      }
    }
  ],
  "on_failure": [
    {
      "set": {
        "description": "Index document to 'failed-<index>'",
        "field": "_index",
        "value": "failed-{{{ _index }}}"
      }
    },
    {
      "set": {
        "description": "Set error message",
        "field": "ingest.failure",
        "value": "{{_ingest.on_failure_message}}"
      }
    }
  ]
}
The field_map object of the inference processor maps the paragraph field
in the Les Misérables documents to text_field (the name of the
field the model is configured to use). The target_field is the name of the
field to write the inference results to.
The script processor pulls out the entities and groups them by type. The end
result is lists of people, locations, and organizations detected in the input
text. This painless script enables you to build visualizations from the fields
that are created.
The purpose of the on_failure clause is to record errors. It sets the _index
meta field to a new value, and the document is now stored there. It also sets a
new field ingest.failure and the error message is written to this field.
Inference can fail for a number of easily fixable reasons. Perhaps the model
has not been deployed, or the input field is missing in some of the source
documents. By redirecting the failed documents to another index and setting the
error message, those failed inferences are not lost and can be reviewed later.
When the errors are fixed, reindex from the failed index to recover the
unsuccessful requests.
Ingest the text of the novel - the index les-miserables - through the pipeline
you created:
POST _reindex
{
  "source": {
    "index": "les-miserables",
    "size": 50
  },
  "dest": {
    "index": "les-miserables-infer",
    "pipeline": "ner"
  }
}
|
The default batch size for reindexing is 1000. Reducing |
Take a random paragraph from the source document as an example:
{
    "paragraph": "Father Gillenormand did not do it intentionally, but inattention to proper names was an aristocratic habit of his.",
    "line": 12700
}
After the text is ingested through the NER pipeline, find the resulting document stored in Elasticsearch:
GET /les-miserables-infer/_search
{
  "query": {
    "term": {
      "line": 12700
    }
  }
}
The request returns the document marked up with one identified person:
(...)
"paragraph": "Father Gillenormand did not do it intentionally, but inattention to proper names was an aristocratic habit of his.",
  "@timestamp": "2020-01-01T17:38:25.000+01:00",
  "line": 12700,
  "ml": {
    "ner": {
      "predicted_value": "Father [Gillenormand](PER&Gillenormand) did not do it intentionally, but inattention to proper names was an aristocratic habit of his.",
      "entities": [
        {
          "entity": "gillenormand",
          "class_name": "PER",
          "class_probability": 0.9452480789333386,
          "start_pos": 7,
          "end_pos": 19
        }
      ],
      "model_id": "elastic__distilbert-base-uncased-finetuned-conll03-english"
    }
  },
  "tags": {
    "PER": [
      "gillenormand"
    ]
  }
(...)
Visualize results
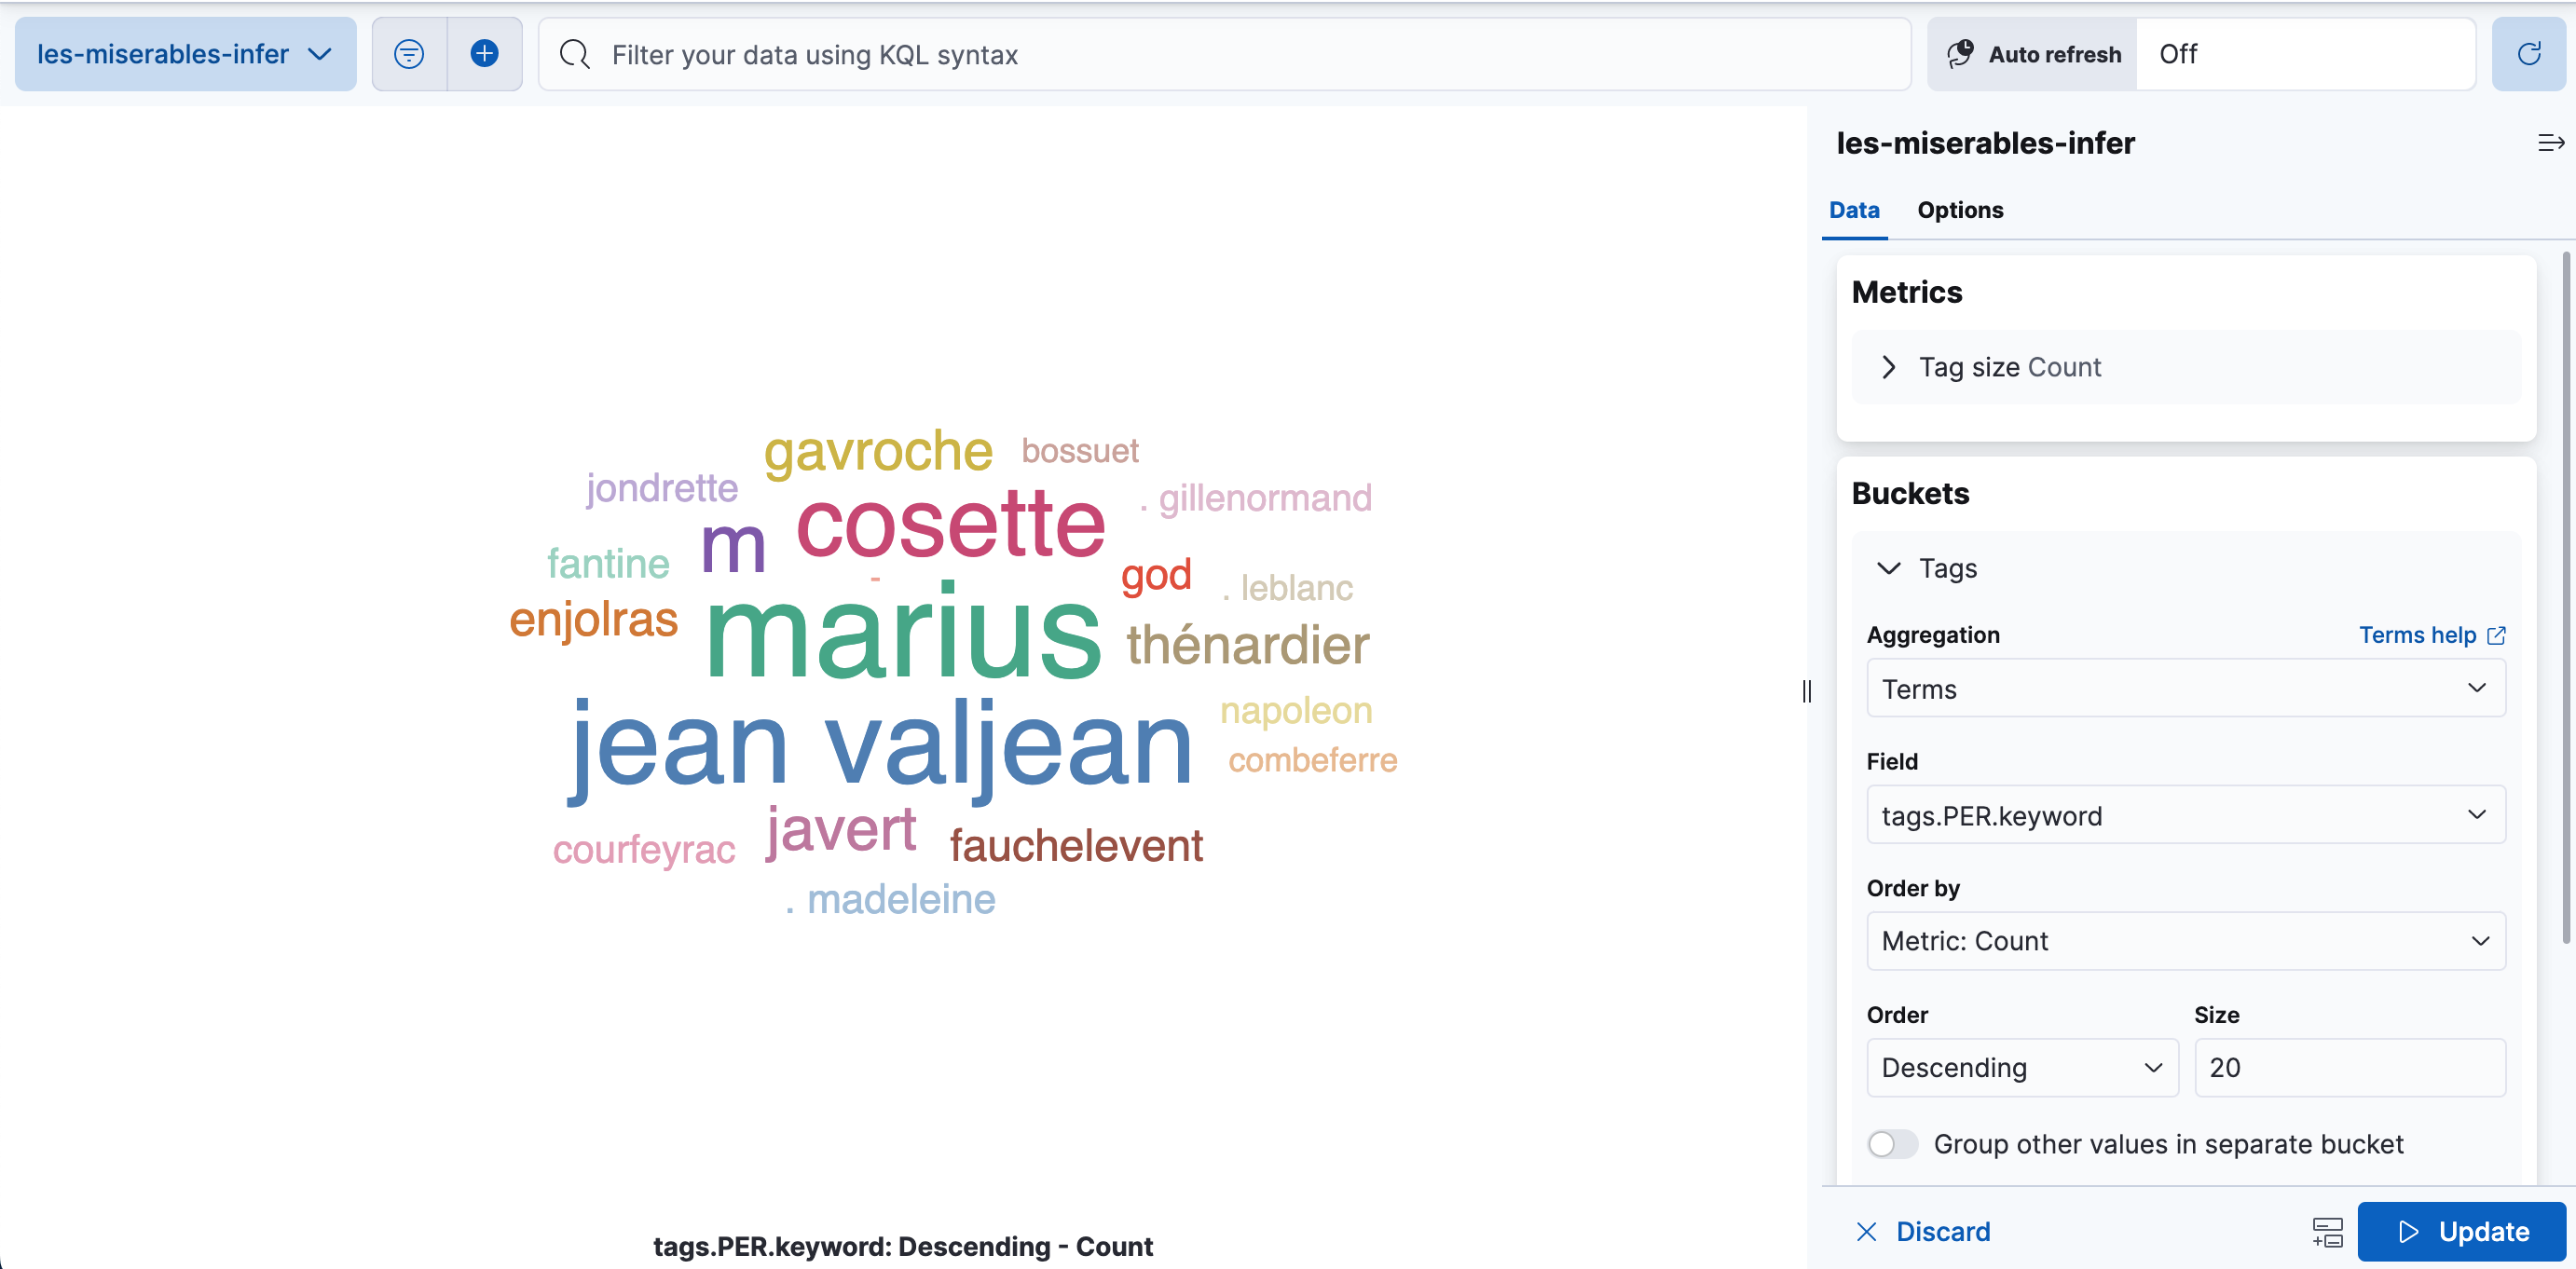
editYou can create a tag cloud to visualize your data processed by the inference pipeline. A tag cloud is a visualization that scales words by the frequency at which they occur. It is a handy tool for viewing the entities found in the data.
In Kibana, open Stack management > Data views, and create a new
data view from the les-miserables-infer index pattern.
Open Dashboard and create a new dashboard. Select the Aggregation based-type > Tag cloud visualization. Choose the new data view as the source.
Add a new bucket with a term aggregation, select the tags.PER.keyword field,
and increase the size to 20.
Optionally, adjust the time selector to cover the data points in the data view if you selected a time field when creating it.
Update and save the visualization.