Generating alerts for anomaly detection jobs
editGenerating alerts for anomaly detection jobs
editThis functionality is in beta and is subject to change. The design and code is less mature than official GA features and is being provided as-is with no warranties. Beta features are not subject to the support SLA of official GA features.
Kibana alerting features include support for machine learning rules, which run scheduled checks for anomalies in one or more anomaly detection jobs or check the health of the job with certain conditions. If the conditions of the rule are met, an alert is created and the associated action is triggered. For example, you can create a rule to check an anomaly detection job every fifteen minutes for critical anomalies and to notify you in an email. To learn more about Kibana alerting features, refer to Alerting.
The following machine learning rules are available:
- Anomaly detection alert
- Checks if the anomaly detection job results contain anomalies that match the rule conditions.
- Anomaly detection jobs health
- Monitors job health and alerts if an operational issue occurred that may prevent the job from detecting anomalies.
If you have created rules for specific anomaly detection jobs and you want to monitor whether these jobs work as expected, anomaly detection jobs health rules are ideal for this purpose.
Creating a rule
editYou can create machine learning rules in the anomaly detection job wizard after you start the job, from the job list, or under Stack Management > Alerts and Actions.
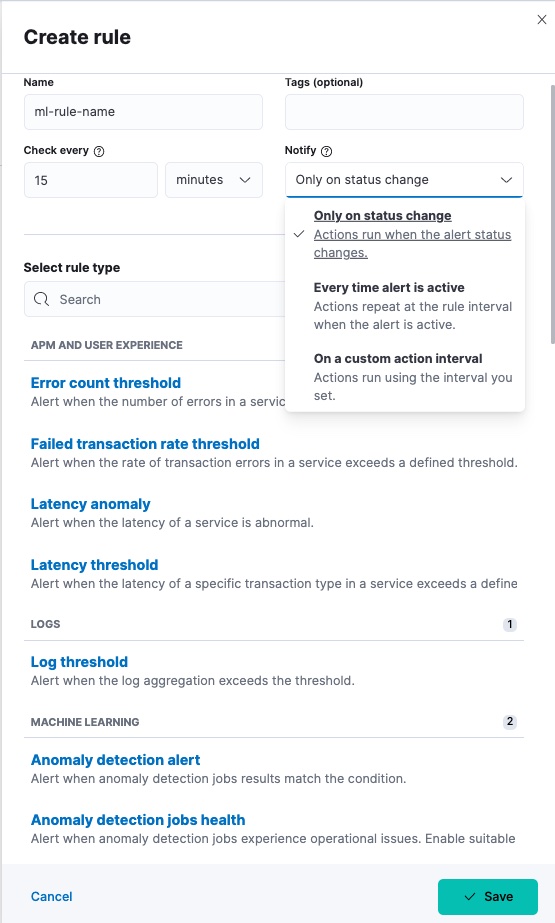
On the Create rule window, give a name to the rule and optionally provide
tags. Specify the time interval for the rule to check detected anomalies or job
health changes. It is recommended to select an interval that is close to the
bucket span of the job. You can also select a notification option with the
Notify selector. An alert remains active as long as the configured conditions
are met during the check interval. When there is no matching condition in the
next interval, the Recovered action group is invoked and the status of the
alert changes to OK. For more details, refer to the documentation of
general rule details.
Select the rule type you want to create under the machine learning section and continue to configure it depending on whether it is an anomaly detection alert or an anomaly detection job health rule.
Anomaly detection alert
editSelect the job that the rule applies to.
You must select a type of machine learning result. In particular, you can create rules based on bucket, record, or influencer results.
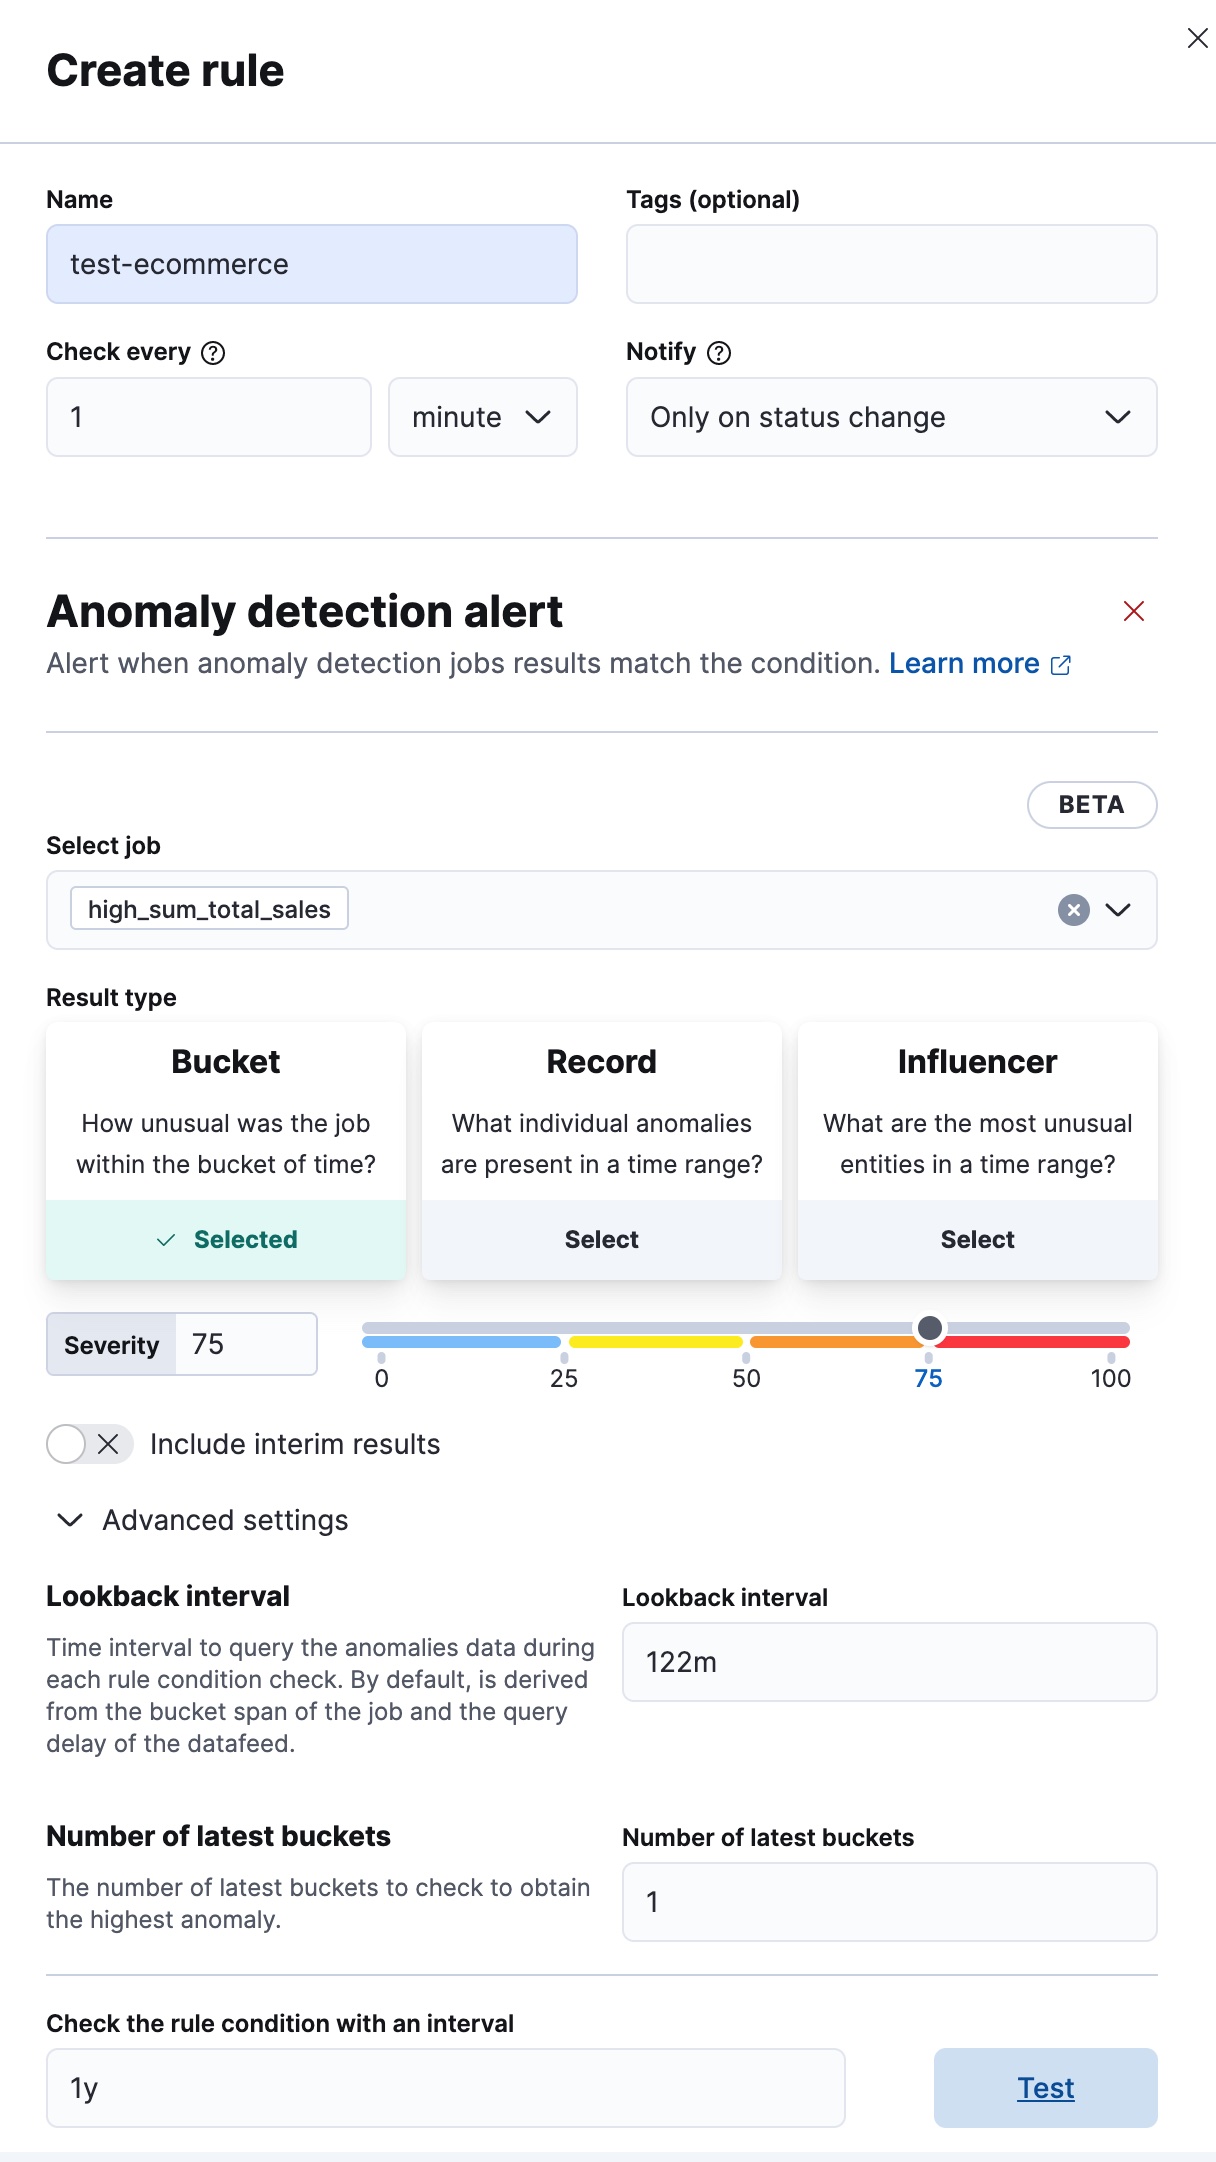
For each rule, you can configure the anomaly_score that triggers the action.
The anomaly_score indicates the significance of a given anomaly compared to
previous anomalies. The default severity threshold is 75 which means every
anomaly with an anomaly_score of 75 or higher triggers the associated action.
You can select whether you want to include interim results. Interim results are created by the anomaly detection job before a bucket is finalized. These results might disappear after the bucket is fully processed. Include interim results if you want to be notified earlier about a potential anomaly even if it might be a false positive. If you want to get notified only about anomalies of fully processed buckets, do not include interim results.
You can also configure advanced settings. Lookback interval sets an interval that is used to query previous anomalies during each condition check. Its value is derived from the bucket span of the job and the query delay of the datafeed by default. It is not recommended to set the lookback interval lower than the default value as it might result in missed anomalies. Number of latest buckets sets how many buckets to check to obtain the highest anomaly from all the anomalies that are found during the Lookback interval. An alert is created based on the anomaly with the highest anomaly score from the most anomalous bucket.
You can also test the configured conditions against your existing data and check the sample results by providing a valid interval for your data. The generated preview contains the number of potentially created alerts during the relative time range you defined.
As the last step in the rule creation process, define the actions that occur when the conditions are met.
Anomaly detection jobs health
editSelect the job or group that the rule applies to. If you assign more jobs to the group, they are included the next time the rule conditions are checked.
You can also use a special character (*) to apply the rule to all your jobs.
Jobs created after the rule are automatically included. You can exclude jobs
that are not critically important by using the Exclude field.
Enable the health check types that you want to apply. All checks are enabled by default. At least one check needs to be enabled to create the rule. The following health checks are available:
- Datafeed is not started
- Notifies if the corresponding datafeed of the job is not started but the job is in an opened state. The notification message recommends the necessary actions to solve the error.
- Model memory limit reached
- Notifies if the model memory status of the job reaches the soft or hard model memory limit. Optimize your job by following these guidelines or consider amending the model memory limit.
- Data delay has occurred
- Notifies when the job missed some data. You can define the threshold for the amount of missing documents you get alerted on by setting Number of documents. You can control the lookback interval for checking delayed data with Time interval. Refer to the Handling delayed data page to see what to do about delayed data.
- Errors in job messages
- Notifies when the job messages contain error messages. Review the notification; it contains the error messages, the corresponding job IDs and recommendations on how to fix the issue. This check looks for job errors that occur after the rule is created; it does not look at historic behavior.
As the last step in the rule creation process, define the actions that occur when the conditions are met.
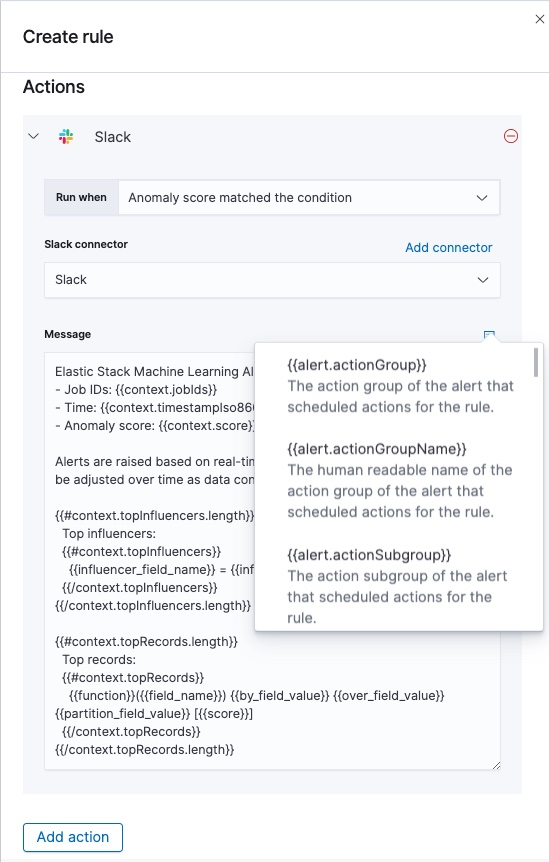
Defining actions
editConnect your rule to actions that use supported built-in integrations by selecting a connector type. Connectors are Kibana services or third-party integrations that perform an action when the rule conditions are met or the alert is recovered. You can select in which case the action will run.
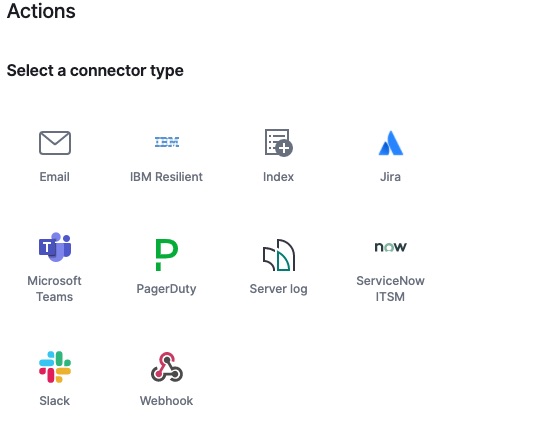
For example, you can choose Slack as a connector type and configure it to send a message to a channel you selected. You can also create an index connector that writes the JSON object you configure to a specific index. It’s also possible to customize the notification messages. A list of variables is available to include in the message, like job ID, anomaly score, time, top influencers, datafeed ID, memory status and so on based on the selected rule type. Refer to Action variables to see the full list of available variables by rule type.
After you save the configurations, the rule appears in the Alerts and Actions list where you can check its status and see the overview of its configuration information.
The name of an alert is always the same as the job ID of the associated anomaly detection job that triggered it. You can mute the notifications for a particular anomaly detection job on the page of the rule that lists the individual alerts. You can open it via Alerts and Actions by selecting the rule name.
Action variables
editYou can add different variables to your action. The following variables are
specific to the machine learning rule types. An * marks the variables that can be used for
actions of recovered alerts.
Anomaly detection alert action variables
editEvery anomaly detection alert has the following action variables:
-
context.anomalyExplorerUrl* - URL to open in the Anomaly Explorer.
-
context.isInterim - Indicates if top hits contain interim results.
-
context.jobIds* - List of job IDs that triggered the alert.
-
context.message* - A preconstructed message for the alert.
-
context.score - Anomaly score at the time of the notification action.
-
context.timestamp - The bucket timestamp of the anomaly.
-
context.timestampIso8601 - The bucket timestamp of the anomaly in ISO8601 format.
-
context.topInfluencers -
The list of top influencers.
Properties of
context.topInfluencers-
influencer_field_name - The field name of the influencer.
-
influencer_field_value - The entity that influenced, contributed to, or was to blame for the anomaly.
-
score - The influencer score. A normalized score between 0-100 which shows the influencer’s overall contribution to the anomalies.
-
-
context.topRecords -
The list of top records.
Properties of
context.topRecords-
actual - The actual value for the bucket.
-
by_field_value - The value of the by field.
-
field_name -
Certain functions require a field to operate on, for example,
sum(). For those functions, this value is the name of the field to be analyzed. -
function -
The function in which the anomaly occurs, as specified in the detector
configuration. For example,
max. -
over_field_name - The field used to split the data.
-
partition_field_value - The field used to segment the analysis.
-
score - A normalized score between 0-100, which is based on the probability of the anomalousness of this record.
-
typical - The typical value for the bucket, according to analytical modeling.
-
Anomaly detection jobs health action variables
editEvery health check has two main variables: context.message and
context.results. The properties of context.results may vary based on the
type of check. You can find the possible properties for all the checks below.
Datafeed is not started
edit-
context.message* - A preconstructed message for the alert.
-
context.results -
Contains the following properties:
Properties of
context.results-
datafeed_id* - The datafeed identifier.
-
datafeed_state* -
The state of the datafeed. It can be
starting,started,stopping,stopped. -
job_id* - The job identifier.
-
job_state* -
The state of the job. It can be
opening,opened,closing,closed, orfailed.
-
Model memory limit reached
edit-
context.message* - A preconstructed message for the rule.
-
context.results -
Contains the following properties:
Properties of
context.results-
job_id* - The job identifier.
-
memory_status* -
The status of the mathematical model. It can have one of the following values:
-
soft_limit: The model used more than 60% of the configured memory limit and older unused models will be pruned to free up space. In categorization jobs no further category examples will be stored. -
hard_limit: The model used more space than the configured memory limit. As a result, not all incoming data was processed.
-
The
memory_statusisokfor recovered alerts.-
model_bytes* - The number of bytes of memory used by the models.
-
model_bytes_exceeded* - The number of bytes over the high limit for memory usage at the last allocation failure.
-
model_bytes_memory_limit* - The upper limit for model memory usage.
-
log_time* - The timestamp of the model size statistics according to server time. Time formatting is based on the Kibana settings.
-
peak_model_bytes* - The peak number of bytes of memory ever used by the model.
-
Data delay has occurred
edit-
context.message* - A preconstructed message for the rule.
-
context.results -
For recovered alerts,
context.resultsis either empty (when there is no delayed data) or the same as for an active alert (when the number of missing documents is less than the Number of documents treshold set by the user). Contains the following properties:Properties of
context.results-
annotation* - The annotation corresponding to the data delay in the job.
-
end_timestamp* - Timestamp of the latest finalized buckets with missing documents. Time formatting is based on the Kibana settings.
-
job_id* - The job identifier.
-
missed_docs_count* - The number of missed documents.
-
Error in job messages
edit-
context.message* - A preconstructed message for the rule.
-
context.results -
Contains the following properties:
Properties of
context.results-
timestamp - Timestamp of the latest finalized buckets with missing documents.
-
job_id - The job identifier.
-
message - The error message.
-
node_name - The name of the node that runs the job.
-