Kibana role management
editKibana role management
editTo create a role that grants Kibana privileges, go to Management → Security → Roles and click Create role.
Adding Kibana privileges
editTo assign Kibana privileges to the role, click Add space privilege in the Kibana section.
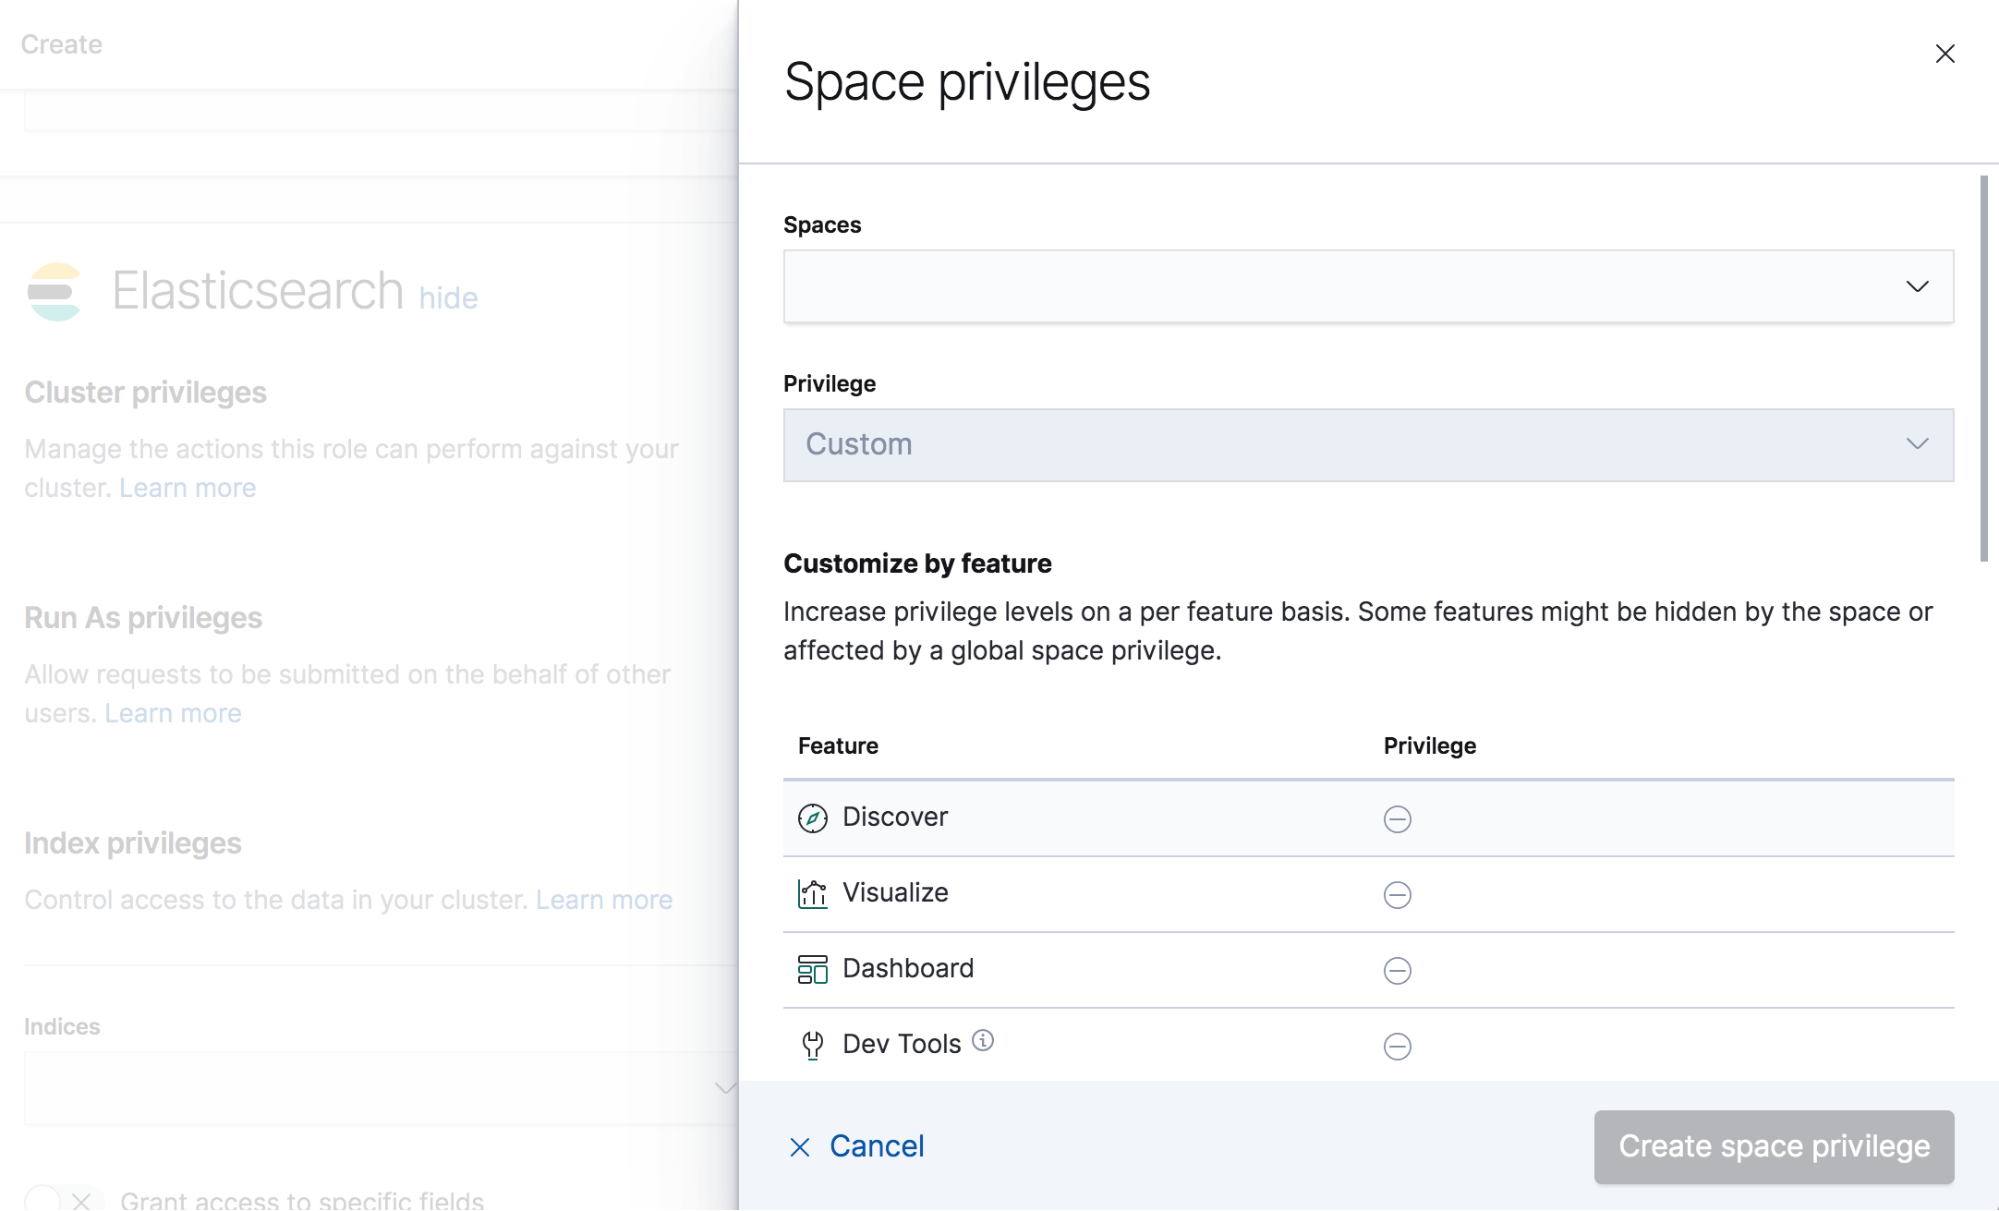
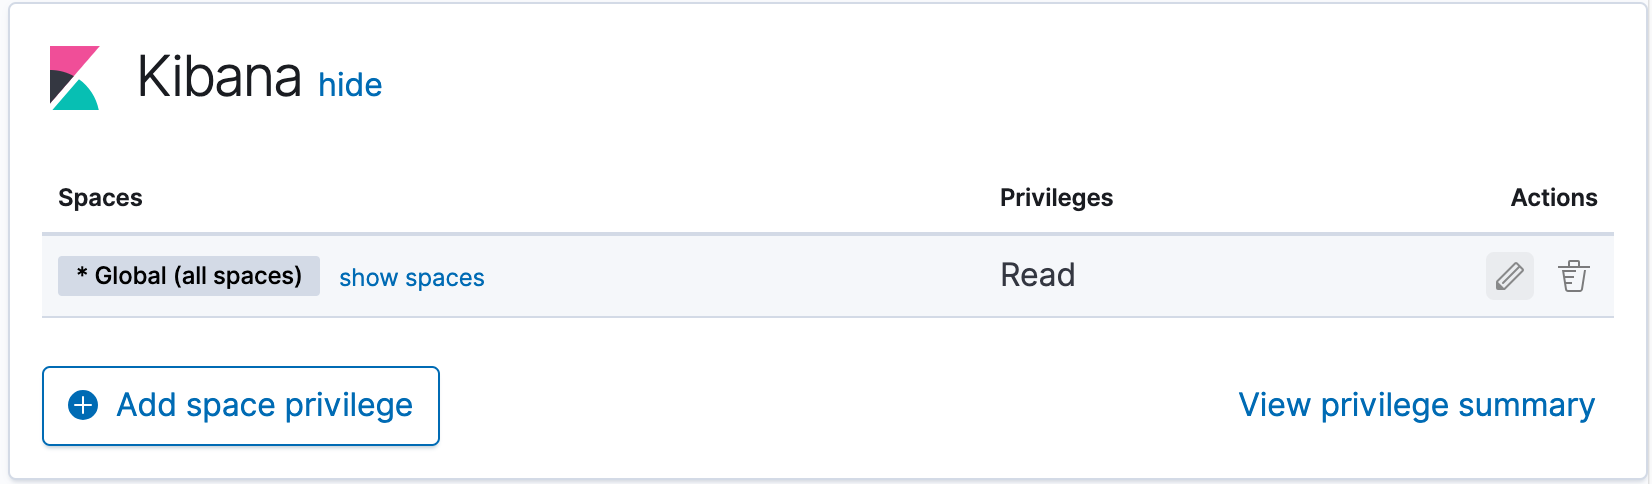
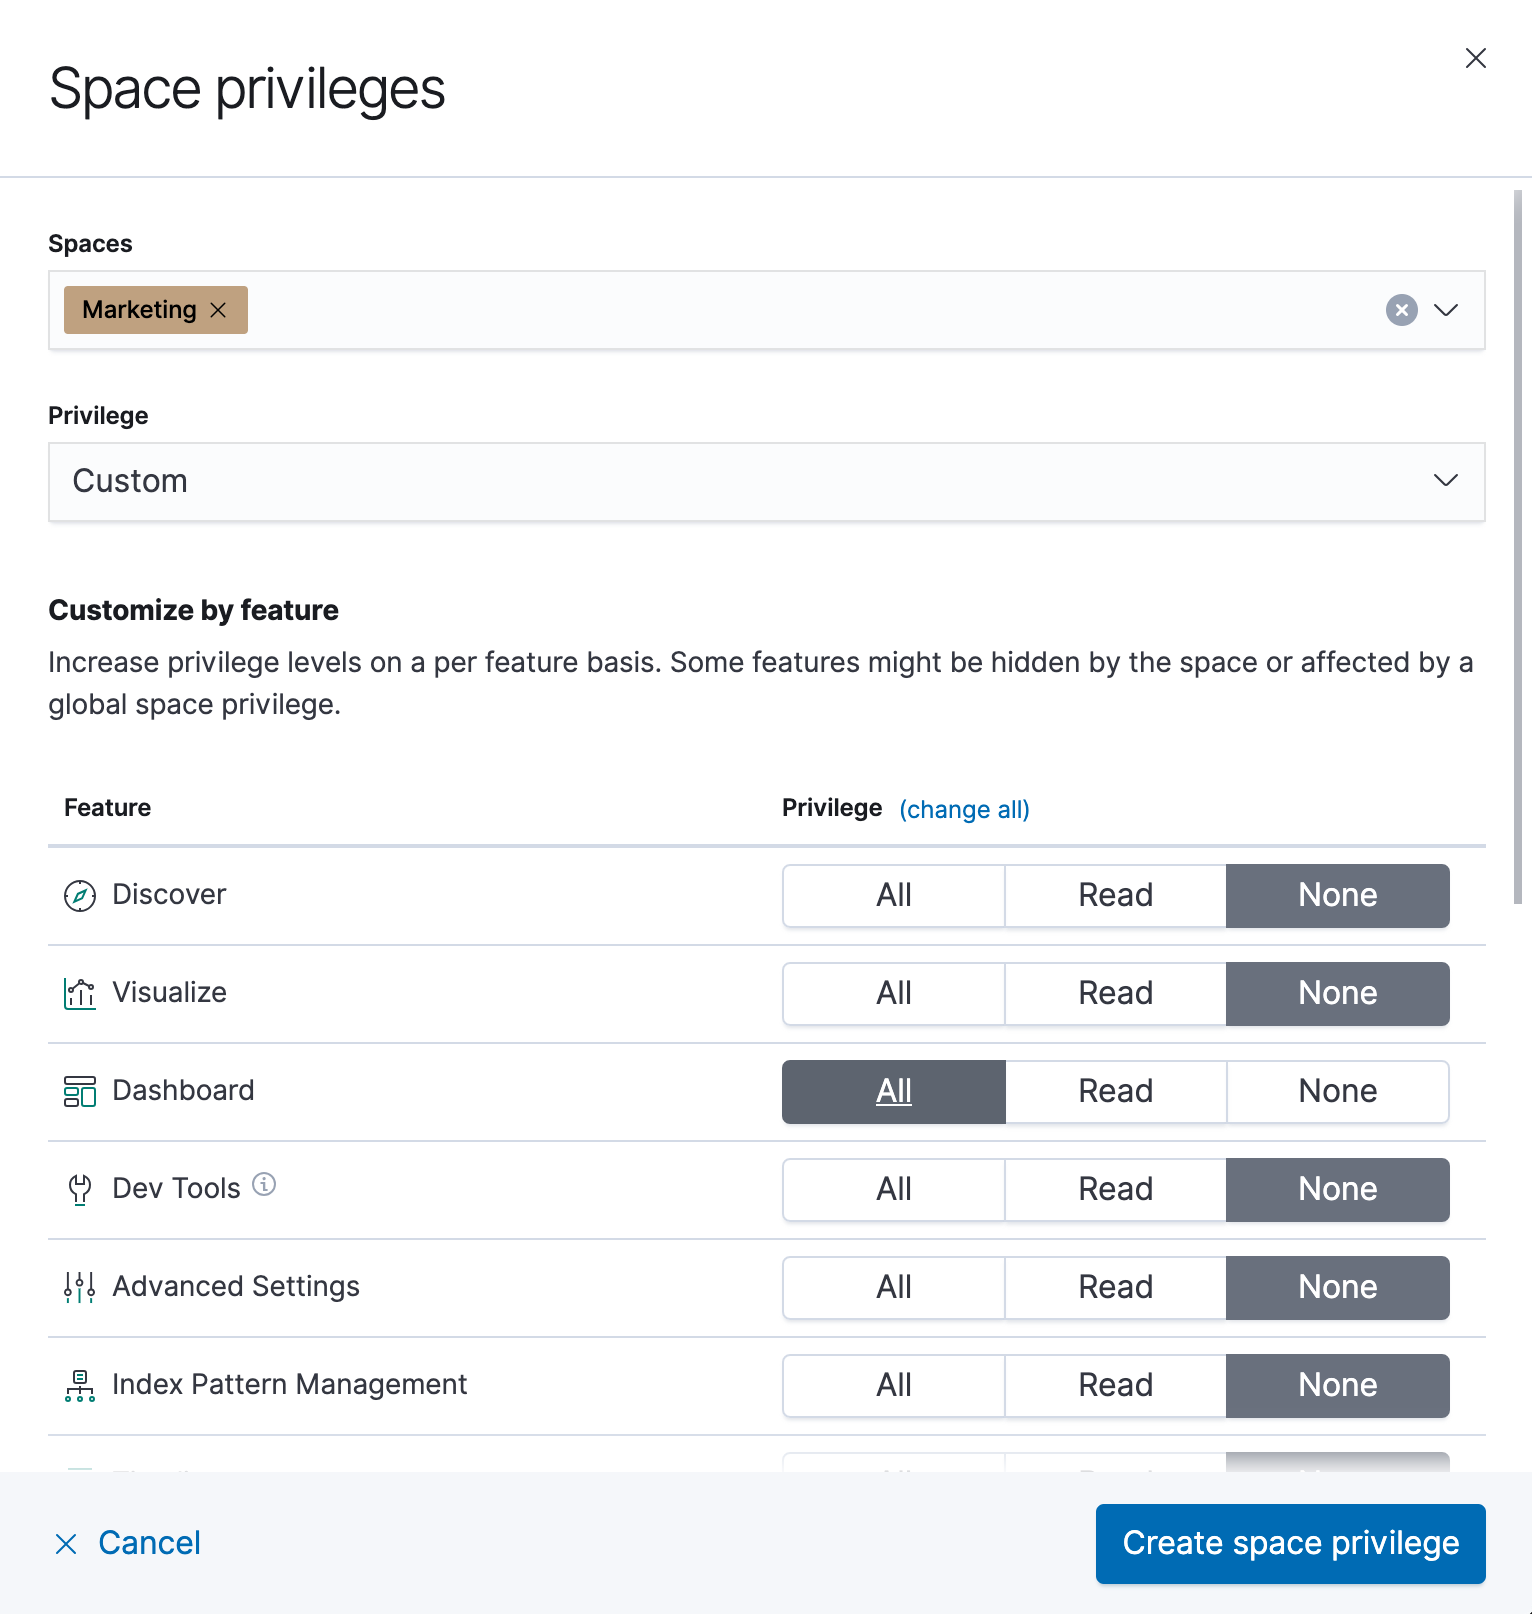
Open the Spaces selection control to specify whether to grant the role access to all spaces * Global (all spaces) or one or more individual spaces. If you select * Global (all spaces), you can’t select individual spaces until you clear your selection.
Use the Privilege menu to grant access to features. The default is Custom, which you can use to grant access to individual features. Otherwise, you can grant read and write access to all current and future features by selecting All, or grant read access to all current and future features by selecting Read.
When using the Customize by feature option, you can choose either All, Read or None for access to each feature. As new features are added to Kibana, roles that use the custom option do not automatically get access to the new features. You must manually update the roles.
Machine Learning and Stack Monitoring rely on built-in roles to grant access. When a user is assigned the appropriate roles, the Machine Learning and Stack Monitoring application are available; otherwise, these applications are not visible.
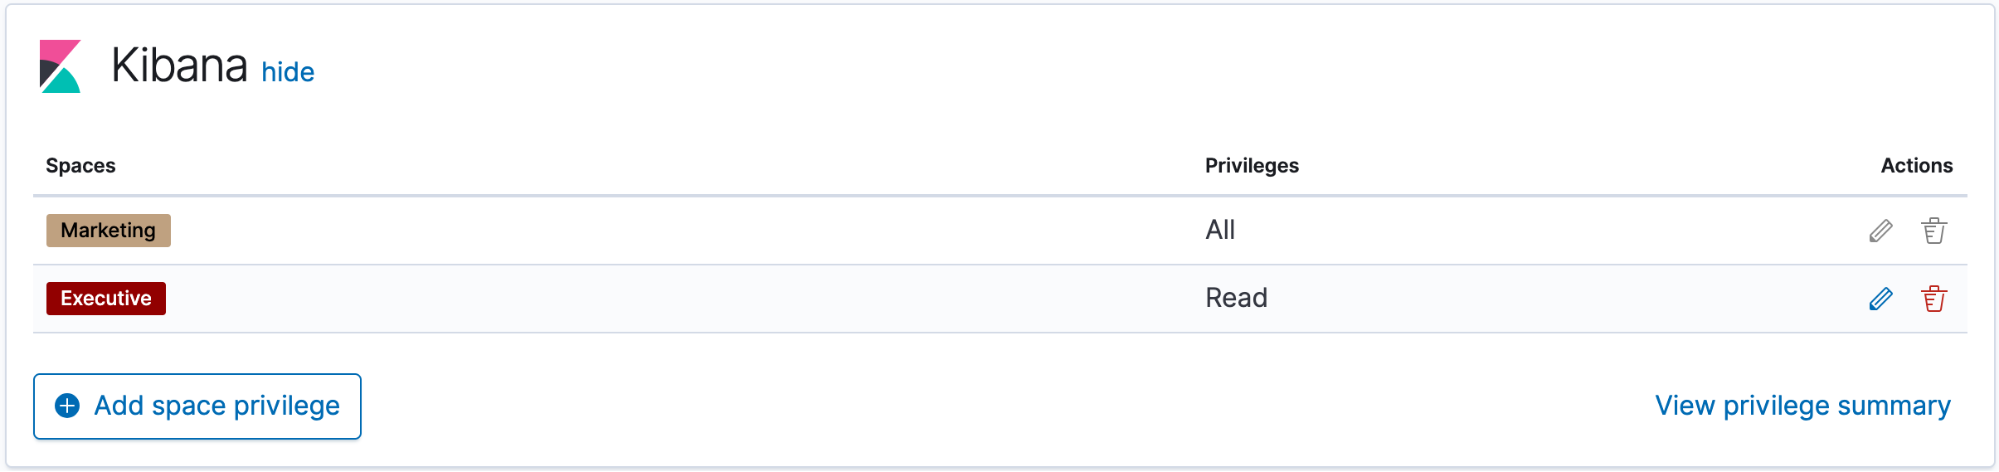
To apply your changes, click Create space privilege. The space privilege shows up under the Kibana privileges section of the role.
Feature availability
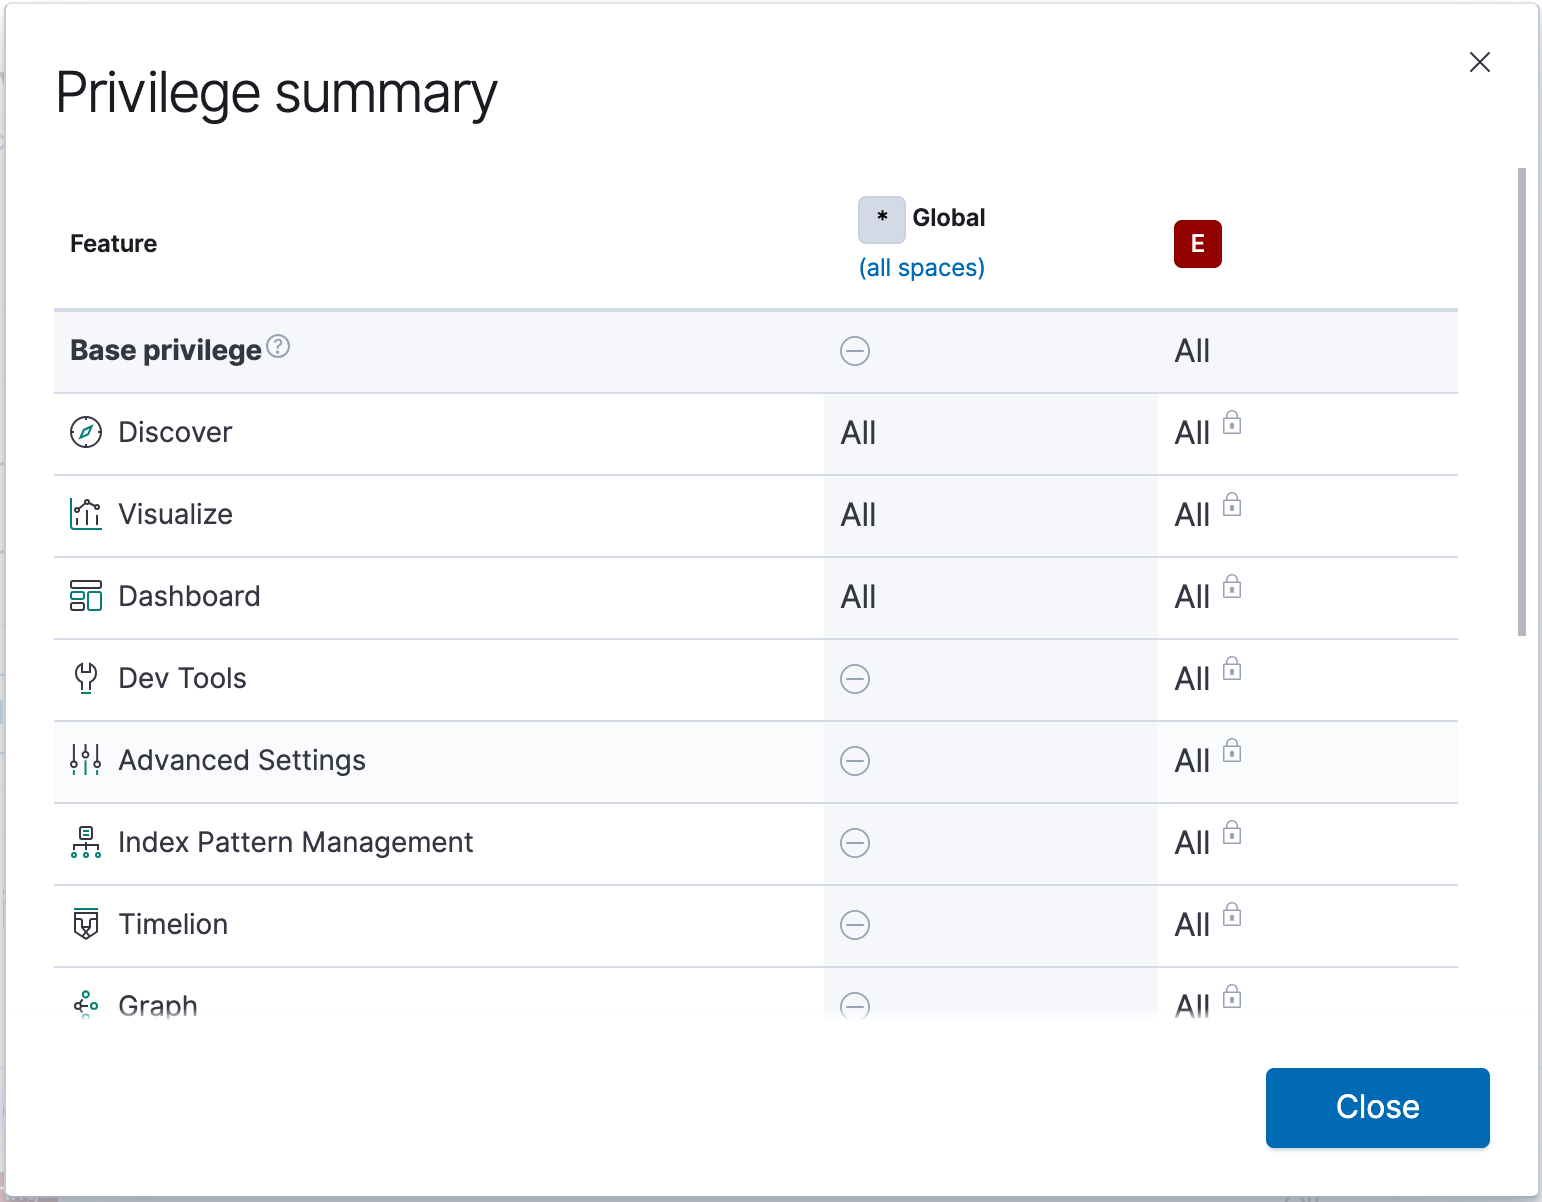
editFeatures are available to users when their roles grant access to the features, and those features are visible in their current space. The following matrix explains when features are available to users when controlling access via spaces and role-based access control:
| Spaces config | Role config | Result |
|---|---|---|
Feature hidden |
Feature disabled |
Feature not available |
Feature hidden |
Feature enabled |
Feature not available |
Feature visible |
Feature disabled |
Feature not available |
Feature visible |
Feature enabled |
Feature available |
Assigning different privileges to different spaces
editUsing the same role, it’s possible to assign different privileges to different spaces. After you’ve added space privileges, click Add space privilege. If you’ve already added privileges for either * Global (all spaces) or an individual space, you will not be able to select these in the Spaces selection control.
Additionally, if you’ve already assigned privileges at * Global (all spaces), you are only able to assign additional privileges to individual spaces. Similar to the behavior of multiple roles granting the union of all privileges, space privileges are also a union. If you’ve already granted the user the All privilege at * Global (all spaces), you’re not able to restrict the role to only the Read privilege at an individual space.
Example 1: Grant all access to Dashboard at an individual space
edit- Click Add space privilege.
- For Spaces, select an individual space.
- For Privilege, leave the default selection of Custom.
- For the Dashboard feature, select All
- Click Create space privilege.
Example 2: Grant all access to one space and read access to another
edit- Click Add space privilege.
- For Spaces, select the first space.
- For Privilege, select All.
- Click Create space privilege.
- Click Add space privilege.
- For Spaces, select the second space.
- For Privilege, select Read.
- Click Create space privilege.
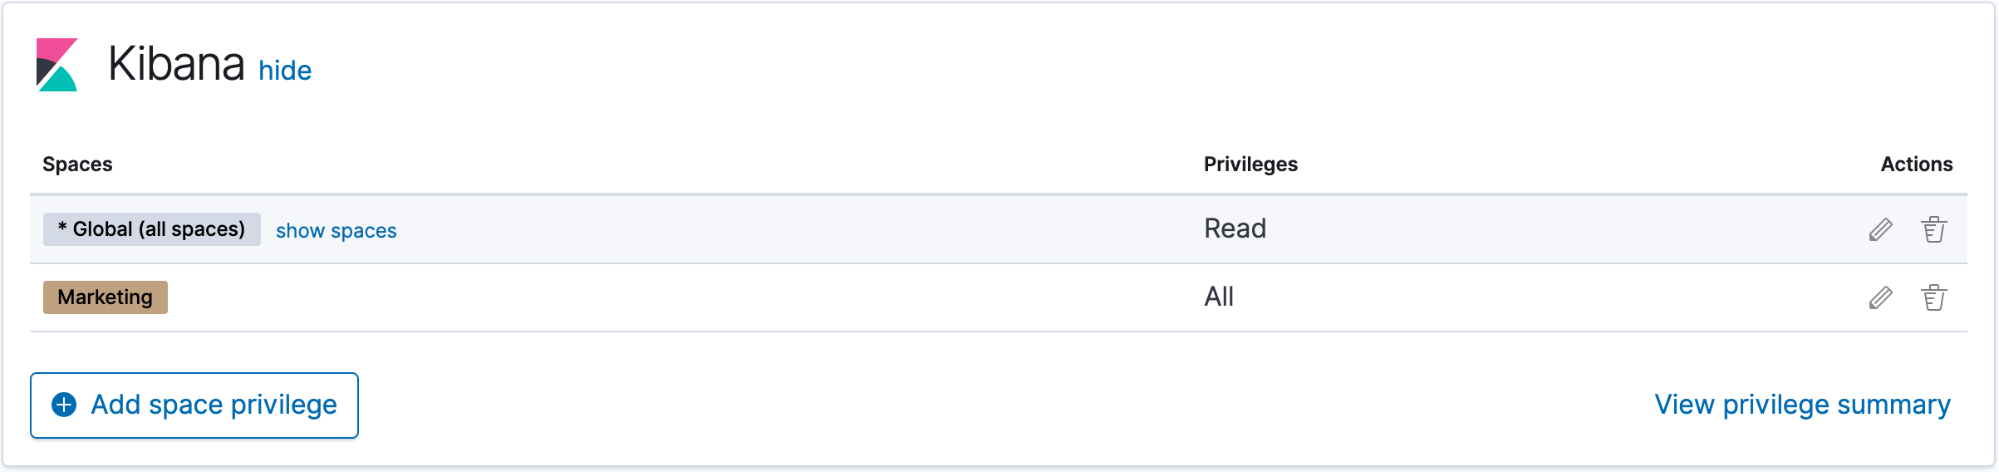
Example 3: Grant read access to all spaces and write access to an individual space
edit- Click Add space privilege.
- For Spaces, select * Global (all spaces).
- For Privilege, select Read.
- Click Create space privilege.
- Click Add space privilege.
- For Spaces, select the individual space.
- For Privilege, select All.
- Click Create space privilege.