Snapshot and Restore
editSnapshot and Restore
editSnapshot and Restore enables you to backup your Elasticsearch indices and clusters using data and state snapshots. Snapshots are important because they provide a copy of your data in case something goes wrong. If you need to roll back to an older version of your data, you can restore a snapshot from the repository.
To get started, open the main menu, then click Stack Management > Snapshot and Restore. With this UI, you can:
- Register a repository for storing your snapshots
- View a list of your snapshots and drill down into details
- Restore data into your cluster from a snapshot
- Create a policy to automate snapshot creation and deletion
- Delete a snapshot to free storage space
Before using this feature, you should be familiar with how snapshots work. Snapshot and Restore is a good source for more detailed information.
Required permissions
editThe minimum required permissions to access Snapshot and Restore include:
-
Cluster privileges:
monitor,manage_slm,cluster:admin/snapshot, andcluster:admin/repository -
Index privileges:
allon themonitorindex if you want to access content in the Restore Status tab
To add privileges, open the main menu, then click Stack Management > Roles.

Register a repository
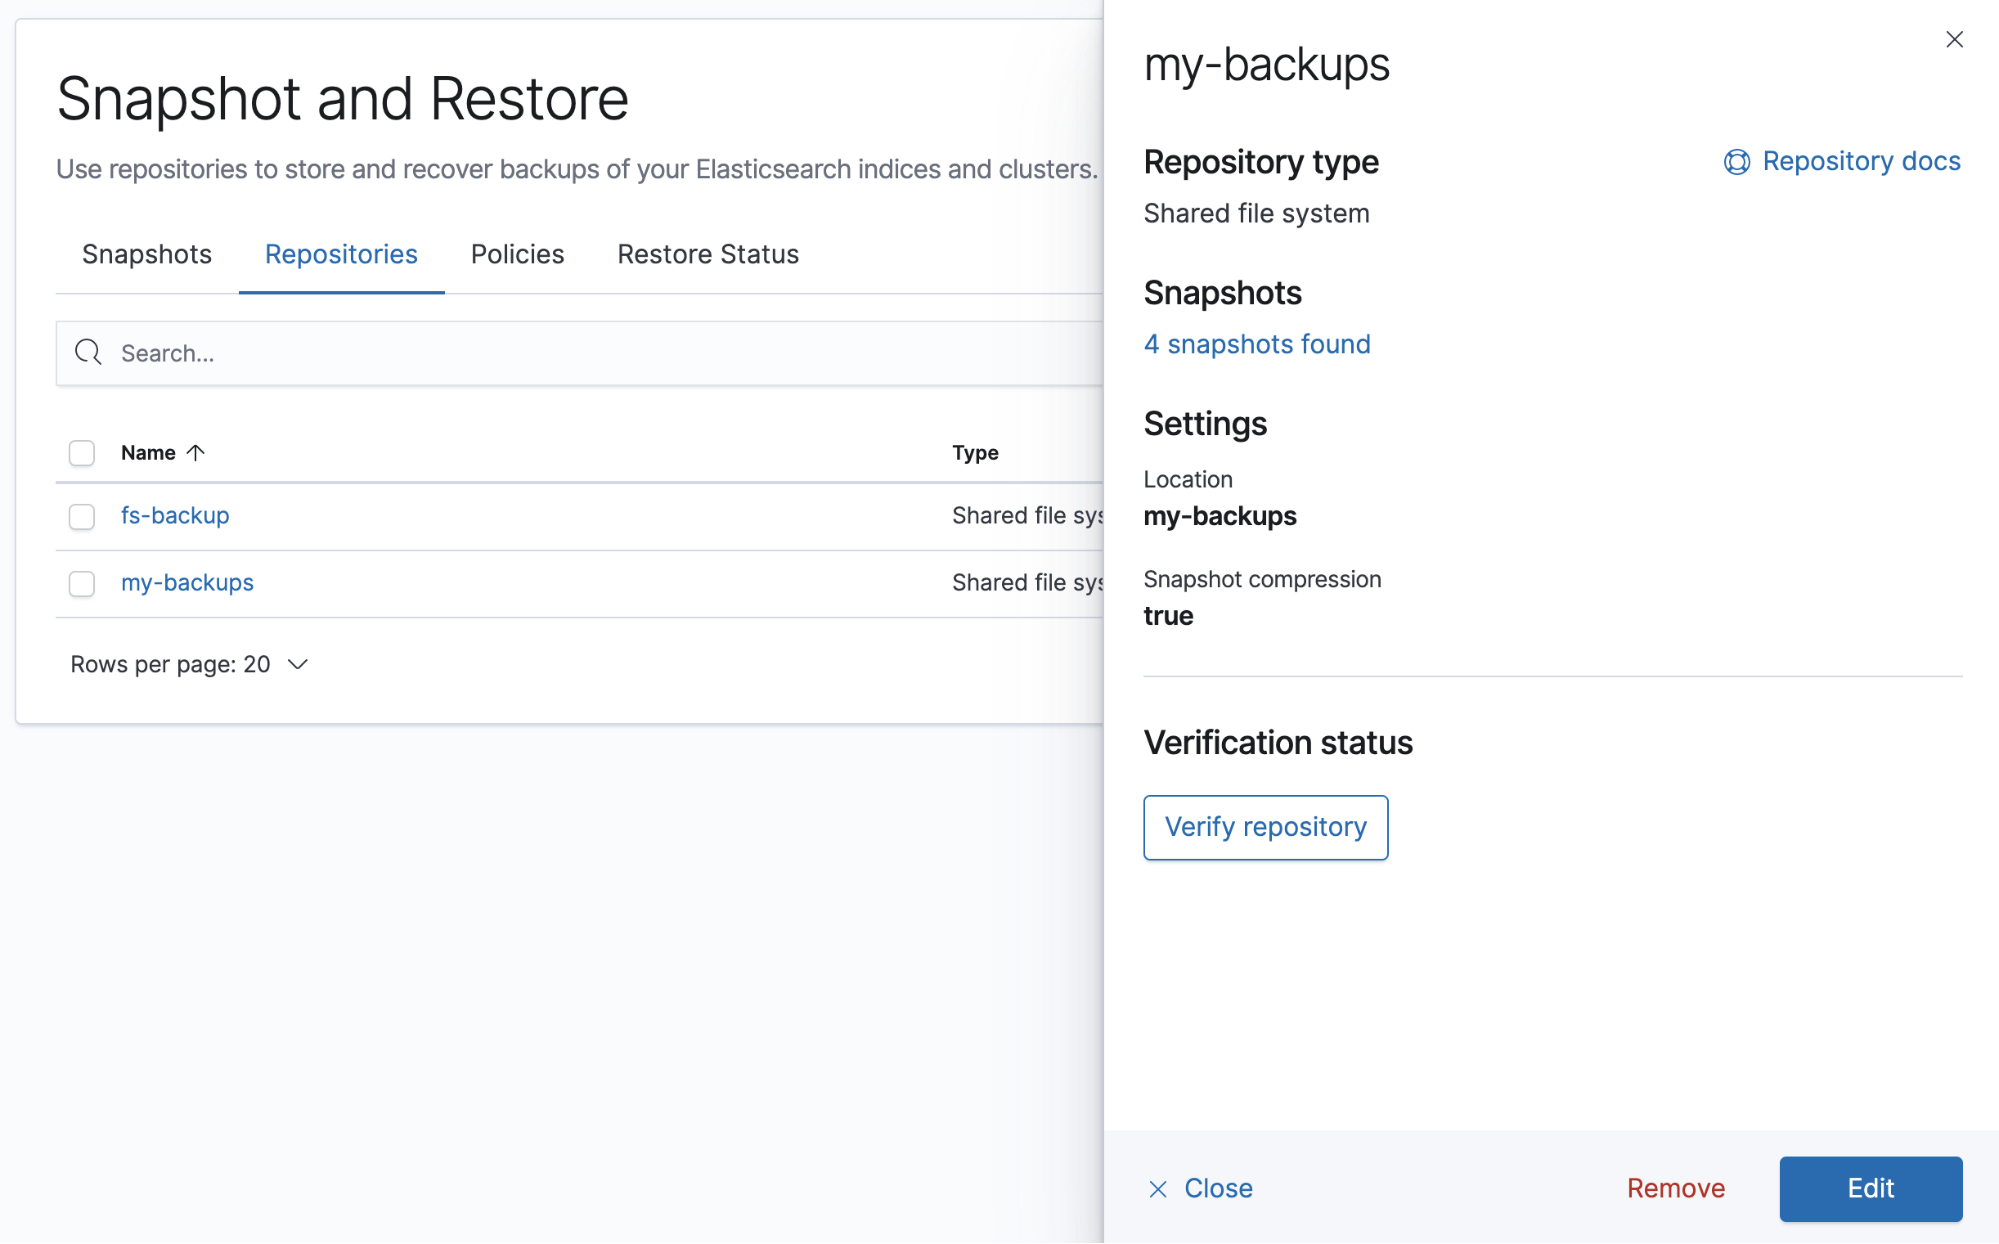
editA repository is where your snapshots live. You must register a snapshot repository before you can perform snapshot and restore operations.
If you don’t have a repository, Kibana walks you through the process of registering one. Kibana supports three repository types out of the box: shared file system, read-only URL, and source-only. For more information on these repositories and their settings, see Repositories. To use other repositories, such as S3, see Repository plugins.
Once you create a repository, it is listed in the Repositories view. Click a repository name to view its type, number of snapshots, and settings, and to verify status.
View your snapshots
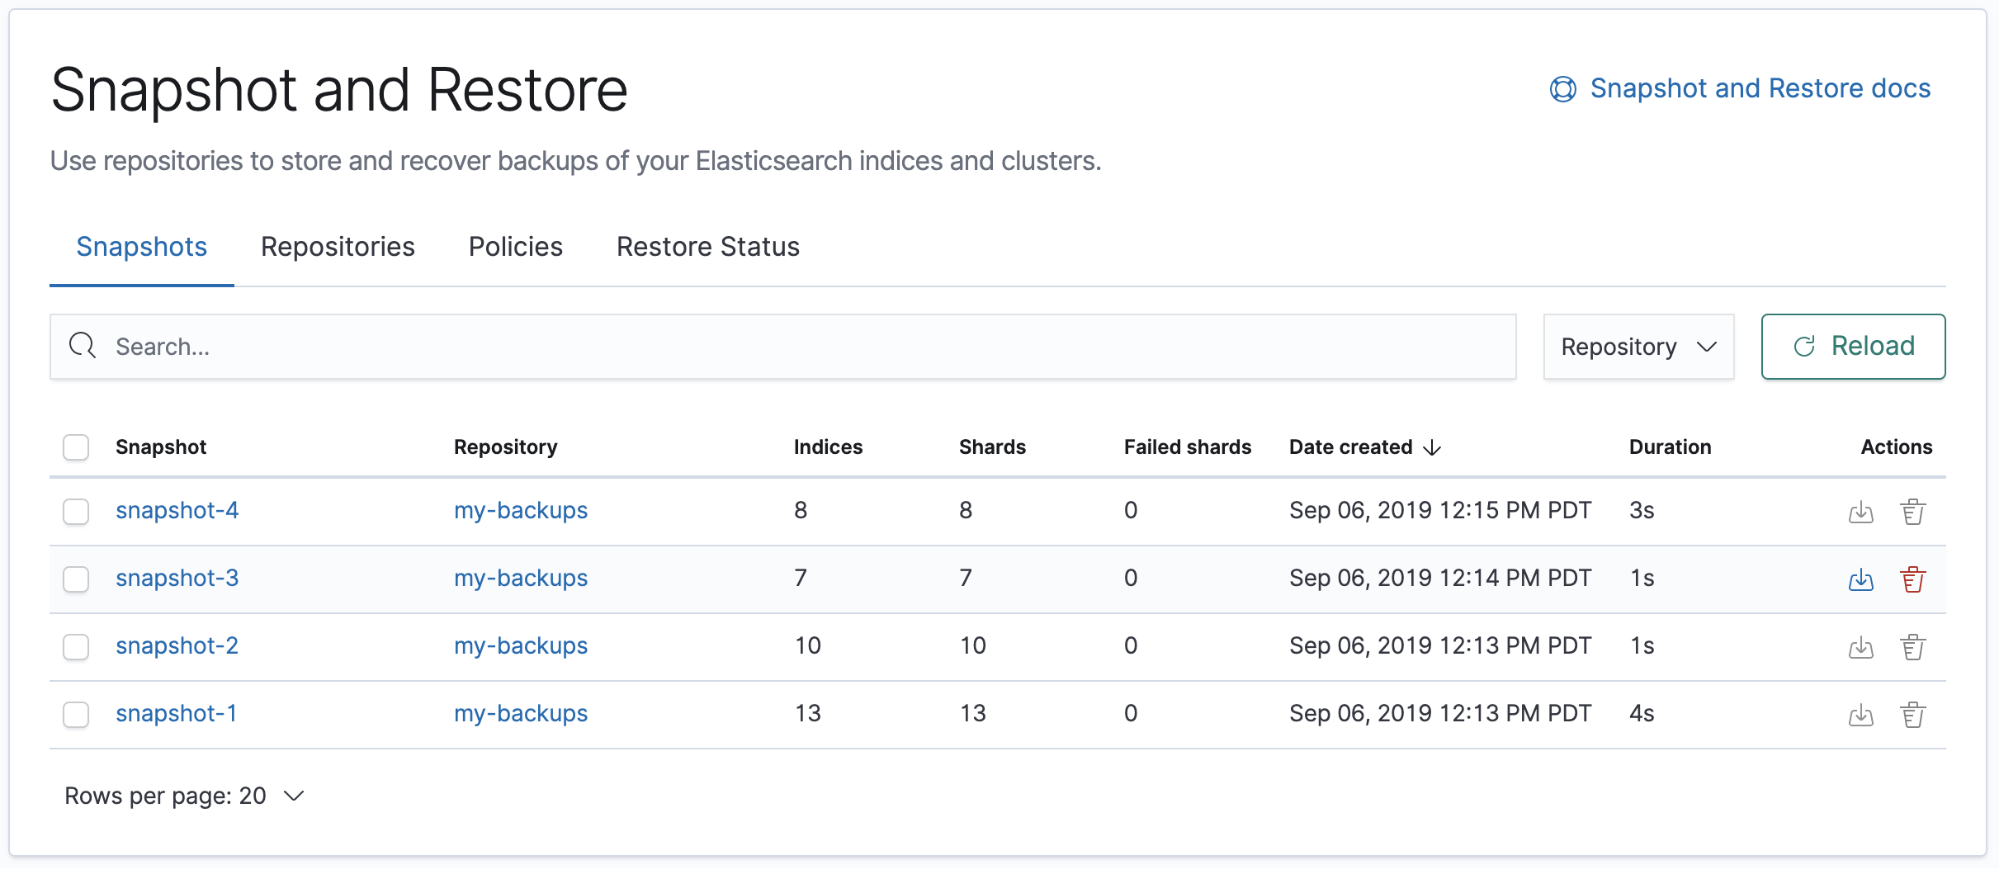
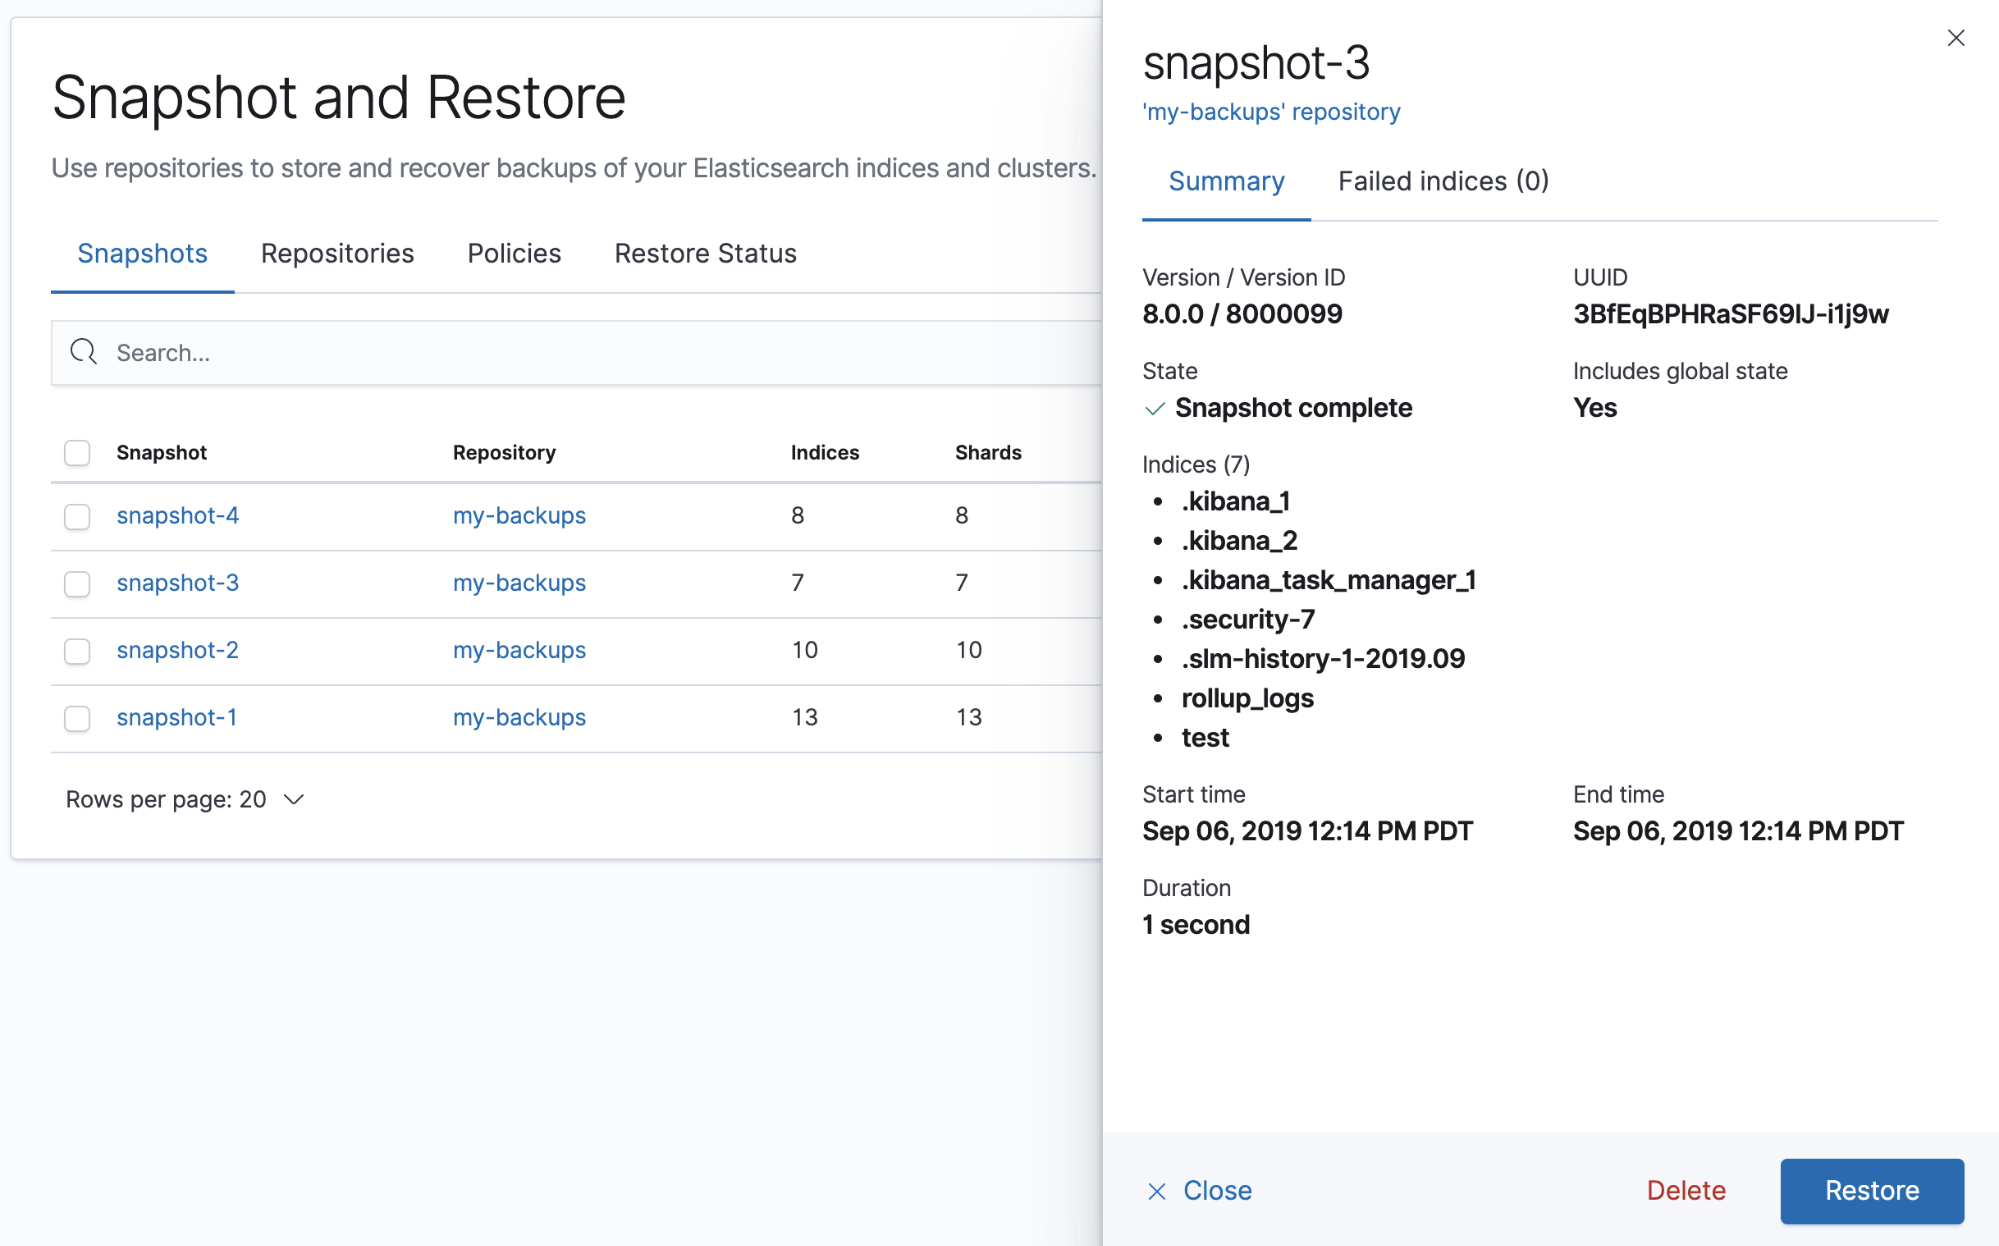
editA snapshot is a backup taken from a running Elasticsearch cluster. You’ll find an overview of your snapshots in the Snapshots view, and you can drill down into each snapshot for further investigation.
If you don’t have any snapshots, you can create them from the Kibana Console. The snapshot API takes the current state and data in your index or cluster, and then saves it to a shared repository.
The snapshot process is "smart." Your first snapshot is a complete copy of the data in your index or cluster. All subsequent snapshots save the changes between the existing snapshots and the new data.
Restore a snapshot
editThe information stored in a snapshot is not tied to a specific cluster or a cluster name. This enables you to restore a snapshot made from one cluster to another cluster. You might use the restore operation to:
- Recover data lost due to a failure
- Migrate a current Elasticsearch cluster to a new version
- Move data from one cluster to another cluster
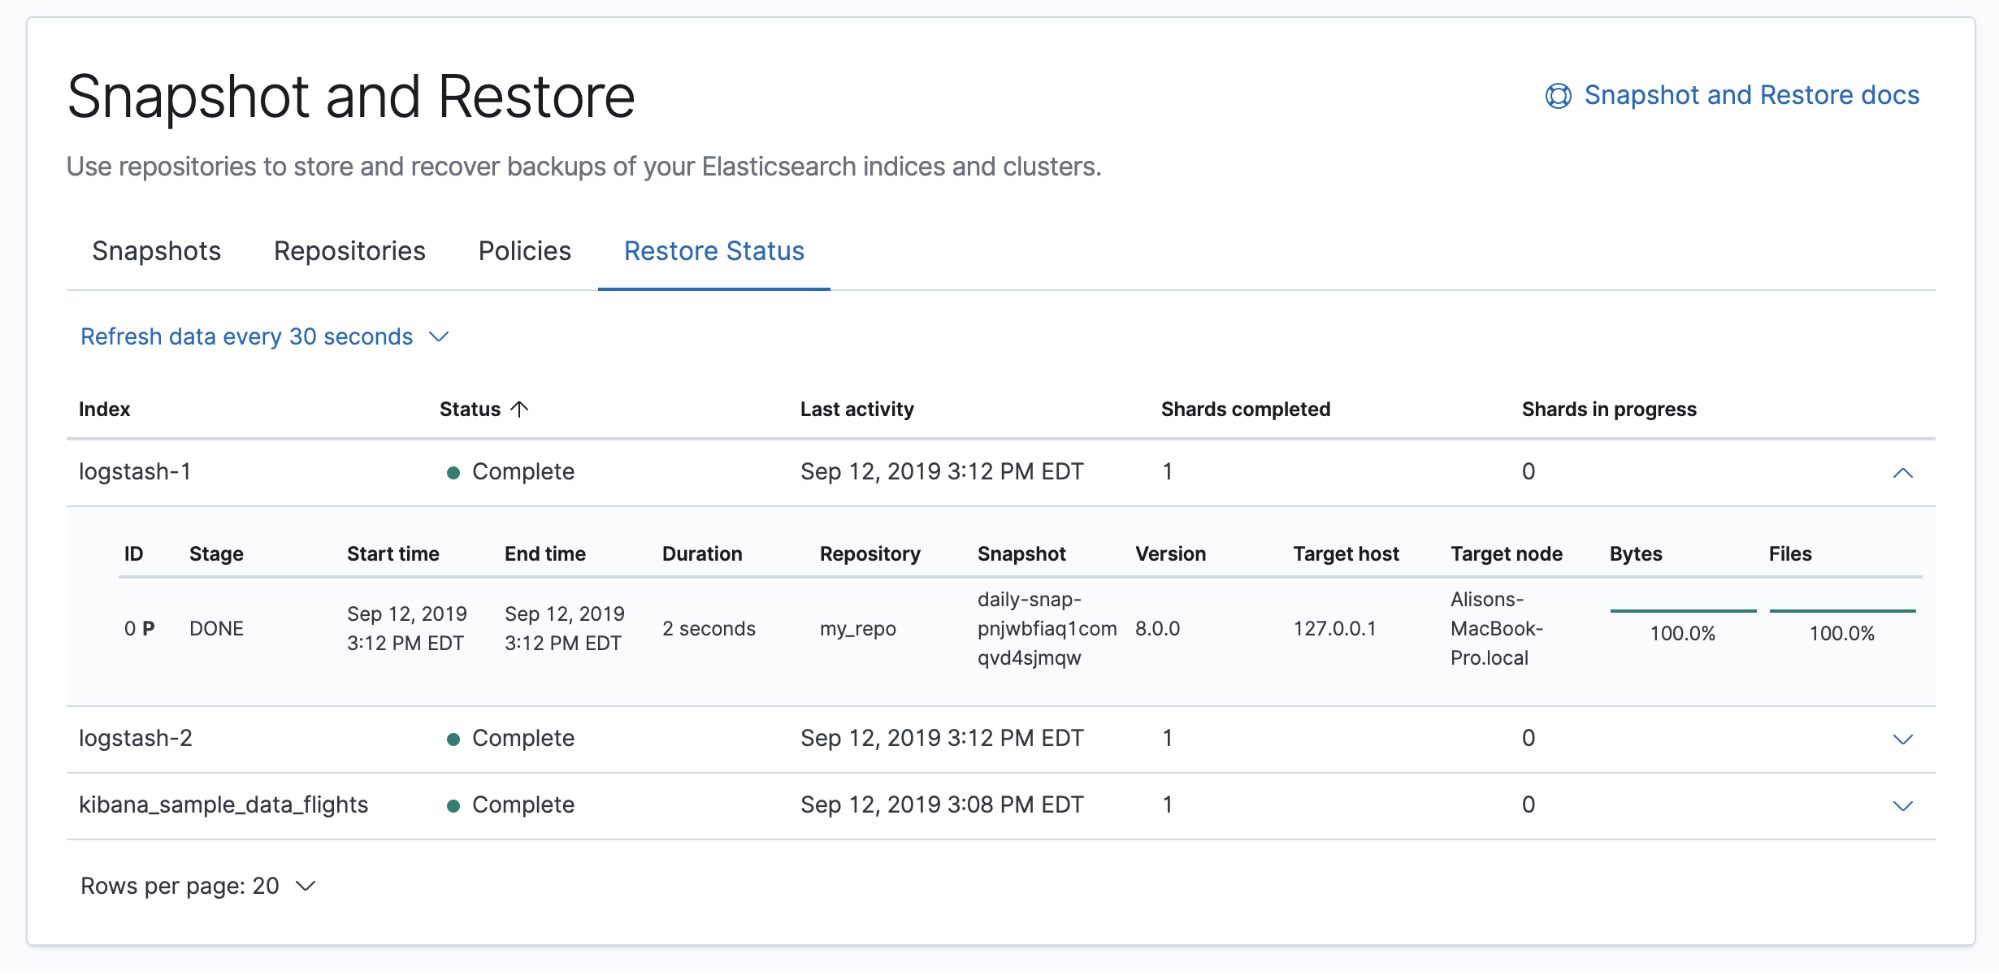
To get started, go to the Snapshots view, find the snapshot, and click the restore icon in the Actions column. The Restore wizard presents options for the restore operation, including which indices to restore and whether to modify the index settings. You can restore an existing index only if it’s closed and has the same number of shards as the index in the snapshot.
Once you initiate the restore, you’re navigated to the Restore Status view, where you can track the current state for each shard in the snapshot.
Create a snapshot lifecycle policy
editUse a snapshot lifecycle policy to automate the creation and deletion of cluster snapshots. Taking automatic snapshots:
- Ensures your Elasticsearch indices and clusters are backed up on a regular basis
- Ensures a recent and relevant snapshot is available if a situation arises where a cluster needs to be recovered
- Allows you to manage your snapshots in Kibana, instead of using a third-party tool
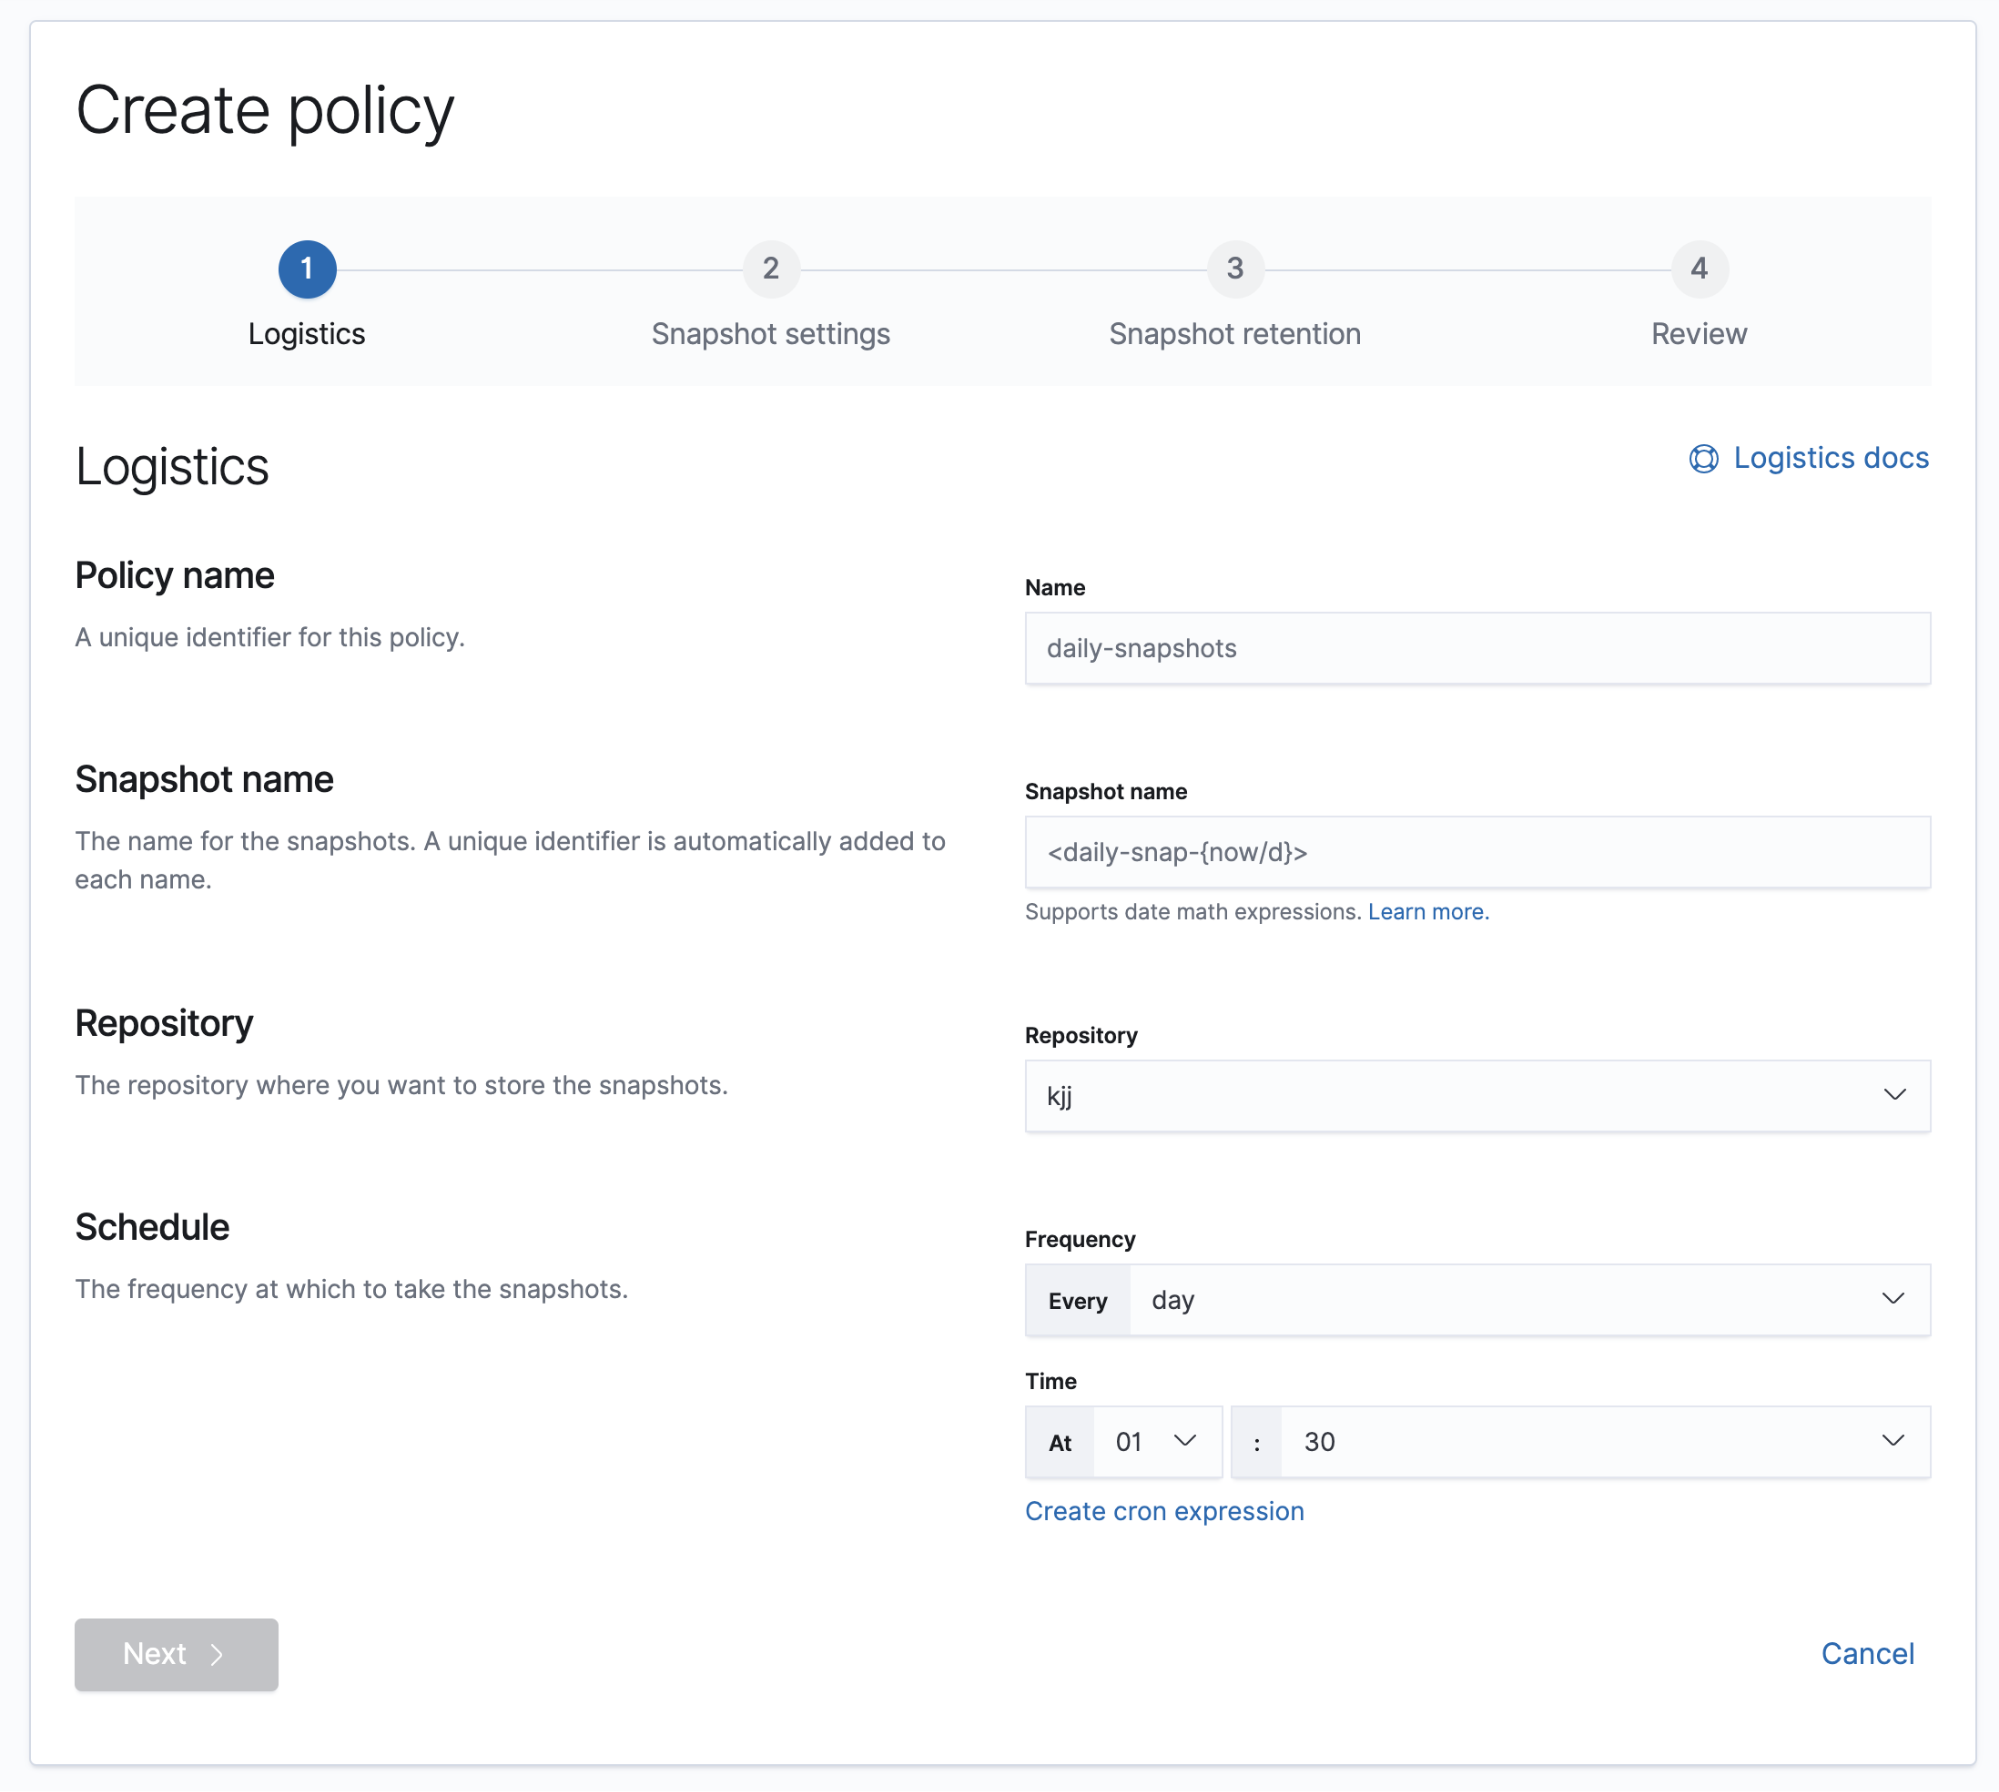
If you don’t have any snapshot policies, follow the Create policy wizard. It walks you through defining when and where to take snapshots, the settings you want, and how long to retain snapshots.
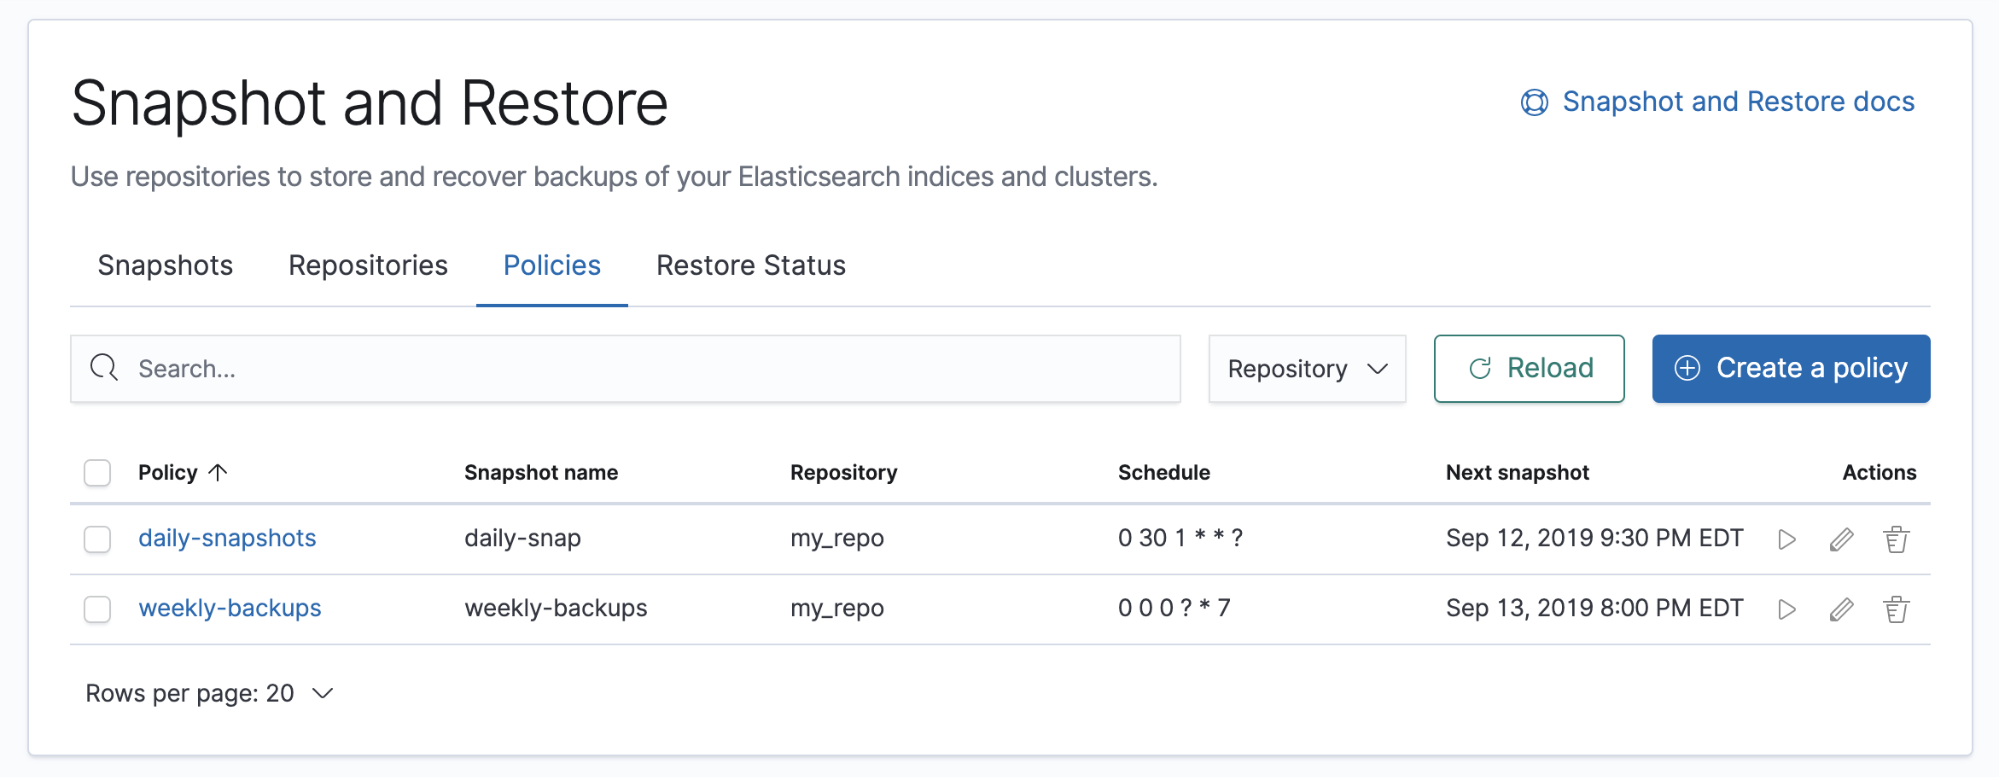
An overview of your policies is on the Policies view. You can drill down into each policy to examine its settings and last successful and failed run.
You can perform the following actions on a snapshot policy:
- Run a policy immediately without waiting for the scheduled time. This action is useful before an upgrade or before performing maintenance on indices.
- Edit a policy and immediately apply changes to the schedule.
- Delete a policy to prevent any future snapshots from being taken. This action does not cancel any currently ongoing snapshots or remove any previously taken snapshots.
Delete a snapshot
editDelete snapshots to manage your repository storage space. Find the snapshot in the Snapshots view and click the trash icon in the Actions column. To delete snapshots in bulk, select their checkboxes, and then click Delete snapshots.