Getting started with Canvas
editGetting started with Canvas
edit[beta] This functionality is in beta and is subject to change. The design and code is less mature than official GA features and is being provided as-is with no warranties. Beta features are not subject to the support SLA of official GA features. Your best bet to getting started with Canvas is to check out one (or all) of the sample data sets that ship with Kibana.
- Click the Kibana logo in the upper left hand corner of your browser to navigate to the Kibana home page.
- Click Load a data set and a Kibana dashboard. This also loads a Canvas workpad to go with the data set.
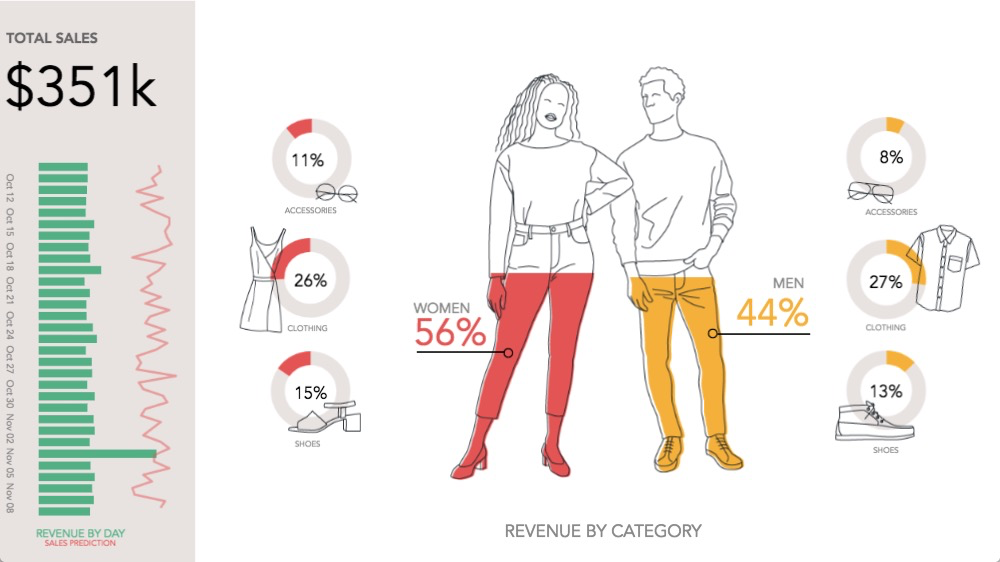
- Pick a data set. Let’s go with the eCommerce one for this example, but while you’re here, feel free to click Add on all of the available sample data sets.
- Click the Canvas icon in the left hand navigation menu.
- Find the [eCommerce] Revenue Tracking workpad and click on its name to open it.
You’re in! The first thing to do is to make a copy of this workpad so you can come back to it later if needed. We’ll be making a mess of it in this tutorial.
-
Click the name of the workpad in the lower left hand corner.
You’ll notice this is similar to the first screen. You could switch to a new workpad from here, but let’s not for now.
-
Click the Clone icon in the [eCommerce] Revenue Tracking row.
You now have a new workpad called [eCommerce] Revenue Tracking - Copy.