Index management
editIndex management
editKibana’s Index Management features are an easy, convenient way to manage your cluster’s indices, data streams, and index templates. Practicing good index management ensures your data is stored correctly and in the most cost-effective way possible.
What you’ll learn
editYou’ll learn how to:
- View and edit index settings.
- View mappings and statistics for an index.
- Perform index-level operations, such as refreshes and freezes.
- View and manage data streams.
- Create index templates to automatically configure new data streams and indices.
Required permissions
editIf you use Elasticsearch security features, the following security privileges are required:
-
The
monitorcluster privilege to access Kibana’s Index Management features. -
The
view_index_metadataandmanageindex privileges to view a data stream or index’s data. -
The
manage_index_templatescluster privilege to manage index templates.
To add these privileges in Kibana, go to Stack Management > Security > Roles.
View and edit indices
editOpen Kibana’s main menu and click Stack Management > Index Management.
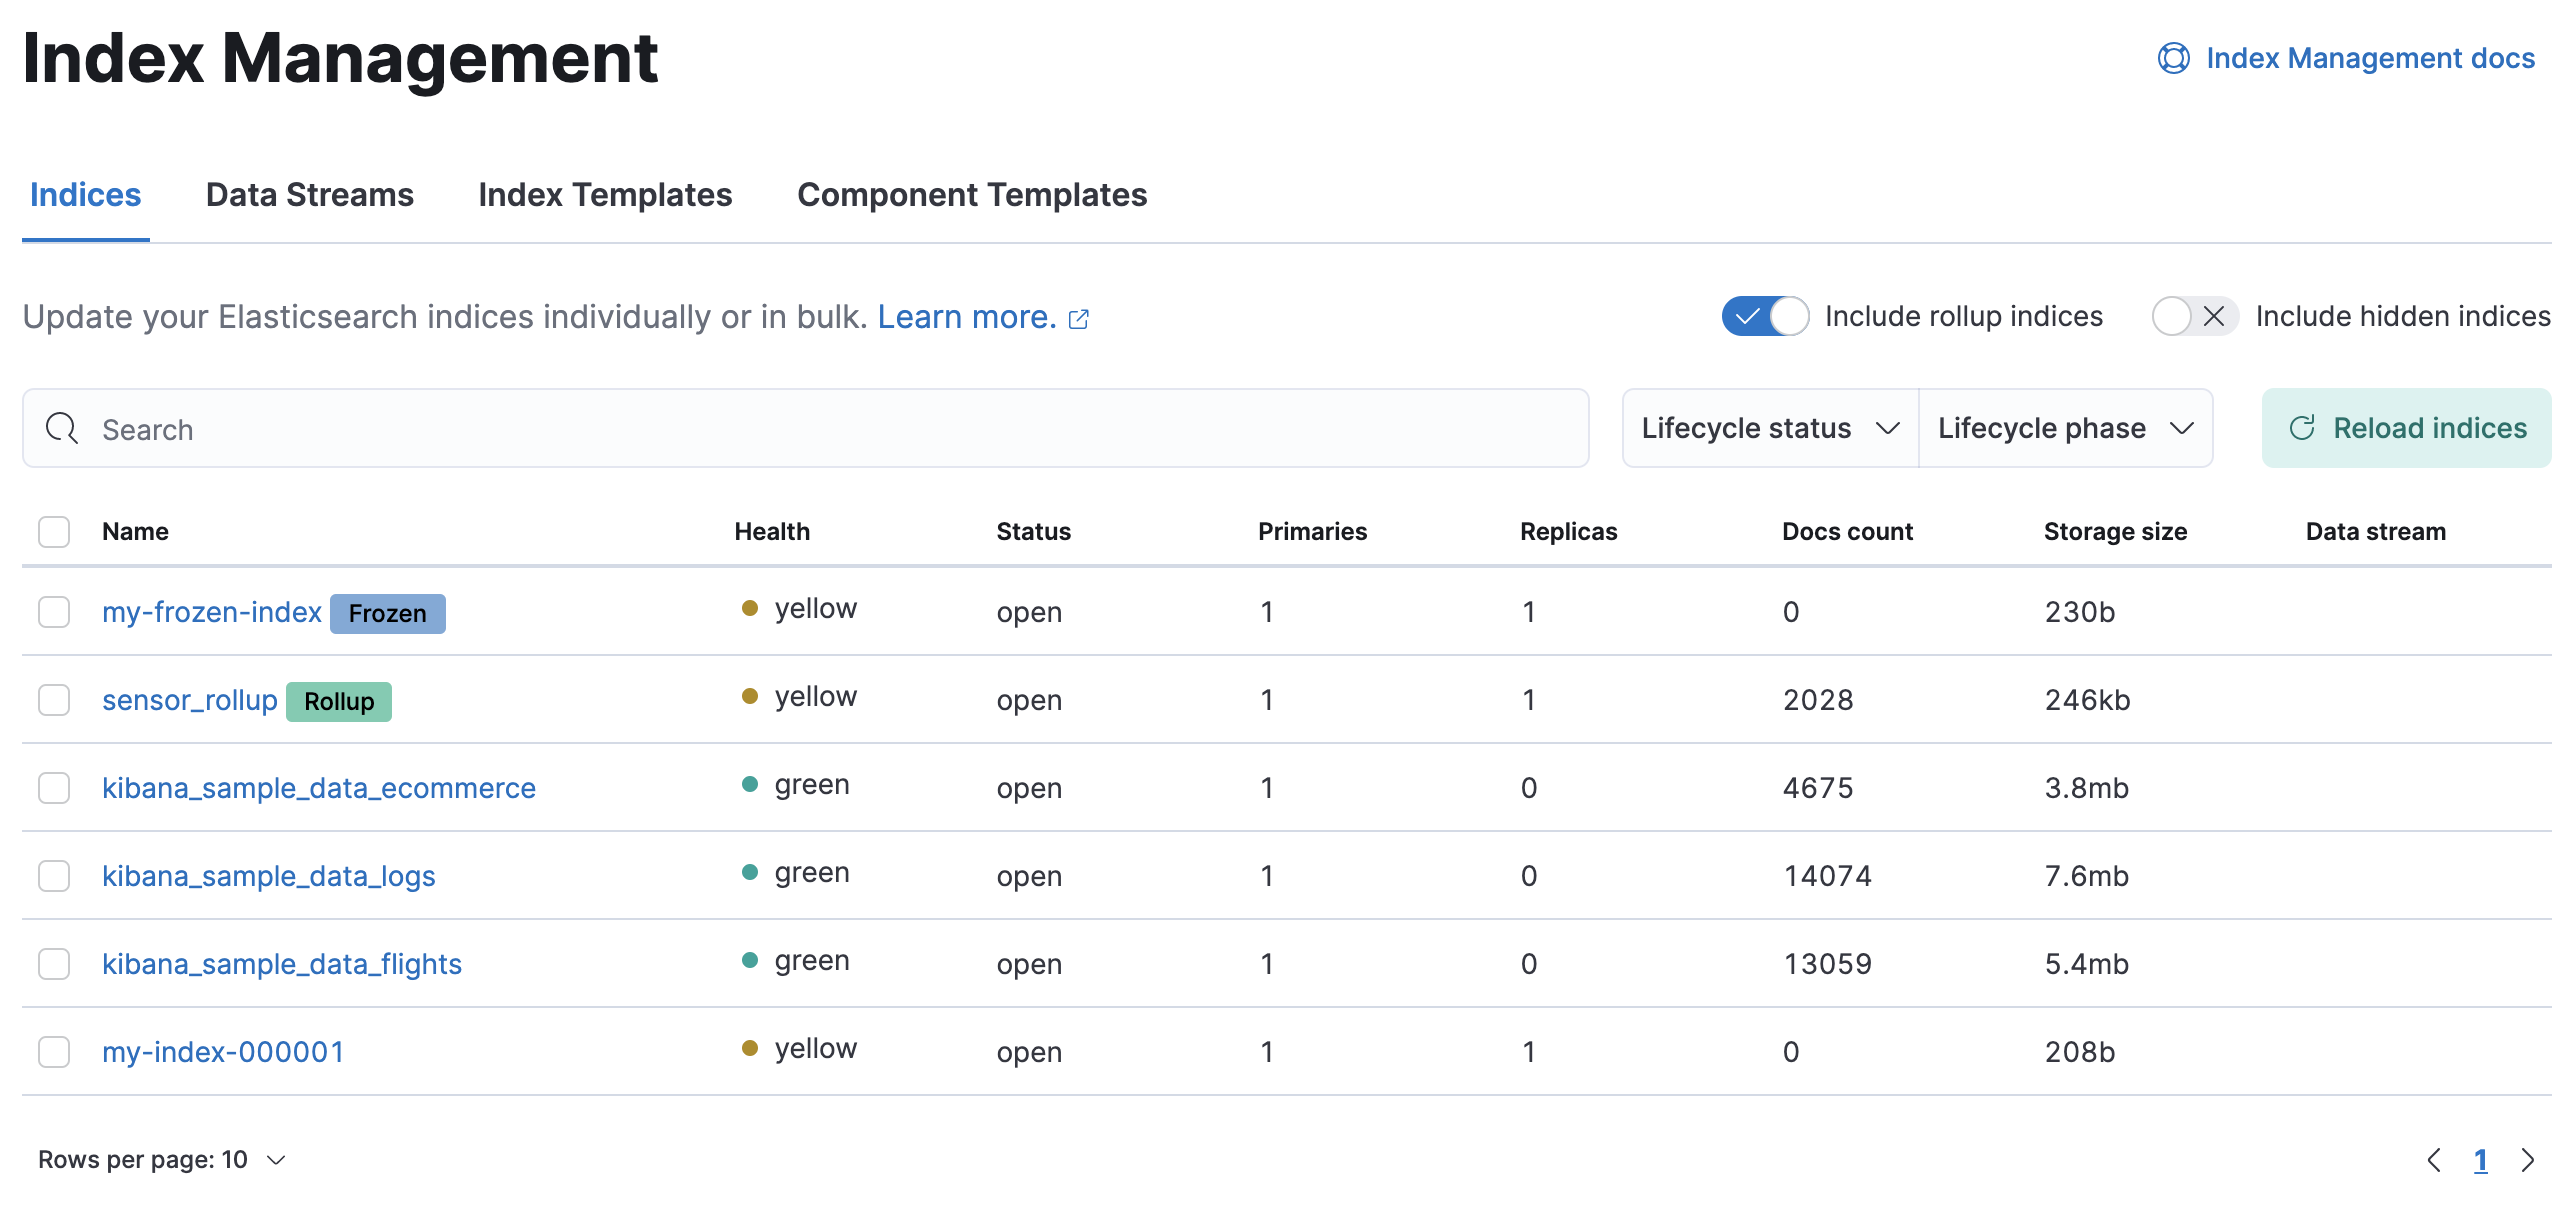
The Index Management page contains an overview of your indices. Badges indicate if an index is frozen, a follower index, or a rollup index.
Clicking a badge narrows the list to only indices of that type. You can also filter indices using the search bar.
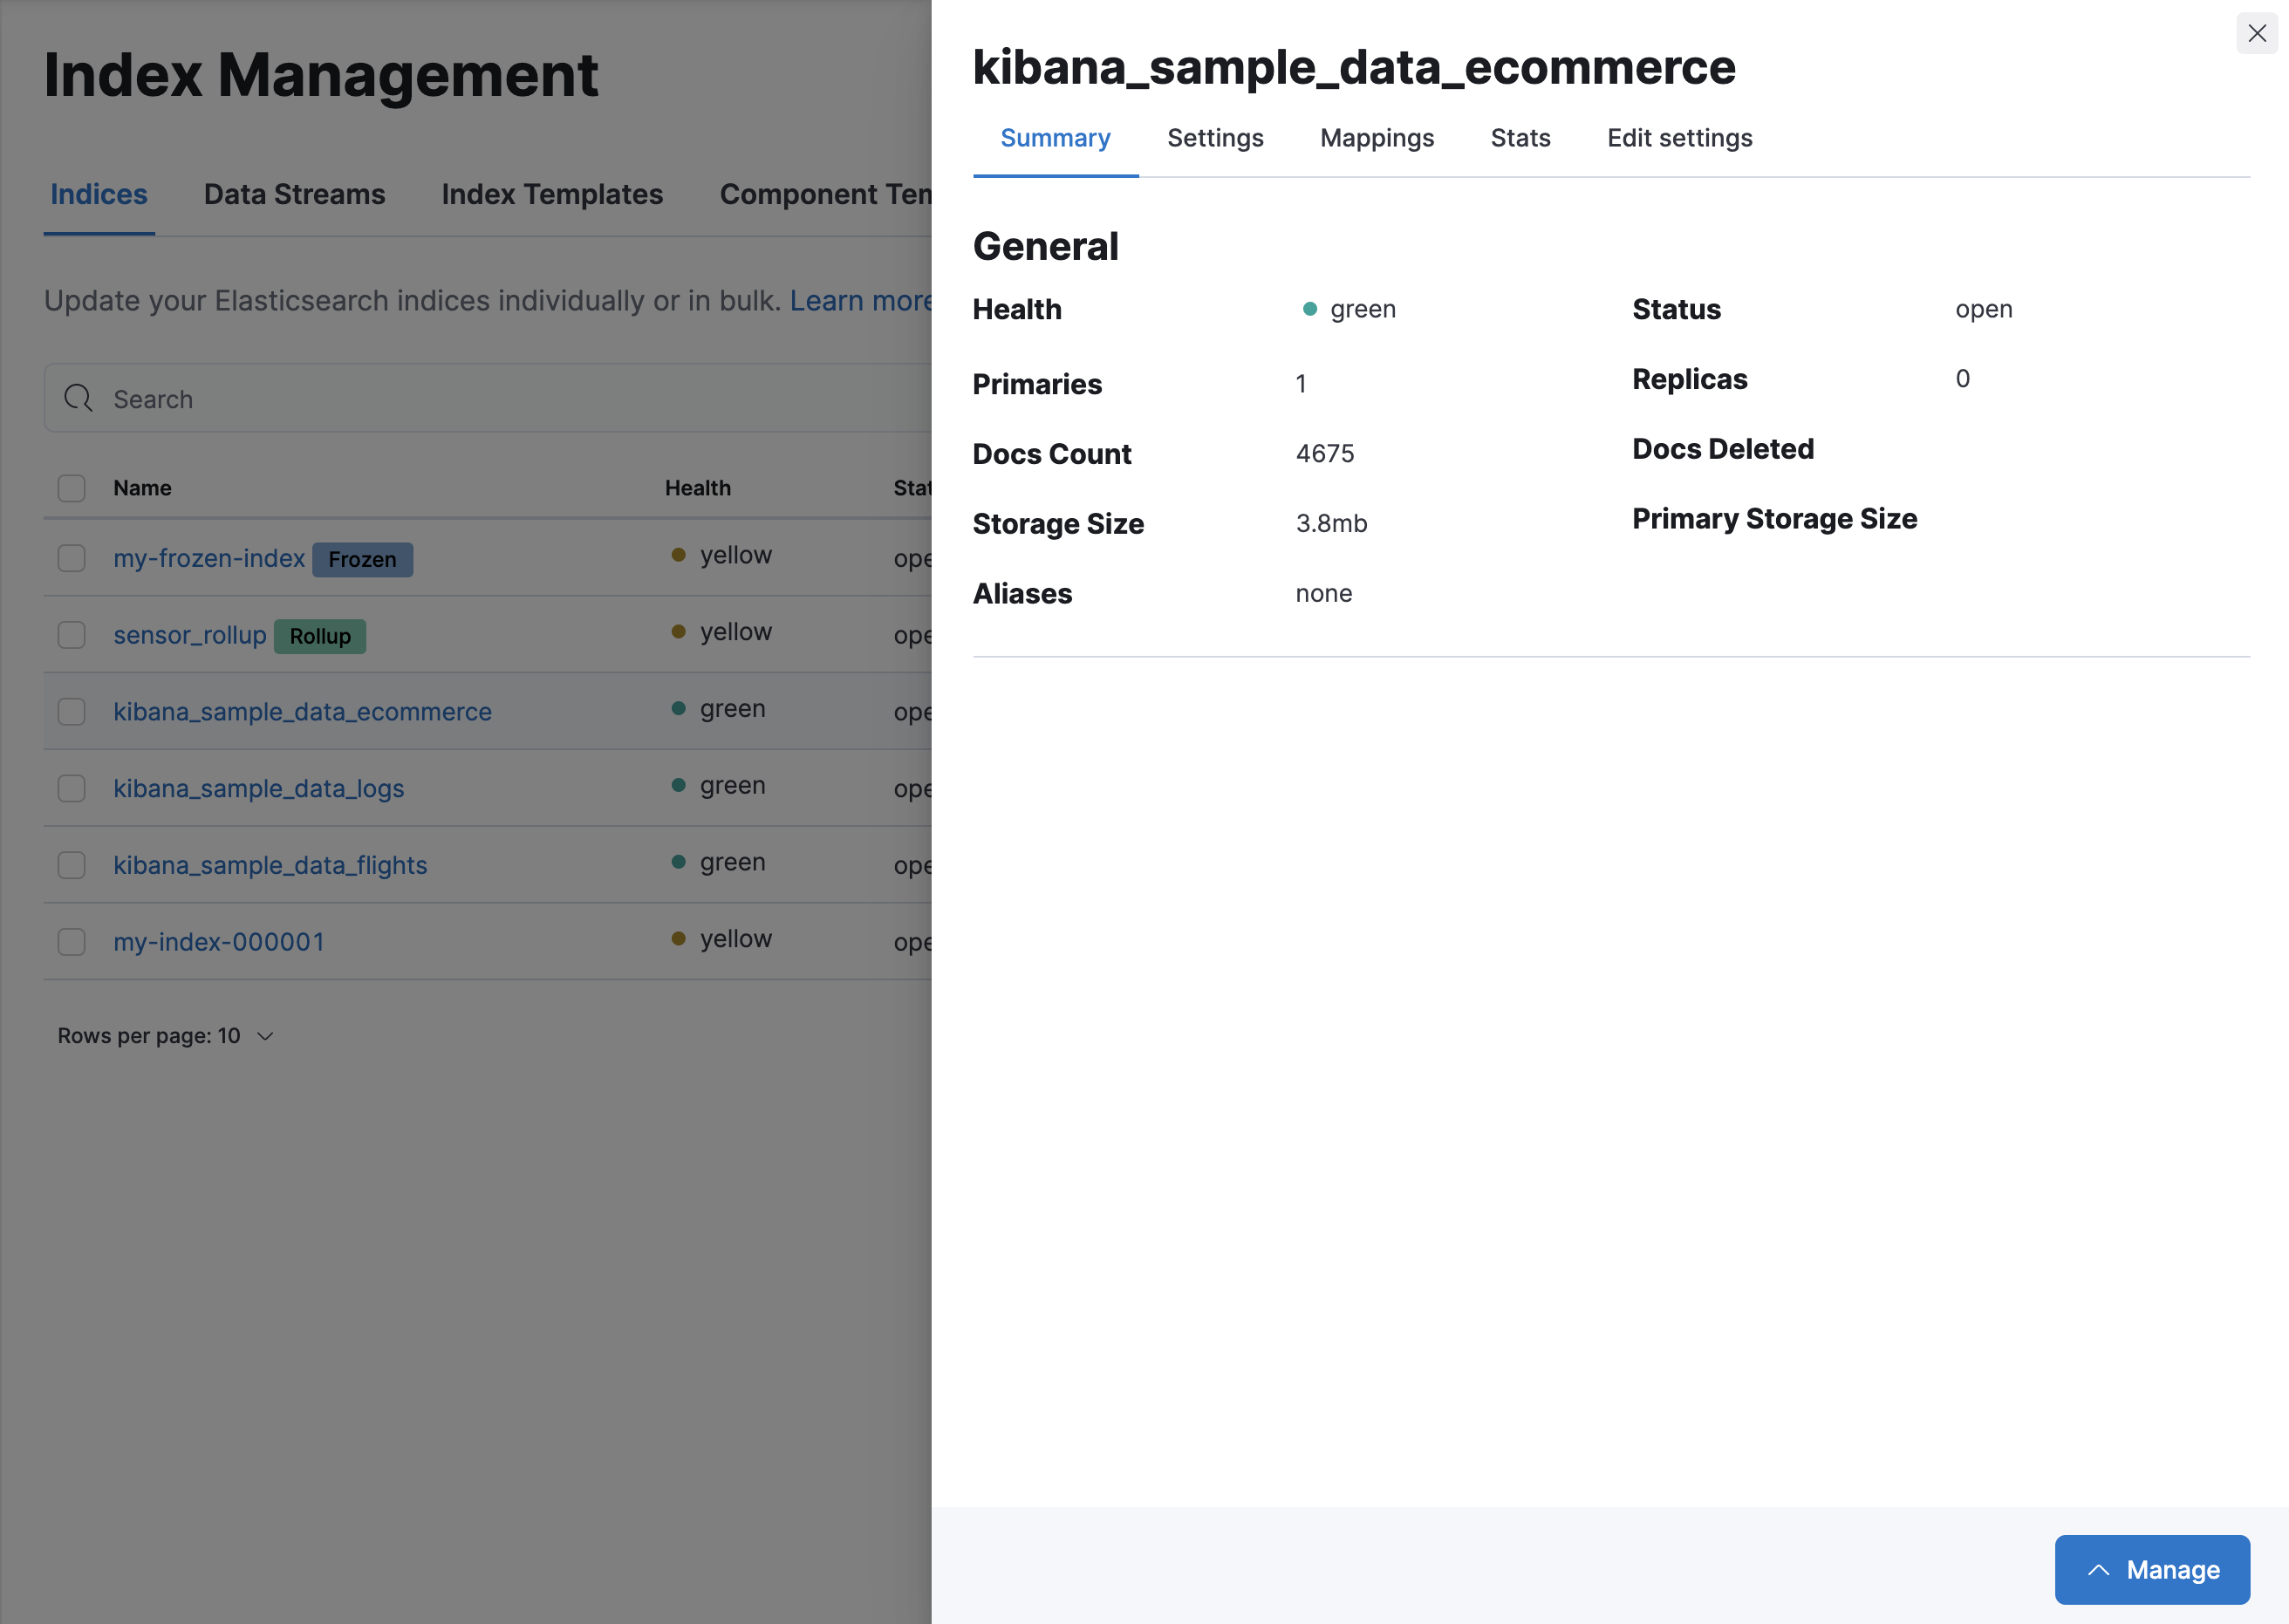
You can drill down into each index to investigate the index settings, mapping, and statistics. From this view, you can also edit the index settings.
Perform index-level operations
editUse the Manage menu to perform index-level operations. This menu is available in the index details view, or when you select the checkbox of one or more indices on the overview page. The menu includes the following actions:
Manage data streams
editThe Data Streams view lists your data streams and lets you examine or delete them.
To view more information about a data stream, such as its generation or its current index lifecycle policy, click the stream’s name.
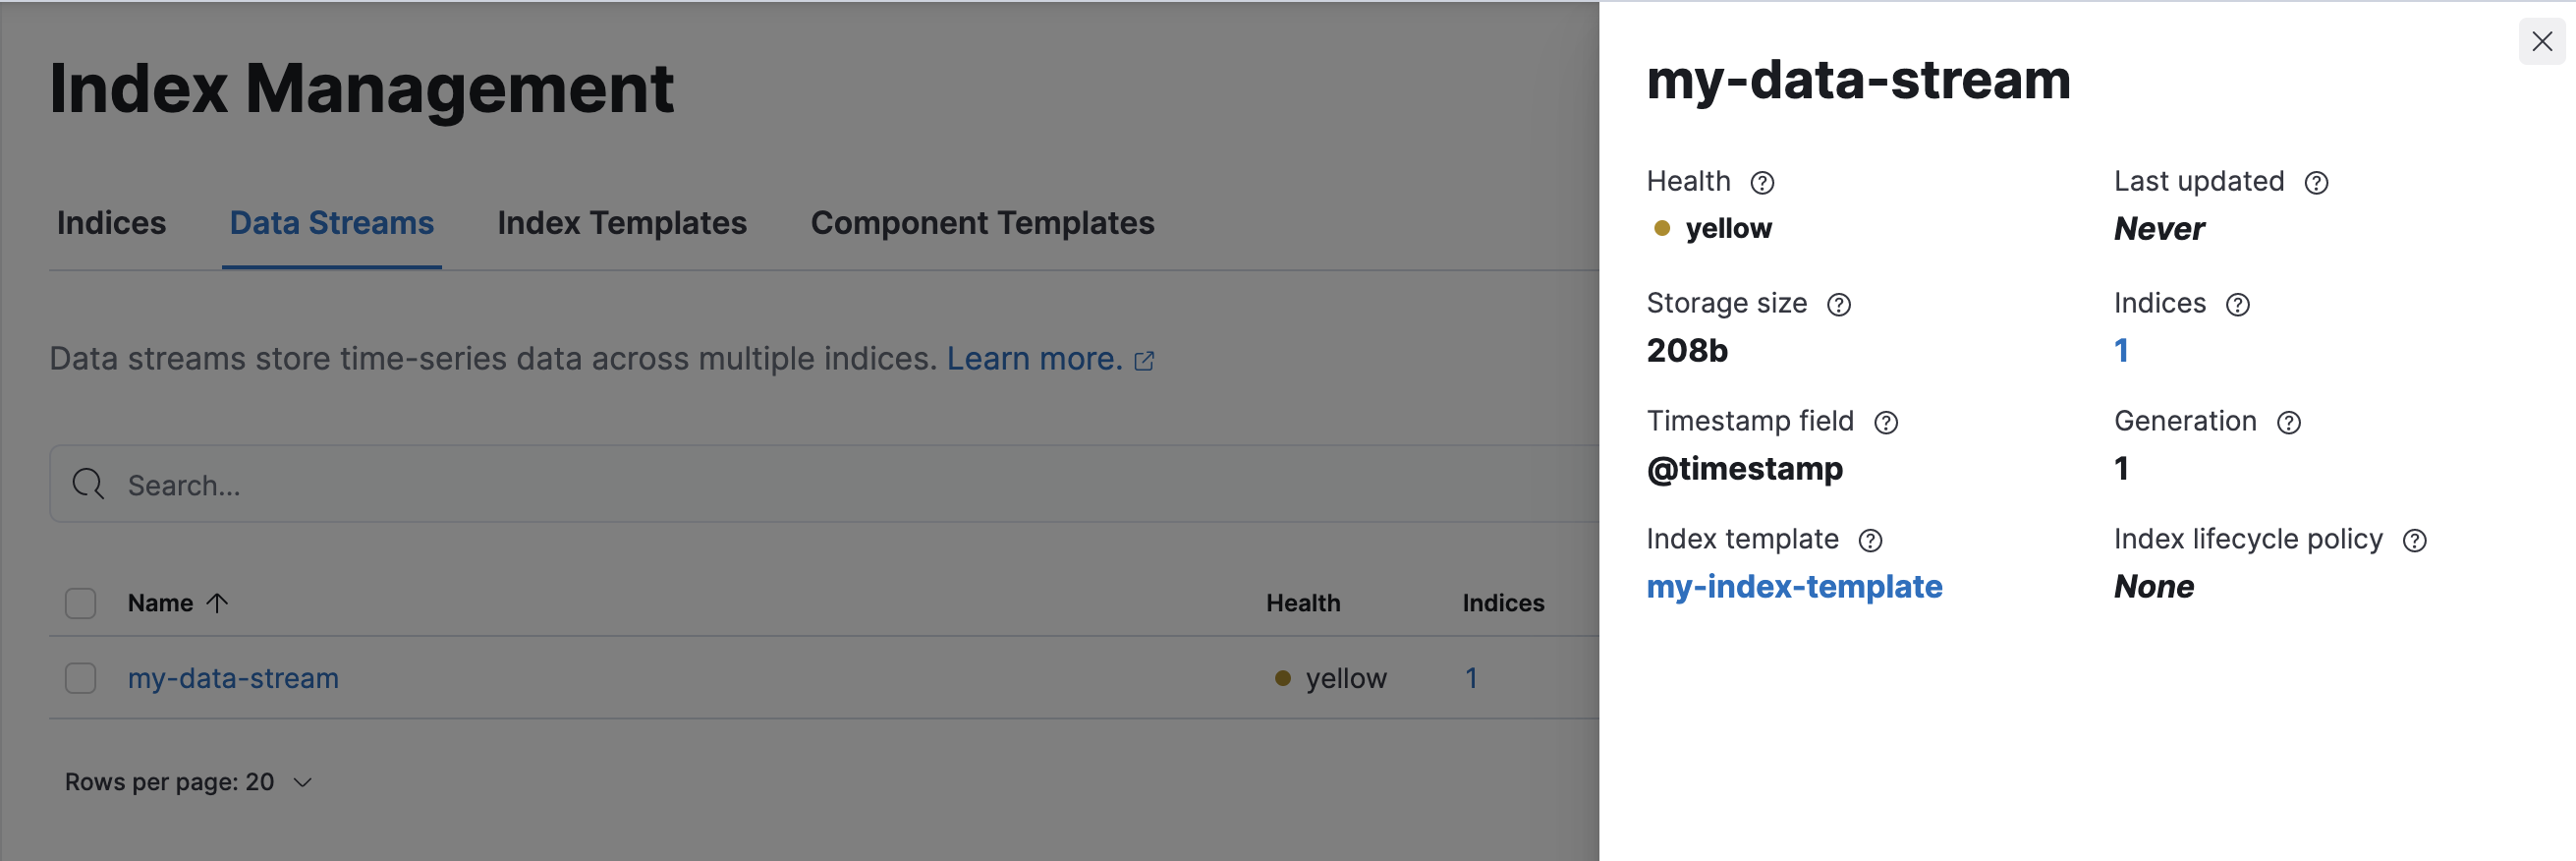
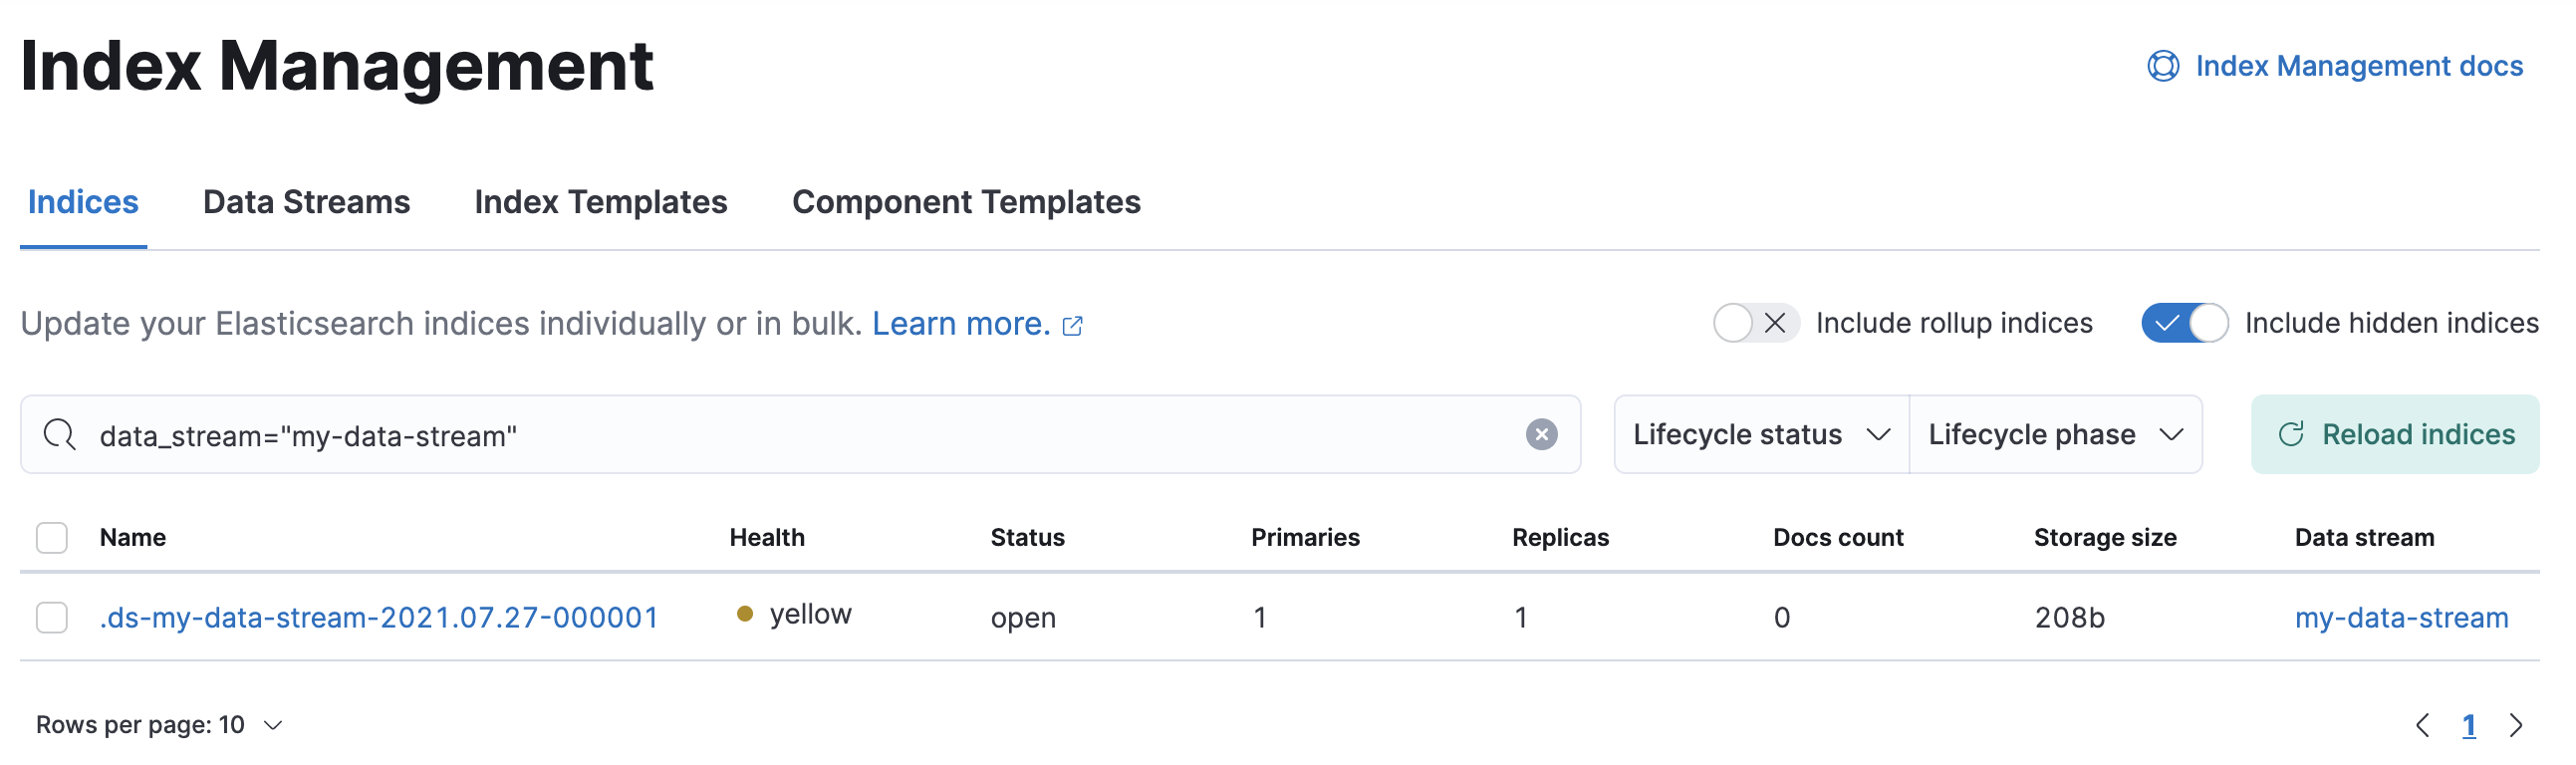
To view information about the stream’s backing indices, click the number in the Indices column.
Manage index templates
editThe Index Templates view lists your templates and lets you examine, edit, clone, and delete them. Changes made to an index template do not affect existing indices.
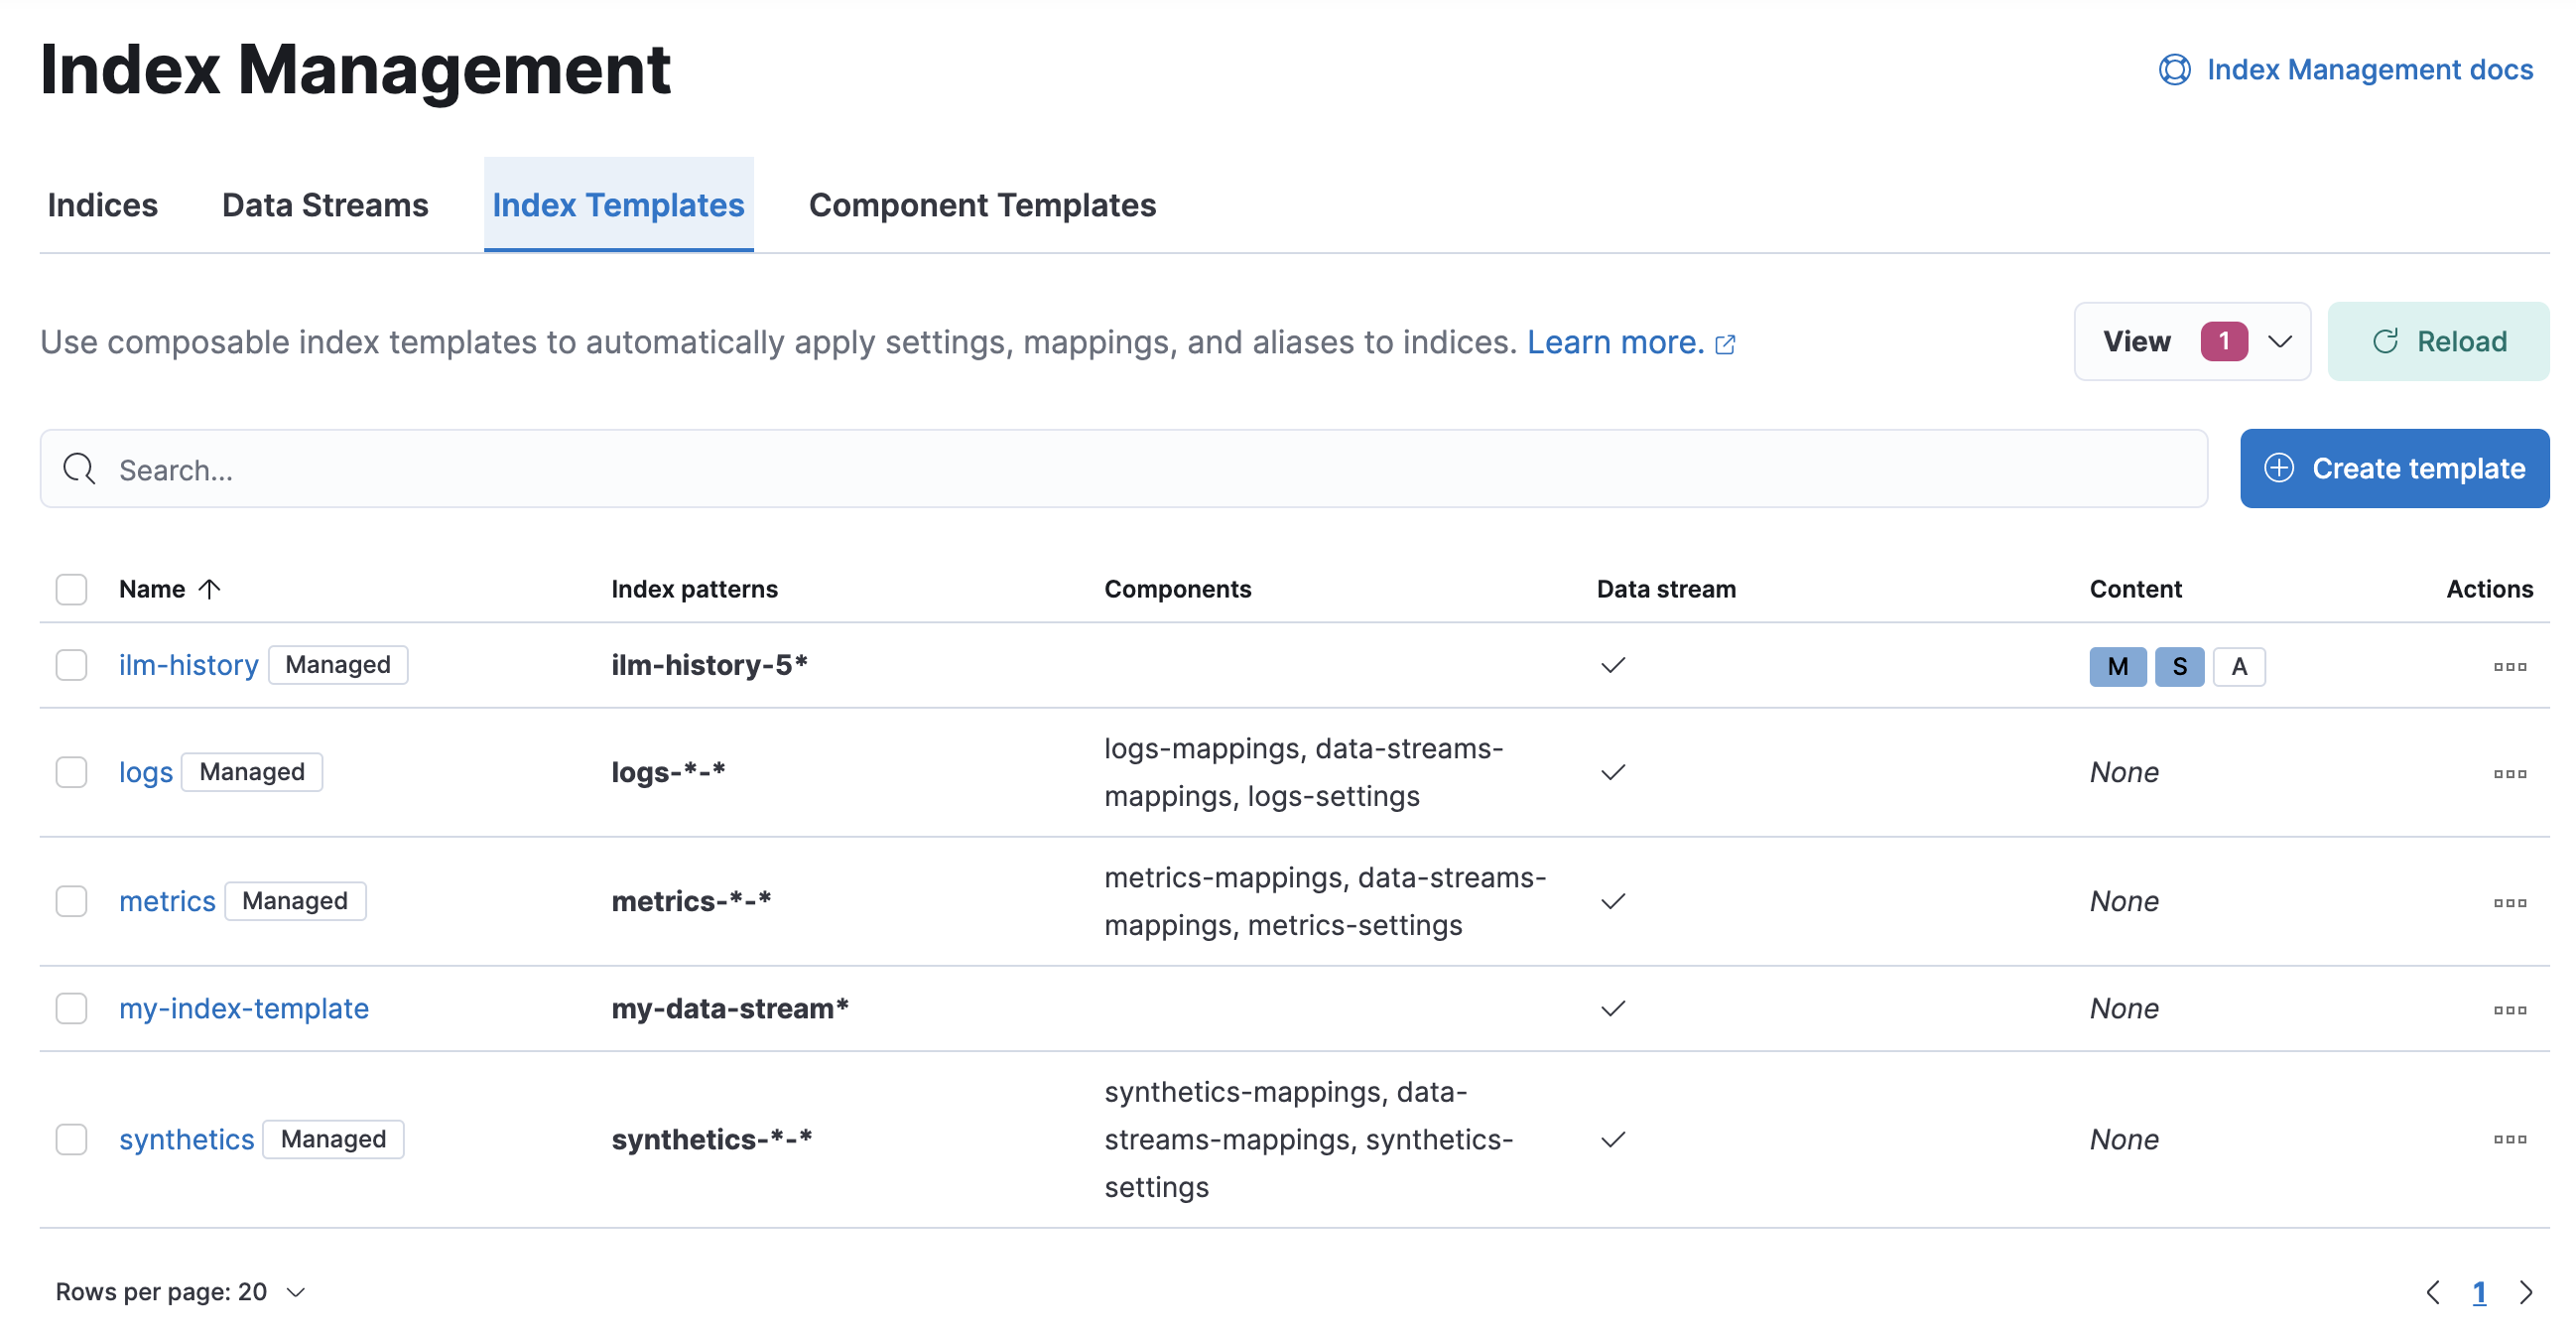
If you don’t have any templates, you can create one using the Create template wizard.
Try it: Create an index template
editIn this tutorial, you’ll create an index template and use it to configure two new indices.
Step 1. Add a name and index pattern
-
In the Index Templates view, open the Create template wizard.

-
In the Name field, enter
my-index-template. -
Set Index pattern to
my-index-*so the template matches any index with that index pattern. - Leave Data Stream, Priority, Version, and _meta field blank or as-is.
Step 2. Add settings, mappings, and aliases
-
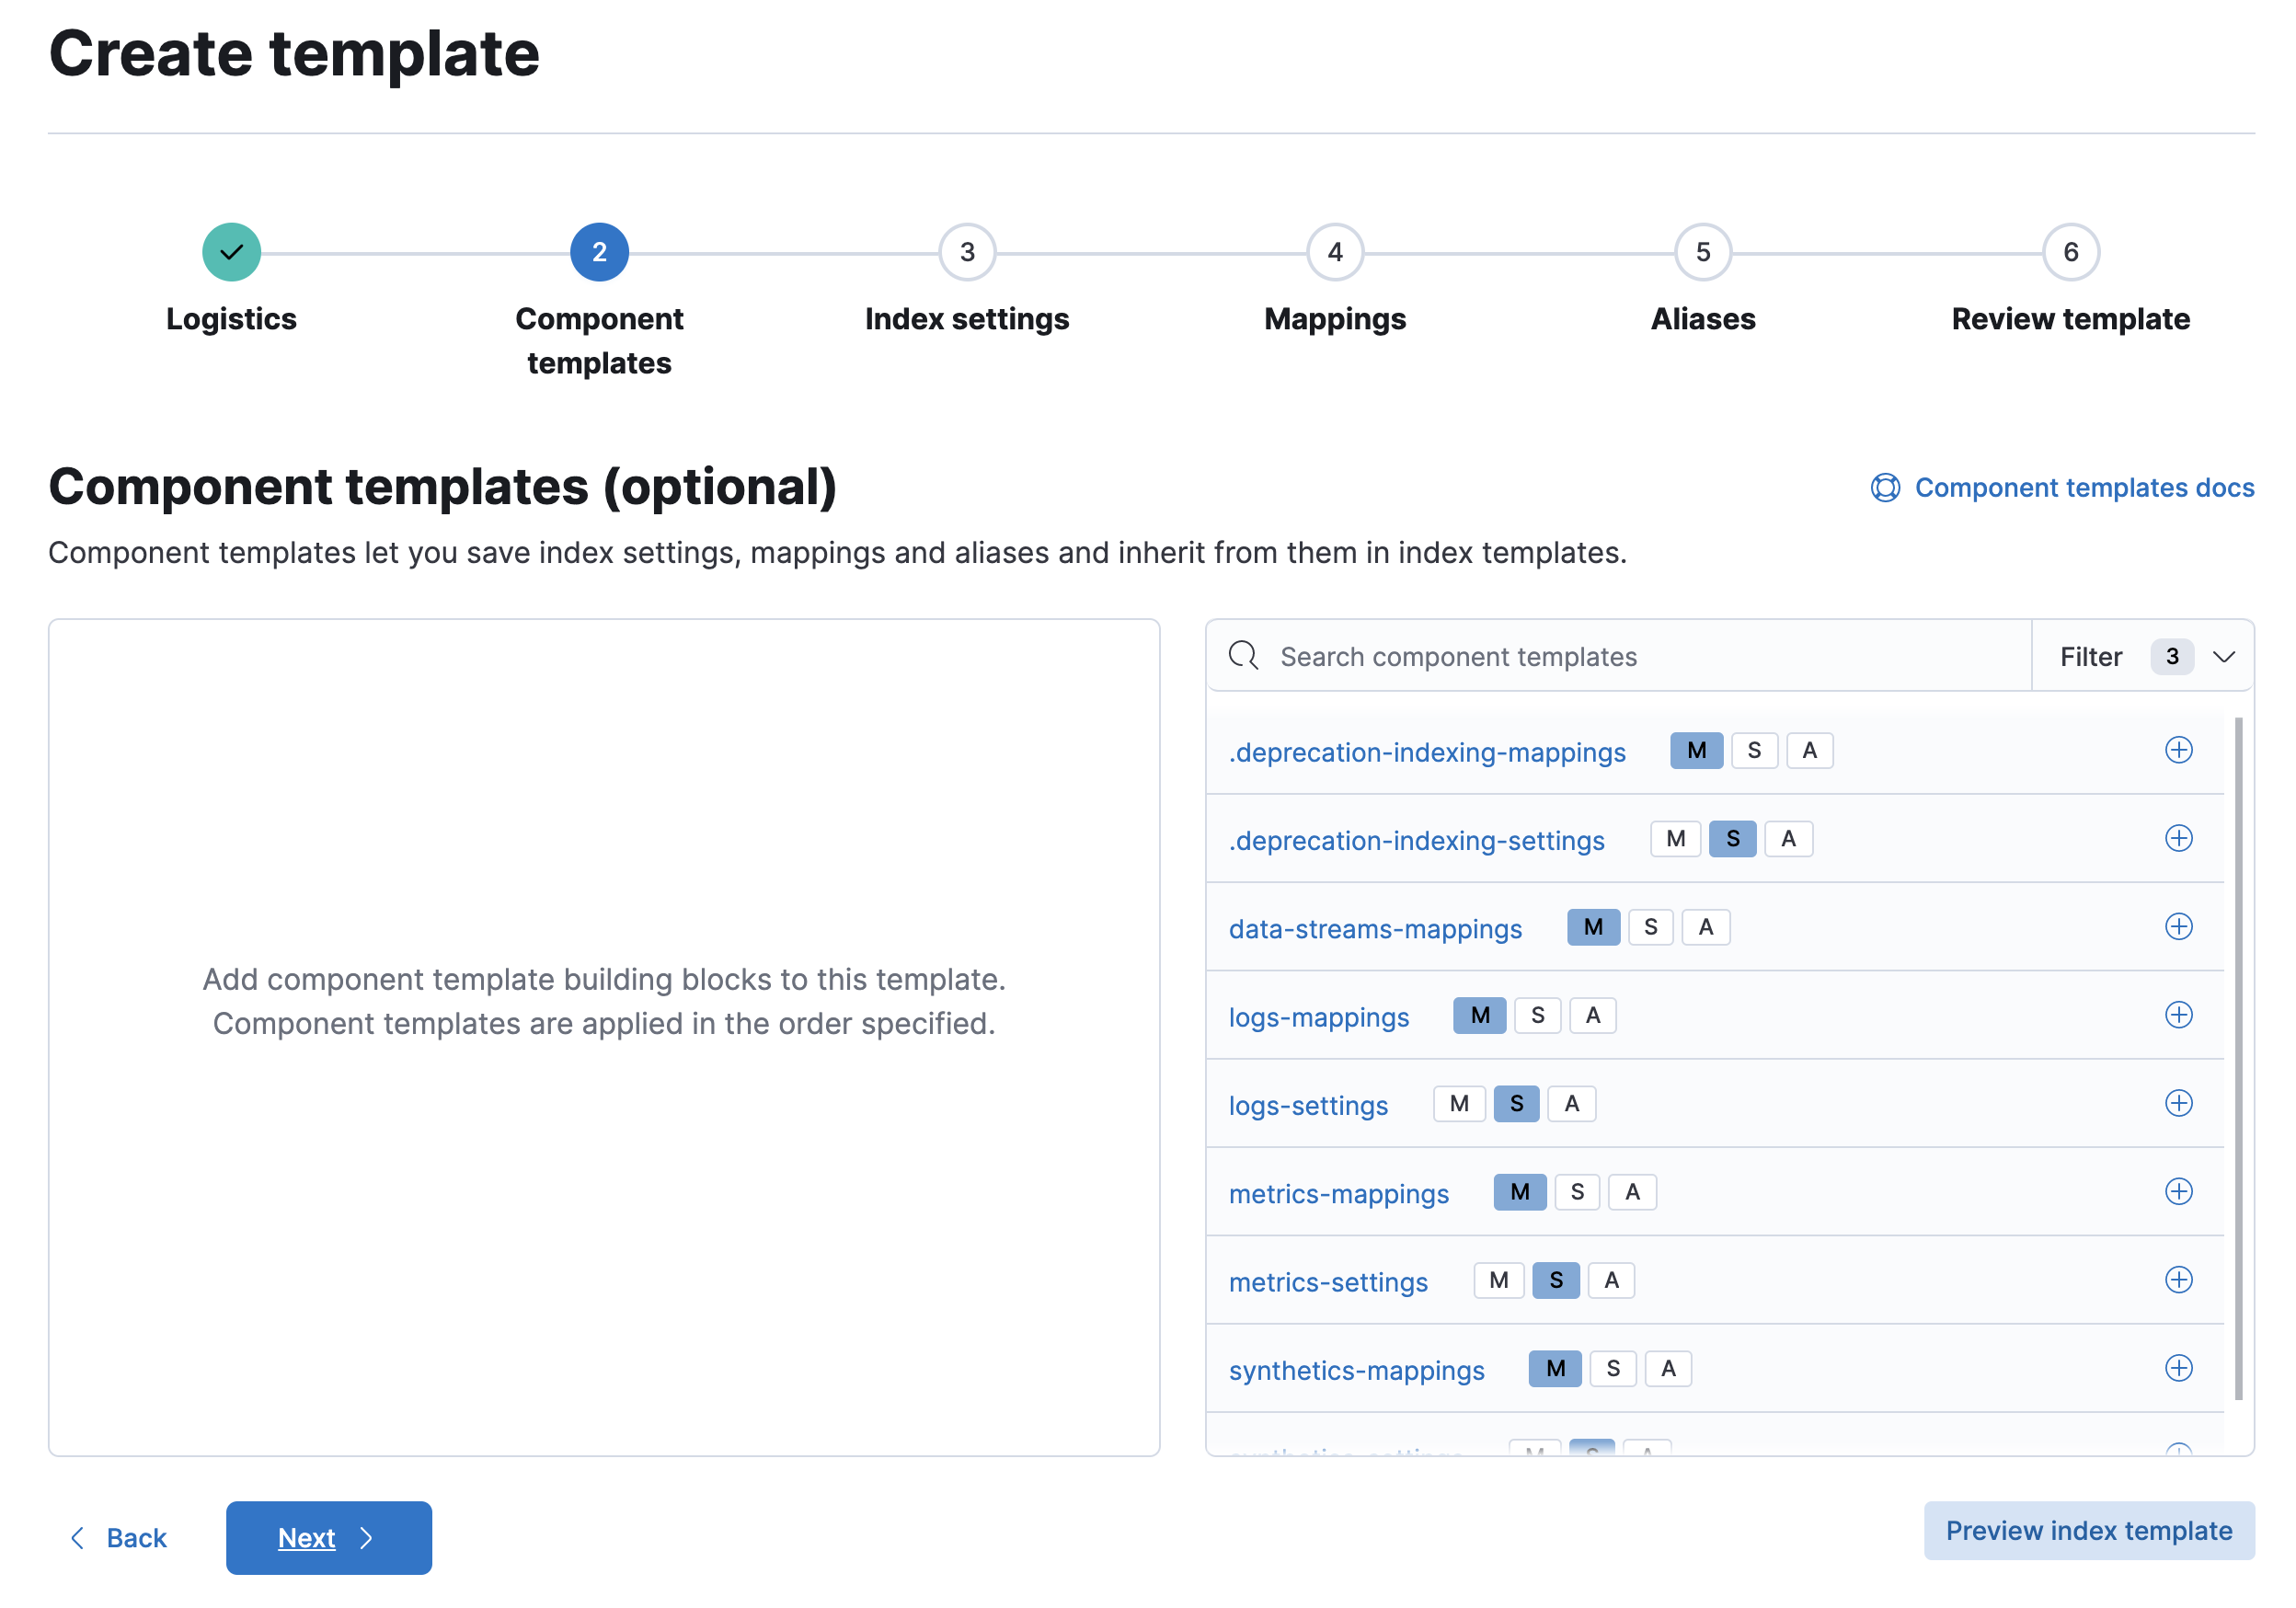
Add component templates to your index template.
Component templates are pre-configured sets of mappings, index settings, and aliases you can reuse across multiple index templates. Badges indicate whether a component template contains mappings (M), index settings (S), aliases (A), or a combination of the three.
Component templates are optional. For this tutorial, do not add any component templates.
- Define index settings. These are optional. For this tutorial, leave this section blank.
-
Define a mapping that contains an object field named
geowith a childgeo_pointfield namedcoordinates: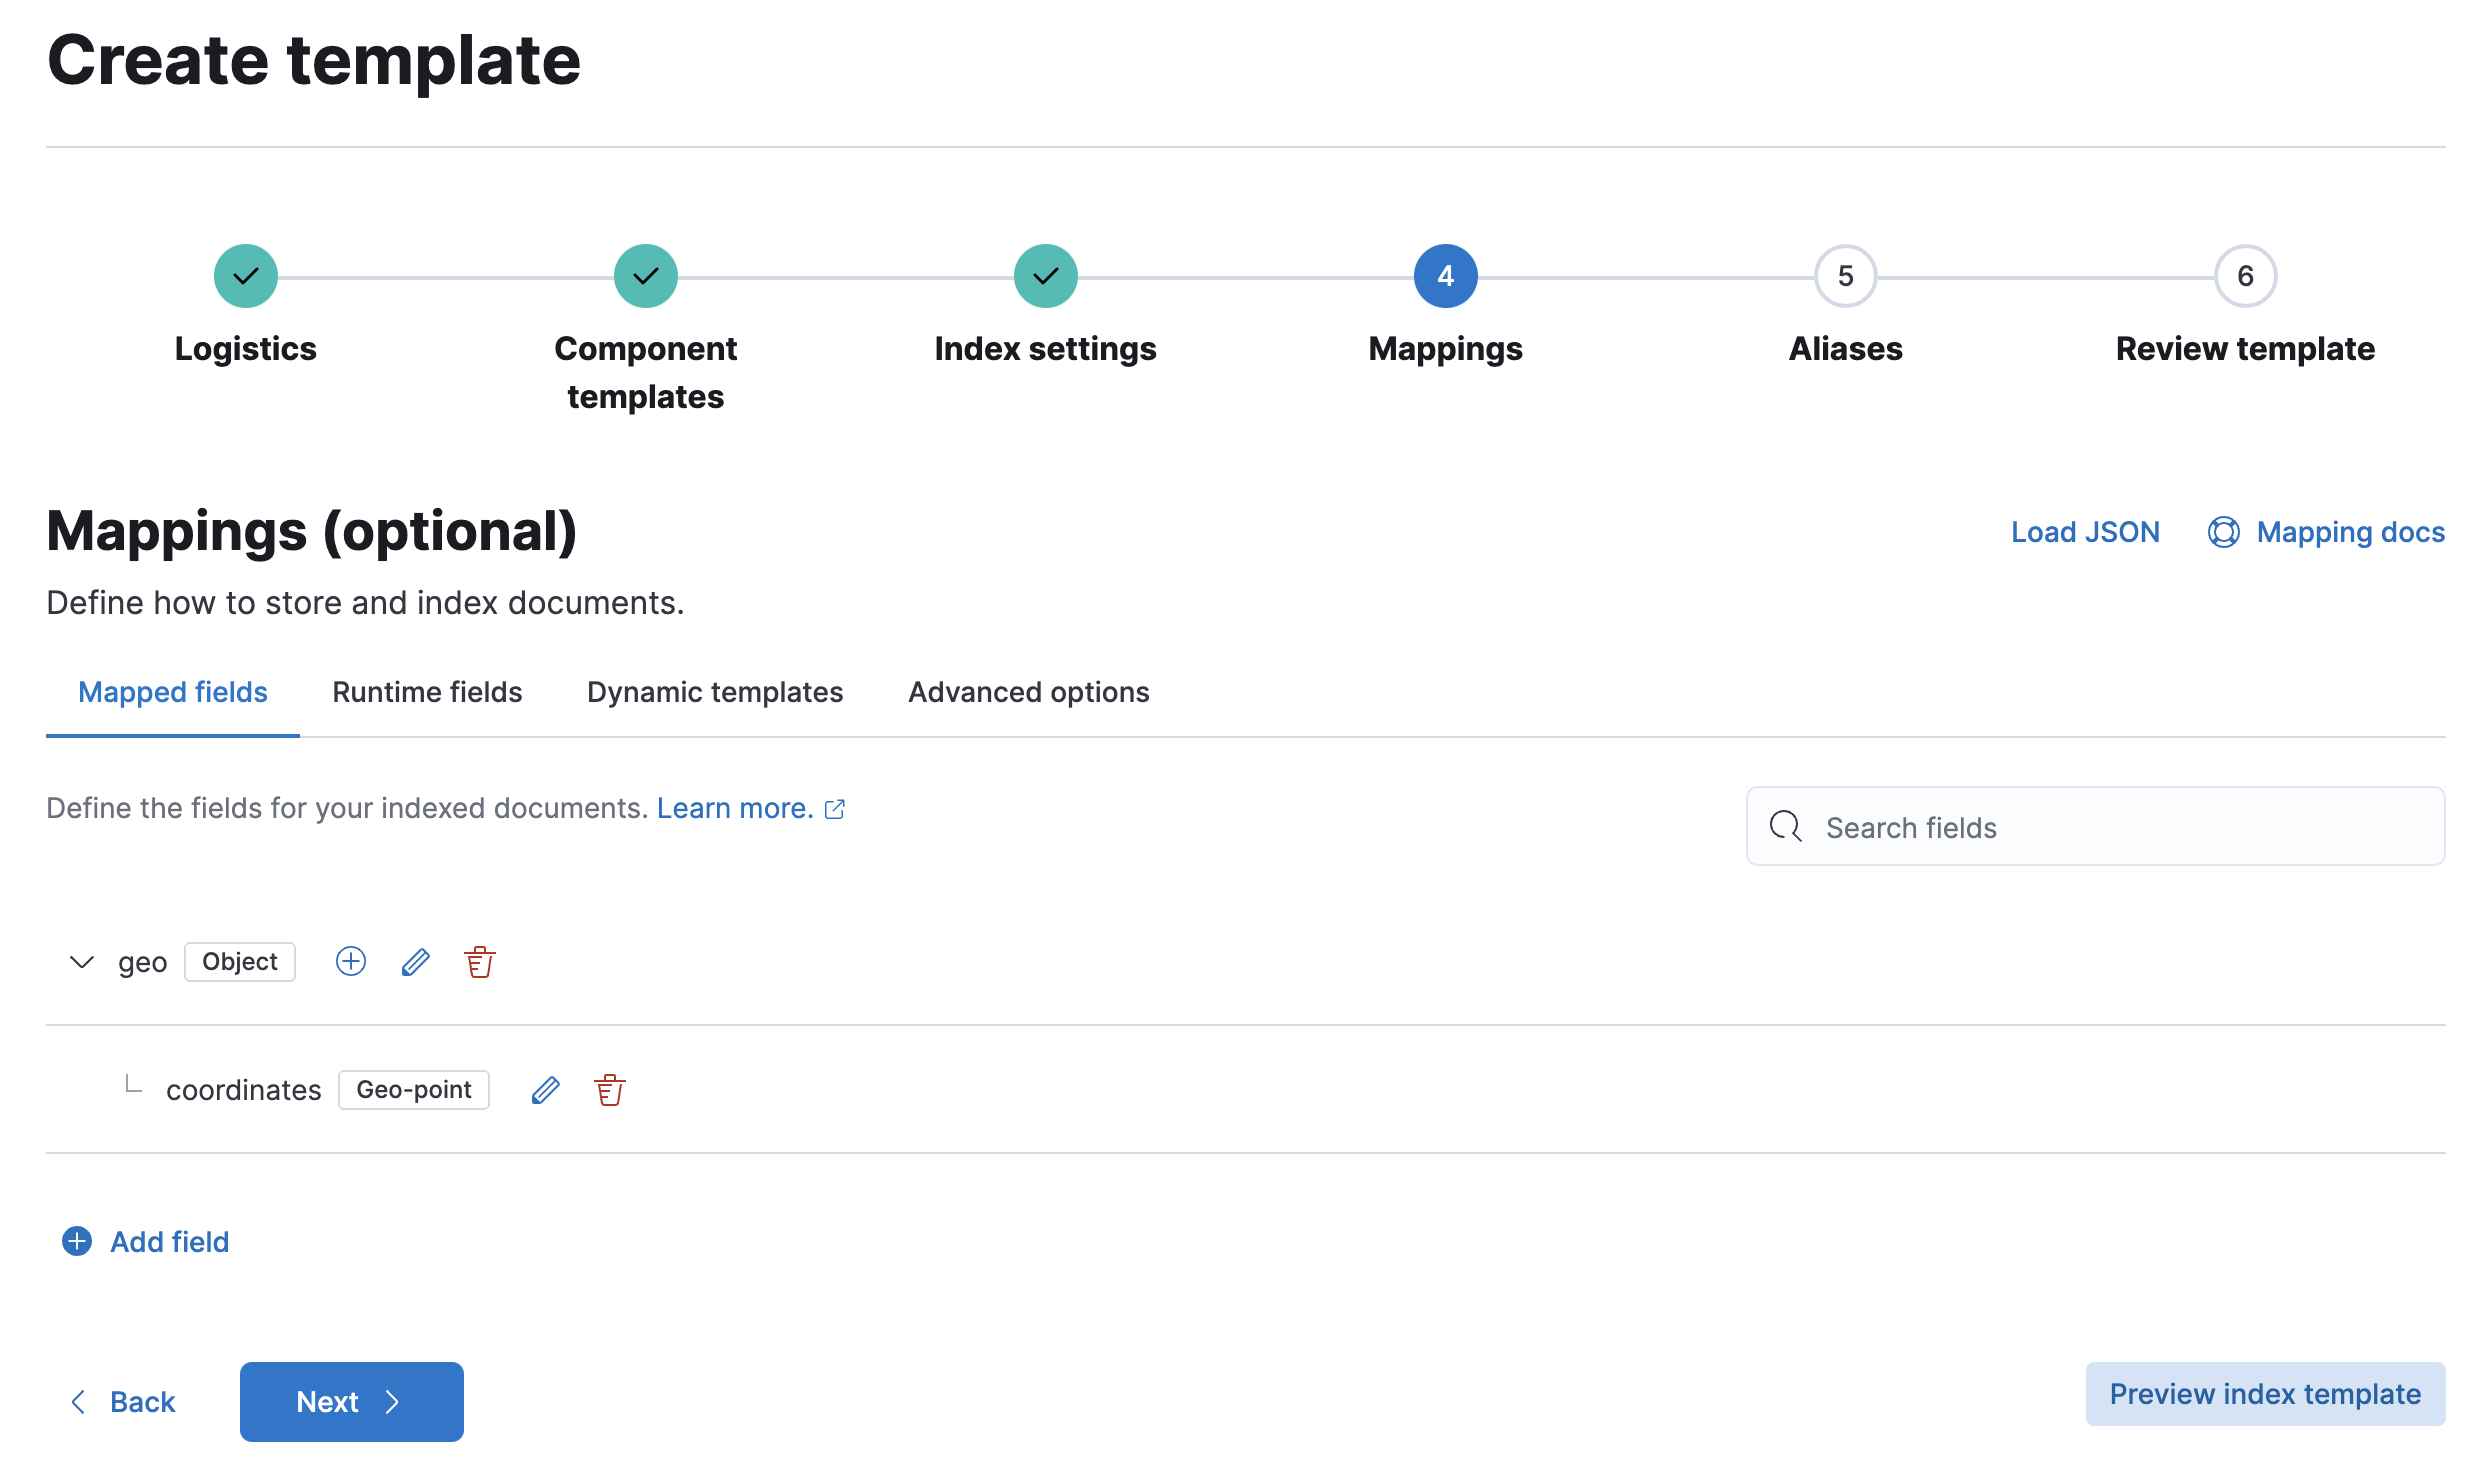
Alternatively, you can click the Load JSON link and define the mapping as JSON:
{
  "properties": {
    "geo": {
      "properties": {
        "coordinates": {
          "type": "geo_point"
        }
      }
    }
  }
}
You can create additional mapping configurations in the Dynamic templates and Advanced options tabs. For this tutorial, do not create any additional mappings.
-
Define an alias named
my-index:{ "my-index": {} } - On the review page, check the summary. If everything looks right, click Create template.
Step 3. Create new indices
You’re now ready to create new indices using your index template.
-
Index the following documents to create two indices:
my-index-000001andmy-index-000002.POST /my-index-000001/_doc { "@timestamp": "2019-05-18T15:57:27.541Z", "ip": "225.44.217.191", "extension": "jpg", "response": "200", "geo": { "coordinates": { "lat": 38.53146222, "lon": -121.7864906 } }, "url": "https://media-for-the-masses.theacademyofperformingartsandscience.org/uploads/charles-fullerton.jpg" } POST /my-index-000002/_doc { "@timestamp": "2019-05-20T03:44:20.844Z", "ip": "198.247.165.49", "extension": "php", "response": "200", "geo": { "coordinates": { "lat": 37.13189556, "lon": -76.4929875 } }, "memory": 241720, "url": "https://theacademyofperformingartsandscience.org/people/type:astronauts/name:laurel-b-clark/profile" } -
Use the get index API to view the configurations for the new indices. The indices were configured using the index template you created earlier.
GET /my-index-000001,my-index-000002