WARNING: Version 5.6 of Elasticsearch has passed its EOL date.
This documentation is no longer being maintained and may be removed. If you are running this version, we strongly advise you to upgrade. For the latest information, see the current release documentation.
If you want to use a Java transport client with a cluster where X-Pack is installed, then you must download and configure the X-Pack transport client.
We plan on deprecating the TransportClient in Elasticsearch 7.0 and removing
it completely in 8.0. Instead, you should be using the
Java High Level REST Client, which executes
HTTP requests rather than serialized Java requests. The
migration guide describes
all the steps needed to migrate.
The Java High Level REST Client currently has support for the more commonly used APIs, but there are a lot more that still need to be added. You can help us prioritise by telling us which missing APIs you need for your application by adding a comment to this issue: Java high-level REST client completeness.
Any missing APIs can always be implemented today by using the low level Java REST Client with JSON request and response bodies.
-
Add the X-Pack transport JAR file to your CLASSPATH. You can download the X-Pack distribution and extract the JAR file manually or you can get it from the Elasticsearch Maven repository.
As with any dependency, you will also need its transitive dependencies. Refer to the X-Pack POM file for your version when downloading for offline usage.
-
If you are using Maven, you need to add the X-Pack JAR file as a dependency in your project’s
pom.xmlfile:<project ...> <repositories> <!-- add the elasticsearch repo --> <repository> <id>elasticsearch-releases</id> <url>https://artifacts.elastic.co/maven</url> <releases> <enabled>true</enabled> </releases> <snapshots> <enabled>false</enabled> </snapshots> </repository> ... </repositories> ... <dependencies> <!-- add the x-pack jar as a dependency --> <dependency> <groupId>org.elasticsearch.client</groupId> <artifactId>x-pack-transport</artifactId> <version>{version}</version> </dependency> ... </dependencies> ... </project> -
If you are using Gradle, you need to add the X-Pack JAR file as a dependency in your
build.gradlefile:repositories { /* ... Any other repositories ... */ // Add the Elasticsearch Maven Repository maven { url "https://artifacts.elastic.co/maven" } } dependencies { compile "org.elasticsearch.client:x-pack-transport:{version}" /* ... */ } -
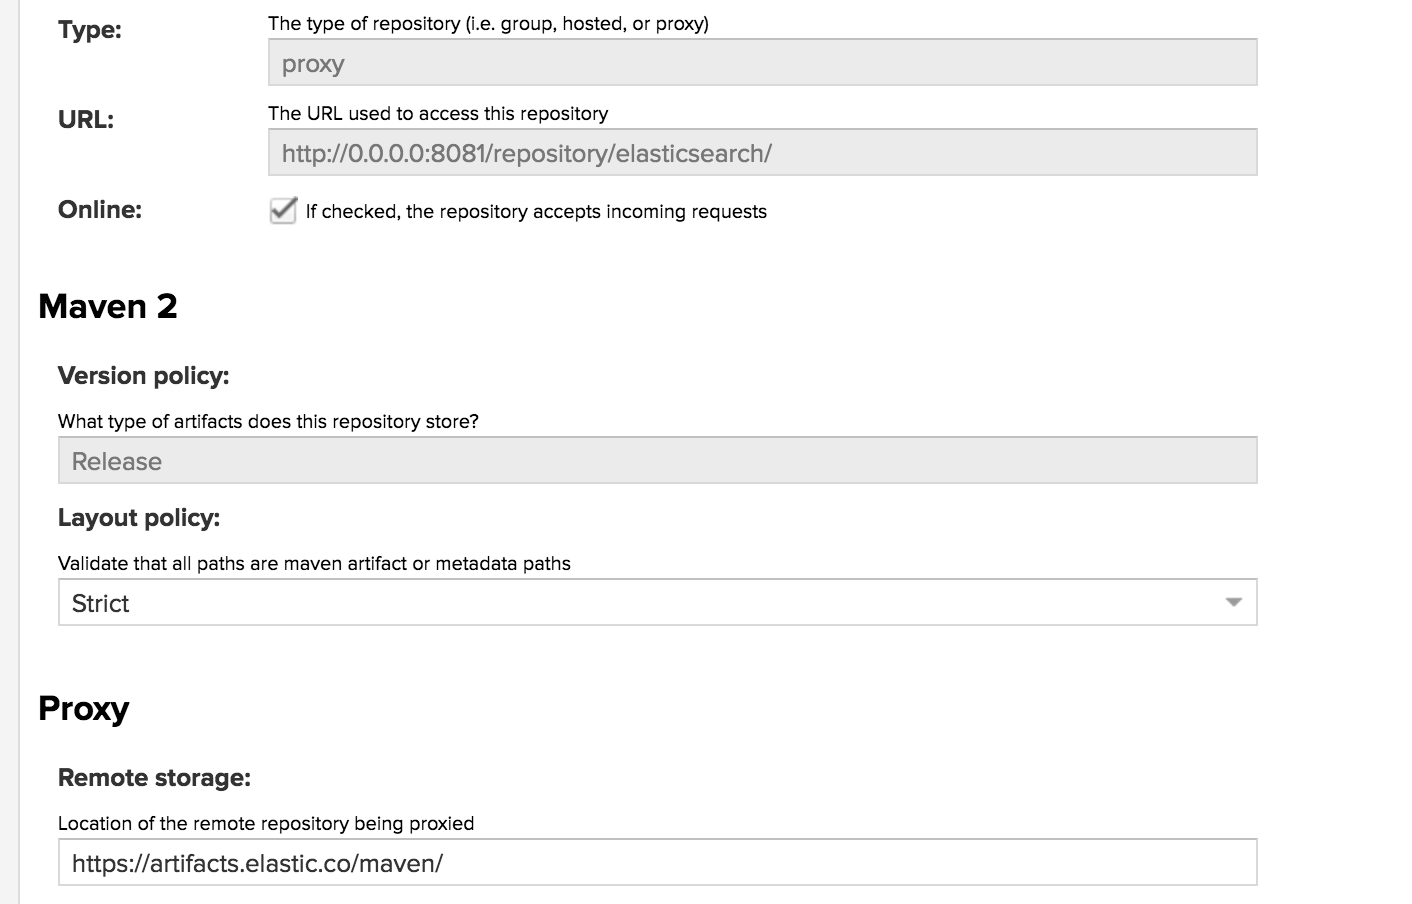
If you are using a repository manager such as Nexus OSS within your company, you need to add the repository as per the following screenshot:
Then in your project’s
pom.xmlif using maven, add the following repositories and dependencies definitions:<dependencies> <dependency> <groupId>org.elasticsearch.client</groupId> <artifactId>x-pack-transport</artifactId> <version>{version}</version> </dependency> </dependencies> <repositories> <repository> <id>local-nexus</id> <name>Elastic Local Nexus</name> <url>http://0.0.0.0:8081/repository/elasticsearch/</url> <releases> <enabled>true</enabled> </releases> <snapshots> <enabled>false</enabled> </snapshots> </repository> </repositories> - If you are using X-Pack security, there are more configuration steps. See Java Client and Security.
