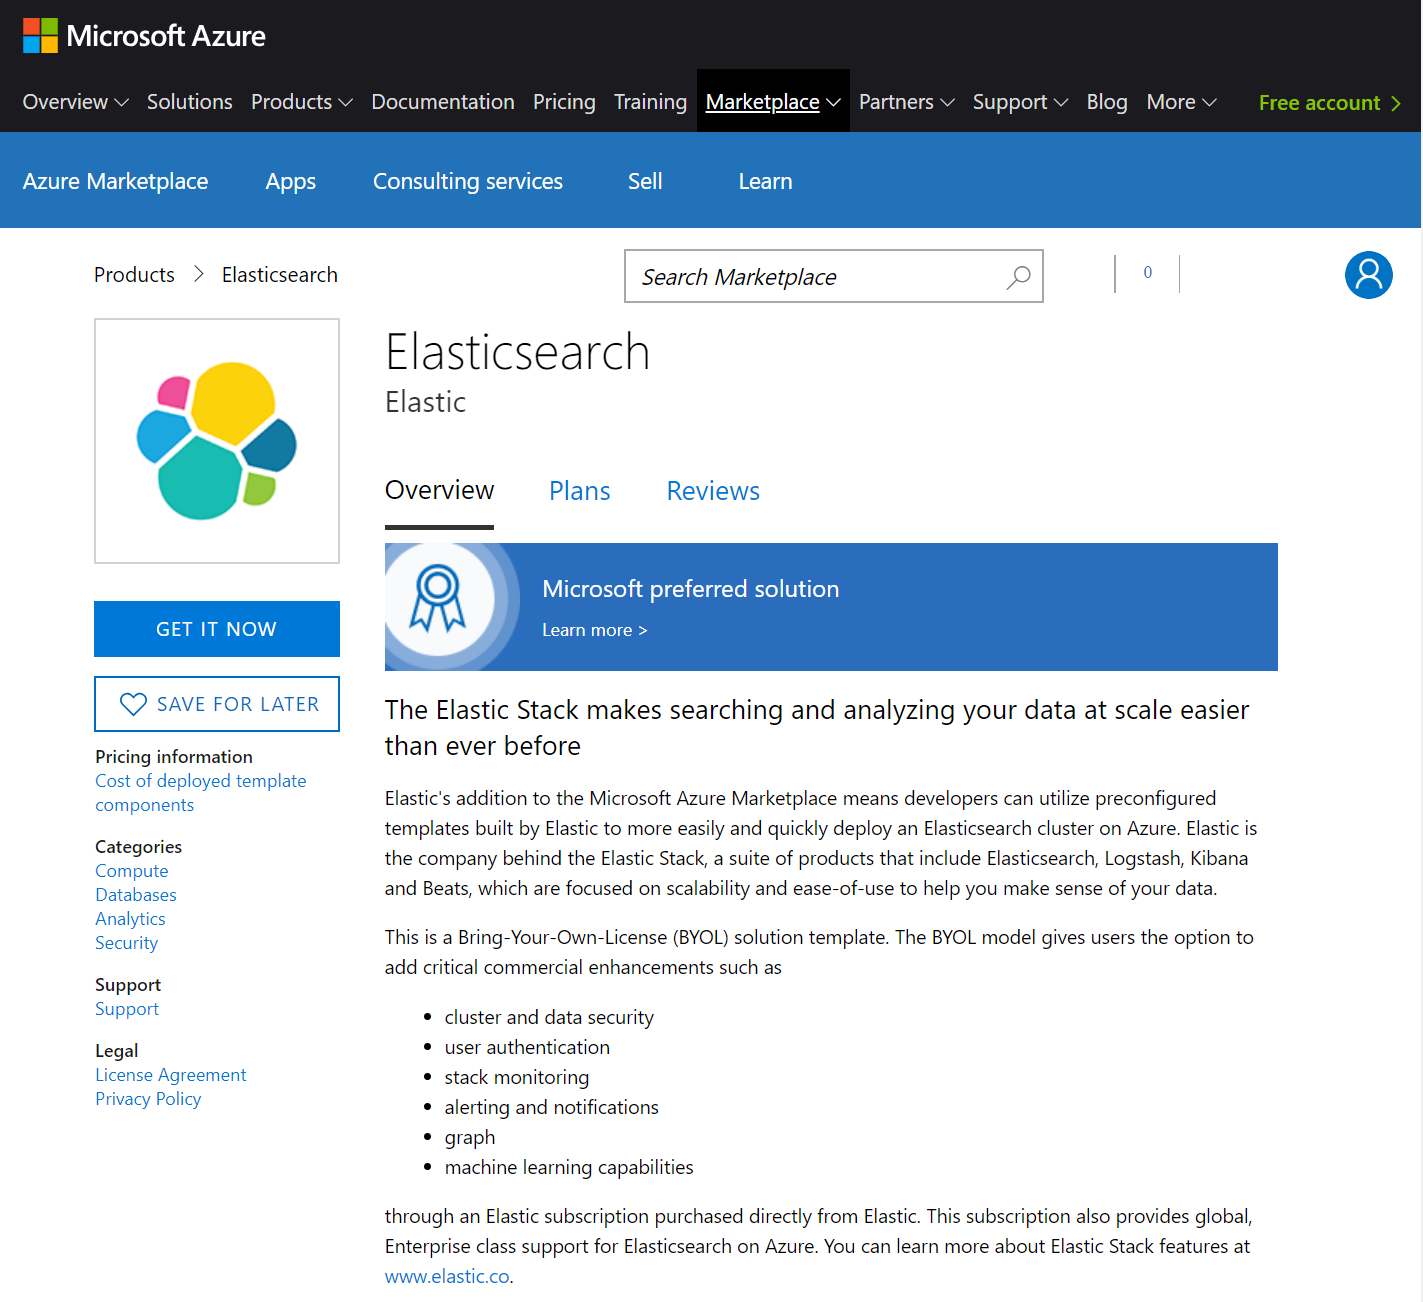
Getting started with the Azure Marketplaceedit
Navigate to the Azure Marketplace offering, and click the "Get it Now" button:
This will take you straight to the solution from the Marketplace, within the Azure portal. If you’re not already logged into the portal, you’ll be prompted to do so first.
Once you’re ready to proceed, click the Create button to walk through the steps.
Marketplace stepsedit
Each step of the process is presented in its own blade within the portal, which we’ll walk through.
Basicsedit
The first step involves setting up the details for the username and authentication mechanism you’ll use to access the virtual machines deployed by the solution:
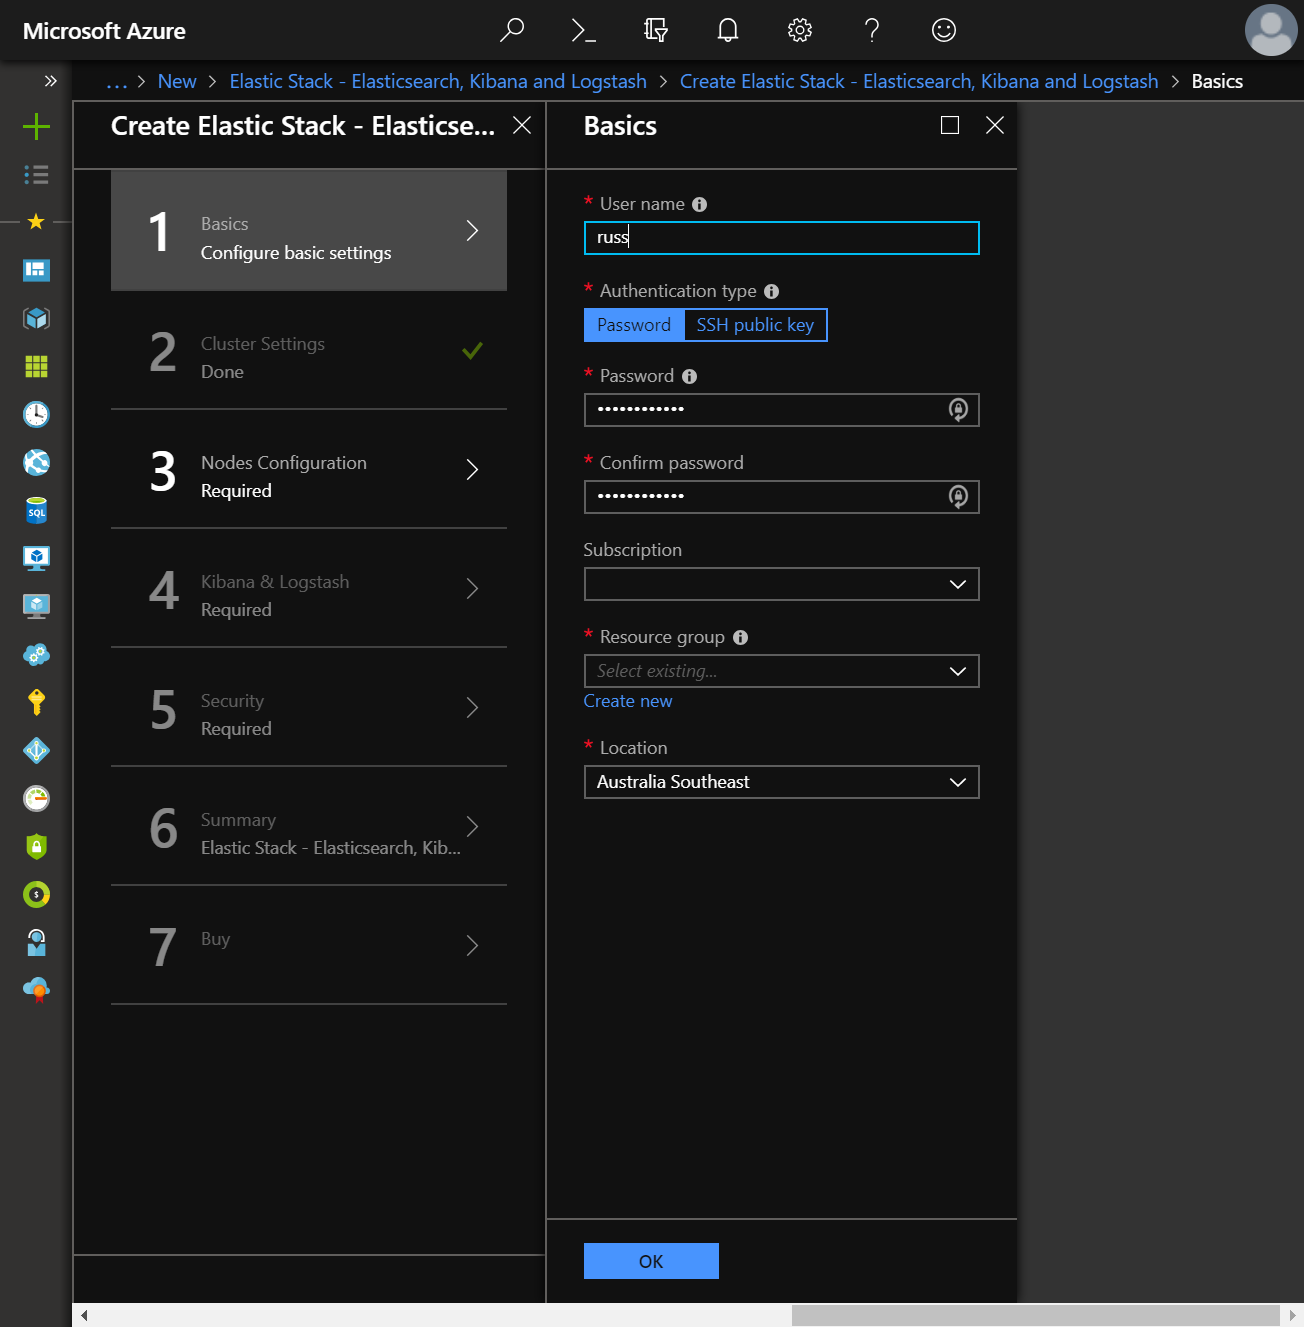
The username must be a valid Ubuntu username and for authentication mechanism, choose between password or SSH key. When choosing SSH key, password authentication will be disabled on the virtual machines.
Next, choose the subscription, resource group and location into which to deploy the solution. When choosing an existing resource group, there a couple of points to bear in mind
- A resource group is a container that holds related resources. As such, those resources share the same lifecycle, permissions and policies
- The solution template deploys in incremental mode; If a previous solution deployment has been performed into the target resource group, the resources that exist in the resource group but are not in the template are left unchanged. All resources that are specified by the solution will be deployed, and for those resources that already exist and whose settings are unchanged, no change will be made. For those resources whose settings are changed however, the resource is provisioned with those new settings. What this means in practice is that you should carefully consider how the settings specified within the template being deployed may affect the resources that could be currently running Elasticsearch.
More often than not, you’ll want to deploy the solution into a new resource group. Providing access to Elasticsearch to existing Azure resources such as Azure App Services can be achieved by connecting the deployed virtual machines to an existing virtual network, which can be specified in the next step.
Cluster settingsedit
the Cluster settings blade provides the option to pick the version of Elasticsearch to deploy, and give the cluster a name:
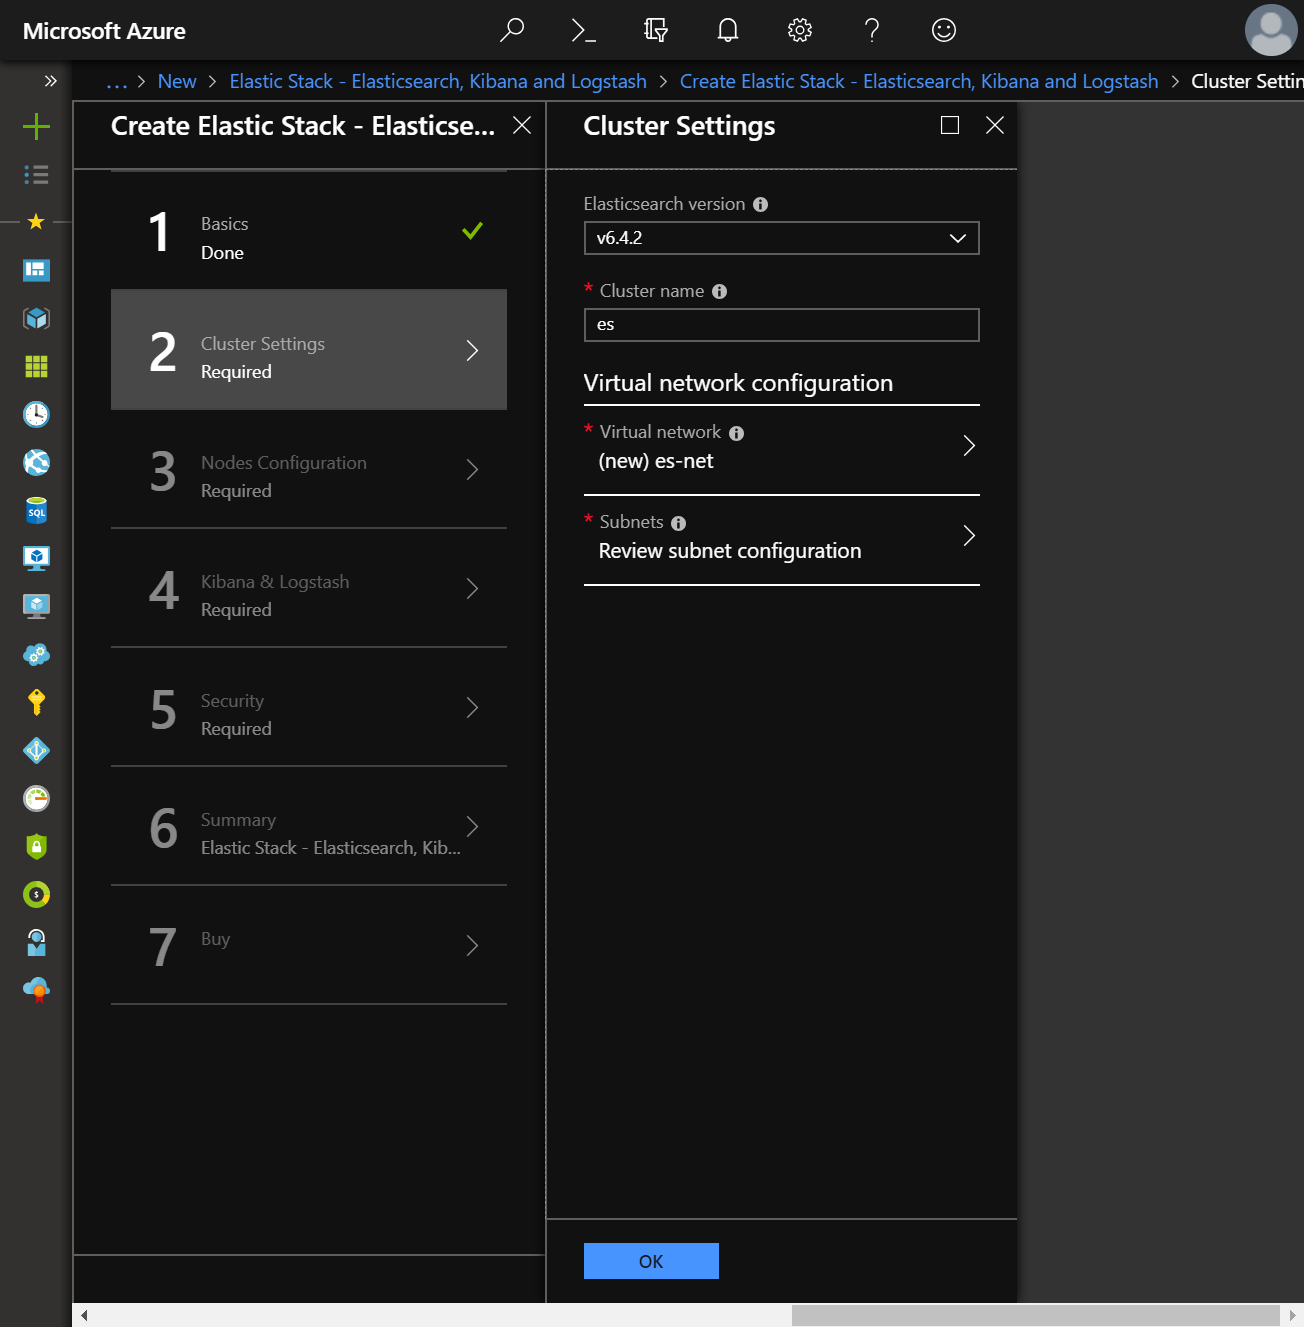
Additionally, the solution can deploy a new virtual network or use an existing virtual network within the same subscription and location as the target resource group. This is particularly useful in situations where resources may already be deployed in another resource group, and the cluster should be accessible to those resources on the same network, and possibly same subnet.
Nodes configurationedit
The Nodes configuration blade controls the number of each type of node to deploy for the cluster:
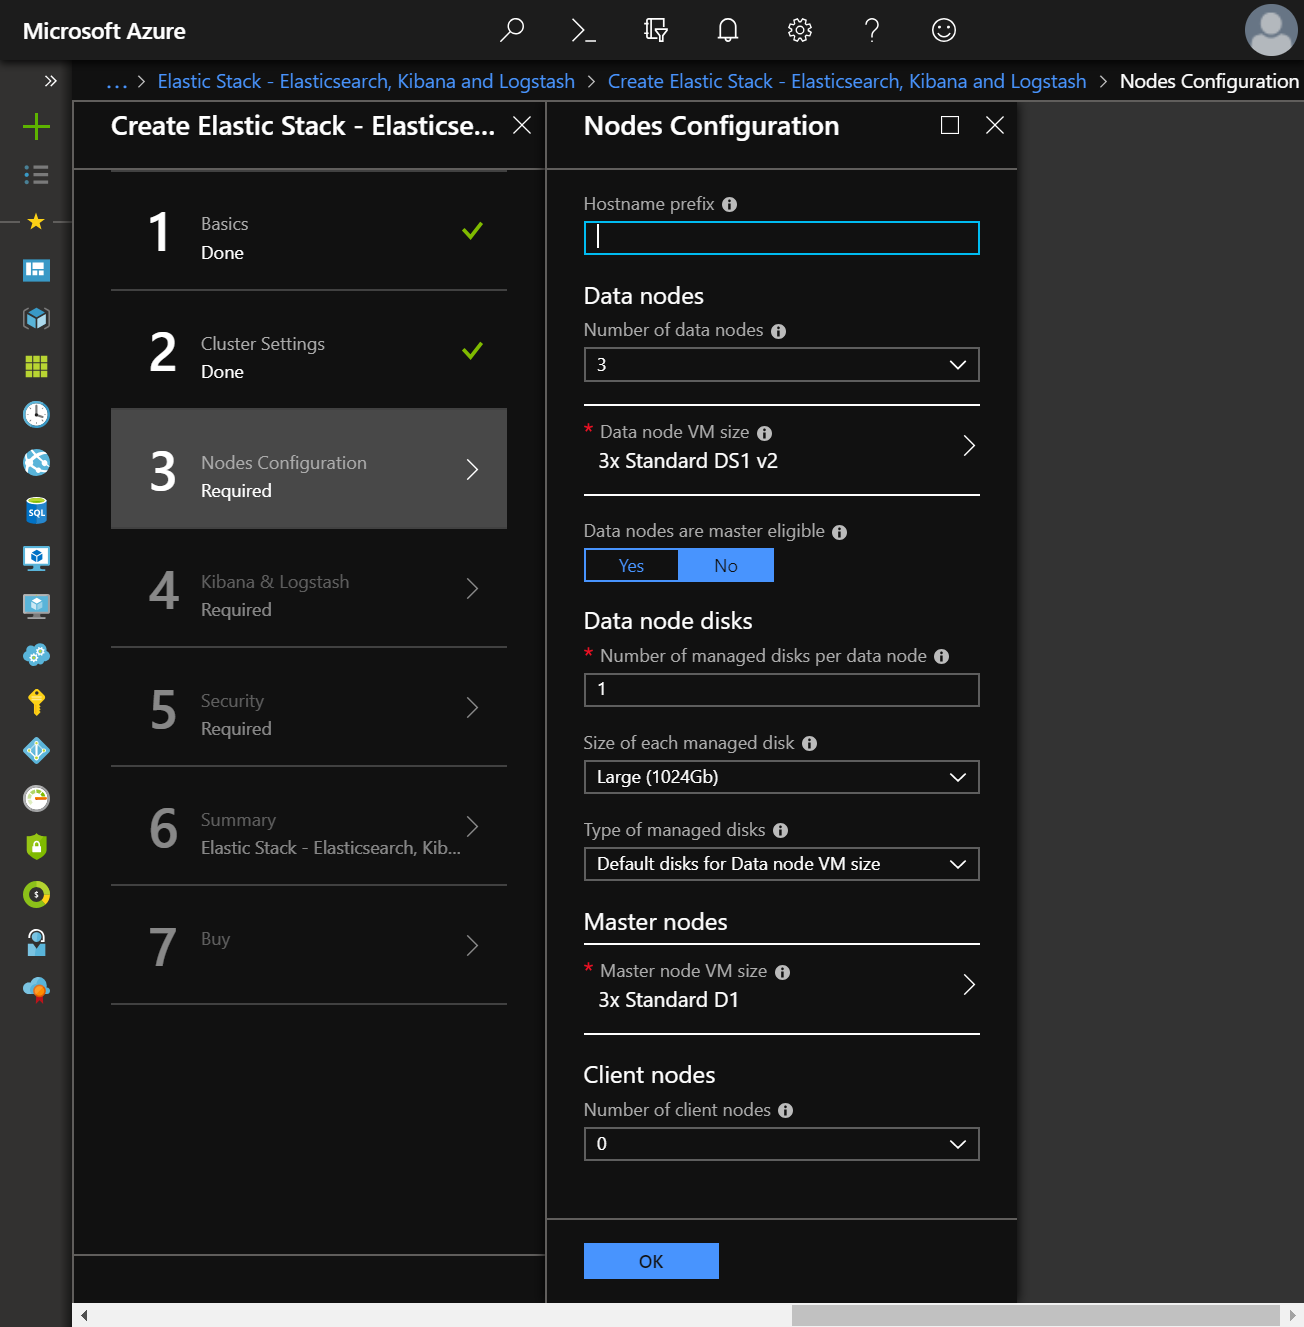
Elasticsearch nodes resolve other nodes on the network by their hostname,
which Azure DNS supports. It is therefore critical that when deploying a cluster to
an existing virtual network, the hostnames for Elasticsearch nodes are unique. The
Hostname prefix input will be applied to the naming convention for master, data and client
nodes, allowing for unique hostnames when deploying multiple clusters to the same
virtual network.
For data nodes, the number of managed disks, in addition to size and type of disks, can be specified. When the number of managed disks is two or more, a RAID 0 array is created across the disks to improve overall operations. When no disks are specified, the node will use the temp storage of the VM for the data directory.
Temp storage, with filesystem /dev/sdb1 mounted on /mnt in Ubuntu,
is present on the physical machine hosting the VM. It is ephemeral in nature and
not persistent; A VM can move to a different host at any point in time for various
reasons, including hardware failures. When this happens, the VM will be created on
the new host using the OS disk from the storage account, and new temp storage
will be created on the new host.
Using temp storage can be a cost effective way of running an Elasticsearch cluster on Azure with decent performance, so long as you understand the tradeoffs in doing so, by snapshotting frequently and ensuring adequate data redundancy through sufficient replica shards.
Kibana, Logstash and External Accessedit
The Kibana & Logstash blade determines whether to deploy Kibana and/or Logstash in addition to Elasticsearch, as well as how the cluster can be accessed from outside of the virtual network:

When installing Kibana, a separate VM will be provisioned onto which Kibana will be deployed and a public IP address will be attached to the Kibana VM along with a Network Security group, allowing TCP access over ports 5601 and 22. The former is used to connect to Kibana through the browser, whilst the latter is used to connect to the Kibana VM via SSH.
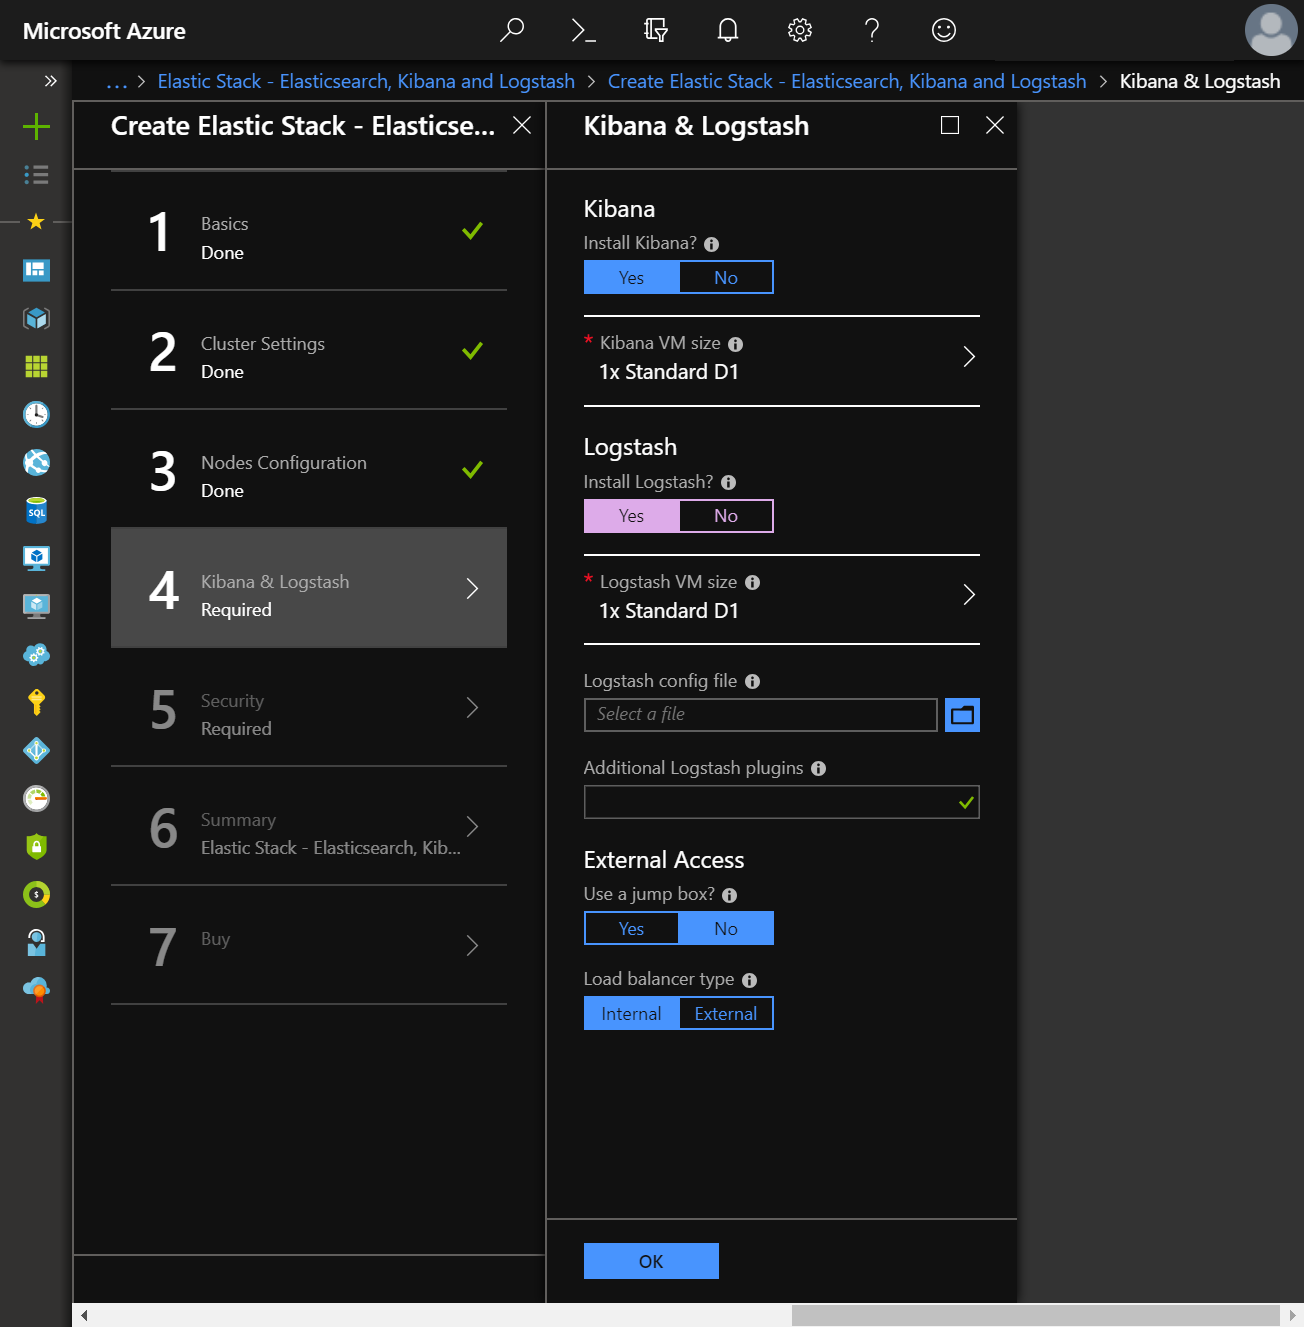
When installing Logstash, a separate VM will be provisioned onto which Logstash will be deployed. A Logstash configuration file can be specified, as well as additional Logstash plugins to install.
A jumpbox VM can optionally be deployed, which can be connected to via SSH in order to gain access to the Elasticsearch VMs.
Either an internal or external load balancer can be deployed from the Marketplace; When choosing external load balancer, both an internal and external load balancer will be deployed. Kibana will use the internal load balancer to communicate with Elasticsearch, and the external load balancer is configured with a public IP address , allowing access to Elasticsearch from outside of Azure over port 9200.
The Marketplace solution does not configure SSL/TLS for communication for any of
- Communication from the browser to Kibana
- Communication from Kibana to Elasticsearch through internal load balancer
- Communication from Logstash to Elasticsearch through internal load balancer
- Communication to Elasticsearch through external load balancer over the HTTP layer
- Communication between Elasticsearch nodes in the cluster over the Transport layer
This is to keep the getting started experience simple through the Marketplace. If you need to configure SSL/TLS, it is recommended that you use the Azure Resource Manager template on GitHub directly. Consult the Security section for more details.
User configurationedit
An Elasticsearch cluster deployed through the Azure Marketplace is always deployed with a 30 day trial license that enables all of the Platinum features of the Elastic Stack, including Security. Security features allow Basic Authentication configuration for the cluster, setting up three built-in user accounts
-
The
elasticuser, a built-in superuser account -
The
kibanauser, a built-in account that Kibana uses to connect and communicate with Elasticsearch -
The
logstash_systemuser, a built-in account that can be used by Logstash when storing monitoring information in Elasticsearch. -
The
beats_systemuser, a built-in account that can be used by Beats when storing monitoring information in Elasticsearch.
Additionally, a read-only user account, es_read, is created that has read only
access to indices:

Passwords must be specified for all of these accounts.
Summaryedit
The last steps of configuring a deployment allow you to confirm the values provided for all inputs in the previous steps, and to read the terms and conditions before deployment:
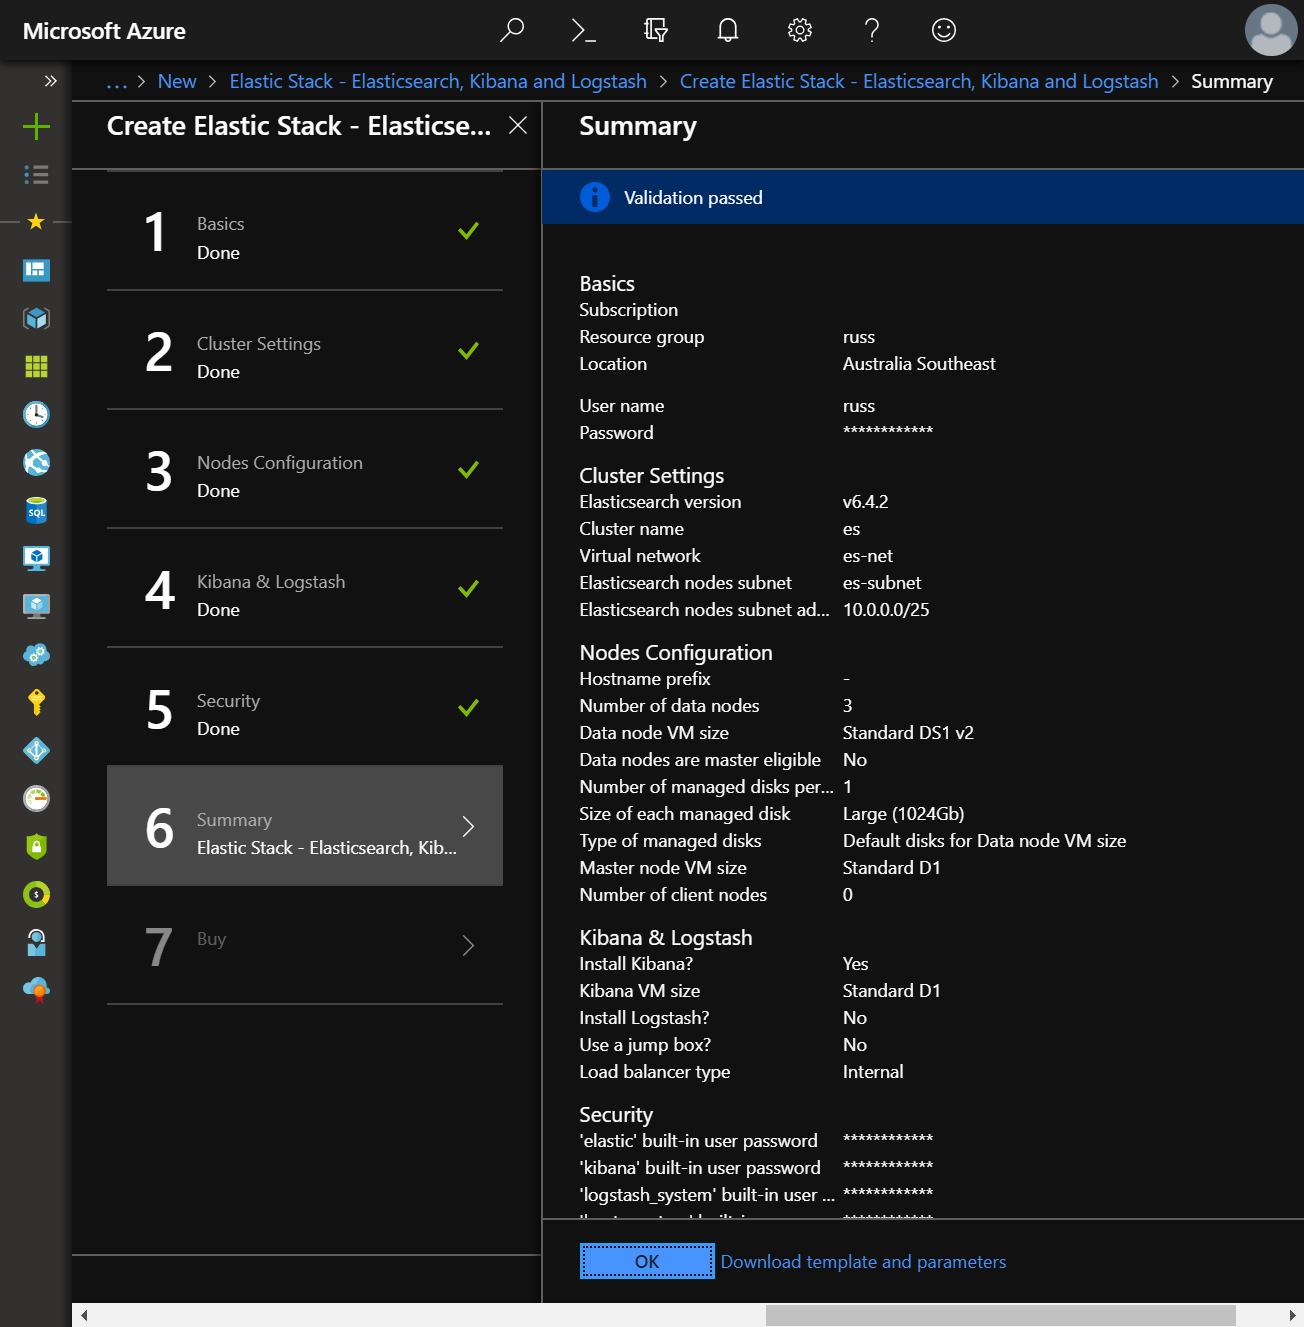
The Azure infrastructure also performs some final validation steps. Once you’re happy to proceed and the OK button is clicked, a new deployment will be started and within minutes, you’ll have Elasticsearch running on Azure!