Connecting Salesforce
editConnecting Salesforceedit
Connector configuration instructions provided in this guide apply both to Salesforce and Salesforce Sandbox.
The Salesforce delete job is not yet supported. It will run, but not delete documents. However, documents may be deleted during full and incremental syncs.
Salesforce is a cloud-based customer relationship management (CRM) platform with a focus on customer service, marketing automation, analytics, and sales operation tooling. The Salesforce connector provided with Workplace Search automatically captures, syncs and indexes the following items:
Accounts |
Including ID, name, address, owner information, and timestamps |
Contacts |
Including ID, name, title, address, and timestamps |
Leads |
Including ID, name, associated account, associated opportunity, and timestamps |
Attachments |
Including ID, owner information, extracted textual content, and timestamps |
Campaigns |
Including ID, name, type, description and timestamps |
Opportunities |
Including ID, name, type, description, owner information, status and timestamps |
Cases |
Including ID, name, case number, description, timestamps, associated comments, feeds, feed comments and emails |
Known issuesedit
-
Syncs may fail with the error Unknown problem occurred when syncing.
This occurs when trying to sync empty tables from Salesforce.
Workarounds
-
Create dummy records and filter them out.
Ensure that the following tables are not empty before syncing: Accounts, Contacts, Opportunities, Users, Leads.
Add dummy data to these tables if they are empty. Use content filtering rules to ensure that these records are not indexed and available for search.
-
Use the framework provided in
8.3to build your own Workplace Search Salesforce connector. Use our technical blog as guidance. - If your search experience is not tied to Workplace Search, use our new async framework written in Python to build your own Salesforce connector client.
-
Configuring the Salesforce Connectoredit
Configuring the Salesforce connector is the first step prior to connecting the Salesforce service to Workplace Search, and requires that you create an OAuth App from the Salesforce platform. To get started, first log in to Salesforce (or Salesforce Sandbox) and access your administrative dashboard.
The procedures for Salesforce’s Classic UI and Lightning UI are very similar but the entry points are different.
Classic UIedit
Step 1. Click your account avatar in the top right and navigate to Settings:
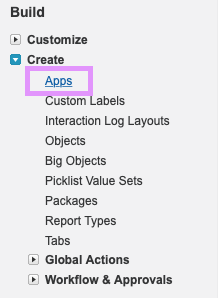
Step 2. You’ll see a large list of menu items. Under Build, expand the Create dropdown, then click Apps:
Workplace Search needs an OAuth App with which to interface. There are two important things to understand before you create one:
- The app can stay in developer mode. You do not need to publish it.
- Make sure that you create this app with a trusted and stable Salesforce account.
We recommend creating a team-owned account for only this app. If access is lost, a new one must be created and the configuration updated in Workplace Search.
Step 3. Scroll to the Connected Apps section and click New:

From here, proceed to the Creating the OAuth Application step (see below).
Lightning UIedit
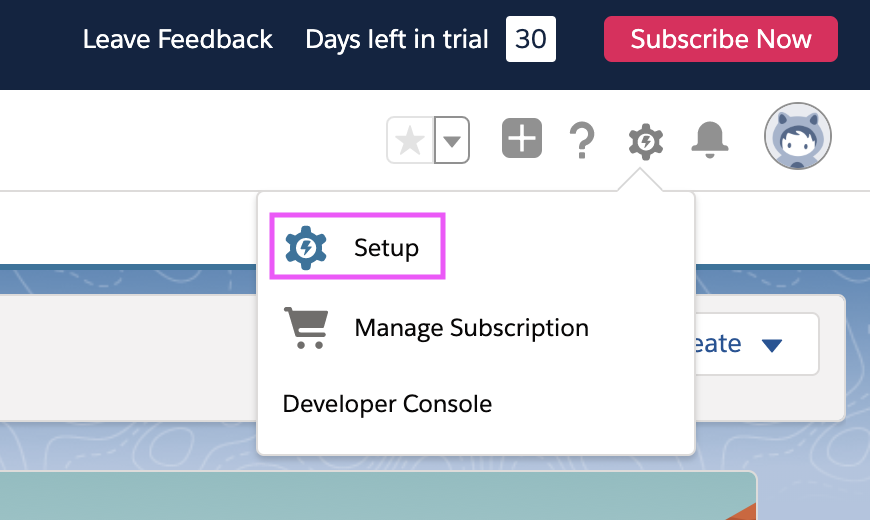
Step 1. From the Lightning experience, click Setup in the top right corner:
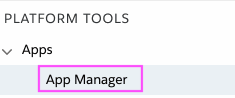
Step 2. Select App Manager on the left sidebar under Apps:
Step 3. Click the New Connected App button:
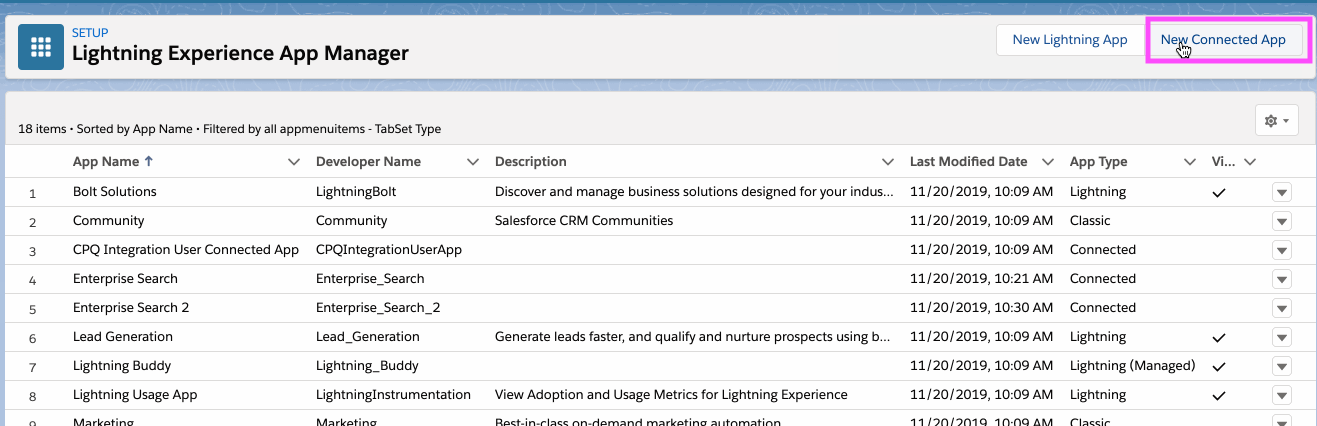
And then proceed to the Creating the OAuth Application step (see below).
Creating the OAuth Applicationedit
We must now create the OAuth application that Workplace Search will use to communicate with the Salesforce platform.
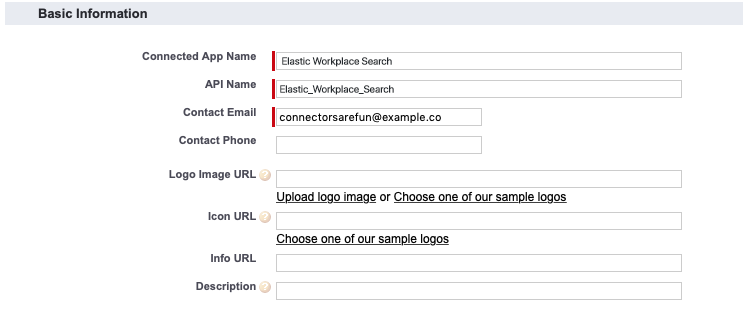
Step 1. Let’s start with the basic information:
- Connected App Name: A name to help you identify the application. Workplace Search, or something like that.
- API Name: A programmatic name which you can access via Salesforce API. Doesn’t impact Workplace Search – it’s for your benefit.
- Contact Email: Use whichever you’d like.
You can also add a logo for visual identification.
Step 2. Click the Enable OAuth Settings checkbox: this will unveil many more options. Under Callback URL, add the Workplace Search OAuth redirect URL for your deployment.
You’ll need to move two scopes from Available OAuth Scopes to Selected OAuth Scopes:
- Full access (Full)
- Perform requests on your behalf at any time
Step 3. At the top of the page, click Save. You will now be able to retrieve your Consumer Key and Consumer Secret.
Step 4. From the Workplace Search administrative dashboard’s Sources area, locate Salesforce and provide both the Client ID and Client Secret. Voilà! The Salesforce connector is now configured, and ready to be used to synchronize content. In order to capture data, you must now connect a Salesforce instance with the adequate authentication credentials.
Connecting Salesforce to Workplace Searchedit
Once the Salesforce connector has been configured, you may connect a Salesforce instance to your organization.
Step 1. Head to your organization’s Workplace Search administrative dashboard, and locate the Sources tab.
Step 2. Click Add a new source.
Step 3. Select Salesforce (or Salesforce Sandbox) in the Configured Sources list, and follow the Salesforce authentication flow as presented.
The account used to connect Salesforce must have the "View All Data" profile permission enabled. Learn more about View All Data profile permissions on the Salesforce Help Center.
Step 4. Upon the successful authentication flow, you will be redirected to Workplace Search, and your organization’s Salesforce content will now be captured and will be ready for search gradually as it is synced. Once successfully configured and connected, the Salesforce synchronization automatically occurs every 2 hours.
Limiting the content to be indexededit
If you don’t need to index all the content, you can specify the indexing rules via the API. This will help shorten indexing times and limit the size of the index. See Customizing indexing.
For Salesforce or Salesforce Sandbox, an applicable rule type would be object_type. An example for limiting content by object_type can be found in the indexing rules guide. Salesforce object types that are available by default:
-
account -
contact -
lead -
attachment -
campaign -
opportunity -
case
Object type names are downcased from their Salesforce representation. The rules are case-sensitive, so if you specify a rule for Account instead, it will not match.
Synchronized fieldsedit
The following table lists the fields synchronized from the connected source to Workplace Search. The attributes in the table apply to the default search application, as follows:
- Display name - The label used when displayed in the UI
- Field name - The name of the underlying field attribute
- Faceted filter - whether the field is a faceted filter by default, or can be enabled (see also: Customizing filters)
-
Automatic query refinement preceding phrases - The default list of phrases that must precede a value of this field in a search query in order to automatically trigger query refinement. If "None," a value from this field may trigger refinement regardless of where it is found in the query string. If
'', a value from this field must be the first token(s) in the query string. IfN.A., automatic query refinement is not available for this field by default. All fields that have a faceted filter (defaultorconfigurable) can also be configured for automatic query refinement; see also Update a content source, Get a content source’s automatic query refinement details and Customizing filters.
| Display name | Field name | Faceted filter | Automatic query refinement preceding phrases |
|---|---|---|---|
Id |
|
No |
N.A. |
URL |
|
No |
N.A. |
Title |
|
No |
N.A. |
Type |
|
Default |
None |
Body |
|
No |
N.A. |
Account type |
|
Configurable |
N.A. |
Tags |
|
Default |
[ |
Website URL |
|
No |
N.A. |
Rating |
|
No |
N.A. |
Address |
|
No |
N.A. |
Owner |
|
Configurable |
N.A. |
Owner email |
|
Configurable |
N.A. |
Parent |
|
Configurable |
N.A. |
Parent URL |
|
No |
N.A. |
Opportunity name |
|
No |
N.A. |
Opportunity URL |
|
No |
N.A. |
Opportunity status |
|
Configurable |
N.A. |
Open activities |
|
No |
N.A. |
Open activities URLs |
|
No |
N.A. |
Created at |
|
No |
N.A. |
Updated at |
|
No |
N.A. |
Last updated |
|
No |
N.A. |
|
No |
N.A. |
|
Phone |
|
No |
N.A. |
Job title |
|
Configurable |
N.A. |
Thumbnail |
|
No |
N.A. |
Lead source |
|
Configurable |
N.A. |
Account |
|
Configurable |
N.A. |
Account URL |
|
No |
N.A. |
Company |
|
Configurable |
N.A. |
Converted account |
|
No |
N.A. |
Converted account URL |
|
No |
N.A. |
Converted contact |
|
No |
N.A. |
Converted contact URL |
|
No |
N.A. |
Converted opportunity |
|
No |
N.A. |
Converted opportunity URL |
|
No |
N.A. |
Converted at |
|
No |
N.A. |
Content type |
|
Configurable |
N.A. |
Media type |
|
Configurable |
None |
Extension |
|
Configurable |
None |
Campaign type |
|
Configurable |
N.A. |
State |
|
Configurable |
[ |
Status |
|
Default |
[ |
Start date |
|
No |
N.A. |
End date |
|
No |
N.A. |
Opportunity type |
|
Configurable |
N.A. |
Next step |
|
Configurable |
N.A. |
Case number |
|
No |
N.A. |
Is Closed |
|
Configurable |
N.A. |
Participant Ids |
|
Configurable |
N.A. |
Participants |
|
Configurable |
N.A. |
Participant Emails |
|
Configurable |
N.A. |
Customizing synchronized objects and fieldsedit
Standard object types synchronize a predefined set of fields, however, you can use the indexing API to extend this list and index more data from Salesforce for these objects. Use the fields property in object_type rules.
For example, you may want to index the NextStep column from the Opportunity object, allowing you to search over this field. To achieve this, create an indexing rule that looks like the following:
  "indexing": {
    "enabled": true,
    "default_action": "include",
    "rules": [
      {
        "include": "opportunity",
        "filter_type": "object_type",
        "fields": [
          {
            "remote": "NextStep",
            "target": "next_step"
          }
        ]
      }
    ]
  }
this field will not be shown in the search application, but will affect the relevance of the search results.
In case you would like to index a field and make it visible in a search application, you can override an existing field for the Salesforce object:
  "indexing": {
    "enabled": true,
    "default_action": "include",
    "rules": [
      {
        "include": "account",
        "filter_type": "object_type",
        "fields": [
          {
            "remote": "AccountNumber",
            "target": "title"
          },
          {
            "remote": "Phone",
            "target": "description"
          }
        ]
      }
    ]
  }
In addition to standard object types, there is also a way to index custom objects from Salesforce. You must specify the fields you need to index for those objects. By default, only Id, CreatedDate and LastModifiedDate are indexed for a non-standard object type.
For example, if you wanted to index Idea objects, you might specify an indexing configuration that looks like this:
  "indexing": {
    "enabled": true,
    "default_action": "include",
    "rules": [
      {
        "include": "idea",
        "filter_type": "object_type",
        "fields": [
          {
            "remote": "Id",
            "target": "id"
          },
          {
            "remote": "CreatedById",
            "target": "created_by"
          },
          {
            "remote": "CreatedDate",
            "target": "created_at"
          },
          {
            "remote": "LastModifiedById",
            "target": "updated_by"
          },
          {
            "remote": "LastModifiedDate",
            "target": "updated_at"
          },
          {
            "remote": "IsDeleted",
            "target": "is_deleted"
          },
          {
            "remote": "IsMerged",
            "target": "is_merged"
          },
          {
            "remote": "Title",
            "target": "title"
          },
          {
            "remote": "Body",
            "target": "body"
          },
          {
            "remote": "VoteTotal",
            "target": "vote_total"
          },
          {
            "remote": "NumComments",
            "target": "num_comments"
          }
        ]
      }
    ],
    <...>
    "schema": [
      <...>
        "is_deleted": "text",
        "is_merged": "text",
        "vote_total": "number",
        "num_comments": "number"
    ],
    "display": [
      <...>
    ]
For these fields, you can also add corresponding definitions in schema and display properties of the content source. You should note that schema and display are set on the whole content source and not per object type, so the schema contains field mappings for all indexed types of objects, either standard or custom. If you add a new field to the list of synchronized fields but not to the schema mappings, the schema mapping will be inferred based on the data that you index and you will be able to change it afterwards.
See also:
- Modifying a content source’s schema;
-
schemasection in Updating content source for more information about updating field types or adding new fields to theschema; -
displaysection in Updating content source for more information about changing search results display options.