Connecting Jira Cloud
editConnecting Jira Cloud
editEnterprise Search versions 7.15.0 and later are required to connect to Jira Cloud. This is due to backwards incompatible API changes introduced by Atlassian, the developer of Jira Cloud.
Additionally, the following patch versions of Enterprise Search are not compatible with Jira Cloud: 7.17.2, 8.1.1, and 8.1.2. This is due to additional, backwards incompatible API changes introduced by Atlassian.
Instructions provided in this guide apply to Jira Cloud only. Refer to Jira Server guide for more information.
Atlassian Jira is an issue tracking product that provides bug tracking, workflow automation, and agile project management tools for teams of all sizes. The Jira Cloud connector provided with Workplace Search automatically captures, syncs and indexes the following items:
Epics |
Including ID, Content, Type, and timestamps |
Projects |
Including ID, Content, Type, Slug and timestamps |
Issues |
Including ID, Content, Status, Priority, Comments, Project, Slug, Collaborators and timestamps |
Attachments |
Including ID, Size, Type, Content, Project, Collaborators and timestamps |
Configuring the Jira Cloud Connector
editConfiguring the Jira Cloud connector is the first step prior to connecting the Jira Cloud service to Workplace Search, and requires that you create an OAuth App from the Jira Cloud platform. To get started, first log in to Atlassian’s Developer Portal:
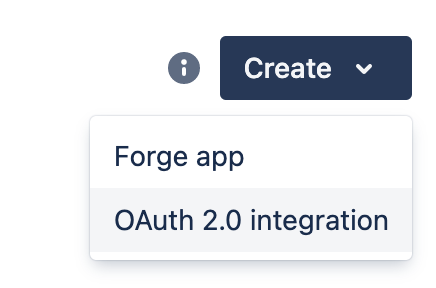
Step 1. Click Create, then select OAuth 2.0 integration:
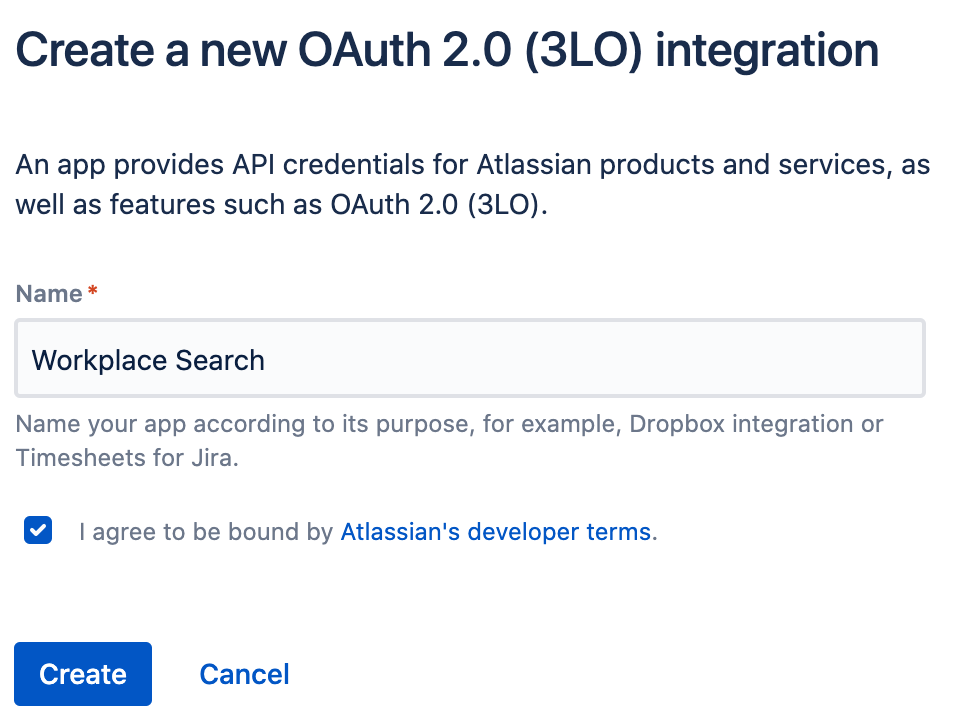
Step 2. Provide a name, agree to the terms, and click Create:
Step 3. Click Settings in the sidebar, add a description and image, and Save changes.
Step 4. You can retrieve the application’s Client ID and Client Secret. Keep them handy, we’ll need these in just a few seconds.
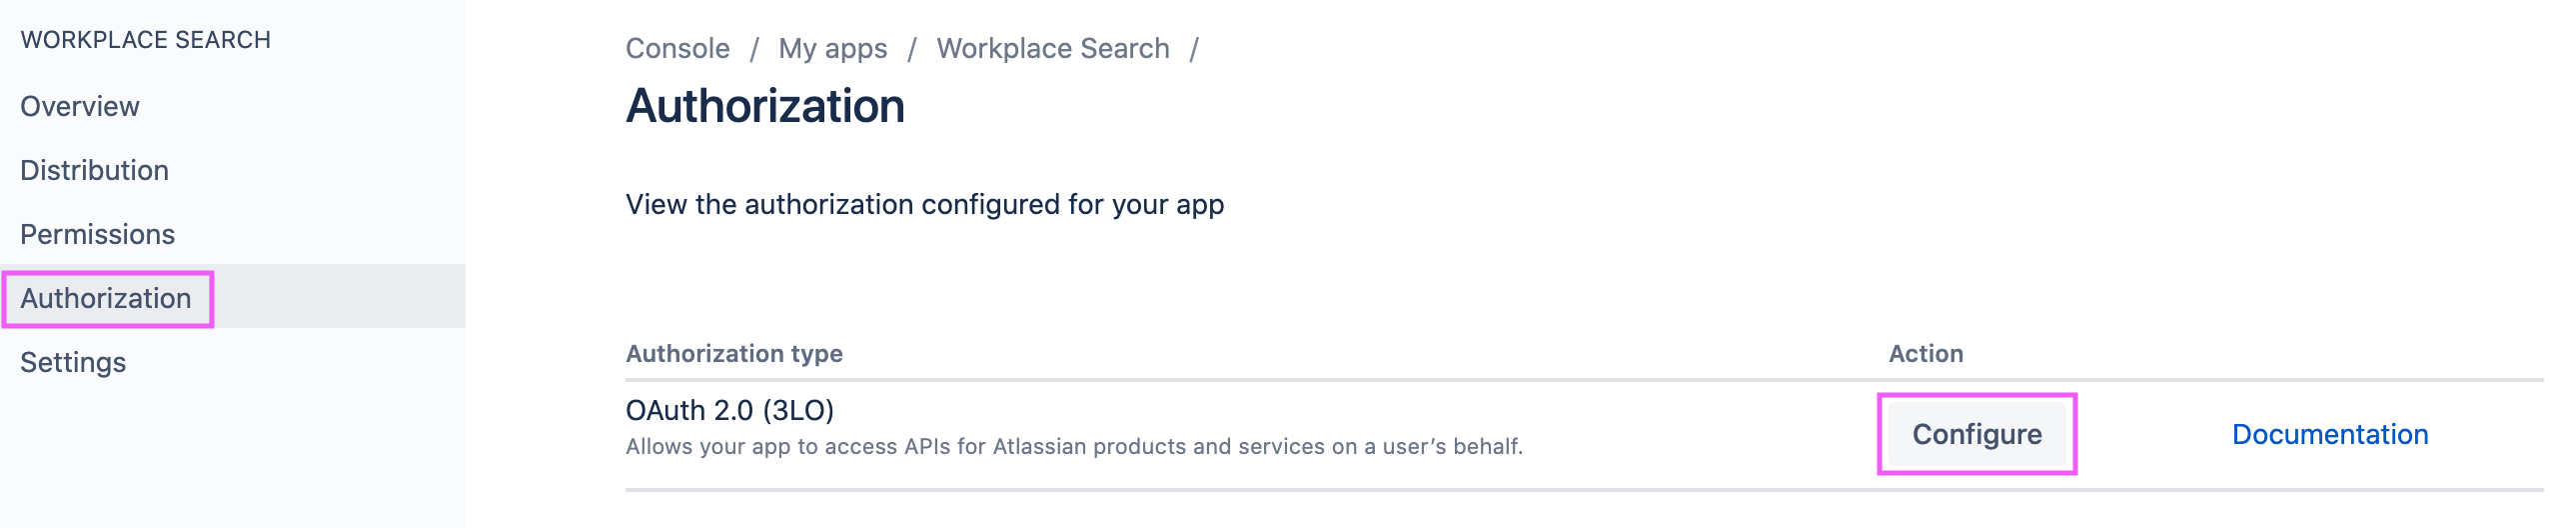
Step 5. We must now create API access and set the right permission level. In the sidebar, click Authorization, locate OAuth 2.0 (3LO), and click Configure:
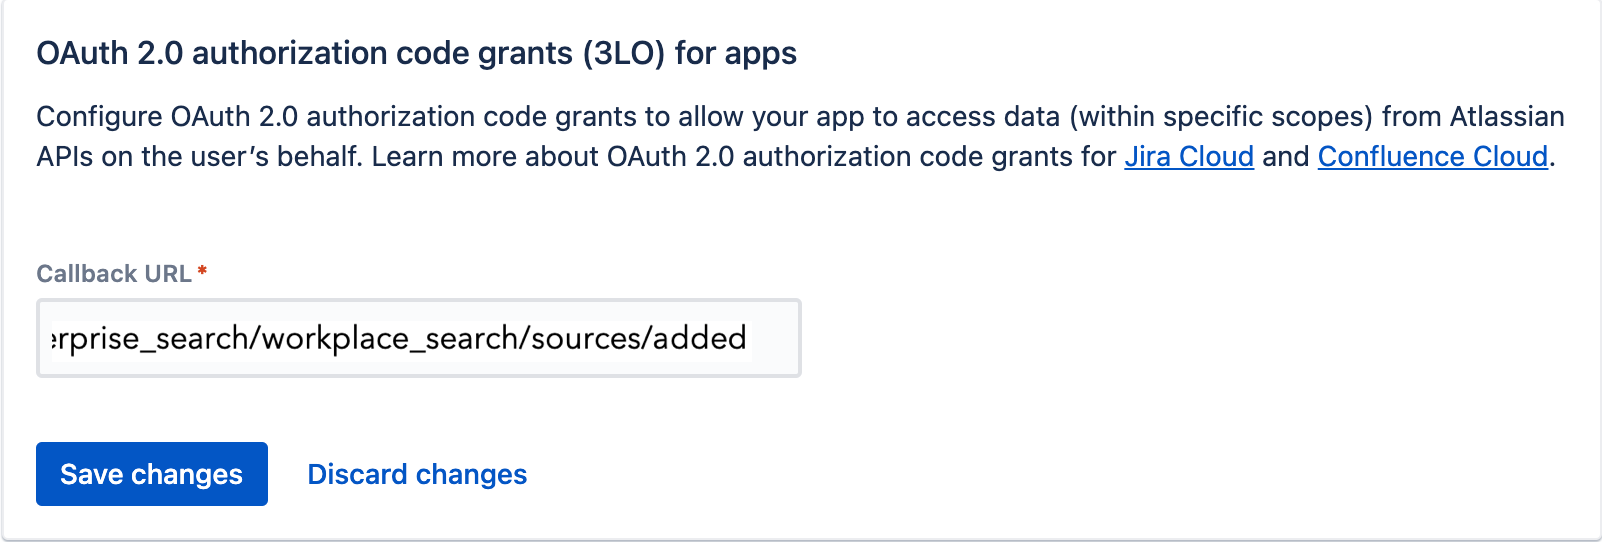
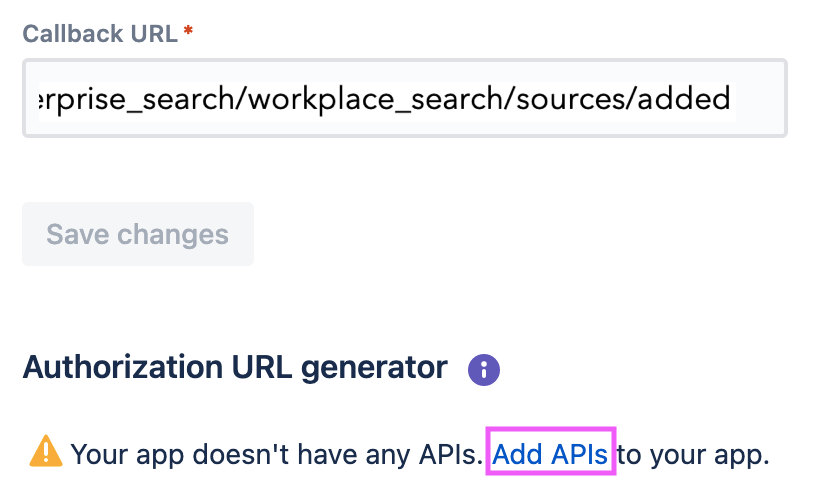
Step 6. Use the Callback URL form to enter the Workplace Search OAuth redirect URL for your deployment.
Step 7. A prompt appears. Click the Add APIs hyperlink.
Step 8. Click Permissions, find Jira platform REST API and click Add, then Configure:
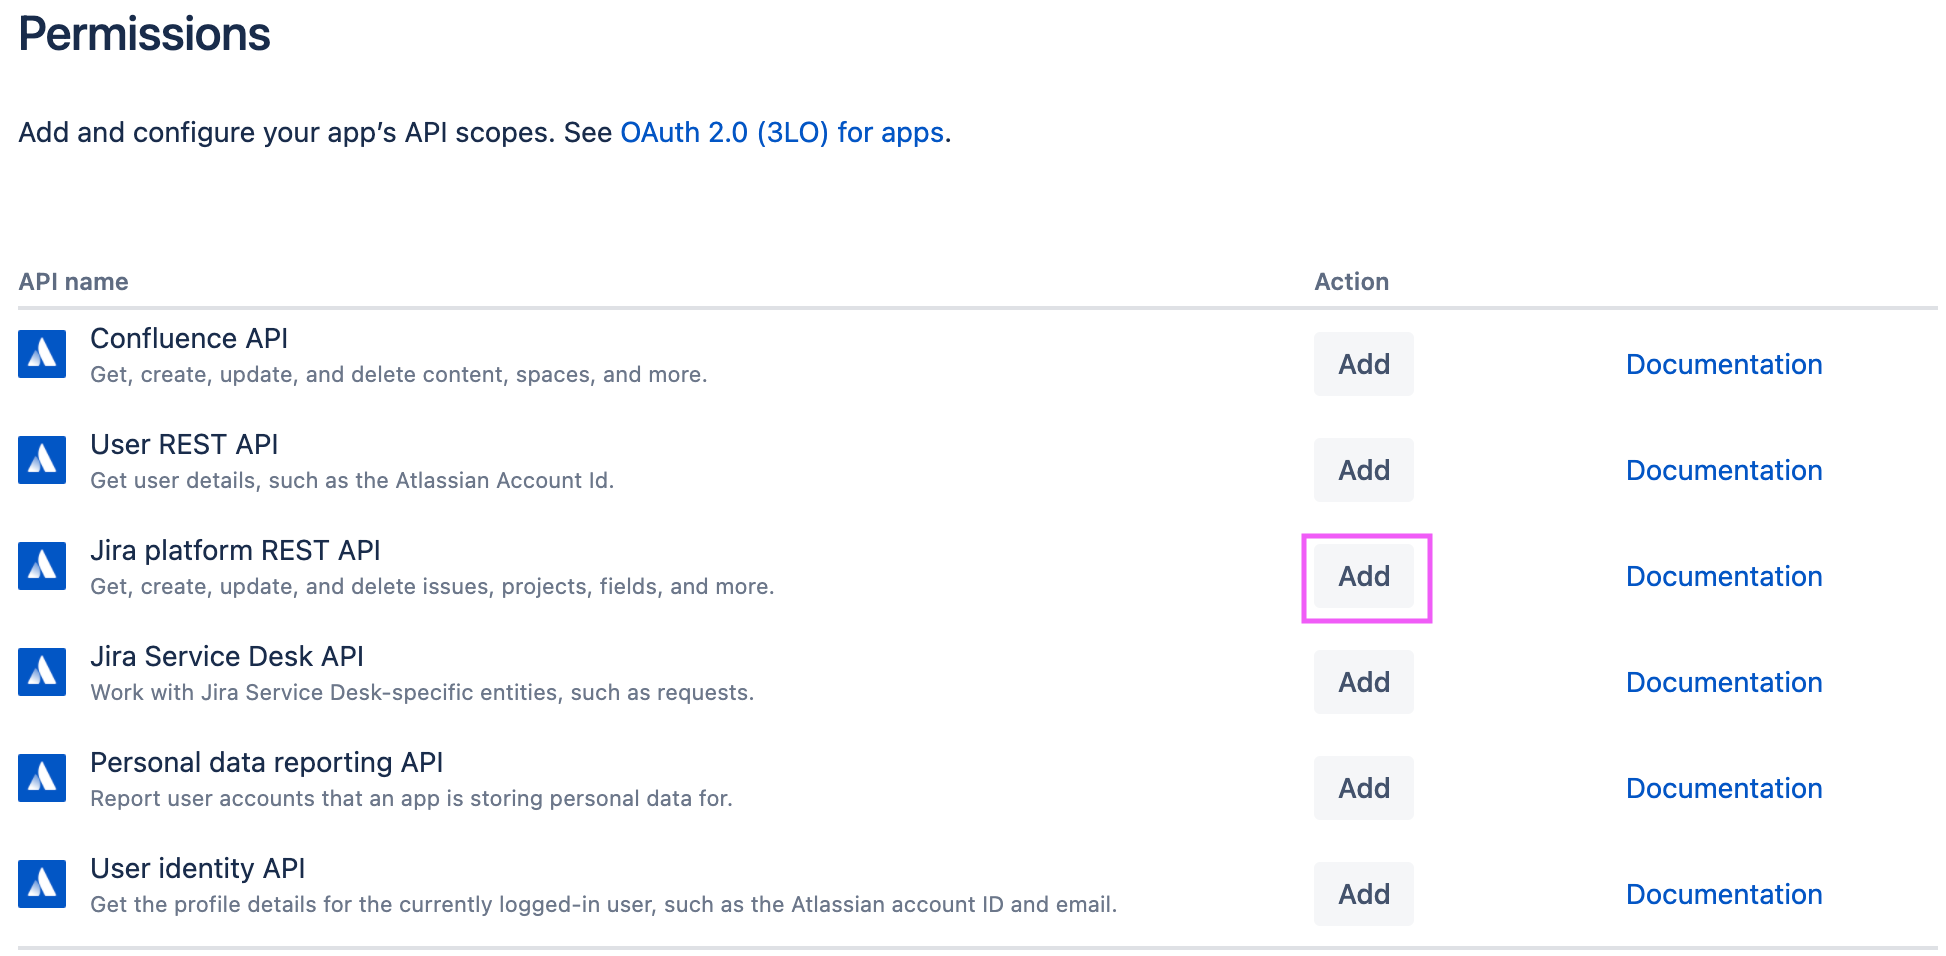
Step 9. We must enable a series of permissions. Add the following and save:
-
read:jira-work- View Jira issue data -
read:jira-user- View user profiles
Step 9. From the Workplace Search administrative dashboard’s Sources area, locate Jira and provide both the Client ID and Client Secret, as well as your Jira instance Base URL. Do not include a trailing slash:
https://example.atlassian.net
Voilà! The Jira Cloud connector is now configured, and ready to be used to synchronize content. In order to capture data, you must now connect a Jira Cloud instance with the adequate authentication credentials.
Connecting Jira Cloud to Workplace Search
editOnce the Jira Cloud connector has been configured, you may connect a Jira Cloud instance to your organization.
Step 1. Head to your organization’s Workplace Search administrative dashboard, and locate the Sources tab.
Step 2. Click Add a new source.
Step 3. Select Jira Cloud in the Configured Sources list, and follow the Jira Cloud authentication flow as presented.
Step 4. Upon the successful authentication flow, you will be redirected to Workplace Search.
Jira Cloud content will now be captured and will be ready for search gradually as it is synced. Once successfully configured and connected, the Jira Cloud synchronization automatically occurs every 2 hours.
Document-level permissions
editYou can synchronize document access permissions from Jira Cloud to Workplace Search. This will ensure the right people see the right documents.
Synchronized fields
editThe following table lists the fields synchronized from the connected source to Workplace Search. The attributes in the table apply to the default search application, as follows:
- Display name - The label used when displayed in the UI
- Field name - The name of the underlying field attribute
- Faceted filter - whether the field is a faceted filter by default, or can be enabled (see also: Customizing filters)
-
Automatic query refinement preceding phrases - The default list of phrases that must precede a value of this field in a search query in order to automatically trigger query refinement. If "None," a value from this field may trigger refinement regardless of where it is found in the query string. If
'', a value from this field must be the first token(s) in the query string. IfN.A., automatic query refinement is not available for this field by default. All fields that have a faceted filter (defaultorconfigurable) can also be configured for automatic query refinement; see also Update a content source, Get a content source’s automatic query refinement details and Customizing filters.
| Display name | Field name | Faceted filter | Automatic query refinement preceeding phrases |
|---|---|---|---|
Id |
|
No |
N.A. |
URL |
|
No |
N.A. |
Title |
|
No |
N.A. |
Type |
|
Default |
None |
Slug |
|
No |
N.A. |
Body |
|
No |
N.A. |
Assigned to |
|
Default |
[ |
Created by |
|
Default |
[ |
Status |
|
Default |
[ |
Priority |
|
Default |
[ |
Comments |
|
No |
N.A. |
Project |
|
Default |
N.A. |
Created at |
|
No |
N.A. |
Updated at |
|
No |
N.A. |
Last updated |
|
No |
N.A. |
Size |
|
No |
N.A. |
Issue |
|
No |
N.A. |
Media type |
|
Configurable |
None |
Extension |
|
Configurable |
None |